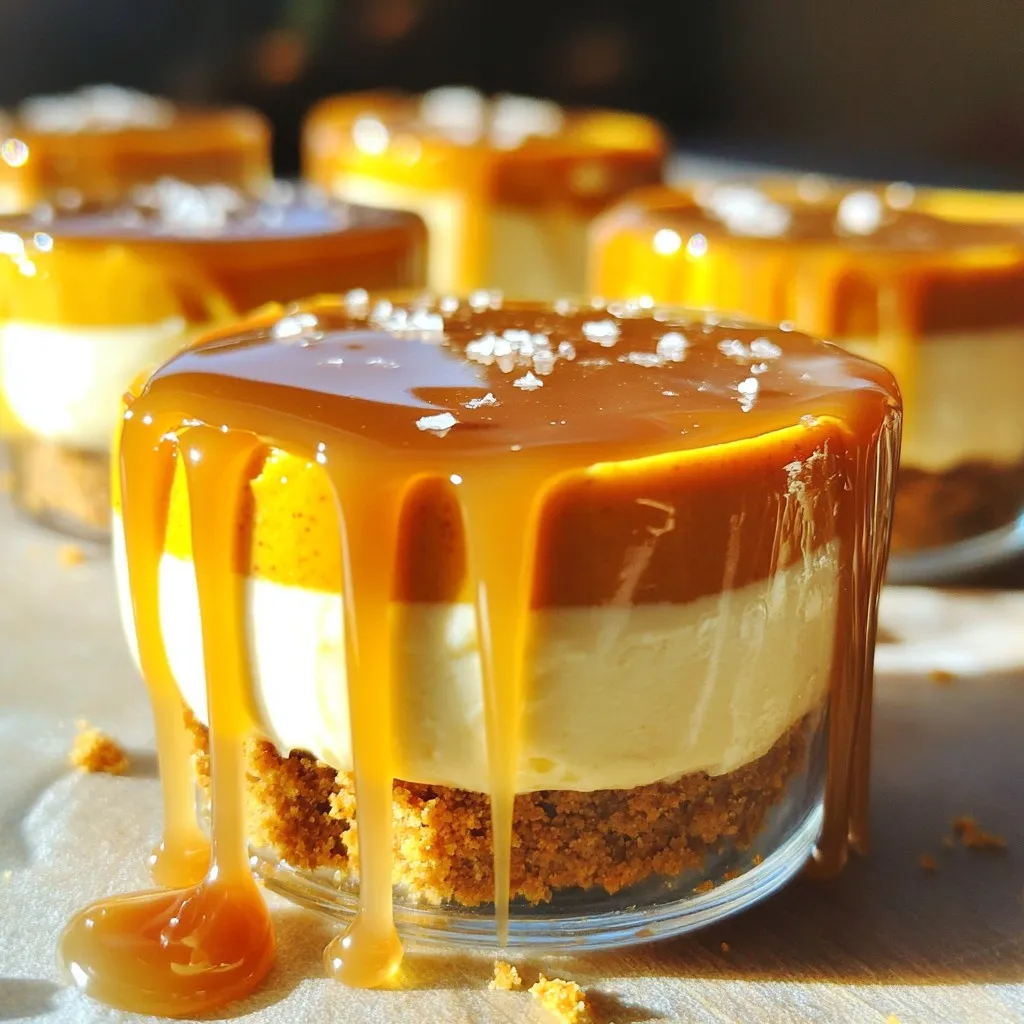
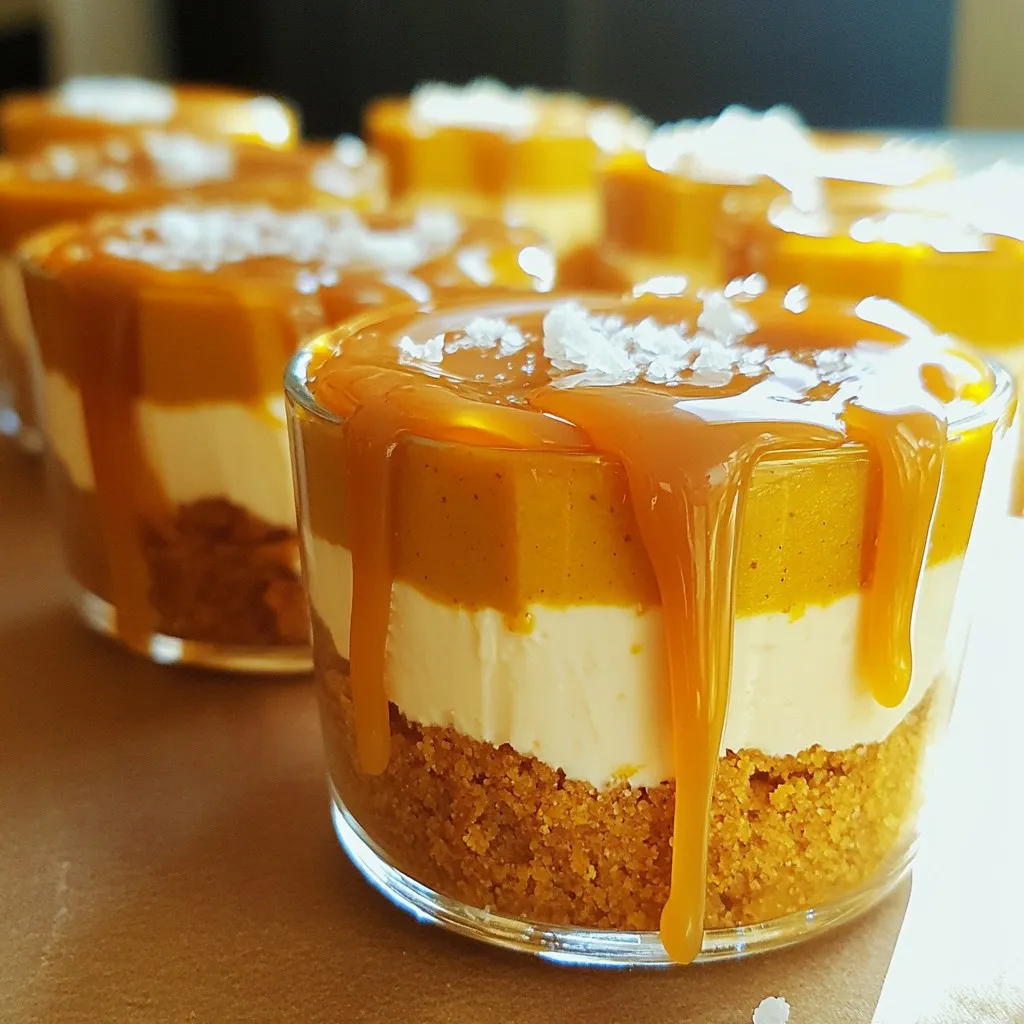
Looking for a dessert that wows with little effort? These No-Bake Salted Caramel Pumpkin Cheesecake Cups are perfect! Creamy pumpkin filling, a crunchy graham cracker base, and drizzles of salted caramel combine for a sweet treat that steals the show. Best of all, you won’t need to turn on the oven. Let’s dive into this easy recipe and impress your friends and family with a stunning dessert they’ll love!
Ingredients
To make No-Bake Salted Caramel Pumpkin Cheesecake Cups, you need some simple ingredients. Here’s what you will need:
– 1 cup graham cracker crumbs
– 1/2 cup unsalted butter, melted
– 2 cups cream cheese, softened to room temperature
– 1 cup pumpkin puree (canned or fresh)
– 1/2 cup powdered sugar
– 1 teaspoon vanilla extract
– 1 teaspoon pumpkin spice mix
– 1/2 cup heavy whipping cream, chilled
– 1/4 cup salted caramel sauce (plus extra for drizzling)
– Pinch of sea salt for garnish
Each ingredient plays a big role in creating the perfect dessert. The graham cracker crumbs form a tasty crust. The melted butter helps bind the crumbs together. Cream cheese gives the cheesecake its rich and creamy texture. Pumpkin puree adds that classic fall flavor we all love.
Powdered sugar sweetens the mix, while vanilla extract enhances the overall taste. Pumpkin spice mix brings warmth and depth to the dessert. Heavy whipping cream makes the filling light and fluffy. Salted caramel sauce adds a sweet and salty touch. Finally, a pinch of sea salt on top elevates the flavors.
Gather these ingredients, and you’re ready to create a delightful treat!
Step-by-Step Instructions
Prepare the Crust
First, gather your graham cracker crumbs and melted butter. In a medium bowl, combine these two ingredients. Mix well until you see a wet sand consistency. This means the crumbs stick together well.
Assemble the Crust
Next, take your graham cracker mixture. Distribute it evenly into your serving cups or small jars. Use your fingers or the back of a spoon to press down firmly. This creates a solid base for your delicious cheesecake.
Make the Cheesecake Filling
Now, let’s make the creamy filling. In a large bowl, beat the softened cream cheese using an electric mixer. Mix until it is smooth and creamy. Then, add the pumpkin puree, powdered sugar, vanilla, and pumpkin spice. Mix again on medium speed until everything is fluffy and well combined.
Fold in Whipped Cream
In another bowl, pour the chilled heavy whipping cream. Whip it until stiff peaks form. This means your cream should hold its shape. Gently fold this whipped cream into the pumpkin mixture. Use a spatula and be careful to keep it light and airy.
Layer the Cheesecake
Take your pumpkin cheesecake filling and spoon it over the crust in each cup. Use a spatula to smooth the top. This ensures you have even layers in your cups.
Add Caramel and Chill
Finally, drizzle salted caramel sauce over the top of each cheesecake layer. Let it cascade down the sides for a nice look. Cover each cup with plastic wrap or a lid. Refrigerate them for at least 4 hours. This helps the filling set and firm up nicely.
Tips & Tricks
Achieve Perfect Texture
To get the best texture for your cheesecake, start with room temperature cream cheese. It blends smoothly without lumps. I usually take it out of the fridge an hour before I mix. This helps the cake feel creamy and rich.
When you fold in the whipped cream, do it gently. Use a spatula and lift the cream from the bottom. This keeps air in the mixture. Air makes it fluffy. If you stir too hard, the filling will be dense.
Flavor Enhancements
You can add more spices to boost the flavor. Try adding a pinch of nutmeg or cinnamon. These spices add warmth and depth. You can also switch up the whipped cream. Use vanilla, maple, or even chocolate whipped cream. These flavors mix well with pumpkin.
Presentation Tips
Presentation makes a big difference. Drizzle extra salted caramel on top of each cup. This not only tastes great but looks amazing, too. You can let it run down the sides for a nice touch.
Choose decorative cups or jars for serving. Clear glass cups show off the layers. It makes the dessert look special. You can even add a sprinkle of crushed graham crackers on top for crunch.
Variations
Alternative Base Options
You can switch up the base for your cheesecake cups. Instead of using graham cracker crumbs, try cookie crumbs. Oreos or vanilla wafers work great. They add a fun twist and a rich taste.
If you need a gluten-free option, use gluten-free cookies. You can also look for gluten-free graham cracker crumbs. This way, everyone can enjoy these treats.
Different Flavors
Want to mix it up? Try a chocolate pumpkin variation. Simply add cocoa powder to your cheesecake mix. This twist gives a rich, chocolatey flavor that pairs well with pumpkin.
You can also create no-bake cheesecake cups with different fruits. Strawberries, blueberries, or raspberries make lovely additions. Just replace the pumpkin puree with your chosen fruit puree for a refreshing twist.
Seasonal Variations
Adjusting spices can change the feel of your cheesecake. For fall, stick with pumpkin spice. In winter, add cinnamon or nutmeg for warmth.
When spring arrives, consider lighter toppings, like fresh berries or whipped cream. In summer, top with citrus zest or a fruit compote to keep things bright and fresh. Each season can bring a new life to your cheesecake cups!
Storage Info
How to Store Leftovers
Store your cheesecake cups in an airtight container. Glass jars work great, but plastic containers are fine too. Keep them in the fridge for up to 5 days. Always make sure they are covered well. This keeps the cheesecake fresh and tasty.
Freezing Instructions
You can freeze the cheesecake cups if you want to save some for later. Make sure to use freezer-safe containers. Wrap each cup tightly in plastic wrap before placing them in the freezer. To serve, let them thaw in the fridge overnight. This keeps the texture creamy.
Shelf Life
These cheesecake cups last about a week in the fridge. Look for any signs of spoilage. If you see mold or the filling smells off, it’s best to toss them. Fresh is always best for flavor and safety.
FAQs
Can I use low-fat cream cheese?
Yes, you can use low-fat cream cheese. However, it may change the flavor and texture. You might notice it is less rich and creamy. This can make your cheesecake less velvety. If you want a lighter option, low-fat cream cheese works but expect a different taste.
How do I make homemade salted caramel sauce?
Making salted caramel sauce at home is easy! Here’s a simple recipe:
– Ingredients:
– 1 cup granulated sugar
– 6 tablespoons unsalted butter, cut into pieces
– 1/2 cup heavy cream
– 1 teaspoon sea salt
– Instructions:
1. In a medium saucepan, heat the sugar over medium heat. Stir until it melts and turns amber.
2. Remove from heat and add butter. Stir until melted.
3. Gradually stir in heavy cream. Be careful, as it will bubble up.
4. Add sea salt and stir well. Let it cool before using.
This sauce is bold and pairs nicely with our cheesecake cups!
What can I substitute for pumpkin puree?
If you don’t have pumpkin puree, there are a few options. You can use:
– Sweet potato puree: This gives a similar texture and flavor.
– Butternut squash puree: It has a sweet taste and works well.
– Applesauce: This adds moisture but will change the flavor.
Each option brings a unique twist to your cheesecake.
Can I make this recipe in advance?
Yes, you can make this recipe ahead of time! Here are some tips:
– Make the cheesecake filling: You can prepare it a day or two in advance. Just store it in the fridge.
– Assemble and chill: Layer the cups and chill them. They need at least four hours to set.
– Add toppings later: Drizzle the salted caramel sauce just before serving. This keeps it fresh and tasty.
Making it in advance can save you time on the day of serving!
In this post, we explored creating delicious pumpkin cheesecake cups. You learned about necessary ingredients, like pumpkin puree and salted caramel, and mastered step-by-step instructions for making them. I shared tips for perfect texture and flavor, plus exciting variations and storage info.
By now, you should feel confident to create this warm dessert. Enjoy sharing these treats at your next gathering or keeping them as your sweet secret.
No-Bake Salted Caramel Pumpkin Cheesecake Cups
A delightful dessert featuring a creamy pumpkin cheesecake filling topped with salted caramel, served in individual cups.
Ingredients
Instructions
- 1
In a medium mixing bowl, combine the graham cracker crumbs and the melted butter. Stir well until all the crumbs are evenly coated with the butter, resembling wet sand.
- 2
Evenly distribute the graham cracker mixture among individual serving cups or small jars. Use your fingers or the back of a spoon to gently press down on the mixture to create a firm base.
- 3
In a separate large mixing bowl, use an electric mixer to beat the softened cream cheese until it reaches a creamy and smooth consistency. Then, add the pumpkin puree, powdered sugar, vanilla extract, and pumpkin spice. Mix on medium speed until all ingredients are well combined and fluffy, scraping down the sides as necessary.
- 4
In another bowl, pour the chilled heavy whipping cream. Using an electric mixer, whip until stiff peaks form. Carefully fold the whipped cream into the pumpkin cheesecake mixture using a spatula, ensuring to incorporate it gently to keep the filling airy and light.
- 5
Spoon the luscious pumpkin cheesecake filling over the graham cracker crust in each cup, smoothing the top with the spatula to create an even layer.
- 6
Generously drizzle salted caramel sauce over the top of each cheesecake layer, allowing some to cascade down the sides for an aesthetically pleasing presentation.
- 7
Cover each cup with plastic wrap or a lid, and refrigerate for at least 4 hours, or until the cheesecake filling is set and firm.
- 8
Just before serving, sprinkle a delicate pinch of sea salt on each cheesecake cup. Optionally, add an extra drizzle of salted caramel on top for a decadent finish.
Chef's Notes
Chill for at least 4 hours for best results.


Recipe Creator
Remy
I’m Chef Remy, your recipe companion, here to bring warmth, bold taste, and simplicity to your kitchen.
View My Recipes