
Get ready to indulge in a sweet treat that’s easy to make and perfect for fall! My No-Bake Pumpkin Cheesecake Truffles combine rich cream cheese, smooth pumpkin puree, and warm spices for a flavor explosion. With only a few simple ingredients, you’ll be on your way to creating truffles that are not only delicious but also a fun addition to any gathering. Let’s dive into this simple and sweet recipe!
Ingredients
Main Ingredients
– 1 cup cream cheese, softened at room temperature
– 1 cup canned pumpkin puree
– 1 cup powdered sugar
The main ingredients create a rich, creamy base. Cream cheese gives a smooth texture. Canned pumpkin puree adds warmth and flavor. Powdered sugar sweetens the mix, making it perfect for a treat.
Flavor Enhancers
– 1 teaspoon vanilla extract
– 1 teaspoon ground cinnamon
– 1/2 teaspoon ground nutmeg
– 1/4 teaspoon ground ginger
These flavor enhancers make the truffles taste like fall. Vanilla extract brings a sweet note. Ground cinnamon adds warmth, while nutmeg and ginger give a spicy kick. Mixing these spices elevates the truffles to a new level.
Coating and Roll Ingredients
– 2 cups graham cracker crumbs
– 1 cup white chocolate chips, melted
– Crushed pecans or walnuts (optional)
The coating creates a lovely crunch. Graham cracker crumbs mimic a cheesecake crust. Dipping the truffles in melted white chocolate adds sweetness. If you like, rolling them in crushed nuts gives extra texture. It’s a fun way to finish the truffles.
Step-by-Step Instructions
Preparing the Cheesecake Mixture
Start by mixing the cream cheese and pumpkin. Place one cup of softened cream cheese into a large bowl. Add one cup of canned pumpkin puree. Use a hand mixer and beat the mix on medium speed. Continue until it becomes smooth and creamy, with no lumps.
Next, gradually add the powdered sugar. Sprinkle it in slowly while mixing. This helps blend it well. Keep beating until the mixture is silky and fully combined.
Incorporating Flavor and Texture
Now, it’s time to add some flavor. Pour in one teaspoon of vanilla extract. Then, add one teaspoon of ground cinnamon, half a teaspoon of nutmeg, and a quarter teaspoon of ground ginger. Mix well. This step brings warmth and depth to the truffles.
After that, fold in the graham cracker crumbs. Use a spatula or wooden spoon for this. Gently combine until you reach a dough-like texture. It should hold together nicely.
Shaping and Chilling the Truffles
Now, let’s shape the truffles. Use a small cookie scoop or your hands. Form the mixture into balls that are about one inch in diameter. Place each ball on a parchment-lined baking sheet. Make sure to leave space between each one.
Next, refrigerate the truffles for at least 30 minutes. This helps them firm up. A cold mixture is easier to handle and shape.
Coating the Truffles
Once the truffles are chilled, it’s time to coat them. Start by melting one cup of white chocolate chips in a microwave or double boiler. Dip each truffle into the melted chocolate. Let any excess chocolate drip off before moving to the next step.
If you want extra crunch, roll each truffle in crushed pecans or walnuts. This adds a nice texture and flavor. Finally, place the coated truffles back on the baking sheet. Return them to the fridge for 10 to 15 more minutes, until the chocolate sets completely.
Tips & Tricks
Perfecting the Truffle Texture
To make perfect truffles, avoid lumps in the mixture. Start with softened cream cheese and canned pumpkin. Use a hand mixer to blend them until smooth. This process will help you get a creamy base.
Next, when adding the powdered sugar, do it slowly. This step helps to blend everything well. Beat the mixture after each addition. You want it silky, not gritty.
For the right consistency, fold in the graham cracker crumbs gently. Use a spatula or a wooden spoon. The mixture should be thick enough to hold its shape. If it feels too wet, add more crumbs.
Presentation Suggestions
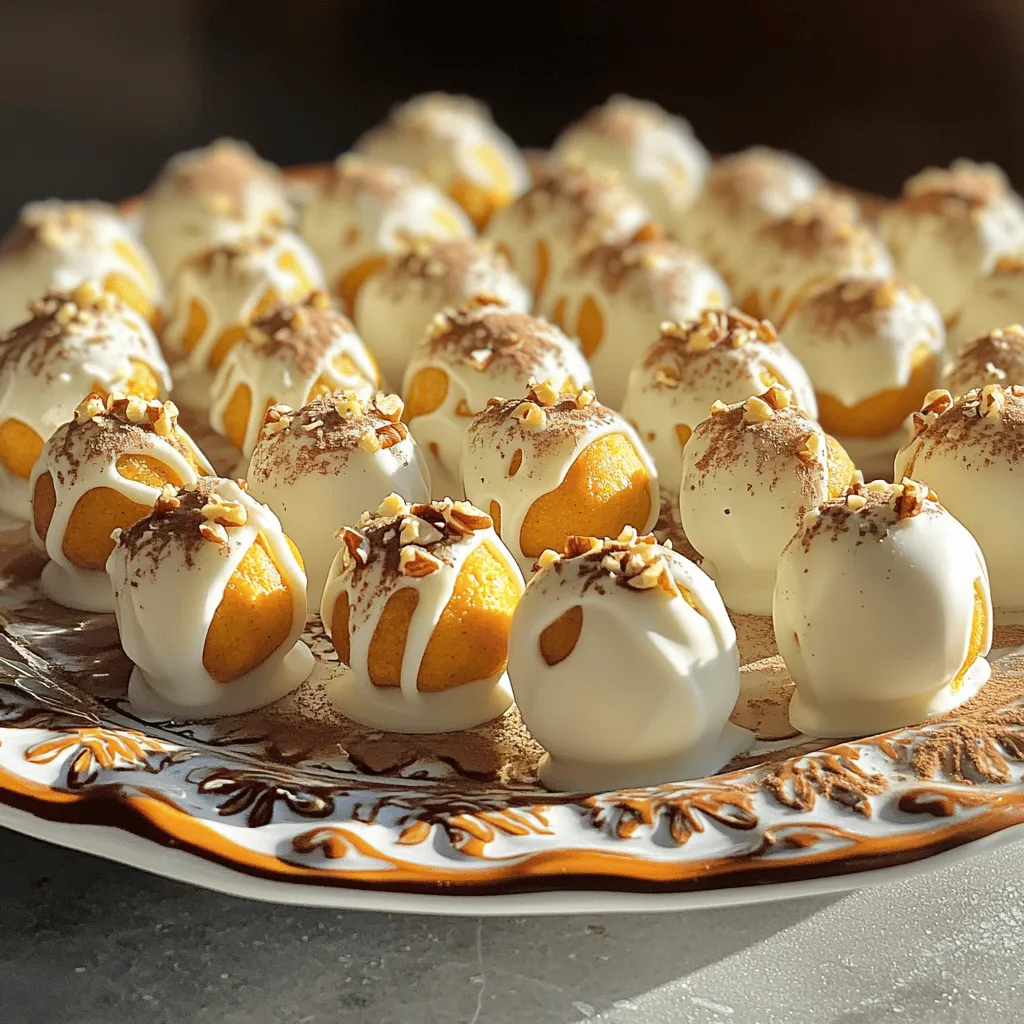
For serving, arrange truffles on a pretty platter. Drizzle some melted white chocolate over the top for style. This makes the truffles look fancy and fun. A light sprinkle of cinnamon adds an autumn touch.
To enhance flavor, consider adding a pinch of sea salt. This little trick boosts the sweetness and adds depth. You can also use colorful paper liners for fun and easy serving.
Common Mistakes to Avoid
One big mistake is not chilling the mixture. Chilling makes the truffles firm and easy to handle. Always refrigerate them for at least 30 minutes before dipping.
Another common error is overcoating with chocolate. Dip each truffle quickly in melted white chocolate. Let the excess chocolate drip off. You want a thin layer that shows the truffle inside.
Variations
Flavor Variations
You can change the flavor of your truffles easily. Add flavored extracts for a new twist. Almond extract brings a nutty taste, while maple gives sweetness. You can also try different spices. Cinnamon is great, but you can use cardamom or allspice for fun. Each change adds unique flavor to your truffles.
Dietary Adjustments
If you need gluten-free truffles, use gluten-free graham cracker crumbs. Many brands offer these. For vegan options, replace cream cheese with dairy-free cream cheese. Use coconut cream instead for a rich base. Substitute white chocolate chips with dairy-free chocolate chips for a fully vegan treat.
Seasonal Modifications
You can make these truffles festive too! Add toppings like crushed candy canes for Christmas. In fall, sprinkle with pumpkin spice or drizzle caramel on top. Mix in dried fruits or coconut for texture. These fun additions make your truffles perfect for any holiday or season.
Storage Info
Proper Storage Techniques
To keep your no-bake pumpkin cheesecake truffles fresh, store them in the refrigerator. Place them in an airtight container. This helps to prevent them from drying out. If you want to save them for later, you can freeze them. Wrap each truffle in plastic wrap. Then, place them in a zip-top bag. This keeps air out and helps maintain their flavor.
Shelf Life of Truffles
When you store these truffles properly, they last for about one week in the fridge. If you freeze them, they can last up to three months. Just remember to label the container with the date you made them. This way, you know when to enjoy them at their best.
Reheating Suggestions
To thaw frozen truffles, take them out of the freezer. Leave them in the fridge for a few hours or overnight. This method helps them retain their texture. Avoid microwaving them, as it can make them too soft. Enjoy the truffles chilled for the best taste!
FAQs
How long do no-bake pumpkin cheesecake truffles last?
No-bake pumpkin cheesecake truffles last about 1 week in the fridge. If left at room temperature, they can sit for about 2 hours before they spoil. Always store them in an airtight container. This keeps them fresh and tasty.
Can I make these truffles ahead of time?
Yes, you can make these truffles ahead of time. Prepare them up to a week in advance. Just store them in the fridge until you are ready to serve. They taste great after a day or two, as the flavors blend nicely.
What can I substitute for cream cheese?
You can use mascarpone cheese or Greek yogurt as a substitute for cream cheese. Both options will give a nice creamy texture. If you prefer a lighter flavor, use Greek yogurt. Just remember to adjust the sweetness if needed.
How do I make these truffles dairy-free?
To make these truffles dairy-free, substitute cream cheese with vegan cream cheese. Use coconut cream for a rich texture. You can also replace white chocolate with dairy-free chocolate chips. This way, everyone can enjoy these tasty treats!
These no-bake pumpkin cheesecake truffles are easy to make and delicious. We covered the key ingredients like cream cheese and pumpkin puree. You learned how to mix, shape, and coat your truffles. Remember to chill them well before serving. Variations let you explore different flavors and dietary needs. Store them properly to keep them fresh longer. Enjoy creating these tasty treats for any occasion!
No-Bake Pumpkin Cheesecake Truffles
Delicious no-bake truffles made with pumpkin and cream cheese, coated in white chocolate.
Ingredients
Instructions
- 1
In a large mixing bowl, combine the softened cream cheese and pumpkin puree. Using a hand mixer, beat the mixture on medium speed until it becomes smooth and creamy, ensuring there are no lumps.
- 2
Gradually sprinkle in the powdered sugar, beating well after each addition until the mixture is fully incorporated and silky in texture.
- 3
Add the vanilla extract along with the ground cinnamon, nutmeg, and ginger. Mix thoroughly until the spices are evenly distributed throughout the cheesecake filling.
- 4
Carefully fold in the graham cracker crumbs using a spatula or wooden spoon. Continue folding until the mixture is well blended and achieves a dough-like consistency that holds together.
- 5
With a small cookie scoop or your hands, form the mixture into bite-sized balls, approximately 1 inch in diameter. Place each ball onto a parchment-lined baking sheet, leaving space between them.
- 6
Refrigerate the truffles for at least 30 minutes, allowing them to firm up and become easier to handle.
- 7
After the truffles have chilled, dip each one into the melted white chocolate. Allow the excess chocolate to drip off before proceeding to the next step.
- 8
If desired, roll each truffle in crushed pecans or walnuts, ensuring even coating for added crunch and flavor.
- 9
Place the coated truffles back onto the baking sheet and return them to the refrigerator for an additional 10-15 minutes, or until the white chocolate has completely set.
Chef's Notes
Arrange the truffles on a decorative platter, artistically drizzling some extra melted white chocolate over the top for an elegant finish. For an extra touch, lightly sprinkle with cinnamon to enhance the autumnal theme.


Recipe Creator
Remy
I’m Chef Remy, your recipe companion, here to bring warmth, bold taste, and simplicity to your kitchen.
View My Recipes