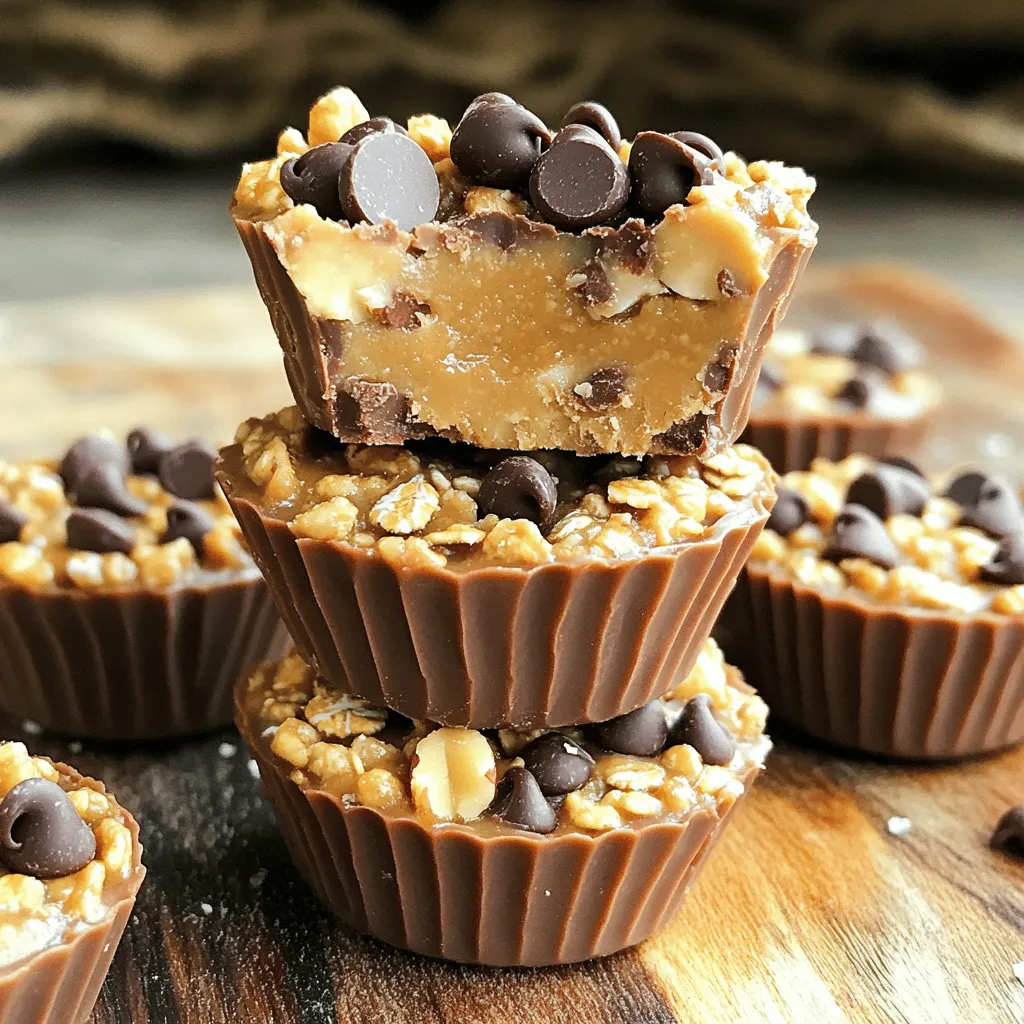
Are you ready for a quick, delicious snack that’s easy to make? No Bake Peanut Butter Oat Cups are just what you need! These tasty treats combine wholesome ingredients like oats and peanut butter with a touch of sweetness. Perfect for kids and adults, this recipe is a fun way to enjoy healthy snacking. Let’s dive into how you can whip up this delightful treat in no time!
Ingredients
List of Ingredients
– 1 cup rolled oats
– 1/2 cup natural peanut butter
– 1/4 cup honey or maple syrup
– 1/4 cup mini chocolate chips
– 1/4 cup chopped nuts (such as almonds or walnuts)
– 1 teaspoon vanilla extract
– A pinch of salt
Gather these ingredients first. Rolled oats provide a great base. Natural peanut butter gives rich flavor and protein. Honey or maple syrup sweetens the mix. Mini chocolate chips add fun bites. Chopped nuts bring crunch. Vanilla extract enhances all the flavors. A pinch of salt balances the sweetness.
Optional Add-Ins
– Different nut butters
– Dried fruits
– Seeds like chia or flaxseed
You can switch up nut butters for variety. Try almond or cashew butter for a twist. Dried fruits add natural sweetness and chewiness. Consider raisins, cranberries, or apricots. Chia or flaxseed packs extra nutrition. These add-ins make the cups even more exciting!
Equipment Needed
– Mixing bowls
– Microwave-safe bowl
– Muffin tin
– Spoon or spatula
You will need a few tools for this recipe. Mixing bowls help combine the dry and wet ingredients. Use a microwave-safe bowl to melt the peanut butter and syrup. A muffin tin shapes your oat cups. A spoon or spatula lets you mix and serve easily.
This recipe is simple and fun, allowing you to enjoy delicious no-bake peanut butter oat cups. Remember to check the full recipe for detailed steps.
Step-by-Step Instructions
Mixing the Dry Ingredients
– Begin by placing 1 cup of rolled oats in a large bowl.
– Add a pinch of salt to the oats.
– Stir them together until they mix well.
Heating the Wet Ingredients
– In a microwave-safe bowl, add 1/2 cup of natural peanut butter and 1/4 cup of honey or maple syrup.
– Heat this mixture for about 30 seconds to 1 minute.
– Stir it until the mix is warm and smooth.
– Add 1 teaspoon of vanilla extract and mix well.
Combining Ingredients
– Pour the warm peanut butter mixture over the oats in the large bowl.
– Stir thoroughly to coat all of the oats.
– Gently fold in 1/4 cup of mini chocolate chips and 1/4 cup of chopped nuts.
Forming the Cups
– Line a muffin tin with paper or silicone liners.
– Use a spoon to evenly distribute the oat mixture into each cup.
– Press down firmly to make sure they hold together.
Chilling
– Place the muffin tin in the refrigerator.
– Let the oat cups chill for at least 30 minutes.
– This helps them firm up and keeps their shape.
For the full recipe, check the details above. Enjoy making your no-bake peanut butter oat cups!
Tips & Tricks
Customization Suggestions
You can make these cups your own. Try different flavors like almond butter or cashew butter. Add dried fruits like cranberries or raisins for extra taste. You can also mix in seeds like chia or flaxseed for nutrition. Adjust the sweetness by adding more or less honey or maple syrup. Taste as you go for the best results.
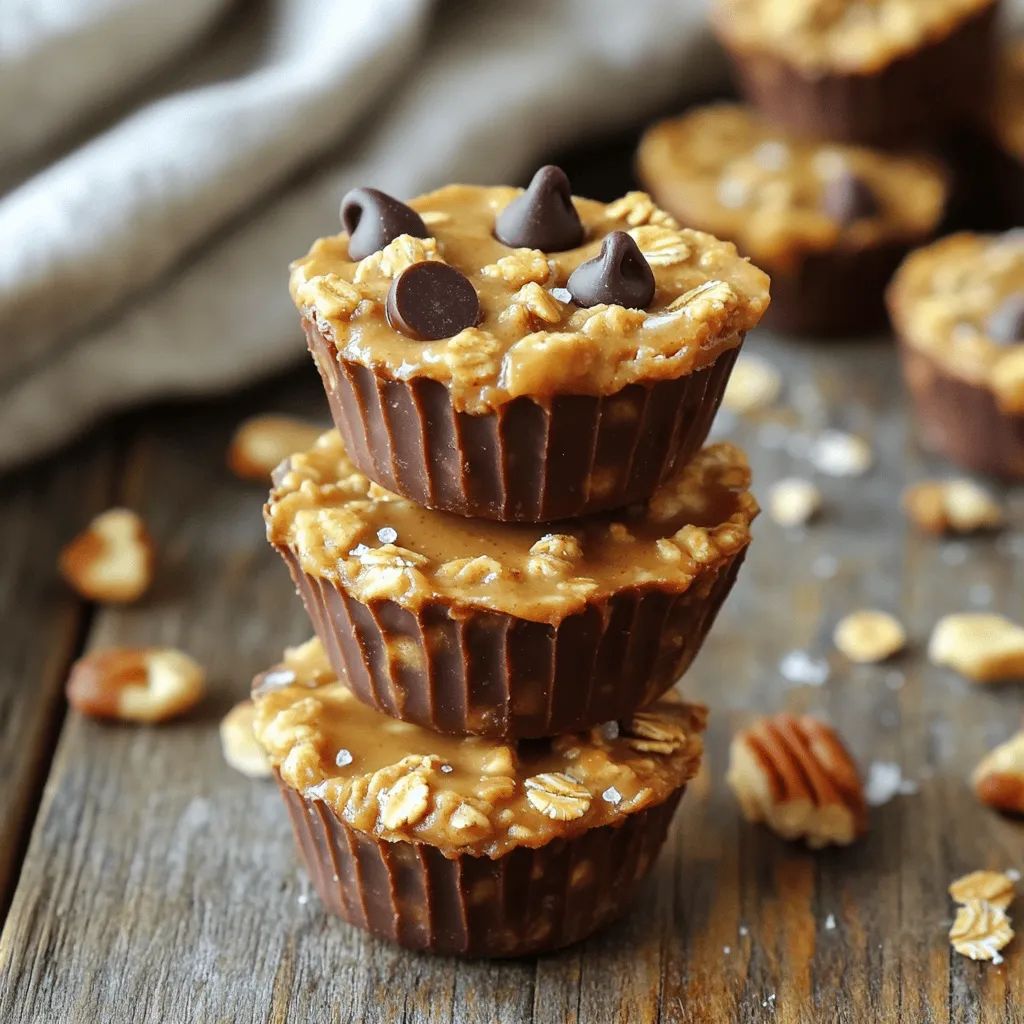
Presentation Ideas
Make your oat cups look fancy! Drizzle melted chocolate or extra peanut butter on top. This adds appeal and taste. Use decorative plates to serve them. A nice presentation makes these treats even more special for friends and family.
Troubleshooting Common Issues
Sometimes, things don’t go as planned. If your mixture seems too crumbly, add more peanut butter. This will help it stick together. If your cups fall apart when you take them out, they might need more chilling. Ensure they are cold enough before serving. This helps them hold their shape.
Variations
Flavor Variations
You can make your no bake peanut butter oat cups even better! A popular choice is chocolate peanut butter oat cups. Just add 1/4 cup of cocoa powder to the peanut butter mix. This gives a rich flavor that pairs well with the oats. If you want a nut-free option, use sunflower seed butter instead of peanut butter. This keeps the same creamy texture and taste without nuts.
Dietary Options
For those who follow a vegan diet, you can substitute honey with maple syrup. This makes your cups vegan-friendly and just as tasty. If you need gluten-free options, use certified gluten-free oats. This ensures that everyone can enjoy these treats without worry.
Serving Suggestions
Pair your oat cups with yogurt or fresh fruits. This adds a nice contrast in texture and flavor. You can also use them as a topping for desserts like ice cream or puddings. The crunchy cups work great on soft desserts, adding fun and flavor.
Storage Info
Refrigeration
Store your no bake peanut butter oat cups in an airtight container. This keeps them fresh and tasty. They will last for up to one week in the fridge. Each time you grab one, it will taste just as good as the first.
Freezing
If you want a longer shelf life, freeze the oat cups. They freeze well and are easy to thaw. Simply take them out before serving. Let them sit at room temperature or place them in the fridge to thaw overnight.
Best Practices for Maintaining Freshness
Always label your containers with dates. This way, you know how long they have been stored. It helps you keep track of freshness. Additionally, keep them away from direct sunlight. Sunlight can cause them to spoil faster, losing that yummy flavor.
FAQs
How long do no-bake peanut butter oat cups last?
No-bake peanut butter oat cups last up to one week in the fridge. Store them in an airtight container to keep them fresh. If you want them to last longer, you can freeze them. They will stay good for about three months in the freezer. Just remember to thaw them in the fridge before you eat them.
Can I make these cups ahead of time?
Yes, you can make these cups ahead of time. They are great for meal prep. Just follow the recipe and store them in an airtight container in the fridge. This way, you can enjoy a tasty treat anytime. They will stay fresh for about a week.
Are there any nut-free alternatives to peanut butter?
If you need a nut-free option, try sunflower seed butter or soy nut butter. Both work well and taste great. You can also use pumpkin seed butter. Each of these spreads gives a different flavor profile, so feel free to experiment.
Can I add protein powder to the recipe?
Yes, you can add protein powder to these cups. Just mix in one or two tablespoons of your favorite protein powder with the dry oats. This will boost the protein content without changing the taste too much. Try to choose a flavor that complements the peanut butter.
What can I use instead of honey?
You can use maple syrup or agave nectar instead of honey. Both will add sweetness and work well in the recipe. If you want a sugar-free option, try using mashed bananas or a sugar substitute. Just keep in mind that it might change the texture a bit.
In this blog post, I shared a simple recipe for no-bake peanut butter oat cups. We covered the ingredients, step-by-step instructions, and helpful tips for customization. These tasty cups are easy to make and fun to adapt. You can experiment with flavors and choices to fit your needs. Whether for a snack or dessert, these treats are sure to please. Enjoy making this recipe and sharing it with others!
No Bake Peanut Butter Oat Cups
Delicious and easy-to-make no bake cups made with oats, peanut butter, and chocolate.
Ingredients
Instructions
- 1
Begin by placing the rolled oats and a small pinch of salt into a large mixing bowl. Stir them together to combine evenly.
- 2
In a separate microwave-safe bowl, combine the natural peanut butter and honey (or maple syrup). Heat in the microwave for about 30 seconds to 1 minute, or until the mixture is warm and smooth enough to stir easily.
- 3
Once the peanut butter and honey mixture is smooth, add the vanilla extract. Mix well until all ingredients are fully blended together.
- 4
Pour the warm peanut butter mixture over the oats in your large mixing bowl. Stir thoroughly to ensure that all of the oats are evenly coated with the mixture.
- 5
Gently fold in the mini chocolate chips and the chopped nuts, mixing until they are evenly distributed throughout the oat mixture.
- 6
Line a muffin tin with paper or silicone liners. This will make it easier to remove the oat cups once they are set.
- 7
Using a spoon, evenly distribute the oat mixture into each muffin cup. Press down firmly on the mixture to ensure that the cups hold together once set.
- 8
Place the muffin tin into the refrigerator and allow the oat cups to chill for at least 30 minutes. This will help them firm up and maintain their shape.
- 9
Once the oat cups are set, carefully remove them from the muffin tin. Enjoy immediately or store in an airtight container in the fridge for up to one week.
Chef's Notes
For a lovely presentation, you can drizzle additional peanut butter or melted chocolate on top of the oat cups before serving. Arrange them on a decorative plate for a charming display.


Recipe Creator
Remy
I’m Chef Remy, your recipe companion, here to bring warmth, bold taste, and simplicity to your kitchen.
View My Recipes