Get ready for a sweet treat that’s easy to make! These No-Bake Cookie Dough Cheesecake Bars combine rich flavors and creamy texture without turning on the oven. Perfect for any occasion, they’ll impress your friends and family. I’ll guide you step-by-step so you can create these delicious bars effortlessly. Let’s dive into the fun of this delightful dessert that everyone will love!
Ingredients
List of Ingredients
– 1 ½ cups graham cracker crumbs
– ½ cup unsalted butter, melted
– 1 cup cream cheese, softened to room temperature
– ½ cup granulated sugar
– 1 teaspoon pure vanilla extract
– 1 cup heavy whipping cream
– ½ cup all-purpose flour (heat-treated)
– ½ cup packed brown sugar
– ½ cup mini chocolate chips
Notes on Ingredient Quality
Using fresh ingredients makes a big difference. I recommend using high-quality cream cheese. This will help create a creamy texture. Choose unsalted butter for a balanced flavor. Pure vanilla extract always tastes better than imitation. For the best results, use heavy whipping cream that is cold. This helps it whip up perfectly.
Substitutions for Common Ingredients
If you don’t have graham cracker crumbs, try crushed cookies, like Oreos. You can use coconut oil instead of unsalted butter for a dairy-free version. For those avoiding sugar, try using a sugar substitute like stevia or monk fruit. If you want a different flavor, you can swap in almond extract for vanilla.
Step-by-Step Instructions
Preparing the Crust
To start, grab a mixing bowl. Combine 1 ½ cups of graham cracker crumbs with ½ cup of melted butter. Stir until it looks like wet sand. Next, press this mixture firmly into the bottom of a lined 9×9 inch pan. Make sure it’s even. This crust needs to chill in the fridge while you make the filling.
Making the Cheesecake Filling
In another large bowl, beat together 1 cup of softened cream cheese and ½ cup of granulated sugar. You can use an electric mixer or a whisk. Mix until it’s smooth and creamy. Add in 1 teaspoon of pure vanilla extract and mix again. Make sure everything is blended well.
Whipping the Cream
Now, take a clean mixing bowl and pour in 1 cup of heavy cream. Use an electric mixer to whip it until stiff peaks form. This will take about 2-3 minutes. Next, gently fold this whipped cream into the cream cheese mixture. Use a spatula and be careful not to deflate the whipped cream. Just mix until everything is smooth.
Preparing the Cookie Dough
In a small bowl, mix together ½ cup of heat-treated flour, ½ cup of packed brown sugar, and ½ cup of mini chocolate chips. This is our cookie dough. Fold this mixture into the cheesecake filling. Make sure the chocolate chips are spread evenly throughout.
Assembling the Bars
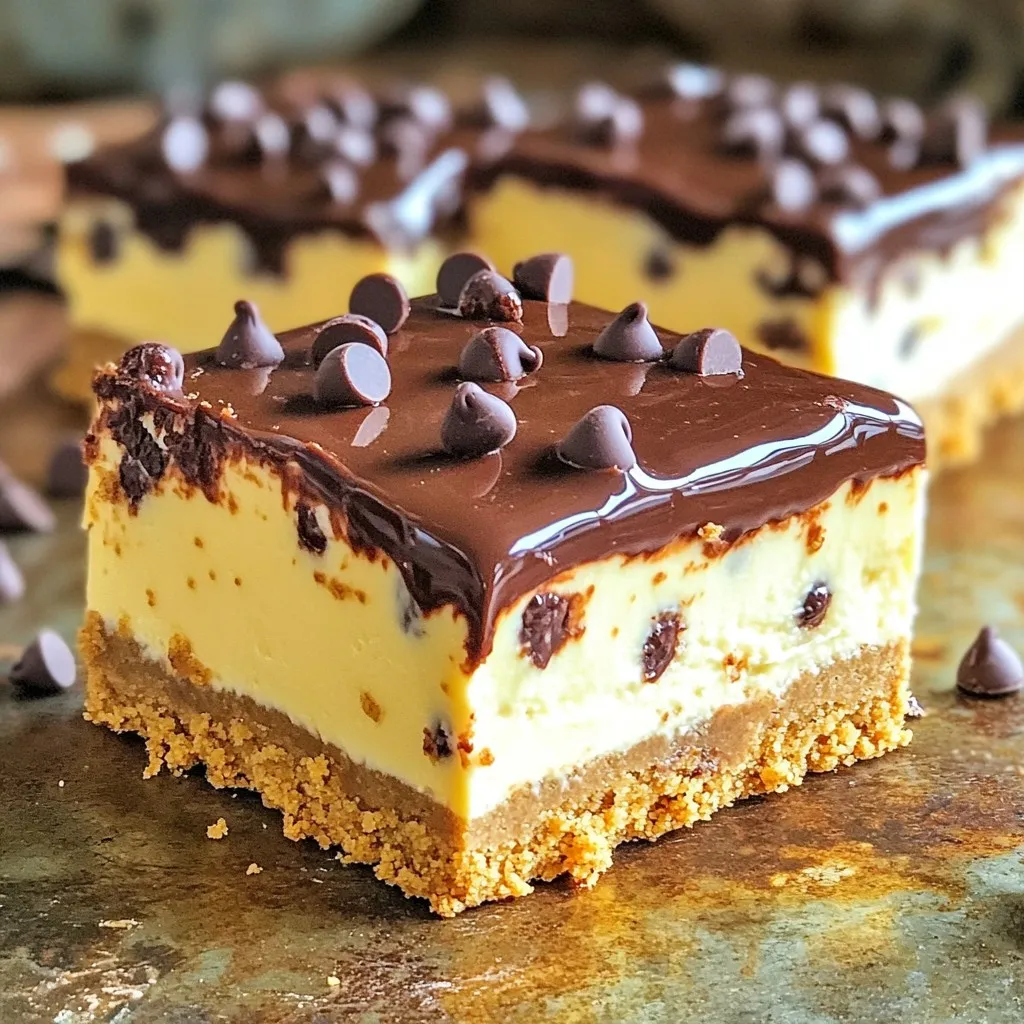
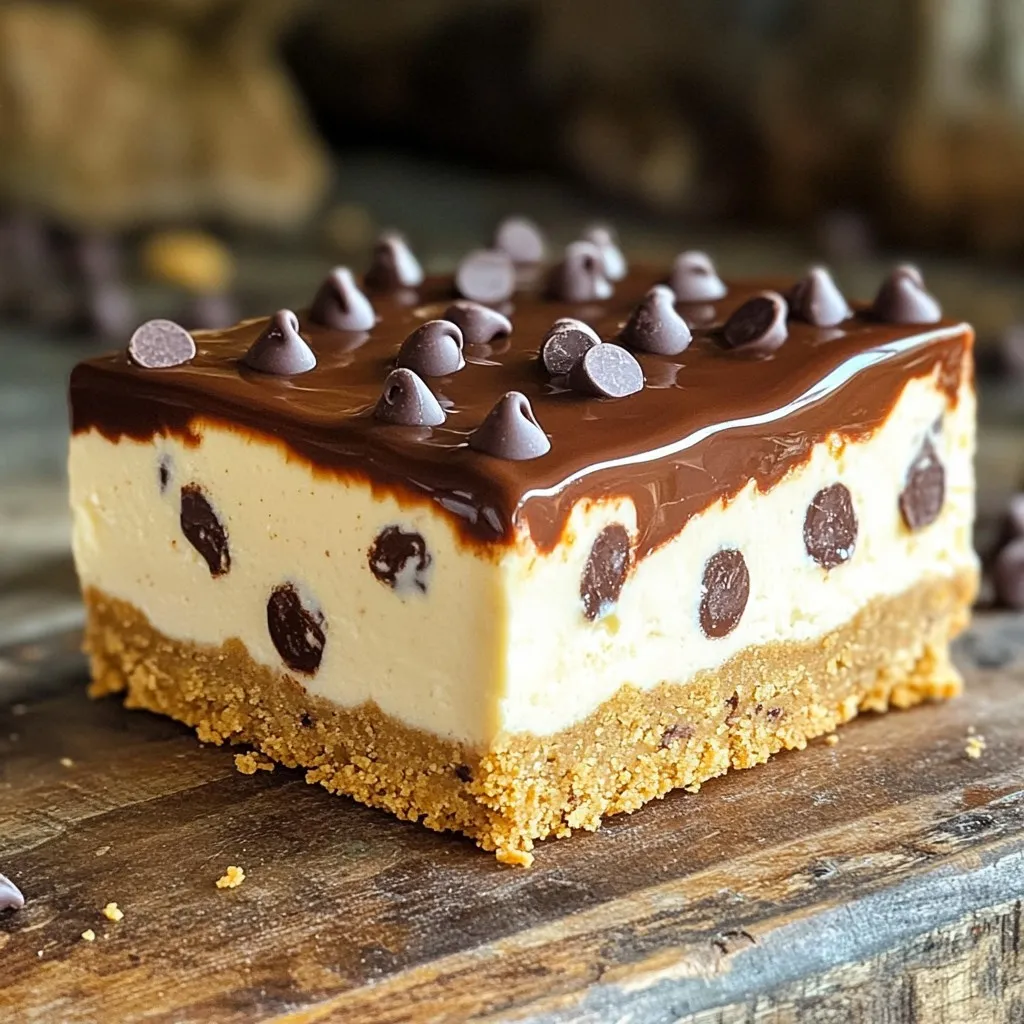
Pour the cookie dough cheesecake filling over the chilled graham cracker crust. Use a spatula to spread it evenly. Smooth the top so it looks nice and flat.
Chilling and Serving the Bars
Cover the pan with plastic wrap or foil. Refrigerate for at least 4 hours, or until the cheesecake filling is firm. Once it’s set, lift the bars out of the pan using the parchment paper. Place them on a cutting board and slice into squares. Enjoy these delicious bars chilled!
Tips & Tricks
Achieving the Perfect Cheesecake Texture
To make a smooth cheesecake, start with room temperature cream cheese. Cold cream cheese can make lumps. Beat the cream cheese and sugar until creamy. This step helps mix air into the batter. Whip the heavy cream to stiff peaks. Fold it in gently. This keeps the texture light.
Decorating and Presentation Ideas
A great way to present these bars is to drizzle chocolate sauce on top. You can also sprinkle mini chocolate chips for fun. For an extra touch, add whipped cream on the side. Serve the bars chilled for the best flavor and texture.
How to Avoid Common Mistakes
One common mistake is not chilling the bars long enough. They need at least four hours to set. Another mistake is overmixing the whipped cream. This can make the filling dense. Also, make sure to use heat-treated flour. It makes the cookie dough safe to eat. Follow these tips for a perfect treat!
Variations
Flavor Variations (e.g., Peanut Butter, Mint)
You can easily switch up the flavor of your No-Bake Cookie Dough Cheesecake Bars. For a peanut butter twist, add ½ cup of creamy peanut butter to the cheesecake filling. Mix it well with the cream cheese and sugar. If you like mint, try adding a few drops of mint extract instead of vanilla. You can also fold in some crushed mint candies for a fun crunch. These little changes can make your bars feel like a whole new dessert!
Gluten-Free Options
Making these bars gluten-free is simple. Just swap out regular graham cracker crumbs for gluten-free ones. Many brands sell gluten-free graham crackers now. Be sure to check the labels to ensure they meet your needs. For the cookie dough, use gluten-free flour instead of all-purpose flour to keep the dough safe for everyone.
Using Different Toppings
Toppings can make your cheesecake bars pop! You might drizzle chocolate sauce over the top for a classic touch. Or, sprinkle extra mini chocolate chips for added texture. Try crushed nuts or colorful sprinkles for a fun look. You can even add fresh fruit like berries for a refreshing bite. The right toppings make each bite even more exciting!
Storage Info
How to Store Leftover Bars
To store leftover cheesecake bars, first cover them well. Use plastic wrap or foil to keep them fresh. You can also place them in an airtight container. This will help prevent them from drying out. Store them in the refrigerator for the best taste. They will stay fresh for several days.
Freezing Instructions
If you want to keep them longer, freezing is a great option. Cut the bars into squares before freezing. Wrap each piece tightly in plastic wrap. Then, place them in a freezer-safe bag or container. They can last up to three months in the freezer. To thaw, simply move them to the fridge overnight.
Shelf Life and Best Practices
These no-bake cookie dough cheesecake bars have a shelf life of about five days in the fridge. For the best flavor and texture, serve them chilled. Avoid leaving them at room temperature for too long. If you notice any changes in smell or texture, it’s best to discard them. Always trust your senses when it comes to food safety.
FAQs
Can I make these cheesecake bars ahead of time?
Yes, you can make these cheesecake bars a day or two ahead. They taste better when chilled. Just store them in the fridge until you are ready to serve.
What is heat-treated flour and why do I need it?
Heat-treated flour is flour that you bake to make it safe to eat raw. Raw flour can contain harmful bacteria. To heat-treat it, spread flour on a baking sheet. Bake it at 350°F for 5 minutes. Let it cool before using it in your recipe.
How can I make the bars firmer?
To make the bars firmer, chill them longer. Refrigerate them for at least 6 hours or overnight. You can also use more cream cheese in the filling. This will help the bars hold their shape better when you cut them.
Can I use a different type of crust?
Yes, you can use a different crust. Try crushed cookies, like Oreos, for a chocolate flavor. You can also use a nut crust for a gluten-free option. Just make sure your crust is firm enough to hold the filling.
What should I serve with no-bake cheesecake bars?
You can serve these bars with fresh fruit, like strawberries or raspberries. A drizzle of chocolate or caramel sauce adds a nice touch. Whipped cream on top can also enhance the flavor and look of your bars.
In this blog post, we explored how to make delicious cheesecake bars from scratch. We covered the best ingredients and why quality matters. You learned to prepare the crust, filling, and cookie dough step by step. I shared tips for a great texture and decoration. We also discussed variations to suit your taste and how to store leftovers safely.
Making cheesecake bars is fun and simple. Enjoy making them your own and sharing with others!
No-Bake Cookie Dough Cheesecake Bars
Delicious cheesecake bars with a cookie dough twist, no baking required.
Ingredients
Instructions
- 1
Prepare the Crust: In a mixing bowl, combine the graham cracker crumbs with the melted butter. Stir until the mixture resembles wet sand. Firmly press this mixture into the bottom of a lined 9x9 inch pan to create an even layer. Place the pan in the refrigerator to chill while you prepare the cheesecake filling.
- 2
Make the Cheesecake Filling: In a large bowl, beat the softened cream cheese and granulated sugar together using an electric mixer or whisk until the mixture is smooth and creamy. Add the vanilla extract and continue mixing until fully incorporated.
- 3
Whip the Cream: In a clean, dry mixing bowl, whip the heavy cream using an electric mixer until stiff peaks form. This should take about 2-3 minutes. Once whipped, gently fold the whipped cream into the cream cheese mixture using a spatula, taking care not to deflate the whipped cream. Mix until just combined and smooth.
- 4
Prepare Cookie Dough: In a small bowl, mix together the heat-treated flour, packed brown sugar, and mini chocolate chips. Fold this cookie dough mixture into the cheesecake filling with a spatula, ensuring that the chocolate chips are evenly distributed throughout.
- 5
Assemble the Bars: Pour the cookie dough cheesecake filling over the chilled graham cracker crust, using a spatula to spread it evenly across the surface. Smooth the top to create a flat finish.
- 6
Chill: Cover the pan with plastic wrap or foil and refrigerate for a minimum of 4 hours, or until the cheesecake filling is firm and set.
- 7
Serve: Once the bars are set, carefully lift them out of the pan using the parchment paper overhang. Place on a cutting board and slice into squares.
Chef's Notes
Elevate the presentation by drizzling chocolate sauce or sprinkling mini chocolate chips on top. Serve chilled for the best texture.


Recipe Creator
Remy
I’m Chef Remy, your recipe companion, here to bring warmth, bold taste, and simplicity to your kitchen.
View My Recipes