Get ready to delight your taste buds with a treat that combines chocolate and pumpkin in the best way! These No Bake Chocolate Pumpkin Cheesecake Bars are easy to make and perfect for any occasion. You won’t need to turn on the oven, making them a great option for warm days. Follow me as I guide you through the simple steps to create these creamy, dreamy bars that everyone will love!
Ingredients
Main Ingredients
– 1 ½ cups graham cracker crumbs
– ½ cup unsweetened cocoa powder
– ½ cup granulated sugar
– ½ cup unsalted butter, melted
– 1 cup cream cheese, softened
– 1 cup canned pumpkin puree
– ½ cup powdered sugar
– 1 teaspoon pure vanilla extract
– 1 teaspoon pumpkin pie spice
– 1 cup whipped cream
– A pinch of salt
– Chocolate shavings or cocoa nibs for garnish
Gathering these ingredients is a fun step. The graham cracker crumbs create a sweet base, while the cocoa powder adds a rich flavor. I love using unsalted butter for a smooth taste. Cream cheese makes the filling creamy and delightful.
Canned pumpkin puree is key for that fall flavor. Always choose the puree, not the pie filling. The powdered sugar gives sweetness, and vanilla extract enhances the taste. Pumpkin pie spice adds warmth with its mix of cinnamon and nutmeg.
For a finishing touch, whipped cream lightens the filling. A pinch of salt balances the sweetness. Finally, chocolate shavings or cocoa nibs make for a pretty garnish. These ingredients come together to create a special dessert that you will love!
Step-by-Step Instructions
Preparing the Crust
To start, gather your crust items. In a medium bowl, combine 1 ½ cups of graham cracker crumbs, ½ cup of unsweetened cocoa powder, and ½ cup of granulated sugar. Pour in ½ cup of melted unsalted butter. Mix until it feels like wet sand. Next, press this mixture firmly into the bottom of a 9×9 inch baking dish. Make sure it is even. Place the dish in the fridge to chill for 15 minutes. This helps the crust hold its shape.
Making the Filling
Now, focus on the filling. In a large bowl, beat 1 cup of softened cream cheese with an electric mixer. Keep mixing until it is smooth and free of lumps. Gradually add in 1 cup of canned pumpkin puree, ½ cup of powdered sugar, 1 teaspoon of pure vanilla extract, and 1 teaspoon of pumpkin pie spice. Add a pinch of salt too. Keep mixing until everything is fluffy and well combined.
Combining with Whipped Cream
Next, bring in the whipped cream. Take 1 cup of whipped cream and gently fold it into the pumpkin mixture using a silicone spatula. Be careful not to deflate the whipped cream. The goal is to keep it light and airy. Fold until just mixed; some small swirls are fine!
Assembling the Bars
Now it’s assembly time. Pour the creamy pumpkin cheesecake mixture over the chilled chocolate crust. Use an offset spatula to spread the filling evenly across the top. Make sure it looks smooth and inviting.
Chilling Process
Cover the baking dish tightly with plastic wrap or aluminum foil. This keeps out any fridge smells. Refrigerate for at least 4 hours, but overnight is best. This wait helps the bars set and meld the flavors.
Serving Suggestions
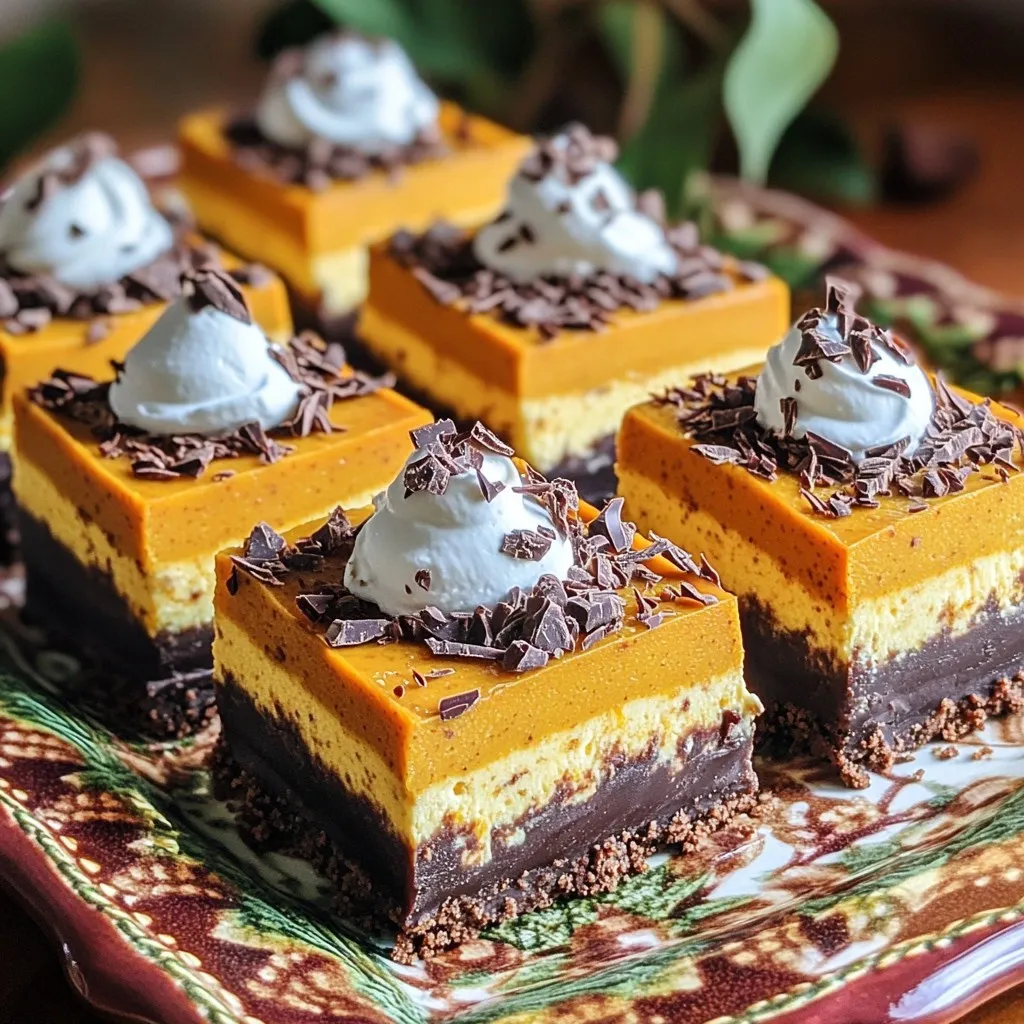
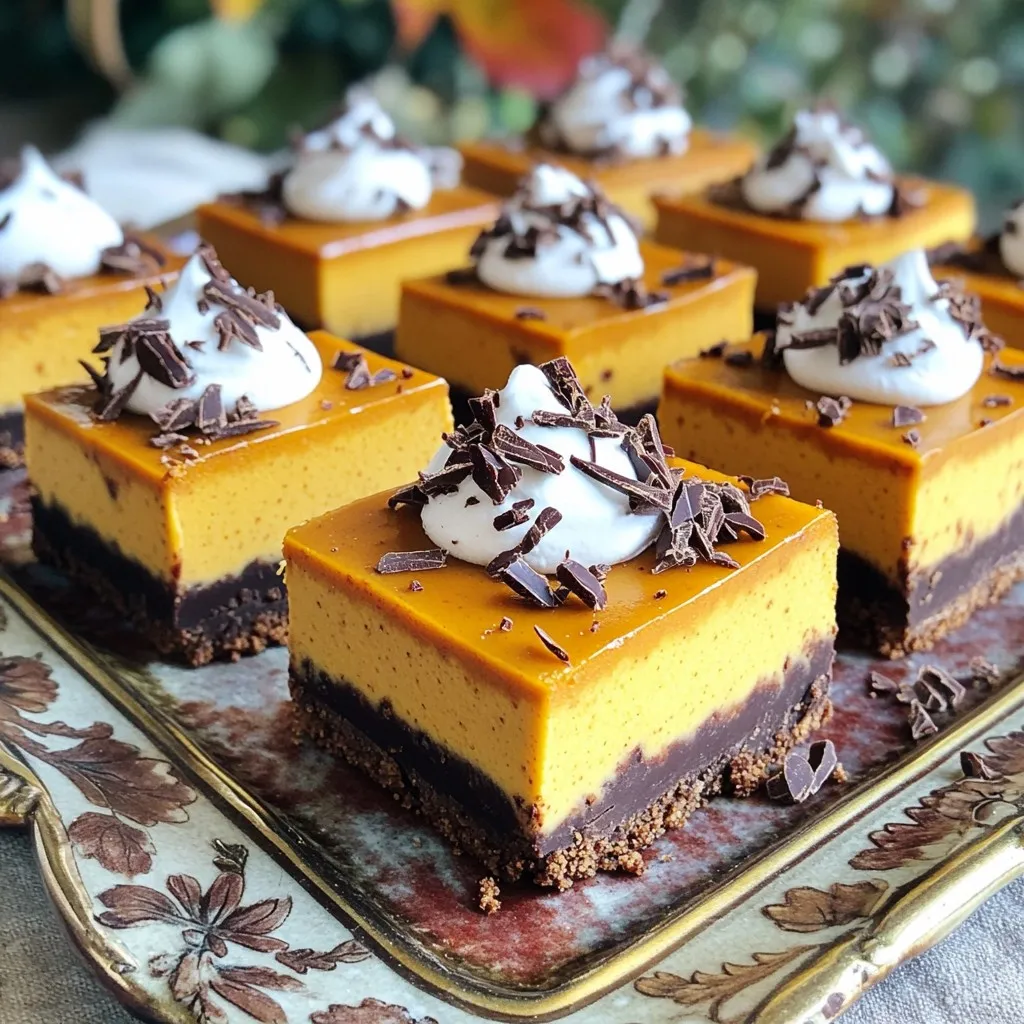
After chilling, take the bars out of the fridge. Use a sharp knife to cut them into squares. For a pretty touch, garnish each square with chocolate shavings or cocoa nibs. If you want to impress, drizzle melted chocolate over the bars or add a dollop of fresh whipped cream on the side. Enjoy your delicious creation!
Tips & Tricks
Best Practices for Mixing
To get the best texture, avoid overmixing your filling. Overmixing can make your bars dense and heavy. Instead, mix just until smooth. This keeps the filling light and fluffy. Use a rubber spatula to fold in the whipped cream. This helps you keep the airiness. Gently fold in the whipped cream until it is just combined. Small swirls of cream add charm to your cheesecake.
Enhancing Flavor
To boost the flavor, try adding more spices. Nutmeg and allspice work well with pumpkin. A pinch of ginger can also add warmth. If you like it sweeter, use maple syrup or honey instead of sugar. These can add a nice twist to your bars.
Presentation Suggestions
For a beautiful presentation, slice your bars carefully. Use a sharp knife to ensure clean edges. Place the bars on a fancy serving platter. Drizzle melted chocolate over the top for a special touch. Adding a dollop of whipped cream beside each bar makes it look gourmet. Finish with chocolate shavings or cocoa nibs for a lovely finish.
Variations
Flavor Variations
You can play with flavors in many fun ways. Try adding spices like nutmeg or allspice. These spices add warmth and depth to your bars. You can also swirl in chocolate or caramel for a special touch. This will give your dessert a rich flavor and a fancy look.
Dietary Alternatives
If you need gluten-free options, use almond flour or gluten-free cookies for the crust. This change keeps the yummy taste while making it safe for everyone. For a dairy-free version, swap the cream cheese with a dairy-free cream cheese. You can also use coconut cream for the filling. This keeps the bars creamy and delicious without dairy.
Storage Info
Short Term Storage
To keep your No Bake Chocolate Pumpkin Cheesecake Bars fresh, refrigerate them. Use an airtight container or cover the dish tightly. This will help prevent odors from the fridge. These bars will last about 5 days in the fridge. Enjoy them chilled for the best taste!
Freezing Instructions
To freeze the bars, cut them into squares first. Place the pieces in a single layer on a baking sheet. Freeze them for about an hour until solid. Then, transfer the squares to a freezer-safe bag or container. Make sure to remove as much air as possible. They can stay frozen for up to 3 months. When ready to eat, thaw the bars in the fridge overnight. This keeps the texture creamy and smooth.
FAQs
Can I make these bars ahead of time?
Yes, you can make these bars a day or two before serving. It helps the flavors blend well. Just make sure to cover them tightly in the fridge. This keeps them fresh and tasty. When ready to serve, slice and enjoy!
Can I substitute pumpkin puree with something else?
You can use butternut squash puree if you can’t find pumpkin. Sweet potato puree also works well. Both options bring a nice flavor and texture. Just ensure they are purees, not pie fillings.
How do I prevent the crust from being too crumbly?
To make the crust firmer, try adding a bit more melted butter. The butter helps bind the crumbs together. You can also press the crust down more firmly in the dish. This helps it hold its shape better when cut.
What can I use instead of whipped cream?
If you prefer, you can use Cool Whip or other whipped toppings. For a dairy-free option, try coconut cream. It adds a nice flavor and texture. Just whip it until light and fluffy before folding it in.
In this blog post, we explored how to create delicious pumpkin bars from scratch. We covered key ingredients like graham cracker crumbs and cream cheese, and provided step-by-step instructions for mixing, chilling, and serving. I shared tips to enhance flavor and presentation, along with variations and storage options.
These pumpkin bars are easy to make and perfect for sharing. With a few tweaks, you can adjust them to fit dietary needs or personal taste. Enjoy making these tasty treats!
No Bake Chocolate Pumpkin Cheesecake Bars
Delicious no-bake cheesecake bars with a chocolate crust and pumpkin filling, perfect for fall.
Ingredients
Instructions
- 1
In a medium-sized bowl, combine the graham cracker crumbs, unsweetened cocoa powder, granulated sugar, and melted butter. Mix until all ingredients are evenly coated and resemble wet sand. Press the mixture into the bottom of a 9x9 inch baking dish, ensuring a compact and even layer. Place the dish in the refrigerator to chill for about 15 minutes.
- 2
In a large mixing bowl, use an electric mixer to beat the softened cream cheese until smooth and creamy, free of lumps. Gradually add in the canned pumpkin puree, powdered sugar, vanilla extract, pumpkin pie spice, and a pinch of salt. Continue mixing until the mixture is fully blended and fluffy.
- 3
With a silicone spatula, gently fold the whipped cream into the pumpkin mixture. Fold until just combined; small swirls are welcomed!
- 4
Pour the pumpkin cheesecake mixture over the chilled chocolate crust. Use an offset spatula to spread the filling evenly across the surface.
- 5
Cover the baking dish tightly with plastic wrap or aluminum foil and refrigerate for at least 4 hours or overnight.
- 6
After chilling, carefully cut into squares using a sharp knife. Garnish each bar with chocolate shavings or cocoa nibs.
Chef's Notes
For an extra indulgent flair, drizzle melted chocolate over the top and add a dollop of fresh whipped cream beside each piece.


Recipe Creator
Remy
I’m Chef Remy, your recipe companion, here to bring warmth, bold taste, and simplicity to your kitchen.
View My Recipes