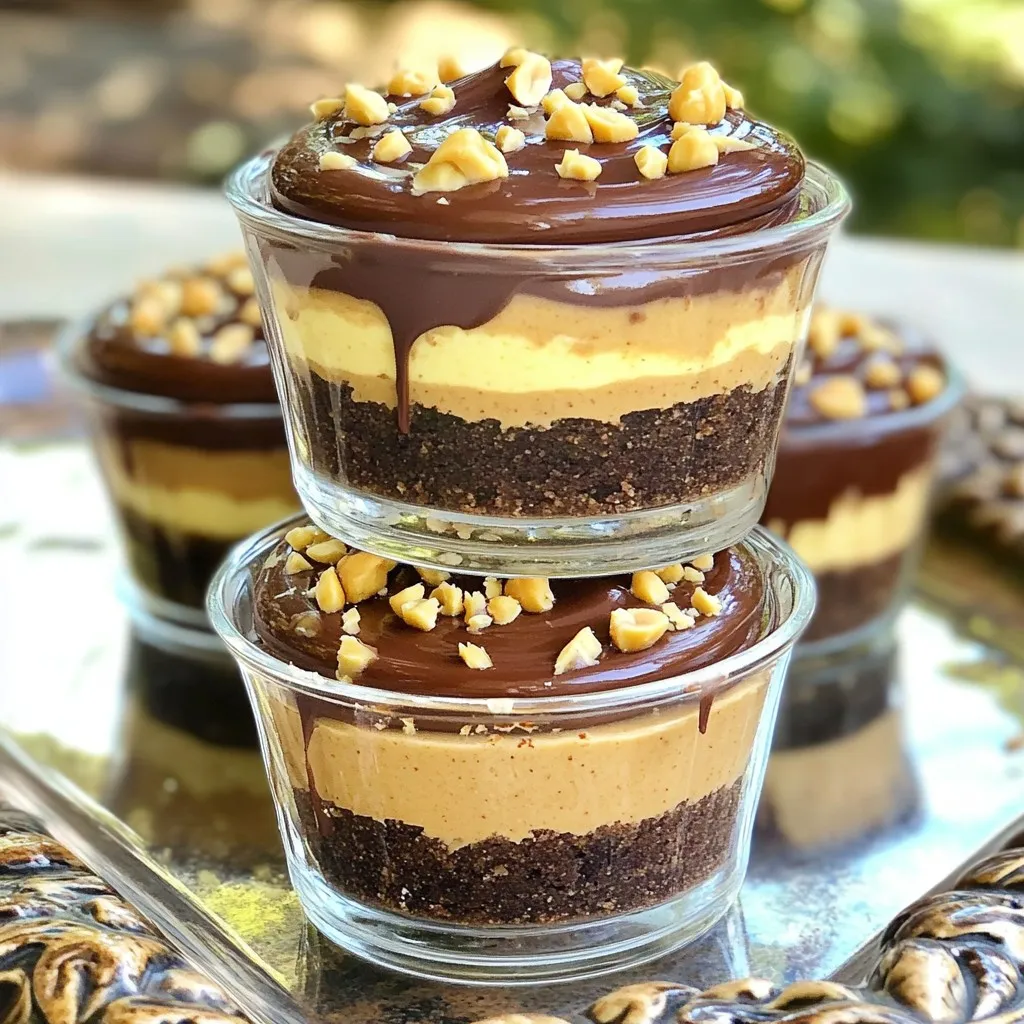
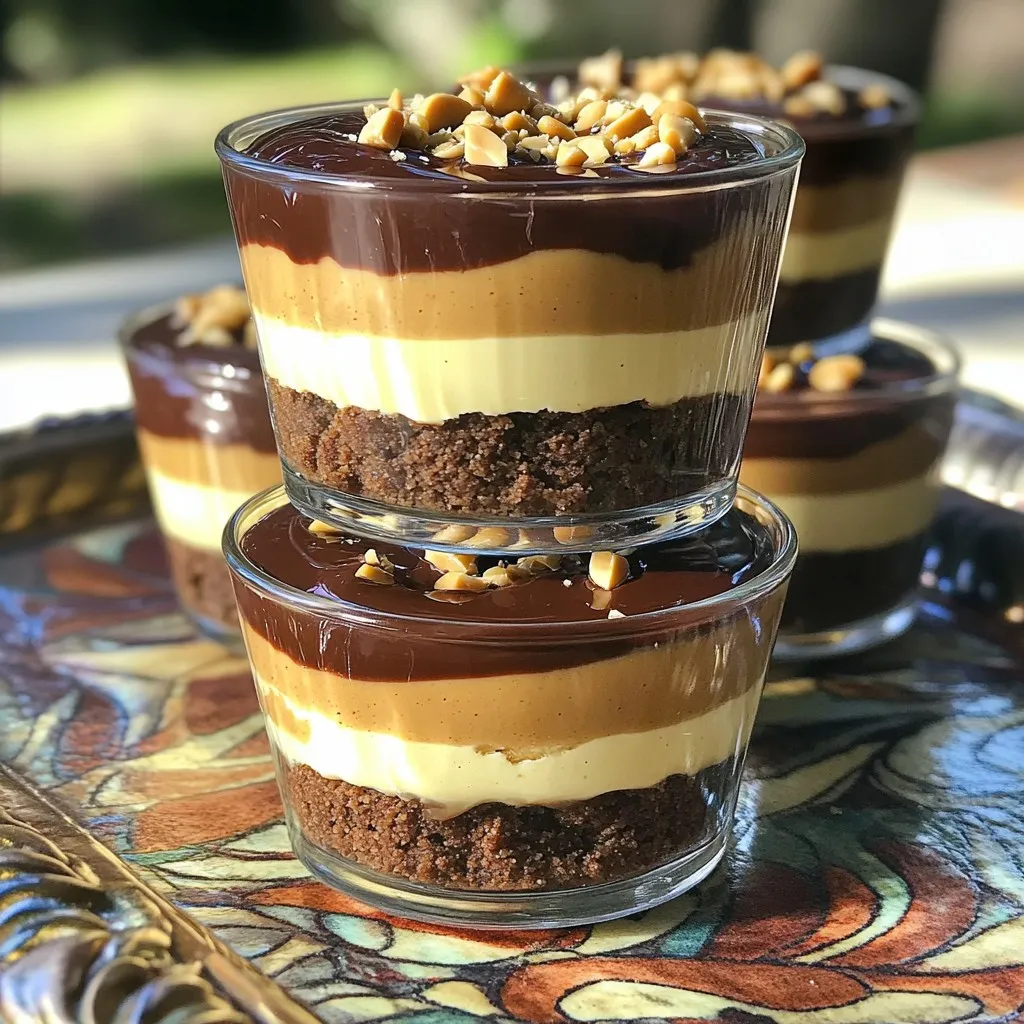
Get ready for a sweet treat that’s simple and indulgent! My No-Bake Chocolate Peanut Butter Cheesecake Cups delight your taste buds with rich chocolate and creamy peanut butter. You’ll love how easy they are to make, and they require no baking at all. Whether you’re hosting a party or just treating yourself, these cups are the perfect dessert. Let’s dive into the recipe and create this deliciousness together!
Ingredients
Detailed List of Ingredients
– 1 cup chocolate cookie crumbs
– 4 tablespoons unsalted butter, melted
– 8 oz cream cheese, softened to room temperature
– 1 cup creamy peanut butter
– 1 cup powdered sugar
– 1 teaspoon vanilla extract
– 1 cup whipped cream (store-bought or homemade)
– 1/2 cup semi-sweet chocolate chips, melted (for drizzling)
– Crushed peanuts (for garnish)
To make the No-Bake Chocolate Peanut Butter Cheesecake Cups, you need simple, tasty ingredients. Each one plays an important role in creating a rich and creamy treat.
Start with chocolate cookie crumbs. They give the dessert a sweet, crunchy base. The unsalted butter helps bind them together, making a solid foundation.
Next, the cream cheese is key for the cheesecake filling. It gives a smooth texture and creamy taste. Creamy peanut butter adds a nutty flavor that pairs perfectly with chocolate.
Powdered sugar sweetens the filling. It blends well, creating a creamy, luscious mix. Vanilla extract adds depth, enhancing the sweetness.
Whipped cream lightens the filling. When you fold it in, you get a fluffy texture that feels great in your mouth.
For the finishing touch, melted semi-sweet chocolate drizzles over the cups. It gives a beautiful look and adds rich chocolate flavor.
Finally, crushed peanuts on top provide a nice crunch. They add a delightful surprise with each bite.
Gather all these ingredients, and you’re ready to create a delightful dessert!
Step-by-Step Instructions
Preparing the Cookie Base
To make the cookie base, start by mixing the chocolate cookie crumbs with melted butter. Use a medium bowl for this task. Combine them well until the crumbs feel like wet sand. This ensures the crumbs stick together. Next, prepare your serving cups. Small glass cups work best. Place a layer of the cookie crumb mixture in each cup. Press it down firmly, using your fingers or the back of a spoon. This creates a solid base for the cheesecake filling.
Making the Cheesecake Filling
Now let’s make the cheesecake filling. Take a separate bowl and beat the softened cream cheese. Use an electric mixer on medium speed until it looks smooth. There should be no lumps in the mixture. Then, add the creamy peanut butter. Keep mixing until it is fully blended and creamy. Gradually add powdered sugar and vanilla extract. Mix on low speed to combine everything well. Check for lumps again to ensure a perfect texture.
Folding in Whipped Cream
Next, we need to fold in the whipped cream. This step is crucial for a light and fluffy filling. Use a spatula and gently incorporate the whipped cream into the peanut butter mixture. Be careful not to deflate the whipped cream. It should stay airy for the best texture. Once mixed, spoon the filling into the cups over the cookie base. Use a spatula to smooth the tops if you want a nice finish.
Chilling the Cheesecake Cups
After filling the cups, it’s time to chill them. Place the cups in the refrigerator. They need to chill for at least 2 hours. This helps the cheesecake set and improves the texture. Chilling also enhances the flavors, making each bite delightful. Once set, they’ll be ready for the final touch before serving.
Tips & Tricks
Ensuring the Best Texture
To get a smooth filling, start with room-temperature cream cheese. It mixes well and avoids lumps. Beat it until creamy before adding peanut butter. When you mix in the powdered sugar, do it slowly. This way, you keep the filling smooth.
Folding whipped cream is key for lightness. Use a spatula and a gentle motion. Start at the center and move to the edges. This helps keep air in the cream. If you mix too hard, the filling will be dense.
Presentation Tips
For serving, arrange the cheesecake cups on a nice tray. It adds a touch of elegance. You can use small glass cups to show off the layers.
Garnishing makes a big difference. Drizzle melted chocolate over each cup for flair. Then, sprinkle crushed peanuts on top. This adds crunch and a pop of color. Your guests will be wowed by the look!
Variations
Flavor Variations
You can change the flavor of your No-Bake Chocolate Peanut Butter Cheesecake Cups easily. Try adding different extracts. Almond or coconut extracts can bring a new twist. Just a drop or two will do. It adds a fresh taste that surprises everyone.
You can also mix in special treats. Swirl in some caramel for a sweet layer. Or toss in chocolate chunks for extra texture. These small changes can make a big difference. Your cheesecake cups will shine with a unique flair.
Dietary Alternatives
If you need a gluten-free option, switch to gluten-free cookie crumbs. Many brands offer these now. They work just as well for the crust. This way, you can enjoy the same great taste without worry.
For those who follow a vegan diet, there are options too. Use vegan cream cheese and a plant-based whipped cream. Also, substitute the butter with coconut oil. These swaps let everyone enjoy your delicious dessert without missing out.
Storage Info
Best Practices for Storage
To keep your leftover cheesecake cups fresh, store them in the fridge. Use an airtight container to prevent them from drying out. If you don’t have one, cover each cup with plastic wrap. This keeps the flavors intact and avoids any odors from mixing.
Shelf Life
In the refrigerator, these cheesecake cups last about 3 to 5 days. If you want to keep them longer, consider freezing. They can stay in the freezer for up to 2 months. Just remember to let them thaw in the fridge before serving. This way, you keep the creamy texture and delicious taste.
FAQs
Can I use crunchy peanut butter instead of creamy?
Yes, you can use crunchy peanut butter. It will change the texture. The cheesecake will have little bits of peanut in it. This adds a fun crunch. If you love texture, go for it! Just remember, it will taste a bit different.
How long do these cheesecake cups need to chill?
These cheesecake cups need to chill for at least 2 hours. This time helps the filling set. It makes the texture creamy and firm. If you can wait longer, chilling overnight is even better. The flavors will blend and taste richer.
Can I make these ahead of time?
Yes, you can make these cups ahead of time. They store well in the fridge. Prepare them a day before your event. Just keep them covered tightly. This will keep them fresh and tasty.
What can I use instead of chocolate cookie crumbs?
If you don’t have chocolate cookie crumbs, you have options. You can use graham cracker crumbs for a different taste. Oreos are another great choice. They add a fun flavor. Just crush them well to make a good base.
You’ve learned how to make delicious cheesecake cups that are easy and fun. We covered the right ingredients, from chocolate cookie crumbs to crushed peanuts. The step-by-step guide ensures a perfect texture and taste. Remember to chill the cheesecake for the best results. You can even try fun variations or make dietary changes. Store your leftovers properly to enjoy later. Trust me, these cheesecake cups will impress at any gathering. Enjoy your tasty creation!
No-Bake Chocolate Peanut Butter Cheesecake Cups
Delicious and easy no-bake cheesecake cups with a chocolate cookie crust and creamy peanut butter filling.
Ingredients
Instructions
- 1
In a medium-sized bowl, combine the chocolate cookie crumbs and the melted unsalted butter. Mix thoroughly until all crumbs are evenly moistened and resemble wet sand.
- 2
Prepare your serving cups (small glass or dessert cups work well) by placing a generous layer of the cookie crumb mixture in the bottom of each one. Press down firmly with your fingers or the back of a spoon to create a solid base, then set aside.
- 3
In a separate mixing bowl, beat the softened cream cheese with an electric mixer on medium speed until it becomes smooth and free of lumps. Add the creamy peanut butter and continue to mix until the mixture is completely blended and creamy.
- 4
Gradually incorporate the powdered sugar and vanilla extract into the peanut butter and cream cheese mixture. Mix on low speed until fully combined, ensuring that there are no remaining lumps.
- 5
Gently fold the whipped cream into the mixture with a spatula. Use a gentle motion to incorporate the whipped cream without deflating it, aiming for a light and fluffy texture.
- 6
Carefully spoon the creamy peanut butter cheesecake filling over the cookie crumb bases in each cup, using a spatula to smooth the tops if desired.
- 7
Place the filled cups in the refrigerator and allow them to chill for at least 2 hours, or until set.
- 8
Before serving, drizzle the melted semi-sweet chocolate over the top of each cheesecake cup in a decorative manner. Finish with a sprinkle of crushed peanuts to add texture and a delightful crunch.
Chef's Notes
For an elegant presentation, arrange the cheesecake cups on a decorative serving tray. Garnish each cup with a sprinkle of additional crushed peanuts and a few delicate chocolate shavings.


Recipe Creator
Remy
I’m Chef Remy, your recipe companion, here to bring warmth, bold taste, and simplicity to your kitchen.
View My Recipes