
Are you ready to impress your friends with a delightful treat? These Mini Fruit Tarts with Cream Cheese Filling will do the trick! They are sweet, creamy, and perfect for any occasion. In this post, I’ll share easy steps, tips, and creative ideas to make these tarts a hit. Let’s dive into making your dessert dreams come true! Your taste buds will thank you.
Ingredients
List of Required Ingredients
To make mini fruit tarts with cream cheese filling, gather these items:
– 1 cup all-purpose flour
– 1/4 cup unsalted butter, softened
– 1/4 cup powdered sugar
– 1/4 teaspoon salt
– 1 large egg, beaten
– 8 oz cream cheese, softened
– 1/3 cup granulated sugar
– 1 teaspoon pure vanilla extract
– Assorted fresh fruits: strawberries, blueberries, kiwis, raspberries
– 2 tablespoons apricot jam (for glazing)
Optional Additions for Flavor
You can enhance the taste of your tarts with these additions:
– A dash of lemon zest for brightness
– A sprinkle of cinnamon for warmth
– A few drops of almond extract for nuttiness
– Fresh mint leaves for a refreshing touch
Best Types of Fruits to Use
Choosing the right fruits makes your tarts shine. Here are my favorites:
– Strawberries: Their sweetness and color pop beautifully.
– Blueberries: These small gems add a lovely burst of flavor.
– Kiwis: Their tartness balances the sweet cream cheese.
– Raspberries: They add a tangy kick and vibrant red.
– Peaches: If in season, they provide a juicy, sweet option.
Use a mix of these fruits for a colorful and tasty treat. You can find the full recipe above to guide you in making these delightful mini tarts.
Step-by-Step Instructions
Preparation of Tart Dough
Start by preheating your oven to 350°F (175°C). Grease a mini muffin tin well. In a medium bowl, mix 1 cup of all-purpose flour, 1/4 cup of softened unsalted butter, 1/4 cup of powdered sugar, and 1/4 teaspoon of salt. Use a fork or pastry cutter to blend until it looks like coarse crumbs. Then, add 1 beaten egg and mix until it forms a smooth dough.
Baking the Tart Shells
Divide the dough into 24 small balls. Press each ball into the mini muffin tin. Make sure to cover the bottom and sides evenly. Place the tin in the oven and bake for 12-15 minutes. Look for a nice golden brown at the edges. Once done, take it out and let it cool completely in the tin.
Creating the Cream Cheese Filling
In a clean bowl, beat 8 oz of softened cream cheese until it’s smooth. Gradually add 1/3 cup of granulated sugar and 1 teaspoon of pure vanilla extract. Keep mixing until it’s creamy and well combined.
Assembling the Mini Fruit Tarts
After the tart shells cool, fill them with the cream cheese mixture using a piping bag or a small spoon. Make a nice mound in each shell. Next, decorate the filling with assorted fresh fruits like strawberries, blueberries, and kiwis. For a shiny finish, warm 2 tablespoons of apricot jam in a small pan until liquid. Brush this glaze over the fruit for added sweetness. Chill the tarts for 30 minutes before serving. Enjoy these delightful bites! For the full recipe, check the earlier sections.
Tips & Tricks
How to Achieve Perfect Tart Shells
To make the best tart shells, use cold butter. This helps keep the dough flaky. When mixing, don’t overwork the dough; just blend until it forms. Press the dough into the mini muffin tin evenly. This ensures an even bake. Bake until golden brown, not longer. Let the shells cool completely before filling them.
Suggestions for Presentation
To make your tarts look stunning, choose colorful fruits. Mix strawberries, blueberries, kiwi, and raspberries for a vibrant display. Arrange the fruit artfully on top of the cream cheese filling. You can also add fresh mint leaves for a touch of green. Serve the tarts on a nice platter to impress guests.
Storing Leftover Tarts
If you have any tarts left, store them in the fridge. Place them in an airtight container to keep them fresh. They stay good for about three days. Avoid freezing them, as this can make the crust soggy. Enjoy your mini fruit tarts chilled for the best flavor!
Variations
Different Fruit Combinations
You can mix and match fruits for your mini tarts. Berries like strawberries, blueberries, and raspberries are great choices. They add color and taste. Try kiwi for a tropical twist. Melon or peaches can also bring a sweet flavor. The fruit should be fresh and vibrant. Use what you love!
Alternative Fillings
While the cream cheese filling is delicious, you can try other options. Chocolate filling gives a rich taste. Just melt dark or milk chocolate and let it cool slightly before filling the tarts. Custard is another choice for a smooth and creamy texture. It pairs well with any fruit topping. You can even blend Greek yogurt with honey for a lighter option.
Gluten-Free Options
Making gluten-free mini tarts is easy. Use gluten-free flour blends to make the crust. Almond flour or coconut flour can work well too. Just ensure your other ingredients are also gluten-free. This way, everyone can enjoy the treat. With these options, you can cater to different diets while keeping the taste amazing.
Storage Info
Best Practices for Refrigeration
To keep your mini fruit tarts fresh, place them in an airtight container. This will prevent the crust from getting soggy. Store them in the fridge for the best taste and texture. Avoid stacking them to keep the fruits intact.
How Long Mini Fruit Tarts Last
When stored properly, mini fruit tarts last up to three days in the fridge. After that, the crust may begin to soften. If you notice any signs of spoilage, it’s best to toss them out. Enjoy them while they are fresh for the best flavor.
Freezing Mini Fruit Tarts
You can freeze your mini fruit tarts for later enjoyment. First, fill the tart shells with cream cheese but skip the fresh fruit. Place the tarts in a single layer on a baking sheet and freeze until solid. Then, transfer them to a freezer-safe container. They can last up to three months in the freezer. When ready to eat, let them thaw in the fridge and then add fresh fruits before serving.
FAQs
What Can I Use Instead of Cream Cheese?
If you want a different taste, you can use mascarpone cheese. It adds a rich flavor. Greek yogurt is another option. It provides a tangy taste and creamy texture. Silken tofu also works well for a dairy-free choice. Blend it until smooth to mimic cream cheese.
Can I Make the Tarts Ahead of Time?
Yes, you can prepare the tart shells a day in advance. Just keep them in an airtight container. Fill them with the cream cheese mixture and add the fruit on the day you plan to serve. This way, the tarts stay fresh and crisp.
How Do I Prevent the Fruit from Getting Soggy?
To keep the fruit fresh, use a glaze. Warm apricot jam makes a great glaze. Brush it over the fruit right after you place it on the tarts. You can also drain any excess juice from the fruit before adding it to the tarts.
Where Can I Find the Full Recipe?
You can find the Full Recipe for the mini fruit tarts with cream cheese filling in the article above. It includes all the steps to create these delicious treats.
You’ve learned about the key ingredients for mini fruit tarts, from crust to filling. I shared step-by-step instructions for flawless tarts, plus tips for perfect shells and great presentation. Don’t forget about the fun variations and storage tips I included. With these ideas, you can impress everyone with tasty tarts. Now, it’s your turn to create and enjoy these delicious treats!
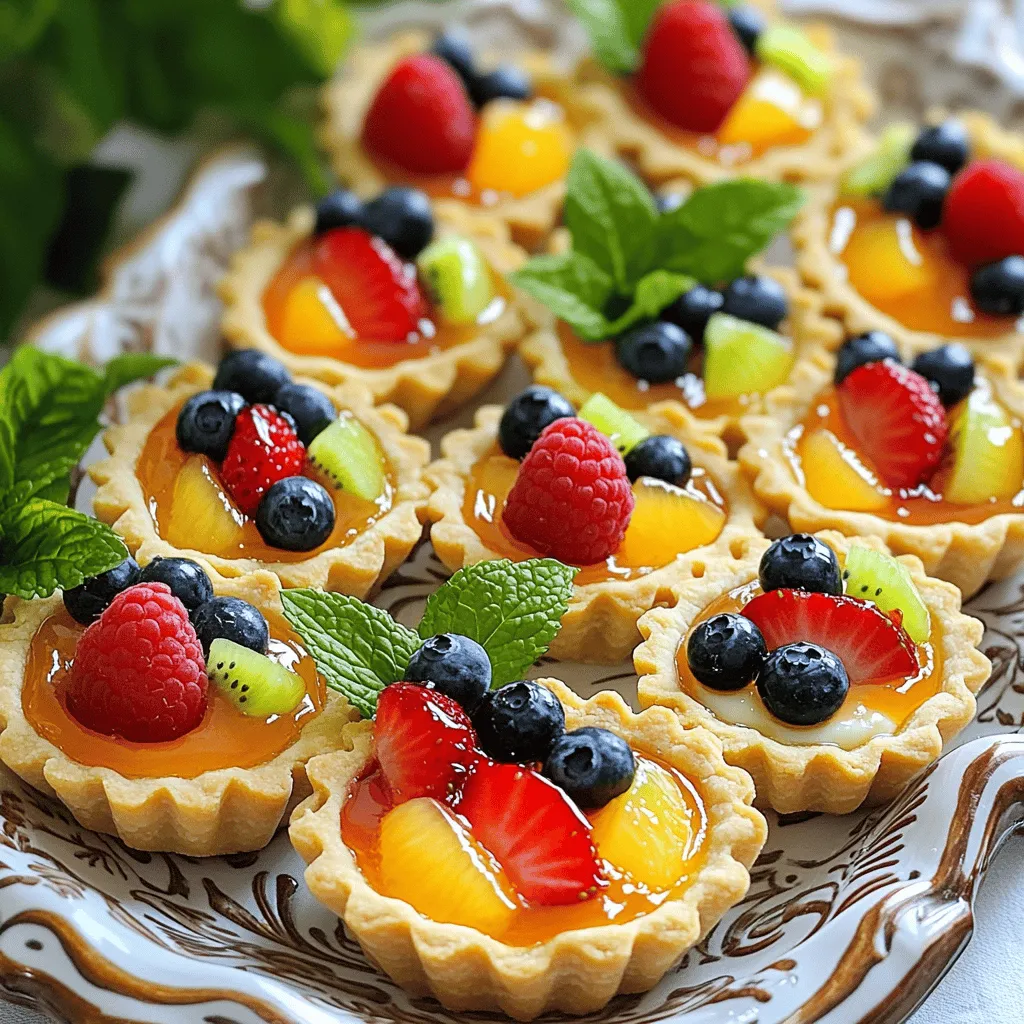
Mini Fruit Tarts with Cream Cheese Filling
Delicious mini fruit tarts filled with creamy cheese and topped with fresh fruits.
Ingredients
Instructions
- 1
Preheat the Oven: Set your oven to 350°F (175°C). Grease a mini muffin tin thoroughly, making sure each cup is well-coated to prevent sticking.
- 2
Prepare the Tart Crust: In a medium mixing bowl, combine the all-purpose flour, softened butter, powdered sugar, and salt. Using a fork or pastry cutter, blend the mixture until it resembles coarse crumbs. Add the beaten egg and mix until a cohesive dough forms, resembling a ball.
- 3
Shape the Tart Shells: Divide the dough into 24 equally-sized small balls. Take each ball and press it firmly into the bottom and up the sides of the mini muffin tin cups, ensuring the dough is evenly distributed to create tart shells.
- 4
Bake the Tart Shells: Place the muffin tin in your preheated oven and bake for about 12-15 minutes or until the edges of the tart shells are a beautiful golden brown. Once baked, remove the tin from the oven and allow the tart shells to cool completely in the tin.
- 5
Make the Cream Cheese Filling: In a separate mixing bowl, beat the softened cream cheese using an electric mixer until smooth. Gradually add the granulated sugar and pure vanilla extract, continuing to mix until the filling is creamy and well-combined.
- 6
Fill the Tart Shells: Once the tart shells have cooled completely, use a piping bag fitted with a star tip or a small spoon to generously fill each shell with the cream cheese mixture, creating a delightful mound in each.
- 7
Top with Fresh Fruit: Decorate the cream cheese filling with an array of fresh fruits. Feel free to arrange the fruits in an artistic manner, using different colors and shapes to create an eye-catching display.
- 8
Glaze the Fruits: In a small saucepan, warm the apricot jam over low heat, stirring until it melts into a liquid consistency. Once melted, use a pastry brush to gently glaze the fresh fruit atop each tart, imparting a lovely shine and added sweetness.
- 9
Chill and Serve: Place the completed mini fruit tarts in the refrigerator for about 30 minutes to allow the filling to set and to enhance the flavors. Serve chilled for delightful bites.
Chef's Notes
Arrange the mini fruit tarts artfully on a decorative platter and adorn with fresh mint leaves for an elegant finish that will impress your guests.


Recipe Creator
Remy
I’m Chef Remy, your recipe companion, here to bring warmth, bold taste, and simplicity to your kitchen.
View My Recipes