Want a quick and fun lunch idea? Let’s make a Homemade Lunchable! My easy recipe guide shows you how to fill a lunchbox with tasty treats like whole grain crackers, cheddar cheese, and fresh veggies. You can customize it however you like! In just a few simple steps, I’ll help you create a delightful meal that kids and adults will love. Dive in and let’s get started!
Ingredients
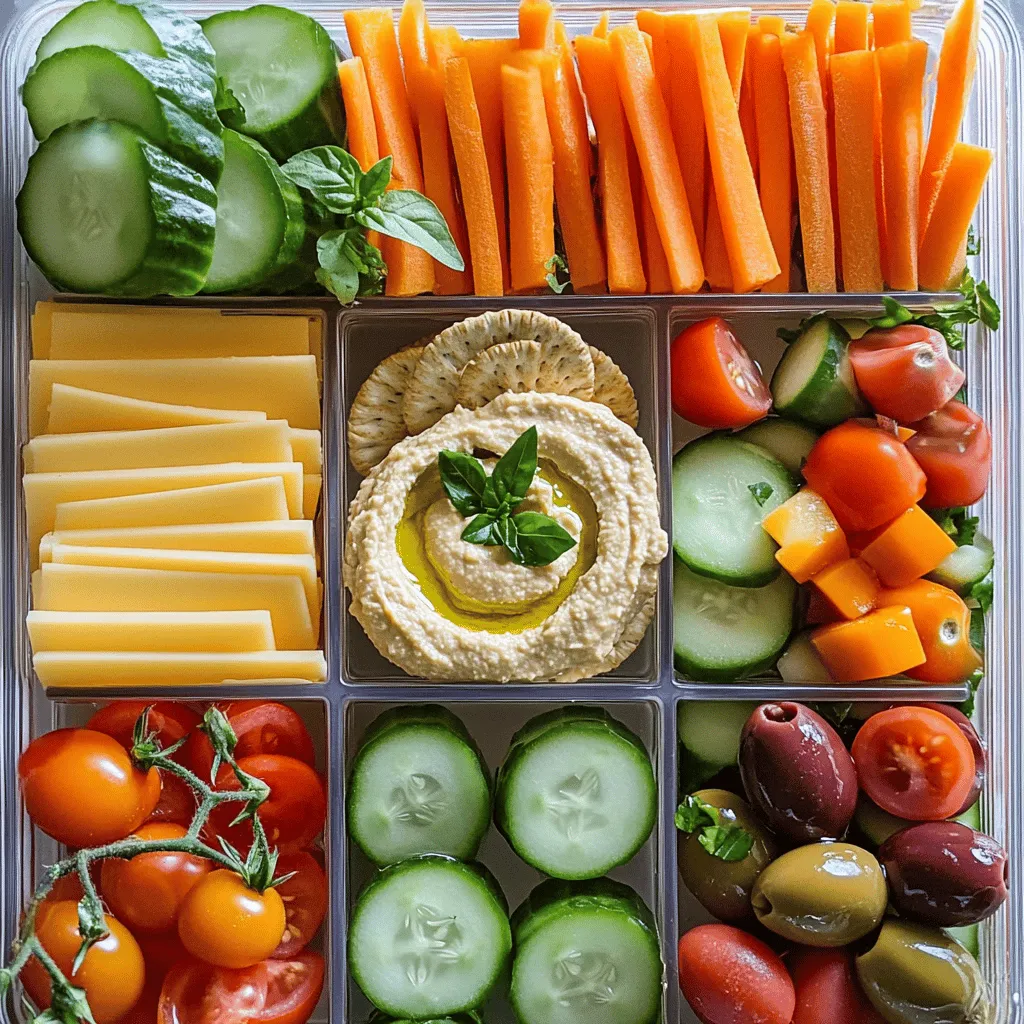
When making a Homemade Lunchable, I focus on fresh and fun ingredients. Here’s what you need:
– Whole grain crackers
– Cheddar cheese
– Turkey or chicken breast
– Hummus
– Carrot sticks
– Cucumber sticks
– Grape tomatoes
– Olives
– Sweet dip options
These ingredients make a tasty and balanced meal. Whole grain crackers provide crunch and fiber. Cheddar cheese gives a rich flavor. Turkey or chicken breast adds protein, while hummus offers a creamy dip.
Carrot sticks and cucumber sticks bring crunch and vitamins. Grape tomatoes add sweetness and color. Olives give a briny taste that complements the other flavors. Sweet dip options, like honey, make it a fun treat.
You can mix and match these ingredients. It allows for creativity. This way, you can cater to different tastes and preferences. Plus, the colors and textures make it appealing.
Using fresh ingredients makes this lunchable healthy and delightful. You can find the full recipe to guide you through the process. Enjoy making your own delicious lunchable!
Step-by-Step Instructions
Preparation of Ingredients
Start by getting all your ingredients ready. Slice the cheddar cheese into small, bite-sized pieces. This makes it easy to eat with the crackers. Next, slice the turkey or chicken breast in the same way. Keep the meat and cheese separate to avoid mixing flavors.
Now, wash the carrot and cucumber sticks thoroughly. Cut them into manageable sizes. You want them easy to grab and dip. Finally, rinse the grape tomatoes and set them aside.
Assembling the Lunchable
Grab a lunchbox or a container with sections. Begin by placing the whole grain crackers in one area. Leave enough space so you can pair them easily with cheese and meat.
In another section, add the sliced cheddar cheese. Next, place the turkey or chicken slices in a different compartment to keep the flavors distinct. This makes it fun to mix and match.
Adding Dips and Garnishes
Scoop a generous amount of hummus into a compartment. This will be a tasty dip for your crackers, veggies, and meats. In another small cup, add the olives to keep them separate. This helps maintain their flavor and texture.
If you want to add a little sweetness, drizzle a tablespoon of honey in a small container. This is optional but makes a fun treat! Finally, garnish your Lunchable with fresh herbs. They add a nice burst of color and flavor.
Now, secure the lunchbox with its lid. You can refrigerate it until you’re ready to eat. Enjoy your homemade Lunchable! For more ideas, check out the Full Recipe.
Tips & Tricks
Ingredient Selection
When making your Homemade Lunchable, pick the best meats and cheeses. Choose lean turkey or chicken breast for protein. Cheddar cheese adds a rich taste. Look for fresh, high-quality options.
For veggies, select fresh carrots, cucumbers, and grape tomatoes. Crunchy veggies make your lunch fun. They also add color and nutrients. Visit local markets for the best produce.
Portion Control
Serving sizes matter for kids and adults. Aim for about 4 ounces of protein. This amount works well for a balanced snack. Use about 1 cup of veggies. This keeps the meal healthy and fresh.
Balance is key. Include protein, carbs, and veggies in each Lunchable. Whole grain crackers give energy. They pair well with meats and dips.
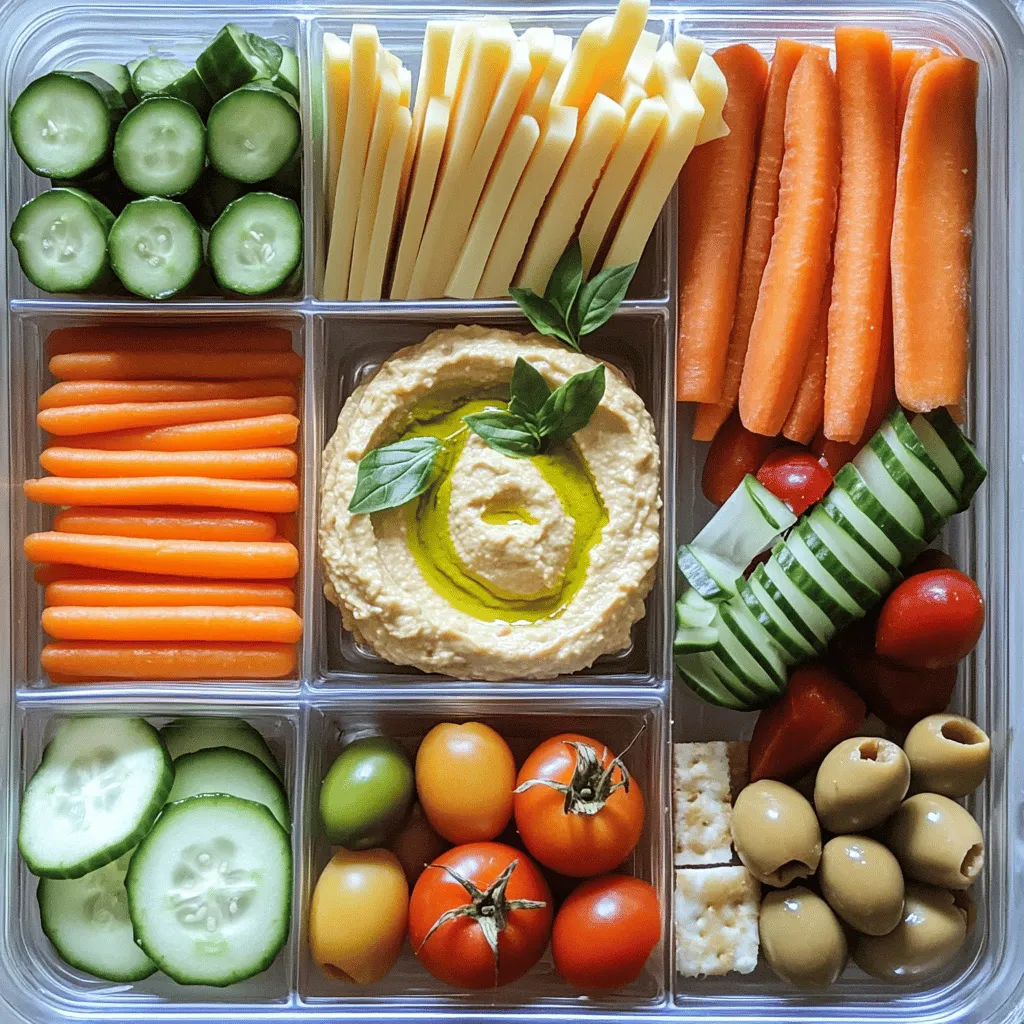
Creative Presentation
Make your Lunchable look appealing. Arrange ingredients in fun shapes or colors. Use small cups for dips and olives. This keeps flavors separate and neat.
Try stacking cheese and meat for a fun look. Kids love colors, so mix red, green, and orange. Use fresh herbs for garnish. They add a pop of color and flavor.
With these tips, you can make a Homemade Lunchable that is not only tasty but also visually exciting. For the complete guide, see the Full Recipe.
Variations
Swap Ingredients
You can easily swap ingredients in your Homemade Lunchable. For protein, try using ham or tofu. Both options add great flavor. For dips, think about using guacamole or tzatziki. These dips bring new tastes and textures to your meal.
Dietary Considerations
If you need gluten-free options, choose gluten-free crackers. Many brands offer tasty choices that fit your needs. For a vegan Lunchable, skip the meat and cheese. Instead, use hummus and add more veggies. This way, you still enjoy a filling meal without animal products.
Themed Lunchables
Get creative with themed Lunchables! For Halloween, use spooky cookie cutters for cheese shapes. You can add orange and black foods like carrots and olives for fun. During Christmas, make it festive with red and green veggies. Swap in seasonal ingredients to keep it fresh and exciting all year long.
Storage Info
How to Store Homemade Lunchables
To keep your homemade Lunchables fresh, refrigeration is key. First, place your packed lunchbox in the fridge right after you prepare it. This helps keep all the ingredients crisp and safe to eat. Aim to eat your lunchable within three days for the best taste. The veggies and dips stay fresh, while the meats and cheese hold up well for this time.
Meal Prep Tips
If you have a busy week ahead, meal prep is a great idea. You can make several Lunchables at once. Store each in its own lunchbox to grab and go. For longer storage, you can freeze certain ingredients. For instance, freeze hummus in small containers. You can add it to your lunchable when ready to eat. Just remember to thaw it in the fridge overnight.
Container Recommendations
Choosing the right container matters. Use containers that seal tightly to keep everything fresh. Compartmentalized lunchboxes work best. They allow you to keep meats, veggies, and dips separate. This way, you maintain the flavors and textures. Look for boxes that are easy to clean and safe for the dishwasher.
FAQs
What can I use instead of crackers?
You can use several tasty options instead of crackers. Here are some great choices:
– Rice cakes for a light crunch
– Pita chips for a thicker bite
– Popcorn for a fun snack
– Tortilla chips for a classic crunch
– Sliced veggies like bell peppers or celery
These alternatives can add fun textures and flavors to your meal.
How long does it stay fresh in the fridge?
Homemade Lunchables can stay fresh in the fridge for about three days. Keep them in an airtight container. This helps maintain the taste and texture of the ingredients. Use your senses to check for freshness. If anything looks or smells off, it’s best to toss it.
Can I include fruits in my Lunchable?
Definitely! Fruits are a great addition to your Lunchable. Here are some ideas:
– Apple slices for sweetness
– Grapes for a juicy burst
– Strawberries for a fresh taste
– Orange segments for a zesty flavor
– Dried fruits like apricots or raisins for a chewy treat
Adding fruits not only boosts nutrition but also makes your Lunchable more colorful and fun. For more details, refer to the Full Recipe.
Homemade Lunchables give you a fun and healthy option for meals. We discussed great ingredients like whole grain crackers, cheese, and fresh veggies. I shared tips for prep and assembly. You can even swap ingredients based on your tastes and dietary needs. Storing them right helps keep everything fresh longer. Don’t forget to get creative with theme ideas! With these steps, you can make tasty Lunchables that kids will love. Enjoy turning lunch into a fun experience!
Homemade Lunchable
A fun and healthy lunch option featuring whole grain crackers, cheese, meats, and fresh veggies.
Ingredients
Instructions
- 1
Begin by preparing all your ingredients: slice the cheddar cheese and turkey or chicken breast into bite-sized pieces to make them easy to pair with the crackers.
- 2
Take a lunchbox or a compartmentalized container and arrange the whole grain crackers in one section, allowing ample space for pairing.
- 3
Place the sliced cheddar cheese in one compartment and the turkey or chicken slices in a separate compartment to keep flavors distinct.
- 4
Use another compartment for a generous scoop of hummus, which serves as a delicious dip for the crackers, veggies, and meats.
- 5
Wash the carrots and cucumbers, then slice them into sticks. Neatly arrange these along with the rinsed grape tomatoes in their own separate sections within the lunchbox.
- 6
Add the olives in their own small cup or designated section to prevent them from mixing with the other ingredients and maintain their flavor.
- 7
If desired, include the sweet dip option by drizzling a tablespoon of honey in a small container or section for an enjoyable dessert-like experience.
- 8
Finish by garnishing the lunchable with fresh herbs, which add a burst of color and a hint of freshness to the meal.
- 9
Finally, secure the lunchbox with its lid, refrigerate until ready to serve, or pack it up for a delightful meal at school or work!
Chef's Notes
Customize with your favorite dips and veggies.


Recipe Creator
Remy
I’m Chef Remy, your recipe companion, here to bring warmth, bold taste, and simplicity to your kitchen.
View My Recipes