Looking for a tasty yet healthy treat? These Healthy Pumpkin Truffles are perfect! With simple ingredients, you can make a delightful snack that satisfies your sweet tooth without the guilt. I’ll guide you step-by-step through creating these irresistible bites, plus share tips for making them fit your dietary needs. Get ready to impress your friends and family with a fun recipe that’s as nutritious as it is delicious!
Ingredients
Essential Ingredients for Healthy Pumpkin Truffles
To make these tasty pumpkin truffles, you need a few key ingredients. Here’s what you will require:
– 1 cup pumpkin puree (canned or homemade)
– 1 ½ cups almond flour
– ½ cup rolled oats
– 1/4 cup pure maple syrup
– 2 tablespoons melted coconut oil
– 1 teaspoon vanilla extract
– 1 teaspoon pumpkin pie spice (or a mix of cinnamon, nutmeg, and ginger)
– 1/4 teaspoon salt
– 1 cup dark chocolate chips (dairy-free for a vegan option)
Each ingredient plays an important role. The pumpkin puree gives moisture and flavor. Almond flour adds a nutty taste and helps bind the mixture. Rolled oats give texture and chewiness. Maple syrup adds sweetness, while coconut oil contributes richness. Vanilla extract and pumpkin pie spice bring warmth and depth.
Nutritional Value Breakdown
These truffles are not only delicious but also nutritious. Here is a quick breakdown of what you get:
– Pumpkin puree is rich in fiber and vitamins A and C.
– Almond flour provides healthy fats and protein.
– Rolled oats offer whole grains and more fiber.
– Maple syrup gives natural sweetness with minerals.
– Coconut oil contains medium-chain triglycerides (MCTs) for energy.
This mix makes the truffles a great snack or dessert. They satisfy your sweet tooth without the guilt.
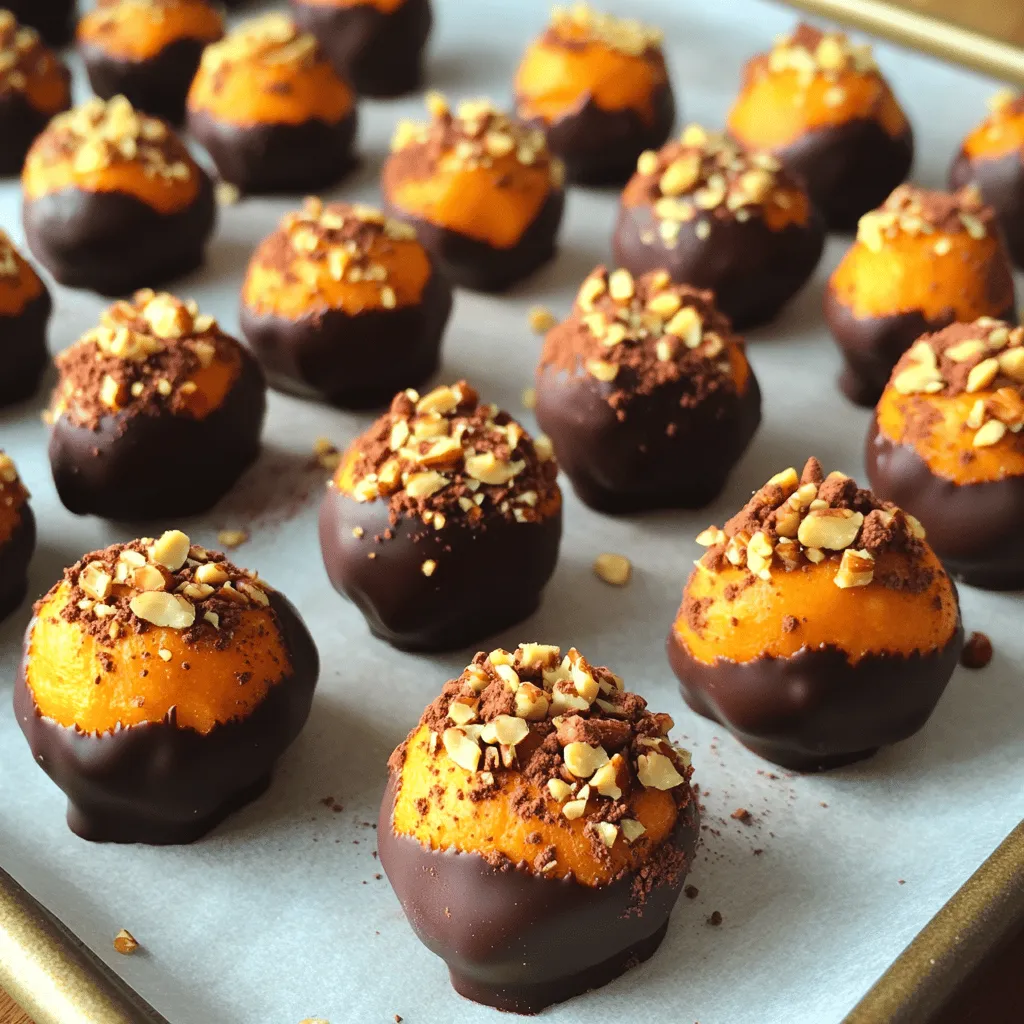
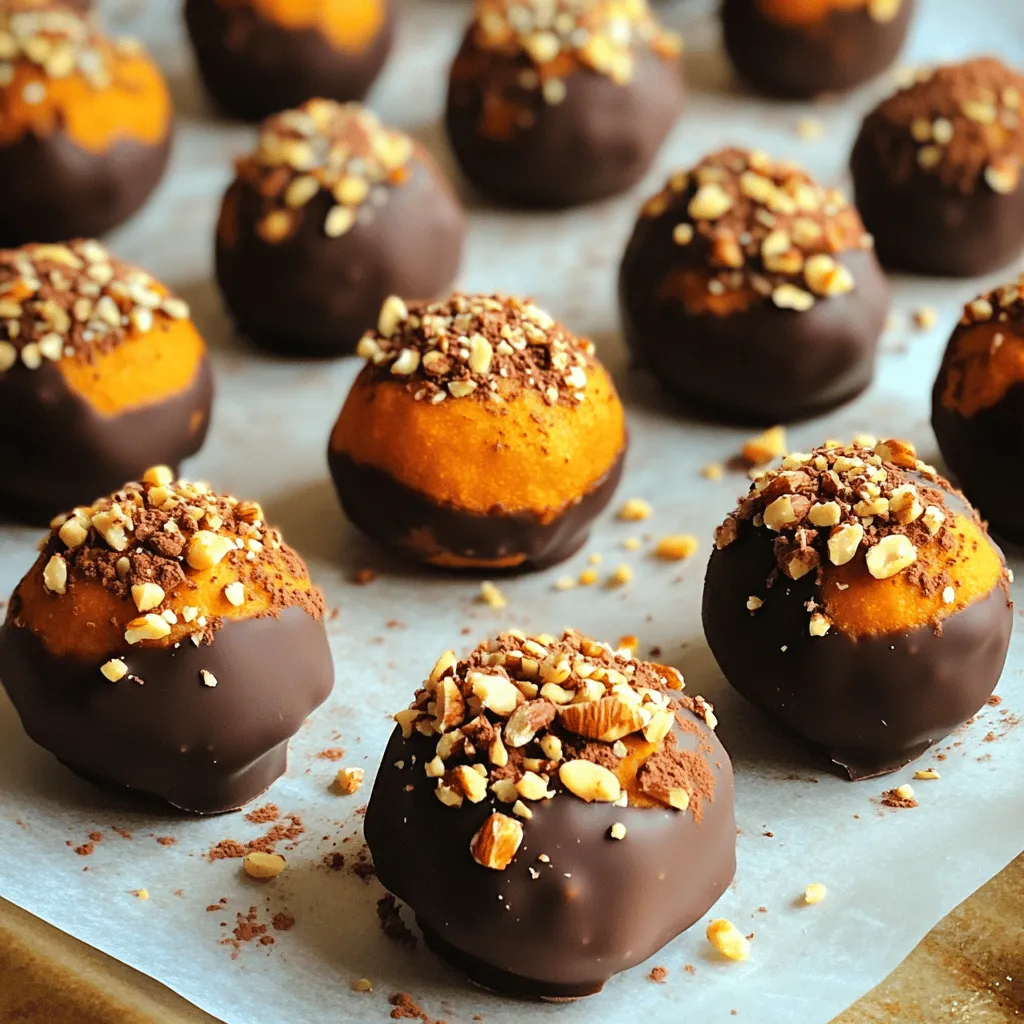
Optional Toppings and Variations
You can customize your truffles with fun toppings. Here are some ideas:
– Crushed nuts
– Shredded coconut
– Cocoa powder
– Festive sprinkles
These toppings add crunch, flavor, and visual appeal. You can also change the spices or sweeteners to fit your taste. For a twist, try adding a dash of ginger or a hint of orange zest. Each variation keeps the treat exciting.
Step-by-Step Instructions
How to Prepare the Mixture
To start, grab a large mixing bowl. Add 1 cup of pumpkin puree. You can use canned or homemade. Next, add 1 ½ cups of almond flour. This gives the truffles a nice texture. Then, mix in ½ cup of rolled oats. These oats add fiber and help bind the mixture. Pour in ¼ cup of pure maple syrup for sweetness. Add 2 tablespoons of melted coconut oil for creaminess. Include 1 teaspoon of vanilla extract for flavor. Don’t forget 1 teaspoon of pumpkin pie spice. This spice mix makes your truffles taste like fall. Finally, add ¼ teaspoon of salt to balance the flavors. Stir everything together until you have a smooth dough. It should feel thick but easy to work with.
Shaping the Truffles
Now it’s time to shape the truffles. Take small portions of the mixture, about 1 inch wide. Roll them between your hands to form round balls. Place each ball on a baking sheet lined with parchment paper. Make sure to leave some space between them. This prevents sticking. Once all the mixture is rolled, you’re ready for the next step.
Melting and Coating with Chocolate
While your truffles chill, let’s melt the chocolate. Take 1 cup of dark chocolate chips. Put them in a microwave-safe bowl. Heat in 30-second intervals, stirring well after each. Keep heating until the chocolate is smooth. When the truffles are firm, it’s time to coat them. Dip each truffle into the melted chocolate. Use a fork to lift it out. Tap gently to remove excess chocolate. This helps keep the coating nice and thin.
Adding Optional Toppings
After dipping, put the coated truffles back on the baking sheet. While the chocolate is still wet, sprinkle your choice of toppings. You can use crushed nuts, shredded coconut, or cocoa powder. Festive sprinkles add a fun touch too. This step makes the truffles extra special.
Final Setting Process
Once all the truffles are coated and topped, chill them again. Put the baking sheet back in the freezer. Let them sit for about 15 to 20 minutes. This helps the chocolate harden completely. When done, your pumpkin truffles are ready to enjoy!
Tips & Tricks
How to Achieve the Perfect Truffle Texture
To get the right texture for your pumpkin truffles, you want a thick dough. Mix the pumpkin puree with almond flour and oats well. If it feels too soft, add a bit more almond flour. If too dry, a little more pumpkin puree can help. Chilling the mixture in the freezer helps firm it up before shaping. This will make rolling easier and keep the truffles from falling apart.
Substituting Ingredients for Dietary Needs
You can easily swap ingredients to fit your diet. If you are gluten-free, almond flour works great. You can also use oat flour if you have a nut allergy. For a vegan version, choose dairy-free chocolate chips. Maple syrup can be replaced with agave nectar if you want a different sweetener. These swaps help keep the recipe friendly for everyone.
Enhancing Flavor with Spices
Spices bring out the best in pumpkin. Pumpkin pie spice is a fantastic choice. You can also mix cinnamon, nutmeg, and ginger for a homemade blend. If you want more heat, add a pinch of cayenne. For a zesty twist, try adding orange zest. These spices will make your truffles pop with flavor and keep them exciting!
Variations
Vegan Option: Dairy-Free Chocolate Alternative
For a vegan treat, use dairy-free chocolate chips. They melt just like regular chocolate. This choice keeps your truffles creamy and rich without dairy. You can find these chips in any grocery store. Look for brands that also focus on fair trade and sustainability. This way, you enjoy your treat while supporting good practices.
Gluten-Free Adaptations
To keep these truffles gluten-free, stick with almond flour and rolled oats. Both are naturally gluten-free. Make sure your rolled oats are certified gluten-free. This step avoids any cross-contamination. You can also try using coconut flour instead of almond flour. It adds a unique flavor and texture. Just remember, you might need to adjust the liquid in the recipe.
Flavor Twist Ideas for More Variety
Get creative with flavors! Here are some ideas to inspire you:
– Chai Spice: Swap pumpkin pie spice for chai spices. This mix adds warmth and depth.
– Nut Butter: Add a tablespoon of almond or peanut butter to the mixture. It gives a creamy, nutty taste.
– Citrus Zest: Mix in some orange or lemon zest for a fresh zing.
– Cocoa Powder: Roll the truffles in cocoa powder instead of chocolate. This gives a rich, dark flavor.
– Mint Extract: Add a few drops of mint extract for a refreshing surprise.
Each of these twists can make your pumpkin truffles unique and exciting. Enjoy experimenting!
Storage Info
Best Practices for Storing Truffles
To keep your pumpkin truffles fresh, store them in an airtight container. This helps avoid moisture and keeps them tasty. You can layer the truffles with parchment paper to prevent sticking. Place them in the fridge if you plan to eat them soon.
Refrigeration vs. Freezing
Refrigeration works well for short-term storage. Your truffles will stay fresh for up to a week this way. If you want to save them longer, freezing is your best bet. Just make sure they are fully set before freezing. You can store them for up to three months in the freezer.
Shelf Life and Freshness Tips
Always check for signs of spoilage. If the truffles smell off or develop a strange texture, it’s best to toss them. When thawing, let them sit in the fridge overnight. This keeps them from getting too soft. Enjoy your pumpkin truffles at their best!
FAQs
How long do pumpkin truffles last?
Pumpkin truffles can last up to one week in the fridge. Store them in an airtight container. If you want them to last longer, you can freeze them. They will keep well in the freezer for about three months. Just make sure to wrap them tightly to avoid freezer burn.
Can I make these truffles nut-free?
Yes, you can make these truffles nut-free! Simply replace almond flour with sunflower seed flour or oat flour. Both options work well and keep the truffles delicious. If you use oats, ensure they are certified gluten-free if needed.
Is there a sugar-free alternative to maple syrup?
You can use sugar-free syrup or agave nectar as a substitute for maple syrup. Both options will maintain the sweetness without adding sugar. You can also try using mashed bananas for a natural sweetness.
Can I freeze pumpkin truffles?
Absolutely! Freezing pumpkin truffles is a great way to enjoy them later. After they chill and set, place them in a freezer-safe bag or container. Just remember to let them thaw in the fridge before enjoying.
You now know how to make healthy pumpkin truffles. We covered essential ingredients and their benefits. You learned step-by-step instructions to make them perfectly. Tips for texture, flavor, and variations gave you more options. Storage methods help keep them fresh longer.
Try these truffles yourself and enjoy the tasty rewards! With simple steps and healthy choices, you can make a sweet treat everyone will love. Now, go create your own pumpkin truffles!
Healthy Pumpkin Truffles
Delicious and nutritious pumpkin truffles coated in dark chocolate, perfect for a sweet treat.
Ingredients
Instructions
- 1
In a large mixing bowl, combine the pumpkin puree, almond flour, rolled oats, maple syrup, melted coconut oil, vanilla extract, pumpkin pie spice, and salt. Stir everything together until a smooth and cohesive dough forms.
- 2
Using your hands, take small portions of the mixture (about 1 inch in diameter) and roll them into round, bite-sized balls. Place each rolled truffle onto a parchment-lined baking sheet.
- 3
Transfer the baking sheet to the freezer and let the truffles chill for approximately 30 minutes.
- 4
While the truffles chill, melt the dark chocolate chips in a microwave-safe bowl, heating in 30-second intervals and stirring until smooth.
- 5
Remove the chilled truffles from the freezer and dip each one into the melted chocolate, ensuring it is fully coated. Use a fork to lift the truffle out, tapping to allow excess chocolate to drip back into the bowl.
- 6
Place the chocolate-coated truffles back onto the parchment-lined baking sheet. While the chocolate is still wet, sprinkle your choice of optional toppings on top.
- 7
Return the baking sheet to the freezer for an additional 15-20 minutes to allow the chocolate to set completely.
- 8
Enjoy your pumpkin truffles right away, or store them in an airtight container.
Chef's Notes
Store in an airtight container in the refrigerator for up to a week or freeze for longer storage.


Recipe Creator
Remy
I’m Chef Remy, your recipe companion, here to bring warmth, bold taste, and simplicity to your kitchen.
View My Recipes