Grilled corn-on-the-cob is a summer favorite that’s both tasty and easy to make. With just a few ingredients, you can create a delicious side dish that pleases everyone. I’ll share my simple recipe, along with tips and tricks to elevate your corn game. Whether you want classic butter or spicy twists, this guide covers it all. Let’s dive in and make your grilling experience unforgettable!
Ingredients
Basic Ingredients for Grilled Corn-On-The-Cob
– 4 ears of fresh corn, husked
– 4 tablespoons unsalted butter, softened
– Fresh herbs and seasonings to enhance flavor
To make your grilled corn shine, start with fresh corn. Choose ears that feel firm and heavy for their size. The husk should be bright green, and the silk should be moist. You will also need unsalted butter to create that rich, creamy flavor. Mixing in fresh herbs is key. I love using parsley, basil, and chives, but feel free to use your favorites.
Optional Ingredients for Variations
– Chili powder for a spicy kick
– Other fresh herbs like cilantro or dill
If you want to spice things up, add chili powder to your herb butter. This gives the corn a nice kick. You can also mix in other fresh herbs like cilantro or dill for different tastes. Each herb brings a unique flavor, making your grilled corn special every time.
Equipment Needed
– Grill (gas or charcoal)
– Aluminum foil
– Mixing bowls and utensils
You will need a grill, either gas or charcoal, to cook the corn. Aluminum foil is essential for wrapping the corn. This step helps to steam the corn while it grills, keeping it juicy. Mixing bowls and utensils are also needed for preparing the herb butter. Simple tools make this process smooth and easy. For the full recipe, check the details above.
Step-by-Step Instructions
Prepping the Corn
– Husk each ear and rinse under cool water.
– Pat dry with a clean kitchen towel.
First, you need to husk each ear of corn. Remove all the green leaves and silk. This makes sure the corn cooks evenly. Once husked, rinse the corn under cool water. This step will remove any dirt. After rinsing, pat the corn dry with a clean kitchen towel. This helps the butter stick later.
Making the Herb Butter
– Combine butter with chopped herbs and spices.
– Ensure a smooth, well-blended mixture.
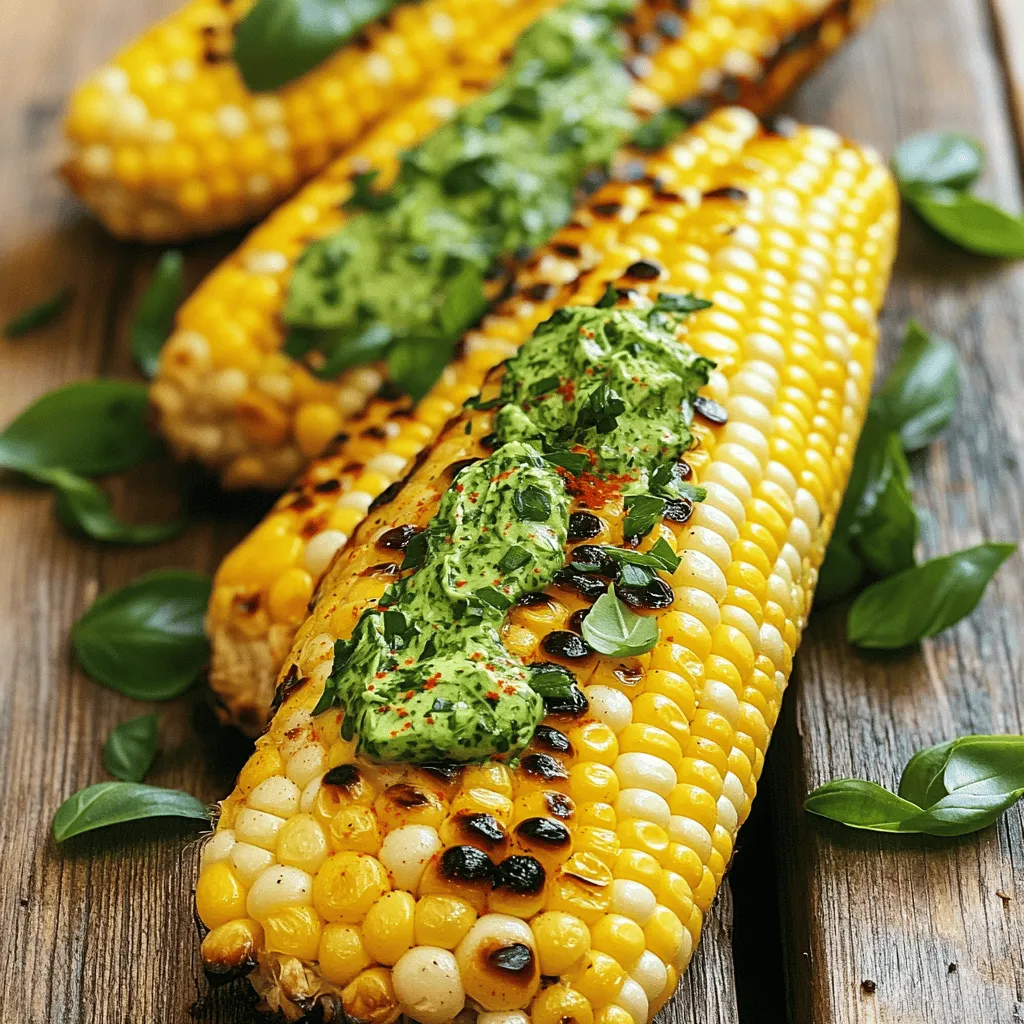
Next, let’s make the herb butter. In a small bowl, mix the softened butter with chopped herbs. Use parsley, basil, and chives for a fresh taste. Add garlic powder, lemon juice, salt, and pepper too. If you like spice, sprinkle in chili powder. Stir until everything is well blended. This butter is key for flavor!
Grilling Techniques
– Wrap corn in foil to trap steam.
– Cook on medium-high heat and turn regularly.
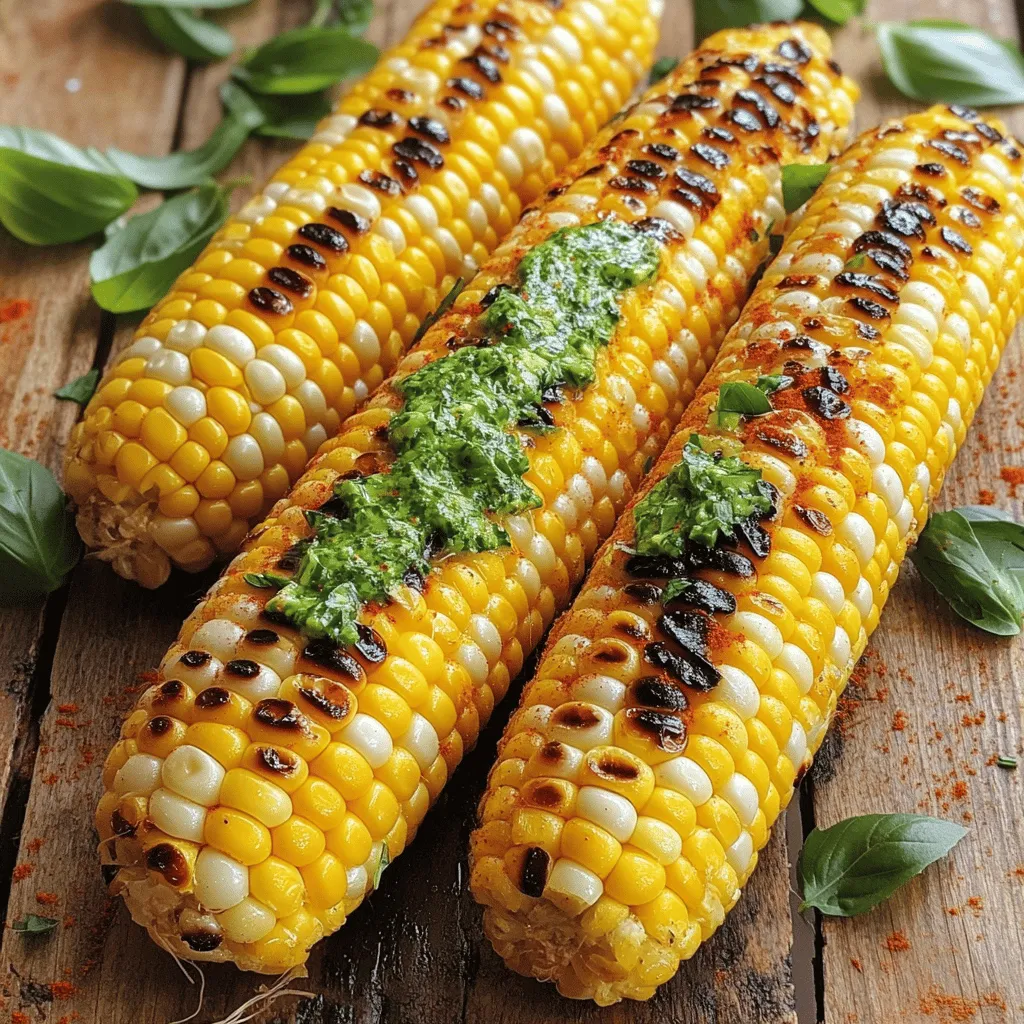
Now, it’s time to grill! Take a sheet of aluminum foil. Place one ear of corn in the center and fold the foil over it. Make sure it is tightly sealed. This keeps the steam inside, making the corn juicy. Place the wrapped corn on the grill over medium-high heat. Cook for about 15-20 minutes. Turn the corn every 5 minutes for even cooking. When done, the kernels should be tender with a slight char.
Check the corn by unwrapping it carefully. The steam will be hot, so be careful! Once cooked, slather the herb butter over each ear. The heat will melt the butter into the corn. Enjoy your delicious grilled corn-on-the-cob! For the complete process, check the Full Recipe.
Tips & Tricks
Perfecting Your Grilled Corn
To know when your corn is done, look for tender kernels. They should be bright yellow and slightly charred. This usually takes 15 to 20 minutes on the grill. Turn the corn every 5 minutes for even cooking. This helps it get that tasty char without burning.
Adding Flavor
You can try many seasonings to boost flavor. Mix in spices like paprika or cayenne for a kick. You can also use different herbs in your butter. For a twist, add dill or cilantro. Experiment with flavors to find what you love best.
Grilling Safety Tips
Always handle hot foil and corn carefully. Use tongs or heat-resistant gloves. When unwrapping the foil, keep your face away. The steam can burn you. To avoid burns, be mindful of where you place your hands on the grill. Stay safe while enjoying your delicious grilled corn!
Variations
Mexican Street Corn
For a tasty twist, try Mexican street corn. Here’s what you need:
– 4 ears of grilled corn
– 1/2 cup mayonnaise
– 1/2 cup cotija cheese, crumbled
– 1 tablespoon chili powder
– Fresh cilantro, chopped, for garnish
– Lime wedges for serving
To make it, grill the corn as usual. Once cooked, brush each ear with mayonnaise. Next, sprinkle on the cotija cheese and chili powder. Finish with fresh cilantro and a squeeze of lime juice. This dish bursts with flavor and is a crowd-pleaser!
Grilled Corn with Cheese
Cheese adds a rich flavor to your corn. Good choices include feta or cotija. Feta gives a creamy taste, while cotija offers a salty bite. Here’s how to add cheese:
1. Grill the corn as directed in the Full Recipe.
2. Once done, sprinkle your chosen cheese over the hot corn. The heat will melt it slightly, making it stick.
3. For extra flavor, drizzle a bit of olive oil on top.
This cheesy option is perfect for cheese lovers!
Herb Butter Alternatives
Spice up your herb butter with fun flavors. Try garlic or truffle butter for something unique. Here are some ideas:
– Garlic Butter: Mix softened butter with minced garlic and a pinch of salt.
– Truffle Butter: Blend butter with truffle oil for a fancy touch.
– Citrus Butter: Add lemon or orange zest to your herb butter for a fresh twist.
These flavored butters can enhance your grilled corn in new ways. Don’t be afraid to experiment!
Storage Info
Storing Leftover Grilled Corn
To keep leftover grilled corn fresh, wrap it tightly in plastic wrap. You can also place it in an airtight container. Store it in the fridge for up to three days. When you want to eat it, reheat the corn on the grill or in the microwave. If using the microwave, cover it with a damp paper towel. This keeps it moist and tasty.
Freezing Grilled Corn
To freeze grilled corn, let it cool first. Then, cut the kernels off the cob. Place the kernels in a freezer-safe bag, squeezing out the air. You can also freeze the corn on the cob. Wrap each ear in aluminum foil before placing it in a bag. Thaw frozen corn in the fridge overnight. For cooking, you can add frozen corn directly to soups or stir-fries.
Shelf Life
In the fridge, grilled corn stays fresh for about three days. If it starts to smell bad or looks slimy, it’s time to toss it. Check for any dark spots on the kernels. These signs show that the corn has spoiled. Always trust your senses; if it doesn’t look or smell right, do not eat it!
FAQs
How long do you grill corn-on-the-cob?
You should grill corn-on-the-cob for about 15 to 20 minutes. This time gives the corn a tender texture and nice char. Turn the corn every five minutes to ensure even cooking. I find checking one ear helps me know if they are done. The kernels should look plump and bright. A slight char adds great flavor.
Should corn be soaked before grilling?
Soaking corn is optional, but it has some benefits. Soaking can help keep the corn moist while grilling. It also can reduce the cooking time. If you do soak, aim for about 30 minutes in cold water. If you skip soaking, just keep an eye on the corn as it grills. Both methods can lead to tasty results.
Can I grill corn without foil?
Yes, you can grill corn without foil! Grilling without foil gives the corn a nice smoky taste. Simply place the husked corn directly on the grill grates. Make sure to turn it often to avoid burning. Cooking time will be similar, about 15 to 20 minutes. Just remember to check for that tender bite.
Grilled corn-on-the-cob is simple and tasty. We covered ingredients, prep steps, and grilling tips. Remember, fresh corn and a few herbs make a big difference. Experiment with spices and toppings for fun flavors. Store leftovers safely for later. With these tips, you’ll grill corn like a pro. Enjoy your delicious creations!
Grilled Corn-On-The-Cob
Deliciously grilled corn on the cob with herb butter.
Ingredients
Instructions
- 1
Begin by preheating your grill to medium-high heat.
- 2
Prepare the herb butter by mixing softened butter with parsley, basil, chives, garlic powder, lemon juice, and a pinch of salt and pepper. Add chili powder if desired.
- 3
Husk each ear of corn, rinse under cool water, and pat dry.
- 4
Wrap each ear of corn in aluminum foil to create a snug package.
- 5
Place the wrapped corn on the grill grate and cook for 15-20 minutes, turning every 5 minutes.
- 6
After 15 minutes, unwrap one ear of corn to check for doneness. Grill longer if needed.
- 7
Remove the corn from the grill, unwrap, and slather with herb butter.
- 8
Sprinkle additional salt and pepper over the buttered corn to taste.
Chef's Notes
Serve with extra herb butter on the side.


Recipe Creator
Remy
I’m Chef Remy, your recipe companion, here to bring warmth, bold taste, and simplicity to your kitchen.
View My Recipes