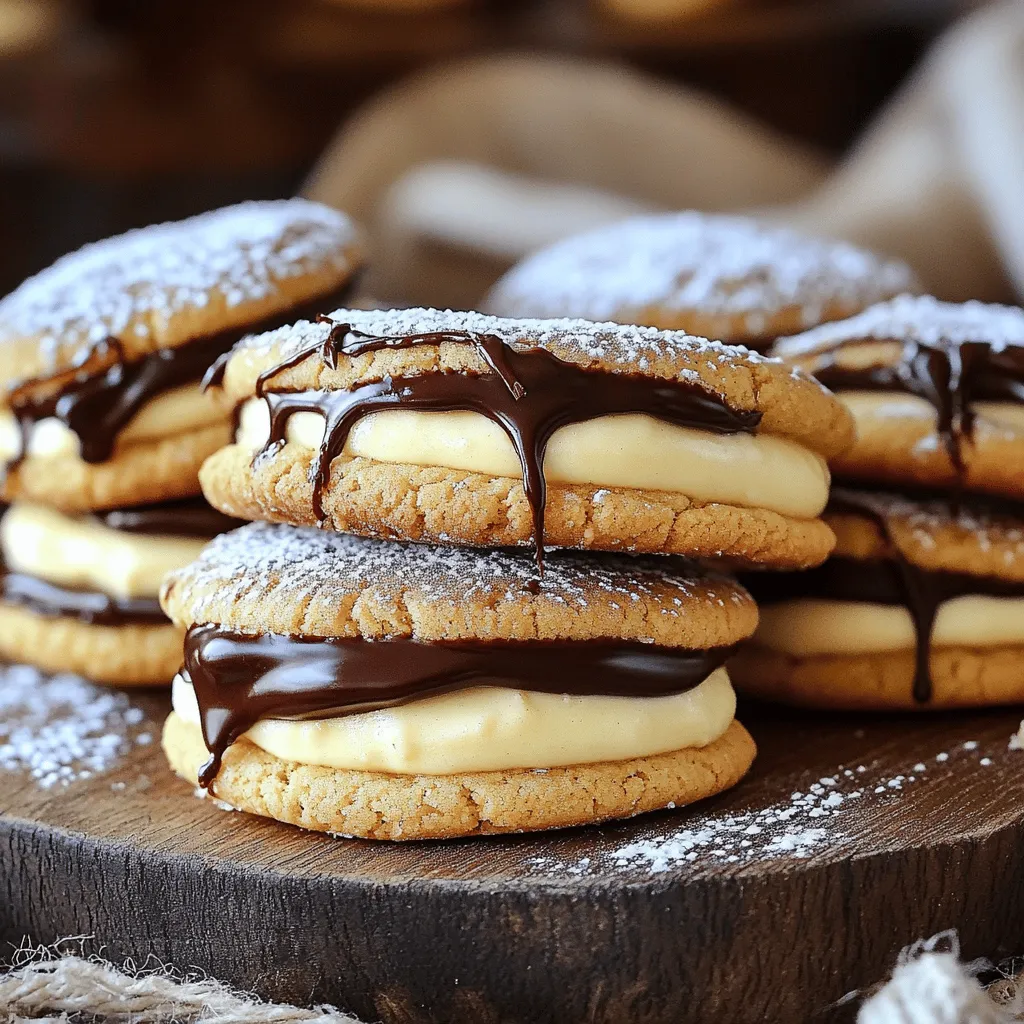
If you love the rich flavors of Boston cream pie, you’re in for a treat! Today, I’m sharing a delightful and easy recipe for Boston Cream Pie Cookies. They combine a soft, chewy cookie with creamy filling and chocolate glaze. This dessert is perfect for sharing or enjoying on your own. Let’s dive into the ingredients and get started on making these tasty cookies!
Ingredients
Essential Ingredients
To make Boston Cream Pie Cookies, you need:
– 1 cup unsalted butter, softened to room temperature
– 1 cup granulated sugar
– 1 cup packed brown sugar
– 2 large eggs, at room temperature
– 2 teaspoons pure vanilla extract
– 3 cups all-purpose flour
– 1 teaspoon baking powder
– 1 teaspoon baking soda
– 1/2 teaspoon fine sea salt
– 1/2 cup heavy cream
– 1 cup instant vanilla pudding mix
– 1 cup semi-sweet chocolate chips
– 1 tablespoon milk (to thin the chocolate glaze)
These ingredients combine to create a rich and fluffy cookie that tastes like a Boston cream pie.
Optional Ingredients
You can add a few extras to change the flavor or look of your cookies:
– Nuts, like chopped walnuts or pecans, for crunch.
– A dash of almond extract for a nutty twist.
– Extra chocolate chips if you love chocolate.
Feel free to play around with these options for a unique touch.
Equipment Needed
Gather these tools for easy baking:
– Mixing bowls
– Electric mixer
– Measuring cups and spoons
– Cookie scoop or tablespoon
– Parchment paper
– Baking sheets
– Wire rack for cooling
– Microwave-safe bowl for melting chocolate
Having the right equipment makes the process smooth and fun. Now, you’re ready to make these delightful treats! Check out the Full Recipe for more details.
Step-by-Step Instructions
Preparing the Cookie Dough
Start by preheating your oven to 350°F (175°C). This helps the cookies bake evenly. Line two baking sheets with parchment paper. This will stop the cookies from sticking. In a large bowl, cream together 1 cup of softened butter, 1 cup of granulated sugar, and 1 cup of brown sugar. Beat this mixture for 3 to 5 minutes. It should look light and fluffy. Next, add 2 large eggs one by one. Mix well after each egg. Stir in 2 teaspoons of pure vanilla extract.
In another bowl, whisk together 3 cups of all-purpose flour, 1 teaspoon of baking powder, 1 teaspoon of baking soda, and 1/2 teaspoon of fine sea salt. Slowly mix the dry ingredients into the wet ingredients. Don’t overmix; just combine them. Finally, fold in 1 cup of semi-sweet chocolate chips. This adds a rich taste to your cookies.
Baking the Cookies
Now it’s time to bake! Use a cookie scoop or a tablespoon to drop rounded dough onto the baking sheets. Leave space between each cookie to allow for spreading. Bake for 10 to 12 minutes. Look for lightly golden edges and set centers. When done, take them out and let them cool for 5 minutes on the sheets. After that, transfer the cookies to a wire rack to cool completely.
Assembling the Cookie Sandwiches
While the cookies cool, make the vanilla pudding filling. In a bowl, whisk together 1 cup of instant vanilla pudding mix and 1/2 cup of heavy cream. Mix until it thickens, about 2 minutes. Once the cookies are cool, take half of them. Spread a generous layer of the pudding on the flat side of each. Place another cookie on top to create a sandwich.
For the chocolate glaze, melt 1 cup of semi-sweet chocolate chips in a microwave-safe bowl. Heat in 30-second bursts, stirring each time. If it’s too thick, add 1 tablespoon of milk. Drizzle or dip the cookie tops in the glaze. Let it set at room temperature. Your Boston Cream Pie Cookies are now ready to enjoy! For the full recipe, check out the details above.
Tips & Tricks
How to Achieve the Perfect Cookie Texture
To get the right cookie texture, start with room temperature ingredients. This helps them blend well. Cream the butter and sugars until light and fluffy. Do not overmix the dough; stop as soon as you see no dry flour. This keeps the cookies soft. Bake them just until the edges turn golden.
Common Mistakes to Avoid
One common mistake is using cold butter. Cold butter makes it hard to cream. Another mistake is overbaking. Always check the cookies a minute or two early. Letting them cool on the baking sheet for five minutes is key. This allows them to set without becoming hard.
Enhancing Flavor and Presentation
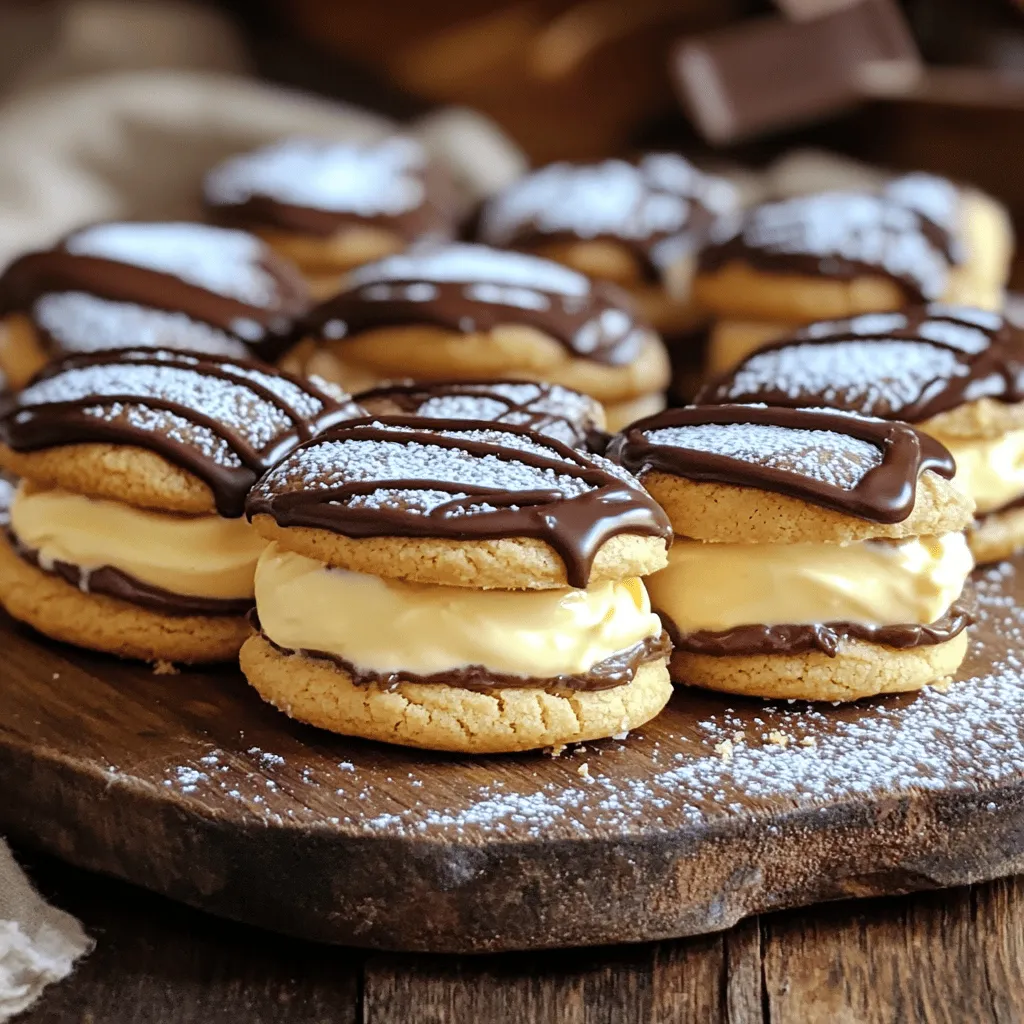
To boost flavor, add a pinch of cinnamon or nutmeg to the dough. You can also use dark chocolate chips for a richer taste. For presentation, dust the cookies with powdered sugar before serving. Arrange them on a nice plate with some extra vanilla pudding. This makes them look even more inviting. Check out the Full Recipe for more tips and tricks!
Variations
Gluten-Free Boston Cream Pie Cookies
You can make gluten-free Boston Cream Pie Cookies. Start with gluten-free flour blends. Look for ones made for baking. They usually work well in cookies. Swap the all-purpose flour in the recipe with the gluten-free blend. Check for a brand that includes xanthan gum for better texture. This keeps your cookies chewy and delicious.
Mini Boston Cream Pie Cookies
Mini Boston Cream Pie Cookies are fun and cute. Use a smaller cookie scoop to drop the dough. This gives you bite-sized treats. Bake for about 8-10 minutes, checking often. Once cooled, fill and glaze just like the full-sized cookies. These little gems are perfect for parties or snacks.
Flavor Adaptations (e.g., Lemon, Mint)
You can play with flavors for these cookies. For a lemon twist, add lemon zest to the dough. Use lemon pudding instead of vanilla. For mint, swap the vanilla extract with mint extract. You can also fold in crushed mint candies. These changes keep the cookies fresh and exciting. Each version offers a new taste adventure!
For more details, check out the Full Recipe for Boston Cream Pie Cookies.
Storage Info
How to Store Boston Cream Pie Cookies
To keep your Boston Cream Pie Cookies fresh, store them in an airtight container. Place parchment paper between layers to avoid sticking. These cookies stay soft and tasty this way.
Freezing Instructions
You can freeze these cookies for later use. First, let them cool completely. Then, wrap each cookie in plastic wrap. Place them in a freezer bag or container. They can last up to three months in the freezer. When you want one, just thaw it at room temperature.
Shelf Life and Best Practices
These cookies are best enjoyed within a week. Store them at room temperature for maximum freshness. If you notice any signs of dryness, they might be past their prime. Always check for any changes in smell or texture.
FAQs
What is the origin of Boston Cream Pie Cookies?
Boston Cream Pie Cookies draw inspiration from the classic Boston Cream Pie, a dessert that first appeared in the late 1800s. The pie is made of layers of sponge cake filled with vanilla cream and topped with chocolate. These cookies combine those same flavors into a fun, handheld treat. They offer a bite-sized twist on a beloved dessert.
Can I make Boston Cream Pie Cookies ahead of time?
Yes, you can make Boston Cream Pie Cookies ahead of time! Bake the cookies and let them cool completely. Then, store them in an airtight container. You can also prepare the vanilla pudding filling ahead of time. Just keep everything separate until you are ready to assemble the cookie sandwiches for the best texture.
How do I substitute ingredients for dietary restrictions?
You can easily adapt this recipe for dietary needs. Use dairy-free butter and almond milk instead of regular butter and milk for a vegan version. For gluten-free cookies, substitute all-purpose flour with a gluten-free blend. Just make sure your pudding mix is also gluten-free. These swaps help everyone enjoy the cookies without worry.
What can I use instead of instant vanilla pudding?
If you need a substitute for instant vanilla pudding, you can make your own. Mix 1 cup of milk with 2 tablespoons of cornstarch and 1 teaspoon of vanilla extract. Heat it until it thickens. This alternative may give you a homemade touch. You can also use other flavors of pudding mix for fun variations.
How can I make a low-sugar version of these cookies?
To lower the sugar in Boston Cream Pie Cookies, reduce the granulated sugar and brown sugar by half. You can use a sugar substitute like erythritol or stevia as well. For the pudding filling, choose a sugar-free pudding mix to keep the sweetness down without losing flavor. These changes help make a delicious treat that fits your needs.
You learned about making Boston Cream Pie Cookies, from the ingredients to storage. We covered essential and optional ingredients, equipment needed, and gave step-by-step instructions. With tips for perfect texture and a few tasty variations, I hope you’re ready to create your own cookie sandwiches. Keep exploring different flavors and have fun with this recipe! Enjoy your baking journey and share your delicious results with family and friends.
Boston Cream Pie Cookies
Delicious cookies filled with vanilla pudding and topped with chocolate glaze.
Ingredients
Instructions
- 1
Begin by preheating your oven to 350°F (175°C). Line two baking sheets with parchment paper to prevent sticking and ensure even baking.
- 2
In a large mixing bowl, use an electric mixer to cream together the softened butter, granulated sugar, and brown sugar. Beat on medium speed for about 3-5 minutes, until the mixture is light, fluffy, and pale in color.
- 3
Add the eggs to the mixing bowl one at a time, mixing well after each addition to ensure thorough incorporation. Next, stir in the pure vanilla extract until just combined.
- 4
In a separate bowl, whisk together the all-purpose flour, baking powder, baking soda, and fine sea salt. Gradually add this dry mixture to the wet ingredients, mixing on low speed until just combined—be careful not to overmix.
- 5
Carefully fold in the semi-sweet chocolate chips with a spatula until they are evenly distributed throughout the cookie dough.
- 6
Using a cookie scoop or a tablespoon, drop rounded tablespoons of the cookie dough onto the prepared baking sheets, ensuring to leave space between each cookie to allow for spreading.
- 7
Bake the cookies in the preheated oven for 10-12 minutes, or until the edges are lightly golden and the centers have set. Remove the cookies from the oven and let them cool on the baking sheets for 5 minutes before transferring them to a wire rack to cool completely.
- 8
As the cookies cool, prepare the vanilla pudding filling. In a mixing bowl, whisk the instant vanilla pudding mix with the heavy cream until thickened, approximately 2 minutes; set aside.
- 9
Once the cookies have cooled completely, take half of the cookies and spread a generous layer of the vanilla pudding filling onto the flat side of each. Top each filled cookie with another cookie to create a sandwich.
- 10
For the chocolate glaze, place the semi-sweet chocolate chips in a microwave-safe bowl. Heat in 30-second increments in the microwave, stirring between each interval until smooth and melted. If the mixture is too thick, add one tablespoon of milk to achieve your desired drizzling consistency.
- 11
Drizzle or dip the tops of the cookie sandwiches into the melted chocolate glaze. Allow the chocolate to set completely at room temperature before serving.
Chef's Notes
Arrange the cookie sandwiches on a decorative platter. For an elegant presentation, dust them lightly with confectioners' sugar. Serve with a small bowl of the remaining vanilla pudding for extra dipping delight!


Recipe Creator
Remy
I’m Chef Remy, your recipe companion, here to bring warmth, bold taste, and simplicity to your kitchen.
View My Recipes