Go Back
- 1 cup creamy peanut butter - 1/2 cup honey or maple syrup - 2 cups rolled oats - 1/2 cup coconut flour - 1/4 cup chocolate chips (optional) - 1/4 cup crushed nuts (such as almonds or walnuts) - 1/4 teaspoon salt - 1 teaspoon vanilla extract You may want to swap some ingredients for different flavors or needs. - Alternative sweeteners: Use agave syrup or brown sugar if you prefer. - Nut butter options: Almond butter or sunflower seed butter work well too. - Gluten-free alternatives: Choose gluten-free oats and coconut flour for a gluten-free treat. These swaps can change the taste and nutrition. You can mix and match to suit your diet and taste. Each ingredient plays a role, so think about how they fit into your plan. Enjoy experimenting! {{ingredient_image_2}} To make these no-bake peanut butter bars, you follow simple steps. First, melt the peanut butter with honey. Next, mix your dry ingredients. Then, combine everything and prepare your pan. Finally, chill the bars to set. Start by placing 1 cup of creamy peanut butter and 1/2 cup of honey or maple syrup in a medium saucepan. Use low heat to melt them together. Stir gently until the mixture is smooth. This process takes just a few minutes. Once melted, take it off the heat and let it cool for a few minutes. In a large mixing bowl, add 2 cups of rolled oats, 1/2 cup of coconut flour, and 1/4 teaspoon of salt. If you want crunch, add 1/4 cup of crushed nuts like almonds or walnuts. Mix the dry ingredients well. If you choose to use chocolate chips, set them aside for later. Pour the warm peanut butter mixture into the bowl with the dry ingredients. Add 1 teaspoon of vanilla extract for flavor. Use a spatula or wooden spoon to mix everything together. Keep stirring until it all comes together into a thick dough-like mixture. Take an 8x8 inch square pan. Line it with parchment paper, leaving some paper hanging over the edges. This helps when you take the bars out later. Transfer the peanut butter mixture into the pan. Press it down with your spatula to make it even. Smooth the top to make it look nice. Place the pan in the refrigerator. Let it chill for at least 2 hours. This helps the bars set firm. After chilling, use the parchment paper to lift the bars out of the pan. Cut them into 12 even squares or rectangles. Enjoy your tasty treats! To get the perfect dough-like consistency, start by warming the peanut butter and honey mix. This step helps them blend well together. Make sure to stir until smooth. Mix the dry ingredients in a big bowl. The oats, coconut flour, and nuts should be well combined. When you add the warm mixture, stir it all together quickly. The heat helps everything stick. If it feels too dry, add a splash of water or more honey. This will help it hold together. For a great presentation, cut the bars into neat squares or rectangles. Place them on a clean plate. You can sprinkle some extra crushed nuts on top for a nice look. If you want a fun snack, wrap each bar in parchment paper. This makes them easy to grab and eat on the go. You can also place them in small bags for kids’ lunch boxes. Feel free to get creative with the bars! You can add chocolate chips, dried fruits, or seeds for extra flavor. If you love dark chocolate, try using dark chocolate chips instead. For a fruity twist, mix in some raisins or cranberries. You can also swap out nuts. Try using almonds or walnuts based on your taste. With these tips, your bars will be both tasty and unique! Pro Tips Use Natural Sweeteners: Honey and maple syrup are great, but consider using agave syrup for a lower glycemic index option. Experiment with Mix-ins: Customize your bars by adding dried fruits like cranberries or apricots for added flavor and texture. Chill for Best Results: Chilling the mixture for a longer time can lead to firmer bars, making them easier to cut and handle. Store for Freshness: Keep bars in an airtight container in the fridge or freezer to maintain their texture and flavor over time. {{image_4}} Want to switch up those flavors? You can easily add cocoa powder to make chocolate bars. Just mix in 1/4 cup of cocoa when you combine the dry ingredients. This gives a rich, chocolatey twist. You can also throw in dried fruits, like raisins or cranberries. They add natural sweetness and a chewy texture. If you prefer seeds, try sunflower or pumpkin seeds. They add crunch and nutrition too. If you need a nut-free option, don’t worry! You can use sunbutter, which is made from sunflower seeds. It has a similar taste and works well in this recipe. Just replace the peanut butter with the same amount of sunbutter. This way, everyone can enjoy these tasty bars without worries. Making these bars vegan is simple! Just choose maple syrup instead of honey. Ensure your chocolate chips are dairy-free as well. You can find many brands that offer vegan chocolate. By swapping these ingredients, you keep the bars delicious and plant-based. Enjoy a guilt-free treat that everyone can love! To keep the no-bake peanut butter bars fresh, place them in an airtight container. The refrigerator is the best spot. This helps maintain their texture and flavor. Make sure to separate layers with parchment paper if stacking. This prevents sticking and keeps them easy to grab. If you want to save some bars for later, freezing works well. First, cut the bars into squares. Wrap each square tightly in plastic wrap or foil. Then, place them in a freezer-safe bag or container. When you're ready to enjoy, remove a bar and let it thaw in the fridge for a few hours. You can also thaw them at room temperature for about 30 minutes. These delicious bars stay fresh for up to two weeks in the fridge. If frozen, they remain good for about three months. Just remember, the longer they stay frozen, the more they might lose their texture. So, enjoy them while they are at their best! Yes, you can use natural peanut butter. It has less sugar and oil than creamy peanut butter. This may change the texture of your bars. Your mixture may be a bit drier. To fix this, add a bit more honey or maple syrup. You want to keep the mixture sticky and cohesive. To make the bars firmer, chill them longer. Aim for at least three hours. You can also add more coconut flour. This helps absorb extra moisture. If the mixture seems too soft, try adding an extra 1/4 cup of coconut flour. It will help hold everything together better. Yes, you can add protein powder. Start with 1/4 cup of your favorite protein. Mix it in with the dry ingredients. Be careful not to add too much, as it can change the texture. If the batter seems too dry, add a splash of almond milk or a touch more honey. To make the bars more filling, add nuts or seeds. Consider 1/2 cup of chopped almonds or walnuts. You can also mix in dried fruits like cranberries or raisins. This will add more flavor and texture. Each bite will be more substantial and satisfying. This blog post covered a simple method to make tasty energy bars. You learned about key ingredients, how to mix and chill them, and tips for perfecting the texture. Don't forget the many options to customize your bars with flavors, nut-free choices, or vegan ingredients. Store them well, and they’ll last. With these steps and tips, you can create bars that fit your taste and diet. Take the time to experiment and enjoy your delicious, homemade treats!

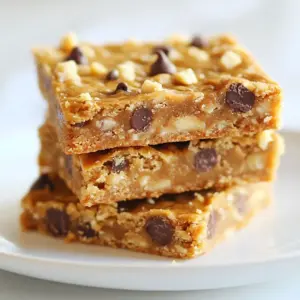
Peanut Butter Bliss Bars

Delicious and nutritious no-bake bars made with peanut butter, oats, and optional chocolate chips.
Course Dessert
Cuisine American
Servings 12
Calories 150 kcal

Ingredients
  

  • 1 cup creamy peanut butter
  • 1/2 cup honey or maple syrup
  • 2 cups rolled oats
  • 1/2 cup coconut flour
  • 1/4 cup chocolate chips (optional)
  • 1/4 cup crushed nuts (such as almonds or walnuts)
  • 1/4 teaspoon salt
  • 1 teaspoon vanilla extract

Instructions
 

  • In a medium saucepan, place the creamy peanut butter and honey (or maple syrup) over low heat. Stir gently until both ingredients melt together smoothly, creating a rich mixture. Once combined, remove from heat and let it cool for a few minutes.
  • In a large mixing bowl, add the rolled oats, coconut flour, salt, and crushed nuts. If you are including chocolate chips, set them aside for later incorporation.
  • Pour the warm peanut butter mixture into the bowl with the dry ingredients. Add the vanilla extract. Using a spatula or wooden spoon, mix all the ingredients vigorously until everything is well incorporated and the mixture has a thick, dough-like texture.
  • If you chose to use chocolate chips, gently fold them into the mixture now, ensuring they are evenly distributed.
  • Prepare an 8x8 inch square pan by lining it with parchment paper, leaving some overhang to make removal easier. Transfer the peanut butter mixture into the pan, pressing it down firmly with your spatula to create an even layer. Smooth the top to achieve a nice finish.
  • Place the pan in the refrigerator and let it chill for at least 2 hours, or until the mixture is firm to the touch. After chilling, remove the bars from the pan using the parchment overhang, and cut them into 12 even squares or rectangles.
  • To store, place the bars in an airtight container and keep them in the refrigerator for up to two weeks. For extended freshness, you can also freeze them for future snacking.

Notes

For a convenient snack on the go, wrap each bar individually in parchment paper or place them in small, resealable bags.
Keyword bars, no-bake, peanut butter, snack