Go Back
To make delicious Halloween cookies, gather these key ingredients: - 2 ½ cups all-purpose flour - 1 teaspoon baking powder - ½ teaspoon baking soda - ½ teaspoon salt - 1 cup unsalted butter, softened - 1 ½ cups granulated sugar - 1 large egg - 1 teaspoon vanilla extract - 1 teaspoon almond extract - 2 cups powdered sugar (for icing) - Food coloring (various colors for decorating) - Edible glitter (optional for sparkle) - Royal icing (for detailed decorations) These ingredients create a soft, tasty cookie base that you can decorate in fun spooky designs. You can enhance your Halloween cookies with some fun decorations and tools: - Cookie cutters (skull shapes and more) - Piping bags for icing - Small brushes for detail work - Sprinkles or edible glitter for extra flair - Halloween-themed stencils These tools help you create cookies that look as good as they taste. Choosing the right ingredients makes a big difference. Here are some tips: - Butter: Use unsalted butter for better control over salt content. - Flour: Always use fresh all-purpose flour for the best texture. - Sugar: Granulated sugar should be pure, with no lumps. - Eggs: Use large, fresh eggs for better results in baking. - Extracts: Choose pure vanilla and almond extracts for richer flavors. Selecting quality ingredients helps you achieve the best flavor and texture in your cookies. For the complete recipe, check out the Full Recipe. First, gather your ingredients for the spooky sugar skull cookies. You will need: - 2 ½ cups all-purpose flour - 1 teaspoon baking powder - ½ teaspoon baking soda - ½ teaspoon salt - 1 cup unsalted butter, softened - 1 ½ cups granulated sugar - 1 large egg - 1 teaspoon vanilla extract - 1 teaspoon almond extract Start by whisking together the flour, baking powder, baking soda, and salt in a bowl. This step ensures even mixing. Set this aside for later. In a separate bowl, cream the softened butter and sugar together. Use an electric mixer and beat for 3-4 minutes until light and fluffy. Next, add the egg, vanilla extract, and almond extract. Mix until fully combined. Gradually add the dry ingredients to the wet mixture. Mix on low, stopping as soon as the flour is almost fully incorporated. This helps keep the cookies soft. Divide the dough into two parts and wrap them in plastic wrap. Chill the dough in the fridge for at least 1 hour. Chilling makes the dough easier to roll. While your dough chills, preheat your oven to 350°F (175°C). Line two baking sheets with parchment paper. After chilling, take one dough portion and roll it out on a floured surface. Aim for about 1/4 inch thickness. Use a skull-shaped cookie cutter to cut out cookies. Place them on the prepared sheets. Bake the cookies for 8-10 minutes. Watch for the edges to turn light golden. Once baked, let them cool on the sheets for 5 minutes. Then, transfer them to wire racks to cool completely. Now for the fun part: decorating! In a bowl, mix powdered sugar with a few tablespoons of water to make icing. You want it smooth and spreadable. Divide this icing into bowls and add food coloring to create spooky designs. Using the colored icing, decorate your skull cookies. Try big eyes, flowers, or fun patterns. If you like sparkle, sprinkle some edible glitter on the wet icing. Once the colored icing sets, use royal icing for fine details. This adds a professional touch to your cookies. For the full recipe, check the earlier section. Enjoy your spooky treats! When making Halloween cookies, avoid these common mistakes: - Overmixing the dough: This makes cookies tough. Mix just until combined. - Skipping the chill time: Chilling helps cookies hold their shape. Always refrigerate the dough. - Not measuring ingredients: Use measuring cups for accuracy. This ensures the right texture. - Baking at the wrong temperature: Always preheat your oven. Check your oven with a thermometer if needed. To get great icing on your cookies: - Use the right consistency: Icing should be smooth and spreadable. - Pipe with control: Use a piping bag for neat lines and designs. - Work quickly: Icing dries fast. Decorate each cookie right after icing. - Layer designs: Add details once the first layer sets. This creates depth. Great tools make cookie baking easier and more fun: - Silicone baking mats: These prevent sticking and help with even baking. - Rolling pin: A good rolling pin helps roll dough evenly. - Cookie cutters: Get a variety of shapes for fun designs. - Piping bags and tips: Use these for precise icing work. - Offset spatula: This is great for spreading icing smoothly. For a full recipe, check out my spooky sugar skull cookies! {{image_4}} You can be creative with flavors. Try adding spices like cinnamon or nutmeg. These spices bring warmth to your cookies. You can also use pumpkin puree for a fall twist. It adds moisture and a subtle sweetness. Another option is to use chocolate or peanut butter. These flavors pair well with spooky shapes. Halloween is all about fun shapes. Use cookie cutters to create ghosts, bats, and pumpkins. Kids love these shapes, and they are easy to decorate. For a party, consider themes like monsters or witches. You can create cookies that match your costume or party decor. These ideas make your treats extra special and memorable. Making gluten-free cookies is simple. Use almond flour or gluten-free flour blends. These flours give a nice texture without gluten. For vegan cookies, replace eggs with flaxseed meal. Mix one tablespoon of flaxseed with three tablespoons of water. Let it sit until it thickens. This mix works well as an egg substitute. You can use coconut oil instead of butter for a vegan option. These alternatives make your cookies inclusive for everyone. For more ideas, check out the Full Recipe for Spooky Sugar Skull Cookies. To keep your Halloween cookies fresh, store them in an airtight container. This helps maintain their texture and flavor. Place parchment paper between layers of cookies to prevent sticking. Do not expose cookies to heat or sunlight, as this can dry them out. Halloween cookies can last up to one week at room temperature. If you store them properly, they stay soft and tasty. For longer storage, consider freezing them. Freezing cookies is simple! After they cool completely, place them in a single layer on a baking sheet. Freeze until firm, then transfer them to an airtight container or freezer bag. They can last up to three months in the freezer. When ready, thaw them at room temperature for a delightful treat! For the complete recipe, check out the Spooky Sugar Skull Cookies . You can make Halloween cookies ahead of time. First, prepare the dough and chill it. Wrap it tightly in plastic wrap and store it in the fridge for up to 3 days. For longer storage, freeze the wrapped dough for up to 3 months. When ready to bake, let the dough thaw in the fridge before rolling it out. This method keeps your cookies fresh and saves you time. I love using fun shapes for Halloween cookies! The best cookie cutters include skulls, bats, pumpkins, and ghosts. These shapes add a spooky touch to your treats. Look for sturdy metal or plastic cutters that will hold their shape. You can also find sets that include various sizes to create a fun mix. Yes, store-bought icing is a great option! It saves you time and effort. You can find many flavors and colors in stores. Just make sure to choose a thick icing for decorating. If you want to add more flair, mix in some food coloring or edible glitter. This will make your Halloween cookies even more festive. - Full Recipe Reference: Spooky Sugar Skull Cookies Making Halloween cookies can be a fun and tasty project. We covered key ingredients, step-by-step baking, and clever decorating tips. I shared ways to avoid common mistakes and the best tools to use. Don't forget about variations, like gluten-free or vegan options. Proper storage lets you enjoy these treats longer. With some practice, you can create not just cookies but spooky masterpieces for any occasion. Happy baking!

Halloween Cookies

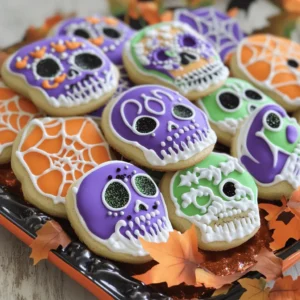
Get ready for a spooky treat this Halloween with these delightful Spooky Sugar Skull Cookies! This fun recipe combines simple ingredients to create delicious cookies perfect for decorating. From chilling the dough to adding colorful icing and edible glitter, every step is easy and enjoyable. Gather your friends and family to create these festive cookies together! Click through for the full recipe and make your Halloween celebrations extra sweet!

Ingredients
  

2 ½ cups all-purpose flour

1 teaspoon baking powder

½ teaspoon baking soda

½ teaspoon salt

1 cup unsalted butter, softened to room temperature

1 ½ cups granulated sugar

1 large egg

1 teaspoon vanilla extract

1 teaspoon almond extract

2 cups powdered sugar (for icing)

Food coloring (various colors for decorating)

Edible glitter (optional for sparkle)

Royal icing (for detailed decorations)

Instructions
 

Prepare the Dry Ingredients: In a medium bowl, whisk together the all-purpose flour, baking powder, baking soda, and salt until well combined. Set this mixture aside for later.

    Cream the Butter and Sugar: In a large mixing bowl, use an electric mixer to cream the softened unsalted butter and granulated sugar together on medium speed. Beat for about 3-4 minutes until the mixture is light, fluffy, and pale in color.

      Incorporate the Wet Ingredients: Add the large egg, vanilla extract, and almond extract to the butter-sugar mixture. Beat on low speed until everything is well integrated, ensuring no streaks remain.

        Combine Wet and Dry Mixtures: Gradually add the prepared dry ingredients to the wet ingredients, mixing on low speed. Stop mixing as soon as the flour is barely incorporated to prevent overmixing, which can toughen the cookies.

          Chill the Dough: Divide the dough into two equal portions. Wrap each portion tightly in plastic wrap and refrigerate for at least 1 hour, or until the dough is firm to the touch.

            Preheat the Oven: While the dough is chilling, preheat your oven to 350°F (175°C) and line two baking sheets with parchment paper.

              Roll and Cut the Dough: Take one portion of the chilled dough and roll it out on a lightly floured surface to a thickness of about 1/4 inch. Use a skull-shaped cookie cutter to cut out as many cookies as possible, placing them on the prepared baking sheets afterward.

                Bake the Cookies: Place the baking sheets in the preheated oven and bake the cookies for 8-10 minutes, or until the edges begin to turn lightly golden. Once done, remove the sheets from the oven and let the cookies cool on the sheets for 5 minutes. Then, transfer them to wire racks to cool completely.

                  Prepare the Icing: In a mixing bowl, combine the powdered sugar with a few tablespoons of water. Stir until you achieve a smooth and spreadable consistency. Divide the icing into separate bowls and mix in your desired food coloring to create a palette for decorating.

                    Decorate the Cookies: Using the colored icing, decorate each skull cookie with fun and spooky designs, such as big eyes, intricate flowers, and fancy patterns. If using, sprinkle edible glitter on top while the icing is still wet for a magical effect.

                      Add Final Touches: After the colored icing has set, use royal icing to add intricate details, outlines, and additional designs for a professional finish.

                        Prep Time: 30 minutes | Total Time: 2 hours (includes chilling) | Servings: Approximately 24 cookies

                          - Presentation Tips: Showcase your finished cookies on a Halloween-themed platter. For an extra spooky display, scatter artificial spider webs or tiny ghost decorations around the platter to create a festive atmosphere!