Are you ready to whip up a delightful holiday treat without the oven? With my No-Bake Eggnog Nutmeg Swirl Fudge, you’ll impress family and friends with minimal effort. This creamy delight blends classic eggnog flavors into a sweet fudge that’s oh-so-easy to make. I’ll walk you through every step, ingredient, and tip to create this festive candy. Let’s dive into the holiday spirit with this simple, no-bake recipe!
Ingredients
Essential Ingredients for No-Bake Eggnog Nutmeg Swirl Fudge
The main ingredients make this fudge rich and creamy. Here’s what you need:
– 2 cups white chocolate chips
– 1 cup sweetened condensed milk
– 1 teaspoon vanilla extract
– 1 teaspoon ground nutmeg (plus extra for garnish)
– 1 teaspoon ground cinnamon
– 1/4 cup unsweetened eggnog (or eggnog-flavored creamer)
– A pinch of salt
These ingredients blend to create a smooth fudge with a holiday twist. White chocolate gives it a sweet base, while nutmeg and cinnamon add warm flavors. Eggnog brings a festive touch that makes this treat special.
Optional Ingredients for Added Flavor
If you want to enhance the taste, consider using:
– 1/2 cup chopped walnuts or pecans (optional)
Adding nuts gives the fudge a nice crunch. It also adds depth to the flavors. You can choose your favorite nuts or leave them out if you prefer a smooth texture.
Measurement Units and Substitutions
Make sure to measure your ingredients carefully. Here’s a quick guide:
– 1 cup = 8 ounces
– 1 teaspoon = 5 milliliters
If you don’t have sweetened condensed milk, you can use heavy cream mixed with sugar. Just mix 1 cup of cream with 1/4 cup of sugar until dissolved. This will give you a similar creamy texture. Always check if your eggnog is dairy-free or low-sugar if needed.
Step-by-Step Instructions
Preparing the Baking Dish
First, get your baking dish ready. You need an 8×8-inch square dish. Line it with parchment paper. Leave some paper hanging over the sides. This helps you lift the fudge out later.
Melting the Chocolate and Mixing Ingredients
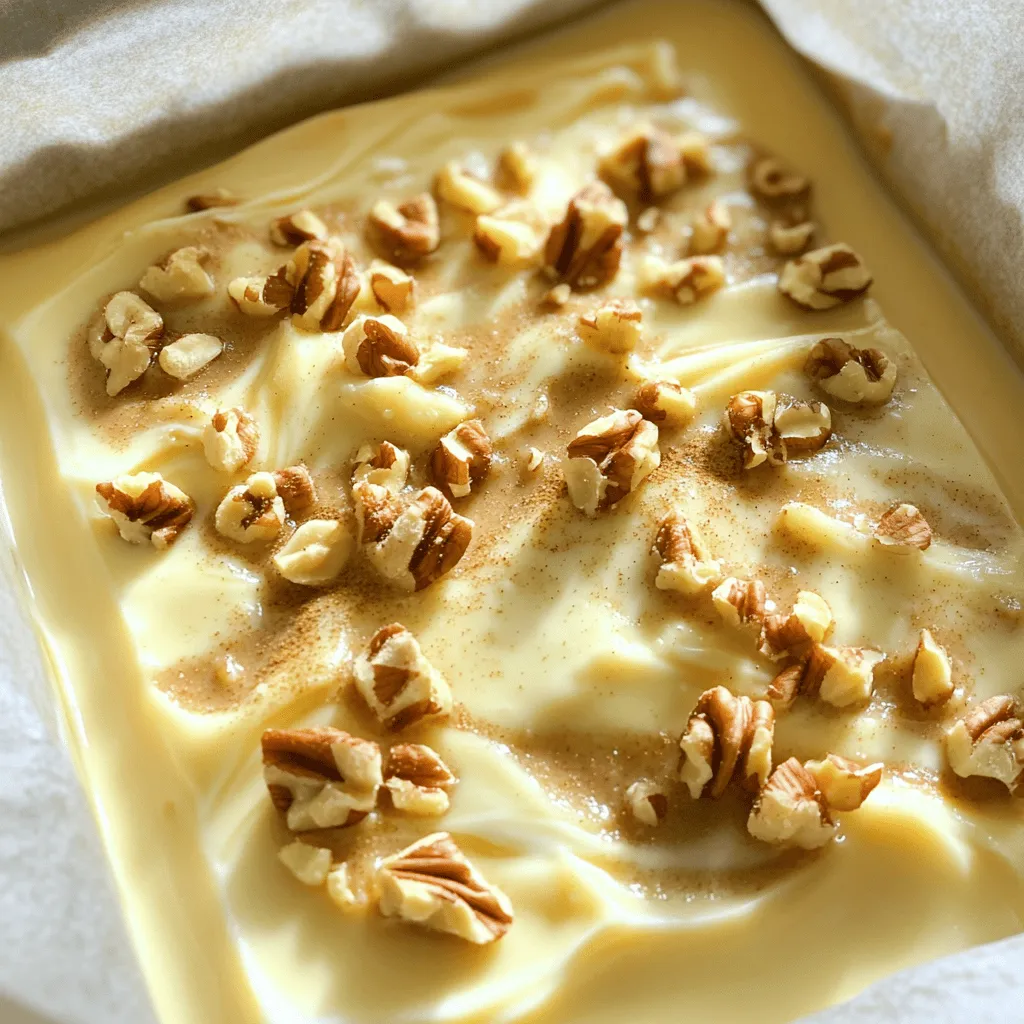
Now, let’s melt the chocolate. In a medium saucepan, add 2 cups of white chocolate chips and 1 cup of sweetened condensed milk. Set the heat to low. Stir the mix as it heats. This keeps the chocolate smooth. Once it’s melted, take it off the heat. Add 1 teaspoon of vanilla extract, 1 teaspoon of ground nutmeg, and 1 teaspoon of ground cinnamon. Don’t forget a pinch of salt! Stir well to blend everything. Slowly mix in 1/4 cup of eggnog until it’s all smooth. If you want nuts, fold in 1/2 cup of chopped walnuts or pecans now.
Swirling the Fudge and Setting
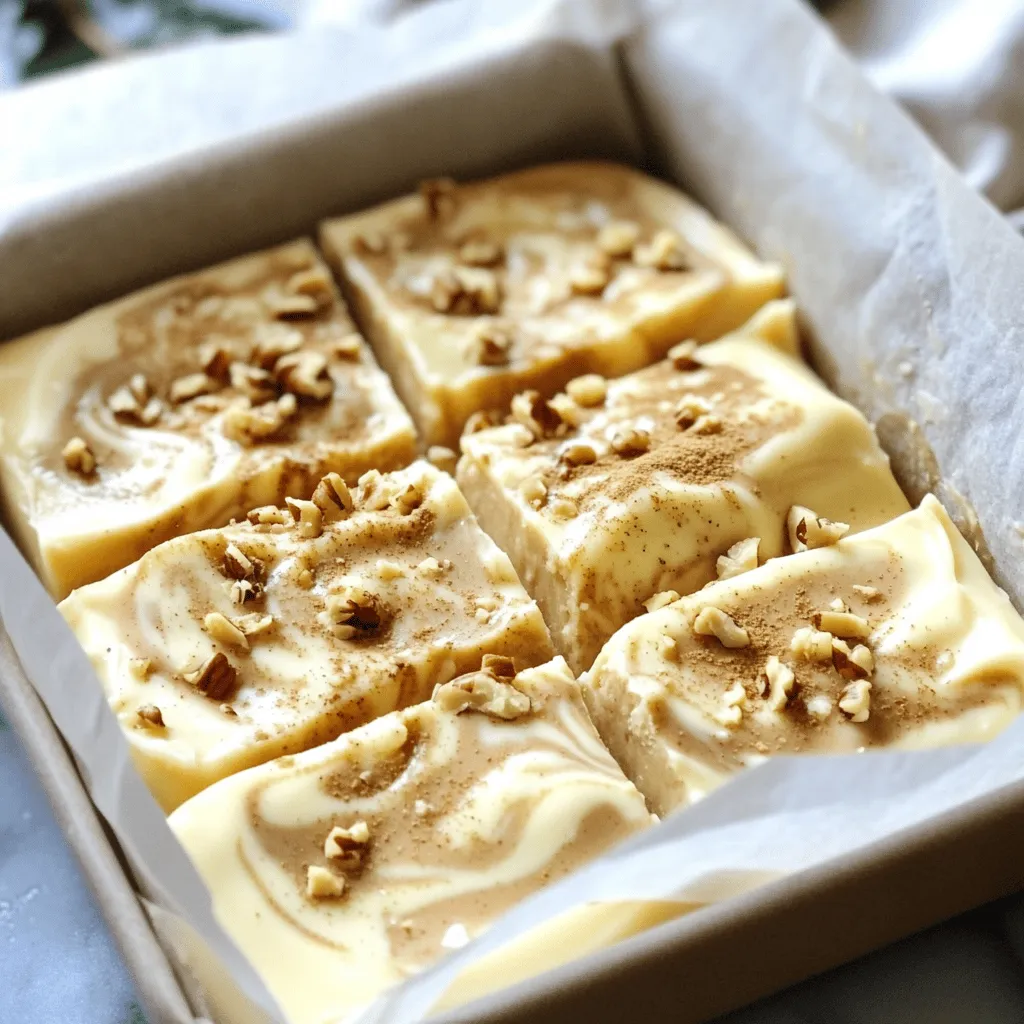
Next, pour half of your fudge mix into the dish. Spread it out flat with a spatula. Now, take the remaining fudge and drop spoonfuls on top. Use a toothpick or knife to swirl the two layers together. This creates a nice marbled look. For extra flair, sprinkle some ground nutmeg on top. Now, place the dish in the fridge. Let it chill for about 2 to 4 hours until set. Once firm, lift the fudge out using the parchment paper. Place it on a cutting board and cut into 16 squares. Enjoy your delicious no-bake eggnog nutmeg swirl fudge!
Tips & Tricks
Ensuring Smooth Fudge Consistency
To create smooth fudge, you need to melt the chocolate carefully. Use low heat to avoid burning the chocolate. Stir it often so it melts evenly. If you notice lumps, keep stirring. Once you add the eggnog, mix it in well. This makes the fudge creamy and rich. A pinch of salt enhances the flavors too.
Customizing with Seasonal Spices
You can change up the spices based on your taste. If you love cinnamon, add more! Pumpkin spice is a fun twist for fall. Try adding vanilla bean for extra flavor. Even a dash of ginger can make it festive. Don’t be afraid to play with spices to find your favorite mix.
Best Practices for Swirling
Swirling is all about technique. Drop spoonfuls of the fudge mixture on top of the first layer. Use a toothpick or a knife to swirl gently. Be careful not to mix too much; you want to see both layers. The goal is a beautiful marbled design. A light touch keeps the fudge looking pretty and makes it more fun to eat.
Variations
Nut-Free Version: Omit Nuts and Alternatives
If you want a nut-free fudge, simply leave out the nuts. The fudge will still taste great! You can replace the nuts with sunflower seeds or leave them out entirely. This keeps it safe for those with allergies while still being delicious.
Different Flavor Profiles: Chocolate or Peppermint
You can change the flavor of your fudge easily. For chocolate fudge, swap white chocolate chips for dark chocolate chips. This will give you a rich, deep taste. If you love peppermint, add a teaspoon of peppermint extract instead of vanilla. You can also sprinkle crushed candy canes on top for a festive touch.
Alternative Garnishes for Festive Presentation
Presentation is key for any treat. Instead of just nutmeg, try using a dusting of cocoa powder or shredded coconut. You can also drizzle melted chocolate over the top for an extra treat. Use colorful sprinkles or edible glitter to make your fudge stand out on the dessert table.
Storage Info
How to Store Leftover Fudge
To keep your fudge fresh, store it in an airtight container. I suggest placing parchment paper between the layers. This helps prevent the fudge from sticking together. Keep it in the fridge for up to two weeks. If you want to enjoy it longer, freezing is a great option.
Freezing Tips for Long-Term Storage
To freeze your fudge, cut it into squares first. Then, wrap each square in plastic wrap. Place the wrapped fudge in a freezer-safe container or bag. This keeps it fresh and prevents freezer burn. The fudge can last in the freezer for up to three months. Just remember to label the container with the date.
Best Ways to Thaw and Serve
When you’re ready to eat the fudge, take it out of the freezer. Let it sit at room temperature for about 30 minutes. This helps it soften nicely. If you’re in a hurry, you can microwave it for a few seconds. Just watch it closely to avoid melting. Enjoy the creamy, nutmeg flavor as a sweet treat!
FAQs
Can I use other types of chocolate?
Yes, you can use dark or milk chocolate. Each type gives a different taste. Dark chocolate adds richness, while milk chocolate makes it sweeter. Adjust the sweetened condensed milk amount for balance. If you pick dark chocolate, consider adding more eggnog to keep the creaminess.
How long does the fudge last?
The fudge lasts about two weeks in the fridge. Keep it in an airtight container. This helps maintain its soft texture and rich flavor. If you want to store it longer, freeze it. Frozen fudge can last up to three months. Just remember to thaw it in the fridge before serving.
Is there an eggnog substitute for this recipe?
You can use eggnog-flavored creamer as a substitute. This works well if you want a lighter version. Other options include milk mixed with vanilla and a pinch of nutmeg. This gives a similar taste without using eggnog. Feel free to experiment with these choices!
You learned how to make rich no-bake eggnog nutmeg swirl fudge. We covered each step, from ingredients to storage tips. This fudge is easy to customize with fun flavors and spices. Remember to store your leftovers correctly for later enjoyment. With this guide, you can make a tasty treat for any occasion. Enjoy creating your own delicious fudge and delight your friends and family!
