Are you ready to indulge in a warm, gooey treat? These Caramelized Apple Cinnamon Blondies are the perfect blend of sweet apples and rich cinnamon. You’ll love the way they melt in your mouth! In this post, I’ll share an easy recipe that makes use of simple ingredients and clear steps. Let’s dive into creating this delightful snack that will impress your family and friends!
Ingredients
To make caramelized apple cinnamon blondies, gather these simple ingredients:
– 1 cup unsalted butter, melted
– 1 cup packed brown sugar
– 1/2 cup granulated sugar
– 2 large eggs
– 2 teaspoons vanilla extract
– 2 cups all-purpose flour
– 1 teaspoon baking powder
– 1/2 teaspoon baking soda
– 1/2 teaspoon salt
– 1 tablespoon ground cinnamon
– 2 medium Granny Smith apples, peeled, cored, and diced
– 1 tablespoon lemon juice
– 1/2 cup chopped walnuts or pecans (optional)
– 1/4 cup caramel sauce (for drizzling)
These ingredients come together to create a warm, sweet treat. The unsalted butter gives a rich base. The mix of brown and granulated sugar adds depth to the flavor. Eggs and vanilla bind everything and add moisture.
Next, all-purpose flour, baking powder, baking soda, and salt give structure. Ground cinnamon brings warmth and spice. Granny Smith apples add a tart bite, while lemon juice keeps them fresh. You can toss in walnuts or pecans for crunch. Lastly, caramel sauce drizzles over the top, making it extra special.
This blend of flavors and textures makes these blondies a delightful treat. Enjoy the process of gathering ingredients and baking!
Step-by-Step Instructions
Prepping the Oven and Pan
First, heat your oven to 350°F (175°C). Next, grab a 9×13 inch baking pan. Grease it or line it with parchment paper. This will help you lift the blondies out easily later.
Mixing the Wet Ingredients
In a big bowl, combine 1 cup of melted unsalted butter, 1 cup of packed brown sugar, and 1/2 cup of granulated sugar. Whisk them together until they blend well. Add 2 large eggs, one at a time. Mix well after each egg. Finally, stir in 2 teaspoons of vanilla extract.
Combining Dry Ingredients
Take another bowl and whisk together 2 cups of all-purpose flour, 1 teaspoon of baking powder, 1/2 teaspoon of baking soda, 1/2 teaspoon of salt, and 1 tablespoon of ground cinnamon. Slowly fold the dry mix into the wet mix. Stir until no dry spots remain, but don’t overmix.
Preparing the Apples
Peel, core, and dice 2 medium Granny Smith apples. To stop them from browning, toss the diced apples with 1 tablespoon of lemon juice. This keeps the apples fresh for your blondies.
Folding in Caramelized Apples
In a skillet, heat 1 tablespoon of butter over medium heat. Add the diced apples, 1 tablespoon of brown sugar, and a pinch of cinnamon. Sauté for about 5-7 minutes. You want the apples to be soft and caramelized. Let them cool a bit before folding into the batter.
Baking the Blondies
Pour the batter into the prepared baking pan. Spread it evenly using a spatula. Bake for 25-30 minutes. Check if they are done by inserting a toothpick in the center. If it comes out clean or with a few moist crumbs, they’re ready.
Cooling and Serving Suggestions
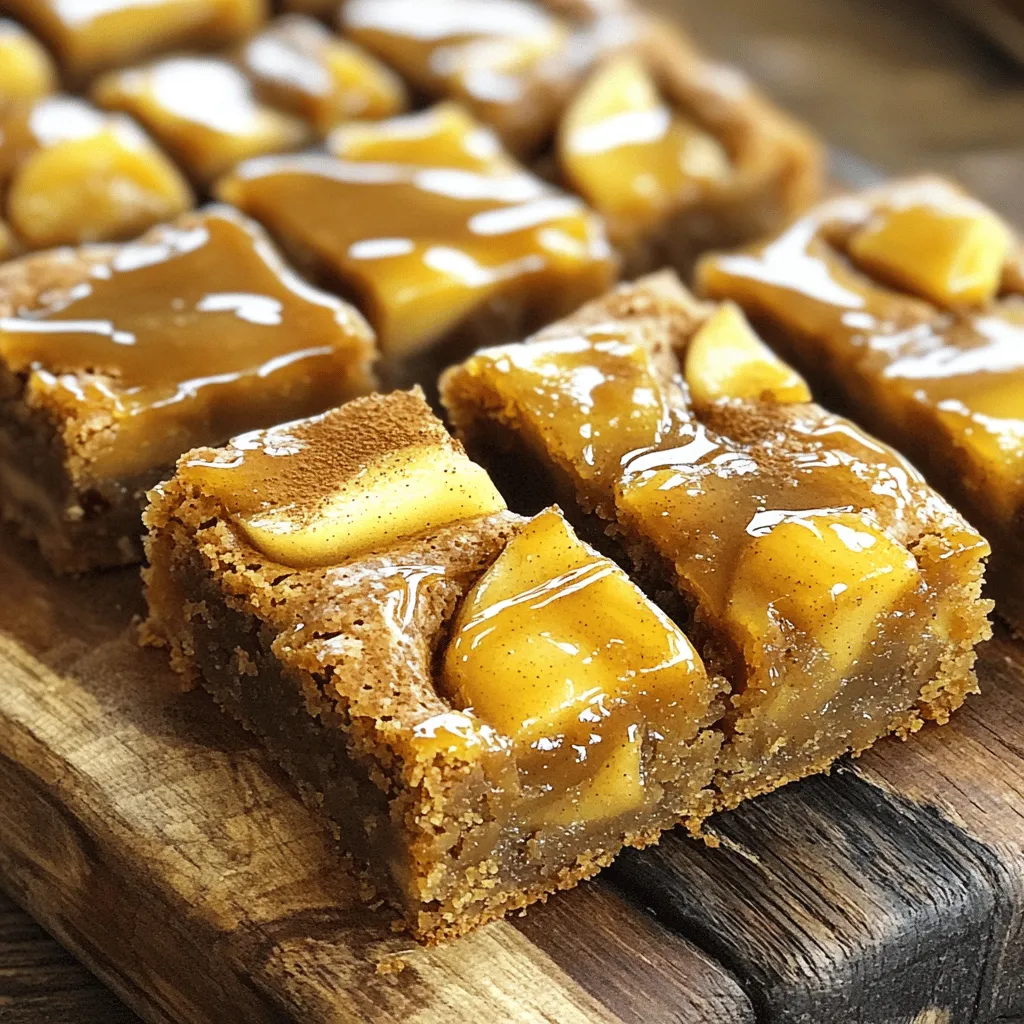
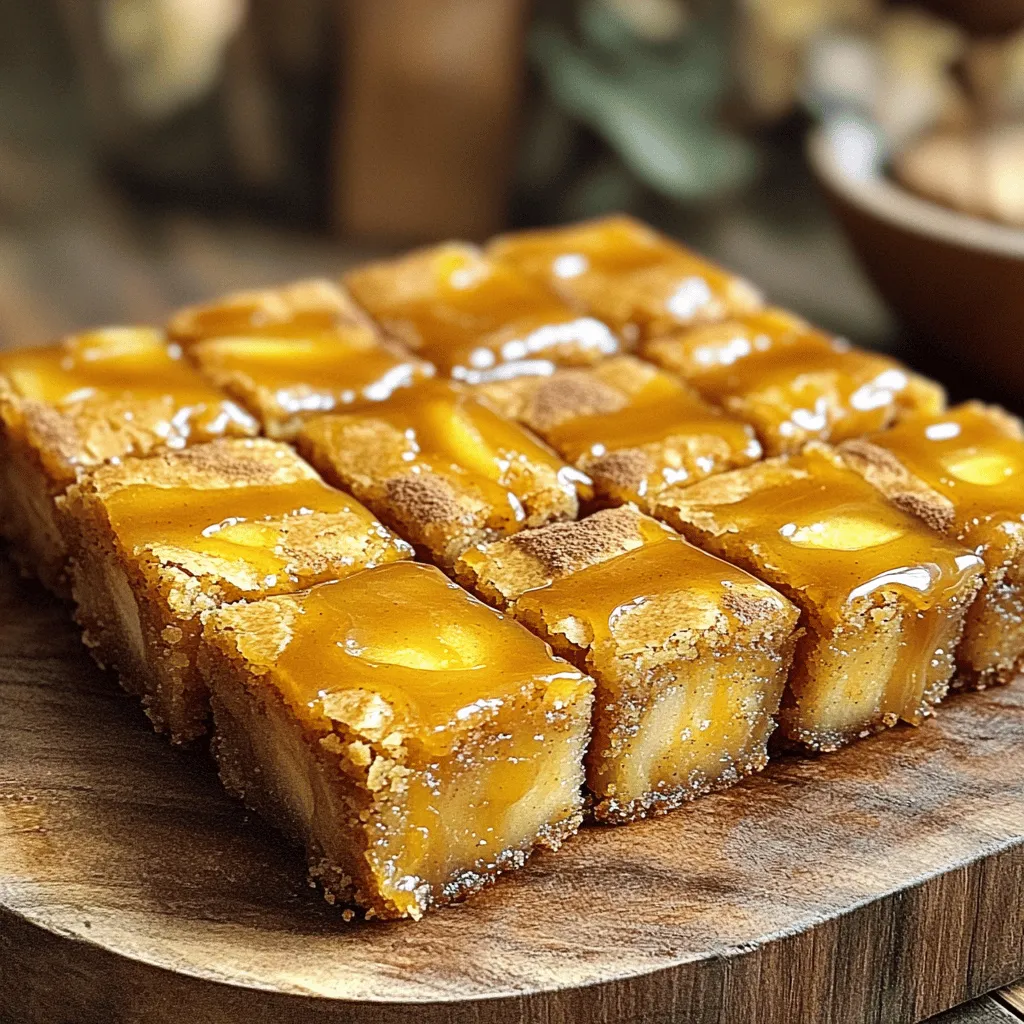
Remove the pan from the oven and let the blondies cool completely on a wire rack. Once cool, cut them into squares. For a tasty touch, drizzle caramel sauce over the blondies before serving. They look great on a rustic wooden board!
Tips & Tricks
Best Practices for Caramelizing Apples
To get the best flavor from your apples, choose Granny Smith apples. They are tart and hold their shape well. Start by peeling and dicing them into small pieces. Use a medium skillet and heat 1 tablespoon of butter over medium heat. Once the butter melts, add the diced apples, 1 tablespoon of brown sugar, and a pinch of cinnamon. Cook for 5-7 minutes. Stir gently until the apples soften and turn golden. This process makes them sweet and rich.
How to Avoid Overmixing
Overmixing can make your blondies tough. When you mix your wet and dry ingredients, do it gently. Stir until just combined. You should still see some flour bits. It’s okay! This keeps your blondies soft and chewy. Remember, the goal is to mix without losing that tender texture.
Ideal Baking Times and Temperature
Preheat your oven to 350°F (175°C). Bake your blondies for 25-30 minutes. Check for doneness by inserting a toothpick in the center. If it comes out clean or with a few moist crumbs, they are ready. Keep an eye on them to prevent overbaking. The edges should be golden, while the center remains soft.
Serving and Presentation Ideas
Serve your blondies on a rustic wooden board for a homey feel. Drizzle caramel sauce over the top for a sweet touch. A light dusting of ground cinnamon adds warmth and looks nice. Cut them into squares and arrange them neatly. You can also add a scoop of vanilla ice cream on the side for a delightful treat.
Variations
Substitute Ingredients
You can easily swap ingredients to fit your needs. If you want a dairy-free option, use coconut oil instead of butter. For a healthier choice, try using coconut sugar in place of brown sugar. Applesauce can replace eggs if you are vegan.
Different Types of Nuts
Nuts add crunch and flavor. You can use walnuts or pecans, but feel free to explore! Almonds or hazelnuts also work well. Just chop them up and mix them into the batter for added texture.
Flavor Additions
Add extra fun with flavor enhancements! Chocolate chips bring sweetness and richness. Dried fruit, like cranberries or raisins, can add a chewy touch. You can also sprinkle some sea salt on top for a sweet and salty contrast.
Gluten-Free Option
For a gluten-free version, swap all-purpose flour with almond flour or a gluten-free blend. Make sure the baking powder you use is gluten-free. This way, everyone can enjoy these tasty blondies!
Storage Info
How to Store Leftover Blondies
To keep your blondies fresh, let them cool completely. Then, cut them into squares. Place them in an airtight container. You can store them at room temperature for up to three days. If you want them to last longer, refrigerate them. They will be good for about a week.
Freezing Instructions
If you have extra blondies, freezing is a great option. Wrap each square in plastic wrap tightly. Then, place them in a freezer-safe bag. Label the bag with the date. You can keep them in the freezer for up to three months. When you’re ready to eat, just thaw them in the fridge overnight.
Best Ways to Reheat
To reheat, you can use the microwave or the oven. For the microwave, place a blondie on a plate and heat for about 10-15 seconds. Check to ensure it’s warm but not too hot. For the oven, preheat it to 350°F. Place the blondies on a baking sheet for about 5-10 minutes. This helps them regain their soft texture. Enjoy your warm, gooey blondies!
FAQs
What can I substitute for brown sugar in blondies?
You can use white sugar or coconut sugar. White sugar will make your blondies less chewy. Coconut sugar gives a similar flavor, but it is less sweet.
Can I use other types of apples?
Yes, you can use other apples. Honeycrisp or Fuji apples work well. They add sweetness and flavor to the blondies. Just make sure they are firm and not too soft.
How do I know when the blondies are done baking?
The blondies are done when the top is golden brown. You can test with a toothpick. If it comes out clean, they are ready. A few moist crumbs are okay.
Can I make the batter ahead of time?
Yes, you can mix the batter and store it. Keep it in the fridge for up to 24 hours. Just remember to let it warm slightly before baking.
What’s the difference between blondies and brownies?
Blondies are made with brown sugar and butter, giving them a butterscotch flavor. Brownies use cocoa powder, making them chocolatey. Blondies are lighter and sweeter than brownies.
This blog covered how to make delicious blondies with caramelized apples. We started with a list of key ingredients, including butter, sugars, and apples. I walked you through step-by-step instructions to prepare and bake them perfectly. I also shared tips to enhance your blondies and ideas for storing leftovers.
In the end, these blondies are tasty and easy to customize. Enjoy your baking adventure!
