Get ready to bake some delightfully spooky Halloween cookies! In this guide, I’ll share my favorite recipes and tips to create treats that are both fun and delicious. Whether you’re looking for creepy shapes, vibrant colors, or even gluten-free options, I’ve got you covered. Let’s dive into the world of Halloween cookies and turn your kitchen into a haunted bakery that the whole family will love!
Ingredients
Key Ingredients for Halloween Cookies
To make delicious Halloween cookies, gather these key ingredients:
– 2 ½ cups all-purpose flour
– 1 teaspoon baking powder
– ½ teaspoon baking soda
– ½ teaspoon salt
– 1 cup unsalted butter, softened
– 1 ½ cups granulated sugar
– 1 large egg
– 1 teaspoon vanilla extract
– 1 teaspoon almond extract
– 2 cups powdered sugar (for icing)
– Food coloring (various colors for decorating)
– Edible glitter (optional for sparkle)
– Royal icing (for detailed decorations)
These ingredients create a soft, tasty cookie base that you can decorate in fun spooky designs.
Optional Decorations and Tools
You can enhance your Halloween cookies with some fun decorations and tools:
– Cookie cutters (skull shapes and more)
– Piping bags for icing
– Small brushes for detail work
– Sprinkles or edible glitter for extra flair
– Halloween-themed stencils
These tools help you create cookies that look as good as they taste.
Tips for Selecting Quality Ingredients
Choosing the right ingredients makes a big difference. Here are some tips:
– Butter: Use unsalted butter for better control over salt content.
– Flour: Always use fresh all-purpose flour for the best texture.
– Sugar: Granulated sugar should be pure, with no lumps.
– Eggs: Use large, fresh eggs for better results in baking.
– Extracts: Choose pure vanilla and almond extracts for richer flavors.
Selecting quality ingredients helps you achieve the best flavor and texture in your cookies. For the complete recipe, check out the Full Recipe.
Step-by-Step Instructions
Preparation Phase: Mixing and Chilling the Dough
First, gather your ingredients for the spooky sugar skull cookies. You will need:
– 2 ½ cups all-purpose flour
– 1 teaspoon baking powder
– ½ teaspoon baking soda
– ½ teaspoon salt
– 1 cup unsalted butter, softened
– 1 ½ cups granulated sugar
– 1 large egg
– 1 teaspoon vanilla extract
– 1 teaspoon almond extract
Start by whisking together the flour, baking powder, baking soda, and salt in a bowl. This step ensures even mixing. Set this aside for later. In a separate bowl, cream the softened butter and sugar together. Use an electric mixer and beat for 3-4 minutes until light and fluffy.
Next, add the egg, vanilla extract, and almond extract. Mix until fully combined. Gradually add the dry ingredients to the wet mixture. Mix on low, stopping as soon as the flour is almost fully incorporated. This helps keep the cookies soft.
Divide the dough into two parts and wrap them in plastic wrap. Chill the dough in the fridge for at least 1 hour. Chilling makes the dough easier to roll.
Baking Cookies: Temperature and Time
While your dough chills, preheat your oven to 350°F (175°C). Line two baking sheets with parchment paper. After chilling, take one dough portion and roll it out on a floured surface. Aim for about 1/4 inch thickness.
Use a skull-shaped cookie cutter to cut out cookies. Place them on the prepared sheets. Bake the cookies for 8-10 minutes. Watch for the edges to turn light golden. Once baked, let them cool on the sheets for 5 minutes. Then, transfer them to wire racks to cool completely.
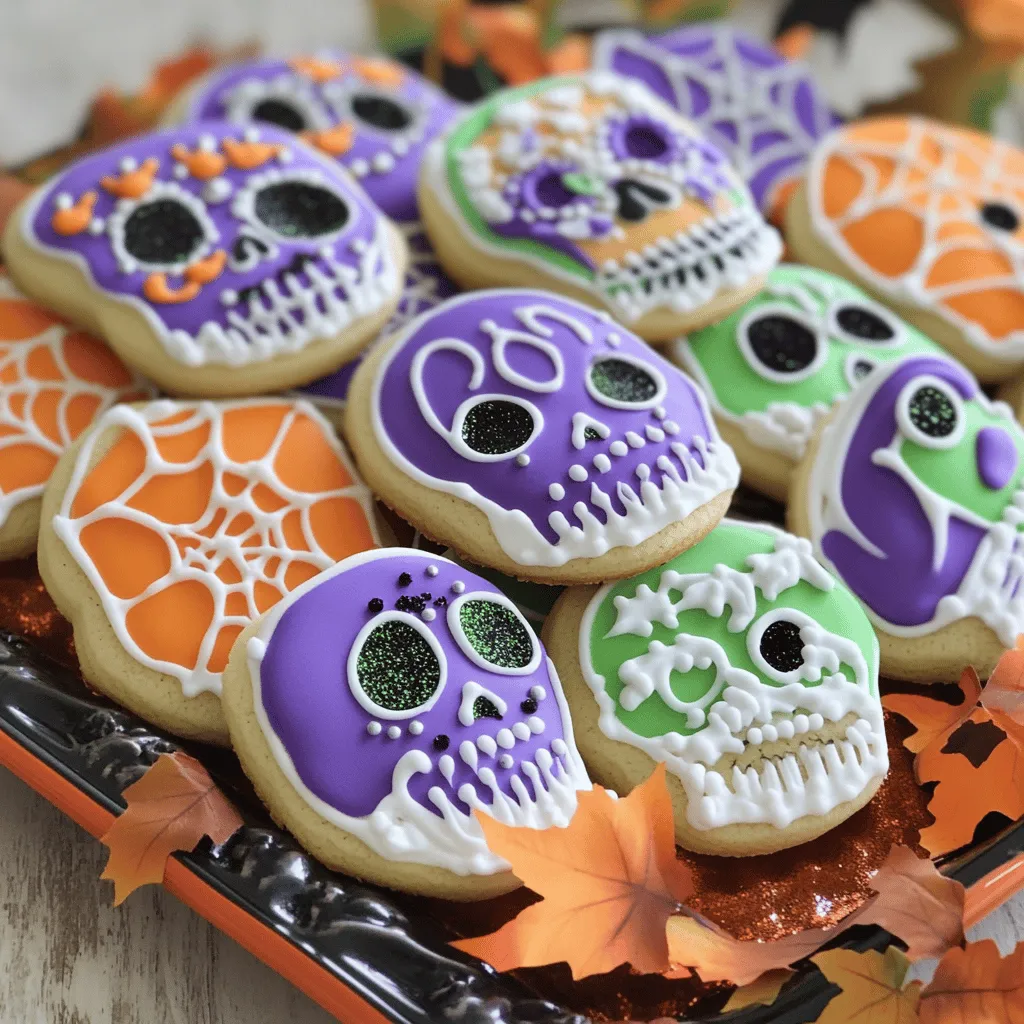
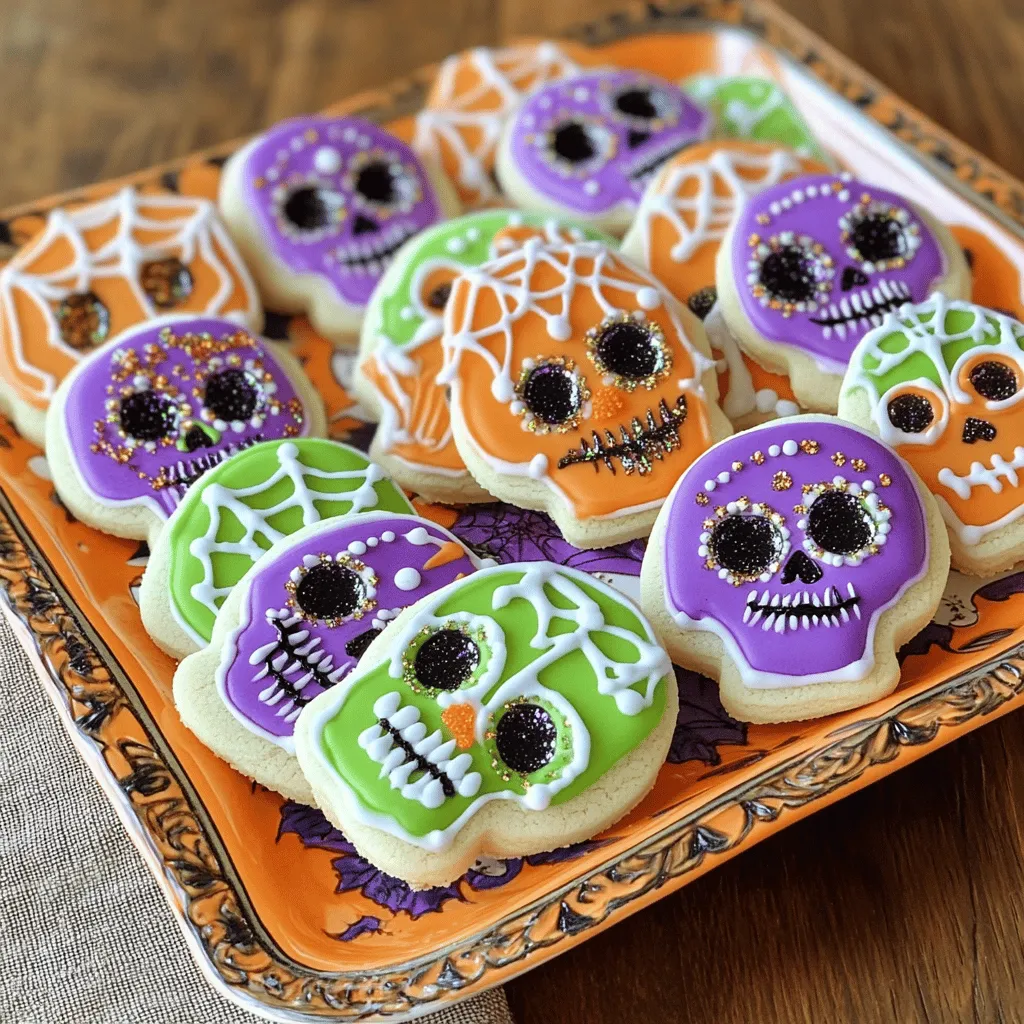
Decorating Techniques for a Spooky Finish
Now for the fun part: decorating! In a bowl, mix powdered sugar with a few tablespoons of water to make icing. You want it smooth and spreadable. Divide this icing into bowls and add food coloring to create spooky designs.
Using the colored icing, decorate your skull cookies. Try big eyes, flowers, or fun patterns. If you like sparkle, sprinkle some edible glitter on the wet icing.
Once the colored icing sets, use royal icing for fine details. This adds a professional touch to your cookies.
For the full recipe, check the earlier section. Enjoy your spooky treats!
Tips & Tricks
Common Mistakes to Avoid
When making Halloween cookies, avoid these common mistakes:
– Overmixing the dough: This makes cookies tough. Mix just until combined.
– Skipping the chill time: Chilling helps cookies hold their shape. Always refrigerate the dough.
– Not measuring ingredients: Use measuring cups for accuracy. This ensures the right texture.
– Baking at the wrong temperature: Always preheat your oven. Check your oven with a thermometer if needed.
How to Achieve Perfectly Iced Cookies
To get great icing on your cookies:
– Use the right consistency: Icing should be smooth and spreadable.
– Pipe with control: Use a piping bag for neat lines and designs.
– Work quickly: Icing dries fast. Decorate each cookie right after icing.
– Layer designs: Add details once the first layer sets. This creates depth.
Recommended Tools for Baking and Decorating
Great tools make cookie baking easier and more fun:
– Silicone baking mats: These prevent sticking and help with even baking.
– Rolling pin: A good rolling pin helps roll dough evenly.
– Cookie cutters: Get a variety of shapes for fun designs.
– Piping bags and tips: Use these for precise icing work.
– Offset spatula: This is great for spreading icing smoothly.
For a full recipe, check out my spooky sugar skull cookies!
Variations
Alternative Flavors for Halloween Cookies
You can be creative with flavors. Try adding spices like cinnamon or nutmeg. These spices bring warmth to your cookies. You can also use pumpkin puree for a fall twist. It adds moisture and a subtle sweetness. Another option is to use chocolate or peanut butter. These flavors pair well with spooky shapes.
Fun Shapes and Themes for Different Occasions
Halloween is all about fun shapes. Use cookie cutters to create ghosts, bats, and pumpkins. Kids love these shapes, and they are easy to decorate. For a party, consider themes like monsters or witches. You can create cookies that match your costume or party decor. These ideas make your treats extra special and memorable.
Gluten-Free and Vegan Options
Making gluten-free cookies is simple. Use almond flour or gluten-free flour blends. These flours give a nice texture without gluten. For vegan cookies, replace eggs with flaxseed meal. Mix one tablespoon of flaxseed with three tablespoons of water. Let it sit until it thickens. This mix works well as an egg substitute. You can use coconut oil instead of butter for a vegan option. These alternatives make your cookies inclusive for everyone.
For more ideas, check out the Full Recipe for Spooky Sugar Skull Cookies.
Storage Info
Best Practices for Storing Cookies
To keep your Halloween cookies fresh, store them in an airtight container. This helps maintain their texture and flavor. Place parchment paper between layers of cookies to prevent sticking. Do not expose cookies to heat or sunlight, as this can dry them out.
How Long Do Halloween Cookies Last?
Halloween cookies can last up to one week at room temperature. If you store them properly, they stay soft and tasty. For longer storage, consider freezing them.
Freezing Cookies for Future Enjoyment
Freezing cookies is simple! After they cool completely, place them in a single layer on a baking sheet. Freeze until firm, then transfer them to an airtight container or freezer bag. They can last up to three months in the freezer. When ready, thaw them at room temperature for a delightful treat! For the complete recipe, check out the Spooky Sugar Skull Cookies .
FAQs
How to Make Halloween Cookies in Advance?
You can make Halloween cookies ahead of time. First, prepare the dough and chill it. Wrap it tightly in plastic wrap and store it in the fridge for up to 3 days. For longer storage, freeze the wrapped dough for up to 3 months. When ready to bake, let the dough thaw in the fridge before rolling it out. This method keeps your cookies fresh and saves you time.
What are the Best Cookie Cutters for Halloween?
I love using fun shapes for Halloween cookies! The best cookie cutters include skulls, bats, pumpkins, and ghosts. These shapes add a spooky touch to your treats. Look for sturdy metal or plastic cutters that will hold their shape. You can also find sets that include various sizes to create a fun mix.
Can I use store-bought icing?
Yes, store-bought icing is a great option! It saves you time and effort. You can find many flavors and colors in stores. Just make sure to choose a thick icing for decorating. If you want to add more flair, mix in some food coloring or edible glitter. This will make your Halloween cookies even more festive.
– Full Recipe Reference: Spooky Sugar Skull Cookies
Making Halloween cookies can be a fun and tasty project. We covered key ingredients, step-by-step baking, and clever decorating tips. I shared ways to avoid common mistakes and the best tools to use. Don’t forget about variations, like gluten-free or vegan options. Proper storage lets you enjoy these treats longer.
With some practice, you can create not just cookies but spooky masterpieces for any occasion. Happy baking!
