Halloween Chocolate Chip Sugar Cookies Irresistible Treat

WANT TO SAVE THIS RECIPE?

Get ready to bake some magic this Halloween! These Halloween Chocolate Chip Sugar Cookies are the perfect blend of sweet and spooky. With simple ingredients and fun decorations, you’ll charm everyone at your gathering. I’ll guide you through the easy steps to make these tempting treats. Whether you’re a baking pro or a novice, these cookies will bring out your inner festive spirit. Let’s jump in and make something delicious!

Ingredients

Main Ingredients for Halloween Chocolate Chip Sugar Cookies

– 2 ¾ cups all-purpose flour

– 1 cup unsalted butter, softened

– 1 cup granulated sugar

– ½ cup brown sugar

– 1 large egg

The base of our cookies starts with flour, butter, and sugars. Flour gives structure, while butter adds rich flavor. Granulated sugar makes them sweet, and brown sugar adds moisture and a hint of caramel taste. The egg helps bind everything together.

Special Additions

– 1 cup semi-sweet chocolate chips

– ½ cup spooky-themed sprinkles

– Optional: Food coloring (orange or black)

Chocolate chips give a delicious bite to each cookie. The spooky sprinkles add fun and festivity. If you want to make the cookies extra festive, add a splash of food coloring. This makes the dough even more fun and colorful for Halloween!

Baking Essentials

– 1 tsp baking soda

– ½ tsp salt

– Parchment paper for baking

Baking soda helps the cookies rise and become soft. Salt enhances the flavors and balances the sweetness. Parchment paper ensures easy cleanup and prevents sticking. Using these essentials will help you bake perfect cookies every time.

You can find the full recipe at the bottom of the article to make these delightful treats!

Step-by-Step Instructions

Prepping the Oven and Baking Sheet

– Preheat your oven to 350°F (175°C).

– Line your baking sheet with parchment paper.

First, turning on your oven is crucial. This step ensures your cookies bake evenly. Parchment paper helps cookies come off the sheet easily. It also makes cleanup a breeze.

Mixing Dry and Wet Ingredients

– Whisk together flour, baking soda, and salt.

– Cream butter, granulated sugar, and brown sugar.

In a medium bowl, whisk the flour, baking soda, and salt. This mix forms the base of our cookies. Then, in a large bowl, beat the softened butter with both sugars. You want it light and fluffy. This process takes about 2-3 minutes.

Combining Mixtures and Adding Flavor

– Incorporate egg and vanilla extract.

– Mix in food coloring (optional).

– Add dry ingredients to wet ingredients.

Next, add the egg and vanilla to the butter-sugar mix. Beat until everything blends well. If you want a spooky touch, add food coloring now. Mix until you see your desired color. Then, gently fold in the dry mix. Be careful not to overmix. This keeps your cookies soft.

These steps lead to a delicious dough. Ready to scoop onto the baking sheet? Follow the full recipe for the next steps!

Tips & Tricks

Perfecting the Cookie Texture

To get the best cookies, avoid overmixing. Mix until the dough is just combined. This keeps your cookies soft and chewy. When you add the dry mix to the wet mix, stir gently. If you mix too much, the cookies can become tough.

For baking time, I recommend 10 to 12 minutes. Keep an eye on them. You want the edges to be light golden. The centers may look underbaked, but they will set as they cool.

Enhancing Flavor and Appearance

Choosing the right chocolate chips is key. I love using semi-sweet chocolate chips. They melt well and give a rich taste. A popular brand is Ghirardelli, but any good quality chips will work.

Adding food coloring can make your cookies pop. Use orange or black for a festive look. Just a few drops will create a fun effect. Mix it in with your wet ingredients for even color.

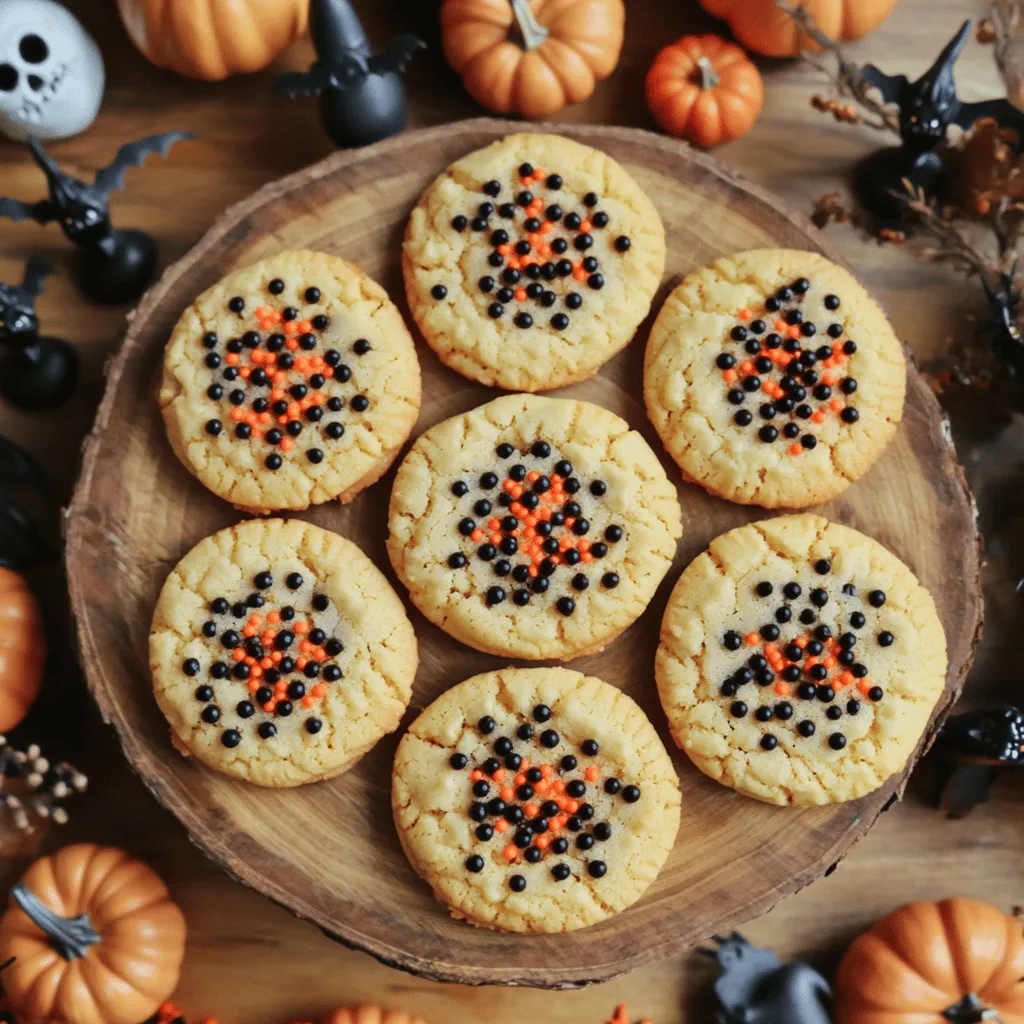
Presenting Your Halloween Cookies

When it comes to serving, think fun! Arrange cookies on a spooky platter. You can add extra sprinkles on top or drizzle melted chocolate for flair.

For display, place mini pumpkins or ghost figurines around the cookies. This adds to the Halloween spirit. Your friends and family will love the effort and enjoy these tasty treats!

Variations

Dietary Substitutions

For a gluten-free cookie, swap the all-purpose flour with a gluten-free blend. This works well and keeps the cookies tasty. Look for brands that have xanthan gum to help with the texture.

If you want a vegan option, replace the butter with coconut oil or a plant-based butter. You can use a flax egg instead of the large egg. To make a flax egg, mix one tablespoon of ground flaxseed with three tablespoons of water. Let it sit for a few minutes until it thickens.

Flavor Variations

You can change the flavor of your cookies by adding nuts, like walnuts or pecans. These add a nice crunch and taste. You can also use different types of chocolate chips, such as dark or milk chocolate.

Flavored extracts can take your cookies to the next level. Try using almond or pumpkin spice for a special twist. Just a few drops can make a big difference.

Themed Ideas for Halloween

Get creative with spooky shapes! Use cookie cutters to create ghosts, bats, or pumpkins. Kids love helping with this fun part.

Decorating with icing can add extra Halloween flair. Use colored icing to make your cookies look festive. Add fun designs like spider webs or faces. This makes your cookies not only tasty but also a treat for the eyes.

For the full recipe, check out the details above!

Storage Info

Storing Your Cookies

To keep your Halloween chocolate chip sugar cookies fresh, store them in an airtight container. This helps maintain their softness and prevents them from drying out. You can use:

– Plastic storage containers

– Glass jars with lids

– Ziplock bags

Make sure the cookies are completely cool before packing them. If you stack the cookies, place parchment paper between layers to avoid sticking.

Freezing for Later Enjoyment

Freezing is a great way to enjoy these cookies later. You can freeze both the dough and the baked cookies. To freeze the dough, scoop it into balls and place them on a baking sheet. Freeze until solid, then transfer to a ziplock bag. For baked cookies, let them cool completely before freezing.

Thawing: To thaw dough, leave it in the fridge overnight. For baked cookies, let them sit at room temperature for a few hours.

Reheating: Warm baked cookies in the oven at 350°F for about 5 minutes.

Cookie Shelf Life

At room temperature, your cookies will last for about 5 to 7 days. Keep them stored properly to extend their freshness.

Look for these signs of spoilage:

– Change in texture (hard or dry)

– Off smell

– Mold growth

Enjoy your treats while they are fresh and tasty!

FAQs

How do I make my cookies chewy instead of crunchy?

To make chewy cookies, you need to adjust the baking time. Bake them for less time. Check them at 10 minutes. The edges should be lightly golden. The centers can look soft. They will firm up as they cool. You can also lower the temperature to 325°F (163°C). This helps keep them chewy.

Can I make these cookies ahead of time?

Yes, you can make these cookies ahead of time. You can prepare the dough and store it. Cover the dough tightly with plastic wrap. This will keep it fresh in the fridge for up to three days. When ready to bake, scoop and place on a baking sheet. You can also freeze the dough. It lasts up to three months in the freezer. Just thaw it in the fridge before baking.

What can I use if I don’t have spooky-themed sprinkles?

If you don’t have spooky sprinkles, don’t worry! You can use regular sprinkles. Colors like orange or purple work well. You can also use chopped nuts, mini candies, or chocolate pieces. These will still make your cookies fun and festive. Get creative with what you have!

In this post, we covered making Halloween chocolate chip sugar cookies. We talked about key ingredients, special additions, and baking essentials. I shared step-by-step instructions for perfect cookies. You learned tips for texture, flavor, and fun presentations. We also discussed variations for diets and creative designs. Lastly, I provided storage tips to keep your treats fresh.

Enjoy baking these festive cookies. They are sure to bring joy this Halloween season!

- 2 ¾ cups all-purpose flour - 1 cup unsalted butter, softened - 1 cup granulated sugar - ½ cup brown sugar - 1 large egg The base of our cookies starts with flour, butter, and sugars. Flour gives structure, while butter adds rich flavor. Granulated sugar makes them sweet, and brown sugar adds moisture and a hint of caramel taste. The egg helps bind everything together. - 1 cup semi-sweet chocolate chips - ½ cup spooky-themed sprinkles - Optional: Food coloring (orange or black) Chocolate chips give a delicious bite to each cookie. The spooky sprinkles add fun and festivity. If you want to make the cookies extra festive, add a splash of food coloring. This makes the dough even more fun and colorful for Halloween! - 1 tsp baking soda - ½ tsp salt - Parchment paper for baking Baking soda helps the cookies rise and become soft. Salt enhances the flavors and balances the sweetness. Parchment paper ensures easy cleanup and prevents sticking. Using these essentials will help you bake perfect cookies every time. You can find the full recipe at the bottom of the article to make these delightful treats! - Preheat your oven to 350°F (175°C). - Line your baking sheet with parchment paper. First, turning on your oven is crucial. This step ensures your cookies bake evenly. Parchment paper helps cookies come off the sheet easily. It also makes cleanup a breeze. - Whisk together flour, baking soda, and salt. - Cream butter, granulated sugar, and brown sugar. In a medium bowl, whisk the flour, baking soda, and salt. This mix forms the base of our cookies. Then, in a large bowl, beat the softened butter with both sugars. You want it light and fluffy. This process takes about 2-3 minutes. - Incorporate egg and vanilla extract. - Mix in food coloring (optional). - Add dry ingredients to wet ingredients. Next, add the egg and vanilla to the butter-sugar mix. Beat until everything blends well. If you want a spooky touch, add food coloring now. Mix until you see your desired color. Then, gently fold in the dry mix. Be careful not to overmix. This keeps your cookies soft. These steps lead to a delicious dough. Ready to scoop onto the baking sheet? Follow the full recipe for the next steps! To get the best cookies, avoid overmixing. Mix until the dough is just combined. This keeps your cookies soft and chewy. When you add the dry mix to the wet mix, stir gently. If you mix too much, the cookies can become tough. For baking time, I recommend 10 to 12 minutes. Keep an eye on them. You want the edges to be light golden. The centers may look underbaked, but they will set as they cool. Choosing the right chocolate chips is key. I love using semi-sweet chocolate chips. They melt well and give a rich taste. A popular brand is Ghirardelli, but any good quality chips will work. Adding food coloring can make your cookies pop. Use orange or black for a festive look. Just a few drops will create a fun effect. Mix it in with your wet ingredients for even color. When it comes to serving, think fun! Arrange cookies on a spooky platter. You can add extra sprinkles on top or drizzle melted chocolate for flair. For display, place mini pumpkins or ghost figurines around the cookies. This adds to the Halloween spirit. Your friends and family will love the effort and enjoy these tasty treats! {{image_4}} For a gluten-free cookie, swap the all-purpose flour with a gluten-free blend. This works well and keeps the cookies tasty. Look for brands that have xanthan gum to help with the texture. If you want a vegan option, replace the butter with coconut oil or a plant-based butter. You can use a flax egg instead of the large egg. To make a flax egg, mix one tablespoon of ground flaxseed with three tablespoons of water. Let it sit for a few minutes until it thickens. You can change the flavor of your cookies by adding nuts, like walnuts or pecans. These add a nice crunch and taste. You can also use different types of chocolate chips, such as dark or milk chocolate. Flavored extracts can take your cookies to the next level. Try using almond or pumpkin spice for a special twist. Just a few drops can make a big difference. Get creative with spooky shapes! Use cookie cutters to create ghosts, bats, or pumpkins. Kids love helping with this fun part. Decorating with icing can add extra Halloween flair. Use colored icing to make your cookies look festive. Add fun designs like spider webs or faces. This makes your cookies not only tasty but also a treat for the eyes. For the full recipe, check out the details above! To keep your Halloween chocolate chip sugar cookies fresh, store them in an airtight container. This helps maintain their softness and prevents them from drying out. You can use: - Plastic storage containers - Glass jars with lids - Ziplock bags Make sure the cookies are completely cool before packing them. If you stack the cookies, place parchment paper between layers to avoid sticking. Freezing is a great way to enjoy these cookies later. You can freeze both the dough and the baked cookies. To freeze the dough, scoop it into balls and place them on a baking sheet. Freeze until solid, then transfer to a ziplock bag. For baked cookies, let them cool completely before freezing. - Thawing: To thaw dough, leave it in the fridge overnight. For baked cookies, let them sit at room temperature for a few hours. - Reheating: Warm baked cookies in the oven at 350°F for about 5 minutes. At room temperature, your cookies will last for about 5 to 7 days. Keep them stored properly to extend their freshness. Look for these signs of spoilage: - Change in texture (hard or dry) - Off smell - Mold growth Enjoy your treats while they are fresh and tasty! To make chewy cookies, you need to adjust the baking time. Bake them for less time. Check them at 10 minutes. The edges should be lightly golden. The centers can look soft. They will firm up as they cool. You can also lower the temperature to 325°F (163°C). This helps keep them chewy. Yes, you can make these cookies ahead of time. You can prepare the dough and store it. Cover the dough tightly with plastic wrap. This will keep it fresh in the fridge for up to three days. When ready to bake, scoop and place on a baking sheet. You can also freeze the dough. It lasts up to three months in the freezer. Just thaw it in the fridge before baking. If you don’t have spooky sprinkles, don’t worry! You can use regular sprinkles. Colors like orange or purple work well. You can also use chopped nuts, mini candies, or chocolate pieces. These will still make your cookies fun and festive. Get creative with what you have! In this post, we covered making Halloween chocolate chip sugar cookies. We talked about key ingredients, special additions, and baking essentials. I shared step-by-step instructions for perfect cookies. You learned tips for texture, flavor, and fun presentations. We also discussed variations for diets and creative designs. Lastly, I provided storage tips to keep your treats fresh. Enjoy baking these festive cookies. They are sure to bring joy this Halloween season!

Halloween Chocolate Chip Sugar Cookies

Get ready to celebrate Halloween with these delightful Halloween Chocolate Chip Sugar Cookies! This easy recipe blends buttery sweetness with chocolatey goodness and a fun sprinkle of spooky themes. Perfect for gatherings or a festive treat at home, these cookies are sure to impress. Click through to discover the full recipe and tips to make your Halloween extra delicious and fun!

Ingredients
  

2 ¾ cups all-purpose flour

1 tsp baking soda

½ tsp salt

1 cup unsalted butter, softened to room temperature

1 cup granulated sugar

½ cup brown sugar, packed firmly

1 large egg

1 tsp vanilla extract

1 cup semi-sweet chocolate chips

½ cup spooky-themed sprinkles (witches, ghosts, etc.)

Optional: Food coloring (orange or black for a festive flair)

Instructions
 

Begin by preheating your oven to 350°F (175°C) and prepare a baking sheet by lining it with parchment paper for easy cookie removal later.

    In a medium-sized bowl, whisk together the all-purpose flour, baking soda, and salt until well combined. Set this dry mixture aside for later use.

      In a large mixing bowl, use an electric mixer to beat together the softened butter, granulated sugar, and packed brown sugar. Mix until the mixture is light and fluffy, which should take about 2-3 minutes.

        Next, add in the large egg and vanilla extract to your butter-sugar mixture, and continue to beat until everything is thoroughly blended together.

          If you’re feeling festive, add a few drops of food coloring to the bowl at this stage. Mix until you achieve a vibrant color of your choice.

            Carefully incorporate the dry ingredients into the wet mixture, stirring until just combined. Be mindful not to overmix so that your cookies will remain tender.

              Gently fold in the semi-sweet chocolate chips and spooky sprinkles, ensuring they are evenly distributed throughout the cookie dough.

                Using a tablespoon or a cookie scoop, drop rounded balls of dough onto the prepared baking sheet. Make sure to leave about 2 inches between each cookie to allow for spreading while baking.

                  Place the baking sheet in the preheated oven and bake for 10-12 minutes, or until the edges of the cookies turn a light golden color. The centers may seem slightly underbaked but will complete the cooking process as they cool.

                    Once baked, remove the cookies from the oven and allow them to cool on the baking sheet for 5 minutes. After this time, transfer them to a wire rack to cool completely.

                      Prep Time: 15 minutes | Total Time: 30 minutes | Servings: 24 cookies

                        - Presentation Tips: Arrange the cooled cookies on a decorative platter and consider garnishing them with extra sprinkles or a drizzle of melted chocolate for that added festive element. To enhance the Halloween spirit, place a small decorative pumpkin or some spooky figurines around the cookies when presenting them. Enjoy this sweet treat with your friends and family!

                          WANT TO SAVE THIS RECIPE?