Craving a sweet treat that’s easy to make? Look no further! These No-Bake Peanut Butter Bars are simple, tasty, and perfect for any occasion. You just need a few ingredients like creamy peanut butter, oats, and honey. In this post, I’ll guide you step-by-step to whip up these mouthwatering bars. Let’s dive into this delicious recipe that will satisfy your sweet tooth without turning on the oven!
Ingredients
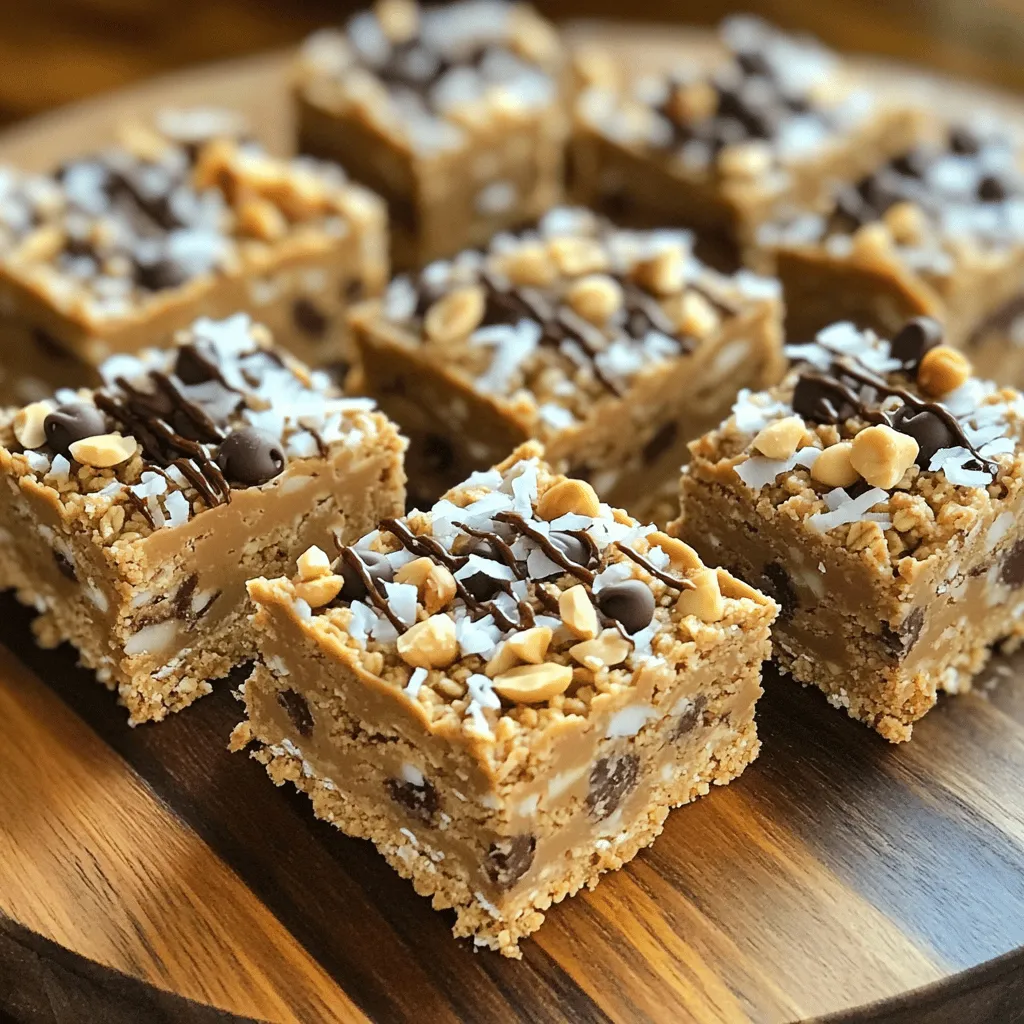
To make these no-bake peanut butter bars, gather these simple ingredients:
– 1 cup creamy peanut butter
– 1 cup rolled oats
– 1/2 cup honey or maple syrup
– 1/2 cup chocolate chips (semi-sweet or dark)
– 1/4 cup shredded coconut (unsweetened)
– 1/4 teaspoon salt
– Optional toppings: chopped nuts, seeds, or a drizzle of melted chocolate
These ingredients are easy to find and combine well for a tasty treat. I love using creamy peanut butter for smoothness, but you can switch to crunchy if you prefer a bit of texture. Rolled oats provide a hearty base, while honey or maple syrup adds just the right amount of sweetness. Chocolate chips give a rich flavor, and coconut adds a fun twist.
Feel free to customize your bars! You can add chopped nuts or seeds for more crunch. A drizzle of melted chocolate on top makes them even more special. These bars are not only simple to prepare but also fun to adapt. Check out the Full Recipe for detailed steps!
Step-by-Step Instructions
Detailed Preparation Steps
1. Mixing the peanut butter and honey
Start by adding the creamy peanut butter and honey to a large bowl. Use a spatula to mix them well. Keep mixing until the blend is smooth and creamy.
2. Combining dry ingredients with the wet mixture
Next, add the rolled oats, shredded coconut, and salt to the bowl. Gently fold these dry ingredients into the peanut butter mix. Make sure everything is well combined. You don’t want any dry spots left behind.
3. Lining the baking dish and pressing the mixture
Grab an 8×8 inch baking dish and line it with parchment paper. Leave some paper hanging over the edges. This will help you lift the bars out later. Once lined, pour the peanut butter mix into the dish. Use your hands or a spatula to press it down firmly. Make sure you create an even layer.
Setting and Slicing
1. Refrigeration time and conditions
Cover the dish with plastic wrap. Place it in the fridge for about 1 to 2 hours. This will let the bars set and become firm. Check after an hour to see if they feel solid.
2. How to slice the bars evenly
Once the bars are set, use the parchment paper to lift them out. Place the slab on a cutting board. Use a sharp knife to slice it into squares or rectangles. Try to cut evenly for a nice look.
For a detailed recipe, check out the Full Recipe.
Tips & Tricks
Perfecting the Texture
To make your no-bake peanut butter bars smooth, mix the peanut butter and honey well. Use a spatula and blend until creamy. This smooth base keeps the bars from being gritty. After mixing, fold in the oats and coconut gently. This helps keep the texture light and airy.
When pressing the mixture into the baking dish, use your hands or a spatula. Press firmly and evenly to create a solid layer. If you don’t press hard enough, the bars may crumble later. Aim for a flat top for better slicing later.
Serving Suggestions
For a beautiful presentation, serve the bars chilled on a nice platter. You can add a sprinkle of shredded coconut on top. This adds a pop of color and makes them look more appealing. You can also place a few whole nuts around the bars for a rustic touch.
Pair these bars with a glass of cold milk or a warm cup of coffee. They make a great snack or dessert. If you want to impress guests, try serving them with fresh fruit. Berries or banana slices add a nice balance to the rich peanut flavor.

Variations
Flavor Enhancements
You can mix flavors in many fun ways. First, try using different nut butters. Almond or cashew butter can add a unique taste. Each nut butter brings its own flair. You can also experiment with toppings. Crushed pretzels add crunch and a salty bite. Dried fruits like cranberries or apricots give a sweet twist. These small changes keep your bars fresh and exciting.
Dietary Adjustments
If you follow a vegan diet, swap honey for maple syrup. This simple switch makes your bars plant-based. For a gluten-free option, use gluten-free oats. These changes keep the taste without losing texture. If you want to lower sugar, consider using a sugar substitute. Stevia or monk fruit can work well here. You can enjoy the same great flavor while being mindful of sugar intake.
Storage Info
Best Storage Practices
To keep your no-bake peanut butter bars fresh, use an airtight container. A glass or plastic container works well. Layer parchment paper between bars to prevent sticking. This keeps them intact and easy to grab. Store the bars in the fridge. The cool air helps maintain their texture and taste.
Shelf Life
These bars can last about one week in the fridge. After that, they may start to lose flavor and texture. Look for a change in smell or color as signs they have gone bad. If they feel too soft or sticky, it’s best to toss them. Always check before you take a bite!
FAQs
Common Questions
Can I use crunchy peanut butter instead of creamy?
Yes, you can use crunchy peanut butter. It adds a fun texture. Just keep in mind, it may change the bar’s consistency slightly. The flavors will still be great!
How can I make these bars healthier?
To make these bars healthier, you can:
– Use natural peanut butter with no added sugar.
– Replace honey or maple syrup with mashed bananas.
– Add more oats for fiber.
– Incorporate seeds like chia or flax for extra nutrients.
What can I substitute for honey or maple syrup?
You can use agave nectar or brown rice syrup. If you want a lower-calorie option, try stevia or monk fruit sweetener. Just adjust the amount based on sweetness.
Troubleshooting
What to do if the mixture is too crumbly?
If the mixture is too crumbly, add a bit more peanut butter or honey. Mix it well until it sticks together. You can also try adding a splash of water or milk.
How to fix overly sticky bars?
If your bars are too sticky, sprinkle in more oats or shredded coconut. Mix until it feels right. You can also chill the bars longer to help them firm up.
We covered key ingredients like peanut butter, oats, and honey for your energy bars. I shared step-by-step instructions to help you mix and set them right. You learned useful tips to get the best texture and serving ideas. We also explored tasty variations and storage info to keep your bars fresh.
Feel confident to customize your bars and enjoy a delicious snack. Cooking is fun, so get creative!
No-Bake Peanut Butter Bars
Delicious and easy-to-make no-bake bars made with peanut butter, oats, and chocolate.
Ingredients
Instructions
- 1
Begin by placing the creamy peanut butter and honey (or maple syrup) in a large mixing bowl. Use a spatula to thoroughly mix them together until the mixture is smooth and homogenous.
- 2
Next, gently fold in the rolled oats, shredded coconut, and salt. Stir until all dry ingredients are fully combined with the peanut butter mixture, ensuring there are no dry patches.
- 3
Carefully add the chocolate chips to the bowl and fold them in. Aim for an even distribution throughout the mixture while being mindful not to break the chips.
- 4
Prepare an 8x8 inch baking dish by lining it with parchment paper. Make sure to leave some overhang on the sides, as this will help you remove the bars later with ease.
- 5
Pour the peanut butter mixture into the prepared baking dish. Use a spatula or your hands to press the mixture down firmly and evenly, forming a solid layer.
- 6
If you’d like, scatter additional chopped nuts or seeds atop the mixture for enhanced texture, or drizzle with melted chocolate for an extra sweet touch.
- 7
Cover the dish with plastic wrap and refrigerate for a minimum of 1-2 hours, or until the mixture has fully set and is firm to the touch.
- 8
Once the bars have set, lift them out of the baking dish using the parchment paper overhang. Slice the chilled slab into squares or rectangles for serving.
Chef's Notes
Serve chilled and consider garnishing with shredded coconut or nuts.


Recipe Creator
Remy
I’m Chef Remy, your recipe companion, here to bring warmth, bold taste, and simplicity to your kitchen.
View My Recipes