
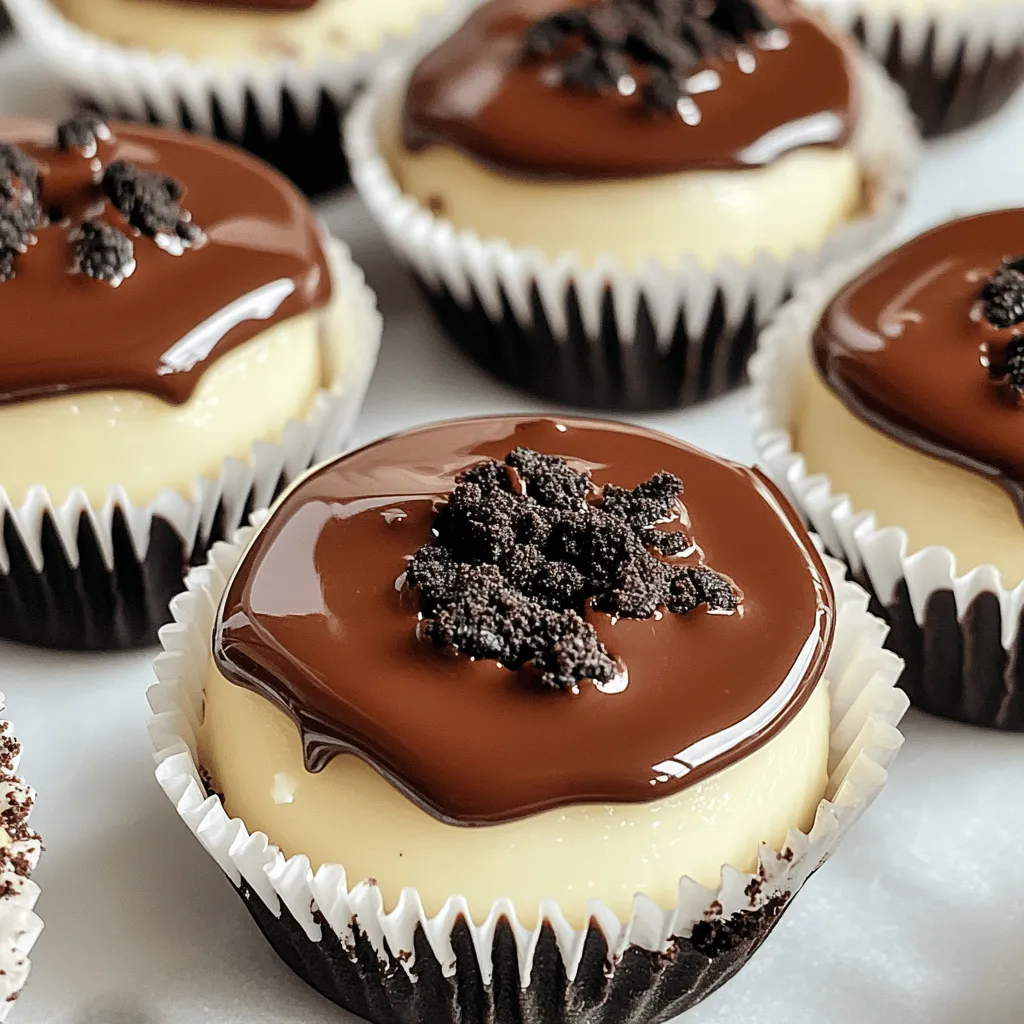
Craving a delicious dessert that’s easy to make? Look no further! These No-Bake Oreo Cheesecake Minis are the perfect treat for any occasion. With a simple crust made from Oreo cookies and a creamy cheesecake filling, you’ll impress friends and family with minimal effort. Let me guide you through a delightful recipe that is both fun and rewarding. Get ready to satisfy your sweet tooth!
Ingredients
When making No-Bake Oreo Cheesecake Minis, having the right ingredients is key. Let’s take a look at what you’ll need.
Main Ingredients List
– 24 Oreo cookies, finely crushed (plus extra for topping)
– 4 tablespoons unsalted butter, melted
– 8 oz cream cheese, softened at room temperature
– 1/2 cup powdered sugar
– 1 teaspoon pure vanilla extract
– 1 cup heavy whipping cream, chilled
– 1/4 cup chocolate ganache (optional for drizzling)
Each ingredient plays a role in creating that creamy texture and rich flavor. The Oreo cookies form the perfect sweet crust and topping. The unsalted butter helps bind the crust together and adds richness. Cream cheese is the star of the show, offering a creamy base that is hard to resist.
Powdered sugar adds sweetness without grittiness, while vanilla extract enhances the overall flavor. Heavy whipping cream brings lightness to the filling, making it fluffier. If you want to elevate your treats, a drizzle of chocolate ganache is a delightful option.
For the full recipe, check the recipe section. Remember, fresh ingredients yield the best results. Enjoy gathering these items; it’s the first step to making a delicious dessert!
Step-by-Step Instructions
Prepare the Crust
To start, take 24 Oreo cookies and crush them well. You want fine crumbs for the crust. Next, mix these crumbs with 4 tablespoons of melted butter. Stir until the mixture feels like wet sand. Now, grab a mini muffin tin and line each cup with cupcake liners. Spoon about 1 tablespoon of the Oreo mixture into each liner. Use your fingers or the back of a spoon to press the mixture firmly down. This helps form a strong crust. Set the tin aside to let it firm up as you move on to the filling.
Make the Cheesecake Filling
In a large bowl, place 8 oz of softened cream cheese. Beat it with an electric mixer until it is smooth. This should take around 2-3 minutes. Next, sift in 1/2 cup of powdered sugar. Add 1 teaspoon of pure vanilla extract at the same time. Continue mixing until everything is well combined and free of lumps.
Combine and Chill
Now it’s time to make it fluffy! In another bowl, pour in 1 cup of chilled heavy whipping cream. Whip it on high speed until you see stiff peaks form. This will take about 3-5 minutes. Carefully fold the whipped cream into the cream cheese mixture using a spatula. Be gentle to keep it airy. Once combined, scoop the cheesecake filling into each crust. Fill them right to the top. Use a spatula to smooth the tops. Cover the muffin tin with plastic wrap and chill in the fridge for at least 4 hours. This step helps the cheesecakes set up perfectly.
Add crushed Oreo cookies on top before you serve them. You can also drizzle with chocolate ganache for extra fun. For the full recipe and more details, check out the [Full Recipe].
Tips & Tricks
Achieving the Perfect Texture
To get the best texture for your No-Bake Oreo Cheesecake Minis, start with the cream cheese. Beat it well until it’s smooth. Use a medium speed on your mixer for about 2-3 minutes. This helps to avoid lumps. Next, chill your heavy whipping cream before using it. Cold cream whips better and adds fluffiness. When you whip it, aim for stiff peaks. This will give your cheesecake a light and airy feel.
Serving Suggestions
For a beautiful presentation, place the cheesecake minis on a nice platter. You can add crushed Oreos on top for style. You could also sprinkle some mint leaves or chocolate shavings around them. Pair these treats with coffee or dessert wines. The rich creaminess of the cheesecake balances well with a nice cup of coffee.
Common Mistakes to Avoid
One common mistake is overmixing the cream. When you fold the whipped cream into the cream cheese, do it gently. This keeps the texture airy. Another mistake is not chilling the cheesecake long enough. Make sure to refrigerate for at least 4 hours. This helps the cheesecakes set properly and hold their shape. Following these tips will help you create perfect mini cheesecakes every time. For the full recipe, check the earlier section.
Variations
Flavor Twists
You can easily switch up the flavors of your No-Bake Oreo Cheesecake Minis. One fun way is by adding different extracts. For example, almond extract gives a nice twist. Just use a half teaspoon for that extra touch. You can also mix in other cookies like chocolate chip. This change adds fun and new tastes to your treats.
Dietary Modifications
If you need gluten-free options, swap out the regular Oreo cookies for gluten-free ones. Many brands now offer this choice, so it’s easy to find. For vegan alternatives, use vegan cream cheese and coconut cream instead of heavy whipping cream. These changes keep the taste great while meeting dietary needs.
Size and Style Variations
You can make larger cheesecakes if you prefer. Just use a springform pan instead of a mini muffin tin. Adjust the baking time and use the same filling. If you want a traditional cheesecake look, pour the filling into a pie dish. This way, you can serve slices instead of minis.
For the full recipe, check the main article.
Storage Info
How to Store Leftovers
To keep your No-Bake Oreo Cheesecake Minis fresh, place them in an airtight container. This helps to lock in moisture and flavor. Store them in the fridge for up to 5 days. If you want to keep them longer, consider freezing them for up to 3 months. Just make sure to wrap each mini well in plastic wrap before placing them in a freezer bag.
Reheating Instructions
You don’t need to reheat these treats. They taste best chilled. If you freeze them, allow them to thaw in the fridge overnight. This way, they regain their creamy texture. For serving, just take them out of the fridge, add your toppings, and enjoy!
FAQs
How long do No-Bake Oreo Cheesecake Minis last in the fridge?
These cheesecake minis last about 5 days in the fridge. Store them in an airtight container. This keeps them fresh and tasty. Before serving, check for any signs of spoilage. Always use clean utensils to avoid contamination.
Can I use low-fat cream cheese?
Yes, you can use low-fat cream cheese. However, it may alter the taste and texture. The cheesecake might be less creamy and rich. It can still work, but the flavor may not be as bold. Choosing full-fat cream cheese gives the best results.
Can I make this recipe ahead of time?
Absolutely! You can make these cheesecake minis a day before your event. This saves time and stress on the day of the party. Just be sure to store them in the fridge. They will set perfectly and taste great the next day.
How to make these gluten-free?
To make these gluten-free, use gluten-free Oreo cookies. This simple swap keeps all the flavors while avoiding gluten. Check the labels on the cream cheese and toppings to ensure they are also gluten-free. Enjoy these treats without worry!
For the full recipe, follow the steps above.
You now have all the steps to make No-Bake Oreo Cheesecake Minis. Start with your crust using Oreo cookies and butter. Then, create a smooth filling with cream cheese, powdered sugar, and whipped cream. Remember the tips on texture and serving ideas. You can personalize your recipe with flavors or dietary options.
With the right storage, these treats will stay fresh and tasty. Enjoy making these fun desserts for your next gathering! Your friends will love them. Keep experimenting and savoring each bite!
No-Bake Oreo Cheesecake Minis
Delicious mini cheesecakes made with crushed Oreos and a creamy filling, perfect for a sweet treat.
Ingredients
Instructions
- 1
In a medium mixing bowl, combine the finely crushed Oreo cookies and melted butter. Stir well until the mixture resembles wet sand and holds together when pressed.
- 2
Take a mini muffin tin and line each cup with cupcake liners. Spoon about 1 tablespoon of the Oreo mixture into each liner. Use the back of a spoon or your fingers to firmly press the mixture down, ensuring a compact crust. Set aside to firm up.
- 3
In a large mixing bowl, use an electric mixer to beat the softened cream cheese. Mix on medium speed until it becomes smooth and creamy, about 2-3 minutes.
- 4
Gradually sift in the powdered sugar while continuing to beat, adding the vanilla extract as you mix. Ensure everything is fully combined and the mixture is free of lumps.
- 5
In a separate chilled bowl, pour in the heavy whipping cream. Whip using an electric mixer on high speed until stiff peaks form, which will take about 3-5 minutes.
- 6
Carefully fold the whipped cream into the cream cheese mixture. Use a spatula and gently combine until just incorporated, being mindful to retain the airy texture of the whipped cream.
- 7
Using a spoon or a piping bag, fill each Oreo crust in the muffin tin with the cheesecake filling, ensuring to fill right up to the top.
- 8
Once filled, smooth the tops with a spatula. Cover the muffin tin with plastic wrap and refrigerate for at least 4 hours, or until the cheesecakes are set and firm.
- 9
Before serving, sprinkle crushed Oreo cookies on top of each cheesecake mini for garnish, and if desired, drizzle with chocolate ganache for an added touch of indulgence.
Chef's Notes
For a delightful touch, place the cheesecake minis on a decorative platter and garnish with mint leaves or chocolate shavings alongside the mini cheesecakes.


Recipe Creator
Remy
I’m Chef Remy, your recipe companion, here to bring warmth, bold taste, and simplicity to your kitchen.
View My Recipes