Are you ready to impress with a delicious dessert that’s easy to make? Mini Tiramisu Cups are your perfect solution! Layers of creamy mascarpone, soaked ladyfingers, and rich coffee come together in these delightful treats. You’ll love how simple they are to prepare and how elegant they look. Let’s dive into the steps, tips, and tricks to create these tasty cups that everyone will adore!
Ingredients for Mini Tiramisu Cups
To create delightful mini tiramisu cups, you’ll need a few essential ingredients. Each one plays a key role in making this treat both rich and tasty.
– 1 cup of strong brewed coffee, cooled to room temperature
– 1 teaspoon of pure vanilla extract
– 1 cup of mascarpone cheese, softened
– 1 cup of heavy whipping cream
– 1/2 cup of powdered sugar, sifted
– 1 cup of ladyfinger cookies, coarsely crushed
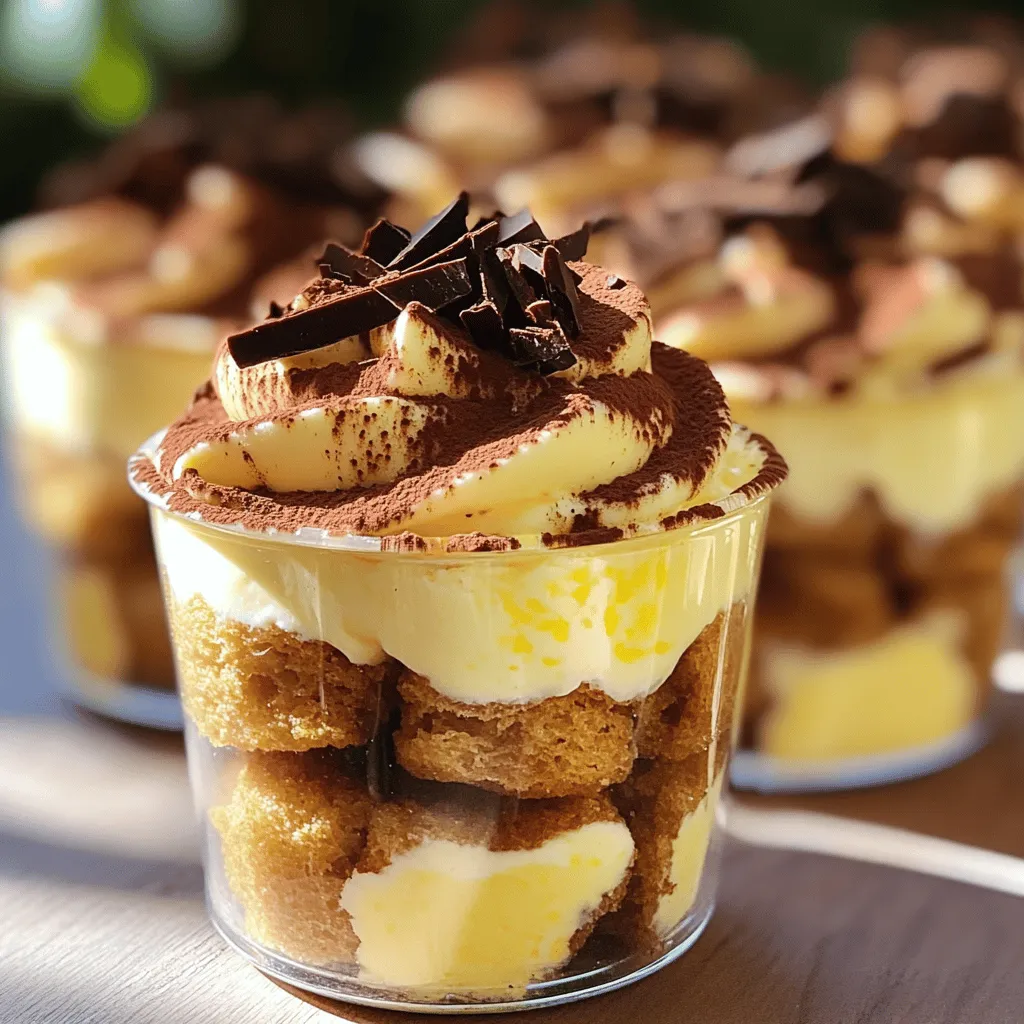
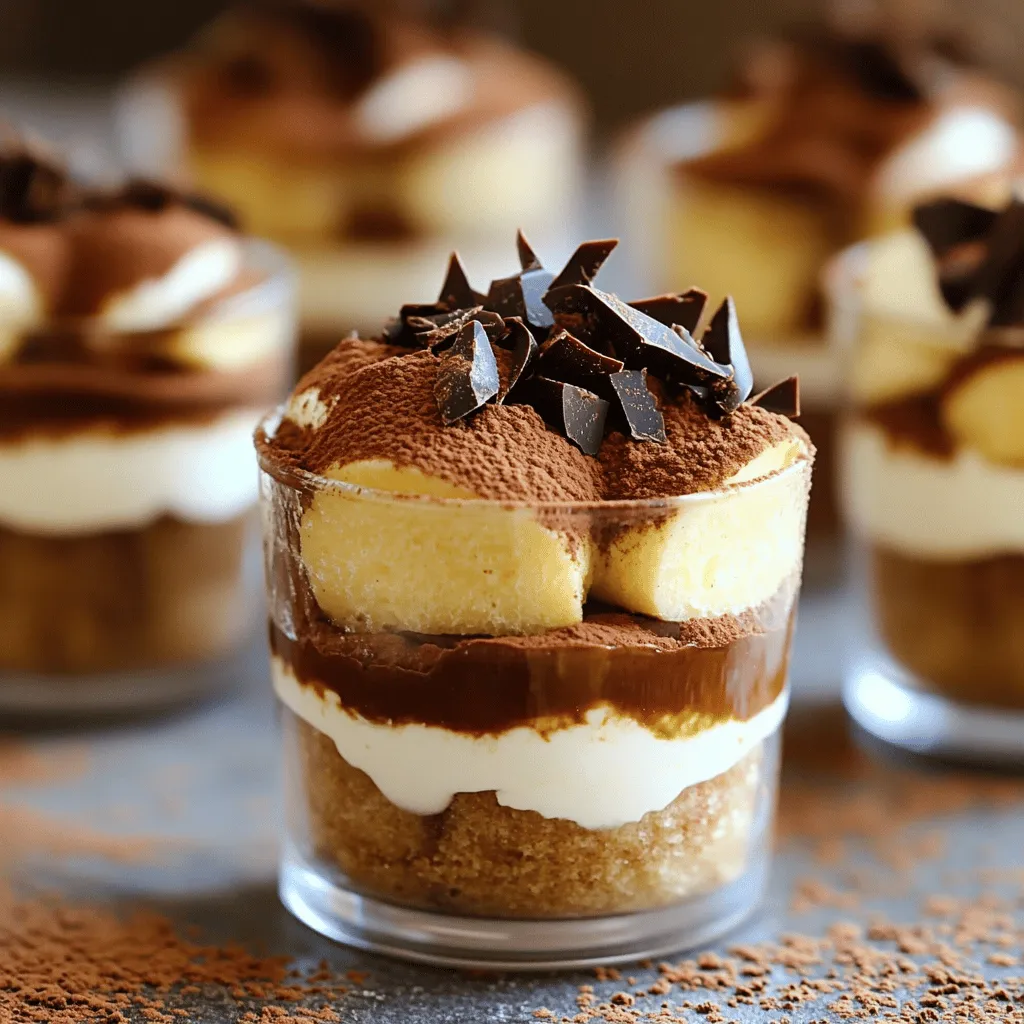
– Unsweetened cocoa powder for dusting
– Dark chocolate shavings for garnish
These ingredients work together to build layers of flavor. The coffee gives a rich taste, while the mascarpone cheese adds creaminess. The whipped cream provides lightness, and the ladyfingers act as the perfect base. Dusting with cocoa powder and adding chocolate shavings gives a nice finish. For the full recipe, check out the complete guide to making these mini tiramisu cups.
Step-by-Step Instructions
Preparing the Coffee Mixture
First, brew one cup of strong coffee. Let it cool to room temperature. Once cooled, add one teaspoon of pure vanilla extract. This mix needs time to blend. Set it aside so the flavors can infuse.
Making the Mascarpone Mixture
In a clean bowl, whip one cup of heavy cream with half a cup of sifted powdered sugar. Use an electric mixer on medium speed. Keep mixing until soft peaks form, which will take about 2-3 minutes. Next, gently fold in one cup of softened mascarpone cheese. Be careful not to lose the airiness of the whipped cream.
Assembling Mini Tiramisu Cups
Now, prepare to layer your cups. Quickly dip each ladyfinger into the coffee mixture for about one to two seconds. They should soak but not become mushy. Arrange the soaked ladyfingers at the bottom of your serving cups.
Next, spoon a layer of the mascarpone mixture over the ladyfingers. Smooth it out evenly with a spatula. Repeat this process—add another layer of soaked ladyfingers, followed by more mascarpone mixture—until the cups are filled. Finish with a generous layer of mascarpone on top.
Cover each cup tightly with plastic wrap. Refrigerate them for at least four hours, but overnight is best. This chilling time helps the flavors develop.
Before serving, dust the tops with unsweetened cocoa powder. For a gourmet touch, add dark chocolate shavings.
For the full recipe, check out the details above!
Tips & Tricks for the Perfect Tiramisu
Achieving the Right Texture
To get the best tiramisu, soft peaks in whipped cream are key. Soft peaks mean your cream holds shape but is still fluffy. Whip until you see peaks that gently bend over. This light texture makes your dessert creamy and airy.
When you fold in mascarpone cheese, be gentle. Use a rubber spatula and scoop from the bottom. This keeps the mixture light. If you stir too hard, you lose that lovely fluffiness.
Soaking Ladyfingers
Soaking ladyfingers is an art. You want to dip them in coffee for just 1-2 seconds. This gives them a nice coffee flavor without turning them mushy. If they soak too long, they fall apart when you layer them.
Ensure the soaked ladyfingers stay firm for the layers. Lay them at the bottom of each cup to create a solid base. The right soak time keeps your dessert intact and delicious.
Presentation Ideas
For a stunning presentation, serve your mini tiramisu cups in clear glass. This shows off the lovely layers of coffee and cream. You can use small mason jars or dessert cups.
Garnish your cups with unsweetened cocoa powder for a rich look. Dark chocolate shavings add a touch of elegance. If you want, top each cup with a whole coffee bean or a mint leaf. These small details make your dessert pop!
Check out the Full Recipe to guide you through making these tasty treats.
Variations of Mini Tiramisu Cups
Flavor Variations
You can bring new life to mini tiramisu cups by adding liqueurs. Amaretto or coffee liqueur enhances the depth of flavor. Just a splash can make a big difference. You can also try different extracts like almond or hazelnut. This small change can give your dessert a unique twist.
Healthier Alternatives
If you want to lighten things up, use light mascarpone or whipped topping. This keeps the creamy texture while reducing calories. You can also opt for gluten-free ladyfingers. Many brands now offer tasty gluten-free options, so no one feels left out.
Seasonal Twists
Seasonal fruits can add bright flavors. Try adding raspberries or strawberries for a fresh touch. These fruits pair well with the rich creaminess. You can also create themed cups for holidays. Think pumpkin spice for fall or peppermint for winter. Each season brings a chance to create something special in your mini tiramisu cups.
For more ideas and detailed steps, check the Full Recipe.
Storage Information
How to Store Mini Tiramisu Cups
To keep your mini tiramisu cups fresh, store them in the fridge. Use an airtight container or cover them tightly with plastic wrap. This helps protect the layers and keeps them flavorful. You should eat them within 3 days for the best taste. The longer they sit, the softer the ladyfingers become.
Freezing Recommendations
Can you freeze tiramisu cups? Yes, you can freeze them. However, I recommend freezing them before adding the cocoa powder and chocolate shavings. This way, they stay nice and fresh. When you want to eat them, move the cups to the fridge for about 6 hours to thaw. For best results, serve them chilled after thawing.
FAQs about Mini Tiramisu Cups
Can I make Mini Tiramisu Cups in advance?
Yes, you can make Mini Tiramisu Cups ahead of time. I suggest preparing them the night before. This allows the flavors to mix well. Aim for at least four hours of chilling. If you chill them overnight, they will taste even better!
What can I substitute for mascarpone?
If you need a substitute for mascarpone, you have options. Cream cheese works well. It gives a similar texture but has a tangy flavor. Ricotta is another choice. Just blend it well until smooth. This will help mimic the creamy texture of mascarpone.
How do I know when the tiramisu is ready to serve?
Look for a few signs to know if your tiramisu is ready. First, check if it has set up well. The layers should hold their shape. Second, the texture should be creamy but firm. Lastly, there should be no liquid separation. If all these look good, dive in and enjoy!
You now know how to make mini tiramisu cups. We covered essential ingredients, from strong coffee to mascarpone. The step-by-step guide made it easy to whip up a delicious treat. Remember to focus on texture and presentation for the best results. You can even try different flavors or healthier options. Store your cups properly to keep them fresh. Enjoy impressing others with this tasty dessert. You have the tools to create a delightful experience with every bite.
Mini Tiramisu Cups
Delicious individual servings of classic tiramisu, perfect for any occasion.
Ingredients
Instructions
- 1
In a shallow bowl, combine the cooled brewed coffee with the vanilla extract, stirring gently. Set this mixture aside to allow the flavors to blend.
- 2
In a separate mixing bowl, use an electric mixer to whip the heavy cream and sifted powdered sugar together on medium speed. Continue whipping until soft peaks form, which should take about 2-3 minutes.
- 3
Gradually fold the softened mascarpone cheese into the whipped cream mixture using a rubber spatula. Take care to combine gently to maintain the lightness of the whipped cream.
- 4
Quickly dip each ladyfinger cookie into the coffee mixture for about 1-2 seconds. Ensure they are adequately soaked but not mushy, as this will help retain their structure. Arrange the soaked ladyfingers at the bottom of each serving cup.
- 5
Spoon a layer of the mascarpone mixture over the soaked ladyfingers, smoothing it out evenly with a spatula. Repeat the layering process: add another layer of soaked ladyfingers followed by more mascarpone mixture until the cups are filled. Finish with a generous layer of the mascarpone on top.
- 6
Cover each cup tightly with plastic wrap and refrigerate for a minimum of 4 hours, or preferably overnight. This chilling time allows the flavors to develop beautifully.
- 7
Just before serving, liberally dust the tops with unsweetened cocoa powder and elegantly garnish each cup with dark chocolate shavings for an added gourmet touch.
Chef's Notes
Serve in clear glass cups or small mason jars to highlight the layers. Top with a whole coffee bean or fresh mint leaf for extra elegance.


Recipe Creator
Remy
I’m Chef Remy, your recipe companion, here to bring warmth, bold taste, and simplicity to your kitchen.
View My Recipes