Dinner
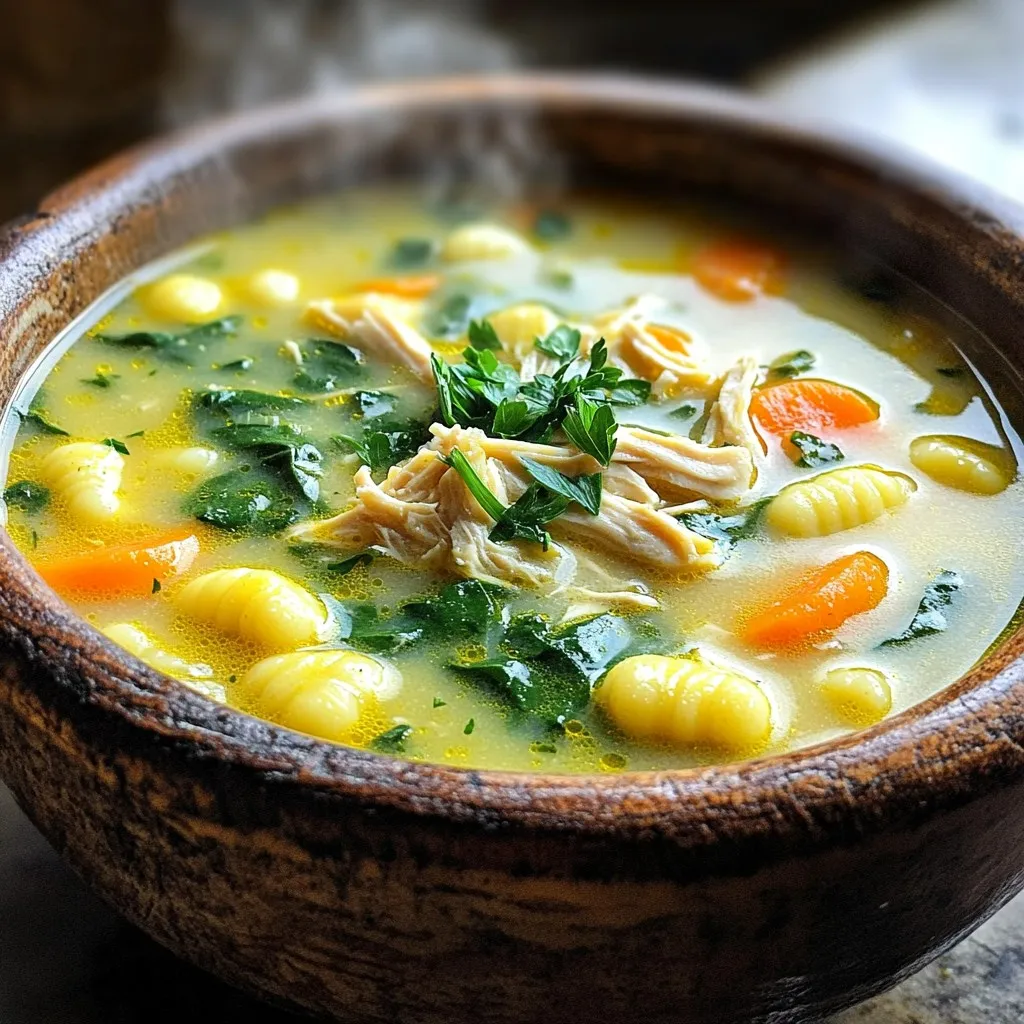
Slow Cooker Chicken Gnocchi Soup Comfort in a Bowl
Do you crave a warm, hearty soup that’s as easy to make as it is delicious? Look no further! My Slow Cooker Chicken Gnocchi Soup
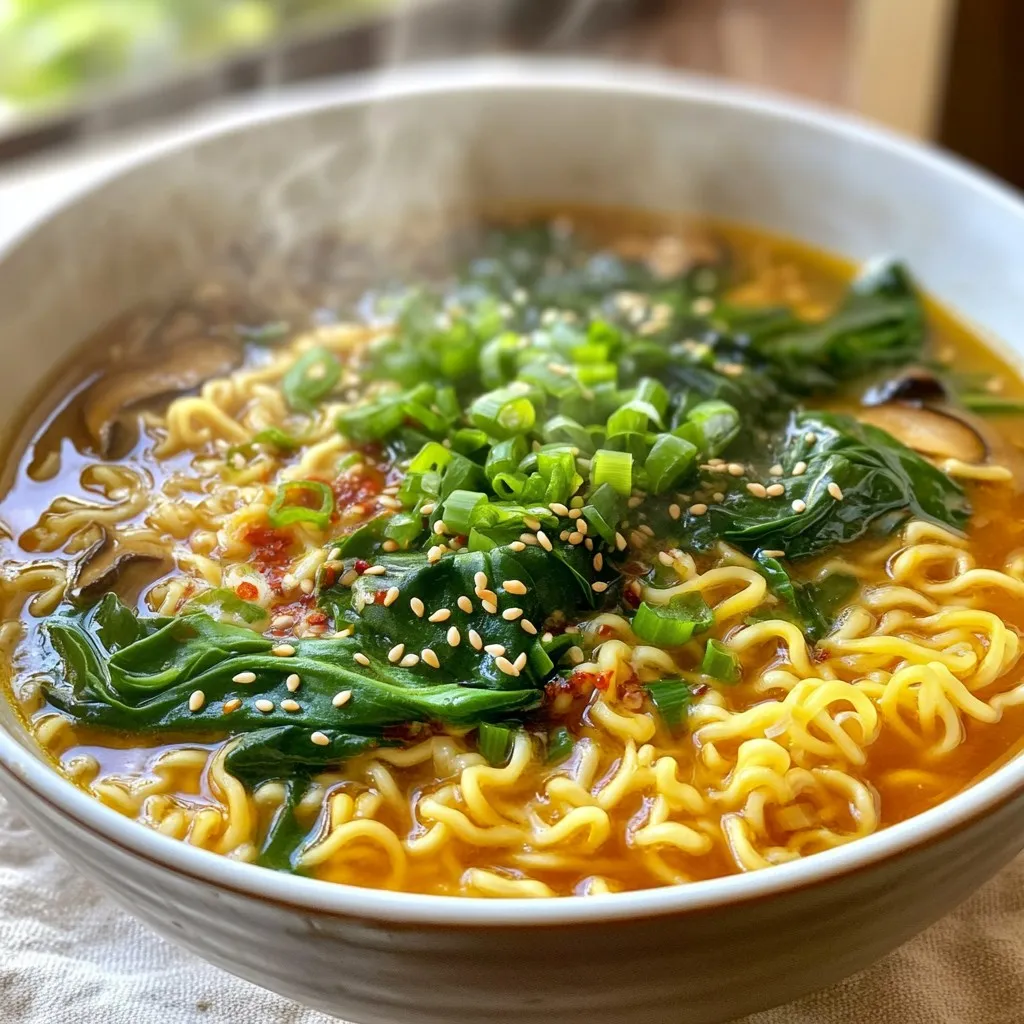
Minute Spicy Garlic Ramen Quick and Flavorful Meal
Are you craving a quick yet flavorful meal? Look no further than Minute Spicy Garlic Ramen! In just one minute, you can whip up a
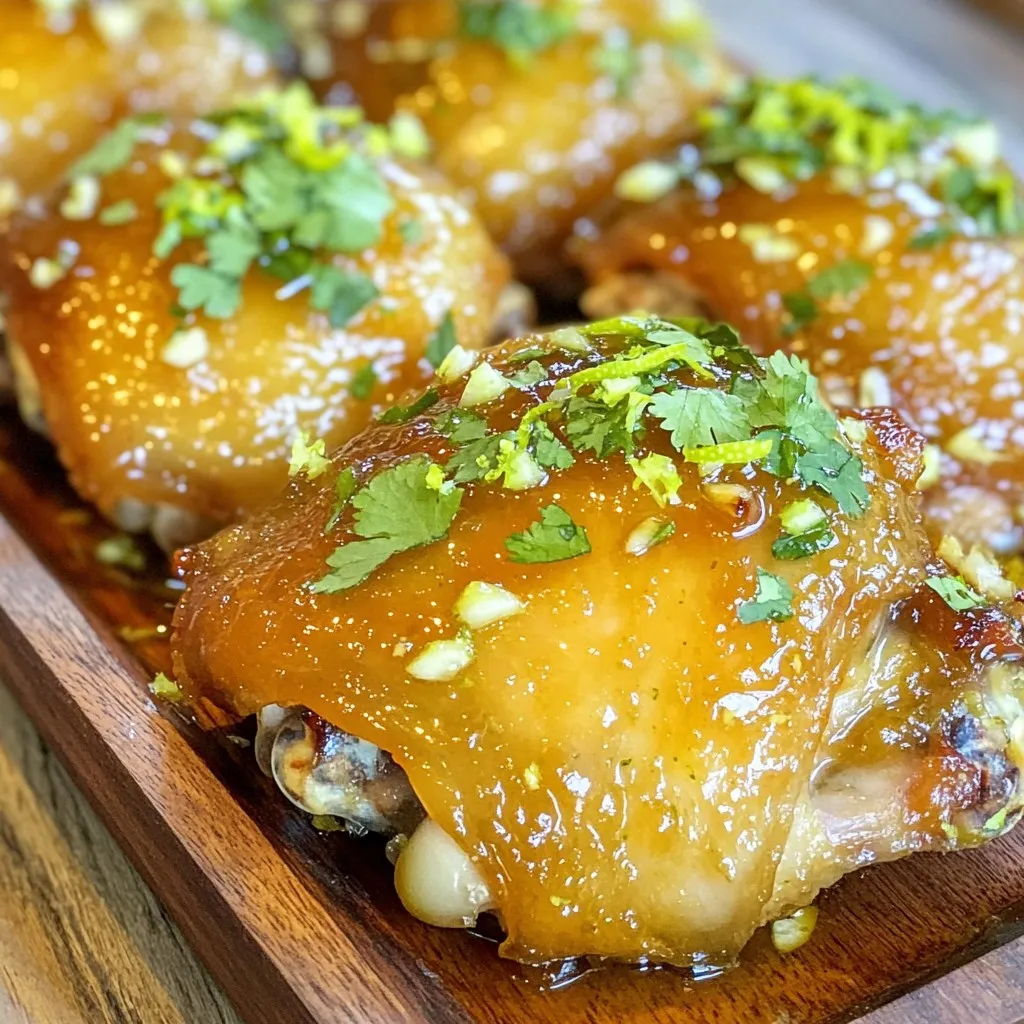
Savory Honey Lime Chicken Thighs in Air Fryer Recipe
Are you ready to take your dinner game to the next level? This Savory Honey Lime Chicken Thighs in Air Fryer recipe is simple, delicious,
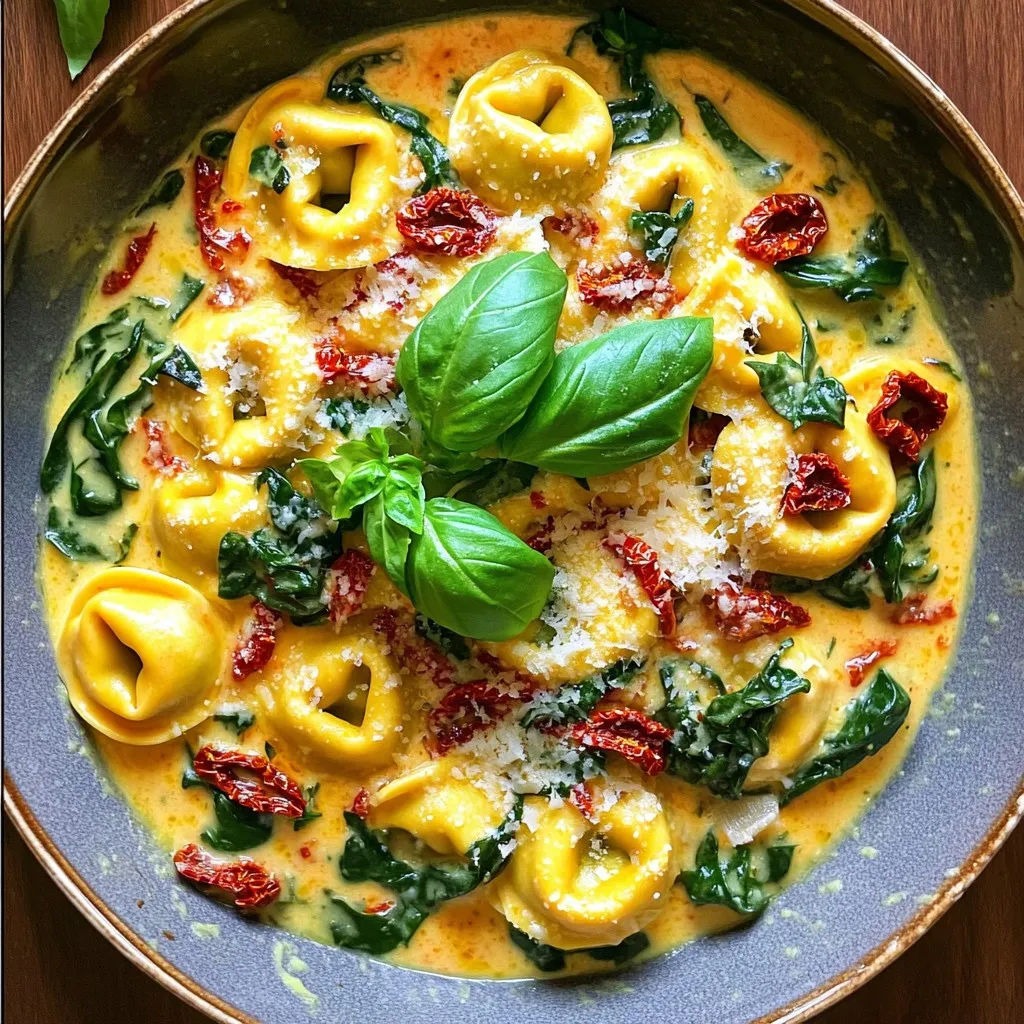
Sun-Dried Tomato Tortellini Skillet Flavor Boost
Looking for a quick, delicious meal? Try this Sun-Dried Tomato Tortellini Skillet! It’s packed with flavor and takes just minutes to prepare. Using easy ingredients

Bang Bang Chicken Bowl Flavorful and Quick Recipe
Are you craving a fun and quick meal? The Bang Bang Chicken Bowl is your answer! This dish packs bold flavors with simple steps, making

One Pan Chicken Gyros Flavorful and Simple Recipe
Craving a tasty and easy meal? This One Pan Chicken Gyros recipe is perfect for you! Packed with bold flavors and simple steps, you’ll whip
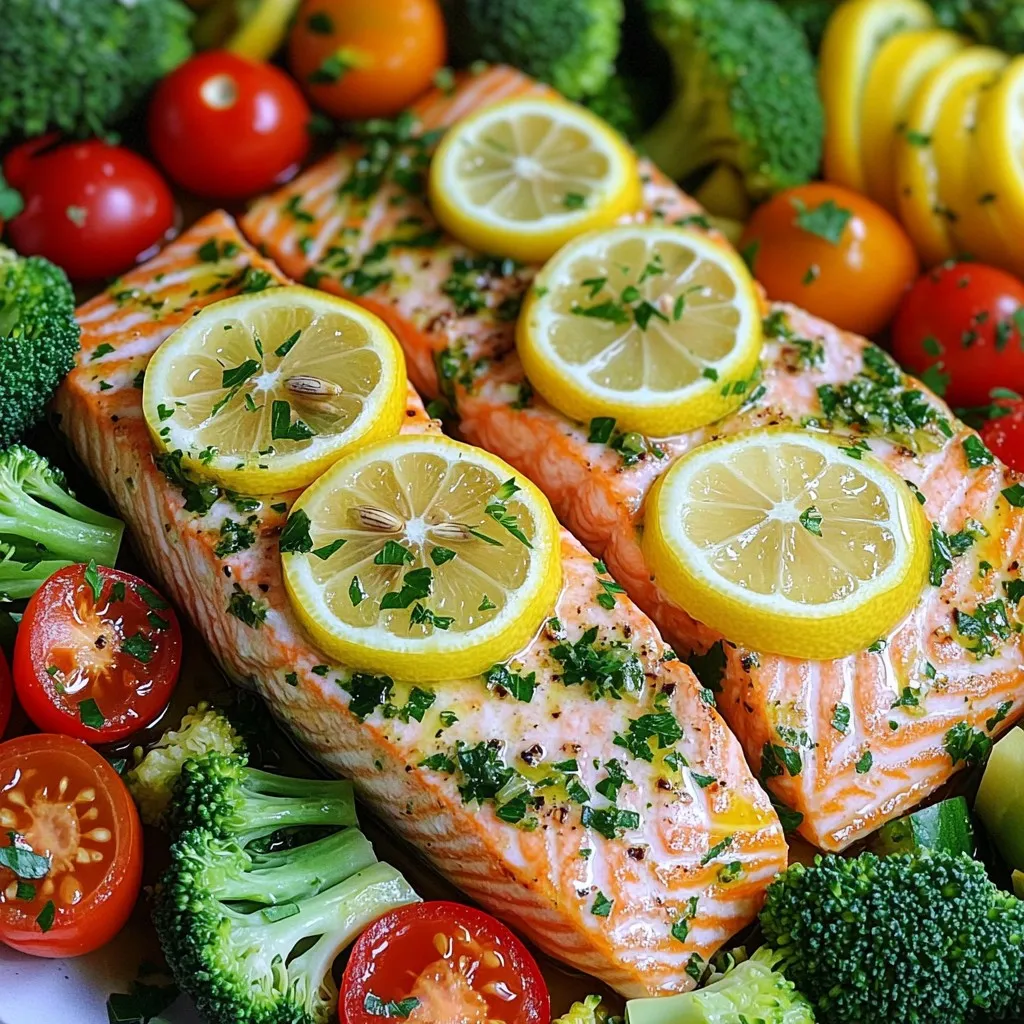
Sheet Pan Lemon Herb Salmon & Veggies Delight
Are you looking for a simple and delicious weeknight dinner? My Sheet Pan Lemon Herb Salmon & Veggies Delight is here to save the day!
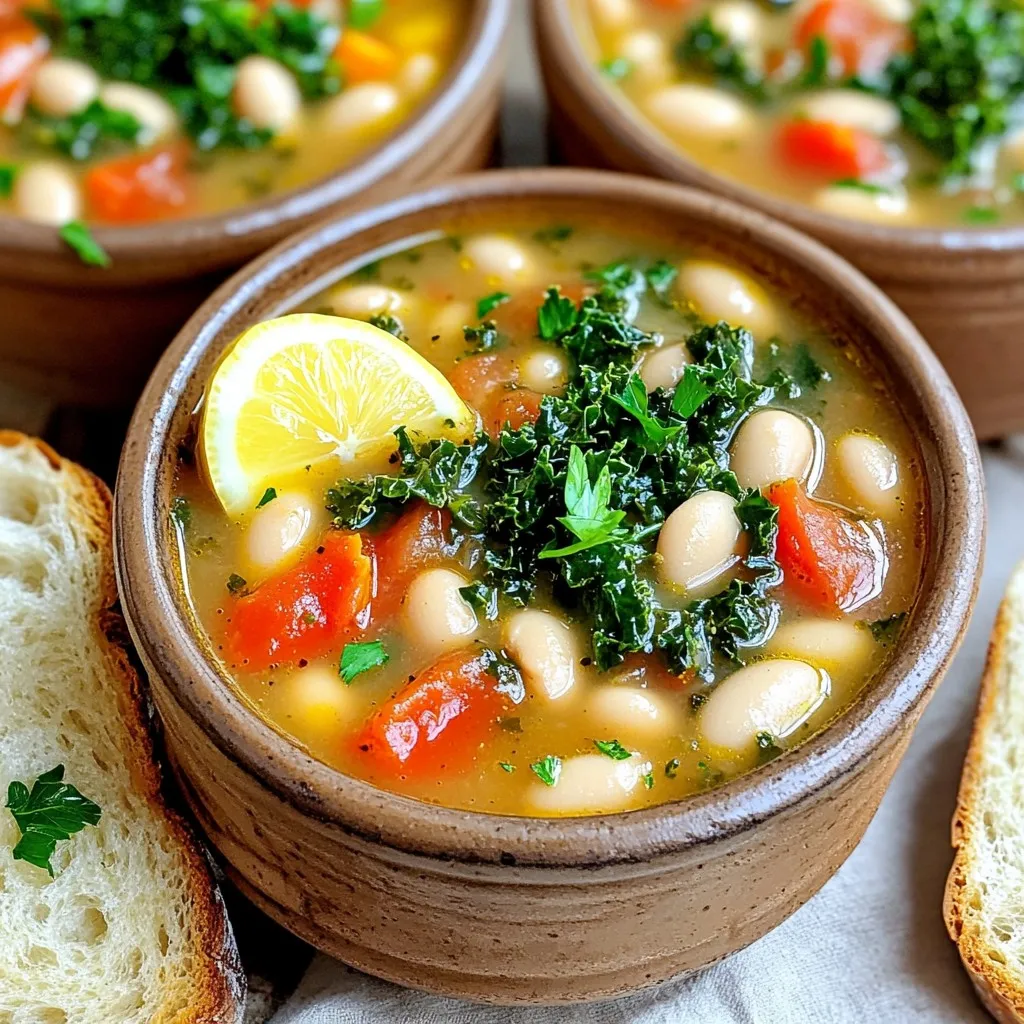
Slow Cooker Tuscan White Bean Soup Delightful Recipe
Ready to warm your soul with a delicious bowl of Slow Cooker Tuscan White Bean Soup? This easy recipe blends creamy beans, fresh veggies, and
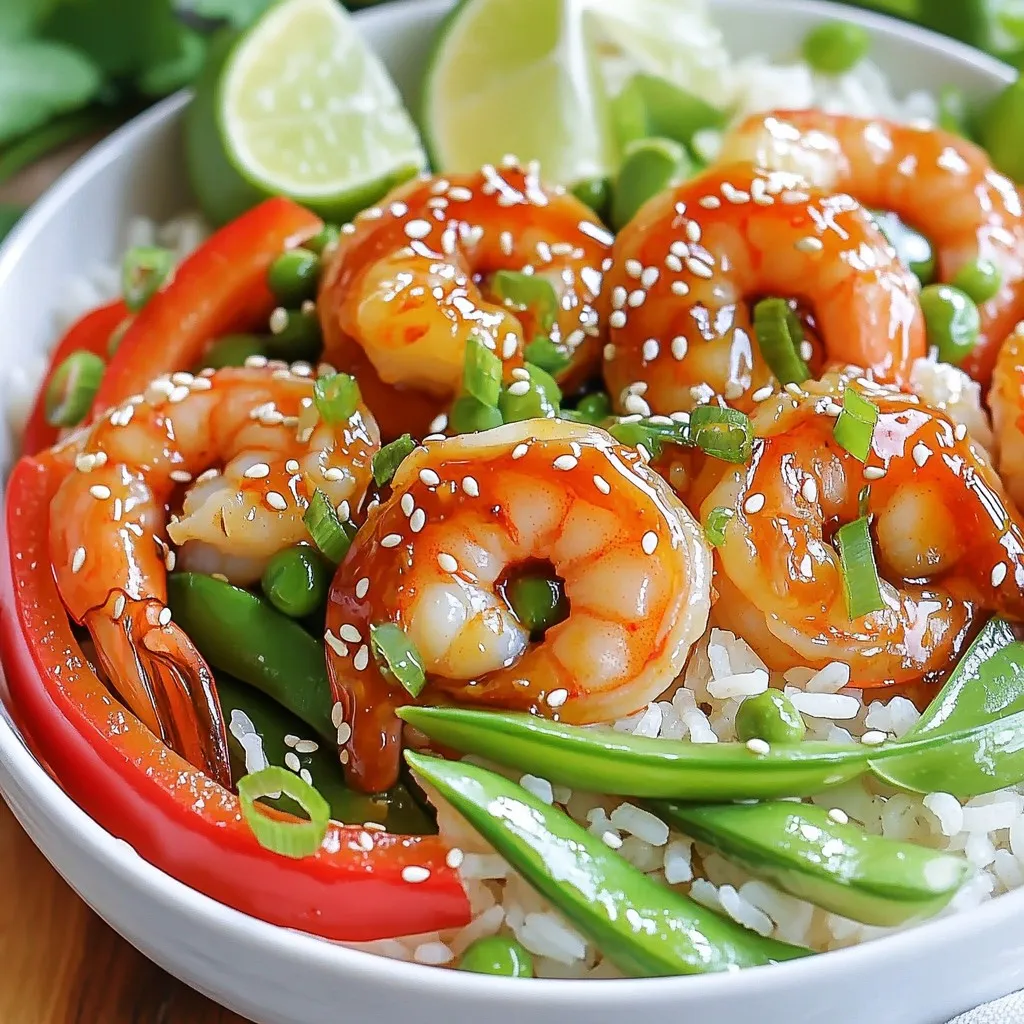
Honey Sriracha Shrimp Rice Bowls Flavorful Delight
Get ready for a tasty treat with my Honey Sriracha Shrimp Rice Bowls! This easy recipe combines sweet honey and spicy Sriracha to create bold
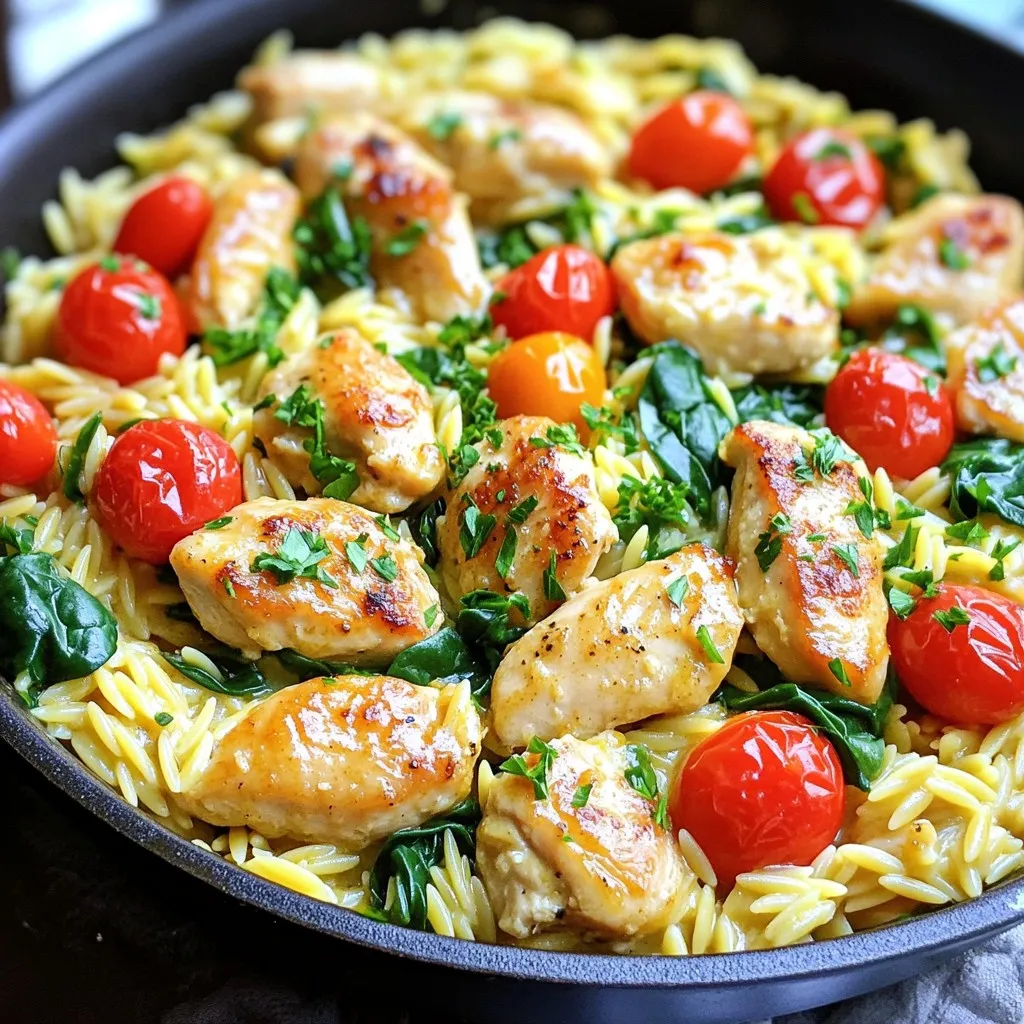
Garlic Butter Chicken Orzo Skillet Flavorful Meal
Looking for a simple yet delicious dinner recipe? I’ve got just the thing for you! This Garlic Butter Chicken Orzo Skillet recipe combines tender chicken,