Dinner
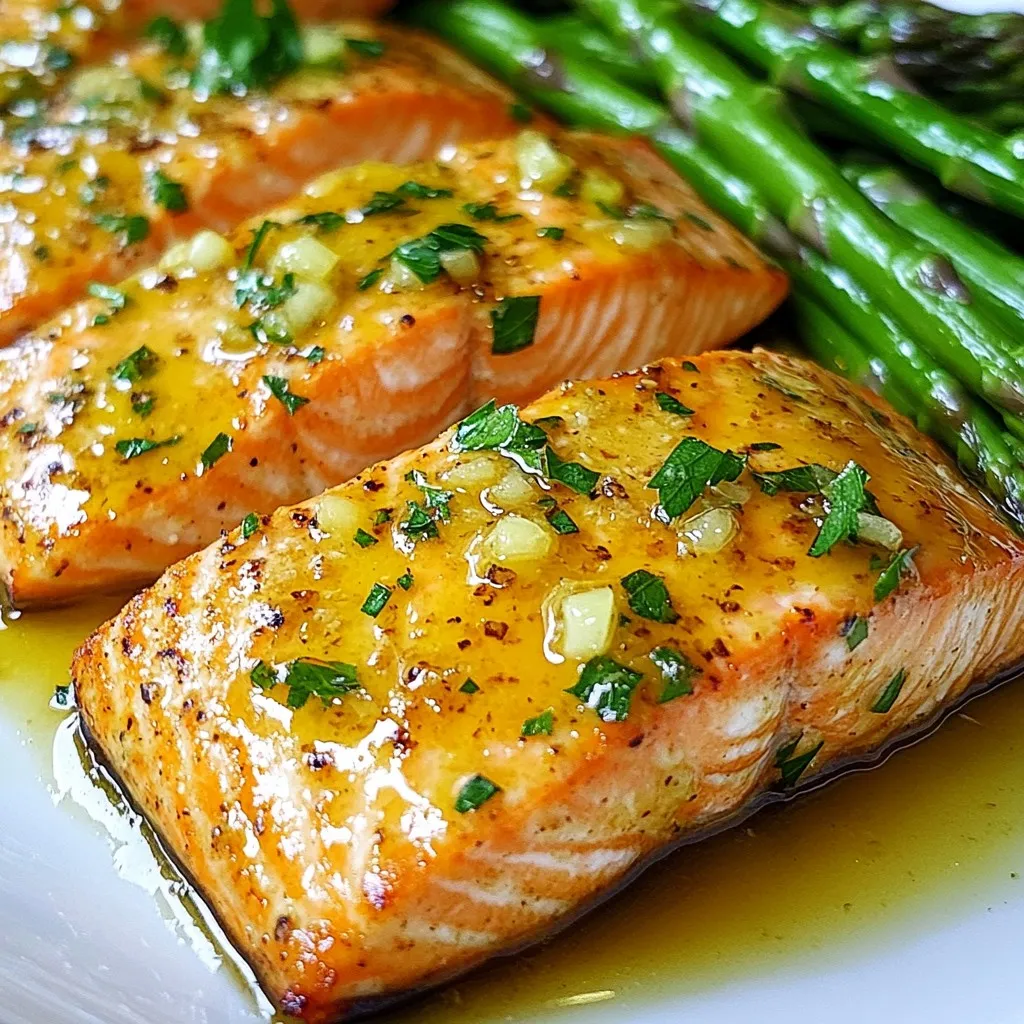
Zesty Lemon Garlic Salmon Simple Flavorful Recipe
If you’re on the hunt for a quick and tasty dinner, look no further! This Zesty Lemon Garlic Salmon recipe packs bold flavor into every
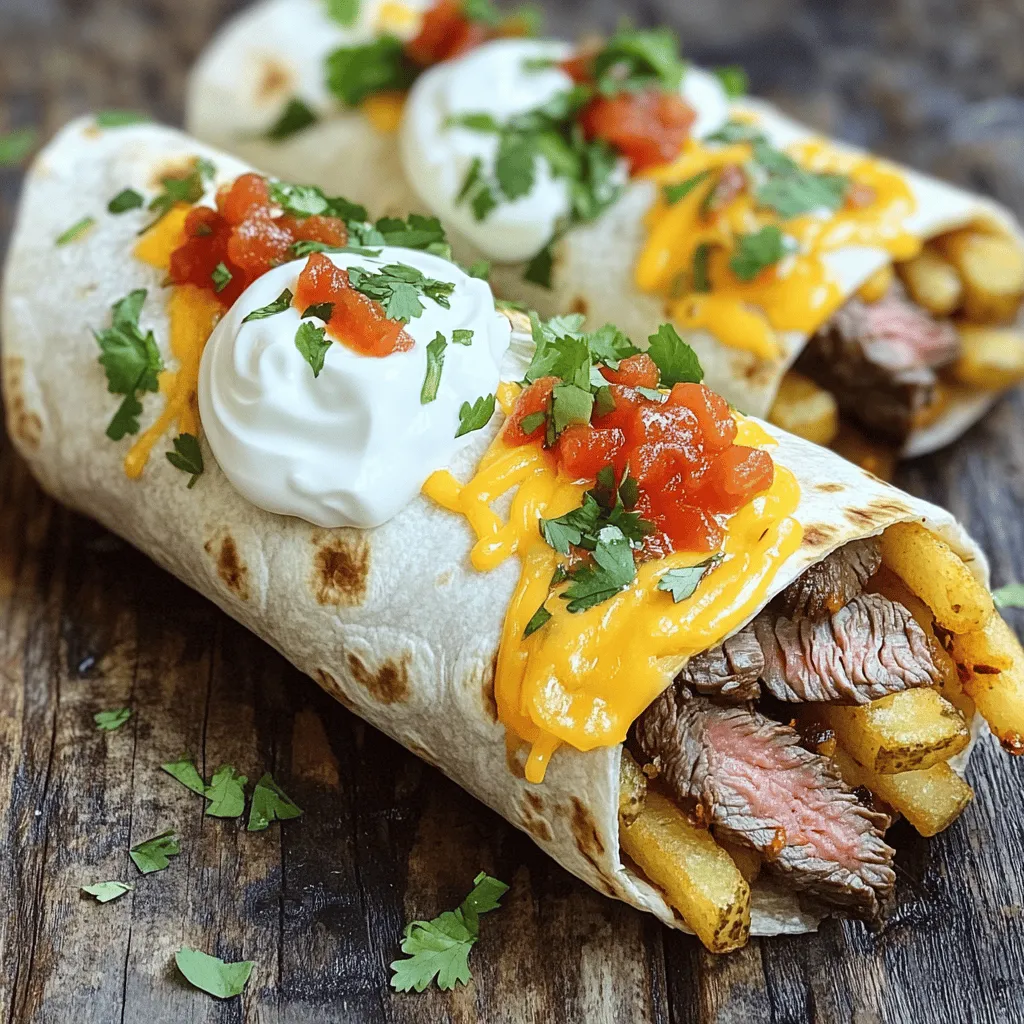
Steak & Cheese Dirty Fry Burritos Savory Treat Today
Craving a savory snack that makes your taste buds dance? You’re in luck! Today, we’re diving into the world of Steak & Cheese Dirty Fry
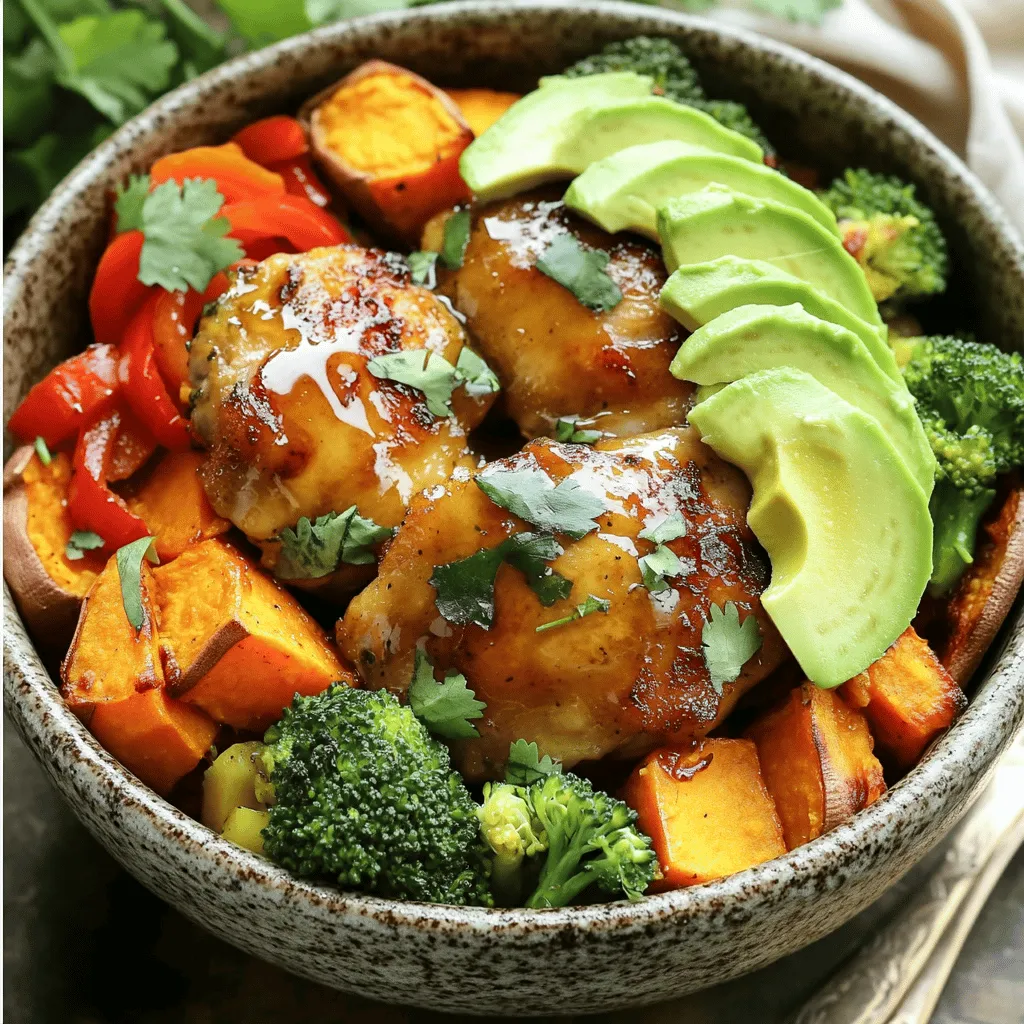
Savory Chicken and Sweet Potato Bowls Recipe Guide
Welcome to my Savory Chicken and Sweet Potato Bowls Recipe Guide! If you’re looking for a meal that is tasty, healthy, and easy to make,
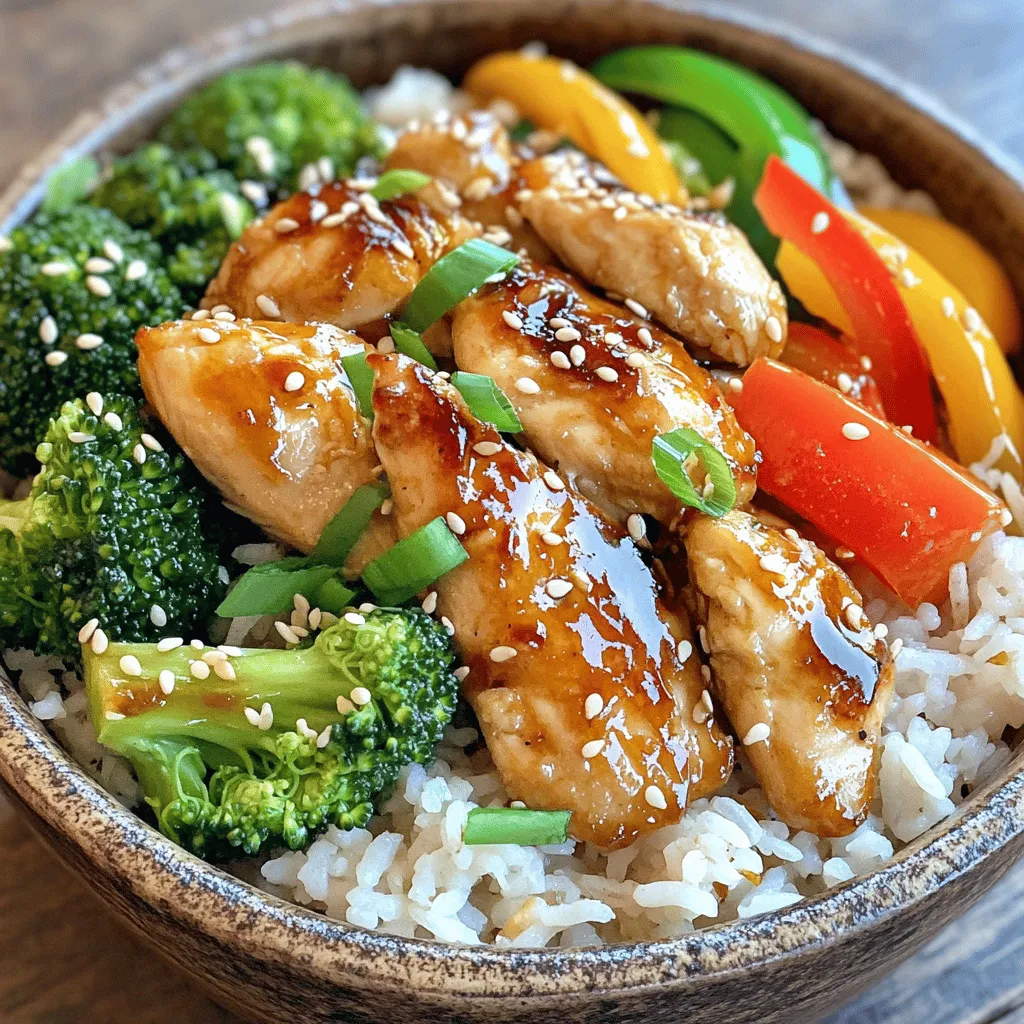
Easy Chicken & Rice Bowls with Garlic Sauce Delight
Looking for a quick, tasty meal? These Easy Chicken & Rice Bowls with Garlic Sauce are your perfect answer! With simple ingredients like juicy chicken,
![- 2 lbs baby potatoes - 1 packet ranch seasoning mix - 3 tablespoons olive oil - 1 cup shredded cheddar cheese The star of this dish is the baby potatoes. They cook fast and stay creamy inside. The ranch seasoning mix adds a burst of flavor. Olive oil helps make everything crispy. Finally, the cheddar cheese melts into gooey goodness. - 1 teaspoon garlic powder - 1/2 teaspoon paprika - Salt and pepper to taste Garlic powder gives a warm taste. Paprika adds a smoky note. Salt and pepper are key to balance. These small tweaks make a big difference in flavor. - 1/2 cup sour cream - 1/4 cup chopped green onions Sour cream adds creaminess and tang. Green onions give a fresh crunch. These toppings elevate your dish and make it even more tasty. To see the full recipe, check the details above. - Preheat your oven to 425°F (220°C). This step makes sure your potatoes cook well. - In a large bowl, add 2 lbs of halved baby potatoes. Pour in 3 tablespoons of olive oil. - Sprinkle in 1 packet of ranch seasoning mix, 1 teaspoon of garlic powder, and 1/2 teaspoon of paprika. - Add salt and pepper to taste. Toss the potatoes so they are well coated in the mixture. - Next, arrange the coated potatoes on a large baking sheet. Spread them out in a single layer. - Place the baking sheet in the oven. Bake for 25-30 minutes. Stir the potatoes halfway through to help them cook evenly. - After baking, take out the sheet. Sprinkle 1 cup of shredded cheddar cheese over the hot potatoes. - Put the sheet back in the oven. Bake for another 5 minutes, until the cheese melts and bubbles. - Remove from the oven. Drizzle 1/2 cup of sour cream over the cheesy potatoes. - Finally, garnish with 1/4 cup of chopped green onions for a fresh touch. Enjoy this simple and tasty dish with the full recipe to guide you! To make the best One-Pan Cheesy Ranch Potatoes, start with the right potatoes. I recommend using baby potatoes. They are small, tender, and cook evenly. Their skin adds great texture and flavor. Next, ensure even seasoning. This step is key for full flavor. When you coat the potatoes, mix them well with the ranch seasoning, olive oil, and other spices. A good toss helps every piece get that tasty blend. Now, let's talk about cooking methods. You may wonder if baking or roasting is better. Baking is great for even cooking and a soft inside. Roasting, on the other hand, can give you a crispier outside. I suggest roasting them at 425°F to get the best of both worlds. To achieve crispy potatoes, spread them out in a single layer on the baking sheet. This helps hot air circulate around each potato. Stir halfway through cooking for even browning. For a complete meal, pair these potatoes with grilled chicken or a fresh salad. The cheesy ranch flavor complements many dishes! If you're hosting a gathering, get creative with your serving. You can serve them straight from the baking sheet for a casual vibe. Alternatively, transfer them to a nice dish and top with extra green onions for a pop of color. For the full recipe, check out the earlier section. {{image_4}} You can swap cheese for variety. Try mozzarella or pepper jack for a different taste. Each cheese brings a unique flavor. You can also add protein to your dish. Cooked bacon or shredded chicken boosts protein and taste. Both options make the meal more filling. If you like spice, add jalapeños or hot sauce. This gives the dish a nice kick. You can also mix in herbs like rosemary or thyme. These herbs add fresh notes and depth. Experiment with different spices to find your favorite blend. Want to save time? Try using an air fryer. Cook the potatoes at 400°F for about 20 minutes. Shake the basket halfway through for even crisping. For a slow cooker method, combine all your ingredients in the cooker. Cook on low for 6 hours or high for 3 hours. This method makes the potatoes tender and allows flavors to meld nicely. You can find the full recipe to get started on your one-pan cheesy ranch potatoes. To store cheesy ranch potatoes, let them cool down first. Then, place them in an airtight container. This helps keep them fresh and prevents them from drying out. You can store them in the fridge for up to four days. When reheating, use the microwave. Heat them in short bursts of 30 seconds. Stir after each burst to ensure even warming. Freezing cheesy ranch potatoes is easy. Start by letting them cool completely. Then, scoop them into freezer-safe containers. Make sure to leave some space at the top since they can expand. You can also wrap them tightly in plastic wrap, then foil. Thaw them overnight in the fridge before reheating. Leftovers last about four days in the fridge. After that, they might spoil. Signs of spoilage include a sour smell, mold, or a strange texture. Always check before eating. If you're unsure, it's best to throw them out to stay safe. Can I make this recipe ahead of time? Yes, you can prepare the potatoes ahead. Just season them and store in the fridge. Bake them when you're ready. This saves you time on busy days. What if I don’t have ranch seasoning? No problem! You can mix your own. Use dried herbs like dill and parsley, plus garlic powder. You can make a tasty blend that still gives great flavor. Is this recipe gluten-free? Yes, this recipe is gluten-free! All the ingredients are safe for those who avoid gluten. Just check the ranch seasoning to be sure. How can I make it vegetarian? This dish is already vegetarian! Just skip any meat toppings. Enjoy the cheesy ranch flavors without any meat. What if my potatoes aren’t cooking evenly? If your potatoes cook unevenly, try cutting them into similar sizes. This helps them cook at the same rate. Stir them halfway through to help too. Can I use other types of potatoes instead? Absolutely! You can use regular potatoes or sweet potatoes. Just adjust the cooking time if needed. Make sure to cut them into pieces for even cooking. For the full recipe, visit [Full Recipe]. One-Pan Cheesy Ranch Potatoes are simple and delicious. We covered key ingredients and easy steps. Topping with cheese, sour cream, and green onions adds great flavor. You can swap ingredients and try different cooking methods to make this dish your own. Enjoy this dish for dinner or special events. With these tips, you’ll impress family and friends. Get ready to enjoy tasty potatoes that everyone will love!](https://roastedflavors.com/wp-content/uploads/2025/05/74cabb86-b793-46bc-9a1d-67127cfafb55.webp)
One-Pan Cheesy Ranch Potatoes Simple and Delicious Dish
Looking for a simple, tasty dish that packs a flavor punch? You’re in the right place! One-Pan Cheesy Ranch Potatoes are easy to make and
![- 1 lb shrimp, peeled and deveined - 1 teaspoon chili powder - 1 teaspoon ground cumin - 1 teaspoon garlic powder - 1 tablespoon extra virgin olive oil - Salt and pepper, to taste - 8 small corn tortillas - 1 cup finely shredded cabbage - 1 ripe avocado, sliced - Fresh cilantro leaves, for garnish - 1/2 cup creamy Greek yogurt - 2 tablespoons mayonnaise - 1 tablespoon fresh lime juice - 1 teaspoon honey - 1 clove garlic, minced finely - 1/2 teaspoon sriracha sauce (for desired spice level) - Pinch of salt When I make shrimp tacos, I focus on fresh and vibrant ingredients. You need good shrimp, of course. I always choose 1 lb of shrimp that is peeled and deveined. This makes cooking easier. Next, the spices matter. I use chili powder, cumin, and garlic powder to give the shrimp a warm kick. A tablespoon of extra virgin olive oil keeps everything moist and adds flavor. Don’t forget salt and pepper to taste. For the tortillas, I prefer eight small corn tortillas. They are soft and hold the filling well. I also love adding a cup of finely shredded cabbage. It adds crunch and freshness. A ripe avocado, sliced, brings creaminess. Finally, garnish with fresh cilantro leaves for a burst of flavor. Now, let’s talk about that dreamy sauce! It’s the star of the show. I mix half a cup of creamy Greek yogurt with two tablespoons of mayonnaise. This makes a rich base. I add one tablespoon of fresh lime juice for brightness. A teaspoon of honey gives it a hint of sweetness. I also include one clove of minced garlic and half a teaspoon of sriracha sauce for heat. A pinch of salt rounds it all out. Check out the [Full Recipe] for a complete guide. Enjoy your cooking! To make the dreamy sauce, start with a small mixing bowl. Combine the following ingredients: - 1/2 cup creamy Greek yogurt - 2 tablespoons mayonnaise - 1 tablespoon fresh lime juice - 1 teaspoon honey - 1 clove garlic, minced finely - 1/2 teaspoon sriracha sauce (adjust for desired spice level) - Pinch of salt Whisk everything together until the mixture is smooth. Taste it, and if you like more heat, add more sriracha. Set the sauce aside for later. In a medium bowl, toss the shrimp with: - 1 teaspoon chili powder - 1 teaspoon ground cumin - 1 teaspoon garlic powder - 1 tablespoon extra virgin olive oil - Salt and freshly ground black pepper, to taste Make sure each shrimp gets a good coating of the spices. This step is key for flavor. Heat a non-stick skillet over medium-high heat. Once it is hot, add the seasoned shrimp in a single layer. Cook for 2-3 minutes on each side. The shrimp should turn pink and opaque when they are done. Remove them from the heat and set aside. In a separate dry skillet, warm the corn tortillas for about 30 seconds on each side. This makes them soft and easy to fold. Once warmed, keep the tortillas in a clean kitchen towel to keep them warm. Now for the fun part! On each warm tortilla, start with a layer of shredded cabbage. Then, add a few of the cooked shrimp. Top it off with slices of avocado. Drizzle a generous amount of your dreamy sauce over everything. Finish with fresh cilantro for a pop of color and flavor. Plate the tacos nicely. Serve them right away with extra lime wedges on the side. A squeeze of lime adds a fresh touch that brightens up the meal. Enjoy every bite! For the full recipe, check the earlier section. To make sure your shrimp cook evenly, follow these tips: - Use fresh shrimp: Fresh shrimp tastes better and cooks more evenly. - Don’t overcrowd the pan: Cook shrimp in a single layer. This helps them cook fast and evenly. - Watch the color: Shrimp turn pink and opaque when cooked. Remove them from heat as soon as they reach this point. For added flavor, marinate your shrimp before cooking. A simple mix of lime juice, garlic, and chili powder works wonders. Let them sit for 15-30 minutes. This adds a zesty kick! The Dreamy Sauce is key to your shrimp tacos. Here are some ideas to make it yours: - Add herbs: Chopped cilantro or parsley can brighten the sauce. - Mix in spices: Try adding cumin or smoked paprika for extra depth. - Swap the yogurt: Use sour cream or avocado for a creamier base. To adjust the spice level, simply add more or less sriracha. Start with a small amount and taste as you go. You can also add a splash of hot sauce for more heat. Pair your shrimp tacos with tasty sides. Here are some ideas: - Rice: Cilantro lime rice complements the tacos well. - Beans: Black beans or refried beans add a hearty touch. - Salad: A fresh salad with lime vinaigrette can balance the meal. For drinks, try serving: - Margaritas: A classic choice that pairs perfectly with shrimp. - Lemonade: A refreshing non-alcoholic option. - Iced tea: This is a nice complement to the flavors of the tacos. Check out the Full Recipe for more delicious details! {{image_4}} You can easily swap shrimp for other proteins. Fish like tilapia or mahi-mahi work well. Chicken is also a great choice. Just grill or sauté it for tasty tacos. Tofu is perfect for a plant-based option. For tofu, press it to remove water, then cube and cook until golden. Each protein brings its own flavor and texture, making your tacos unique. If you want a different flavor, try other sauces. A spicy chipotle sauce adds a nice kick. You can mix chipotle in adobo with yogurt for a smoky taste. A cilantro-lime dressing brightens up the dish. Just blend cilantro, lime juice, and olive oil for a fresh twist. For a creamy topping, make a crema by mixing sour cream with lime juice and salt. Toppings can change the whole taco experience. Mango salsa adds sweetness and a tropical feel. It’s a great contrast to the spicy shrimp. Pickled onions lend a tangy crunch, elevating each bite. For extra crunch, try adding crushed tortilla chips or cabbage. They provide texture and make your tacos more fun to eat. You can mix and match these toppings to create your perfect shrimp taco. Check out the Full Recipe for more ideas! To keep your shrimp tacos fresh, store them in an airtight container. Place the shrimp, tortillas, and toppings in separate containers. This way, they stay fresh longer. Refrigerated shrimp tacos can last up to three days. Avoid stacking the tortillas with toppings to keep them from getting soggy. You can freeze shrimp for later use. First, cook the shrimp as directed in the recipe. Let them cool completely, then place them in a freezer bag. Remove as much air as possible before sealing. This keeps the shrimp fresh for up to three months. For tortillas, wrap them tightly in foil or plastic wrap, then place them in a freezer bag. The sauce can also be frozen. Pour it into an ice cube tray, freeze it, then transfer the cubes to a bag. To reheat shrimp, place them in a skillet over low heat. Cook them gently until warm. This helps maintain their tender texture. For tortillas, warm them in a dry skillet for about 30 seconds on each side. This method keeps them soft and pliable. Avoid microwaving tortillas, as they can turn tough. Enjoy your delicious shrimp tacos again without losing their great taste! For the complete shrimp taco experience, check the Full Recipe. You can tell shrimp is cooked when it turns pink and opaque. The shrimp should curl into a C shape. If it forms an O shape, it is overcooked. A good rule is to cook shrimp for 2 to 3 minutes on each side. Always check that it is no longer translucent in the center. Yes, you can make the dreamy sauce ahead of time. Simply mix all the sauce ingredients and store it in the fridge. It will stay fresh for about three days. This makes it easy to whip up quick meals. Just remember to give it a stir before using. If you need a substitute for corn tortillas, you have options. Flour tortillas work well if you don't mind gluten. Lettuce leaves are great for a low-carb choice. You can also use whole wheat tortillas for a healthier twist. Each option gives a unique taste and texture. To spice up your shrimp tacos, add more sriracha to the sauce. You can also mix in some diced jalapeños or crushed red pepper flakes. For a different kick, try adding a dash of hot sauce directly on the taco. Adjust the heat level to suit your taste. In this post, I shared a simple recipe for shrimp tacos. You learned about key ingredients, cooking steps, and tips to make them shine. The dreamy sauce adds a creamy layer of flavor. Remember, you can swap shrimp for fish or chicken and customize the toppings to your taste. This dish is easy and fun, perfect for any meal. So, grab your ingredients, gather your friends, and enjoy these tasty tacos!](https://roastedflavors.com/wp-content/uploads/2025/05/d9202eaa-12fc-4769-a0ff-4f49ad40ce05.webp)
Mouthwatering Shrimp Tacos with the BEST Sauce Recipe
Get ready for a taste sensation! My Mouthwatering Shrimp Tacos with the BEST Sauce are sure to impress. Imagine tender shrimp, perfectly spiced, wrapped in
. To keep your creamy steak and pasta fresh, store leftovers right away. Use airtight containers to prevent spoilage. Glass or plastic containers with tight lids work best. Make sure the dish cools down before sealing. This helps keep the taste and texture intact. When you’re ready to enjoy leftovers, reheat them gently. Use a skillet on low heat for best results. Add a splash of beef broth or cream to keep it creamy. Stir often to prevent sticking. If you want to refresh the dish, add fresh spinach or cherry tomatoes right before serving. Yes, you can freeze this creamy dish, but it’s best to do it before adding the pasta. Freeze the sauce in a container. When ready to eat, defrost in the fridge overnight. Heat it on the stove, then add cooked pasta to warm everything together. This keeps the sauce from separating. This meal takes about 30 minutes in total. You will spend 10 minutes prepping ingredients and 20 minutes cooking. This quick time makes it perfect for busy nights when you want a great dinner fast. Yes, you can use other cuts of steak. Ribeye, flank, or tenderloin are great options. Each cut offers a unique flavor and texture. Just make sure to slice the steak against the grain for the best tenderness. If you want a lighter option, use half-and-half or whole milk. You can also try coconut cream for a non-dairy choice. These will give a creamy taste without too many calories. You can prepare parts of this dish ahead. Cook the pasta and steak, then store them in the fridge. Make the sauce fresh before serving to keep it creamy and tasty. Serve a fresh green salad or roasted vegetables on the side. Garlic bread is also a great addition. These will complement the creamy flavors and add variety to your meal. Yes, you can freeze leftovers. Store them in an airtight container for up to three months. Just be sure to thaw them in the fridge before reheating for the best taste. In this blog post, we explored how to create a creamy steak and pasta dish. You learned about the main ingredients, step-by-step instructions, and essential tips for perfecting the recipe. We also discussed variations and storage methods. Remember, this meal can be customized and stored for later enjoyment. Try different proteins, sauces, and toppings to make it your own. Cooking can be fun and rewarding, so enjoy every step of the process!](https://roastedflavors.com/wp-content/uploads/2025/05/e514b6b4-d62b-47ca-9ae5-8e49146595fa.webp)
Creamy Steak and Pasta Dinner Simple and Satisfying Meal
Looking for a dish that impresses without the fuss? My Creamy Steak and Pasta Dinner is your answer! This simple meal combines tender steak, silky
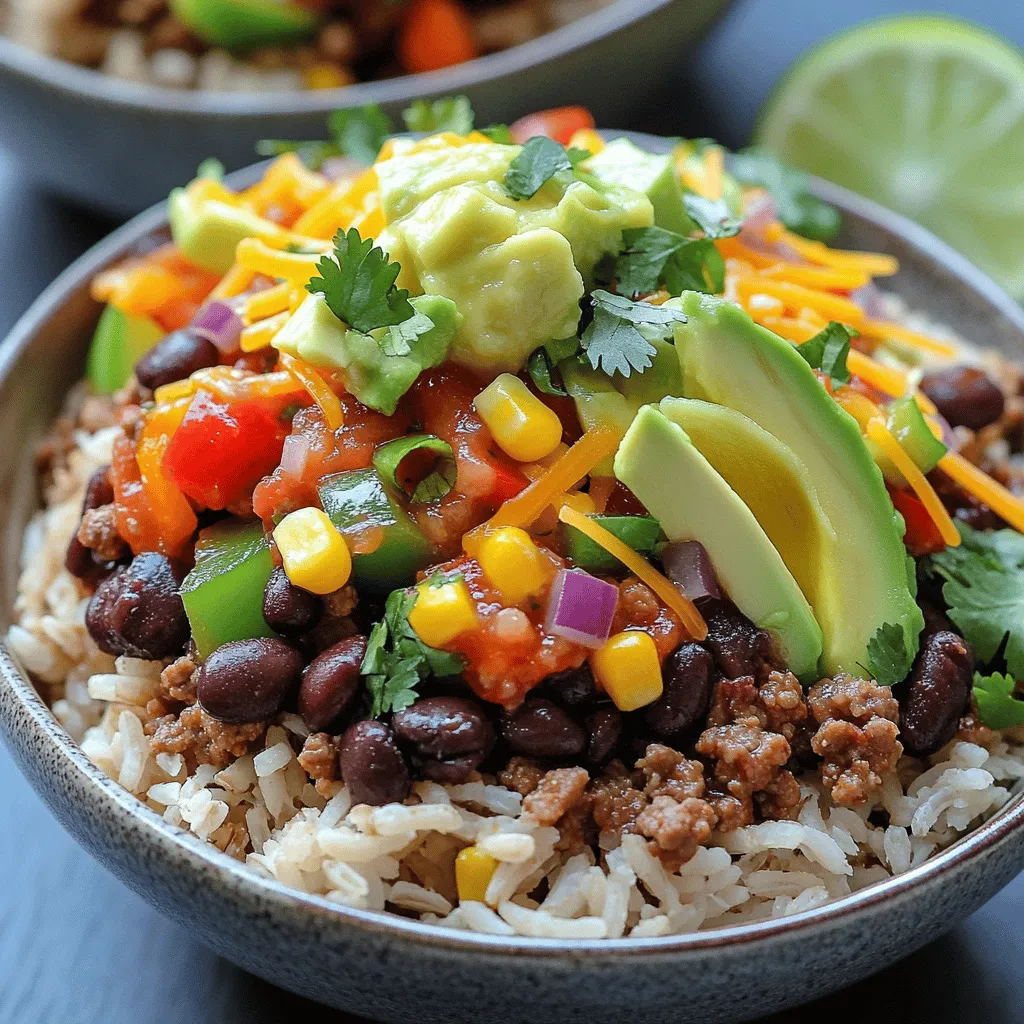
Ground Beef Burrito Bowl Simple and Flavorful Meal
Craving a meal that’s simple, tasty, and satisfying? You’re in the right place! A Ground Beef Burrito Bowl is the perfect dish to please your
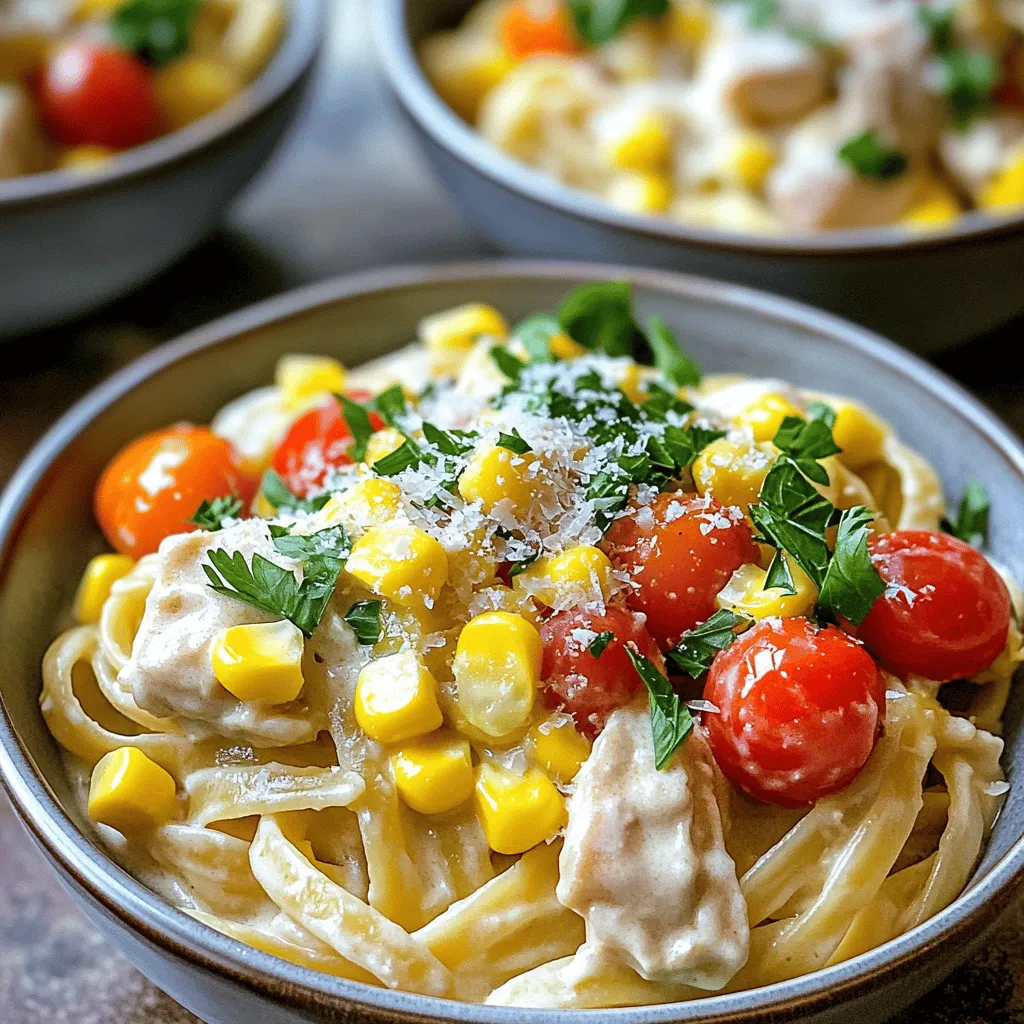
Creamy Cowboy Butter Chicken Linguine Delightful Meal
Are you ready to whip up a dish that will impress your family and friends? Let’s dive into the world of Creamy Cowboy Butter Chicken
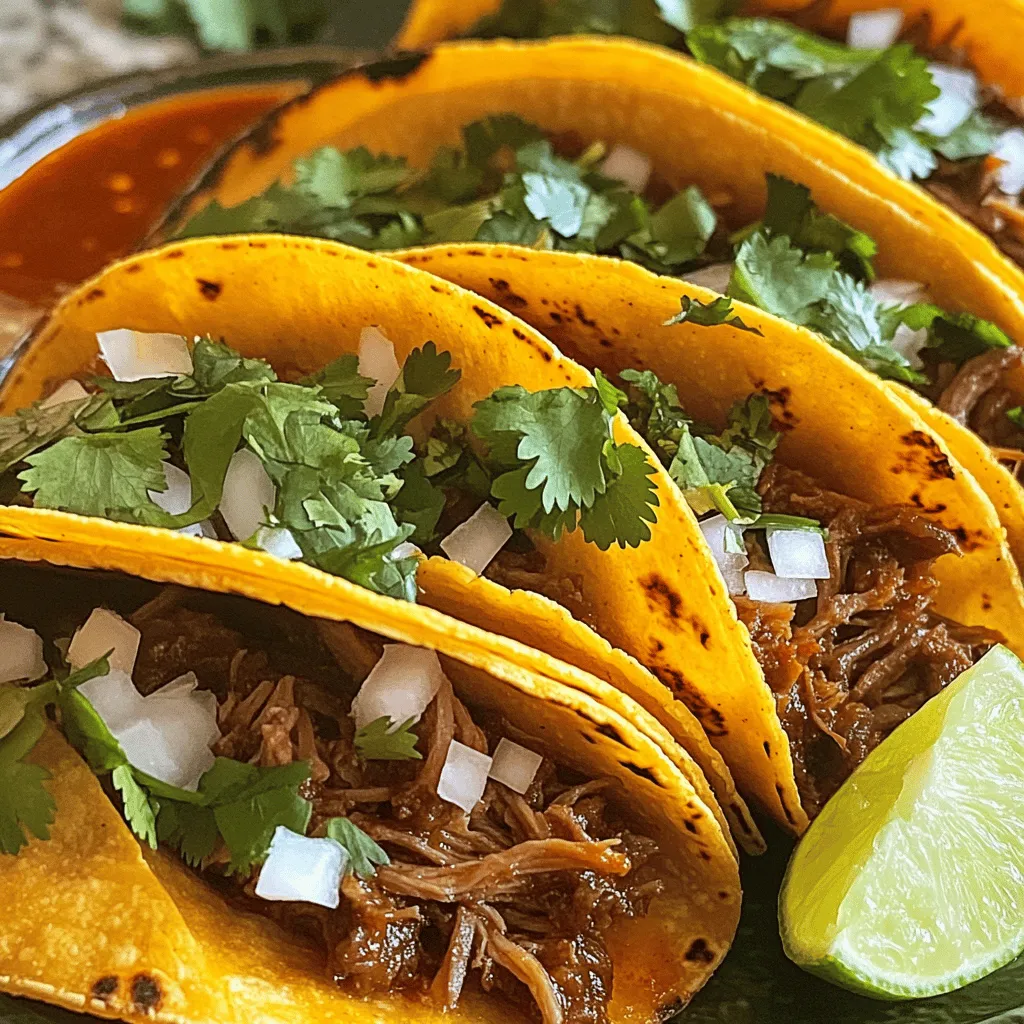
Best Birria Tacos Flavorful and Easy to Enjoy
Looking to dive into the world of birria tacos? You’re in for a treat! In this guide, I’ll share the best places to enjoy these