Dinner

To whip up this hearty meal, gather these ingredients: - 12 ounces penne pasta - 1 pound ground beef - 4 tablespoons unsalted butter - 4 cloves garlic, minced - 1 teaspoon red pepper flakes (optional for heat) - 1 cup heavy cream - 1 ½ cups shredded mozzarella cheese - ½ cup grated Parmesan cheese - Salt and pepper to taste - ½ cup fresh parsley, chopped (for garnish) You can switch some ingredients if you need to. Here are a few ideas: - For a lighter dish, try using ground turkey instead of beef. - Use whole wheat penne for a health boost. - If you want a non-dairy option, use plant-based cream and cheese. - For extra flavor, add sautéed onions or bell peppers. These swaps keep the meal tasty and fun! This dish is a comfort food staple, but let’s check its nutrition: - Calories: About 700 per serving - Protein: Roughly 35 grams - Fat: Around 40 grams - Carbohydrates: About 50 grams It’s filling and good for a cozy night in. Enjoy this cheesy penne as a treat! For the full recipe, check out the detailed steps. To start, fill a large pot with water. Add a generous pinch of salt. Bring the water to a rolling boil. Carefully add 12 ounces of penne pasta. Cook it according to the package instructions for about 8 to 10 minutes. You want it to be al dente, which means it should still have a slight bite. Once cooked, drain the pasta in a colander and set it aside. This step is key for a perfect texture in your dish. Next, take a large skillet and place it over medium heat. Add 1 pound of ground beef to the hot skillet. Break it up with a spatula as it cooks. Stir it frequently until the beef is browned and no longer pink. This should take about 6 to 8 minutes. If you see excess fat, drain it off. You want your beef to be flavorful, not greasy. Now, reduce the heat to low. Add 4 tablespoons of unsalted butter to the beef. Let the butter melt completely. Once melted, stir in 4 minced garlic cloves and 1 teaspoon of red pepper flakes if you like some heat. Cook this mixture for 2 to 3 minutes, stirring until the garlic smells great but does not burn. This step adds a rich flavor to the dish. Slowly pour in 1 cup of heavy cream, mixing well with the garlic butter beef. Let the sauce simmer gently for about 3 to 4 minutes. Stir it occasionally until it thickens slightly. Then, gradually add 1 ½ cups of shredded mozzarella and ½ cup of grated Parmesan cheese. Keep stirring until the cheese melts and the sauce is creamy. Season with salt and pepper to taste. Finally, add the drained penne pasta right into the skillet. Use tongs or a large spoon to toss everything together. Make sure every piece of pasta gets coated in that delicious sauce. This hearty comfort meal is now ready to serve! For the complete recipe, check the Full Recipe section. To make a creamy sauce, start with fresh ingredients. Use heavy cream for richness. Heat your garlic butter mixture gently. Avoid high heat; let it simmer slowly. This helps the flavors blend without burning the garlic. Stir in the cheese gradually. This keeps the sauce smooth and creamy. Be patient and let it melt completely. For extra flavor, try adding herbs like basil or thyme. Fresh herbs brighten up the dish. You can also add a splash of white wine for depth. If you enjoy spice, increase the red pepper flakes. For a touch of acidity, squeeze some lemon juice in before serving. This will balance the richness of the sauce. One common mistake is overcooking the pasta. Always cook it al dente, so it stays firm. Another mistake is not draining the beef properly. Excess fat can make the sauce greasy. Make sure to stir the sauce often. If you let it sit too long, it can thicken too much. Lastly, don’t skip seasoning; taste your sauce before serving! For the complete recipe, check the [Full Recipe]. {{image_4}} You can add veggies to your cheesy penne for more taste and health. Try adding spinach, broccoli, or bell peppers. They cook fast and blend well with the beef and cheese. For spinach, add it in the last few minutes of cooking. If using broccoli or bell peppers, sauté them with the beef. This way, you get extra vitamins and a pop of color. Cheese is key to this dish. While mozzarella and Parmesan work great, you can swap them for other types. Cheddar adds a sharp bite. Gouda gives a rich and creamy flavor. If you love blue cheese, it can bring a bold twist to your meal. Mix and match to find your favorite combo. If you like heat, red pepper flakes are your friend. You can adjust the amount to fit your taste. Start with a little, maybe half a teaspoon. You can always add more if you want it spicier. This simple step can take your cheesy penne to a whole new level. For more details on the recipe, check the Full Recipe. To keep your cheesy penne fresh, store it in an airtight container. Make sure the dish cools completely before sealing. This helps prevent moisture buildup, which can make the pasta soggy. Keep it in the fridge for up to three days. If you plan to eat it later, label the container with the date. This way, you always know how fresh it is. When it’s time to reheat your cheesy penne, use a skillet for the best taste. Add a splash of cream or water to help revive the sauce. Heat it over low to medium heat, stirring often. This method keeps the pasta creamy and avoids burning. You can also use the microwave, but make sure to cover it to keep moisture in. Heat in short bursts, stirring in between. If you want to save your cheesy penne for later, freezing is a great option. Portion the dish into smaller containers for easy meals later on. Make sure to leave some space at the top of the container, as the pasta will expand. Wrap each container tightly with plastic wrap or aluminum foil. You can freeze it for up to three months. When you’re ready to enjoy it again, thaw it in the fridge overnight before reheating. This keeps the flavors intact and the texture nice. For the full recipe, check out the earlier section. Yes, you can use other pastas! Bowtie, fusilli, or rigatoni work well. They all hold the sauce nicely. Stick to similar sizes for even cooking. Just adjust the cooking time based on the pasta shape you choose. To make Cheesy Penne with Garlic Butter Beef healthier, consider these tips: - Lean Meat: Use ground turkey or chicken instead of beef. - Whole Wheat Pasta: This adds fiber and nutrients. - Add Veggies: Toss in spinach, bell peppers, or broccoli for more vitamins. - Less Cheese: Reduce cheese for a lighter sauce, or use low-fat options. - Swap Cream: Use Greek yogurt or a plant-based cream for fewer calories. Great sides can elevate your meal! Try these: - Garlic Bread: Perfect for scooping up the cheesy sauce. - Salad: A light green salad with a simple vinaigrette adds freshness. - Roasted Veggies: Oven-roasted veggies complement the rich flavors. - Steamed Broccoli: This adds color and a healthy crunch. For the full recipe, check out the details above! In this blog post, I covered how to make cheesy penne with garlic butter beef. You learned about the ingredients, cooking steps, and helpful tips. I shared storage info and FAQs to answer common questions. Keep these lessons in mind as you cook. Don’t be afraid to add your twist. Enjoy transforming this dish into your family's new favorite.
Cheesy Penne with Garlic Butter Beef Hearty Comfort Meal
Indulge in the ultimate comfort food with my Cheesy Penne with Garlic Butter Beef. This hearty meal blends rich flavors and creamy goodness, making it
- 4 large flour tortillas - 1 cup shredded cheddar cheese - 1 cup shredded mozzarella cheese - 1 cup cooked grilled chicken, shredded (optional) - ½ cup black beans, rinsed and drained - 1 small avocado, sliced - 1 medium tomato, diced - ¼ cup fresh cilantro, chopped - 1 teaspoon garlic powder - 1 teaspoon onion powder - Salt and pepper to taste - 2 tablespoons unsalted butter - Salsa and sour cream for serving (optional) The key to a great grilled cheese burrito lies in the balance of flavors and textures. Start with fresh, soft tortillas. They wrap up the filling well and hold all those tasty ingredients. Next, the cheeses create that melty goodness you crave. Cheddar brings sharpness, while mozzarella offers a stretchy texture. You can add more fun to your burrito. Try these options: - Jalapeños for heat - Corn for sweetness - Spinach for greens - Cooked bacon for crunch These add-ins enhance the flavor and make the dish more exciting. You can mix and match based on your taste. When shopping, look for the best ingredients. Fresh tortillas are key. Check for no preservatives. For cheese, choose blocks over pre-shredded. Blocks melt better and taste richer. Always pick ripe avocados. They should feel slightly soft when pressed. For tomatoes, find ones that are firm and fragrant. Fresh cilantro should be bright green and not wilted. Quality matters, and it will shine through in your burrito. If you want to dive deeper into the whole process, check out the Full Recipe. To make the grilled cheese burrito, start with the cheese mix. In a big bowl, combine the shredded cheddar and mozzarella cheeses. Add garlic powder, onion powder, salt, and pepper. Mix it well. Next, lay a tortilla flat on your counter. Spoon about a quarter of the cheese mix in the center. Spread it out evenly. Now, add a few slices of avocado, some black beans, and shredded chicken if you like. Top it off with diced tomatoes and cilantro. Fold the sides of the tortilla in. Then roll it tightly from the bottom to make a burrito shape. Repeat this with the other tortillas until you have all filled. Heat a large skillet on medium. Add one tablespoon of butter and let it melt. Place two burritos seam-side down in the skillet. Cook for 3-4 minutes on each side. You want them golden brown and crispy. Once cooked, take them out and repeat with the rest of the burritos. Add more butter if needed. Finally, slice each burrito in half diagonally and serve warm. To get a good burrito roll, place the filling in the center. Make sure not to overfill. This helps keep the burrito tight. Fold the sides in first, then roll from the bottom. Tuck it in as you roll. This keeps everything inside. Using a warm tortilla can help too. Warm tortillas are more flexible and easier to roll. If you like your burritos extra crispy, cook them a bit longer. Keep an eye on them to avoid burning. You can also lower the heat to cook them longer without burning. For softer burritos, just cook them for a shorter time. They will still be warm and melty. Remember, cooking time can change based on your stove and skillet. To make your grilled cheese burrito tasty, use the right seasonings. I suggest adding garlic powder and onion powder. These spices add depth to the cheese. You can also mix in some chili powder for a kick. Don't forget to sprinkle salt and pepper to taste. Fresh herbs like cilantro can also boost flavor. They add freshness and make your burrito pop. Getting cheese to melt just right is key. I recommend using a mix of cheddar and mozzarella. Cheddar gives flavor, while mozzarella melts beautifully. When cooking, keep the heat medium. This allows the cheese to melt without burning the tortilla. Adding a little butter to your skillet helps create a crispy outer layer. Make sure to cover the skillet for a few minutes. This traps heat and helps the cheese melt faster. Many people rush the cooking process. This can lead to burnt tortillas or unmelted cheese. Take your time. Flip the burrito gently with a spatula to prevent spilling the filling. Also, don’t overstuff your burrito. Too much filling makes it hard to roll and can lead to leaks. Stick to a few ingredients that complement each other. Following these tips will help you make a perfect grilled cheese burrito every time. For a full recipe, check out the details provided above! {{image_4}} You can easily make a tasty vegetarian grilled cheese burrito. Start with your base of cheese and tortillas. Then, skip the meat and load up on veggies. Try adding: - Spinach - Bell peppers - Zucchini - Mushrooms These veggies add great flavor and texture. They also make your burrito colorful and fun to eat. If you like heat, add some spice to your grilled cheese burrito. You can use: - Jalapeños - Hot sauce - Chipotle peppers These spicy ingredients give your burrito a nice kick. Mix them in with the cheese for a bold flavor. You can also serve it with salsa that has a spicy twist. Cheese is the star of the show in a grilled cheese burrito. You can mix and match different cheeses for a unique taste. Some great options include: - Pepper Jack for a spicy kick - Gouda for a smoky flavor - Feta for a tangy touch Experiment with your favorite cheeses to find the perfect blend. Each combination brings a new taste to your burrito. For the full recipe, check out the detailed instructions above. Happy cooking! Store leftover grilled cheese burritos in an airtight container. Let them cool first. Make sure to keep them in the fridge. They will stay fresh for about 3 days. If they are still warm, they can create steam and make the tortillas soggy. To reheat, use a skillet for the best taste. Heat over medium-low heat. Place the burrito in the skillet and cook for about 3-4 minutes on each side. This method keeps the outside crispy. You can also use a microwave. Wrap the burrito in a damp paper towel to keep it moist. Heat for about 30 seconds to 1 minute, checking often. You can freeze grilled cheese burritos for later. Wrap each burrito tightly in plastic wrap. Then, place them in a freezer bag. They can last up to 3 months. When you're ready to eat, thaw them overnight in the fridge. Reheat following the skillet method for the best taste. Enjoy these delicious bites any time! For more tips, check the Full Recipe. A grilled cheese burrito is a tasty mix of two favorite foods. It combines the cheesy goodness of a grilled cheese sandwich with the hearty wrap of a burrito. You start with a soft tortilla and fill it with melted cheeses, like cheddar and mozzarella. You can add meat, beans, and fresh veggies for more flavor. The whole thing gets grilled until crispy and golden brown. It’s a fun and easy meal that everyone loves. Yes, you can make a grilled cheese burrito ahead of time. You can prepare the filling and wrap the burritos, but don't cook them yet. Then, store them in the fridge for up to a day. When you're ready to eat, just grill them until hot and crispy. This way, you save time and still enjoy a fresh meal. The best grilled cheese burrito can often be found at local food trucks or casual restaurants. Many popular fast-food chains also serve their own versions. However, I believe the best one is the one you make at home! You can customize it with your favorite ingredients. That way, you can create a unique taste that suits your style. For a full recipe, check out the [Full Recipe]. I’ve shared the key ingredients and steps to create a tasty grilled cheese burrito. You can use simple ingredients or add extras to boost flavor. Follow the cooking tips for a perfect roll. Explore variations like spicy or vegetarian options. Remember how to store and reheat leftovers for future meals. Enjoying this dish is easy when you know what to do! Keep experimenting to find your favorite twist on this fun food.
Grilled Cheese Burrito Simple and Delicious Recipe
Are you ready to dive into a tasty twist on a classic? The Grilled Cheese Burrito combines comfort food with a fun, hand-held treat. In
- Ground beef - Italian sausage - Mozzarella cheese - Parmesan cheese - Onion - Bell pepper The main ingredients for The Pizza Burger Pie create a rich and tasty dish. First, ground beef and Italian sausage combine for a perfect meat blend. This mix gives the pie its hearty flavor. Next, cheese plays a big role. Mozzarella brings that gooey texture, while Parmesan adds a sharp bite. Fresh vegetables like onion and bell pepper provide crunch and color. They balance out the richness of the meat and cheese. - Garlic powder - Italian seasoning - Salt - Pepper Good seasonings make all the difference in any recipe. For this pie, garlic powder boosts the flavor of the meat. Italian seasoning brings warmth and a hint of herbs. A sprinkle of salt and pepper enhances all the flavors, making each bite better. These simple seasonings ensure your pie tastes amazing. - Pizza dough (store-bought or homemade) - Pizza sauce - Olive oil The crust holds everything together, and pizza dough is key. You can use store-bought dough for quick prep or make your own for a fun touch. The pizza sauce adds moisture and flavor to the filling. Drizzling olive oil over the crust helps it brown and keeps it crispy. Using quality ingredients here sets the stage for a delightful meal. You can find the full recipe above to guide you through each step. 1. Cooking the meat mixture: Start by heating a large skillet over medium heat. Add 1 pound of ground beef and 1 pound of Italian sausage to the skillet. Use a spatula to break up the meat as it cooks. Brown it for about 6 to 8 minutes until it’s crumbled and no longer pink. Make sure to drain any extra fat. 2. Sautéing vegetables with seasonings: Next, add 1 small chopped onion and 1 diced bell pepper to the meat. Sprinkle in 1 teaspoon of garlic powder and 1 teaspoon of Italian seasoning. Season with salt and pepper to taste. Stir these ingredients together and cook for another 5 minutes. You want the veggies to be soft and fragrant. 1. Rolling out the pizza dough: On a lightly floured surface, roll out 1 pound of pizza dough into a large circle. Aim for about 12 to 14 inches in diameter. This will fit nicely into a 9-inch pie dish. 2. Layering ingredients in the pie dish: Carefully place half of the rolled dough into the dish. Press it firmly to cover the bottom and sides. Now, layer half of the 2 cups of shredded mozzarella cheese on top. Add the meat and vegetable mixture evenly over the cheese. Then, sprinkle 1/2 cup of grated Parmesan cheese. Finish with the rest of the mozzarella. 1. Oven temperature and baking time: Preheat your oven to 400°F (200°C). Bake the pie for 25 to 30 minutes. You want the crust to be golden brown and the cheese to bubble. 2. Cooling and slicing tips: After baking, let the pie cool for about 10 minutes before slicing. This cooling time helps the filling set a bit. Serve warm slices on plates. You can add fresh basil leaves on top for a nice touch. Enjoy your delightful family meal! For the complete recipe, check the earlier section. To ensure a crispy base, roll the dough thin. A thicker crust may lead to a soggy bottom. Bake it at a high temperature. This helps the crust cook fast and get that golden color. For sealing the top crust, press the edges firmly. This keeps the filling from leaking out. Use a fork to crimp the edges for a neat look. Add extra spices for depth. A pinch of red pepper flakes gives a nice kick. You can mix in some oregano or crushed garlic for more flavor. Fresh basil makes a great garnish. It adds color and a fresh scent. Just sprinkle it on top right before serving for the best taste. If you want a vegetarian option, swap out the meat. Use a mix of mushrooms, spinach, and zucchini instead. For cheese, try different types. Cheddar or gouda can add a unique twist. You can even use dairy-free cheese for a vegan version. Adjusting the cheese will change the flavor, so have fun with it! {{image_4}} You can switch up the meat in your Pizza Burger Pie. Ground turkey or chicken works well. These options are leaner but still tasty. If you prefer a meatless meal, try plant-based substitutes. There are many good meatless options available today. They give your pie great texture and flavor. You can also change the style of your pie. Add chunky veggies like mushrooms, zucchini, or spinach for a health boost. If you like spice, toss in spicy pepperoni. This adds a nice kick to your dish. You can even mix your favorite toppings to make it your own. Think about using regional flavors to inspire your pie. You can try a stuffed crust with cheese or herbs inside. This creates a fun surprise when you take a bite. Also, consider local toppings like jalapeños, olives, or even barbecue sauce. These toppings can give your Pizza Burger Pie a unique twist. Store leftover slices in the fridge. Use airtight containers to keep them fresh. This helps prevent moisture loss and keeps the flavors intact. If you place a paper towel inside, it will absorb extra moisture, keeping the crust from getting soggy. To freeze The Pizza Burger Pie, first let it cool completely. Wrap it tightly in plastic wrap and then place it in a freezer bag. Try to remove as much air as possible. When you want to enjoy it again, thaw it overnight in the fridge. Reheat it in the oven at 350°F (175°C) for about 20-25 minutes. This restores its crispy crust. You can store The Pizza Burger Pie in the fridge for about 3-4 days. If frozen, it will last up to 2-3 months. Always check for signs of spoilage. Look for a change in smell or color. If it looks or smells off, it’s best to throw it away. For more cooking tips, check out the Full Recipe. The Pizza Burger Pie is a fun twist on classic flavors. It combines pizza and burger elements into one delicious dish. This pie has layers of seasoned meat, gooey cheese, and savory sauce. It likely started as a way to mix two favorites into one meal. You can enjoy it with family or friends, making it a great choice for gatherings. Yes, you can prepare The Pizza Burger Pie ahead of time. Assemble the pie and cover it with plastic wrap. Store it in the fridge for up to 24 hours. When ready to eat, just bake it. You can also freeze it for later use. To reheat, bake it at 400°F (200°C) until warm. This way, you save time on busy days. The Pizza Burger Pie pairs well with many sides. Here are some great options: - Green salad: A simple salad adds freshness. - Garlic bread: Crunchy garlic bread adds flavor. - Veggie sticks: Carrots and celery provide a nice crunch. - Dipping sauces: Offer extra pizza sauce or ranch dressing. These sides create a balanced meal and enhance the pie's flavors. The Pizza Burger Pie combines ground beef, Italian sausage, cheese, and fresh veggies. We explored the key ingredients and the importance of seasonings. I shared simple steps for prepping, assembling, and baking. You learned tips for a crispy crust and flavor boosts. We discussed variations for different tastes and how to store leftovers. This dish is fun, tasty, and easy to make. You can impress family and friends with your pizza pie skills. Enjoy experimenting with flavors to create your perfect pie!
The Pizza Burger Pie Delightful Family Meal
Are you ready to delight your family with a fun twist on dinner? The Pizza Burger Pie combines the best of pizza and burgers in
- Fresh shrimp selection and preparation Choose one pound of large shrimp. Look for shrimp that are firm and smell fresh. Peel and devein them before cooking. This helps keep the shrimp tender and clean. - Choosing the right spices and seasonings Use these spices for flavor: - 2 tablespoons extra virgin olive oil - 1 tablespoon smoked paprika - 1 teaspoon garlic powder - 1 teaspoon onion powder - 1/2 teaspoon cayenne pepper (adjust for spice level) - 1/2 teaspoon freshly ground black pepper - 1 teaspoon salt These spices create a smoky and spicy taste that enhances the shrimp. - Other key ingredients for bowl assembly Assemble your bowl with: - 1 cup cooked quinoa - 1 cup black beans, drained and rinsed - 1 cup corn kernels (canned or frozen) - 1 ripe avocado, sliced - 1 cup cherry tomatoes, halved - Fresh cilantro leaves, chopped, for garnish - Lime wedges, for serving Each ingredient adds color, texture, and nutrition. The quinoa acts as a base, while the beans and corn add protein and fiber. The fresh vegetables brighten up the dish. For the full recipe, check the details above. To start, you need to marinate the shrimp with spices. In a medium bowl, mix 1 pound of shrimp with 2 tablespoons of olive oil, 1 tablespoon of smoked paprika, 1 teaspoon of garlic powder, 1 teaspoon of onion powder, 1/2 teaspoon of cayenne pepper, 1/2 teaspoon of black pepper, and 1 teaspoon of salt. Toss well to coat the shrimp evenly. Let it sit for 15-20 minutes. This helps the spices soak in. Next, let’s focus on cooking techniques for optimal blackening. Preheat a large skillet over high heat until it's very hot. This high heat is key to getting that perfect blackened crust. Carefully place the marinated shrimp in a single layer in the skillet. Do not stir them for the first 2-3 minutes. This helps the shrimp get a good sear. Now, here are some safety tips for using high heat with shrimp. Always be cautious when working with hot oil. Use tongs to flip the shrimp, and avoid overcrowding the skillet. This ensures even cooking and a nice blackened look. Now it's time to assemble the bowl. Start with a generous spoonful of cooked quinoa as the base in each serving bowl. This provides a hearty foundation. Next, layer on the black beans and corn. Use 1 cup of black beans and 1 cup of corn. These add protein and sweetness. Then, add the beautifully blackened shrimp on top. Each bowl should look vibrant and colorful. After that, add sliced avocado and halved cherry tomatoes for freshness. Finally, garnish the bowls with chopped cilantro. This adds a fresh flavor and a pop of color. Serve each bowl with lime wedges on the side. Squeezing lime juice over the shrimp bowls adds a zesty kick. Enjoy your delicious blackened shrimp bowls! For full details, check the Full Recipe. How can I adjust spice levels to taste? Start with the cayenne pepper. This spice adds heat. Use less if you prefer mild flavors. You can also add more smoked paprika for a smoky taste without extra heat. Taste your spice mix before marinating the shrimp. Adjust it until it feels just right for you. What are tips for achieving the best crust? A hot skillet is key. Preheat your skillet until it is very hot. This helps the shrimp develop that nice blackened crust. Avoid overcrowding the pan; cook in batches if needed. This ensures each shrimp gets the heat it needs. Do not stir the shrimp too early; let them sear for a few minutes to form a good crust. What are common mistakes to avoid while cooking shrimp? One mistake is overcooking shrimp. They cook fast, so stay alert. Cook them just until they are opaque. Another issue is not using enough oil. A light coating helps with browning. Lastly, don’t skip marinating. It adds flavor and moisture to the shrimp, making your dish even better. What side dishes pair well with blackened shrimp bowls? You can serve your blackened shrimp bowls with a fresh salad. A simple green salad adds crunch. Grilled veggies also make a great side. Try roasted asparagus or bell peppers for a colorful plate. They complement the shrimp's bold flavors perfectly. What beverage recommendations complement the meal? A crisp white wine pairs nicely. A Sauvignon Blanc or Pinot Grigio works well. For a non-alcoholic choice, try sparkling water with lime. It refreshes and balances the dish's spice. What are creative serving ideas for gatherings or meal prep? You can create a build-your-own bowl station. Offer quinoa, beans, and toppings in separate bowls. Guests can customize their meals. For meal prep, pack everything in containers. This makes lunch easy and delicious throughout the week. It’s a fun way to enjoy blackened shrimp anytime! {{image_4}} You can customize your blackened shrimp bowls with different ingredients. If you want to replace quinoa, try brown rice or farro. Both add good fiber and taste. For beans, chickpeas work well. They have a nice texture and pack protein. If you want to switch up the protein, chicken or tofu are great options. Marinate them the same way as the shrimp. For a vegetarian or vegan dish, use grilled vegetables or tempeh. They absorb flavors well and add a hearty bite. To boost flavor, think about sauces or dressings. A squeeze of lime juice brightens up the dish. You could also drizzle some tahini or yogurt for creaminess. Seasonal ingredients can keep your meal fresh. Try adding bell peppers in summer or roasted squash in fall. Both give great taste and color. If you like more heat, toss in some jalapeños or a dash of hot sauce. For sweetness, consider adding mango or pineapple. They create a nice contrast with the spices. Explore these variations, and feel free to mix and match based on what you enjoy! To keep your blackened shrimp bowls fresh, store them in airtight containers. Place the shrimp, quinoa, beans, and veggies in separate containers if possible. This helps maintain their texture and flavor. When reheating, use the microwave for quick warming. Heat in short bursts to avoid overcooking the shrimp. You can also reheat in a skillet over low heat. Add a splash of water to keep it moist. If you plan to freeze the bowls, let them cool completely first. Freeze in airtight containers for up to three months. Thaw in the fridge overnight before reheating. Cooked shrimp can last in the fridge for about three days. Always check for any off odors or slimy texture before eating. For fresh vegetables, like avocado and tomatoes, consume them within a day or two. They spoil faster than grains or beans. Signs of spoilage include weird smells, changes in color, or a mushy feel. If something looks or smells off, it’s best to throw it away. What is the best type of shrimp for blackening? The best shrimp for blackening are large, fresh shrimp. Look for wild-caught shrimp if possible. They have better flavor and texture. Always choose shrimp that are peeled and deveined for ease. Can I prepare blackened shrimp in advance? Yes, you can prepare the shrimp in advance. Marinate them and store them in the fridge for up to an hour. Cooking is best done right before serving. This keeps the shrimp juicy and flavorful. How can I make blackened shrimp bowls spicier or milder? To adjust the spice level, change the amount of cayenne pepper. For milder shrimp, reduce or leave out the cayenne pepper. You can also add more paprika for flavor without heat. Caloric breakdown of the dish One serving of blackened shrimp bowls has about 450 calories. This includes shrimp, quinoa, black beans, and toppings. The healthy fats from avocado add richness. Health benefits of ingredients used This recipe is rich in protein from the shrimp and black beans. Quinoa adds fiber and nutrients. Avocado provides healthy fats and vitamins. Together, these ingredients create a balanced meal. Tips for making the recipe more nutritious To make it even healthier, use brown rice instead of quinoa. Add more veggies like bell peppers or spinach. These additions boost vitamins and minerals. What does “blackened” mean in cooking? "Blackened" means cooking food at high heat in a skillet. The spices create a dark, flavorful crust. This adds depth and a smoky flavor to the shrimp. Can I use an oven instead of a skillet for the shrimp? You can use an oven, but it won't give the same crust. If you bake the shrimp, use a high temperature, around 400°F, to mimic skillet cooking. How do I avoid overcooking shrimp? To avoid overcooking shrimp, watch the time closely. Cook for only 2-3 minutes on each side. Shrimp are done when they turn pink and opaque. Remove them from heat right away. Blackened shrimp bowls are a flavorful meal that you can easily create. Start with fresh shrimp, the right spices, and tasty ingredients. Follow simple steps to both marinate and cook the shrimp safely. Assemble your bowl with a solid base, and don’t forget the garnishes. Remember to adjust flavors and serve with fun sides. You can even swap ingredients for your taste. Storing leftovers properly keeps your meal fresh, and these bowls are great for meal prep. Enjoy making this dish again and again!
Blackened Shrimp Bowls Quick and Flavorful Recipe
Craving a meal that’s quick, easy, and packed with flavor? Let’s dive into blackened shrimp bowls! This vibrant dish combines juicy shrimp, zesty spices, and
- 12 oz. cheese tortellini - 1 cup cooked Italian sausage, crumbled - 1 cup pepperoni slices - 1 cup diced ham - 1 cup marinara sauce - 1 cup mozzarella cheese, shredded - 1/2 cup Parmesan cheese, grated - 1 teaspoon Italian seasoning - 1/2 teaspoon crushed red pepper flakes (optional) - Fresh basil leaves for garnish The main ingredients in this dish create a rich, hearty flavor. I love using cheese tortellini as a base. It adds a creamy texture that blends well with the meats. The Italian sausage gives a nice spice, while the pepperoni and ham add a savory depth. I often choose a quality marinara sauce. A good sauce makes all the difference. The mozzarella and Parmesan cheeses create a gooey, melty topping that pulls everything together. If you want some heat, the crushed red pepper flakes are great to add. For garnish, fresh basil leaves add color and flavor. They bring a touch of brightness to the rich dish. You can find all these ingredients in most grocery stores. Check out the Full Recipe for detailed steps on how to combine these flavors into a satisfying meal. - Bring a pot of salted water to boil. - Cook tortellini according to package instructions. Cooking the tortellini is simple. First, fill a large pot with water and add salt. The salt makes the tortellini taste better. Once the water boils, add the cheese tortellini. They usually take about 3-5 minutes to cook. When they float to the top, they are ready. Drain them in a colander and set them aside. - Brown the Italian sausage in a skillet. - Add pepperoni and ham to the skillet. For the meat mixture, heat a large skillet over medium heat. Add the crumbled Italian sausage. Cook it for about 5 minutes until it turns brown. Stir it often so it cooks evenly. Once the sausage is brown, add the pepperoni slices and diced ham. Cook these for another 2-3 minutes until they are warm and mixed well. - Fold in the tortellini with the meat mixture. - Pour in marinara and sprinkle seasonings. Now, it’s time to mix everything. Gently fold the cooked tortellini into the skillet with the meat. Then, pour in the marinara sauce. Sprinkle some Italian seasoning and crushed red pepper flakes if you like spice. Toss everything together until the tortellini and meat are well coated with sauce. - Mix half of the cheeses into the tortellini mixture. Lower the heat a bit. Fold in half of the shredded mozzarella and half of the grated Parmesan cheese into the tortellini mixture. Stir carefully so the cheese melts slightly into the dish, making it creamy. - Preheat the oven to 375°F (190°C). - Transfer to a baking dish and top with remaining cheese. - Bake for 20-25 minutes. Preheat your oven to 375°F (190°C). Transfer the tortellini and meat mixture to a greased baking dish. Spread it evenly. Then, sprinkle the remaining mozzarella and Parmesan cheeses on top. Bake in the oven for 20-25 minutes. Look for that golden brown cheese and bubbly sauce. Your Meat Lovers Pizza Tortellini is now ready to enjoy! To make your Meat Lovers Pizza Tortellini burst with flavor, choose high-quality meats. Good sausage and pepperoni can elevate your dish. Feel free to adjust the seasoning to match your taste. You can add more Italian seasoning or even a bit of garlic for a kick. When cooking tortellini, it's key to ensure it is cooked al dente. This gives it a nice bite and keeps it from getting mushy. While sautéing your meats, make sure to stir occasionally. This helps everything cook evenly and gives you great texture. To make your meal complete, pair the tortellini with a fresh garden salad. The crispness of the salad balances the rich flavors of the dish. Serving it with garlic bread adds a lovely touch. Imagine dipping that warm bread into the marinara sauce! For the Full Recipe, refer to the complete instructions earlier in the article. {{image_4}} You can easily switch up the meats in this dish. Try using chicken or beef instead of Italian sausage. Both options bring a different flavor that can surprise your taste buds. Want even more taste? Add crispy bacon for an extra layer of flavor. The smoky crunch pairs well with the other meats. If you want a meatless option, go for vegetable-based tortellini. You can use mushrooms or bell peppers instead of meat. This keeps the dish full of flavor while being lighter. Zucchini or spinach also make great choices. They add freshness and nutrients without losing the savory taste. Cheese is the star of this dish! While mozzarella is classic, you can try other cheeses too. Provolone adds a sharp taste, while cheddar gives a rich, creamy finish. Mix and match to find your favorite blend. Each type of cheese brings its own unique flavor to this tasty dish. For the full recipe, check out the details above. Cool the dish before storing it in an airtight container. This helps keep the flavors fresh. I always let mine sit at room temperature for about 30 minutes. This way, it cools down nicely. You can keep Meat Lovers Pizza Tortellini in the fridge for up to 3-4 days. Make sure it stays sealed well. I recommend labeling the container with the date. This helps you remember when you made it. To reheat, use the oven or microwave until heated through. If you use the oven, set it to 350°F (175°C). Bake for about 15 minutes. If you prefer the microwave, heat in short bursts. Stir every minute to avoid cold spots. Enjoy that cheesy goodness again! Yes, just follow the package instructions for cooking. Frozen tortellini cooks quickly and is very convenient. When using frozen, make sure the water is boiling before adding them. You want them to cook evenly. Yes, you can prepare it and keep it in the fridge before baking. This is great for busy days. Just follow the cooking steps until you layer the cheese on top. Cover it well and store it in the fridge. When you're ready, pop it in the oven. Use gluten-free tortellini for a gluten-free option. Many stores offer gluten-free pasta now. Check the labels to find a good brand. You can still enjoy this rich dish without gluten. Alfredo sauce or pesto can be delicious alternatives. Each sauce brings a unique flavor. Alfredo adds creaminess, while pesto gives a fresh, herbal taste. Feel free to get creative with your favorite sauces! If you want more ideas, check out the Full Recipe for inspiration. This blog post showed you how to make a tasty tortellini bake. We covered key ingredients like tortellini, meats, and cheeses. You learned step-by-step cooking and baking methods. Tips helped you perfect flavor and serving ideas. In your kitchen, feel free to try different meats and cheeses. Store leftovers well for future meals. Enjoy cooking this dish and make it your own!
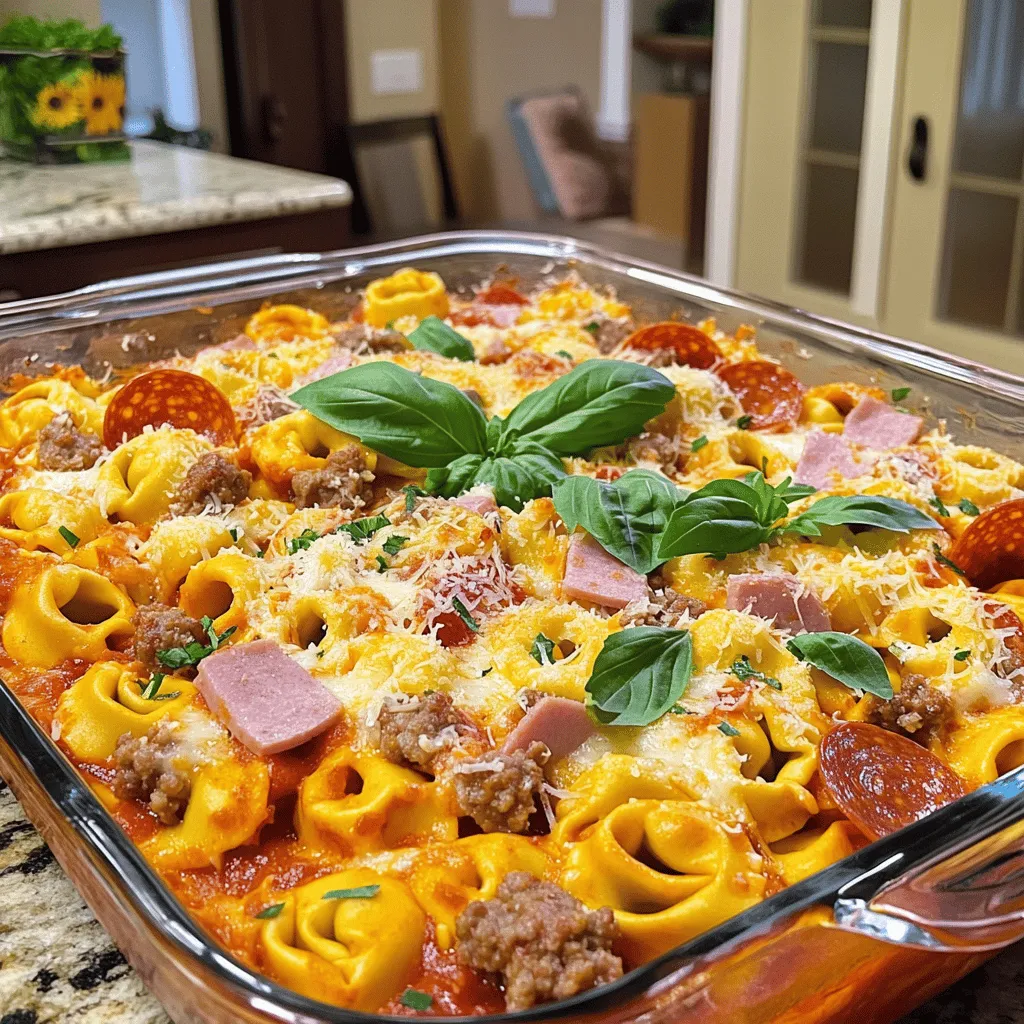
Meat Lovers Pizza Tortellini Tasty and Satisfying Dish
Craving a hearty meal that combines your love for meat and pasta? Look no further! My Meat Lovers Pizza Tortellini is the perfect dish for
To create a delightful Mediterranean pasta dish, you need fresh and vibrant ingredients. Here’s what to gather: - 300g spaghetti or penne pasta - 2 tablespoons olive oil - 3 cloves garlic, finely chopped - 1 medium red bell pepper, diced - 1 medium zucchini, diced - 1 cup cherry tomatoes, halved - 1 can (15oz) chickpeas, drained and rinsed - 1 teaspoon dried oregano - 1 teaspoon dried basil - Salt and pepper to taste - 1 cup feta cheese, crumbled - Fresh parsley, chopped (for garnish) - Juice of 1 lemon These ingredients deliver bold flavors and a colorful plate. If you can't find some ingredients, don’t worry! Here are easy swaps: - Use whole wheat pasta instead of regular pasta for a healthy twist. - Swap chickpeas for cannellini beans for a creamier texture. - Try sun-dried tomatoes if you don’t have fresh cherry tomatoes. - Use goat cheese instead of feta for a tangy taste. - Fresh herbs can replace dried ones if you have them on hand. These substitutes keep the dish tasty and exciting. Fresh herbs uplift any dish. They add brightness and a fresh taste. Parsley is great for garnishing. You can also use basil or oregano from your garden. Fresh herbs enhance the aroma and the flavor. They make your Mediterranean pasta feel special. Always add them just before serving. This keeps their vibrant taste intact. Start with a large pot. Fill it with water and add salt. Bring the water to a boil. Add 300g of spaghetti or penne pasta. Cook according to the package instructions until it is al dente. This usually takes around 8 to 10 minutes. Once done, drain the pasta. Save about ½ cup of the pasta water for later. In a big pan, heat 2 tablespoons of olive oil over medium heat. Add 3 finely chopped garlic cloves. Cook for 1-2 minutes until you smell the garlic. Next, add 1 medium red bell pepper and 1 medium zucchini, both diced. Stir and cook for 5-7 minutes. You want the veggies to soften. Then, toss in 1 cup of halved cherry tomatoes and 1 can of drained chickpeas. Cook for another 3-4 minutes until the tomatoes soften. Once the veggies are ready, season with 1 teaspoon of dried oregano, 1 teaspoon of dried basil, salt, and pepper. Mix everything well to blend the flavors. Now, add the cooked pasta, the reserved pasta water, and the juice of 1 lemon. Gently stir to coat the pasta with the veggies. Finally, add 1 cup of crumbled feta cheese. Mix it in until it starts to melt. Serve warm, garnished with chopped parsley. You can also add lemon wedges for extra zing. For the full recipe, check out Mediterranean Sun-Kissed Pasta . To cook pasta perfectly, use a large pot. Fill it with water and add salt. The water should taste like the sea. Bring the water to a boil before adding your pasta. Stir the pasta so it doesn’t stick together. Follow the cooking time on the package. For best results, cook until al dente. This means the pasta should be firm to the bite. Save some pasta water before draining. It adds great flavor and helps the sauce stick. You can boost the flavors in your Mediterranean pasta. Try adding fresh herbs like basil and parsley. They give a bright taste. Lemon juice adds a nice zing, too. If you like heat, add red pepper flakes. You can also mix in olives or capers for a salty touch. For extra richness, consider adding a splash of cream or a sprinkle of Parmesan cheese. These ingredients can elevate your dish from good to amazing. When mixing your pasta and sauce, do it gently. Use tongs to toss the pasta with the vegetables. This helps coat the pasta evenly. If the mix feels dry, add some reserved pasta water. It helps bind everything together. Be careful not to over-mix; you want to keep the pasta intact. Finally, once everything is combined, let it sit for a minute before serving. This allows the flavors to meld. For a show-stopping finish, sprinkle extra feta on top. For the full recipe, check out Mediterranean Sun-Kissed Pasta. {{image_4}} If you want a great vegetarian meal, skip the meat. You can use many veggies instead. Think about adding eggplant, spinach, or artichokes. These foods add color and taste. You can also toss in some olives for a briny kick. This makes the dish exciting and fresh. You can find many vegetarian Mediterranean pasta recipes online. They all use fresh, tasty ingredients. For those who enjoy protein, chicken and shrimp work well. Grilled chicken adds a nice smoky flavor. Just cook it first, then slice and mix it in. Shrimp cooks quickly and stays tender. Add shrimp in the last few minutes of cooking. This way, it stays juicy and flavorful. You can also use salmon or scallops, if you like. These options make your Mediterranean pasta even more satisfying. If you need gluten-free pasta, there are many options now. You can choose rice pasta, chickpea pasta, or quinoa pasta. These taste great and have nice textures. Just follow the cooking instructions on the package. They will blend perfectly with your mix of veggies and sauces. This way, everyone can enjoy Mediterranean pasta, regardless of diet. Try this Mediterranean sun-kissed pasta for a fresh twist. You can find the full recipe above. To keep your Mediterranean pasta fresh, wait for it to cool. Then, place the pasta in an airtight container. Make sure to cover it well to prevent drying. This method helps maintain flavor and texture. You can store the pasta in the fridge for up to three days. If you want to keep it longer, consider freezing it. When reheating, add a splash of water or olive oil. This helps revive the dish and keeps it moist. You can use a microwave or a stovetop. If using a microwave, heat in short bursts to avoid drying out. For stovetop reheating, warm the pasta in a pan over low heat. Stir well to ensure even heating. Most fresh ingredients have a short shelf life. Here’s a quick guide: - Pasta: Uncooked pasta lasts for about two years. Cooked pasta should be eaten within three days. - Vegetables: Use fresh vegetables within a week for the best taste. - Feta Cheese: Keep it in the fridge, and it will last about a week after opening. - Canned Chickpeas: These can last for years unopened. Once opened, store them in the fridge and use within three to four days. Mediterranean pasta is a vibrant dish full of fresh flavors. It combines pasta with vegetables, herbs, and cheese. You can use any pasta shape, like spaghetti or penne. Common veggies include zucchini, bell peppers, and tomatoes. The dish often features chickpeas for protein. A drizzle of olive oil and fresh herbs tie it all together. You can find a full recipe for Mediterranean Sun-Kissed Pasta in this article. Yes, you can make Mediterranean pasta ahead of time. It tastes great even after sitting in the fridge. Just cook the pasta and veggies, then store them separately. When ready to eat, mix them together and heat gently. This keeps the pasta from getting mushy. You can add a splash of lemon juice to brighten the flavors when reheating. Mediterranean pasta pairs well with many sides. Here are a few great options: - A light salad with mixed greens and olives - Garlic bread or crusty rolls - Roasted vegetables, like eggplant or peppers - Tzatziki sauce for a refreshing dip - Grilled or baked fish for added protein These sides add more flavor and texture to your meal. Enjoy mixing and matching! Mediterranean pasta is a simple, tasty dish with fresh herbs and hearty veggies. We discussed key ingredients, cooking steps, and how to make your pasta shine. You can try different variations, like vegetarian or gluten-free options. Storing leftovers correctly helps keep the flavors alive. In the end, enjoy the fun of making this meal your own. Explore the flavors and make it a favorite in your kitchen.
Mediterranean Pasta Delight Fresh and Flavorful Dish
If you’re craving a fresh and tasty dish, Mediterranean pasta is the answer. This vibrant meal is packed with colors and flavors that will excite
- 1 lb ground beef or turkey - 3 cups frozen tater tots - 2 cups marinara sauce The main ingredients create the base for the casserole. I often use ground beef, but turkey works well too. Both give a nice flavor. Tater tots add a crispy texture. Marinara sauce brings a rich, tangy taste that ties everything together. - 1 small onion, finely chopped - 1 bell pepper, diced - 1 teaspoon garlic powder - 1 teaspoon Italian seasoning Onions and bell peppers add color and sweetness. I like to sauté them for extra flavor. Garlic powder gives a nice kick, while Italian seasoning adds depth. These veggies and spices make the dish more exciting. - 2 cups shredded mozzarella cheese - 1 cup sliced pepperoni - Fresh basil leaves Mozzarella cheese creates a gooey, delicious layer on top. Pepperoni adds a savory touch and a bit of crunch. I like to finish with fresh basil for a pop of color and a fresh taste. These toppings make this casserole a family favorite. For the full recipe, check the detailed instructions. Cooking the ground beef or turkey Start by heating a large skillet over medium heat. Add 1 pound of ground beef or turkey. Cook it until it is browned. Use a spatula to break it apart as it cooks. Once browned, drain any extra fat. This keeps the dish less greasy. Sautéing the vegetables Next, add 1 small onion, finely chopped, and 1 diced bell pepper to the skillet. Sauté these veggies for about 5 minutes. You want them to be tender and smell great. Adding marinara sauce and spices Now, mix in 2 cups of marinara sauce, 1 teaspoon of garlic powder, and 1 teaspoon of Italian seasoning. Season with salt and pepper to your taste. Simmering the mixture Allow this mixture to simmer for 2-3 minutes. This step helps all the flavors blend together. Layering the ingredients in the baking dish Prepare a greased 9x13 inch baking dish. Spread the meat sauce mixture evenly across the bottom. This creates a hearty base for our casserole. Baking time and temperature Cover the meat sauce with a layer of frozen tater tots. Make sure they are in a single layer for crispiness. Sprinkle 2 cups of shredded mozzarella cheese on top, then add 1 cup of sliced pepperoni. Place the dish in a preheated oven at 400°F (200°C) and bake for 30-35 minutes. The casserole is ready when the tater tots are golden brown and the cheese is bubbly. Don't forget to check the [Full Recipe] for more details! To make the best Pizza Tater Tot Casserole, start with browning the meat right. Heat your skillet on medium. Add the ground beef or turkey. Stir it often until it turns brown. This step adds flavor and texture. If you skip this, the dish can taste bland. After browning, drain any fat. This keeps your casserole from being greasy. Next, you want the tater tots crispy. Arrange them in a single layer on top of your meat sauce. This helps them get golden and crunchy. If they overlap, some might turn soggy. Bake them until they are crispy and the cheese is bubbling. Keep an eye on the time so they don't burn. For presentation, serve your casserole right from the dish. This gives a homey feel. It also keeps the dish warm for longer. Pair it with a crisp side salad. The freshness of the salad balances the richness of the casserole. When garnishing, sprinkle fresh basil leaves on top. They add color and taste. You can also drizzle some extra marinara sauce on top. This makes it look even more inviting. You can serve it for family dinners or casual gatherings. Everyone loves this dish! For the full recipe, check out the details above. {{image_4}} You can swap proteins in this recipe. Ground chicken or turkey works well. For a veggie option, use black beans or lentils. Both choices add great flavor and texture. Dairy-free cheese options are also available. Look for brands that melt well. These can fit a plant-based diet, making the dish friendly for everyone. To change the taste, try different sauces. BBQ sauce can add a smoky kick. Buffalo sauce brings heat and spice, perfect for bold palates. Adding veggies boosts nutrition. Spinach, zucchini, or mushrooms blend nicely with the other flavors. Not only do they add color, but they also pack in vitamins. You can serve this dish family-style, straight from the baking dish. This makes sharing easy and fun. If you want individual portions, use ramekins for a personal touch. For a breakfast twist, add scrambled eggs on top. This adds protein and makes it a hearty morning meal. Enjoy these variations to keep things exciting! To store your Pizza Tater Tot Casserole, first let it cool down. Once it's cool, transfer it to a container. Use an airtight container for best results. This helps keep the casserole fresh. You can store it in the fridge for up to three days. If you have more, consider freezing some for later. When you reheat the casserole, you want it to stay crispy. The oven is your best friend here. Preheat your oven to 350°F (175°C). Place the casserole in a baking dish. Cover it with foil to keep moisture in. Heat for about 20-25 minutes. Remove the foil for the last 5 minutes to crisp up the top. You can also use an air fryer for a quick, crispy result. If you want to freeze your casserole, let it cool completely first. Cut it into portions for easy thawing. Wrap each portion tightly in plastic wrap. Then, place them in freezer bags. This helps keep the flavor intact. You can freeze it for up to three months. To thaw, move it to the fridge overnight, then reheat as mentioned before. Enjoy your delicious meal even after freezing! To make Pizza Tater Tot Casserole, start by cooking the meat. Use ground beef or turkey and brown it in a skillet. Next, add chopped onion and bell pepper. Cook until they soften. Mix in garlic powder, Italian seasoning, and marinara sauce. Let it simmer for a few minutes. Then, layer this meat sauce in a greased baking dish. Top with frozen tater tots, shredded mozzarella cheese, and pepperoni slices. Bake at 400°F for 30-35 minutes until golden brown. This process gives you a warm, cheesy dish that is sure to please. Yes, using frozen tater tots works great for this recipe. They save time and make cooking easier. You do not need to thaw them before baking. Just layer them on top of the meat sauce directly from the freezer. This way, you get a crispy texture and a golden color. It’s a simple trick that makes meal prep quick and fun. You can serve this casserole with a fresh side salad. A crisp salad balances the richness of the dish. You might also pair it with garlic bread for extra comfort. For drinks, try a light soda or iced tea. These options enhance the meal and keep it enjoyable. Want more ideas? Consider dips like extra marinara sauce for added flavor. This blog post explored how to make a tasty Pizza Tater Tot Casserole. We discussed the key ingredients like ground beef, tater tots, and marinara sauce, along with tempting toppings. You learned step-by-step instructions for cooking, combining flavors, and assembling the dish. I shared tips for cooking success and ideas for variations. Finally, we covered storage and reheating methods. This dish is fun to make and perfect for sharing. So gather your ingredients and enjoy a cozy meal!
Pizza Tater Tot Casserole Easy Family Meal Idea
Looking for a fun and easy family meal? Pizza Tater Tot Casserole hits the spot! This dish combines your favorite pizza flavors with crispy tater
- 1 lb large shrimp, peeled and deveined - 2 ripe avocados, diced - 1 cup cherry tomatoes, halved - 1 cup corn (fresh or frozen, thawed) - 1 small red onion, finely diced - Juice of 1 lime - 2 tablespoons olive oil - 1 teaspoon ground cumin - 1 teaspoon smoked paprika - Salt and freshly ground black pepper to taste - Cooked quinoa or brown rice (about 2 cups) - Fresh cilantro, chopped, for garnish This recipe is simple yet full of flavor. You will enjoy how fresh and vibrant these bowls are. The shrimp brings a savory touch, while the creamy avocado adds richness. Each ingredient plays a part in making this dish delightful. The lime juice brightens everything up, making it a perfect choice for a light meal. You can find the full recipe at the end of this article. - Preparing the shrimp: Start with 1 pound of large shrimp. Peel and devein them. This step is key for clean shrimp. - Prepping the vegetables: Dice 2 ripe avocados. Halve 1 cup of cherry tomatoes. Finely dice 1 small red onion. Thaw 1 cup of corn if using frozen. - Heating the skillet: Preheat a large skillet over medium-high heat. A hot skillet cooks shrimp fast and evenly. - Sautéing the shrimp: In a bowl, mix shrimp with 2 tablespoons of olive oil, 1 teaspoon of ground cumin, 1 teaspoon of smoked paprika, and salt and pepper. Toss well. Add shrimp to the hot skillet. Sauté for 3-4 minutes until pink and opaque. Remove from heat. - Layering ingredients: In each bowl, add half a cup of cooked quinoa or brown rice. Top with the avocado mixture of diced avocados, cherry tomatoes, corn, and red onion. - Garnishing and serving: Layer the sautéed shrimp on top. Finish with chopped fresh cilantro. Serve immediately for the best taste. Enjoy your meal! For the complete recipe, check out the Full Recipe. When cooking shrimp, time is key. Sauté them for just 3-4 minutes. This ensures they are juicy and tender. Overcooking can make shrimp rubbery. Look for a vibrant pink color to know they are ready. The shrimp should also be opaque. Once you see these signs, remove them from the heat. Choosing ripe avocados makes a big difference. Look for avocados that yield slightly to gentle pressure. If they feel hard, they need more time. To check if they are ready, hold them in your palm and squeeze gently. To dice without mashing, slice the avocado in half. Use a spoon to scoop out the flesh. Then, cut it into cubes while still in the skin. Finally, use the spoon to scoop the diced avocados out. Make your bowls look great! Start with a base of quinoa or brown rice. Add your avocado mixture on top, then layer shrimp. For a colorful touch, sprinkle fresh cilantro over the top. You can add other toppings too, like sliced radishes or feta cheese. These extra touches make your bowl pop with flavor and color. For more ideas, check out the Full Recipe. {{image_4}} You can switch shrimp for chicken or tofu. Chicken breast works well. Just season it like the shrimp. Cook it until it's golden and safe to eat. Tofu is a great option too. Use firm tofu, press it, and cut it into cubes. Sauté it with the same spices. Both options give you tasty meals. Feel free to mix in different veggies. Bell peppers add color and crunch. Cucumbers bring freshness. You can also use spinach or kale for a nutrient boost. For grains, consider farro or barley. They add a hearty texture. These swaps keep your bowls exciting and new. To boost flavors, try different sauces or dressings. A drizzle of balsamic glaze gives a sweet touch. You can also use a zesty vinaigrette. For heat lovers, add sliced jalapeños or a dash of hot sauce. These changes make your dish pop with flavor. Check the Full Recipe for more ideas. To keep your shrimp and avocado bowls fresh, store them in an airtight container. Place them in the fridge right after your meal. The best practice is to separate the shrimp and avocado from the grains. This helps maintain their texture. You can keep them for up to three days. After that, the quality may drop. You can freeze shrimp and avocado bowls, but it's best to freeze only the shrimp and grains. Avocados do not freeze well. If you need to freeze, use a freezer-safe container. To thaw, place it in the fridge overnight. Reheat the shrimp and grains in a skillet over medium heat. This keeps everything warm and tasty. Making these bowls ahead of time is easy. You can cook the shrimp and grains in advance. Store them separately in the fridge. For a fresh taste, prep the avocado and veggies just before serving. This keeps everything crisp and bright. Consider chopping the vegetables the night before. This way, you save time during the week. The full recipe is here if you want to check back for steps. To cook shrimp perfectly, focus on time. Shrimp cook quickly, so watch them closely. Heat your skillet to medium-high. When you add shrimp, they should sizzle. Cook them for about 3-4 minutes. They will turn pink and opaque when done. Remove them from heat right away to avoid overcooking. Yes, you can use frozen shrimp. Just remember to thaw them first. Place shrimp in cold water for about 15 minutes. This is a quick way to get them ready. After thawing, pat them dry with a paper towel. This helps the shrimp sear better and adds more flavor. If you want alternatives for quinoa or brown rice, consider these options: - Cauliflower rice - Couscous - Barley - Farro - Couscous Each option offers a unique taste and texture. Choose what fits your diet or preference best. Yes, this recipe is great for meal prep. You can make the shrimp and avocado mix ahead. Store them in separate containers. This keeps flavors fresh and prevents sogginess. When ready to eat, just reheat the shrimp. Then, combine with your base for a quick meal. Shrimp and avocado offer great health benefits. Shrimp are low in calories and high in protein. They also contain important nutrients like selenium. Avocados are rich in healthy fats and fiber. They support heart health and help keep you full. Together, they make a balanced meal. Absolutely! To add heat, try these ideas: - Add diced jalapeños to the avocado mix. - Sprinkle red pepper flakes on top. - Mix in hot sauce with the shrimp before cooking. These options let you control the spice level. Enjoy experimenting with flavors! This article covered how to make delicious shrimp and avocado bowls. We talked about the key ingredients and spices, and went through the step-by-step process. I shared tips to cook perfect shrimp and choose ripe avocados. You also learned about variations and meal prep. Incorporating these ideas will make your meals tasty and fun. Enjoy this dish and let your creativity shine!
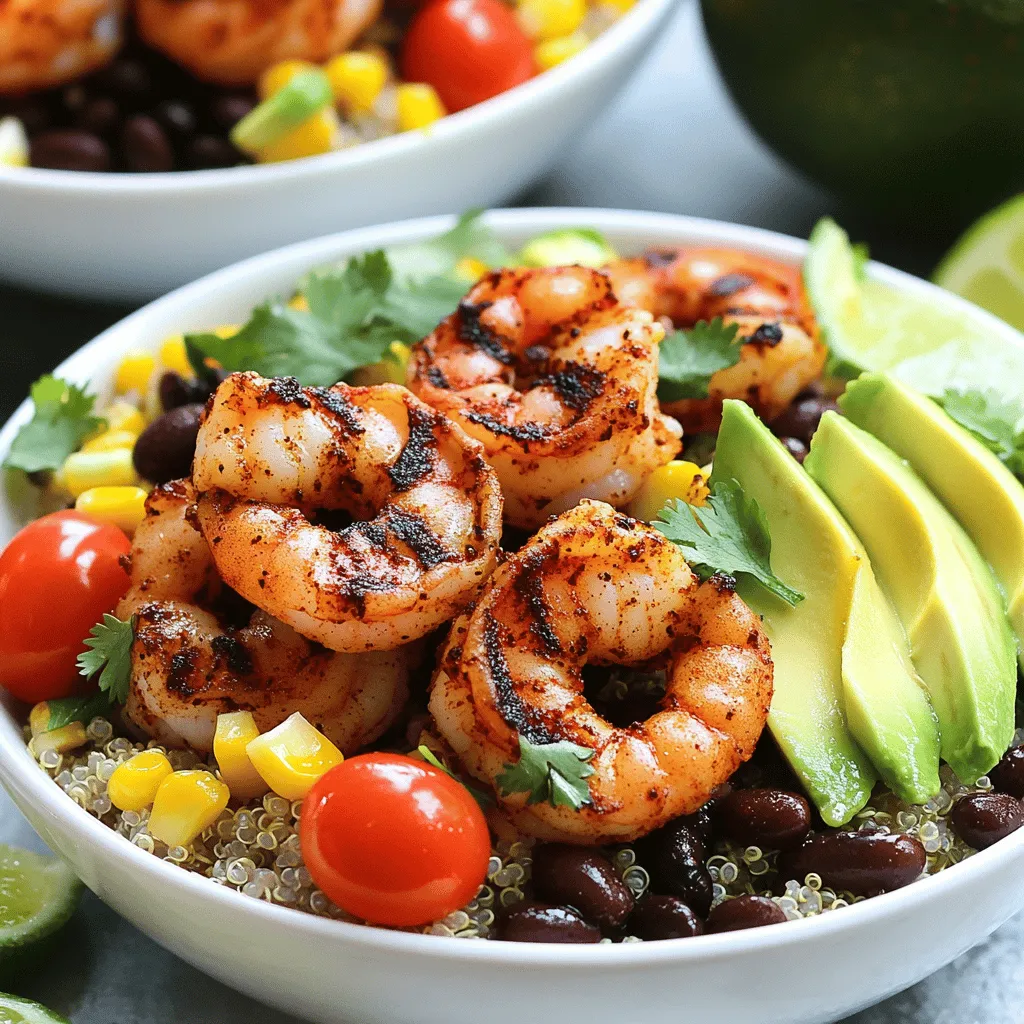
Savory Shrimp and Avocado Bowls Quick and Easy Recipe
Are you ready to make a delicious meal that’s quick and easy? My Savory Shrimp and Avocado Bowls will wow your taste buds without wasting
- 1 package of fresh cheese ravioli (approximately 9 oz) - 3 cups ripe cherry tomatoes, halved - 3 cloves of garlic, finely minced - 1/4 cup fresh basil leaves, chopped - 1 tablespoon extra virgin olive oil - 1/2 teaspoon red pepper flakes (optional for spice) - Sea salt and freshly ground black pepper, to taste - Grated Parmesan cheese for serving (optional) A serving of this dish is about 350 calories. Each dish contains protein, carbs, and healthy fats. You get around 15 grams of protein, 50 grams of carbs, and 10 grams of fat. This meal offers a good balance of nutrients. - Pot for cooking ravioli - Large skillet - Knife and cutting board Using fresh ingredients makes all the difference in this recipe. With these simple items, you can create a dish full of flavor and freshness. For the full recipe, check out the main article. To cook the cheese ravioli, bring a large pot of salted water to a boil. Add the ravioli and cook them for about 3-5 minutes. You want them to be al dente, which means they should be firm but cooked through. After cooking, drain the ravioli carefully. Make sure to save a cup of the pasta water. This water helps later with the sauce. Reserving pasta water is very important. It contains starch from the pasta, which helps the sauce stick and gives it a nice texture. You won't want to skip this step! In a large skillet, pour in the extra virgin olive oil and warm it up over medium heat. Once hot, add the finely minced garlic. Sauté the garlic for about one minute. You want it to smell good but not burn. Now, add the halved cherry tomatoes to the skillet. Cook them for 5-7 minutes, stirring often. Watch as they soften and start to burst. This is how you create a rich and tasty sauce. If you want a little heat, sprinkle in some red pepper flakes. Don't forget to season your sauce with sea salt and freshly ground black pepper. Once the tomatoes are ready, gently fold the cooked ravioli into the skillet. This action helps mix the flavors. If the sauce looks too thick, add a splash of the reserved pasta water. This will help you get that silky smooth sauce. Before you serve, mix in the chopped basil. The heat from the pasta will wilt the basil and bring out its nice flavor. Serve the dish right away, and feel free to add some grated Parmesan cheese on top for extra taste. To cook ravioli to al dente, follow the package instructions closely. Al dente means that the pasta is firm yet tender. This gives your dish a nice texture. When you drain the ravioli, remember to save a bit of pasta water. This water helps to adjust the sauce later. For the sauce, start with fresh ingredients. I recommend ripe cherry tomatoes for the best flavor. When sautéing garlic, do it gently. Cook it just until fragrant to avoid burning. Add salt and pepper to taste. This enhances the natural flavors of your sauce. Serving your ravioli in shallow bowls makes for an elegant look. The bright colors of the tomatoes and basil will stand out beautifully. Drizzle a little olive oil on top for added shine and flavor. For garnishing, use fresh basil leaves. You can also sprinkle some grated Parmesan cheese on top. This adds a rich flavor and a lovely touch to your dish. One common mistake is overcooking tomatoes. You want them to soften but not become mushy. This will keep the sauce fresh and vibrant. Another mistake is using too much or too little pasta water. If your sauce is thick, a splash of reserved water can help. If too watery, it can dilute the flavors. Finding the right balance is key for a perfect dish. {{image_4}} You can switch up your ravioli for fun. Try using mushroom or spinach ravioli. These options add unique flavors and textures. You can also add vegetables to your dish. Sliced zucchini or fresh spinach work well. They add color and nutrients. Herbs can change the taste of your dish. For a different flavor, use oregano or parsley. Both herbs bring freshness to the sauce. If you want some heat, try different peppers. Jalapeños or crushed red pepper can spice things up. Pair your ravioli with tasty side dishes. A fresh salad or garlic bread makes a great match. For drinks, consider white wine. A chilled Pinot Grigio or Sauvignon Blanc complements the meal nicely. You can find more ideas in the Full Recipe. To keep your delicious ravioli fresh, store it in the fridge. Use airtight containers to prevent moisture loss. Place the ravioli and sauce together if you plan to eat it within two days. If not, store them separately. This way, the ravioli won’t get too soggy. Glass or plastic containers work well for this purpose. You can freeze ravioli before or after cooking. For uncooked ravioli, lay them flat on a baking sheet. Freeze them for about an hour, then transfer them to a freezer-safe bag. This prevents them from sticking together. For cooked ravioli, let them cool first. Then, place them in a container with some sauce. When reheating, use a skillet over low heat. Add a splash of water to keep them moist. In the fridge, your ravioli dish lasts about three to four days. Look for signs of spoilage, like an off smell or a change in color. If the sauce has separated or looks dry, it's best to toss it. Always trust your senses. If it looks or smells bad, it’s time to say goodbye. To make homemade ravioli, you need flour, eggs, and water. Start by mixing flour and eggs to form a dough. Knead it for about 10 minutes until smooth. Let it rest for 30 minutes. Roll the dough thin and cut it into squares. Fill each square with your choice of filling, then fold and seal the edges. Cooking them is simple; just boil in salted water for three to four minutes. Yes, you can use dried ravioli instead of fresh. Fresh ravioli cooks faster and is softer. Dried ravioli takes longer to cook and often has a firmer texture. When using dried ravioli, follow the package instructions for cooking time. Adjust the sauce to match the heartiness of dried ravioli. If you need to avoid Parmesan cheese, try nutritional yeast for a cheesy flavor. You can also use pecorino cheese if you want a similar taste. For a creamy option, consider cashew cream or vegan cheese. These substitutions work well without losing the dish's richness. This blog covers a simple and tasty recipe for cheese ravioli with cherry tomato sauce. You learned how to cook ravioli, make a fresh sauce, and put it all together. I shared tips for perfecting your dish and variations to try. Remember to store leftovers properly to enjoy later. Whether cooking for family or friends, this recipe is sure to impress. Enjoy making this delicious meal and have fun in the kitchen!
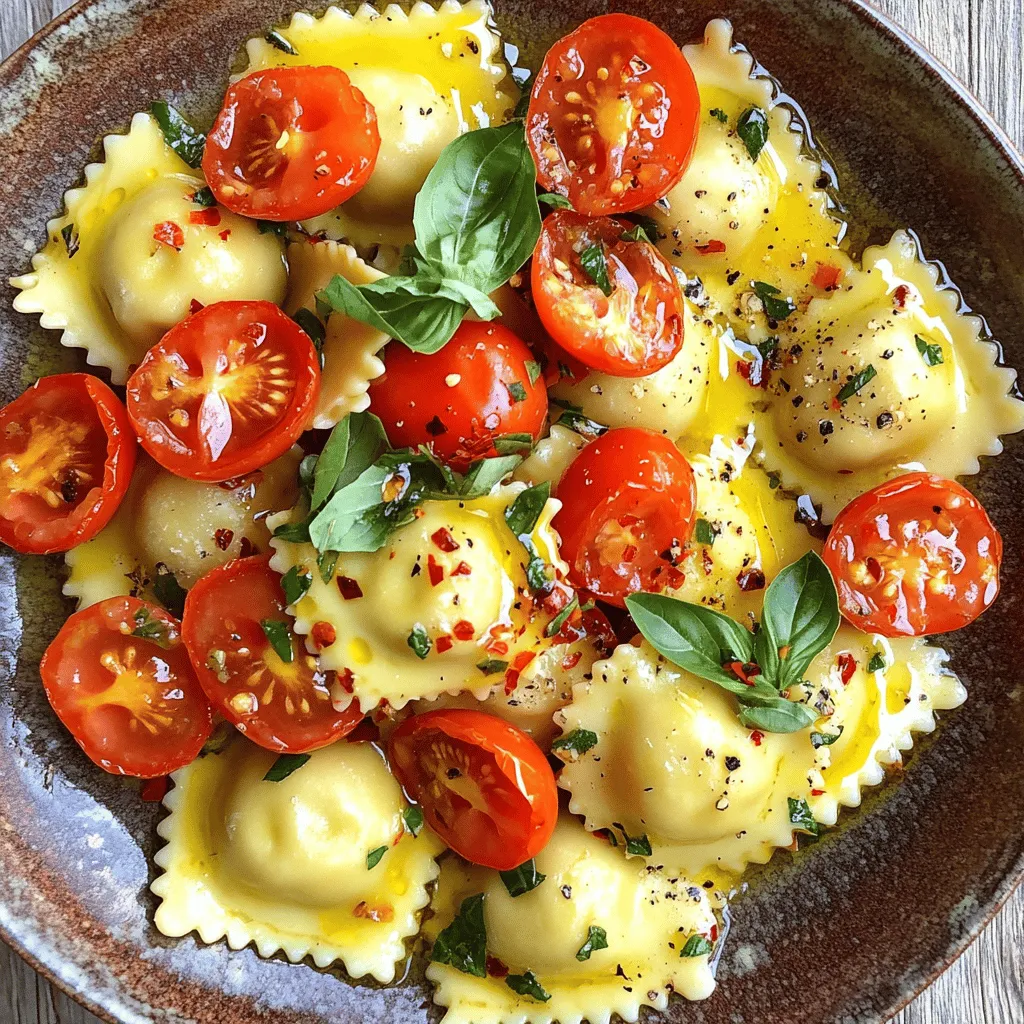
Delicious Ravioli with Fresh Tomatoes Quick Dish
Are you craving a quick and tasty meal? Let me show you how to make delicious ravioli with fresh tomatoes in under 30 minutes. This
- 12 oz cheese tortellini (fresh or frozen) - 1 can (14 oz) artichoke hearts, drained and roughly chopped - 3 cups fresh spinach, roughly chopped In this dish, cheese tortellini serves as the base. You can use fresh or frozen tortellini. The artichoke hearts add a unique flavor. They bring a nice, tangy taste to the meal. Fresh spinach adds color and nutrition. It wilts down nicely in the creamy sauce. - 1 cup heavy cream - 1 cup vegetable broth - 1 cup freshly grated Parmesan cheese Heavy cream creates a rich sauce. It makes the dish feel indulgent. Vegetable broth adds depth to the flavor. It combines well with the cream. Parmesan cheese enhances the dish's taste. It melts wonderfully and gives a cheesy finish. - 2 tablespoons olive oil - 2 cloves garlic, minced - 1 teaspoon dried Italian herbs (a mix of oregano, basil, and thyme) - Salt and pepper to taste - 1/4 teaspoon red pepper flakes (optional, for a kick) Olive oil is great for sautéing garlic. It brings out the garlic's flavor. Dried Italian herbs add a nice aroma. Salt and pepper are essential for seasoning. If you like a bit of heat, add red pepper flakes. They give a nice kick to the dish. {{ingredient_image_2}} 1. First, warm the olive oil in a large pot over medium heat. 2. Next, add the minced garlic and sauté it for 1-2 minutes. Watch closely to avoid browning. 3. Now, add the chopped artichoke hearts. Cook for another 2-3 minutes. Stir occasionally to blend the flavors. 1. Carefully pour in the vegetable broth and heavy cream. 2. Stir until everything is combined. 3. Increase the heat slightly and bring the mixture to a gentle simmer. 1. Add the cheese tortellini to the pot. Cook according to the package instructions, about 3-5 minutes. 2. Stir occasionally until the tortellini are tender and heated through. 1. Once the tortellini are cooked, stir in the chopped spinach. 2. Add the grated Parmesan cheese next. 3. Mix gently until the spinach wilts and the cheese melts. 4. Season the dish with dried Italian herbs, salt, pepper, and red pepper flakes if you like. 5. Stir once more to blend all flavors together. To keep your tortellini from getting mushy, follow these steps: - Cook the tortellini according to the package instructions. - Stir them gently while cooking. This helps them cook evenly. Stirring often is key. It prevents sticking and burning. When you add the tortellini to the pot, make sure to stir well. This helps them absorb the flavors of the sauce. You can easily boost the flavor of your dish. Here are some ideas: - Add fresh herbs like basil or parsley. They brighten the taste. - For a stronger kick, sprinkle in more red pepper flakes. - Consider mixing in fresh garlic or shallots for depth. If you love cheese, try adding more Parmesan or a sprinkle of mozzarella. It melts beautifully and adds richness. Presentation makes a huge difference. Serve your tortellini in deep bowls. This allows for a nice, creamy coating. - Top with extra grated Parmesan. It looks great and tastes even better. - A sprinkle of black pepper adds a nice touch. - Fresh herbs like basil or parsley make your dish pop. Pair this dish with a simple green salad or garlic bread. They complement the creamy tortellini well. Enjoy your meal! Pro Tips Use Fresh Ingredients: Whenever possible, opt for fresh spinach and high-quality cheese tortellini to enhance the flavor and texture of the dish. Customize the Heat: Adjust the amount of red pepper flakes based on your spice preference; you can also substitute with a pinch of cayenne for a different kick. Make it Vegan: Substitute the heavy cream with coconut cream or a plant-based cream alternative and use nutritional yeast instead of Parmesan for a vegan version. Garnish for Presentation: Elevate the dish by garnishing with fresh herbs like basil or parsley and an extra sprinkle of Parmesan cheese before serving. {{image_4}} You can easily swap some ingredients in this dish. For a gluten-free option, choose gluten-free tortellini. Many stores offer this choice. You can also use zucchini or bell peppers instead of artichokes. These veggies add great taste and color. If you want a vegan dish, use plant-based cheese and cream. Many brands now offer great alternatives. For broth, choose a vegetable or mushroom base. These options keep the flavor rich and creamy without dairy. You can add proteins to make it heartier. Chicken or shrimp works well with this dish. Just cook them with the garlic first. You can also try different herbs for extra flavor. Fresh basil or parsley adds a nice touch. Experiment with these ideas for a dish that fits your taste. To keep your One-Pot Spinach Artichoke Tortellini fresh, follow these tips: - Allow the dish to cool to room temperature. - Transfer it to an airtight container. - Store it in the fridge for up to 3 days. Using glass or BPA-free plastic containers works best. They keep the flavors locked in and are easy to clean. You can reheat your tortellini in two ways: microwave or stove. - Microwave: Place a portion in a bowl. Heat for 1-2 minutes, stirring halfway. - Stove: Warm a pan on medium heat. Add a splash of broth or cream to keep it creamy. Stir until heated through. Adding liquid prevents the dish from drying out and keeps it delicious. Yes, you can freeze One-Pot Spinach Artichoke Tortellini! Here’s how: - Cool the dish completely. - Use a freezer-safe container or heavy-duty freezer bags. - Remove as much air as possible to avoid freezer burn. To reheat from frozen, thaw it overnight in the fridge. Then, follow the reheating tips for best results. Enjoy your tasty leftovers later! Yes, you can use frozen spinach. However, it may change the texture. Frozen spinach holds more water, which can make the dish a bit soupy. If you do use frozen spinach, make sure to thaw and drain it well before adding it to the pot. This helps keep your dish creamy and flavorful. This dish keeps well for about 3 to 4 days in the fridge. Store it in an airtight container. Make sure it cools completely before sealing it. This will help maintain its taste and texture. If your sauce is too thick, you can easily fix it. Just add a little more vegetable broth or heavy cream. Stir it in slowly until you reach your desired consistency. You can also add a splash of water if needed. This keeps the sauce creamy without losing flavor. This dish uses cheese tortellini, artichoke hearts, and spinach for great flavor. Add heavy cream, vegetable broth, and seasonings to create a rich sauce. You learned tips on cooking and flavor enhancements to make it your own. Don’t forget serving ideas and how to store leftovers. With simple steps and easy ingredients, you can enjoy this dish any night. Whether you stick to the recipe or switch things up, cooking can be fun and satisfying. Try making it today!
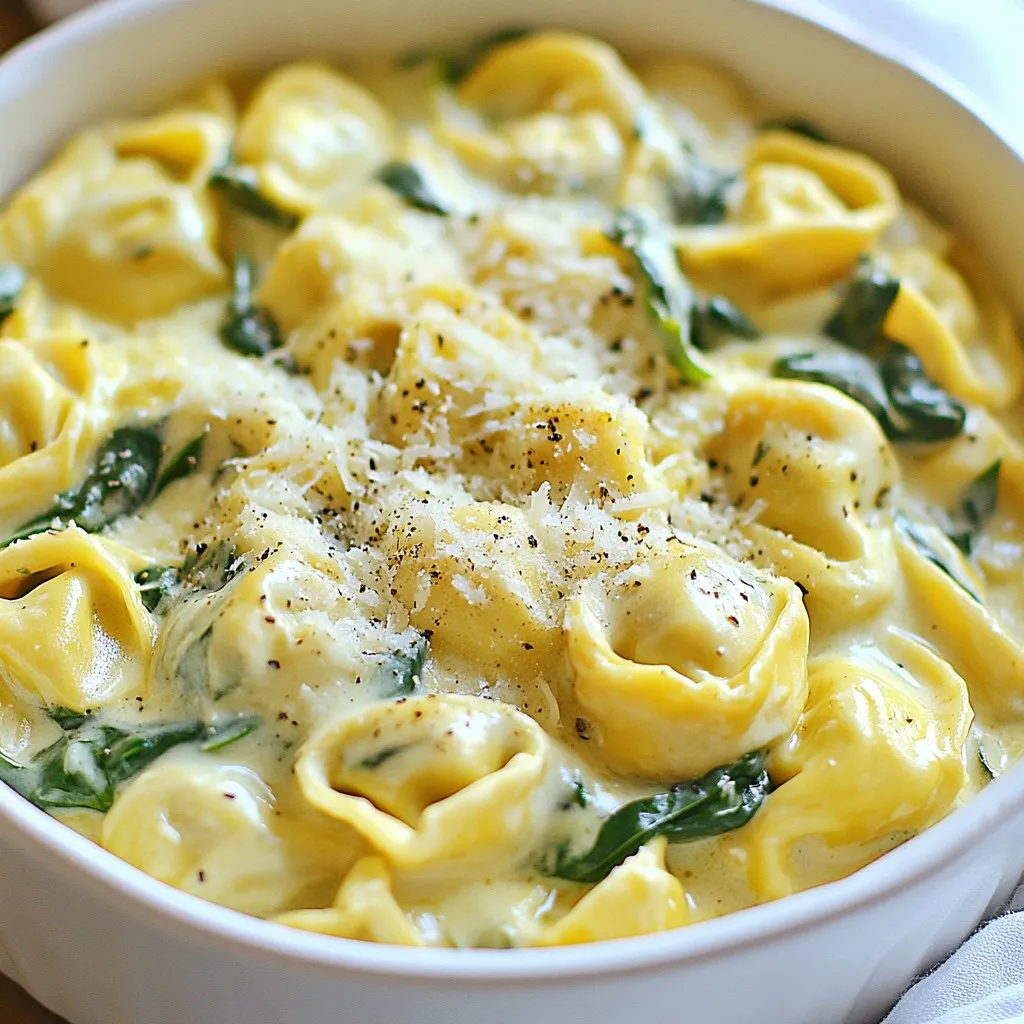
One-Pot Spinach Artichoke Tortellini Easy Dinner Dish
Looking for a quick and tasty dinner? This One-Pot Spinach Artichoke Tortellini recipe is what you need! With just a few simple ingredients and easy