Dinner
![To make Cranberry Orange Chicken, you need fresh and simple ingredients. Each one adds its own flavor to the dish. Here’s what you will need: - Boneless skinless chicken breasts - Fresh or frozen cranberries - Orange zest and juice - Olive oil, honey, garlic, ginger - Seasoning (salt, black pepper, dried thyme) - Garnish options (cilantro or parsley) Using fresh ingredients makes a big difference in taste. For the cranberries, you can choose frozen if fresh ones are not available. The orange zest adds a lovely zing, while the honey brings sweetness. This balance of flavors is what makes the dish special. When you gather these ingredients, think about how they work together. The garlic and ginger give warmth, while the thyme adds earthiness. In the end, you create a dish that is not just delicious but also visually appealing. For the full recipe, see the [Full Recipe]. Start by preheating your oven to 375°F (190°C). This step is key. A hot oven helps cook the chicken evenly. Make sure to be careful when using hot appliances. Always use oven mitts to prevent burns. Next, mix your ingredients for the cranberry sauce. In a bowl, combine cranberries, orange juice, orange zest, honey, minced garlic, grated ginger, salt, black pepper, and dried thyme. Each ingredient plays a role: cranberries add tartness, honey brings sweetness, and garlic adds depth. Stir this mix well to blend the flavors. Now, it's time to sear the chicken. Heat olive oil in a large oven-safe skillet over medium heat. While the oil heats, season both sides of each chicken breast with salt and black pepper. When the oil shimmers, add the chicken. Sear each side for about 5 minutes until they turn a nice golden-brown. This step gives the chicken a tasty crust. After searing, pour the cranberry sauce over the chicken in the skillet. Make sure the sauce covers the chicken well. Carefully transfer the skillet to your preheated oven. Bake for 25-30 minutes until the chicken reaches an internal temperature of 165°F (75°C). This ensures it is fully cooked. Once baked, remove the skillet from the oven. Let the chicken rest for about 5 minutes. Resting is vital. It allows juices to redistribute, making the chicken tender and flavorful. For serving, place the chicken breasts on plates and drizzle them with the cranberry sauce. Garnish with freshly chopped cilantro or parsley for a pop of color. This not only looks great but adds a fresh taste too. Enjoy your meal! For the full recipe, check the details above. To make your cranberry orange chicken shine, focus on ingredient quality. Use fresh cranberries if you can find them. They add a bright taste that frozen ones can't match. The orange should be juicy and fragrant. Zest it well to get all those oils. Balancing sweet and savory is key. The honey adds sweetness, while the salt and spices give depth. Taste your sauce as you mix it. Adjust the honey or salt to fit your liking. One common mistake is overcooking the chicken. Chicken can dry out quickly. Use a meat thermometer to check the temperature. It should reach 165°F (75°C) for safety and juiciness. Another mistake is not allowing the sauce to thicken properly. After baking, let the chicken rest. This helps the sauce set and taste even better. For this recipe, I recommend using a large oven-safe skillet. Cast iron works great. It keeps the heat even and helps with browning. If you don’t have an oven-safe skillet, use a regular skillet and transfer the chicken to a baking dish. This works just as well. Don't forget to have a good meat thermometer on hand. It really helps ensure your chicken is cooked just right. For the full recipe, check out the complete guide to make this dish your own. {{image_4}} You can switch up the fruits in this dish. Instead of cranberries, try using tart cherries or pomegranate seeds. Both add a nice tang. You can also use fresh blueberries for a sweeter twist. If you want a different flavor, swap the orange for lemon or lime. For dietary needs, replace honey with maple syrup for a vegan option. If you're avoiding sugar, use a sugar-free sweetener. You can also use chicken thighs instead of breasts. They are juicier and add more flavor. You can prepare this dish in different ways. A slow cooker is great for busy days. Just combine all ingredients in the cooker and set it on low for six to eight hours. This method makes the chicken very tender. If you want a quicker option, use the oven. Preheat it as directed in the full recipe. You can also grill the chicken for a smoky flavor. Just marinate it in the sauce and grill until cooked through. This works well in summer, adding a nice char. Change up the recipe for different seasons. In fall, add cinnamon and nutmeg for warmth. In winter, try rosemary or sage for a cozy touch. Spring calls for fresh herbs like basil or mint. In summer, use fresh cilantro or dill for a light flavor. Adapting herbs and spices keeps the dish exciting. This way, you can enjoy Cranberry Orange Chicken all year round. Each season brings a new twist to this lovely meal. To keep your Cranberry Orange Chicken fresh, let it cool first. Place it in an airtight container. You can store it in the fridge for up to three days. If you want to keep it longer, freezing is a great option. When reheating, avoid drying out your chicken. You can use an oven or a microwave. If using an oven, set it to 350°F (175°C). Heat for about 15-20 minutes. If using a microwave, cover the chicken and heat for about 2-3 minutes. Check it often to avoid overcooking. To freeze, wrap the chicken tightly in plastic wrap. Then place it in a freezer bag. This helps keep the flavor and moisture. When ready to eat, thaw overnight in the fridge. After thawing, reheat as mentioned above. This method will help maintain its taste and texture. Enjoy your leftovers! You can pair Cranberry Orange Chicken with many tasty sides. Here are some ideas: - Steamed broccoli - Roasted sweet potatoes - Quinoa or rice - A fresh green salad - Mashed potatoes with herbs These sides will balance the sweet and tangy flavors of the chicken. They add nutrition and texture to your meal. Yes, you can use frozen chicken. Just make sure to adjust the cooking time. If using frozen chicken, cook it for about 10 to 15 minutes longer. Always check the internal temperature. It should reach 165°F (75°C) for safety. Cooking frozen chicken is safe as long as it cooks fully. To check if the chicken is done, use a meat thermometer. Stick it into the thickest part of the breast. The safe internal temperature is 165°F (75°C). You can also look for signs of doneness. The chicken should be opaque and the juices should run clear. If it’s still pink or the juices are red, it needs more time. Cranberry Orange Chicken is not just a meal; it’s a delight. For the full recipe, check out the detailed instructions above. This recipe for Cranberry Orange Chicken combines simple ingredients with easy steps. You learned how to prepare a tasty dish that balances sweet and savory. Remember to rest the chicken for the best flavor. With tips on cooking methods and variations, you can make this meal your own. Enjoy creating different versions each season! Follow these instructions, and you will impress friends and family with your cooking skills. Now, get started and savor each bite!](https://roastedflavors.com/wp-content/uploads/2025/06/9a6362d0-504c-47cd-be63-f13ed7f1d668.webp)
Cranberry Orange Chicken Flavorful Dinner Recipe
Looking for a new, tasty dinner idea? Try my Cranberry Orange Chicken! This dish blends sweet cranberries and fresh oranges for bright flavor that will
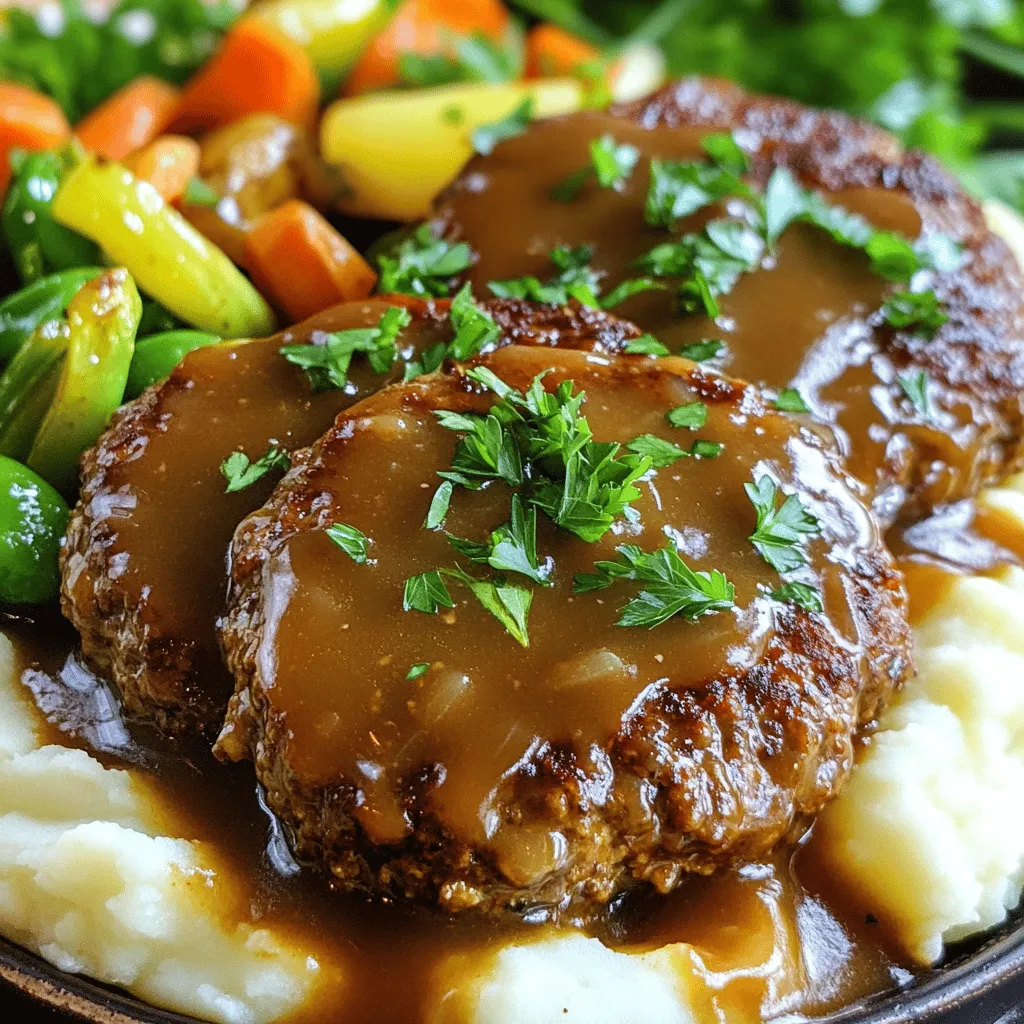
Best Salisbury Steak and Gravy Recipe for Success
Are you ready to impress your family with a classic dish? My Best Salisbury Steak and Gravy Recipe is a guaranteed success! With rich flavors
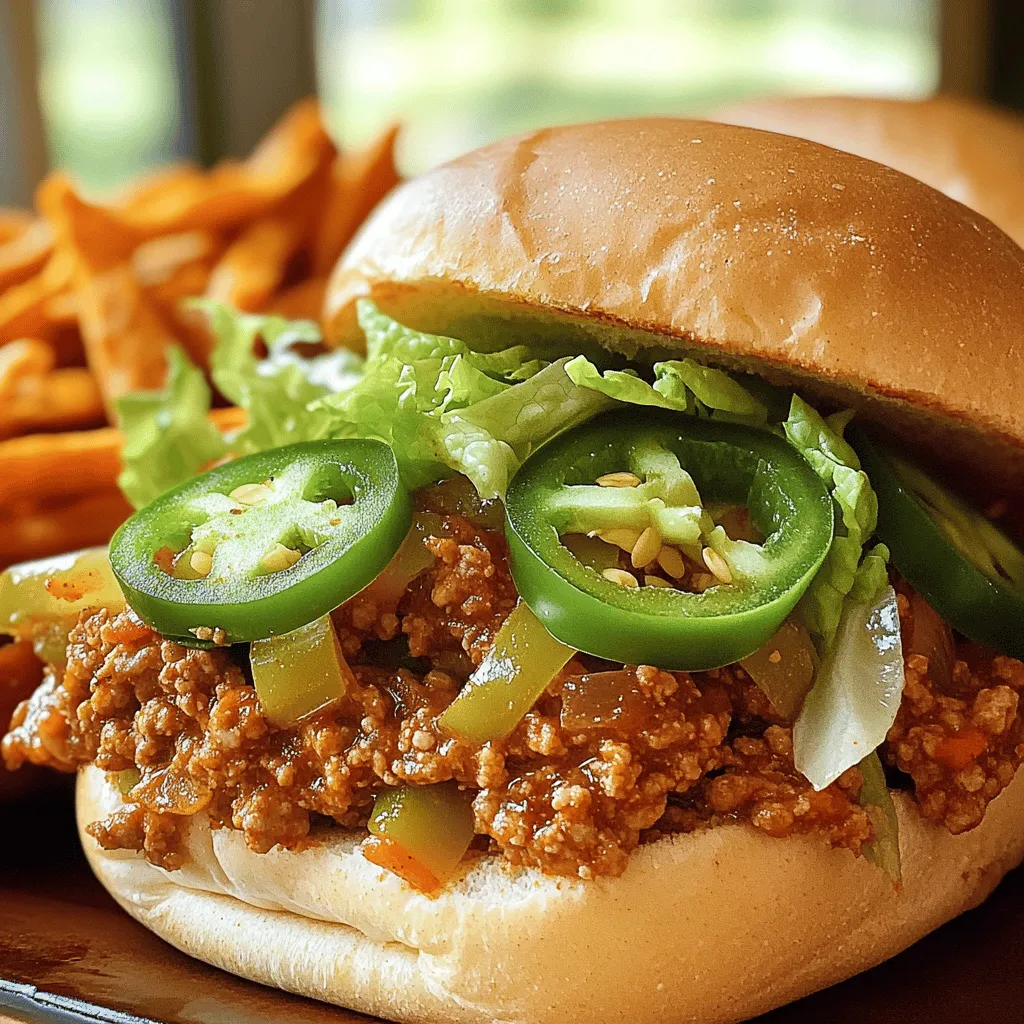
Delicious Cajun Chicken Sloppy Joes Flavorful Dinner
Are you ready to spice up dinner time? In this blog, I’ll show you how to make Delicious Cajun Chicken Sloppy Joes that burst with
![- 2 slices of hearty whole-grain bread - 1 cup fresh spinach, finely chopped - 1/4 cup crumbled feta cheese - 1/4 cup sun-dried tomatoes, roughly chopped - 1 tablespoon black olives, pitted and chopped - 1 tablespoon extra virgin olive oil - 1 tablespoon unsalted butter - Salt and freshly cracked pepper, to taste - Optional: 1/2 teaspoon dried oregano or basil Gathering the right ingredients is vital for making a great Mediterranean spinach grilled cheese. I love using hearty whole-grain bread. It gives a nice texture and flavor. Fresh spinach adds a bright and healthy touch. I always choose crumbled feta cheese for its creamy and tangy taste. The sun-dried tomatoes bring a sweet, rich flavor that balances well with the spinach. Black olives add a lovely briny note. Make sure to have olive oil on hand. It helps to sauté the spinach just right. Unsalted butter is perfect for achieving that crisp crust. A pinch of salt and freshly cracked pepper brings everything together. If you want to boost the flavor, try adding dried oregano or basil. These optional herbs can elevate the taste even more. When you have these ingredients, you are ready to create a delightful treat. Check out the [Full Recipe] for step-by-step guidance. 1. Heat a small skillet on medium. Add one tablespoon of olive oil and wait for it to warm. 2. Toss in one cup of finely chopped spinach. Sauté for 2-3 minutes. Look for vibrant green color. 3. In a bowl, mix the sautéed spinach with 1/4 cup crumbled feta, 1/4 cup chopped sun-dried tomatoes, and 1 tablespoon chopped black olives. 4. If desired, sprinkle in 1/2 teaspoon dried oregano or basil. Season with salt and freshly cracked pepper to taste. Set this filling aside. 1. Preheat a non-stick frying pan over medium heat. 2. Generously spread unsalted butter on one side of each slice of hearty whole-grain bread. 3. Place one slice in the skillet, buttered side down. 4. Evenly spread the spinach and cheese mixture over this slice. Ensure the filling covers the bread completely. 5. Top with the second slice of bread, buttered side facing up. 1. Cook the sandwich, keeping an eye on it. Aim for about 3-4 minutes. The bottom should turn golden brown. 2. Using a spatula, gently flip the sandwich over. Grill the other side until it is golden and the cheese melts. This should take another 3-4 minutes. 3. Once both sides are perfectly toasted, remove the sandwich from the pan. Let it rest for a minute. 4. Slice it in half for easy handling. Enjoy your Mediterranean Spinach Grilled Cheese! For the complete process, check the [Full Recipe]. To make your Mediterranean Spinach Grilled Cheese truly shine, focus on two key points: gooey cheese and crisp bread. - Ensuring gooey cheese: Use high-quality cheeses like feta and a melting cheese. Combine them well. Mix the feta with your spinach for creamy bites. This keeps the cheese from becoming rubbery. - Avoiding soggy bread: Butter both sides of the bread. This helps create a nice barrier against moisture. Use a non-stick pan over medium heat. This way, the bread toasts nicely without burning. Serving your grilled cheese is just as important as making it. Here are some ideas to elevate your dish: - Ideal accompaniments: Pair your sandwich with a light salad. A simple mix of greens dressed in olive oil and lemon juice works well. You can also serve it with a bowl of tomato soup for a classic touch. - Presentation ideas: Use a colorful plate to showcase your sandwich. Cut it in half for a more inviting look. Add a few olives or cherry tomatoes on the side for extra color. This makes the dish pop and looks appetizing. Don’t forget to check out the [Full Recipe] for more details on preparing this delightful treat! {{image_4}} You can swap the feta cheese for other tasty options. Try mozzarella for a stretchy feel. Goat cheese adds a tangy kick. Cheddar gives a sharp flavor, while provolone offers a mild touch. Each cheese brings its own fun twist to the sandwich. You can mix and match to find your favorite. The Mediterranean has a bounty of veggies to explore. Add roasted red peppers for a sweet touch. Artichoke hearts bring a unique flavor and texture. Zucchini slices can add freshness and crunch. You could also include mushrooms for an earthy taste. Experimenting with different veggies makes each grilled cheese special. Adding spices or herbs can elevate your dish. Sprinkle in some garlic powder for a savory punch. A pinch of red pepper flakes can add heat. Fresh herbs like parsley or dill brighten the flavors. Every little bit of spice or herb can make your sandwich sing. Don't be afraid to get creative! To keep your Mediterranean Spinach Grilled Cheese fresh, wrap it tightly in foil or plastic wrap. This keeps moisture in and prevents it from drying out. Place the wrapped sandwich in an airtight container. Store it in the fridge for up to three days. If you want to keep it longer, consider freezing it. Just make sure to wrap it well to avoid freezer burn. For the best results, reheat the sandwich in a skillet. Heat the skillet over medium heat and add a little butter. Place the sandwich in the pan, cooking it for about 3-4 minutes on each side. This method keeps the bread crispy while warming the cheesy filling. You can also use an oven. Preheat it to 350°F (180°C). Wrap the sandwich in foil and heat it for 10-15 minutes. This way, it stays crunchy on the outside and gooey on the inside. Yes, you can use various breads. Here are some great options: - Sourdough - Ciabatta - Rye - Gluten-free bread Each type gives a unique flavor and texture. Experiment and find your favorite! Yes, this recipe works well for meal prep. Here are some tips: - Prepare the spinach filling in advance. - Store it in the fridge for up to three days. - Assemble the sandwich just before grilling for the best taste. This way, you'll enjoy a quick and tasty meal anytime. To make this recipe vegan, swap out dairy ingredients with these options: - Use vegan cheese instead of feta. - Replace butter with vegan butter or olive oil. - Ensure your bread is dairy-free. These changes keep the delicious flavor while making it plant-based. You can check out the [Full Recipe] for Mediterranean Spinach Grilled Cheese Delight. This blog post covers how to craft a Mediterranean Spinach Grilled Cheese. We explored key ingredients, focusing on whole-grain bread, fresh spinach, and flavorful cheeses. I shared step-by-step instructions for cooking, along with tips for the perfect crunch and gooeyness. You can also make delightful variations and store your leftovers effectively. In closing, these tips and ideas will elevate your grilled cheese experience. Enjoy experimenting with flavors and textures in your kitchen!](https://roastedflavors.com/wp-content/uploads/2025/06/0eae439f-c49f-4552-b460-4519394630d7.webp)
Mediterranean Spinach Grilled Cheese Delightful Treat
Are you ready to take your grilled cheese game to the next level? My Mediterranean Spinach Grilled Cheese is tasty, easy to make, and perfect
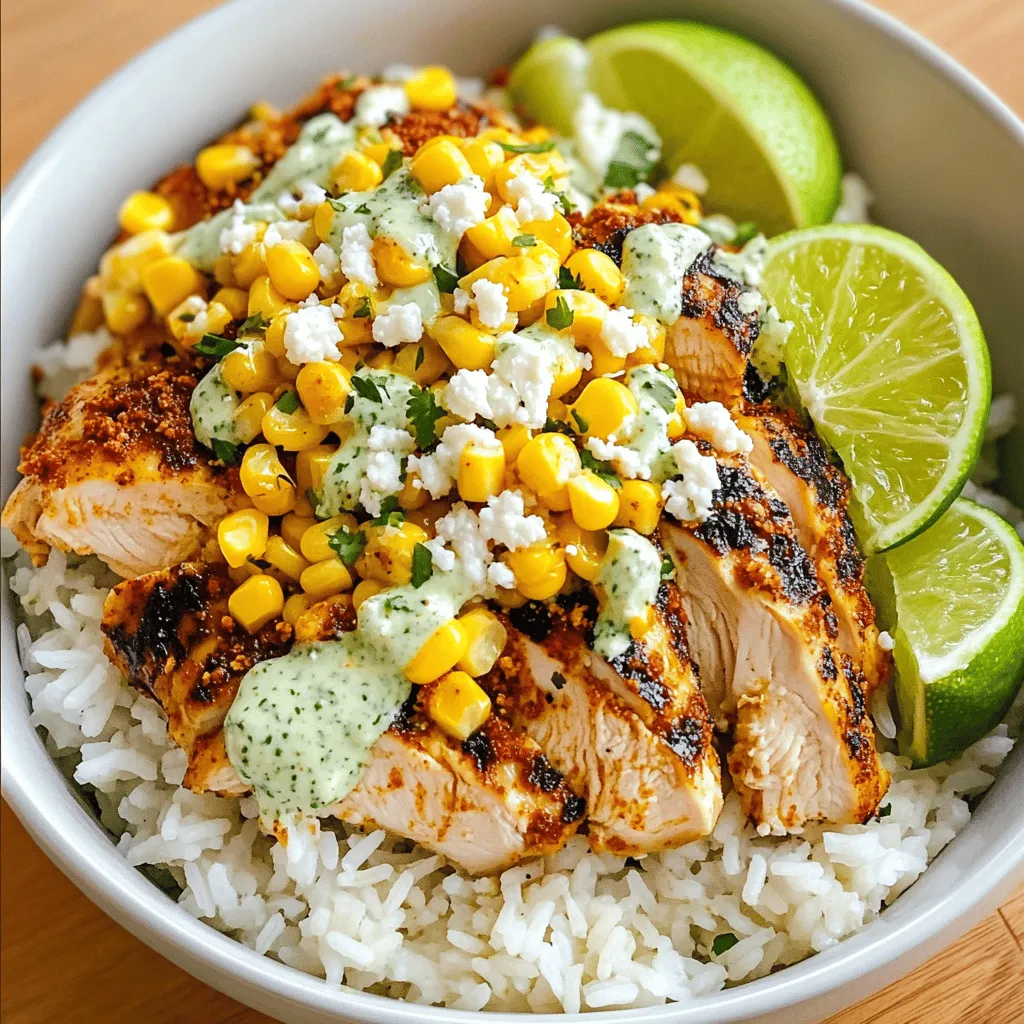
Mexican Street Corn Chicken Rice Bowl Delight
Get ready to savor the flavors of my Mexican Street Corn Chicken Rice Bowl Delight! This dish merges juicy chicken, sweet corn, and vibrant spices,

Korean Beef Tacos Flavorful and Quick Meal Guide
Are you ready to spice up your dinner routine? Korean Beef Tacos are a fun twist on classic tacos, packed with rich flavors that make
![To make the sweet chili chicken bowl, gather these ingredients: - 2 boneless, skinless chicken breasts, diced into bite-sized pieces - 1 cup jasmine rice - 1 cup low-sodium chicken broth - 1 red or yellow bell pepper, sliced into thin strips - 1 cup snap peas, ends trimmed and halved if large - 2 tablespoons sweet chili sauce - 1 tablespoon soy sauce (preferably low-sodium) - 1 tablespoon sesame oil - 2 green onions, thinly sliced - 1 tablespoon sesame seeds (for garnish) - Salt and freshly ground black pepper to taste When choosing fresh ingredients, look for bright colors and firm textures. For chicken, check that it has no smell and is pink in color. Select bell peppers that feel heavy and have shiny skin. Snap peas should be crisp, with a vibrant green hue. For rice, make sure the package is sealed and has no holes. Fresh green onions should be bright green with no wilting. Always buy sauces that are within their expiration date for the best flavor. Each serving of the sweet chili chicken bowl has about: - Calories: 450 - Protein: 34g - Carbohydrates: 55g - Fat: 12g - Fiber: 4g - Sodium: 600mg This dish is a great source of protein and carbs, perfect for a balanced meal. Enjoy the flavors while nourishing your body! For the full recipe, you can check the instructions above. To start, grab a medium saucepan. Combine 1 cup of jasmine rice with 1 cup of low-sodium chicken broth. This broth adds rich flavor. Bring the mixture to a strong boil over medium-high heat. Once it boils, lower the heat to low. Cover the pot with a lid and let it simmer for 15 minutes. This cooks the rice perfectly. After that time, remove it from heat but keep it covered for another 5 minutes. This step lets the rice steam and become fluffy. Fluff the rice with a fork before serving. Next, we move on to the chicken. Heat 1 tablespoon of sesame oil in a large skillet over medium-high heat. Add 2 diced chicken breasts, seasoned with salt and pepper. Cook the chicken for 6 to 8 minutes. Stir it occasionally. Look for it to turn golden brown and no longer pink in the center. This ensures it's fully cooked and safe to eat. Once the chicken cooks, it's time for the veggies. Add 1 sliced bell pepper and 1 cup of snap peas to the skillet. Sauté these for 3 to 4 minutes. You want them tender but still crunchy. Next, lower the heat to medium. Pour in 2 tablespoons of sweet chili sauce and 1 tablespoon of soy sauce. Stir well to coat the chicken and veggies. Let it cook for 2 more minutes. This thickens the sauce and combines all the flavors. Now, let’s put it all together. In a serving dish, divide the fluffy jasmine rice evenly. Spoon the sweet chili chicken and vegetable mix over the rice. Make sure to share the sauce evenly for the best taste. Each bite should be a mix of flavors. Finally, we add some flair. Sprinkle chopped green onions and sesame seeds on top. This adds color and crunch. If you like, drizzle extra sweet chili sauce over the bowl. A lime wedge on the side brings a refreshing touch. Enjoy your tasty and colorful creation! For the complete recipe, check out the Full Recipe. To get tender chicken, start with good-quality meat. Always use fresh, boneless, skinless chicken breasts. Cut the chicken into bite-sized pieces. This helps it cook evenly. Season the chicken with salt and pepper before cooking. Searing it in hot sesame oil locks in moisture. Cook until golden brown and no longer pink. A meat thermometer can help; aim for 165°F. You can make this dish your own! Swap chicken for tofu for a vegetarian option. Try using different veggies, like broccoli or carrots. For extra heat, add sliced jalapeños or red pepper flakes. You can also change the sauce; teriyaki or hoisin works well. Top with fresh herbs like cilantro or basil for added flavor. Don’t forget to adjust the rice portion too! Fluffy rice is key to this dish. Rinse the jasmine rice under cold water first. This removes excess starch and prevents stickiness. Use chicken broth instead of water for more flavor. Bring the broth to a boil before adding the rice. Cover the pot and simmer on low heat. Let it rest after cooking; this helps the rice grains separate. Fluff with a fork before serving for the best texture. For the complete recipe, check the [Full Recipe] section. {{image_4}} You can easily swap chicken for tofu in this recipe. Use firm or extra-firm tofu for the best texture. First, press the tofu to remove extra water. Cut it into bite-sized cubes. Then, sauté the tofu in sesame oil, just like you would with chicken. Cook until it's golden brown. This gives it a nice texture and flavor. Then, follow the rest of the recipe as you normally would. The sweet chili sauce will add great flavor to the tofu. If you need a gluten-free option, you can make simple changes. Choose gluten-free soy sauce or tamari instead of regular soy sauce. This keeps the dish tasty while being safe for those who can't eat gluten. Also, make sure your sweet chili sauce is gluten-free. Most brands are, but it’s good to check the label. Want to make your bowl even more nutritious? Adding extra veggies is a fantastic idea! You can include broccoli, carrots, or zucchini. Just chop them into small pieces. Sauté them with the chicken or tofu until they soften. This adds color, flavor, and more vitamins to your meal. You can mix and match your favorite veggies to customize your bowl. Don't be afraid to experiment! For the full recipe, check [Full Recipe]. To keep your sweet chili chicken bowl fresh, store leftovers in an airtight container. Let the dish cool down to room temperature before sealing it. This prevents moisture buildup, which can make the food soggy. You can keep it in the fridge for about 3 to 4 days. If you want to enjoy it later, consider freezing it. When you're ready to eat your leftovers, reheating is easy. You can use a microwave or a stovetop. If using a microwave, place the food in a bowl and cover it with a damp paper towel. This keeps it moist. Heat for 1 to 2 minutes, checking often. If using a stovetop, add a splash of water in a pan. Heat it on medium until warm, stirring occasionally. This method helps maintain the dish's texture. To freeze your sweet chili chicken bowl, first, let it cool completely. Portion it into freezer-safe bags or containers. Be sure to remove as much air as possible before sealing. You can freeze it for up to 2 to 3 months. When you want to eat it, thaw it overnight in the fridge. Reheat it using the tips above for the best results. Enjoy your meal anytime! Yes, you can use other rice types. Brown rice or basmati rice works well. Just adjust the cooking time. For brown rice, you may need 40-45 minutes to cook. Basmati rice cooks faster, about 12-15 minutes. Follow package instructions for best results. If you don’t have sweet chili sauce, try mixing honey and sriracha. Use one part honey and one part sriracha for a sweet and spicy mix. You can also use hoisin sauce for a different flavor. Adjust the amount based on your taste. To make the dish less spicy, reduce the amount of sweet chili sauce. You can also add more honey to balance the heat. For more spice, add a dash of red pepper flakes or extra sriracha. Taste as you go to find the right balance. Yes, this recipe is great for meal prep. Store the chicken and rice in separate containers to keep them fresh. When ready to eat, just reheat them together or separately. This dish stays tasty for up to four days in the fridge. This blog post breaks down how to make a delicious sweet chili chicken bowl. We covered the key ingredients and how to choose fresh ones. You learned step-by-step instructions for cooking fragrant jasmine rice and tender chicken while adding a variety of veggies. We discussed storage tips and answered common questions. In conclusion, this dish is easy to make and customize. Whether you go for chicken, tofu, or extra veggies, you can create a bowl that fits your taste. Enjoy making it your own!](https://roastedflavors.com/wp-content/uploads/2025/06/ff808c9d-0d5a-4c0b-b43e-cd7bad74e4df.webp)
Sweet Chili Chicken Bowl Easy and Flavorful Recipe
Craving something sweet, spicy, and satisfying? You’re in the right place! This Sweet Chili Chicken Bowl is easy to make and packed with flavor. I’ll
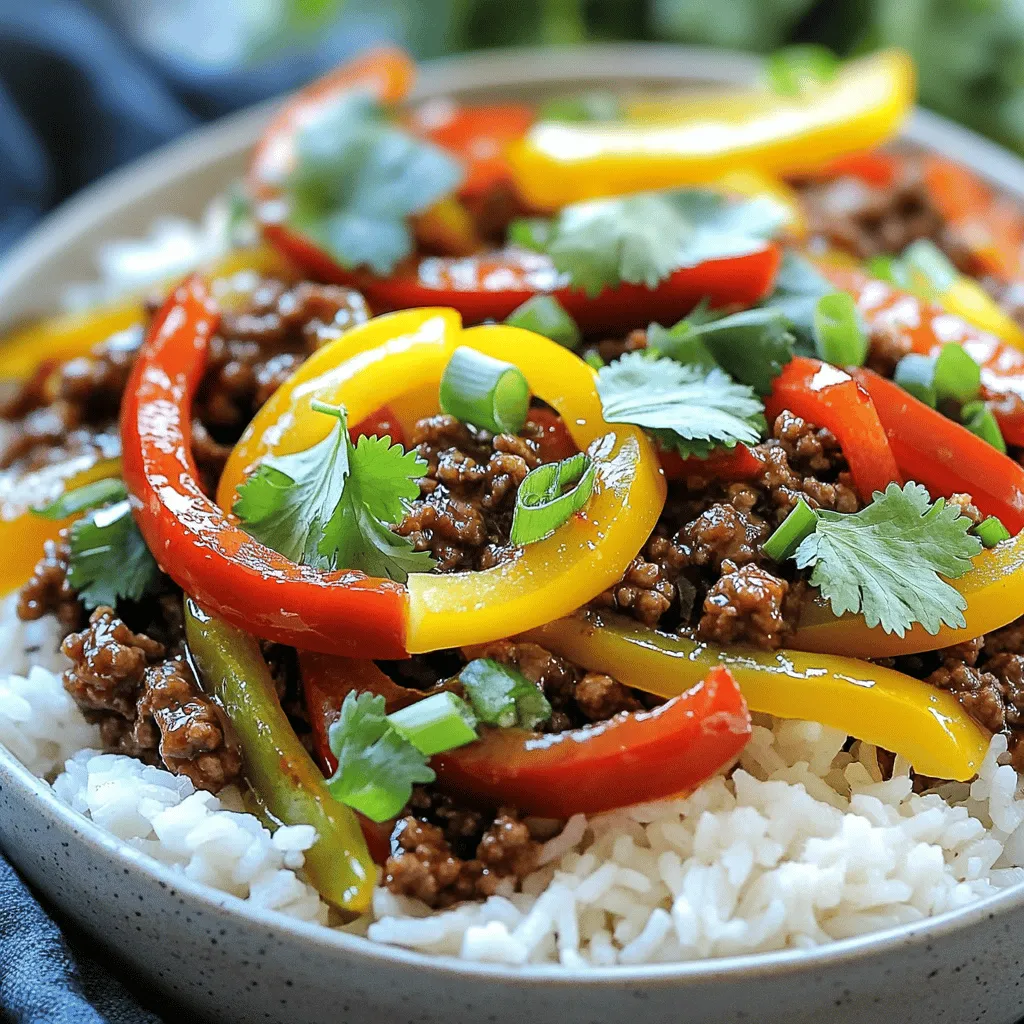
Beef and Pepper Rice Bowls Flavor-Packed Delight
Are you ready to spice up your dinner routine? My Beef and Pepper Rice Bowls are flavorful and easy to make! Packed with ground beef,
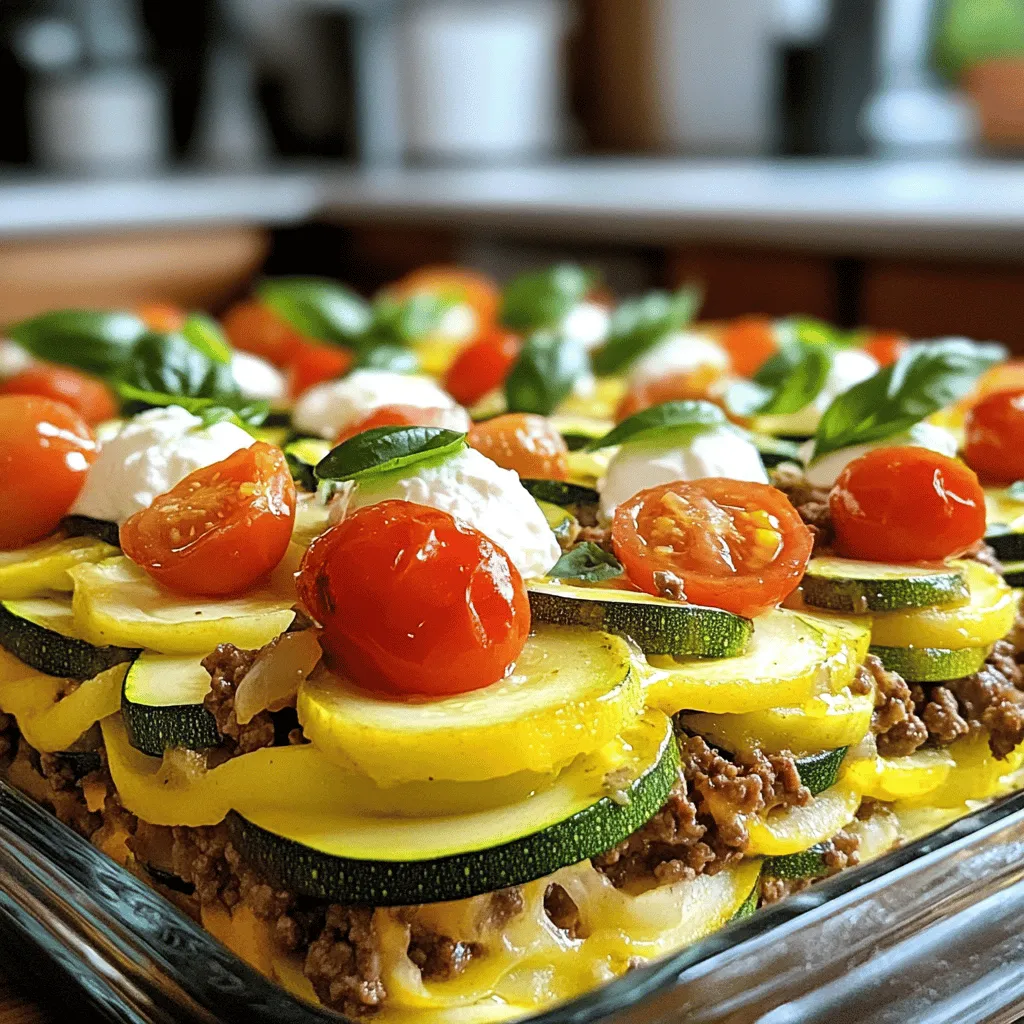
Ground Beef Zucchini Casserole Easy and Tasty Meal
Are you looking for a quick, hearty meal? You’ve come to the right place! This Ground Beef Zucchini Casserole is not only easy to make

Cheesy Low Carb Philly Cheesesteak Casserole Recipe
If you crave a hearty meal that aligns with your low-carb lifestyle, you’re in for a treat! This Cheesy Low Carb Philly Cheesesteak Casserole combines