Dinner
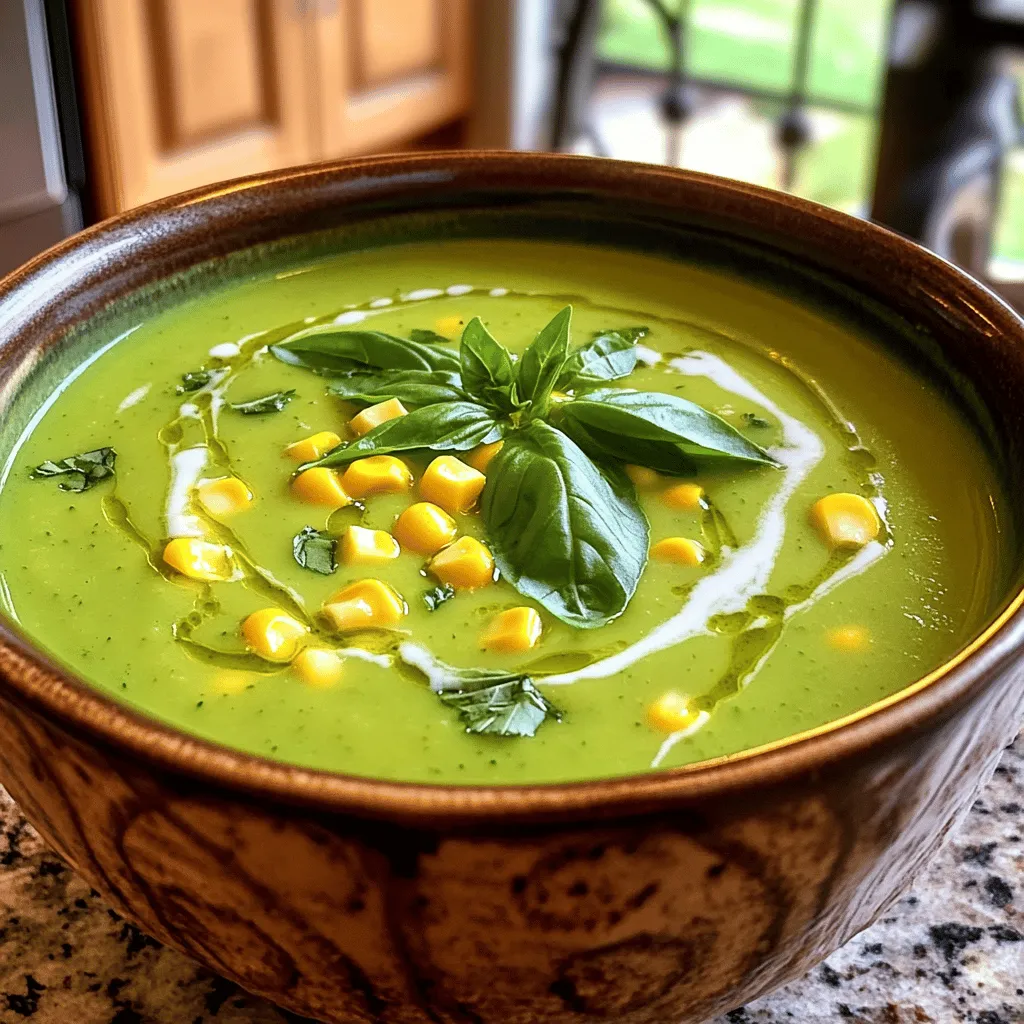
Zucchini & Sweet Corn Summer Soup Refreshing Delight
Are you ready to dive into a delicious bowl of summer? This Zucchini & Sweet Corn Summer Soup is a refreshing delight just bursting with
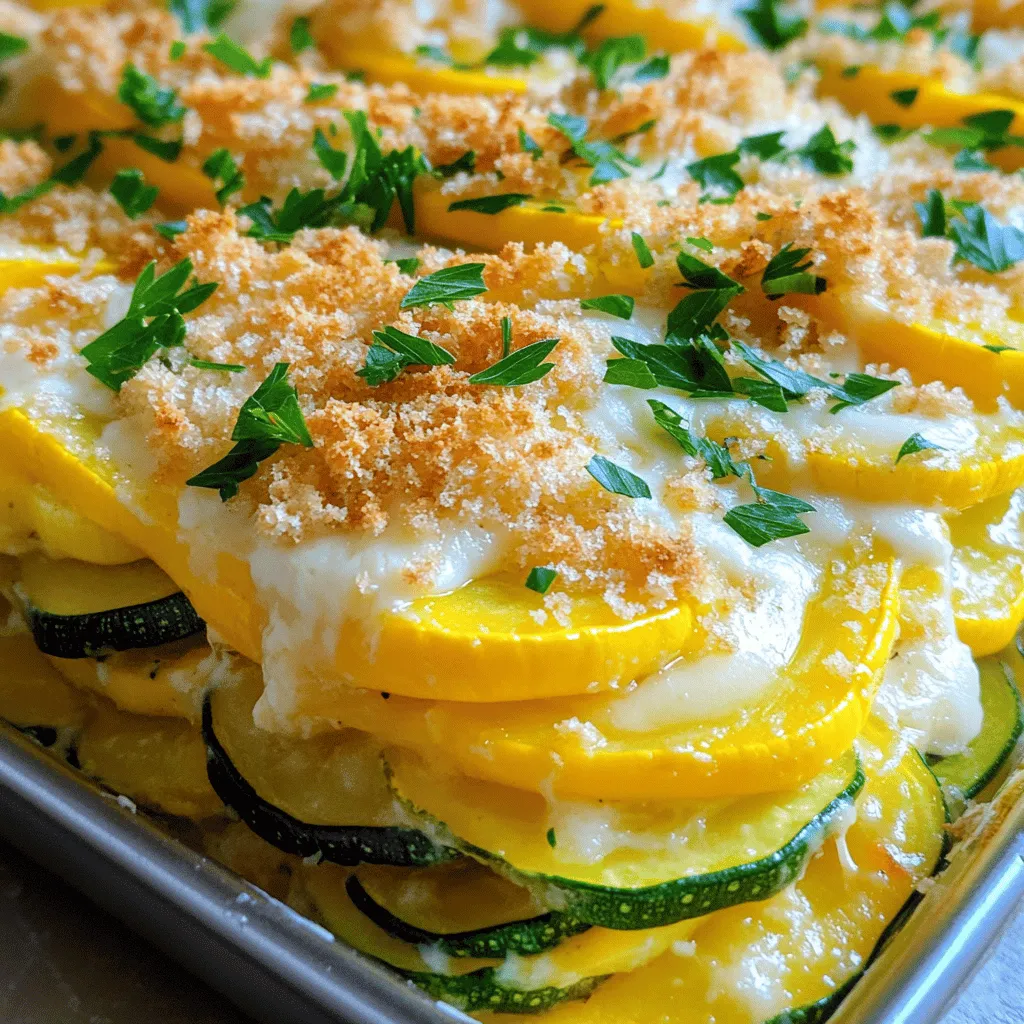
Cheesy Summer Squash and Zucchini Casserole Delight
Craving a comforting dish packed with flavor? My Cheesy Summer Squash and Zucchini Casserole is your answer! This easy-to-follow recipe brings together fresh squash, rich

Herb and Cheddar Squash Bread Deliciously Savory Loaf
Are you ready to bake something truly special? Herb and Cheddar Squash Bread is a savory loaf that brings warmth and flavor to your table.
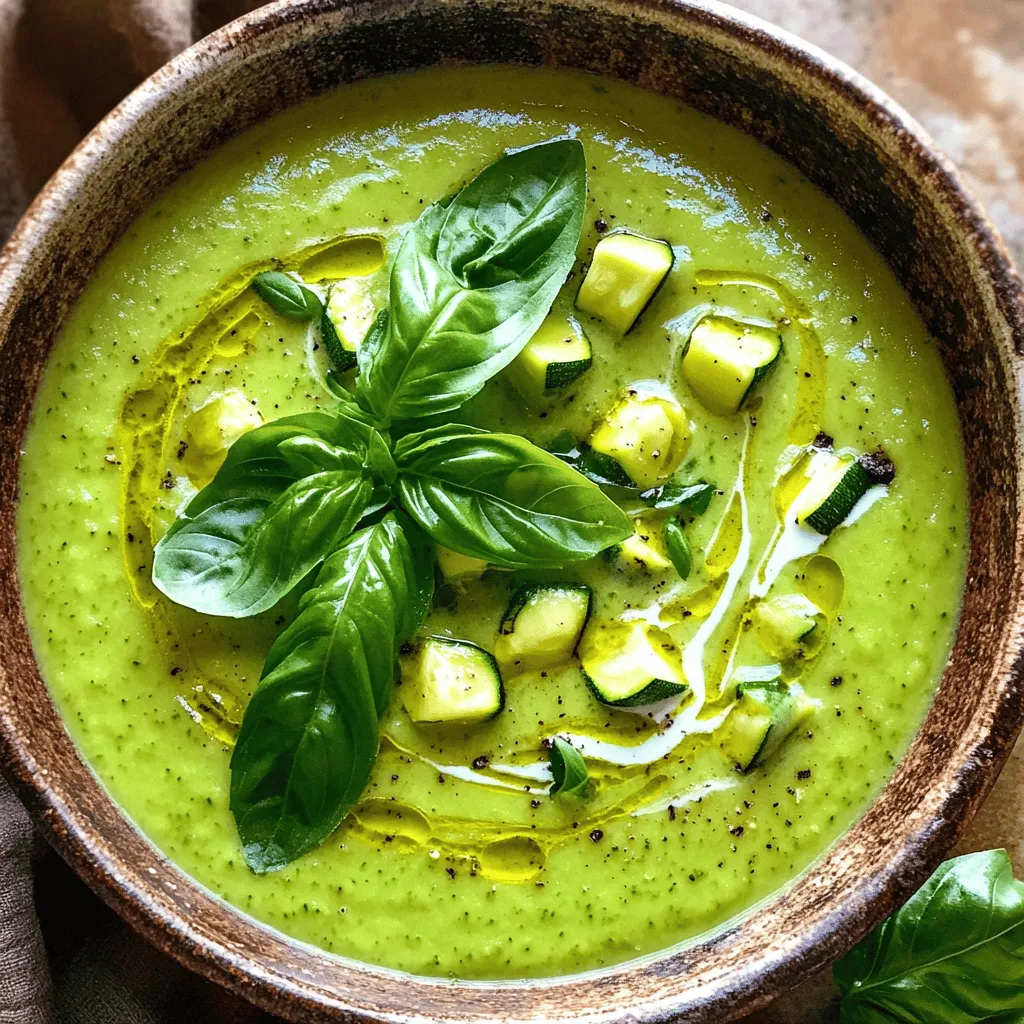
Zucchini Soup Simple and Nourishing Recipe
Discover the joy of making a warm bowl of zucchini soup with my simple recipe. Packed with fresh ingredients like zucchini, garlic, and creamy coconut
. Yes, you can make this casserole ahead of time. Prepare it up to the baking step. Cover it well and store it in the fridge for up to 24 hours. When ready, bake it straight from the fridge. You might need to add a few extra minutes to the baking time. This casserole pairs well with a light side salad or some grilled chicken. You can also serve it with crusty bread or a fresh fruit salad. These sides balance the rich flavors in the casserole. You can tell the casserole is done when it is set in the center. The top should be golden brown and bubbly. Use a knife to check the center. If it comes out clean, your casserole is ready to enjoy. Yes, you can use other squash types. Butternut or acorn squash can add sweetness. Delicata squash adds a nice texture. Each type will change the flavor a bit, so feel free to experiment! In this blog post, we explored the tasty zucchini, squash, and corn casserole. We covered fresh veggies, dairy, and eggs that create a creamy base. You learned how to prepare, assemble, and bake the dish for the best flavor. We also offered storage tips, variations, and answers to common questions. This casserole is versatile and easy. It can be a delicious side or a main meal. Try it out and enjoy the vibrant flavors!](https://roastedflavors.com/wp-content/uploads/2025/06/e00f3243-5a63-43cd-8c9c-2d72142aecdb.webp)
Savory Zucchini, Squash & Corn Casserole Recipe
If you’re looking for a delicious and easy dish, this Savory Zucchini, Squash & Corn Casserole is perfect for you! Bursting with fresh veggies and
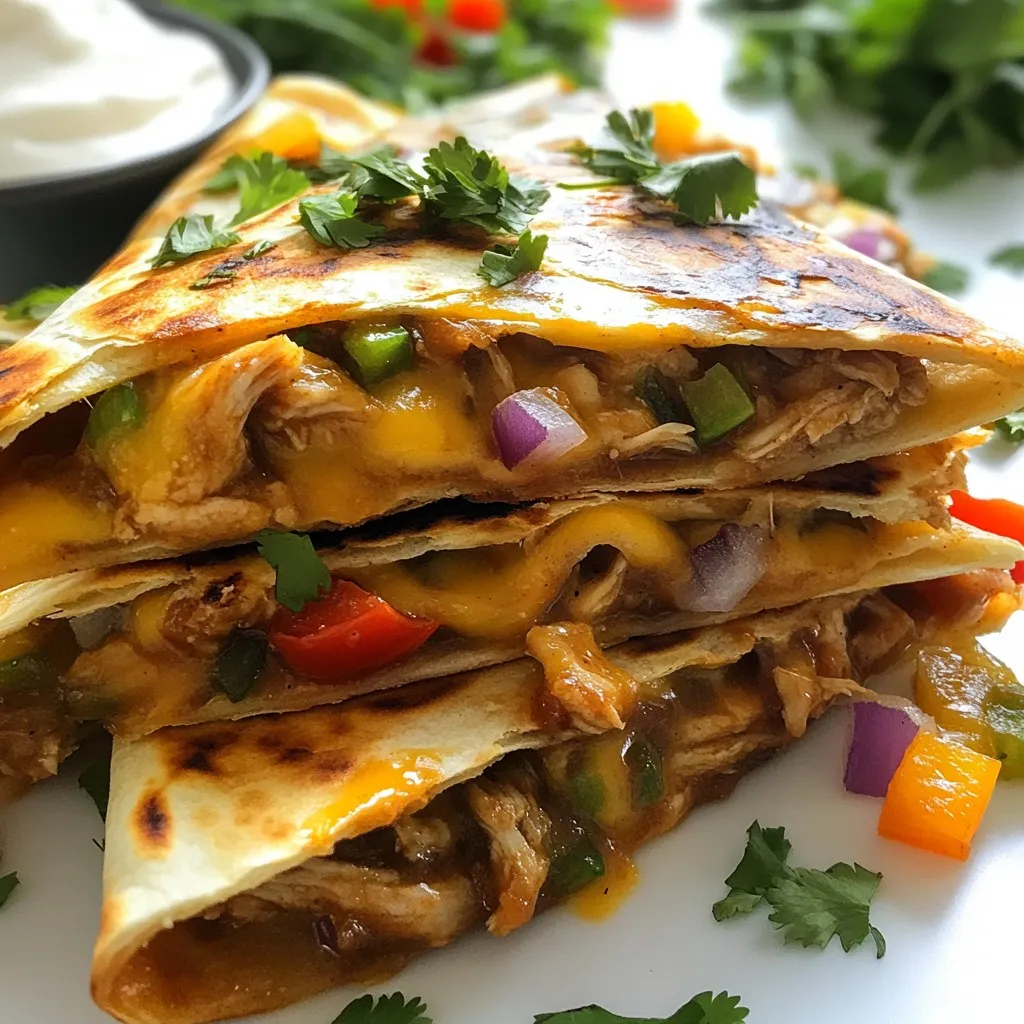
BBQ Chicken Quesadillas Easy and Flavorful Meal
Looking for a quick and tasty meal? BBQ Chicken Quesadillas will hit the spot! With just a few simple ingredients, you can whip up a

Ultimate Cheeseburger Soup Flavorful and Filling Meal
Craving a hearty meal that warms your soul? Try my Ultimate Cheeseburger Soup! This recipe combines rich flavors and fills your belly with comfort. You’ll
![To make Broccoli Cheese Stuffed Chicken, you need these simple ingredients: - Boneless, skinless chicken breasts (4 pieces) - Broccoli florets (1 cup, blanched) - Sharp cheddar cheese (1 cup, shredded) - Cream cheese (1/2 cup, softened) - Garlic (1/4 cup, minced) - Seasonings (black pepper and sea salt) - Extra virgin olive oil (1 tablespoon) - Breadcrumbs (optional, for topping) - Fresh parsley (for garnish) These ingredients blend well to create a rich, cheesy filling. The sharp cheddar gives a strong flavor, while the cream cheese adds creaminess. Blanching the broccoli keeps it bright and crisp, which balances the dish. Using fresh garlic adds a nice punch. Seasoning the chicken with black pepper and sea salt enhances its flavor. If you like some crunch, add breadcrumbs on top before baking. The fresh parsley at the end not only looks good but also adds a fresh taste. For the full recipe, check out the [Full Recipe]. - Preheat your oven to 375°F (190°C). This helps cook the chicken evenly. - Prepare the filling by mixing the broccoli, cheeses, garlic, and seasonings in a bowl. You want a creamy texture that holds together well. - Cut pockets into each chicken breast. Make the cuts in the thickest part, but don’t cut all the way through. - Sear the chicken in olive oil over medium heat until it turns golden brown. This should take about 3 to 4 minutes on each side. - If you want a crunchy topping, sprinkle breadcrumbs on top of the stuffed chicken. - Transfer the skillet to the preheated oven. Bake the chicken for 20 to 25 minutes. Check that the chicken reaches an internal temperature of 165°F (75°C). - After baking, let the chicken rest for 5 minutes. This keeps the meat juicy. - Just before serving, garnish the chicken with fresh parsley. It adds a nice touch and color. - Use a meat thermometer to ensure chicken is cooked through. It should reach 165°F (75°C). - Allow resting time for juicier chicken. Resting helps keep the juices inside. - Substitute different cheeses or vegetables in the filling. Try mozzarella or spinach for a twist. - Adjust spiciness with added ingredients. Red pepper flakes or jalapeños can add heat. - Plate with a balsamic glaze drizzle for a touch of elegance. It adds flavor and flair. - Pair with sides for a complete meal. Steamed vegetables or a fresh salad work well. Enjoy the process! For more details, check the Full Recipe. {{image_4}} You can make this dish your own by changing some ingredients. Using spinach instead of broccoli adds a new twist. Spinach gives a different taste and pairs well with cheese. You might also try using different types of cheese. Mozzarella brings a mild flavor, while gouda adds a nutty touch. Both options can create a unique taste experience. If you need to make this meal fit specific diets, you have options. For gluten-free needs, you can use gluten-free breadcrumbs or skip the topping altogether. This keeps the dish light but still tasty. If dairy is a concern, there are many dairy-free cheese and cream cheese options available. These swaps allow everyone to enjoy this delicious meal. Checking labels is key to ensuring the alternative products work for your needs. To refrigerate leftovers, let the chicken cool first. Place the stuffed chicken in an airtight container. This keeps it fresh and prevents odors. Use glass or plastic containers with tight lids. You can store it in the fridge for up to three days. For long-term storage, freezing works well. Wrap each stuffed chicken breast tightly in plastic wrap. Then, place them in a freezer-safe bag or container. This helps keep out air and avoid freezer burn. You can freeze the chicken for up to three months. To thaw, move the chicken from the freezer to the fridge. Let it thaw overnight. This keeps the chicken safe and tasty. When reheating, you want to keep the chicken moist. The best way is to use the oven. Preheat your oven to 350°F (175°C). Place the chicken in a baking dish. Add a splash of chicken broth or water to help with moisture. Cover the dish with foil. Heat for about 20 minutes or until warmed through. This keeps your chicken juicy and delicious. Can I use frozen broccoli for this recipe? Yes, you can use frozen broccoli. Just thaw and drain it well before mixing. This helps avoid excess water in the filling. How can I tell when the chicken is properly cooked? Use a meat thermometer to check the chicken. It should reach 165°F (75°C) in the thickest part. This ensures it's safe to eat. What sides pair well with Broccoli Cheese Stuffed Chicken? Great sides include steamed rice, roasted potatoes, or a fresh salad. These add color and balance to your meal. How to adjust cooking time for thicker chicken breasts? For thick chicken, bake longer. Add about 5-10 minutes to baking time. Always check with a thermometer for safety. Can I make this dish ahead of time? Yes, you can prepare the chicken and filling ahead. Stuff the chicken, cover, and refrigerate for up to 24 hours before cooking. Can I grill the stuffed chicken instead of baking it? Yes, grilling works well! Just sear the chicken on medium heat, then cook until fully done. Keep the grill lid closed for even cooking. Is it possible to cook the chicken in an air fryer? Absolutely! Preheat the air fryer to 375°F (190°C). Cook for about 15-18 minutes, checking for doneness as you go. In this article, we explored a tasty recipe for Broccoli Cheese Stuffed Chicken. You learned about the key ingredients, step-by-step cooking methods, tips for better results, and storage advice. Remember, you can personalize this dish by swapping veggies or cheeses. Cooking should be creative and fun. Don't hesitate to try new ideas or methods. With these tips, you can make a delicious meal that impresses everyone. Enjoy your cooking journey and happy eating!](https://roastedflavors.com/wp-content/uploads/2025/06/4c18a98c-6fe6-4c7f-bab7-ba5dfb0666b2.webp)
Broccoli Cheese Stuffed Chicken Hearty and Satisfying Meal
Are you ready to whip up a meal that’s both hearty and satisfying? Broccoli Cheese Stuffed Chicken is a delicious way to enjoy those protein-packed

Korean Fried Chicken Crispy Delight for Dinner
If you crave something new for dinner, let me introduce you to Korean Fried Chicken. It’s crispy, tender, and packed with flavor. This dish stands

Extra Crispy Spicy Fried Chicken Recipe to Savor
Get ready to spice up your dinner with my Extra Crispy Spicy Fried Chicken! This recipe combines tender chicken, a savory marinade, and a crunchy