Dinner

- 3 medium yellow squash - 2 tablespoons extra virgin olive oil - Seasonings: garlic powder, dried oregano, fresh rosemary The main ingredients make this dish simple yet tasty. For yellow squash, choose ones that are firm and smooth. Slice them into ½-inch rounds. This size allows them to roast evenly. The olive oil adds healthy fat and enhances flavor. - Red pepper flakes - Sea salt and black pepper - Zest of 1 lemon - Fresh parsley for garnish These enhancements bring bright and bold flavors to the squash. Red pepper flakes add a nice kick. Use sea salt and black pepper to taste. Lemon zest gives a fresh pop that balances the squash's sweetness. Finally, fresh parsley brightens the dish, making it look appealing. For the full recipe, check out the details on how to combine these ingredients for a delicious side dish. Start by preheating your oven to 400°F (200°C). This temperature is key for roasting. A hot oven helps the squash cook evenly and brown well. Line your baking sheet with parchment paper. This makes cleanup easy and prevents sticking. Take your three medium yellow squash and slice them into ½-inch rounds. This size helps the squash cook through without getting mushy. Add the sliced squash to a large bowl. Next, drizzle in 2 tablespoons of extra virgin olive oil. Toss gently to coat each piece with oil. A good coat of oil ensures crisp edges and adds flavor. Now, it’s time to season the squash. Sprinkle on 1 teaspoon of garlic powder, 1 teaspoon of dried oregano, and 1 teaspoon of finely chopped fresh rosemary. Add ½ teaspoon of red pepper flakes for heat. Season with sea salt and freshly ground black pepper to taste. Toss the squash again to make sure every piece is evenly coated with the seasonings. This step enhances the flavor of the squash. Arrange the seasoned squash rounds in a single layer on the baking sheet. Make sure there is space between the pieces. This helps them roast properly. Place the baking sheet in the oven and roast for 20-25 minutes. Halfway through, take the sheet out and flip the squash. This flipping is important for even browning. When done, the squash should be tender and lightly golden. Once the squash is roasted, remove it from the oven. Immediately sprinkle the zest of one lemon over the warm squash. This adds a bright flavor. Garnish your dish with fresh parsley for a pop of color. These final touches make your Sizzling Herb-Roasted Yellow Squash even more appealing. For the complete recipe, check out the Full Recipe section. When selecting fresh yellow squash, look for bright colors. The skin should be firm and unblemished. Choose squash that feels heavy for its size. Recommended squash varieties include straightneck and crookneck. Both types work well in this recipe. To achieve even cooking, cut the squash into uniform slices. This ensures that all pieces cook at the same rate. Preheat your oven to 400°F (200°C) for best results. A hot oven helps the squash become tender and golden without drying out. For serving, place the roasted squash in a large, shallow dish. This allows the vibrant colors to stand out. Drizzle a little extra olive oil on top for a glossy finish. You can also add lemon wedges on the side for a fresh touch. This elevates both the look and taste of your dish. {{image_4}} You can change the taste of roasted yellow squash in many ways. Try using fresh herbs like thyme or basil. Both add a nice twist. You could also use spices like cumin or smoked paprika for a deeper flavor. For extra texture, add cheese or nuts. Feta or parmesan works well. Chopped walnuts or almonds can give a nice crunch too. If you want a different cooking method, grilling the squash is a fun option. It adds a smoky flavor that’s hard to beat. Just slice the squash and brush it with olive oil. Place it on a hot grill, and cook until it's tender. You can also use an air fryer. This method cooks the squash faster while still making it crispy. Set your air fryer to 400°F and cook for about 10-15 minutes. Roasted yellow squash pairs well with many dishes. You can serve it with grilled chicken or fish for a healthy meal. It also complements pasta nicely. Try it with a light tomato sauce or pesto. For sides, consider a fresh salad or quinoa. These options create a balanced plate that pleases everyone. For more ideas, check out the Full Recipe. To store your roasted yellow squash, let it cool first. Place it in an airtight container. This helps keep it fresh. You can keep the squash in the fridge for about 3 to 5 days. Make sure the container is sealed tight to avoid moisture loss. When you want to enjoy your leftovers, reheating is key. Use the oven or the microwave. In the oven, set it to 350°F (175°C) and heat for about 10-15 minutes. This keeps the squash crispy. In the microwave, heat in short bursts of 30 seconds. Stir in between to heat evenly. This way, the squash stays tasty and does not get soggy. If you want to save your roasted squash for later, freezing works well. First, let the squash cool completely. Then, spread it out on a baking sheet and freeze until solid. After that, transfer the pieces to a freezer bag. This prevents them from sticking together. Roasted squash can stay fresh in the freezer for up to 3 months. When you are ready to eat it, thaw it in the fridge overnight. For quick meals, you can reheat it straight from the freezer. Just add a few extra minutes to your heating time. Enjoy your delicious roasted yellow squash anytime! For the full recipe, check out the Sizzling Herb-Roasted Yellow Squash 🥒. You will know yellow squash is done when it is tender and golden. The squash should easily pierce with a fork. Look for a slight browning on the edges. If it feels soft yet firm, it's ready to serve. Yes, you can use other squash types like zucchini or butternut squash. Just remember to adjust the cooking time. Thicker squash may need a bit more time, while thinner ones cook faster. Always check for tenderness. For extra flavor, try adding grated Parmesan cheese or crushed nuts. Fresh herbs like basil or thyme also work well. You can drizzle balsamic glaze or sprinkle lemon juice for a zesty kick. Experiment with your favorites! Yes, this recipe is great for meal prep! You can roast the squash ahead of time and store it in the fridge. It stays fresh for about 3-4 days. Just reheat in the oven or microwave when ready to eat. Roasting yellow squash is easy and tasty. We covered the main ingredients, like squash and olive oil. We explored how to prepare and season for great flavor. You learned tips to roast it just right and how to make it look nice. We discussed variations and storage info for future meals. Enjoy trying out these methods and make them your own! Roasted squash can add great flavor to any dish.
Easy Roasted Yellow Squash Flavorful and Simple Recipe
Are you ready to elevate your vegetable game? Easy roasted yellow squash is your new go-to side dish! In this simple recipe, I’ll show you
- Fresh produce: - 2 medium zucchinis, thinly sliced into rounds - 4 ripe tomatoes, sliced - 1 medium onion, thinly sliced - 3 cloves garlic, minced - Cheese selection: - 1 cup shredded mozzarella cheese - 1/2 cup grated Parmesan cheese - Seasonings: - 1/4 cup fresh basil leaves, chopped - 1 teaspoon dried oregano - 1/2 teaspoon red pepper flakes (optional, for heat) - Pantry staples: - 2 tablespoons extra virgin olive oil - Salt and freshly ground pepper to taste - 1 cup breadcrumbs (preferably whole wheat or gluten-free) When making this tomato zucchini casserole, focus on fresh, high-quality ingredients. The zucchinis and tomatoes should be firm and ripe for the best flavor. I love using fresh basil as it adds a bright taste. If you want a kick, add red pepper flakes. For the cheese, mozzarella gives a nice melt, while Parmesan adds depth. The breadcrumbs create a crunchy topping, making each bite delightful. You can find the full recipe above to guide you through the cooking process. Enjoy gathering your ingredients! To make a delicious Tomato Zucchini Casserole, follow these steps closely. First, we need to prepare the oven and vegetables. - Preheat your oven to 375°F (190°C). This ensures even cooking. - In a large skillet, heat 2 tablespoons of extra virgin olive oil over medium heat. - Add 1 medium onion, thinly sliced, and 3 cloves of minced garlic. Sauté them together until the onions are soft and clear. This takes about 5 minutes. The smell will be amazing! Next, we will layer the casserole. - In a large bowl, start with the first layer. Add half of the sliced zucchini and half of the sliced tomatoes. - Season this layer with salt, freshly ground pepper, and half of the dried oregano. Add 1/2 teaspoon of red pepper flakes if you like some heat. - Now, spread half of the sautéed onion and garlic mixture on top of the vegetables. - Then, sprinkle one-third of the shredded mozzarella and grated Parmesan cheese evenly over the layer. Repeat this process for the second layer. - Add the remaining zucchini, then the rest of the tomato slices. - Use the remaining onion and garlic mixture. Top it with half of the remaining cheese. Now for the final assembly. - Top your casserole with 1 cup of breadcrumbs and the rest of the mozzarella and Parmesan cheese. - For a pop of flavor, sprinkle 1/4 cup of chopped fresh basil on top. Now, let’s get baking! - Cover the dish with aluminum foil and place it in your preheated oven. - Bake for 30 minutes to let the flavors mix well. - After 30 minutes, carefully take off the foil. Bake uncovered for another 15-20 minutes. You want the top to be golden and bubbly. Once it's done, let the casserole cool for a few minutes before slicing. This will help it hold together when you serve it. Enjoy your meal! For the complete recipe, check out the Full Recipe link. Let your casserole cool for a few minutes before you slice it. This makes serving easier. If you slice it right away, it may fall apart. Cooling helps it set up nicely. When it comes to cheese and toppings, distribution is key. Spread the cheese evenly across each layer. This way, every bite has the same great taste. Use your hands or a spoon to make sure it’s spread out well. Garnish your casserole with fresh basil leaves. This adds a pop of color and fresh flavor. You can also drizzle balsamic reduction around the plate. It looks fancy and tastes great with the dish. For a complete meal, think about what to pair with it. A simple green salad can balance the rich flavors. Crusty bread is also a great side. It helps soak up any extra sauce. Enjoy your delicious meal! {{image_4}} You can easily switch up the cheese in this recipe. Try using cheddar, gouda, or feta for a new flavor. If you want a vegan option, look for plant-based cheese. It melts well and works great in this dish. Want to add protein? You can mix in cooked chicken or turkey. Beans like chickpeas or black beans add a hearty touch too. Both options make this casserole more filling. If you have a crockpot, you can use it for this recipe. Layer all your ingredients in the pot. Cook on low for about 4 to 6 hours. This method makes the flavors even richer. You can also use a skillet for a quick version. Sauté the veggies, then layer them in the skillet with cheese. Cook on low heat until everything is melted and warm. For a gluten-free option, swap the regular breadcrumbs with gluten-free ones. You can also use crushed gluten-free crackers for a crunchy topping. This way, everyone can enjoy this tasty dish. Check the [Full Recipe](#) for more details on how to make this delicious casserole! To keep your Tomato Zucchini Casserole fresh, store it after it cools. Place leftovers in an airtight container. Refrigerate them right away. This helps avoid spoilage. It can last in the fridge for up to four days. If you want long-term storage, freeze the casserole. Cut it into portions for easy use later. Wrap each piece in plastic wrap, then place it in a freezer bag. This keeps it fresh for up to three months. When it's time to eat your leftovers, reheating is easy. You can use the oven or the microwave. For the oven, preheat it to 350°F (175°C). Place the casserole in a baking dish. Cover it with foil to keep moisture in. Heat for about 20-25 minutes, until hot. If you prefer the microwave, place a piece on a microwave-safe plate. Heat it for 1-2 minutes, checking often. This method is quicker but may change the texture. Always make sure it is heated all the way through. Enjoy your meal with the same great flavors! For the full recipe, check out the detailed instructions above. Can I make this casserole ahead of time? Yes, you can prepare this casserole a day in advance. Just follow the steps, but stop before baking. Cover it and keep it in the fridge. When you are ready, bake it according to the instructions. This saves time and makes dinner easy! What can I serve with Tomato Zucchini Casserole? This casserole pairs well with a fresh salad or crusty bread. You could also serve it with grilled chicken or fish for a complete meal. The light flavors of the casserole balance nicely with hearty sides. How do I know when the casserole is done cooking? Look for a golden, bubbly top. After baking, you can insert a knife in the center. If it comes out hot and clean, your casserole is ready. Let it cool a bit before slicing to help it set. Is this recipe suitable for a vegetarian diet? Absolutely! This recipe is fully vegetarian. It uses fresh vegetables and cheese, making it a tasty option for veggie lovers. You can also make it vegan by using plant-based cheese. You now have all the steps needed to make a delicious Tomato Zucchini Casserole. You learned about key ingredients and how to layer them for the best flavor. Remember to cool your casserole before slicing for neat pieces. Explore variations that suit your taste, and try different methods for cooking. Store any leftovers properly, and follow reheating tips to keep it tasty. Enjoy your cooking adventure and share this dish with family and friends! Your table will shine with this delightful meal.
Tomato Zucchini Casserole Flavorful and Easy Recipe
Are you looking for a simple yet delicious dish? Look no further than this Tomato Zucchini Casserole! I’ll guide you through easy steps to create
For chicken and pasta, you need simple ingredients. Grab 2 boneless, skinless chicken breasts. You will also need 8 ounces of pasta. Fusilli or penne works best. This will be the hearty base of your meal. Fresh produce adds flavor and color. Use 2 cups of cherry tomatoes. Halve them for easy cooking. You’ll also need 1 cup of fresh basil leaves, chopped. This gives the dish a fresh, vibrant taste. Don’t forget 4 cloves of garlic, minced. Garlic brings a rich flavor that brightens every bite. Seasoning is key to taste. Keep it simple with salt and pepper to taste. For oils, you need 2 tablespoons of extra virgin olive oil. This adds richness. Lastly, use 1 tablespoon of balsamic vinegar. The vinegar gives a tangy kick that balances the dish. For an extra treat, consider grated Parmesan cheese for serving. {{ingredient_image_2}} Start by boiling a large pot of salted water. When the water bubbles, add 8 ounces of pasta. Fusilli or penne works best. Cook the pasta according to the package instructions until it's al dente. This usually takes about 8 to 10 minutes. Once cooked, drain the pasta but keep 1/2 cup of the cooking water. Set the pasta aside for later. While the pasta cooks, heat 1 tablespoon of olive oil in a large skillet over medium heat. Season 2 boneless chicken breasts with salt and pepper. Place the chicken in the skillet and cook for 6 to 7 minutes on each side. You want it golden brown and cooked through. After cooking, remove it from the skillet and let it rest on a cutting board for 5 minutes. Then, slice the chicken into thin pieces. In the same skillet, add another tablespoon of olive oil. Next, add 4 minced garlic cloves. Sauté the garlic for about 1 minute. Stir it often to keep it from browning. After that, add 2 cups of halved cherry tomatoes and 1 tablespoon of balsamic vinegar. Cook for 3 to 4 minutes. Stir occasionally until the tomatoes soften and their juices flow. Return the sliced chicken to the skillet. Add the cooked pasta and 1 cup of chopped basil. Gently toss everything together. If needed, add some reserved pasta water to help create a smooth sauce. Finally, mix in 1 cup of shredded mozzarella cheese. Stir until the cheese melts and mixes throughout the dish. Taste and add more salt and pepper, if needed. Serve hot, garnished with fresh basil and grated Parmesan cheese on the side. To cook chicken perfectly, start with thin chicken breasts. This helps them cook faster and more evenly. Use a meat thermometer to check the internal temperature. Aim for 165°F for safe eating. Let the chicken rest after cooking. This keeps it juicy. Slice it thin for easy mixing with pasta. Seasoning is key for great flavor. Use salt and pepper to taste. I like to add garlic powder for extra taste. A splash of balsamic vinegar adds a nice tang. Fresh basil gives a bright note. Experiment with different herbs like oregano or thyme. These will elevate the dish. Mozzarella cheese melts beautifully in this dish. If you want a twist, try using provolone or fontina. These cheeses add a rich flavor. You can mix different cheeses for more depth. For an extra kick, sprinkle some grated Parmesan on top before serving. This adds a savory finish to the meal. Pro Tips Perfectly Cooked Pasta: Always cook your pasta until al dente for the best texture; it will continue to cook slightly when mixed with the sauce. Rest the Chicken: Letting the cooked chicken rest for a few minutes before slicing helps retain its juices, making it more flavorful and tender. Fresh Basil Flavor: Add the chopped basil at the end to preserve its vibrant color and fresh flavor, enhancing the overall dish. Cheese Melting Tips: For a creamier texture, allow the cheese to sit at room temperature for a few minutes before adding it to the hot pasta; this helps it melt evenly. {{image_4}} You can easily make a vegetarian version of bruschetta chicken pasta. Just skip the chicken. Instead, use more cherry tomatoes and add some roasted red peppers. You can also toss in some artichoke hearts for extra flavor. This dish stays bright and fresh without meat. For a gluten-free meal, swap out regular pasta for gluten-free pasta. Many brands offer tasty alternatives made from rice or corn. Just follow the cooking time on the package. The rest of the recipe stays the same, giving you a delicious gluten-free delight. Adding more veggies to your pasta makes it even better. Try adding spinach or zucchini. You can also include bell peppers or broccoli. Just sauté them with the garlic for a few minutes. This adds color and nutrition to your dish, making it a wholesome meal. To keep leftovers fresh, place your bruschetta chicken pasta in an airtight container. Make sure to cool the dish to room temperature before sealing it. This helps prevent moisture buildup. Store it in the fridge for up to three days. For best taste, eat the leftovers within this time. When you’re ready to enjoy your leftovers, reheat them gently. You can use the microwave or stovetop. If using the microwave, place the pasta in a bowl and cover it with a damp paper towel. Heat in short bursts, stirring in between. This keeps the pasta moist. On the stovetop, add a splash of water or broth in a pan. Heat over low until warm, stirring often. If you want to save some pasta for later, freezing is an option. Let the dish cool completely before freezing. Use a freezer-safe container or bag to store it. Make sure to remove as much air as possible. This helps prevent freezer burn. You can freeze bruschetta chicken pasta for up to three months. To reheat, thaw it in the fridge overnight. Then, use the stovetop or microwave to warm it up. Yes, you can use different types of pasta. Fusilli and penne work great. You can try spaghetti, rotini, or even farfalle. Just ensure the pasta cooks to al dente. This gives the best texture in the dish. If you need a substitute for mozzarella, try using provolone or fontina cheese. Both melt well and add flavor. You can also use ricotta for a creamy twist. Vegan cheese is another option if you want a dairy-free choice. To make this dish ahead, prepare the pasta and chicken first. You can store them separately in the fridge. Mix the pasta, chicken, cherry tomatoes, and garlic just before serving. Reheat gently on the stove. This keeps the flavors fresh and vibrant. This blog post guides you through a delicious pasta dish. We covered key ingredients like chicken, fresh produce, and seasonings. You learned step-by-step instructions for cooking and combining everything. Tips for perfect chicken and flavor enhancement were discussed too. We also explored fun variations and provided storage advice. Now, you can easily make this dish your own and impress others. Try new ingredients or methods. Enjoy your cooking journey and share what you create!
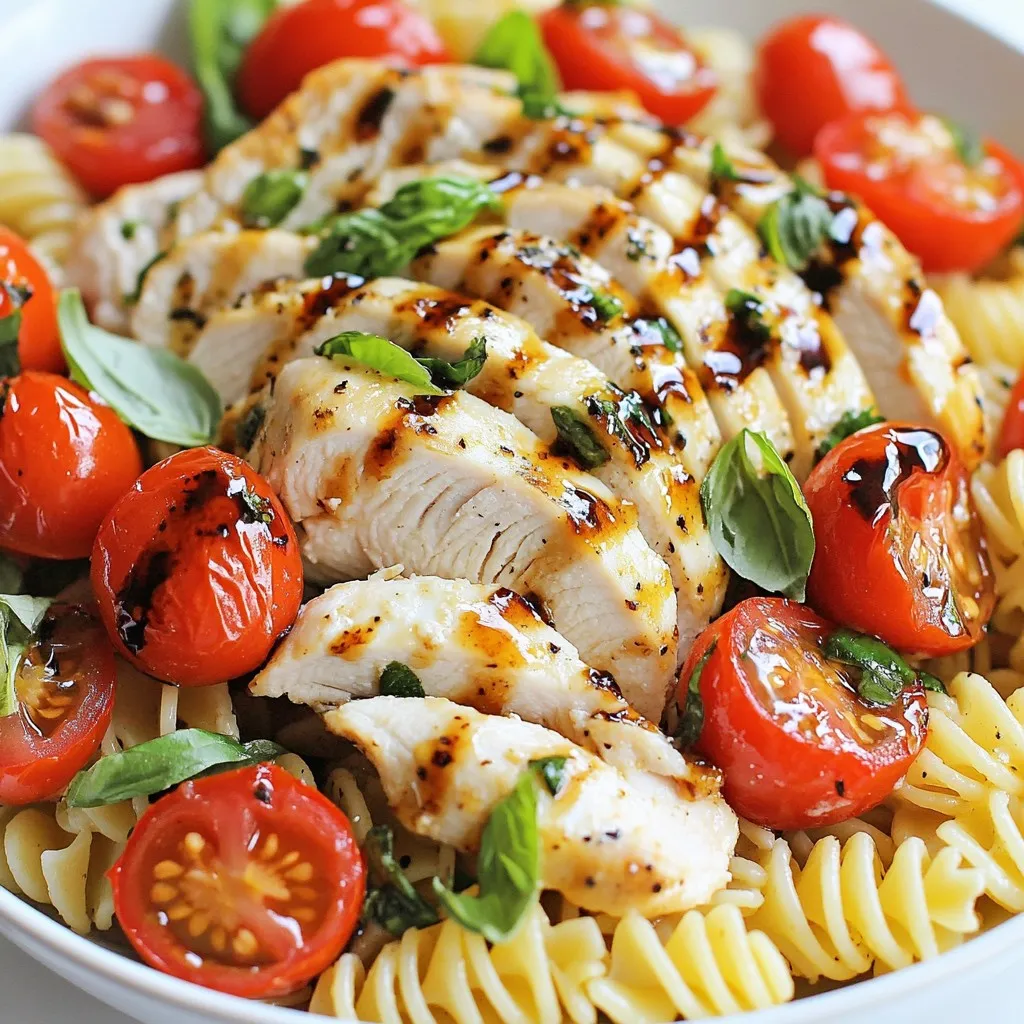
Bruschetta Chicken Pasta Delightfully Simple Meal
If you’re craving a quick and tasty meal, look no further! Bruschetta Chicken Pasta is a delightful dish that combines juicy chicken, fresh tomatoes, and
- 2 lbs beef chuck, trimmed and cut into 1-inch cubes - 4 medium carrots, peeled and sliced into rounds - 3 medium potatoes, peeled and diced into 1-inch cubes - 1 large onion, finely chopped - 3 cloves garlic, minced The main ingredients create a hearty base for your beef stew. I love using beef chuck because it becomes tender and rich in flavor during cooking. The carrots add sweetness and color, while potatoes bring a creamy texture. Onion and garlic add depth and aroma. - 4 cups beef broth (low sodium if preferred) - 2 tablespoons tomato paste - 2 tablespoons Worcestershire sauce - 1 teaspoon dried thyme - 1 teaspoon smoked paprika The liquids and seasonings make the stew come alive. Beef broth enriches the stew with meaty flavor. Tomato paste adds a touch of sweetness and acidity. Worcestershire sauce boosts umami and depth. Thyme and smoked paprika introduce warm, earthy notes that complement the beef. - 2 tablespoons olive oil - 1 tablespoon cornstarch (for thickening the stew) - Fresh parsley, finely chopped (for garnish) - Salt and pepper to taste Olive oil is essential for searing the beef, enhancing flavor. Cornstarch helps thicken the stew if you like a heartier texture. Fresh parsley adds a bright touch when serving. Always season with salt and pepper to your taste, as this enhances every bite. {{ingredient_image_2}} - Trimming and cutting the beef: Start with 2 lbs of beef chuck. Trim off any fat. Cut the beef into 1-inch cubes. This helps the beef cook evenly. - Slicing carrots and potatoes: Take 4 medium carrots. Peel them and slice into rounds. Next, peel 3 medium potatoes and dice them into 1-inch cubes. This size lets them cook well in the stew. - Chopping onion and mincing garlic: Finely chop 1 large onion. Then, mince 3 cloves of garlic. These add great flavor to the stew. - Searing the beef: Select the ‘Sauté’ mode on your Instant Pot. Add 2 tablespoons of olive oil. When the oil shimmers, add the beef cubes in batches. Sear them for 5-7 minutes, turning occasionally. Remove the beef and set it aside. - Sautéing the vegetables: In the same pot, add the chopped onion. Sauté for 3-4 minutes until it turns translucent. Add the minced garlic and cook for 1 more minute. Stir constantly to avoid burning. - Combining all ingredients in the Instant Pot: Return the browned beef to the pot. Add the sliced carrots, diced potatoes, and 4 cups of beef broth. Mix in 2 tablespoons of tomato paste, 2 tablespoons of Worcestershire sauce, 1 teaspoon of dried thyme, 1 teaspoon of smoked paprika, and 1 bay leaf. Season with salt and pepper. Stir everything together. - Setting the correct mode and time for pressure cooking: Close the lid tightly. Make sure the steam release valve is set to ‘Sealing’. Select the ‘Manual’ option and set the timer for 35 minutes to cook the stew under pressure. - Natural release vs. quick release methods: When the cooking time ends, let the pot rest for 10 minutes. This is called a natural release. After that, switch to a quick release to let out any remaining steam. Then, carefully open the lid. To achieve the ideal beef texture, select the right cut. I always use beef chuck. It’s tender after cooking and full of flavor. Cut the beef into 1-inch cubes for even cooking. Searing the beef first adds a rich taste. Don’t rush this step; let it get nice and brown. Adjusting seasoning improves flavor depth. Start with salt and pepper, then taste the stew. If it needs more kick, add Worcestershire sauce or smoked paprika. Fresh herbs like parsley also brighten the dish. To thicken your stew, I recommend the cornstarch slurry method. Mix 1 tablespoon of cornstarch with 2 tablespoons of water. Stir this into the stew during the last few minutes of cooking. It thickens quickly and doesn’t alter the flavor. You can also use alternate thickening ingredients. Mashed potatoes or pureed vegetables work well. For a richer stew, try adding a bit of flour or even some ground oats. When cooking for different sized batches, adjust the time slightly. For a smaller batch, you can reduce the pressure cooking time by 5 minutes. For larger amounts, increase it by about 5-10 minutes. If you use frozen ingredients, cook for a bit longer. Add about 10 extra minutes to the cooking time. Fresh ingredients cook faster, so keep that in mind to avoid mushy vegetables. Pro Tips Choose the Right Cut: For a tender and flavorful stew, always opt for beef chuck, as it becomes incredibly tender after slow cooking. Prep Ingredients Ahead: Chopping vegetables and measuring spices in advance can save time during cooking and make the process smoother. Use Fresh Herbs: Adding fresh herbs like parsley at the end not only enhances the flavor but also adds a beautiful pop of color to your stew. Adjust Seasoning Before Serving: Always taste your stew before serving and adjust salt and pepper accordingly for the best flavor. {{image_4}} You can make your beef stew even better by adding more veggies. Seasonal vegetables work great. Think about using: - Sweet potatoes for a sweet touch - Parsnips for a nutty flavor - Turnips for a peppery bite To add greens, try spinach or kale. They mix in well toward the end of cooking. This way, they stay bright and fresh. Just toss them in for the last few minutes. This adds color and nutrition to your stew. Want to change up the flavor? Spice is your friend. Different spices can make your stew unique. Consider: - Adding a pinch of cayenne for some heat - Using rosemary for an earthy taste - Trying cumin for a warm flavor You can also add a splash of red wine. This gives a rich depth to the stew. Fresh herbs like thyme or bay leaves can brighten the taste. Just remember to remove whole herbs before serving. If you need gluten-free options, just swap the Worcestershire sauce. Use a gluten-free version or skip it. For low-sodium needs, use low-sodium beef broth. This will help control the salt levels without losing flavor. Adjust the seasoning to your taste as you go. These changes keep your meal tasty while meeting dietary needs. To keep your leftover beef stew fresh, let it cool first. Store it in airtight containers. Glass or plastic containers work well. Make sure to use containers that you can seal tightly. This helps prevent any odors from other foods in the fridge. Always label your containers with the date. This way, you know how long it has been stored. Freezing beef stew is easy and great for meal prep. Let the stew cool down before freezing. Use freezer-safe containers or heavy-duty freezer bags. Remove as much air as possible from bags to prevent freezer burn. When you want to eat it, thaw it in the fridge overnight. This keeps the stew’s texture and taste. Reheat it on the stove or in the microwave until it is hot through. In the fridge, beef stew lasts about 3 to 4 days. If you freeze it, it can last up to 3 months. After that, the stew can lose flavor and texture. Always check for signs of spoilage before eating. If it smells off or has strange colors, it’s best to throw it away. You can pair your beef stew with simple sides. I like to serve it with: - Crusty bread for dipping - Mashed potatoes for extra comfort - A fresh green salad for balance - Steamed vegetables for color and crunch These sides make the meal feel complete and cozy. Yes, you can use different cuts. Beef chuck is great for its flavor and tenderness. Other good options include: - Brisket, which adds a rich taste - Round, for a leaner texture - Short ribs, for a melt-in-your-mouth feel Each cut offers a unique flavor and texture. Choose what you like best! To boost flavor, try these tips: - Sear the meat well for a deep taste. - Use low-sodium beef broth for a rich base. - Add a splash of red wine for depth. - Mix in fresh herbs like thyme or rosemary. These steps can transform a good stew into a great one! In this article, we explored how to make a rich Instant Pot beef stew. We covered the main ingredients, such as beef chuck, carrots, and potatoes. I shared step-by-step instructions for preparation and cooking. You learned tips for perfecting taste and texture, plus variations to try. Remember, cooking is about creativity. Feel free to make this recipe your own. Enjoy a hearty meal today!
Instant Pot Beef Stew Hearty and Savory Recipe
Craving a hearty meal that warms both your belly and soul? You’ve come to the right place! This Instant Pot Beef Stew is not just
- 2 large sweet potatoes, peeled and diced into 1-inch cubes - 1 lb boneless, skinless chicken breasts - 2 tablespoons olive oil, divided - 1 teaspoon garlic powder - 1 teaspoon smoked paprika - 1 teaspoon ground cumin - Salt and freshly cracked black pepper to taste - 1 red bell pepper, chopped into bite-sized pieces - 1 cup broccoli florets, approximately 1-inch in size - 1 can black beans, rinsed and drained - Fresh cilantro for garnish (optional) - Lime wedges for serving I love using sweet potatoes in my meals. They add a nice sweetness and color. They also give a great source of fiber and vitamins. When you roast them, they become tender and caramelized. They pair perfectly with chicken. Chicken breasts are my go-to protein. They cook quickly and take on flavors well. I season them with spices to make them more tasty. Olive oil is key for roasting. It adds flavor and helps everything cook evenly. I use it on the sweet potatoes and chicken to keep them moist. For seasoning, I like garlic powder, smoked paprika, and ground cumin. Garlic powder gives a nice punch. Smoked paprika adds warmth and depth. Cumin gives it an earthy taste. I always use salt and pepper to enhance the flavors. Fresh vegetables bring color and nutrients to the dish. Red bell peppers add a crunch and sweetness. Broccoli florets give that green freshness and a nice texture. Black beans are a great source of protein and fiber. I love adding them for a hearty meal. Lastly, I finish with fresh cilantro and lime wedges. The cilantro brightens the dish. The lime juice adds a refreshing zing. Together, they make the meal feel light and vibrant. {{ingredient_image_2}} First, preheat your oven to 425°F (220°C). This step warms up the oven for even cooking. Next, peel and dice two large sweet potatoes into 1-inch cubes. Place these cubes in a big bowl. Drizzle 1 tablespoon of olive oil over them. Then, add 1 teaspoon of garlic powder, 1 teaspoon of smoked paprika, salt, and freshly cracked black pepper. Toss everything well. Spread the sweet potatoes in a single layer on one side of a baking sheet. This helps them roast nicely. Take 1 pound of boneless, skinless chicken breasts. Season them well with salt, pepper, and 1 teaspoon of ground cumin. Heat the remaining tablespoon of olive oil in a large skillet over medium-high heat. When the oil is hot, add the chicken breasts. Sear them for about 5-7 minutes on each side. They should be golden brown and reach an internal temperature of 165°F (75°C). After cooking, transfer the chicken to a cutting board. Let it rest for a few minutes before slicing it into strips. While the chicken cooks, prepare your vegetables. Cut a red bell pepper into bite-sized pieces. Add the chopped pepper and 1 cup of broccoli florets to the empty side of the baking sheet with the sweet potatoes. Roast all the vegetables together for about 15-20 minutes. Stir them halfway through. This helps with even cooking and gets them tender and slightly caramelized. Now it’s time to put the bowls together. Evenly distribute the roasted sweet potatoes, sliced chicken, black beans, and roasted vegetables into four meal prep containers. If you like, you can sprinkle fresh cilantro on top of each bowl for a burst of flavor. Serve with lime wedges on the side. Squeezing lime over the ingredients adds a fresh twist right before eating. - Storage containers recommendations: Use clear, airtight containers. They help you see the colorful food inside. Choose ones that are microwave-safe for easy reheating. I like glass containers for their durability and safety. - Portion control advice: Aim for even portions. Divide the sweet potatoes, chicken, and veggies evenly. This helps control servings and keeps meals balanced. Use a scale if you want more accuracy. - Ensuring even cooking: Spread the sweet potatoes and veggies in a single layer on the baking sheet. This allows hot air to circulate and cook them evenly. Stir the veggies halfway through roasting for best results. - Tips for tender chicken: Sear the chicken on high heat first. This locks in juices and adds flavor. Let it rest after cooking. This keeps it juicy and prevents dryness when you slice it. - Adding sauces or dressings: Experiment with different sauces. A drizzle of tahini or a splash of hot sauce can elevate your bowl. You can also use a dressing made from olive oil and lime juice for brightness. - Alternative garnishes: Fresh herbs like cilantro add a nice touch. You can also try avocado slices or a sprinkle of feta cheese. These garnishes add flavor and make your bowl more appealing. Pro Tips Perfectly Cooked Chicken: Use a meat thermometer to ensure your chicken reaches an internal temperature of 165°F (75°C) for safety and juiciness. Flavor Boost: Marinate the chicken in your favorite spices or a citrus marinade for at least an hour before cooking to enhance flavor. Even Roasting: Cut your vegetables into uniform sizes to ensure they cook evenly and achieve that perfect caramelization. Storage Tips: Allow the bowls to cool completely before sealing them for storage to prevent condensation and sogginess. {{image_4}} You can switch up the protein in your meal prep bowls. Use turkey instead of chicken. Turkey has a similar taste and texture. It can be just as juicy and flavorful. If you prefer plant-based options, try tofu. Firm tofu absorbs flavors well. Just season it like you do with chicken for a tasty twist. Another option is canned chicken. It saves time and is easy to use. Just drain and rinse the chicken, then mix it in with your other ingredients. This alternative can make meal prep quick and simple. You can play around with vegetables based on the season. For spring, add asparagus or snap peas. In fall, consider using Brussels sprouts or squash. Seasonal swaps keep meals fresh and exciting. Don’t forget about flavor additions! Try adding spinach or kale for extra nutrients. You can even toss in some corn for sweetness. These changes add color and variety to your bowls. Think about serving your chicken sweet potato bowls with grains. Quinoa or brown rice are great options. They add texture and make your meal more filling. If you want to go vegan, swap out the chicken for chickpeas or lentils. These options are high in protein and very filling. You can also skip the beans for a lighter dish. These variations let you create meals that fit any diet. Store your Meal Prep Chicken Sweet Potato Bowls in the fridge. They stay fresh for up to four days. Check for signs of spoilage before eating. Look for a strange smell or any mold. If you see either, it’s best to toss the bowl. Freezing is a great option for longer storage. To freeze, let the bowls cool completely. Place them in airtight containers. This keeps them fresh for up to three months. For thawing, move the bowl to the fridge overnight. You can also use the microwave, but the fridge is best for taste. When it’s time to enjoy your meal prep bowls again, you have options. You can use the microwave or oven. For the microwave, heat for two to three minutes. Stir halfway through for even warmth. The oven takes longer but keeps the texture. Preheat it to 350°F (175°C) and heat for about 10-15 minutes. This way, your flavors stay vibrant. Yes, you can! Here are some tasty options: - Zucchini, sliced - Carrots, chopped - Cauliflower florets - Asparagus, cut into pieces - Brussels sprouts, halved Feel free to mix and match based on what you have. Each veggie adds its own flavor and texture. Meal prep bowls last about 4-5 days in the fridge. Store them in airtight containers. This keeps your food fresh and safe to eat. Check for any odd smells or changes in color before eating. Absolutely! You can prepare it a few days ahead. Cook the chicken and veggies, then pack them into containers. You can store them in the fridge. If you want to keep them longer, freeze the bowls instead. Just thaw before eating! This blog post walks you through a healthy meal prep recipe using sweet potatoes, chicken, and fresh veggies. We discussed cooking techniques and how to store your meals. Remember, you can swap proteins and veggies for variety. Meal prep saves time and helps you eat well. Enjoy creating your own tasty bowls while keeping it fresh and fun!
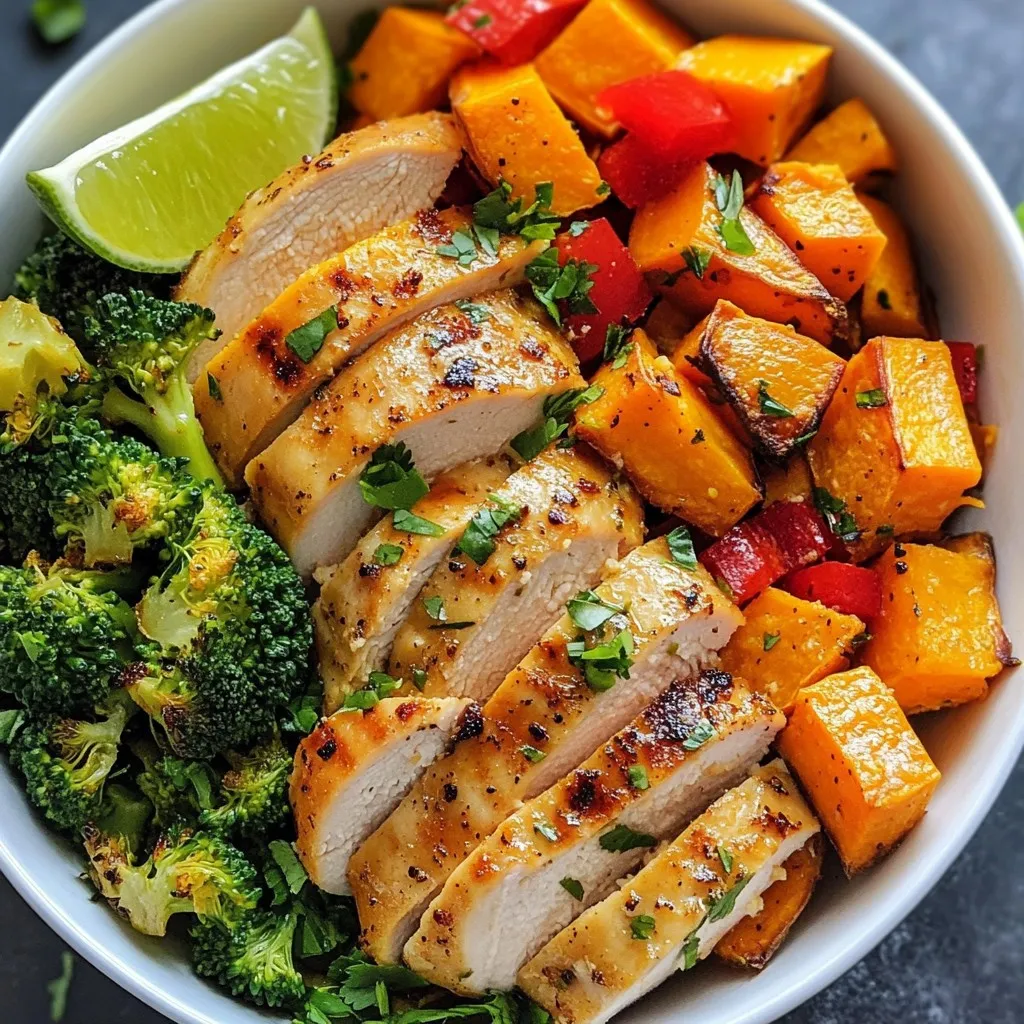
Meal Prep Chicken Sweet Potato Bowls Packed with Flavor
Ready to elevate your meal prep game? My Meal Prep Chicken Sweet Potato Bowls are packed with flavor and nutrients. In just a few simple
For this dish, you need key ingredients that bring bright flavors. Here’s what you need: - 2 medium zucchinis, sliced into half-moons - 2 boneless, skinless chicken breasts, cut into bite-sized pieces - 1 cup cherry tomatoes, halved - 1 red bell pepper, diced - 1 small red onion, finely chopped - 3 cloves garlic, minced - 1 teaspoon dried oregano - 1 teaspoon dried thyme - 1 teaspoon smoked paprika - ½ teaspoon salt - ½ teaspoon black pepper - ¼ cup extra-virgin olive oil - 1 cup feta cheese, crumbled - Fresh basil leaves for garnish These ingredients create a colorful and tasty dish. You can make this dish even better with some add-ins. Try these options: - Artichoke hearts for a tangy bite - Spinach for added greens - Olives for a salty kick - Lemon zest for a fresh twist These add-ins boost flavor and offer great texture. Herbs and spices play a big role in this bake. Here are my favorites: - Oregano gives a warm, earthy taste. - Thyme adds a subtle sweetness. - Smoked paprika brings a lovely smoky flavor. Feel free to mix and match herbs to suit your taste. Experimenting with herbs makes cooking fun! For the full recipe, check out the details above. First, gather all your ingredients. You will need: - 2 medium zucchinis, sliced into half-moons - 2 boneless, skinless chicken breasts, cut into bite-sized pieces - 1 cup cherry tomatoes, halved - 1 red bell pepper, diced - 1 small red onion, finely chopped - 3 cloves garlic, minced - 1 teaspoon dried oregano - 1 teaspoon dried thyme - 1 teaspoon smoked paprika - ½ teaspoon salt - ½ teaspoon black pepper - ¼ cup extra-virgin olive oil - 1 cup feta cheese, crumbled - Fresh basil leaves for garnish Start by preheating your oven to 400°F (200°C). This step is important for even cooking. Next, slice the zucchinis and chop the chicken. Make sure all pieces are small; this helps them cook evenly. In a large bowl, combine the zucchinis, chicken, cherry tomatoes, red bell pepper, and red onion. Then, add the minced garlic, oregano, thyme, smoked paprika, salt, and black pepper. Mix everything well. You want every piece to be coated in the spices. Now, drizzle the olive oil over your mixture. Toss everything together again until the chicken and veggies are well coated. This oil helps keep the dish moist and flavorful as it bakes. Transfer the mixture to a greased 9x13 inch baking dish. Spread it out evenly. This ensures that the chicken and vegetables cook at the same rate. Next, sprinkle the feta cheese on top. The cheese will melt and add a creamy texture to the dish. Place your baking dish in the preheated oven. Bake for 25-30 minutes. The chicken should be fully cooked, and the veggies tender. Once it’s done, take it out and let it rest for a few minutes. This helps the flavors meld together. Finally, garnish with fresh basil leaves for a pop of color and taste. Enjoy your Mediterranean chicken zucchini bake! To make your Mediterranean Chicken Zucchini Bake burst with flavor, focus on fresh ingredients. Use ripe cherry tomatoes and high-quality feta cheese. Fresh herbs like basil will elevate the dish even more. Marinate your chicken with olive oil, garlic, and spices for at least 30 minutes. This extra step adds depth and richness. Don't rush this part; the flavors need time to mingle. Preheat your oven to 400°F (200°C) to ensure even cooking. Use a large baking dish to spread the chicken and veggies evenly. This helps everything cook at the same rate. Check the chicken with a meat thermometer. It should reach an internal temperature of 165°F (74°C). If you want extra crispy veggies, broil the dish for the last few minutes. Just watch carefully so it doesn’t burn. Serve the bake hot right from the oven. You can also put it on individual plates for a nice touch. Add a drizzle of olive oil for shine. Fresh basil leaves make a bright garnish. You could also sprinkle some additional feta on top for extra flavor. For a complete meal, pair it with a light salad or crusty bread. {{image_4}} You can switch up the protein in this dish. If you prefer, use turkey or shrimp instead of chicken. Both options bring their own unique flavors. You can also try adding chickpeas for a plant-based protein. This will add texture and heartiness to your meal. For vegetables, feel free to get creative. Broccoli, asparagus, or even eggplant can work great in this bake. The key is to keep the flavors balanced. Each veggie adds its own taste and nutrients, making your dish richer. This recipe is easy to make gluten-free. Just ensure your spices do not contain gluten. You can also swap feta cheese with a dairy-free alternative. There are many great options on the market today. If you want a creamier texture, consider using coconut cream. It adds richness without dairy. This way, you can enjoy the dish while sticking to your dietary needs. If you like some heat, add red pepper flakes to the mix. Just a pinch can really elevate the dish. For more spice, try adding sliced jalapeños or a dash of hot sauce. You can also use spicy paprika instead of smoked paprika. This change will bring a new layer of flavor to the bake. Don’t be afraid to adjust the spice level to match your taste. Enjoy experimenting! After enjoying your Mediterranean Chicken Zucchini Bake, store any leftovers in a sealed container. This helps keep the dish fresh. Place the container in the fridge. It stays good for about three days. Make sure to let it cool down first before sealing. This prevents moisture build-up inside the container. To reheat, use your oven for the best taste. Preheat your oven to 350°F (175°C). Place the leftovers in an oven-safe dish. Cover it with foil to keep moisture in. Heat for about 15-20 minutes or until warm. You can also use the microwave. Heat in 30-second intervals, stirring in between. This way, it warms evenly. If you want to save the dish for later, freezing is a great option. First, let it cool completely. Then, portion it into freezer-safe containers or bags. Make sure to remove extra air to prevent freezer burn. It can last up to three months in the freezer. When you're ready to eat, thaw it in the fridge overnight and reheat as mentioned above. Enjoy your meal anytime! It takes about 40 minutes to make this dish. You need 15 minutes for prep and 25 minutes for baking. This quick time makes it easy to serve a tasty dinner on busy nights. Yes, you can add other veggies to this bake. Try bell peppers, mushrooms, or even spinach. Each veggie adds its own flavor and texture. Feel free to mix and match based on what you like. Serve it warm right from the baking dish. The colors of the chicken, zucchini, and feta look great. You can also add a drizzle of olive oil for extra flavor. It pairs well with a side salad or crusty bread. For the full recipe, check out the Mediterranean Chicken Zucchini Bake section. It gives you all the steps to make this delightful dish. This blog post covered the key ingredients and steps for making Mediterranean Chicken Zucchini Bake. I shared tips for flavor, baking, and serving. You learned about variations that fit different diets and how to store leftovers properly. In closing, making this dish can be simple and fun. Enjoy the fresh flavors and feel free to experiment. Each cook adds their touch, so be creative and enhance your meals!
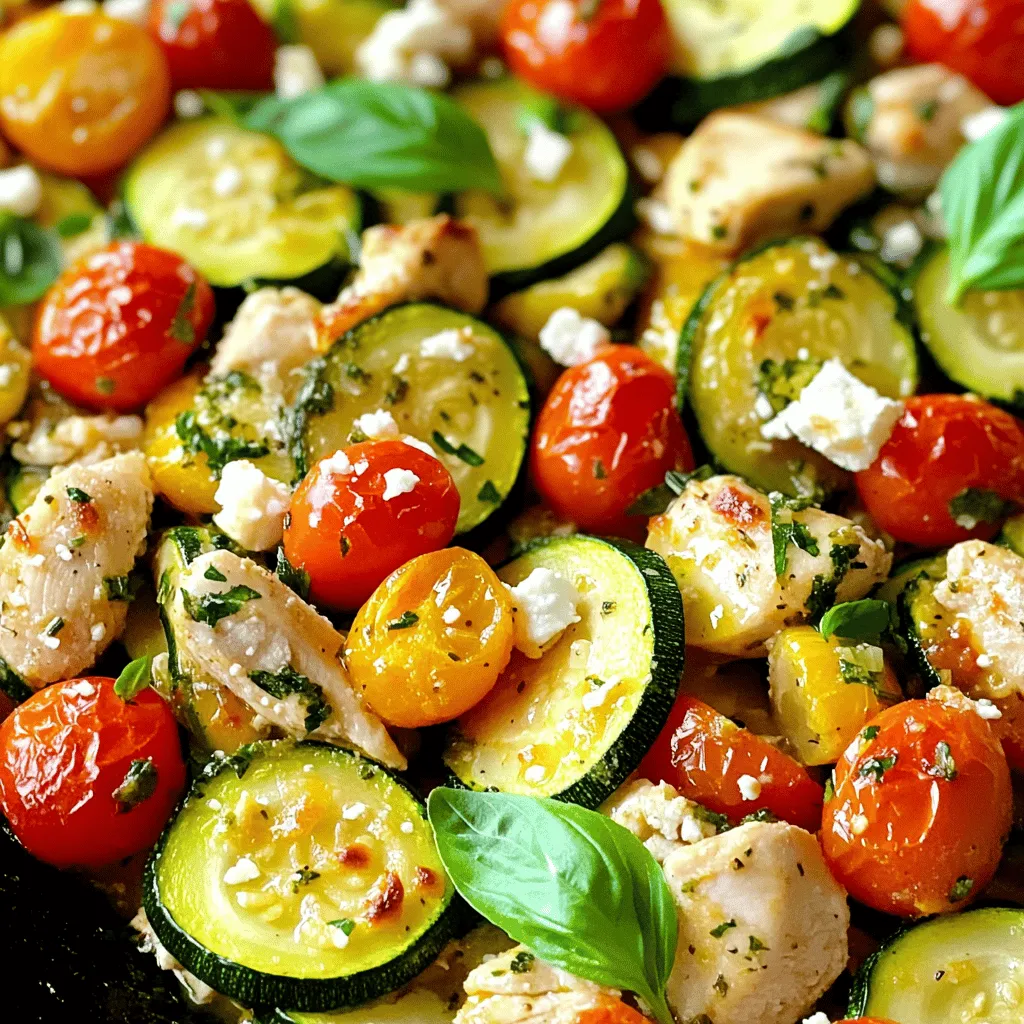
Mediterranean Chicken Zucchini Bake Flavorful Dish
If you’re looking for a dish that’s both tasty and healthy, you’ve come to the right place! The Mediterranean Chicken Zucchini Bake is packed with
- 4 medium zucchinis, sliced into half-moons (about 1/4 inch thick) - 3 tablespoons extra virgin olive oil - 3 cloves garlic, finely minced - 1 teaspoon red pepper flakes (adjust for spice preference) - Zest of 1 lemon (about 1 tablespoon) - Juice of 1 lemon (about 2 tablespoons) - Salt and freshly cracked black pepper, to taste - 1/4 cup fresh parsley, finely chopped - 2 tablespoons grated Parmesan cheese (optional for serving) When I cook sautéed zucchini, I focus on fresh, vibrant flavors. Zucchini gives a mild taste that soaks up other flavors well. The garlic adds depth, and the olive oil creates a silky texture. Red pepper flakes bring a gentle heat, while lemon zest and juice lift the dish with brightness. The salt and pepper balance the flavors perfectly. For some extra flair, I sprinkle fresh parsley for color and flavor. If you want a richer touch, try adding Parmesan cheese. Feel free to explore the [Full Recipe] for detailed steps on making this dish. Cooking zucchini can be simple yet rewarding, and with the right ingredients, you will create a dish everyone loves. To begin, rinse the zucchinis under cold water. This removes dirt and debris. After washing, dry them well with a towel. Now, slice each zucchini into half-moons. Aim for about 1/4 inch thick pieces. This thickness helps them cook evenly. If the slices are too thick, they may not cook well. Next, heat the olive oil in a large skillet. Set the heat to medium. When the oil shimmers, it is ready. Carefully add the minced garlic and red pepper flakes. Sauté these ingredients for about 1 minute. Stir often to avoid burning the garlic. You want it to smell great, not dark brown. Now, add the zucchini slices to the skillet. Stir them well to coat with oil and garlic. Cook the zucchini for about 5 to 7 minutes. You want them tender yet slightly crisp. Stir occasionally for even cooking. After that, add the lemon zest and juice. Mix everything for 2 minutes. Finally, season with salt and black pepper. Remove the skillet from the heat. Fold in the fresh parsley. If you like, sprinkle the Parmesan cheese on top. Your sautéed zucchini is now ready to serve! You can find the complete recipe in the Full Recipe section. For sautéing zucchini, use a wide, flat skillet. A non-stick skillet works best. It allows the zucchini to cook evenly and not stick. Heat your skillet to medium. This helps the zucchini brown nicely without burning. If you use high heat, watch closely. It can go from golden to burnt quickly. To boost flavor, try adding fresh herbs. Basil and thyme pair well with zucchini. You can also use spices like cumin or smoked paprika for depth. If you want to replace lemon, use vinegar or lime juice. Both options add brightness without the same taste. Plating is key for a beautiful dish. Arrange the sautéed zucchini in a circle on a white plate. This creates a nice contrast. You can sprinkle fresh parsley on top for a pop of color. A few shavings of Parmesan cheese can make it look gourmet. Remember, we eat with our eyes first! {{image_4}} You can easily change up the ingredients in sautéed zucchini. One great swap is yellow squash. It cooks similarly and adds a nice color. You can also add bell peppers. They bring a sweet crunch and vibrant hues to the dish. Want to switch the taste? For an Italian vibe, use Italian herbs like basil and oregano. This adds warmth and depth. If you crave heat, try adding jalapeños. They give a spicy kick that elevates the dish. Sautéed zucchini pairs well with proteins like grilled chicken or fish. The flavors complement each other beautifully. You can also transform this dish into zoodles. Just spiralize the cooked zucchini, and you have a fun, low-carb option. For the full recipe, check out the Zesty Lemon Garlic Sautéed Zucchini. To keep sautéed zucchini fresh, store it in the fridge. Place it in an airtight container. This helps to lock in flavors. Make sure to cool it down first. Hot food in a container can create steam and spoil it faster. Use glass or BPA-free plastic containers for best results. You can freeze sautéed zucchini if you want to keep it longer. First, let it cool completely. Then, place it in freezer-safe bags. Squeeze out the air to prevent freezer burn. When you are ready to eat, thaw it in the fridge overnight. For quick reheating, microwave it for a few minutes until warm. Sautéed zucchini lasts about 3 to 5 days in the fridge. If stored properly, it stays fresh longer. Watch for signs of spoilage like a sour smell or slimy texture. If you notice either, throw it away. Enjoy your sautéed zucchini while it’s still tasty! For the full recipe, check out Zesty Lemon Garlic Sautéed Zucchini. You can sauté zucchini without oil by using vegetable broth or water. Heat a non-stick skillet over medium heat. Add the broth or water instead of oil. Toss in sliced zucchini and cook until tender, about 5-7 minutes. This method keeps the dish light and healthy. Yes, you can use frozen zucchini for sautéing. However, it may release more water. Thaw it first and pat dry with a towel. Then, sauté in a hot skillet. Cook for a few extra minutes to ensure it is fully heated and tender. The best spices for sautéed zucchini include: - Garlic - Red pepper flakes - Black pepper - Italian herbs These spices enhance the natural flavor of zucchini and make it more savory. Yes, sautéed zucchini is healthy. Zucchini is low in calories and high in water. It provides vitamins A and C, along with fiber. Sautéing it adds flavor without a lot of fat, especially if you use minimal oil. You can make sautéed zucchini more flavorful by adding: - Fresh herbs like basil or thyme - A splash of balsamic vinegar - Cheese, such as Parmesan - Nuts for a crunchy texture These additions create layers of taste and make the dish more exciting. For a full recipe, check out the Zesty Lemon Garlic Sautéed Zucchini. This post walks you through sautéing zucchini, from ingredients to storage tips. You learned about the key ingredients, like zucchini, garlic, and olive oil, plus seasonings that enhance flavor. I shared easy steps to prepare the dish and added some tips for better results. Remember, you can vary the recipe with different ingredients and flavors too. Sautéed zucchini can be a healthy side or a base for many meals. Use the advice here to enjoy your cooking adventure!
Sauteed Zucchini Savory and Simple Vegetable Dish
Zucchini is a versatile vegetable that shines when sautéed. In my blog, Sautéed Zucchini: Savory and Simple Vegetable Dish, I’ll guide you through a quick
To make the Mediterranean stuffed zucchini, you'll need: - 4 medium zucchinis - 1 cup cooked quinoa - 1 cup cherry tomatoes, halved - 1/2 cup black olives, pitted and chopped - 1/2 cup feta cheese, crumbled - 1/4 cup red onion, finely chopped - 2 cloves garlic, minced - 1 teaspoon dried oregano - 1/2 teaspoon ground cumin - 2 tablespoons extra virgin olive oil - Salt and freshly cracked black pepper to taste - Fresh parsley, chopped, for garnish These ingredients blend well and create a fresh, tasty dish. The zucchini acts as a great vessel for healthy fillings. Quinoa adds protein, while olives and feta bring saltiness and depth. You can add several optional ingredients to enhance the taste: - Sliced bell peppers for crunch - Spinach for extra greens - Fresh basil for a fragrant touch - Pine nuts for a nutty flavor Feel free to mix in your favorite veggies or herbs. This makes the dish more exciting and personal. Here are some tools to make your cooking easier: - A baking dish for the zucchini - A mixing bowl for the filling - A spoon for scooping the zucchini - A sharp knife for cutting Using the right tools makes prep much simpler and more fun. Whether you follow the Full Recipe or create your own, these items will help you succeed. First, set your oven to 375°F (190°C). This helps cook the zucchinis evenly. While the oven heats, take the zucchinis. Slice them in half from top to bottom. Use a spoon to scoop out the seeds and a bit of flesh. This creates space for the tasty filling. Place the hollow zucchinis, cut side up, in a baking dish. In a large bowl, mix the cooked quinoa with halved cherry tomatoes, chopped black olives, crumbled feta cheese, finely chopped red onion, and minced garlic. Add in dried oregano and ground cumin for extra flavor. Stir everything well. This step blends all the unique tastes together. Next, fill each zucchini half with the quinoa mixture. Use a spoon to press down gently, packing it well. If you have extra filling, spread it evenly among the zucchinis. Cover the dish tightly with aluminum foil. Bake for about 25 minutes. This keeps the dish moist. After 25 minutes, remove the foil. Bake for another 10 minutes. This helps the tops turn golden and crispy. Once done, let them cool for a few minutes. Garnish with chopped parsley before serving. For the full recipe, check the earlier section. Enjoy! When picking zucchinis, look for firm ones. They should feel heavy for their size. Choose those with smooth skin and no blemishes. Smaller zucchinis are often sweeter and more tender. Avoid large zucchinis; they can be watery and have tough seeds. For the best taste, select organic zucchinis if possible. The filling should be moist but not soggy. To achieve this, ensure your quinoa is cooked and fluffed. Mix in the chopped vegetables and feta well. The olives add saltiness, while the tomatoes give juiciness. If your filling feels too dry, add a little more olive oil or a splash of lemon juice. This will keep it vibrant and fresh. To bake evenly, place the zucchini halves cut side up in the dish. Cover them with foil at first to trap steam. This helps them cook through without drying out. After 25 minutes, remove the foil for that perfect golden top. Check for doneness by piercing with a fork; they should feel tender but not mushy. For extra flavor, consider adding a sprinkle of Parmesan cheese on top before the final minutes of baking. For a complete guide, check the Full Recipe. {{image_4}} You can easily make this dish vegetarian. Simply leave out any meat. The filling stays tasty and filling with just vegetables and grains. Try adding more veggies like bell peppers or spinach. Mushrooms also add a great earthy taste. Want more protein? Add cooked chicken or turkey to your filling. Shred the meat and mix it with the quinoa. Lentils are a great choice too. They are packed with protein and keep this dish healthy. Just make sure they are cooked before mixing in. For gluten-free stuffed zucchini, use rice instead of quinoa. Cauliflower rice is another good option. If you need a dairy-free version, skip the feta cheese. You can try nutritional yeast for a cheesy flavor without dairy. Adjust the spices to keep it tasty! These variations make Mediterranean stuffed zucchini a dish everyone can enjoy. For more details on how to prepare it, check out the Full Recipe. To store leftovers, let the stuffed zucchini cool first. Place them in an airtight container. This keeps the flavors fresh and prevents drying out. You can store them in the fridge for up to three days. If you want to keep them longer, freezing is a great option. To freeze, wrap each stuffed zucchini tightly in plastic wrap. Then place them in a freezer-safe bag or container. This helps prevent freezer burn. You can freeze them for up to three months. When ready to eat, simply thaw them in the fridge overnight. When reheating, use the oven for the best taste. Preheat your oven to 350°F (175°C). Place the zucchini in a baking dish and cover with foil. Heat for about 15-20 minutes, or until warm. This method keeps them moist and tasty, unlike microwaving which can make them soggy. Enjoy each bite of your Mediterranean stuffed zucchini! For the full recipe, check out the details above. You need to bake stuffed zucchini for about 35 minutes. This time includes 25 minutes covered with foil and 10 minutes uncovered. The foil keeps the zucchini moist, while baking it uncovered lets the tops get golden. Check to see if the zucchini is tender. If not, bake for a few more minutes. Yes, you can use other grains instead of quinoa. Brown rice, couscous, or farro are great options. Just make sure they are cooked before adding them to your filling. Each grain will give a different taste and texture, so choose what you like best. Mediterranean stuffed zucchini pairs well with many dishes. You can serve it with a fresh salad or a side of roasted vegetables. A tangy yogurt sauce or tzatziki also adds a nice flavor. For a heartier meal, serve it with warm pita bread or rice. Explore these options to find your favorite combination. For the complete recipe, check out the Full Recipe link! Mediterranean stuffed zucchini is a flavorful dish with many options. We covered key ingredients, step-by-step cooking, and smart tips. This dish offers tasty ways to enjoy veggies, proteins, and grains. Remember, you can adapt it to fit your taste or needs. Store leftovers well and reheat for best flavor. Try different fillings and share your favorite versions with others. I hope you enjoy making this dish as much as I do!
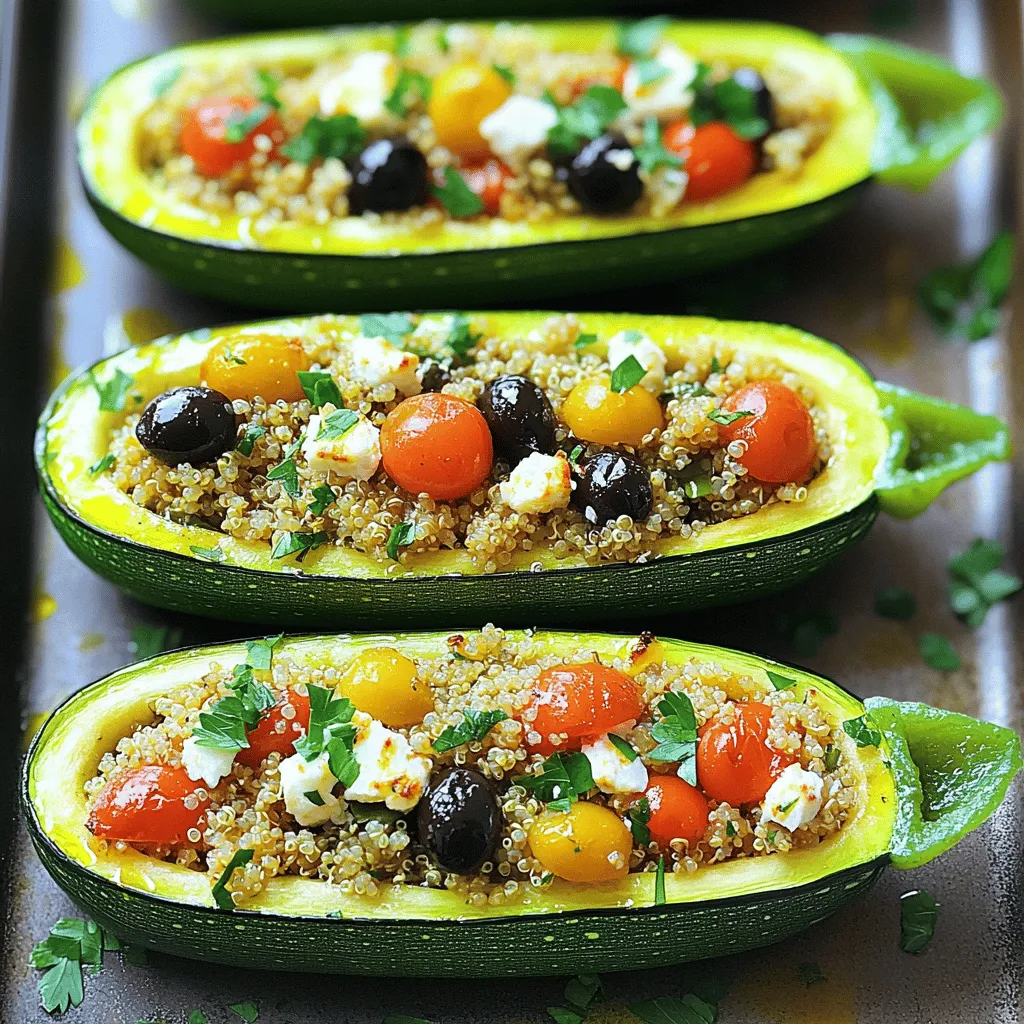
Mediterranean Stuffed Zucchini Flavorful and Healthy Dish
Looking for a healthy yet delicious meal? Try my Mediterranean Stuffed Zucchini! This dish combines fresh zucchini with a tasty quinoa filling, packed with flavor
To make a tasty loaded baked potato soup, you need a few key ingredients: - 4 large russet potatoes, peeled and diced into bite-sized pieces - 1 medium onion, finely chopped - 3 cloves garlic, minced - 4 cups vegetable broth - 1 cup heavy cream - 1 cup shredded sharp cheddar cheese (plus more for garnishing) - 1/2 cup sour cream - 4 slices turkey bacon, cooked until crispy and crumbled - 1 teaspoon dried thyme - 1 teaspoon smoked paprika - Salt and black pepper to taste - Chopped green onions for garnish These ingredients give the soup its creamy texture and rich flavor. The potatoes serve as the base, while the cheese and cream add depth. The spices bring warmth, and bacon adds a delightful crunch. You can easily swap some ingredients to fit your needs: - Potatoes: Use Yukon Gold or red potatoes for a different flavor. - Vegetable broth: Chicken broth works well if you prefer a non-vegetarian option. - Heavy cream: Substitute with half-and-half or coconut milk for a lighter version. - Cheddar cheese: Try Monterey Jack or Gouda for a unique taste. - Sour cream: Greek yogurt can work well as a healthy alternative. - Turkey bacon: You can use regular bacon or omit it for a vegetarian version. These swaps can change the taste and texture, so feel free to experiment! To make this soup, you will need a few key tools: - Large pot for cooking - Knife and cutting board for chopping - Immersion blender or regular blender for pureeing - Measuring cups and spoons for accuracy - Ladle for serving Having these tools ready will make your cooking process smooth and fun! {{ingredient_image_2}} Start by heating a drizzle of olive oil in a large pot over medium heat. Add one finely chopped onion. Sauté the onion for about five minutes. You want it to be soft and translucent. Next, stir in three minced garlic cloves. Cook for one more minute. You’ll smell the garlic soon! Be careful not to let it burn. Now it’s time for the potatoes. Take four large russet potatoes and peel them. Dice them into bite-sized pieces. Add these potatoes to the pot with the onion and garlic. Pour in four cups of vegetable broth. Bring this mixture to a boil. Then, reduce the heat to low and cover the pot. Let it simmer for 15 to 20 minutes. The potatoes should be fork-tender when done. Once the potatoes are cooked, grab an immersion blender. Carefully blend the soup until it’s smooth and creamy. If you like some chunks, blend just half of it. You can also use a regular blender in batches if you prefer. After blending, return the soup to the pot. Stir in one cup of heavy cream, one cup of shredded sharp cheddar cheese, and half a cup of sour cream. Add one teaspoon of dried thyme and one teaspoon of smoked paprika. Season with salt and black pepper to taste. Cook this over low heat. Stir often until the cheese melts and the soup warms through. Taste it and adjust the seasoning if needed. If you want a thinner soup, add more vegetable broth or water until it’s just right. To get the right texture, blend the soup well. Use an immersion blender for a creamy finish. If you like chunks, blend half the soup. This mix gives you both smooth and hearty bites. Cook the potatoes until they are fork-tender. This step helps them break down easily in the soup. If the soup is too thick, add more broth or water to thin it out. To boost flavor, add fresh herbs like chives or parsley. You can also sprinkle in some garlic powder for extra taste. Watch out for salt; taste as you go. Too much salt can ruin the dish. Another mistake is overcooking the garlic. It can turn bitter quickly, so add it after the onion is soft. Lastly, make sure to use sharp cheddar cheese. It adds a punch of flavor that mild cheese can't match. For serving, ladle the soup into bowls and top with crumbled turkey bacon. Add extra shredded cheese and chopped green onions for color. Pair it with crusty bread for a full meal. If you want a fun twist, serve it in bread bowls. This gives a rustic feel and adds more flavor. Enjoy your warm, hearty soup with friends or family for a cozy night. Pro Tips Use Yukon Gold Potatoes: For a creamier texture and naturally buttery flavor, consider using Yukon Gold potatoes instead of russets. Cheese Variations: Experiment with different types of cheese like Gruyère or fontina for a unique twist on flavor! Add Veggies: Incorporate additional vegetables like carrots or celery for extra nutrition and depth of flavor. Make it Vegan: Substitute heavy cream with coconut milk and use vegan cheese for a delicious plant-based version. {{image_4}} You can make loaded baked potato soup healthier without losing flavor. Here are some swaps: - Use low-fat milk or almond milk instead of heavy cream. - Replace sour cream with Greek yogurt. It adds creaminess and protein. - Try using turkey bacon or omit it for a vegetarian option. - Add more veggies like spinach or broccoli for extra nutrients. These changes keep the soup tasty while making it lighter. Want to boost the flavor of your loaded baked potato soup? Here are some great ideas: - Add fresh herbs like chives or parsley for a fresh taste. - Enjoy a sprinkle of nutritional yeast for a cheesy flavor without dairy. - Mix in some sautéed mushrooms or bell peppers for depth. - Top with jalapeños if you like a spicy kick. These add-ins can enhance the soup and add new layers of flavor. You can change up your loaded baked potato soup for different seasons. Here are some fun ideas: - In fall, add pumpkin puree for a warm, autumn twist. - For winter, try adding roasted garlic for a cozy flavor. - In spring, mix in fresh peas and mint for a bright taste. - In summer, use fresh corn for sweetness and crunch. These seasonal variations keep your soup exciting and fresh all year round. To store loaded baked potato soup, let it cool first. Pour the soup into an airtight container. Make sure to leave some space at the top. This allows for expansion when freezing. You can keep it in the fridge for up to three days. If you plan to eat it later, freezing is the best option. When reheating your soup, do it slowly. Place the soup in a pot over low heat. Stir it to help it heat evenly. You can also add a splash of vegetable broth or water. This helps keep the soup creamy and smooth. Keep an eye on it, so it does not stick to the bottom of the pot. If using a microwave, heat it in short bursts. Stir between each burst to avoid hot spots. To freeze loaded baked potato soup, store it in a freezer-safe container. It can last for up to three months in the freezer. When you are ready to eat, move it to the fridge to thaw overnight. Reheat it slowly as mentioned before. Be aware that the texture may change a bit after freezing, but the flavor will still shine through. Yes, you can make this soup ahead of time. Simply prepare the soup, let it cool, and store it in the fridge. It stays fresh for up to three days. When you are ready to eat, just reheat it on low heat. Stir it well to mix the flavors again. This soup often tastes even better the next day! If you want to replace heavy cream, there are a few good options. You can use half-and-half for a lighter choice. Another option is to mix milk with butter. For a dairy-free option, try coconut cream or almond milk. Each of these options adds a unique flavor, so choose one that fits your taste. To make the soup vegetarian, simply remove the turkey bacon. You can add extra veggies like mushrooms or bell peppers for more flavor. Use vegetable broth instead of chicken broth. This keeps the soup rich while making it suitable for vegetarians. Enjoy your delicious, meat-free version! This article covered how to make a tasty loaded baked potato soup. We explored key ingredients, helpful kitchen tools, and the steps to create a creamy base. I shared tips to enhance the flavor and texture, plus ideas for variations. Lastly, we discussed storage, reheating, and common questions about the soup. Remember, making soup can be fun and easy. Enjoy your cooking adventure!
Loaded Baked Potato Soup Creamy and Flavorful Delight
Are you ready to warm your soul with a creamy and flavorful delight? Loaded Baked Potato Soup brings home that cozy, comforting taste we all
To make Chicken with Buttered Noodles, gather these simple yet tasty ingredients. Each one plays a role in creating a delicious meal. - 2 boneless, skinless chicken breasts - 200g egg noodles - 3 tablespoons unsalted butter - 3 cloves garlic, finely minced - 1 cup chicken broth - 1 cup heavy cream - 1 tablespoon olive oil - 1/2 teaspoon dried thyme - 1/2 teaspoon paprika - Salt and freshly cracked pepper to taste - Fresh parsley, chopped (for garnish) - Grated Parmesan cheese (optional) These ingredients bring out rich flavors and textures. The chicken is the star, while the noodles soak up the creamy sauce. Minced garlic adds a nice touch, and seasonings like thyme and paprika enhance the taste. Don't forget the butter; it makes everything better! When you have these ingredients ready, you're set for a fun cooking adventure. {{ingredient_image_2}} Start by filling a large pot with salted water. Bring it to a rolling boil. Once boiling, add the egg noodles. Cook them as per the package instructions until they are al dente. This usually takes about 5 to 7 minutes. After they are done, drain the noodles. Let them rest in the colander while you prepare the chicken. While the noodles cook, take your chicken breasts. Season both sides with salt, freshly cracked pepper, paprika, and dried thyme. Make sure the chicken is well-coated. This will give it great flavor. Heat a large skillet over medium-high heat. Add olive oil when the skillet is hot. Place the seasoned chicken breasts into the skillet. Cook them for about 6 to 7 minutes on each side. You want the chicken to turn a rich golden brown. Check that the internal temperature reaches 165°F. Once done, take the chicken out and let it rest for a few minutes. In the same skillet, add unsalted butter. Let it melt completely over medium heat. Once melted, add minced garlic. Sauté the garlic for about 1 minute. Stir it often until it gets fragrant and lightly golden. Next, carefully pour in the chicken broth. Use a wooden spoon to scrape the bottom of the pan. This helps to deglaze the pan and mix in the tasty browned bits. Bring the mixture to a gentle simmer. Then, stir in the heavy cream. Let it cook for 3 to 5 minutes until the sauce thickens a bit. Stir occasionally to avoid sticking. Slice the rested chicken into strips or small pieces. Add it back to the skillet with the creamy sauce. Gently fold in the drained egg noodles. Toss everything together until the noodles are well-coated with the sauce. Give your dish a taste. Adjust the seasoning, adding more salt and pepper if you need it. For serving, plate big portions of the creamy garlic chicken with the buttered noodles. Garnish with fresh chopped parsley. If you enjoy cheese, sprinkle some grated Parmesan cheese on top. To make your chicken with buttered noodles taste even better, try adding a few extra spices. You can sprinkle in garlic powder or onion powder for depth. A squeeze of fresh lemon juice will brighten up the dish. For a kick, consider red pepper flakes. To keep your chicken juicy, make sure to sear it well. Use medium-high heat and don't rush the cooking. Let each side cook for about 6-7 minutes. This helps lock in moisture. Always check that the chicken reaches 165°F (75°C) for safety. Let it rest after cooking to keep those juices intact. Here are some useful tools for this recipe: - Large pot for boiling noodles - Skillet for searing chicken - Wooden spoon for stirring - Measuring cups for liquids - Knife for slicing chicken These tools make cooking easier and help you get the best results. After cooking, cleanup can be simple. Soak pots and pans in warm, soapy water right away. This helps loosen any stuck food. Use a non-stick skillet to reduce scrubbing time. Wipe down surfaces as you cook to keep things neat. If you have any leftovers, store them in a container quickly to avoid mess. Pro Tips Use Fresh Ingredients: Always opt for fresh garlic and herbs for the best flavor. Fresh ingredients can elevate the dish and provide a more vibrant taste. Rest the Chicken: Allowing the chicken to rest after cooking helps retain its juices, making it more tender and flavorful when sliced. Deglaze Properly: When adding the chicken broth, make sure to scrape up all the browned bits from the skillet. These bits add depth and richness to your sauce. Adjust Consistency: If your sauce is too thick, you can thin it out with a splash of additional chicken broth or a bit of pasta water to achieve your desired consistency. {{image_4}} You can switch up the chicken for other meats or tofu. For a beef option, try thinly sliced steak. It adds a great flavor and cooks quickly. Pork tenderloin also works well; just make sure to cook it until it’s tender. Tofu is a fantastic choice too. Use firm tofu for the best texture. Press it to remove excess moisture, then cube it before cooking. Each of these options gives the dish a unique twist. If you need gluten-free options, consider rice noodles or zucchini noodles. Rice noodles cook quickly and have a light texture. They absorb the sauce nicely too. Zucchini noodles, or zoodles, are a healthy and fun choice. They offer a fresh taste and are low in carbs. Just sauté them briefly to keep them crisp. You can jazz up the cream sauce by adding vegetables. Spinach, mushrooms, or broccoli work great. Just toss them in while sautéing the garlic. For a different flavor, try using flavored creams like garlic or herb-infused cream. You can even mix in a splash of white wine for depth. These changes will keep the dish exciting every time you make it! To store leftovers, let the dish cool down. Place it in an airtight container. Make sure to seal it well. Store it in the fridge for up to three days. This keeps the chicken and noodles fresh and tasty. To reheat, use the stovetop or microwave. If using the stovetop, add a splash of chicken broth. Heat over low to medium heat, stirring gently. This keeps the noodles creamy and the chicken juicy. In the microwave, cover the dish with a damp paper towel. Heat it in short bursts, stopping to stir. This prevents drying out. If you want to freeze your leftovers, use freezer-safe containers. Cool the dish completely before packing. Seal tightly to avoid freezer burn. The dish can last up to three months in the freezer. When ready to eat, thaw it in the fridge overnight. Reheat as described above, adding broth if needed. Yes, you can make Chicken with Buttered Noodles ahead of time. Cook the noodles and chicken as planned. After cooking, let everything cool. Store the noodles and chicken in separate containers. You can keep it in the fridge for up to three days. When you're ready to eat, reheat the chicken and noodles together. Add a splash of cream if the sauce is too thick. This meal prep method saves time on busy nights. You can serve many sides with Chicken with Buttered Noodles. Here are some ideas: - Steamed broccoli: This adds color and nutrients. - Garlic bread: It complements the creamy sauce well. - Side salad: A fresh salad balances the meal. - Roasted vegetables: Seasonal veggies add flavor and crunch. These choices make your meal more complete and enjoyable. To check if the chicken is cooked, use a meat thermometer. The internal temperature should reach 165°F (75°C). If you don’t have a thermometer, cut into the thickest part of the chicken. The meat should be opaque and juices should run clear. Avoid undercooking, as this can lead to foodborne illness. Properly cooked chicken is safe and delicious. Yes, this dish is very family-friendly. Children often love the creamy sauce and tender chicken. The noodles are easy to eat and fun for kids. You can even let them help mix the noodles and sauce. This dish is not only tasty but also a great way to gather around the table. It encourages family time while enjoying a comforting meal together. This blog post guides you through making Chicken with Buttered Noodles. We covered key ingredients, cooking steps, and tips to enhance flavor. I shared variations for different diets and storage advice for leftovers. Remember, this dish is simple and great for families. You can adjust it to fit your taste. Enjoy your cooking and savor every bite!
Chicken with Buttered Noodles Flavorful Dinner Recipe
Looking for a quick and tasty dinner? This Chicken with Buttered Noodles recipe checks all the boxes! It’s easy to make and packed with flavor.