Dinner
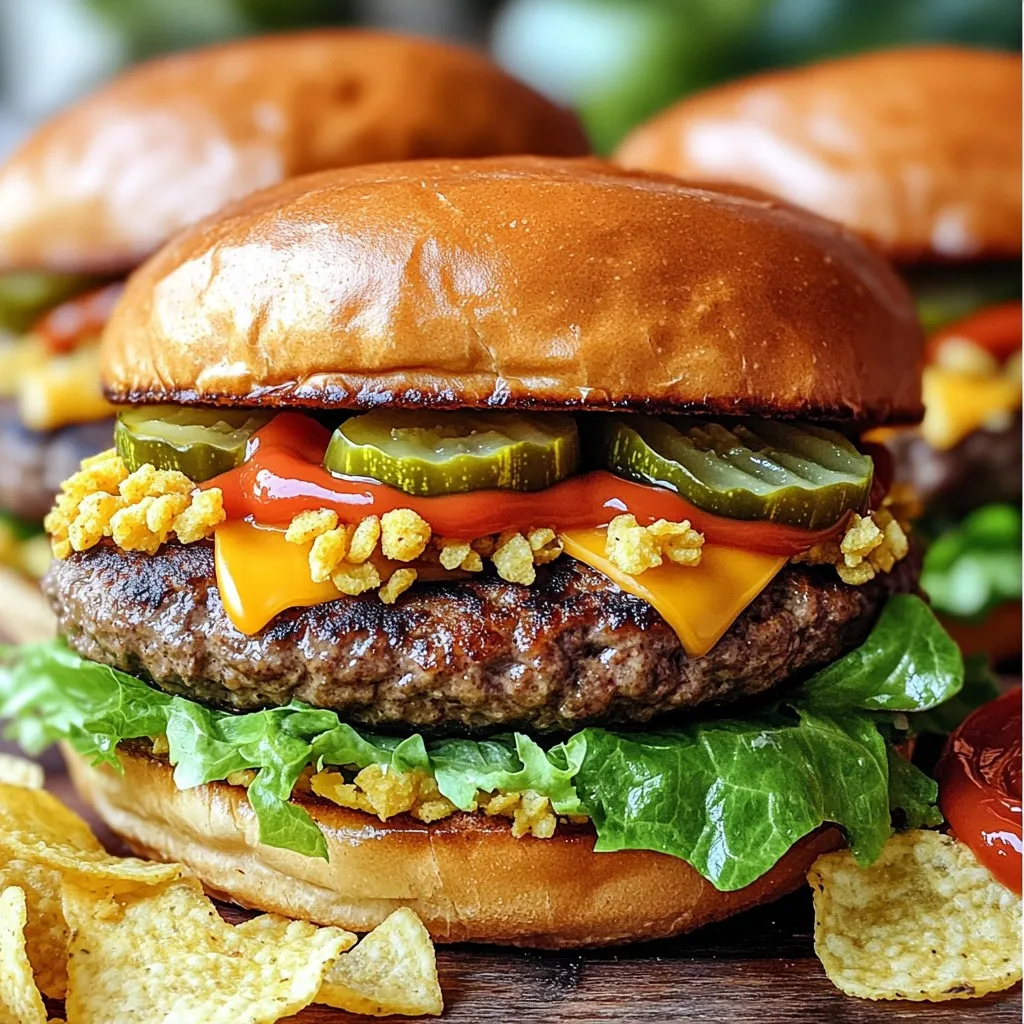
Crack Burgers Juicy Flavor That You Will Love
Are you ready to take your burger game to the next level? Let’s dive into the world of Crack Burgers, where juicy beef meets crunchy
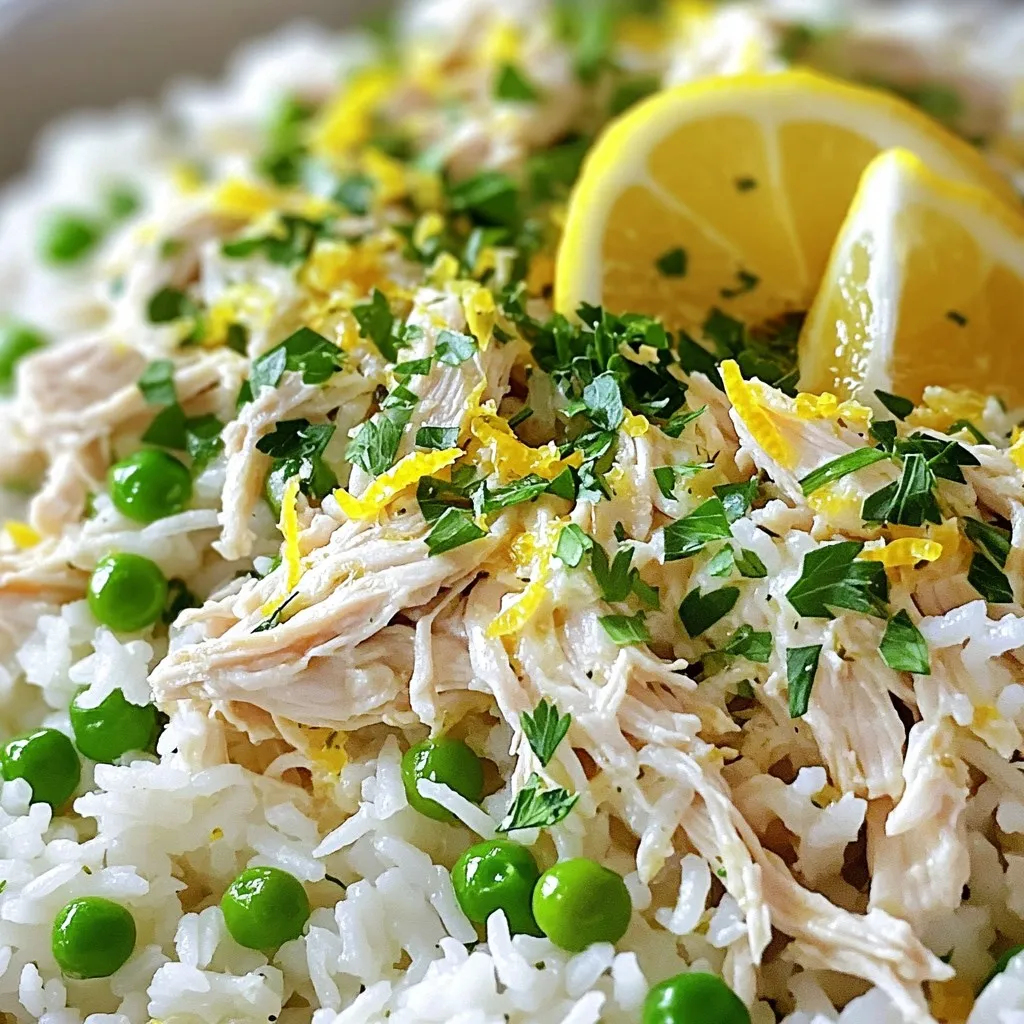
Slow Cooker Lemon Herb Chicken and Rice Delight
Welcome to a delicious journey with my Slow Cooker Lemon Herb Chicken and Rice Delight! This simple recipe packs bright flavors and nutrients, making it
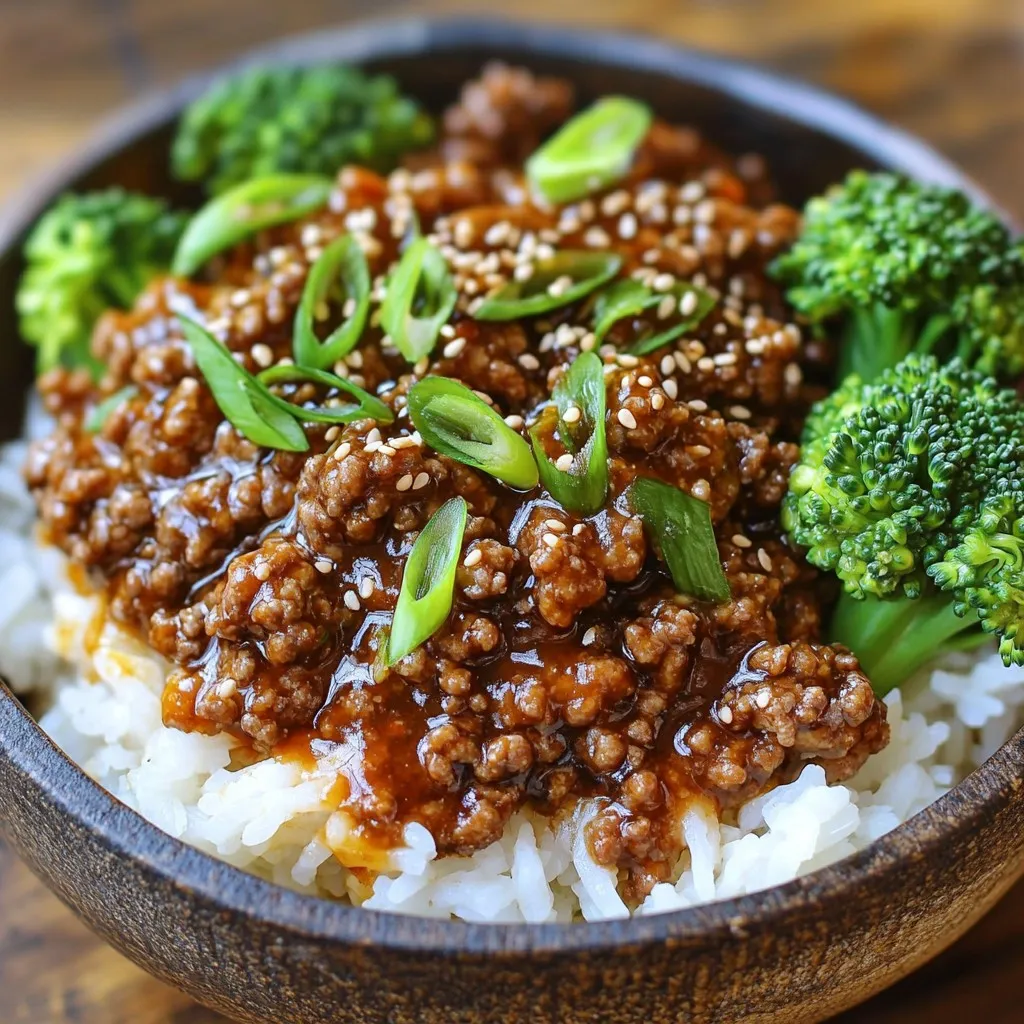
Korean Ground Beef Bowl Satisfying and Simple Meal
Looking for a quick, tasty meal? You’ve hit the jackpot with my Korean Ground Beef Bowl! This dish packs flavor and is easy to make,
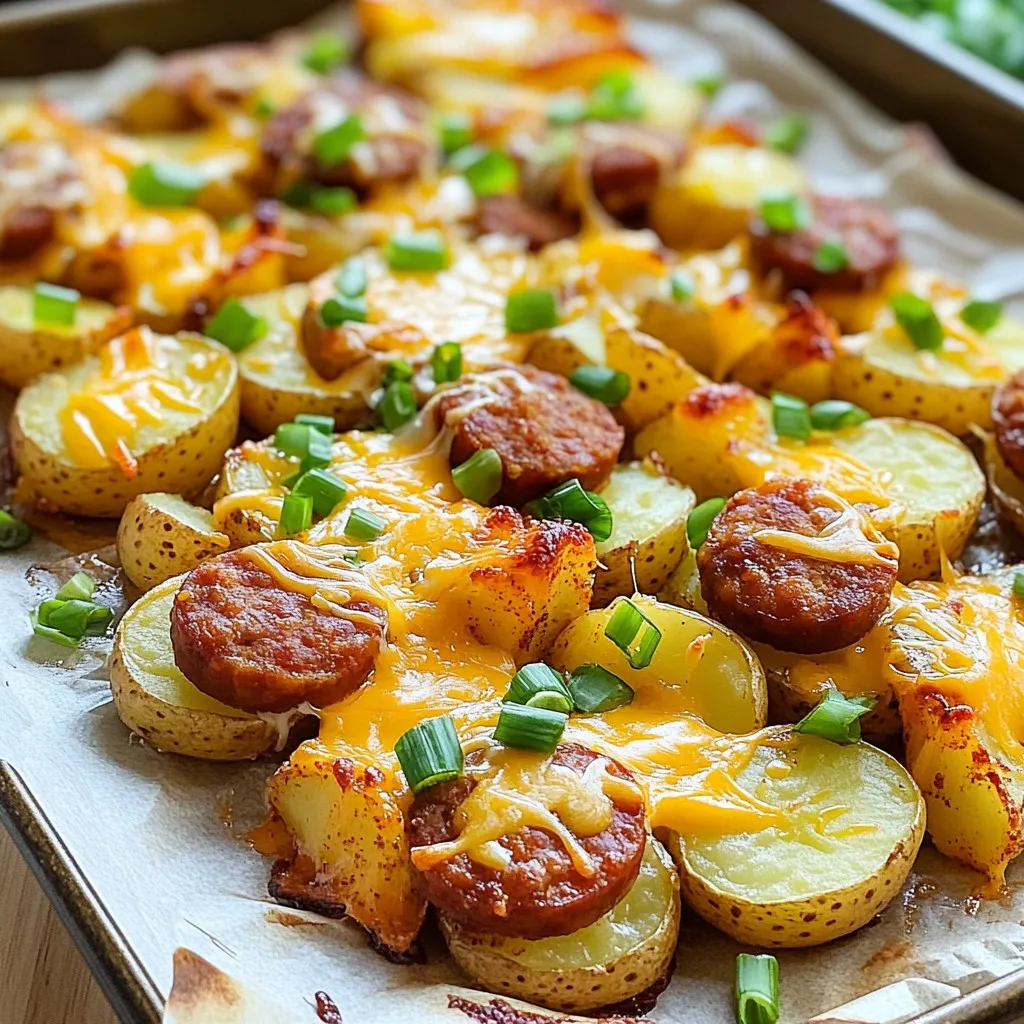
Cheesy Ranch Potatoes with Smoked Sausage Delight
Get ready for a flavor explosion with my Cheesy Ranch Potatoes with Smoked Sausage Delight! This dish combines tender potatoes, savory smoked sausage, and melted
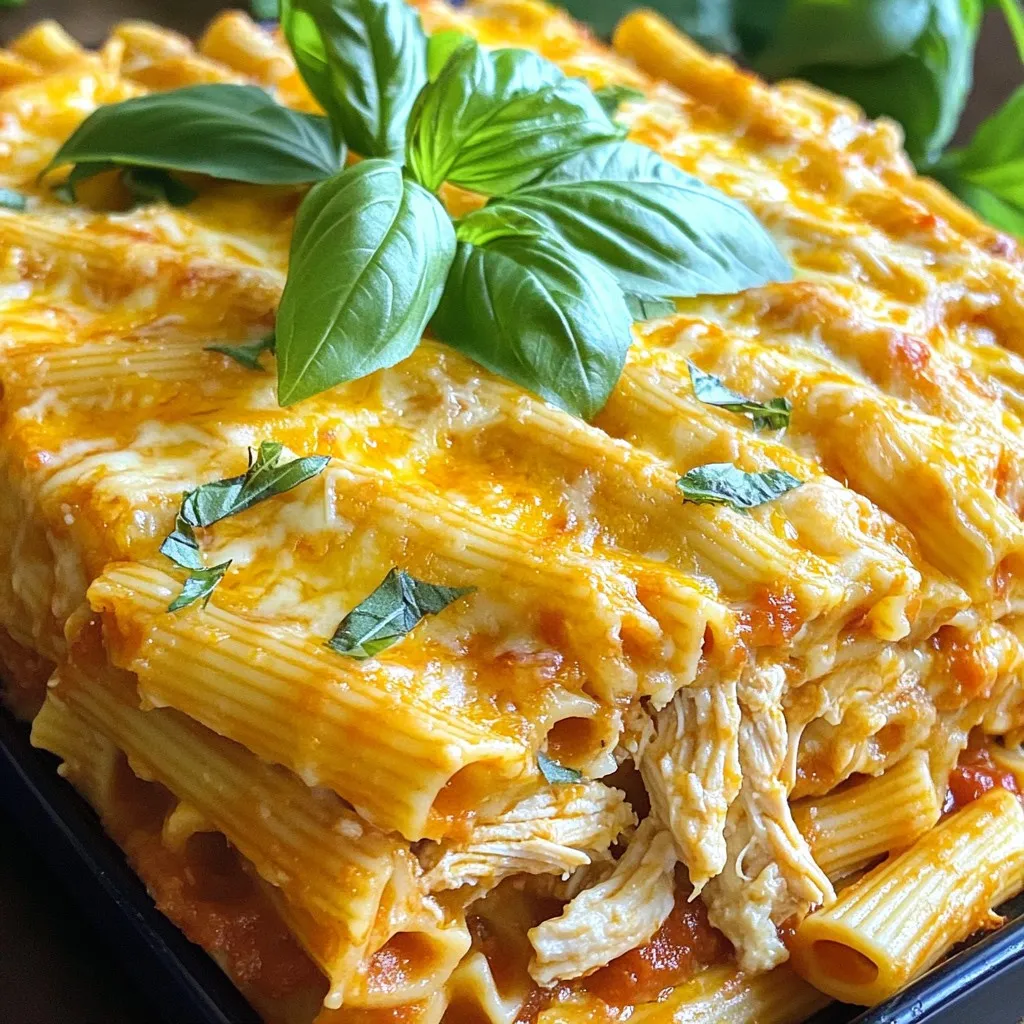
Cheesy Chicken Pasta Bake Simple and Tasty Recipe
Looking for a simple and tasty dish that your whole family will love? You’ve found it! This Cheesy Chicken Pasta Bake is packed with flavor
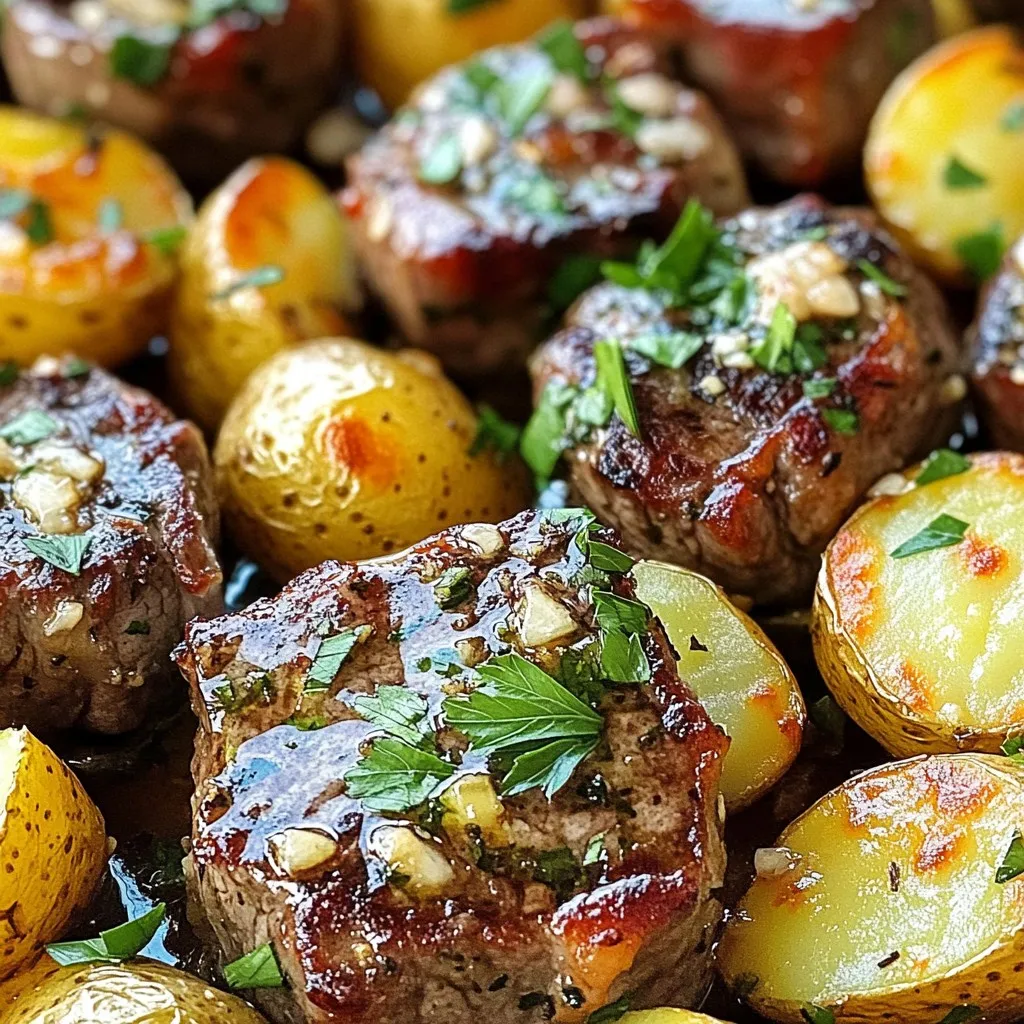
Garlic Butter Steak Bites and Potatoes Simple Meal
Craving a quick, tasty meal that feels special? Look no further than this Garlic Butter Steak Bites and Potatoes recipe! In just a few simple
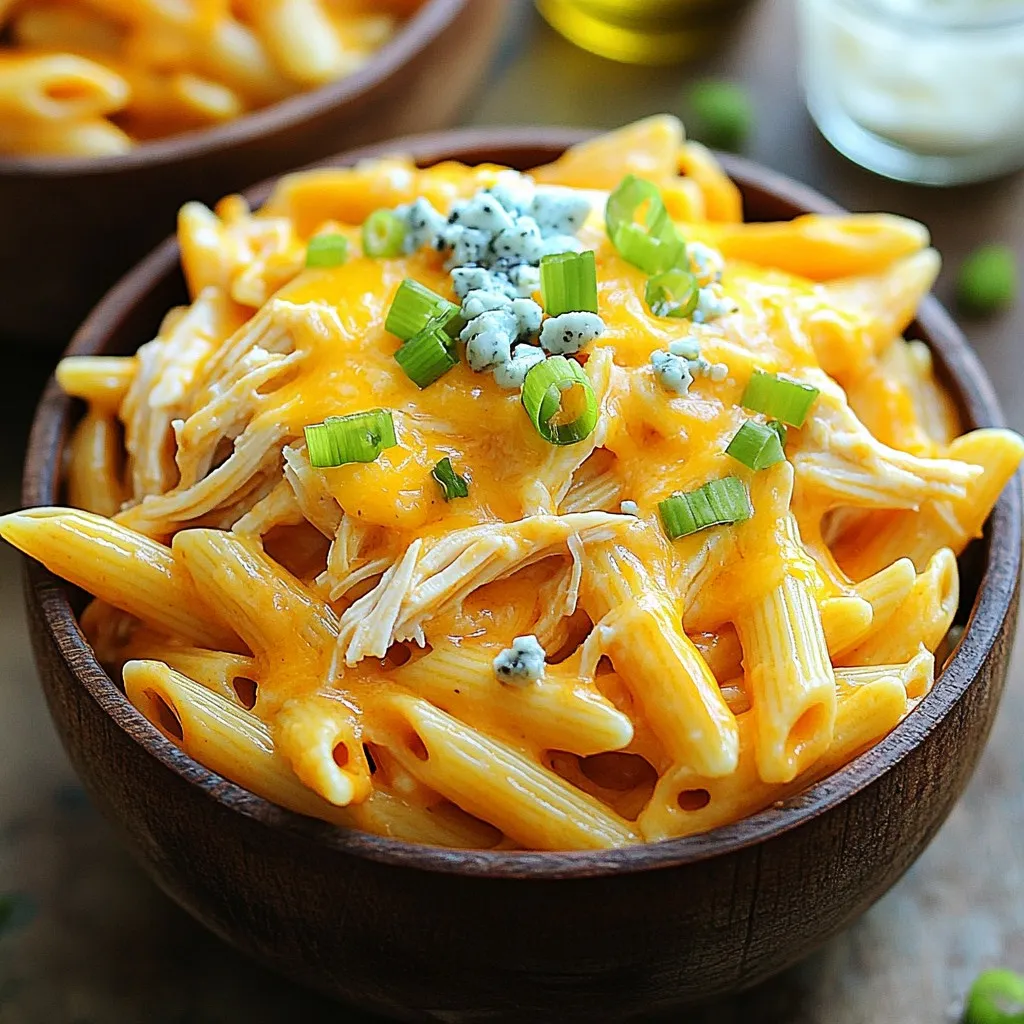
Buffalo Chicken Pasta Cheesy and Flavorful Delight
Looking for a dish that packs a punch of flavor? Let’s dive into Buffalo Chicken Pasta! This creamy, cheesy delight is a perfect way to
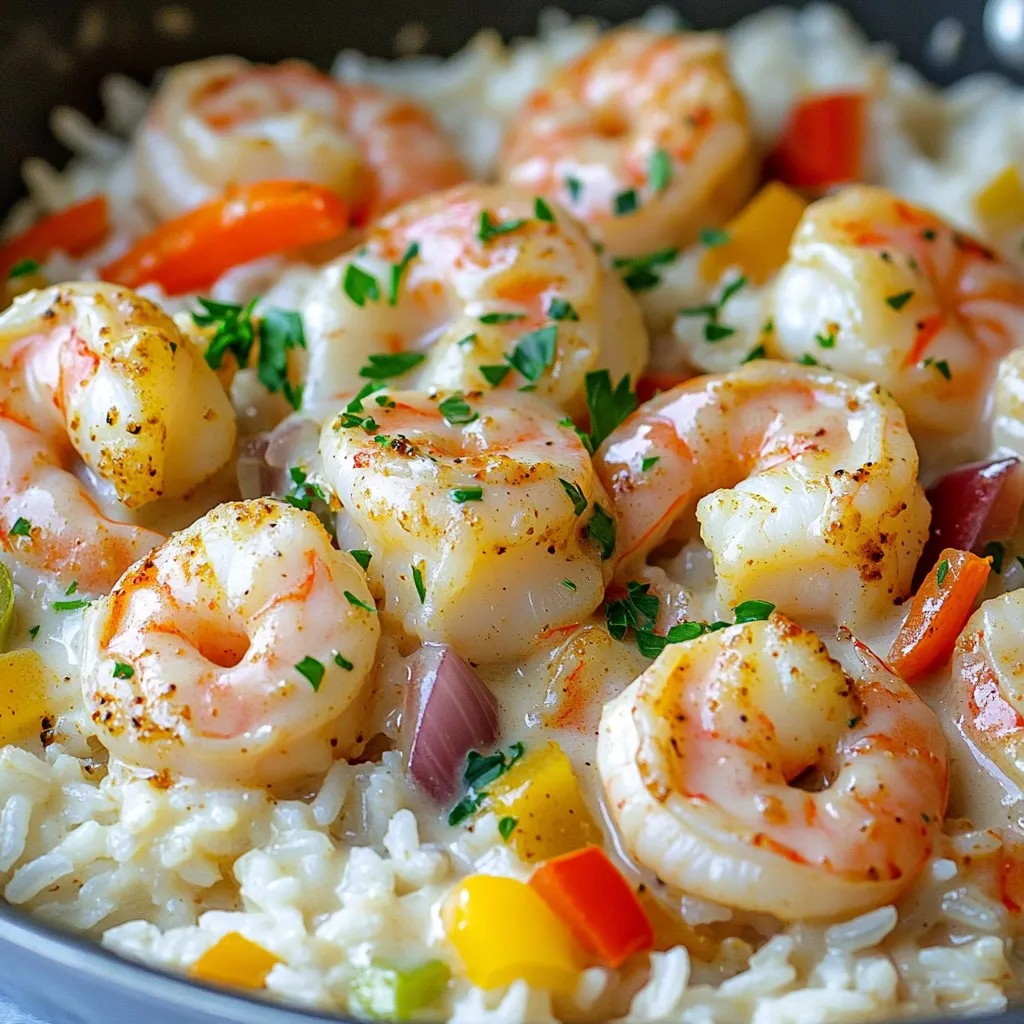
One-Pan Creamy Cajun Shrimp and Rice Delight
Welcome to my kitchen, where I’m excited to share my One-Pan Creamy Cajun Shrimp and Rice Delight! This dish is packed with flavor and so
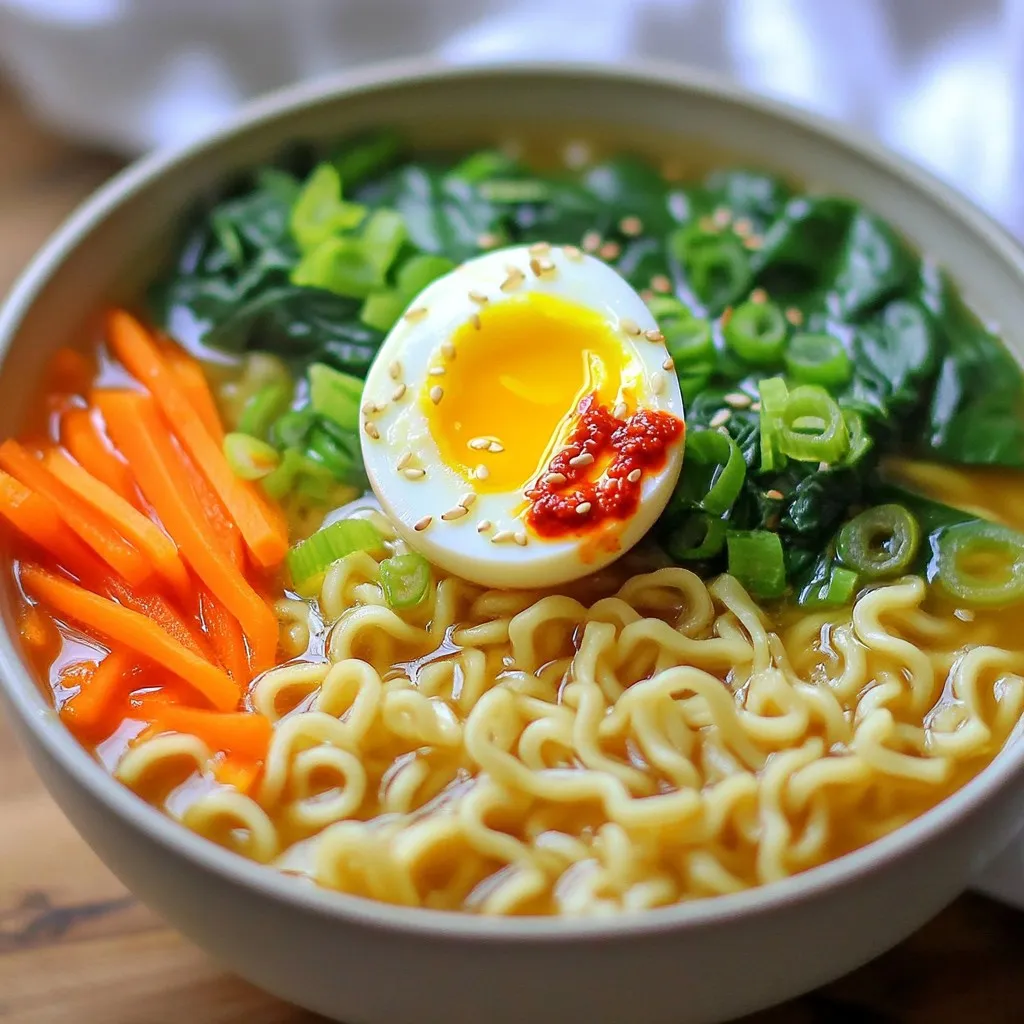
Minute Spicy Garlic Ramen Bowls That Satisfy Cravings
Are you craving something quick, spicy, and packed with garlic flavor? I’ve got just the thing for you: Minute Spicy Garlic Ramen Bowls! In this
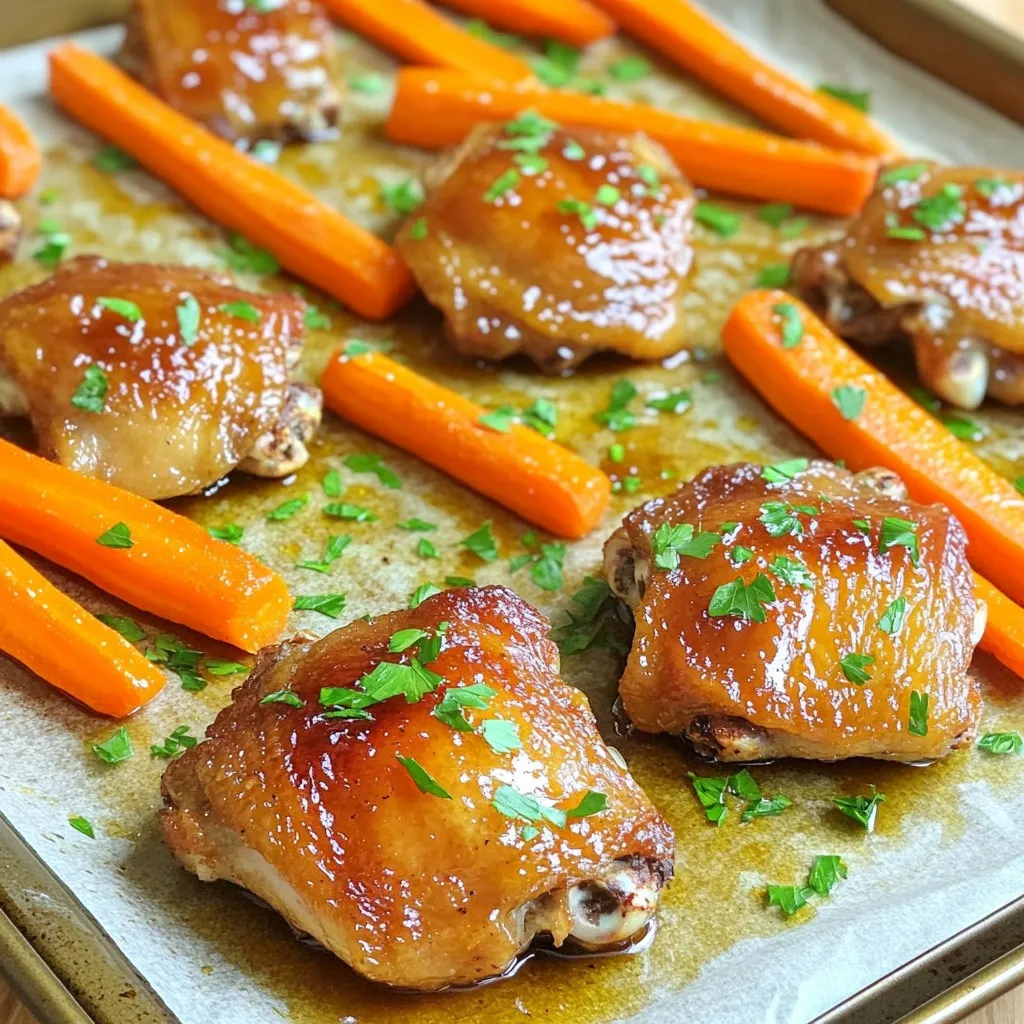
Maple Glazed Chicken & Carrots Sheet Pan Delight
Welcome to my kitchen, where I’m all about easy and tasty meals. Today, I’m sharing my favorite Maple Glazed Chicken & Carrots Sheet Pan Delight.