Dinner
Fall Recipes Inspired by Cottagecore for Comfort
Are you ready to embrace the warmth and charm of autumn? Fall recipes inspired by cottagecore offer the perfect way to savor this cozy season.
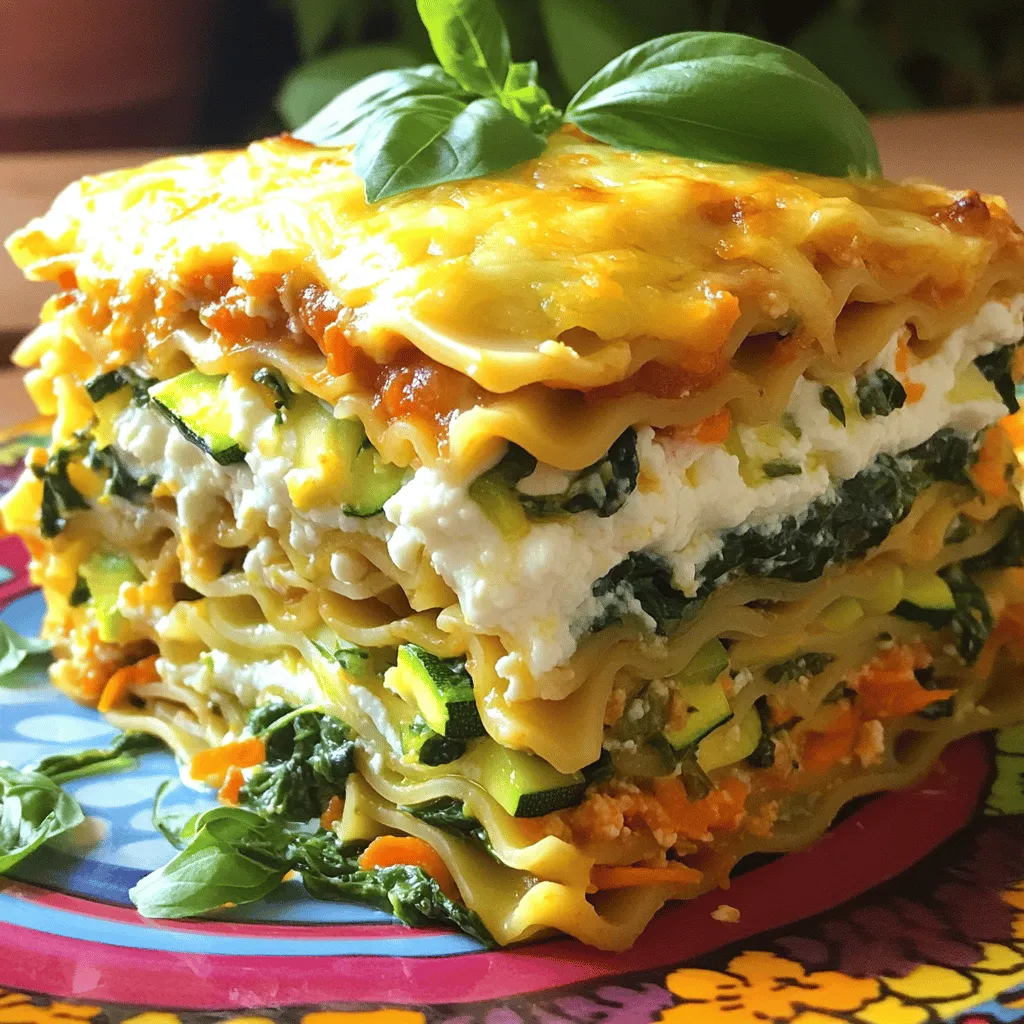
Easy Healthy Baby Lasagna Simple and Nutritious Meal
Are you looking for a delicious and healthy meal for your little one? In this blog post, I’ll show you how to make Easy Healthy
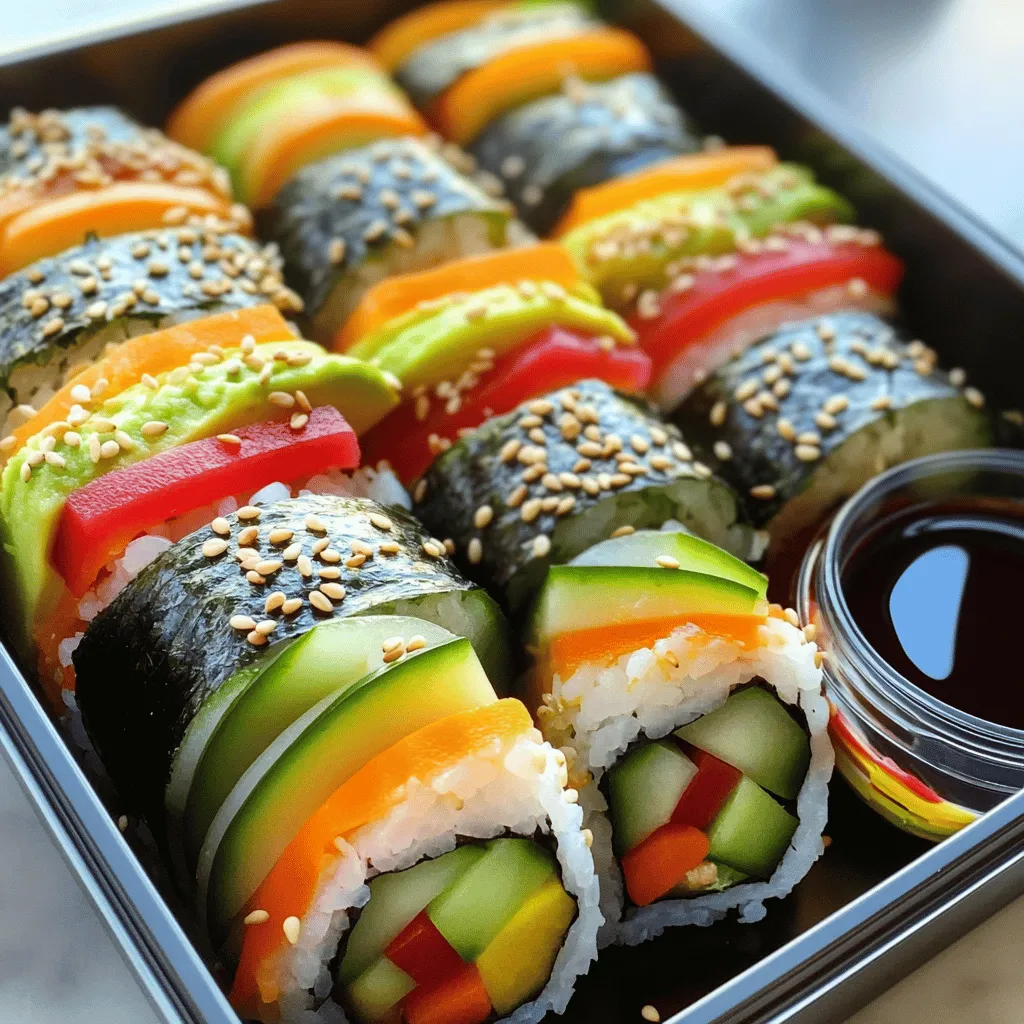
Kids Bento Box Lunch Ideas Fun and Colorful Options
Are you ready to make lunchtime exciting for your kids? Bento box lunches can be a fun way to pack nutritious meals that are colorful
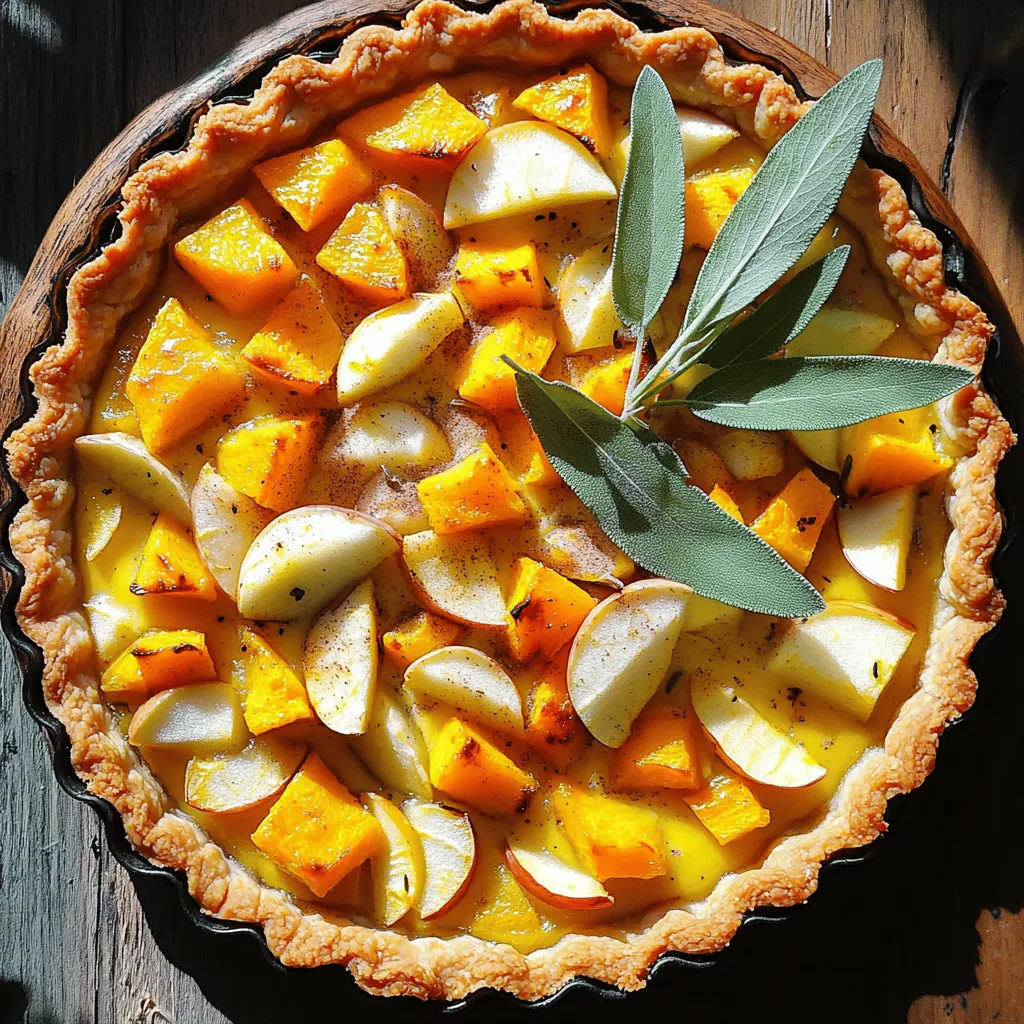
![Cooking with honeynut squash brings warmth and joy to the table. Here’s what you need for the maple roasted honeynut squash recipe: - 2 medium honeynut squashes, halved and seeds removed - 3 tablespoons pure maple syrup - 2 tablespoons extra virgin olive oil - 1 teaspoon ground cinnamon - 1/2 teaspoon ground nutmeg - Sea salt and freshly cracked black pepper to taste - 1/3 cup pecans, roughly chopped - Fresh thyme leaves for garnish These ingredients blend to create a sweet and savory dish. The maple syrup adds natural sweetness, while the olive oil gives it a rich flavor. Cinnamon and nutmeg bring warmth that makes this dish perfect for any season. The pecans add a nice crunch, and the fresh thyme leaves brighten it up. Check the [Full Recipe] for detailed steps to create this delightful dish. To start, halve and seed the honeynut squashes. This step opens them up for flavor. Next, preheat the oven to 400°F (200°C). This warm-up is key for a perfect roast. In a bowl, whisk together the maple syrup, olive oil, cinnamon, nutmeg, salt, and pepper. This mix brings out the squash's natural sweetness. The spices add warmth, making every bite cozy and inviting. Now, coat the squash with the sauce. Make sure every part is covered. This helps create a nice glaze when it roasts. Next, sprinkle the chopped pecans on top. They add a crunchy texture that contrasts with the soft squash. Place the baking sheet in the oven and roast for 30-35 minutes. You want the squash to be tender and caramelized. Test it with a fork; it should pierce easily. Remove it from the oven and let it cool for a few minutes. This lets the flavors blend. Just before serving, sprinkle fresh thyme leaves on top. They add a nice touch of color and flavor. Enjoy this dish warm, as a side or main meal. For the full recipe, check the earlier section. To get the best maple roasted honeynut squash, follow these simple steps. First, ensure your oven is preheated to 400°F (200°C). This heat helps cook the squash evenly. Next, cut the squash in half and scoop out the seeds. This creates a space for the sauce and flavors. Coat the squash with the maple syrup mixture evenly. Use a brush or spoon for a nice cover. This coating helps create a rich caramelization. When you roast, the sugar in the syrup turns golden and delicious. Want to add more flavor? Consider these options: - A pinch of cayenne pepper for heat. - Some garlic powder for depth. - A sprinkle of smoked paprika for a hint of smokiness. You can also add toppings after roasting. Crumbled feta cheese or goat cheese can give a creamy touch. You might also try pomegranate seeds for a burst of color and sweetness. Make your dish eye-catching! Once your squash is roasted, place it on a nice serving platter. Drizzle a little extra maple syrup on top before serving. This adds shine and sweetness. Garnish with fresh thyme leaves for color. You can also sprinkle some chopped pecans on top. This adds texture and looks great on the plate. Beautiful food makes every meal more special! For the full recipe, check out the detailed steps to create this dish. {{image_4}} You can switch pecans for walnuts or almonds. Walnuts give a strong flavor and a crunchy texture. Almonds add a light, sweet touch that pairs well with the squash. Both options work great and keep the dish exciting. If you want to change the flavor, use honey or agave syrup. Honey adds a floral note, while agave syrup gives a mild sweetness. Each sweetener brings its own charm to the dish. Just keep the amount the same as the maple syrup in the full recipe. Don't be afraid to try new herbs like rosemary or sage. Rosemary adds an earthy flavor, while sage gives a warm, savory touch. Mixing herbs can enhance your meal and make it feel special. Each herb option can change the whole vibe of the dish. To store your leftover maple roasted honeynut squash, let it cool first. After it cools, place it in an airtight container. Make sure to seal it well to keep out air. This keeps the squash fresh and tasty. If you want to freeze this dish, cut the cooled squash into smaller pieces. Place these pieces in a freezer-safe bag. Remove as much air as possible before sealing. When you're ready to eat, thaw overnight in the fridge. Reheat in the oven for the best texture. In the fridge, your maple roasted honeynut squash lasts about 3 to 5 days. If you freeze it, it can stay fresh for up to 3 months. Just remember, the sooner you eat it, the better it will taste! Yes, you can. Other squash types work well in this recipe. Try using butternut squash, acorn squash, or even pumpkin. They have a sweet flavor that pairs nicely with maple syrup. Just cut them into similar sizes to ensure even cooking. Each type brings its own unique taste, adding variety to your dish. Look for a few signs to know when the squash is ready. First, the edges should be golden brown and caramelized. You can poke it with a fork; it should go in easily. If it feels soft all the way through, it is done. Trust your senses! The aroma will also fill your kitchen, making it hard to resist. This dish pairs well with many foods. Serve it alongside roasted chicken or turkey for a hearty meal. It also goes well with grains like quinoa or farro. For a lighter option, try it with a fresh salad. You can even add it to a warm grain bowl with your favorite toppings. The sweet and savory flavors enhance any dish! For the complete process, check out the Full Recipe. This blog post detailed the ingredients and steps for making maple roasted honeynut squash. I shared tips on perfect roasting and flavor enhancements. You can even vary the recipe with different nuts or herbs. Remember to store leftovers correctly to enjoy them later. This dish is not just tasty, but also easy to customize. Try making it your own and impress your friends or family. Happy cooking!](https://roastedflavors.com/wp-content/uploads/2025/07/ae56dea6-1e8b-4cfb-93d4-62fce8141ee3.webp)
Maple Roasted Honeynut Squash Flavorful Comfort Dish
Looking for a cozy dish that brings warmth and flavor? Maple Roasted Honeynut Squash is your answer! This simple recipe combines sweet maple syrup, rich
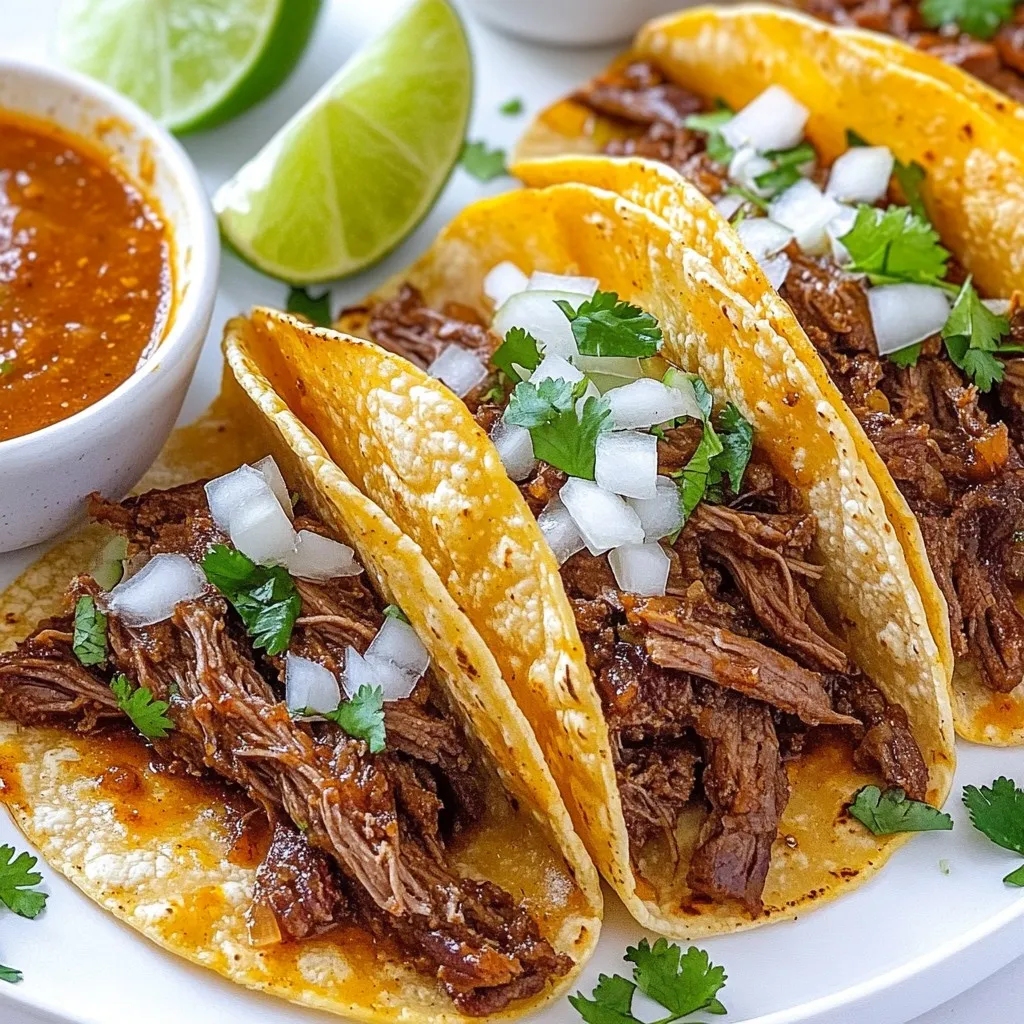
Juicy Birria Tacos Flavorful and Easy Recipe
Are you ready to dive into a world of flavor with Juicy Birria Tacos? This easy recipe combines tender beef and rich spices, making every
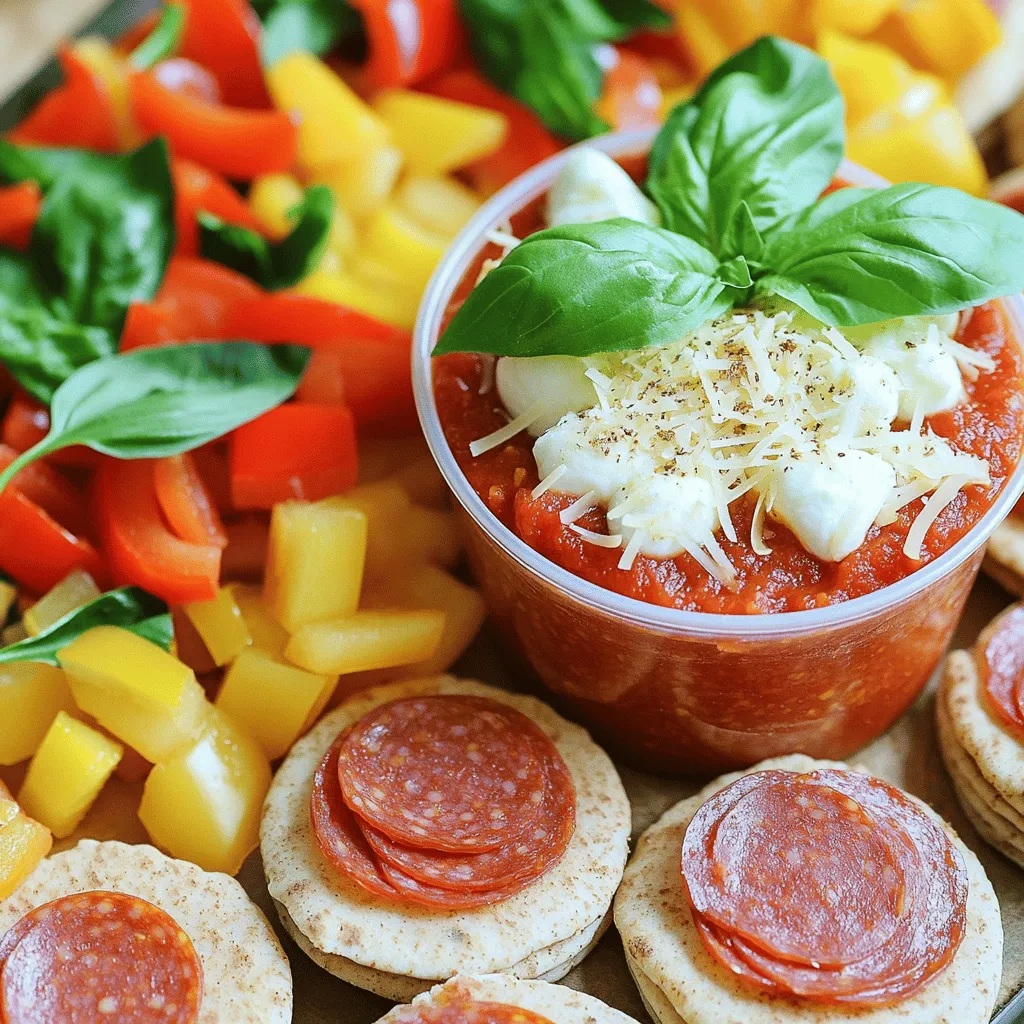
DIY Pizza Lunchables Fun and Easy Meal Idea
Are you ready to make lunch fun and tasty? DIY Pizza Lunchables are simple to put together and perfect for kids and adults. With just
![To make tasty Hatch green chile enchiladas, gather these key ingredients: - 12 corn tortillas - 2 cups shredded cooked chicken (or black beans for a vegetarian option) - 1 cup Hatch green chiles, roasted, peeled, and finely chopped - 1 cup sharp cheddar cheese, shredded - 1 cup Monterey Jack cheese, shredded - 2 cups green enchilada sauce (store-bought or homemade) - 1/2 cup sour cream - 1/4 cup fresh cilantro, chopped (plus extra for garnish) - 1 tablespoon olive oil - 1 teaspoon garlic powder - Salt and pepper to taste These ingredients create a rich flavor and creamy texture in your enchiladas. You might want to add some fun extras to your enchiladas. Here are a few ideas: - Diced onions for crunch - Sliced olives for a briny kick - Corn for sweetness - Avocado slices for creaminess - Jalapeños for extra heat Mix and match these optional ingredients to suit your taste. If you have special dietary needs, don't worry! You can make these enchiladas work for you. Here are some great substitutions: - Use gluten-free tortillas if you need a gluten-free option. - Swap chicken for shredded beef or pork for a different protein. - Replace sour cream with a dairy-free yogurt for lactose intolerance. - Use nutritional yeast instead of cheese for a vegan version. These substitutions keep the dish delicious while accommodating different diets. For the full recipe, check the details above and get ready to cook! Start by gathering all the ingredients. You need corn tortillas, cooked chicken, Hatch green chiles, and cheeses. Measure everything so you have it ready. Preheat your oven to 375°F (190°C). This helps the enchiladas cook evenly. Heat olive oil in a skillet on medium heat. Add the chopped Hatch green chiles and sauté for 2-3 minutes. They should smell great and soften up. Now, it’s time to fill the tortillas. Warm up each tortilla in a skillet or microwave for about 30 seconds. This makes them soft and easy to roll. In a bowl, combine shredded chicken, half of the sharp cheddar, half of the Monterey Jack, sautéed chiles, garlic powder, and season with salt and pepper. Mix well. Spoon 2-3 tablespoons of this mixture into each tortilla. Roll them tightly and place seam-side down in a greased baking dish. Repeat until all tortillas are filled. Pour green enchilada sauce over the rolled enchiladas, covering them fully. Sprinkle the remaining cheeses on top for a cheesy finish. Cover the dish with aluminum foil and bake for 20 minutes. After that, remove the foil and bake for another 10 minutes. This step makes the cheese bubbly and golden. Let the dish cool for about 5 minutes after baking. Drizzle sour cream on top and add fresh cilantro for garnish. Serve hot and enjoy your delicious Hatch Green Chile Enchiladas! For the full recipe, check the [Full Recipe]. To make your enchiladas truly shine, focus on the Hatch green chiles. These chiles have a unique flavor that adds depth. Roast them until charred, then peel and chop them finely. This brings out the best in their taste. Use fresh ingredients whenever possible. Fresh cilantro and lime will elevate your dish. When mixing your filling, be sure to season well. A pinch of salt and pepper can make a big difference. Don’t forget to taste the mixture before rolling. Adjust the seasoning to your liking for a perfectly balanced flavor. One common mistake is skipping the tortilla warming step. Cold tortillas can tear easily. Warm them first to make rolling easier. Another mistake is overfilling your tortillas. This can lead to messy enchiladas. Stick to 2-3 tablespoons per tortilla. Also, avoid using too much sauce. While sauce is important, too much can make your dish soggy. Spread just enough to coat the enchiladas, but not drown them. Toppings can transform your enchiladas. Try adding crumbled queso fresco or diced avocado on top. A sprinkle of fresh cilantro adds color and flavor. You can also serve with a side of Mexican rice or refried beans for a complete meal. For a refreshing contrast, offer a simple salad with lime dressing. This balances the richness of the enchiladas. For more details, check the Full Recipe for complete instructions and tips. {{image_4}} You can easily make Hatch green chile enchiladas vegetarian. Simply swap the shredded chicken for black beans. The black beans add protein and flavor, making the dish hearty and satisfying. You can also mix in some sautéed vegetables, like bell peppers or zucchini, for extra nutrition. These enchiladas remain rich and tasty, thanks to the creamy cheese and green chiles. Hatch green chile enchiladas are great with various proteins. Chicken is a classic choice, but you can use pork or beef for a different twist. Cooked ground beef gives a robust flavor, while shredded pork adds a juicy texture. Use your favorite protein to personalize the dish. Each option brings its unique taste, making each batch of enchiladas special. You can adjust the heat level of your enchiladas by using different chiles. For a mild flavor, use sweet green peppers or Anaheim chiles. If you love heat, add jalapeños or serrano chiles. Hatch green chiles can vary in spice, so taste them before using. Mix and match to find your perfect balance of flavor and spice. To store leftover enchiladas, first, let them cool completely. Then, place them in an airtight container. This will keep them fresh. You can store them in the fridge for up to three days. If you want to eat them later, freezing is a great option. For meal prep, freezing enchiladas is easy. Wrap them tightly in plastic wrap. Then, place them in a freezer-safe bag or container. Be sure to remove as much air as possible. This helps prevent freezer burn. When stored this way, they can last for up to three months. When you're ready to cook, just thaw them overnight in the fridge. To reheat enchiladas, preheat your oven to 350°F (175°C). Place the enchiladas in a baking dish. Cover them with foil to keep them moist. Heat for about 20 minutes. If you want the cheese to get bubbly, remove the foil for the last five minutes. You can also reheat them in the microwave. Just place a damp paper towel over them to keep them from drying out. Enjoy your delicious enchiladas again! For the full recipe, check out the section above. Hatch green chiles come from the Hatch Valley in New Mexico. They are known for their unique flavor and heat. You can find them fresh, canned, or frozen at many grocery stores, especially during the harvest season. Look for them in the produce section or the international aisle. If you can't find fresh ones, canned green chiles work well in this recipe. Yes, you can make these enchiladas gluten-free. Simply choose corn tortillas that are labeled gluten-free. Most corn tortillas are naturally gluten-free, but always check the label to be sure. Additionally, ensure your enchilada sauce does not contain gluten. Many brands offer gluten-free options, or you can make your own sauce at home. You can tell enchiladas are fully cooked when the cheese is bubbly and golden brown. The edges of the tortillas should look slightly crispy, and the filling should be hot throughout. If you have a food thermometer, the center should reach at least 165°F (74°C). Let them cool for a few minutes before serving to ensure they hold their shape. For the full recipe, check the detailed instructions above. Hatch green chile enchiladas are tasty and fun to make. We explored key and optional ingredients to customize your dish. You learned how to prep, assemble, and bake your enchiladas for the best taste. Remember to check for common mistakes and add your favorite toppings. Don't forget about variations for different diets, proteins, and spice levels. Lastly, I shared storage tips to keep leftovers fresh. Enjoy your cooking and get creative with flavors!](https://roastedflavors.com/wp-content/uploads/2025/07/22e2c8cd-faf8-4276-ba13-f7c7ec49620c.webp)
Hatch Green Chile Enchiladas Flavorful and Easy Recipe
Looking for a tasty meal that’s both easy to make and packed with flavor? Let me introduce you to Hatch Green Chile Enchiladas! These enchiladas
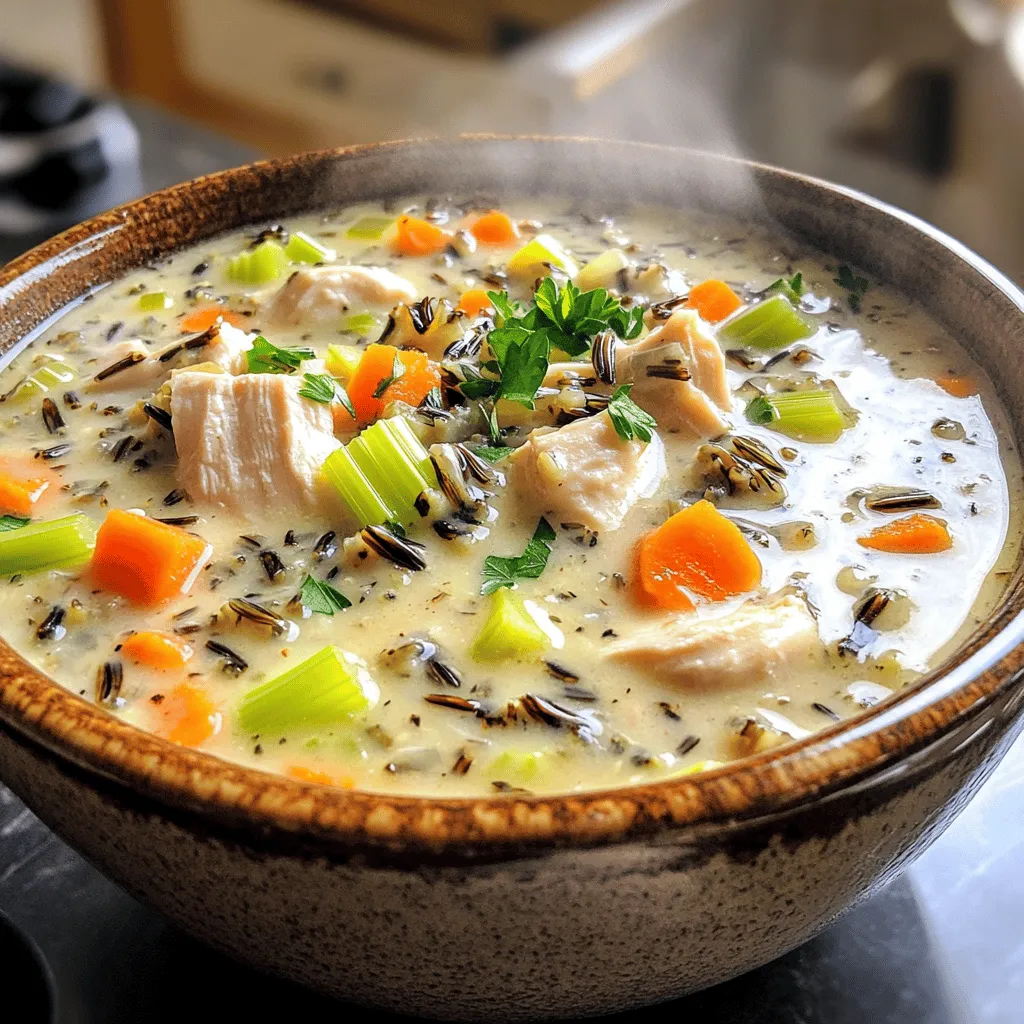
Creamy Wild Rice Chicken Soup Hearty and Nourishing Dish
Looking for a warm and filling meal? My creamy wild rice chicken soup is just the ticket! Packed with tender chicken, fresh veggies, and a

Chicken Parmesan Stuffed Zucchini Boats Delightful Meal
Looking for a fun and tasty meal? Try these Chicken Parmesan Stuffed Zucchini Boats! They mix classic flavors with a healthy twist. You’ll enjoy easy
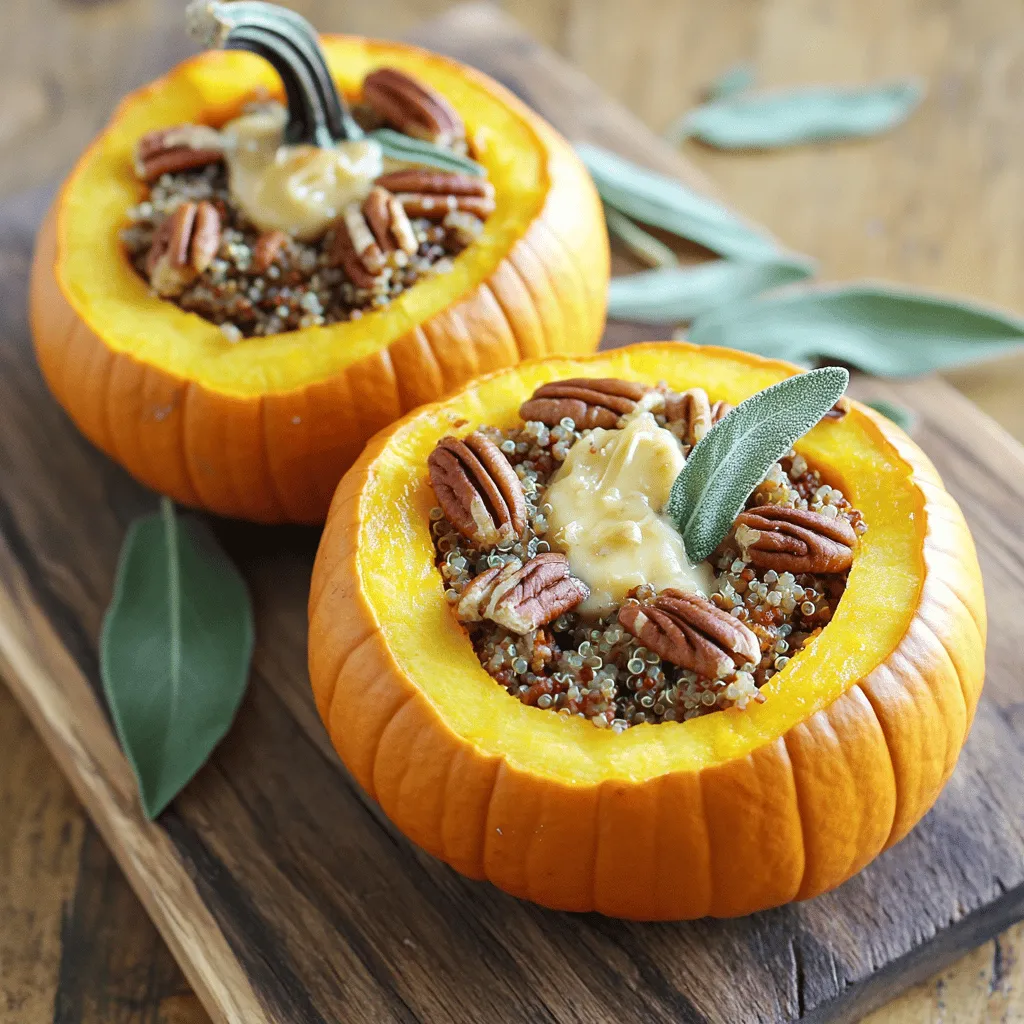
Ground Turkey & Brown Butter Sage Stuffed Pumpkins Easy Recipe
Looking for a fun twist on dinner? Try my Ground Turkey & Brown Butter Sage Stuffed Pumpkins! This easy recipe combines savory flavors with a