Dinner
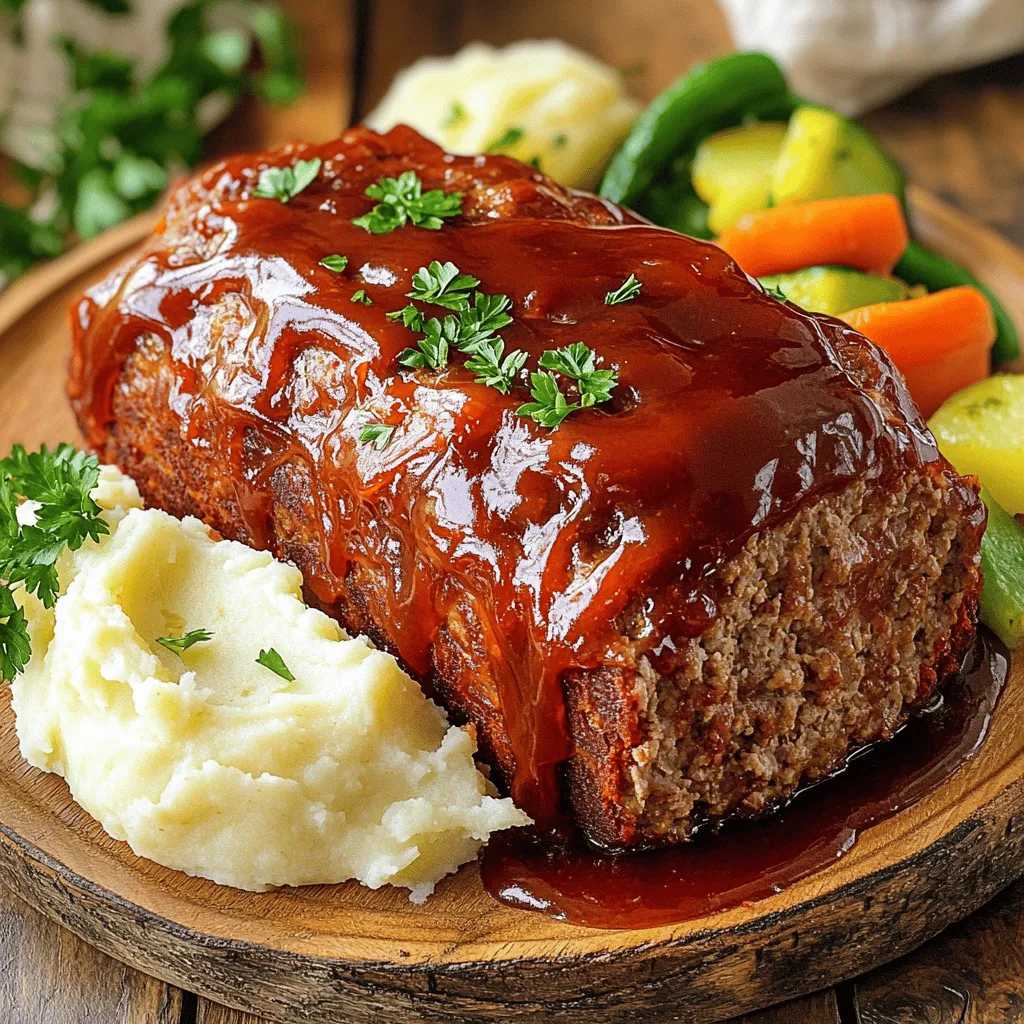
How to Make Crockpot Meatloaf with Flavorful Tips
Want to make a tasty crockpot meatloaf that everyone will love? You’re in the right place! In this guide, I’ll share my best tips and

Easiest Crockpot White Chicken Chili Delicious Recipe
Are you ready for a warm, hearty meal that practically makes itself? This Easiest Crockpot White Chicken Chili is a crowd-pleaser and comfort food at

Cheddar Garlic Herb Potato Soup Hearty and Flavorful
Looking for a warm hug in a bowl? My Cheddar Garlic Herb Potato Soup is hearty and flavorful, perfect for chilly days. With simple ingredients
![To make a tasty Chicken Caesar Wrap, gather the following ingredients: - 2 large flour tortillas - 1 cup cooked chicken breast, shredded or sliced - 1 cup romaine lettuce, roughly chopped - ½ cup cherry tomatoes, halved - ¼ cup freshly grated Parmesan cheese - ¼ cup Caesar dressing (store-bought or homemade) - Freshly cracked black pepper, to taste - Optional: a handful of croutons for added crunch These ingredients combine for a delightful meal. The key is to use fresh, high-quality items. The chicken should be juicy and tender. Romaine lettuce adds a nice crunch. The cherry tomatoes offer a burst of flavor. You can choose to make your own Caesar dressing or use store-bought for convenience. Either way, the creamy dressing is a must for that classic taste. Adding croutons gives your wrap extra texture. For the full recipe, check out the Chicken Caesar Wrap Delight. Enjoy making this easy and delicious meal! To prep the chicken for the wrap, start by seasoning it. Sprinkle salt and pepper on the chicken breast. Grill or bake the chicken until it is fully cooked. Let it cool, then shred or slice it into bite-sized pieces. Next, chop the vegetables. Take your romaine lettuce and cut it into small pieces. Halve the cherry tomatoes for easy mixing. This step adds crunch and color to your wrap. Now, let’s mix the filling ingredients. In a large bowl, combine the shredded chicken, chopped romaine, halved tomatoes, and grated Parmesan cheese. Drizzle the Caesar dressing over this mixture. Gently toss it all together until everything is well coated. As for wrapping the tortillas, lay each one flat on a clean surface. Spoon half of the chicken Caesar mixture onto the center of each tortilla. Leave about an inch empty along the edges. This space helps you wrap easily. To wrap it up, fold the sides of the tortilla inward. Start rolling from one end to the other. Tuck in the filling as you roll. This keeps everything neat and secure. Repeat with the second tortilla. If you want extra flavor, you can toast or grill the wrap. Heat a non-stick skillet over medium heat. Place the wraps seam-side down in the skillet. Cook for about 2-3 minutes on each side until golden brown and slightly crispy. This step adds a nice texture to your meal. Enjoy the deliciousness of your Chicken Caesar Wrap! For the complete recipe, check [Full Recipe]. To make your Chicken Caesar Wrap shine, focus on seasoning. I like to use salt, pepper, and a bit of garlic powder on the chicken. This adds depth to the flavors. Cook the chicken until it’s juicy and tender. Shredded chicken works best as it mixes well with the other ingredients. For a great texture, don’t skip the romaine lettuce. It should be crispy and fresh. You can choose between homemade and store-bought Caesar dressing. Homemade dressing often tastes fresher and lets you control the flavors. Mix Greek yogurt, lemon juice, Dijon mustard, and minced garlic for a simple version. For store-bought, look for a brand with fewer preservatives. If you want to change things up, add herbs or spices to your dressing. A dash of hot sauce can give it a nice kick! When serving your wrap, slice it diagonally. This makes it look more appealing. Arrange the slices on a bright plate or a wooden board for a rustic touch. Add a sprinkle of Parmesan and a few halved cherry tomatoes around the wraps. This adds color and invites people to dig in. For an extra treat, serve with a small bowl of Caesar dressing on the side for dipping. {{image_4}} You can swap chicken for turkey, shrimp, or even a vegetarian option. Each protein brings a unique taste. If you choose turkey, cook it just like chicken. Shrimp cooks faster, so sauté it for only 2 to 3 minutes. If you want a vegetarian wrap, use grilled tofu or chickpeas for protein. Make sure to adjust the cooking times based on what you choose. This way, you keep the wrap juicy and delicious. While flour tortillas are great, you can try whole wheat or spinach tortillas. Whole wheat adds a nutty flavor, and spinach gives a nice color. If you need gluten-free options, use corn tortillas or gluten-free wraps. These alternatives still hold the filling well and taste amazing. Want to spice things up? Add jalapeños or crushed red pepper for heat. You can also toss in extra veggies like bell peppers or avocados for crunch. For cheese lovers, try feta or mozzarella instead of Parmesan. Each option changes the wrap’s flavor and makes it special. To keep your Chicken Caesar Wrap fresh, follow these tips: - Refrigeration: Wrap each wrap in plastic wrap or foil. Place them in an airtight container. This keeps them from drying out. - Freezing: You can freeze the wraps for later. Wrap each one tightly in plastic wrap. Then, place them in a freezer-safe bag. Label them with the date. - Rewarming: To reheat, take the wrap from the fridge or freezer. If frozen, let it thaw in the fridge overnight. Then, heat it in a skillet over medium heat. Cook for about 3-4 minutes on each side until warm. Each component of your Chicken Caesar Wrap has a different shelf life: - Cooked Chicken: Lasts 3-4 days in the fridge. If frozen, it can last up to 4 months. - Tortillas: Store in a cool, dry place. They last about 1-2 weeks in the pantry. - Romaine Lettuce: Use within 3-7 days for best freshness. - Cherry Tomatoes: Last about a week when stored at room temperature. - Parmesan Cheese: When stored properly, it can last 1-2 months in the fridge. - Caesar Dressing: Check the label for expiration. Homemade dressing lasts about 1 week in the fridge. - Signs of Spoilage: Look for changes in color, smell, or texture in chicken or dressing. If it smells off or looks moldy, throw it away. Preparing your wraps ahead can save time. Here’s how: - Prep the Chicken: Cook and shred the chicken in advance. Store it in the fridge for up to 4 days. - Chop Veggies: Wash and chop romaine and tomatoes ahead of time. Keep them in airtight containers. - Make Dressing: If making homemade dressing, prepare it in advance and store it in the fridge. - Portioning: Assemble wraps in pairs. Wrap them tightly and store for quick meals. This way, you can grab and go anytime! For the full recipe, check out the Chicken Caesar Wrap Delight. Enjoy your tasty meal! To make a Chicken Caesar Wrap from scratch, follow these steps: 1. Prep the Ingredients: Gather all your ingredients. If your chicken is raw, cook it well. Season it with salt and pepper, then grill or bake it. Once cooled, shred or slice the chicken. Chop the romaine lettuce and halve the cherry tomatoes. 2. Make the Caesar Dressing: If you're making your own dressing, whisk together Greek yogurt, lemon juice, Dijon mustard, minced garlic, salt, and pepper in a bowl. Adjust the taste to your liking. 3. Combine Filling: In a large bowl, mix the shredded chicken, chopped romaine, halved tomatoes, and grated Parmesan cheese. Add the Caesar dressing and toss until everything is coated. 4. Assemble the Wrap: Place each tortilla flat. Spoon half of the chicken mixture onto the center of each tortilla, leaving space on the edges. 5. Wrap It Up: Fold the sides of the tortilla in, then roll from one end to the other. Tuck in the filling as you roll. 6. Heat the Wraps (optional): For a warm wrap, cook them seam-side down in a skillet over medium heat. Cook for 2-3 minutes on each side until golden. 7. Slice and Serve: Remove the wraps, slice them, and serve with extra dressing for dipping. Add croutons inside for a crunch! Yes, you can customize your Chicken Caesar Wrap in many ways: - Different Proteins: Swap chicken for turkey, shrimp, or a veggie option like grilled tofu. - Add Veggies: Include spinach, bell peppers, or cucumbers for more flavor and crunch. - Change the Cheese: Try blue cheese or feta for a different taste. - Dress It Up: Use different dressings like ranch or a spicy garlic sauce for a twist. Feel free to mix and match ingredients based on what you love! You can find Chicken Caesar Wraps at many popular restaurants: - Fast Food Chains: Many sandwich shops and fast food places offer them. - Casual Dining: Look for wraps on the menu at casual dining spots like Applebee's or Chili's. - Local Cafes: Many local cafes and bistros have unique takes on this classic wrap. Check your favorite places to see if they have this tasty option! For a full recipe to make at home, check out the Chicken Caesar Wrap Delight. In this post, we covered how to make a tasty Chicken Caesar Wrap. We looked at the essential ingredients, steps to prepare, and ways to customize your wrap. Plus, we explored storage tips and answered common questions. With these simple instructions and ideas, you can create your own wraps at home. Enjoy the flavor, nutrition, and ease they bring to your meals. Now, grab your ingredients and get started!](https://roastedflavors.com/wp-content/uploads/2025/08/8a32acea-4c70-42cc-b4e3-e4c1e0f6f4d2.webp)
Savory Chicken Caesar Wrap Easy and Delicious Meal
Are you craving a quick, tasty meal that hits the spot? The Chicken Caesar Wrap is your answer! With its tender chicken, crisp romaine, and

Smash Chicken Caesar Tacos Flavorful and Quick Meal
Craving a quick and tasty meal? Dive into Smash Chicken Caesar Tacos! This dish is a fun twist on the classic Caesar salad, packed with

Pineapple Chicken & Rice Skillet Flavorful One-Pan Meal
Are you ready to take your weeknight dinner to the next level? My Pineapple Chicken & Rice Skillet is a zesty, one-pan dish that’s quick
![- 1 medium butternut squash, peeled and cut into 1-inch cubes - 1 cup quinoa, thoroughly rinsed under cold water - 2 cups vegetable broth (homemade or low-sodium recommended) - 1 medium onion, finely diced - 2 cloves garlic, minced - 1 teaspoon ground cinnamon - 1/2 teaspoon freshly grated nutmeg - Salt and freshly ground black pepper to taste Butternut squash is the star here. It gives the dish a creamy texture and a sweet flavor. You want to pick a squash that feels heavy for its size and has smooth skin. The quinoa adds protein and a nice bite to the dish. Make sure to rinse it well. This helps remove bitterness and makes it fluffier. The vegetable broth adds depth and aroma. You can use homemade or a good store-bought brand. - 1 cup shredded sharp cheddar cheese (or your preferred cheese variety) - 1/2 cup whole wheat breadcrumbs (for added nutrition) - 2 tablespoons olive oil - Fresh parsley, finely chopped (for garnish) The cheese creates a melty, delicious layer on top. Sharp cheddar works great, but feel free to mix it up. The whole wheat breadcrumbs add crunch and a bit of fiber. Drizzling olive oil on the breadcrumbs helps them crisp up nicely. Fresh parsley not only adds color but also a bright flavor that contrasts well with the squash. - Rinsing quinoa: Rinse it under cold water until the water runs clear. This removes the saponins, which can make quinoa taste bitter. - Selecting the right butternut squash: Look for a heavy squash with smooth skin. Avoid any that feel soft or have blemishes. - Optional seasoning suggestions: You can add herbs like thyme or rosemary for extra flavor. Try using smoked paprika for a hint of smokiness. I love these tips because they help you achieve the best taste and texture. With these ingredients and notes, you’re well on your way to a wonderful butternut squash casserole. For the complete method, check out the Full Recipe. How to peel and cube butternut squash Start by cutting off both ends of the butternut squash. Use a sharp peeler to remove the skin. Cut the squash in half lengthwise. Scoop out the seeds with a spoon. Finally, chop the squash into 1-inch cubes. Properly rinsing quinoa To rinse quinoa, place it in a fine mesh strainer. Run cold water over it for about 1 minute. This helps remove any bitter coating. Shake off excess water before using it in the recipe. Sautéing onions and garlic In a large skillet, heat olive oil on medium heat. Add diced onion and cook for 5 to 7 minutes. Stir until the onion turns soft and slightly golden. Then, add minced garlic and sauté for 2 more minutes. Incorporating spices Next, sprinkle in ground cinnamon and nutmeg. Add a pinch of salt and pepper. Stir well to mix spices with the onion and garlic. This step creates a fragrant base for your casserole. Mixing ingredients and pouring into the baking dish In a big bowl, add cubed butternut squash, rinsed quinoa, and vegetable broth. Pour in the sautéed onion and garlic mix. Stir everything together until well combined. Then, transfer this mixture to a greased 9x13 inch baking dish. Adding cheese and breadcrumbs Sprinkle shredded cheese evenly over the top of the mixture. Follow with breadcrumbs for a crunchy topping. This adds both flavor and texture to the casserole. Covering with foil and cooking time Cover the baking dish tightly with aluminum foil. This keeps moisture inside while baking. Place it in the preheated oven for 30 minutes. Final baking without foil for a golden top After 30 minutes, take off the foil. Bake for an additional 15 to 20 minutes. Watch for a golden top and tender squash. A fork should easily pierce the squash when done. For the complete recipe, check out the Full Recipe. To ensure tender butternut squash, cut it into even 1-inch cubes. This helps it cook evenly. Roast for about 30 minutes to soften it before adding to the casserole. For a crispy breadcrumb topping, toast the breadcrumbs in olive oil before sprinkling them on top. This small step gives your casserole a delightful crunch. You can add herbs or spices to change the taste. Try fresh thyme or sage for a warm, earthy flavor. For a twist, use smoked paprika or chili powder for a kick. You can also swap the cheese. Use mozzarella for a milder taste or feta for a tangy zing. Each cheese brings its own magic to the dish. Serve the casserole straight from the baking dish for a warm feel. For an upgrade, layer extra cheese on top before baking. This enhances both flavor and looks. Garnish with fresh parsley for color. You might also add a sprinkle of chili flakes for a pop of color and heat. {{image_4}} You can easily make this casserole vegetarian or vegan. For a dairy-free version, swap out the cheese. Use nutritional yeast or a dairy-free cheese that melts well. This adds a cheesy flavor without the dairy. You can also add more veggies. Consider adding spinach, mushrooms, or bell peppers. They will mix well with the squash and spices. You can sneak in some extra nutrients, which is always a win! Cranberries or nuts can give your casserole a nice twist. Add a cup of dried cranberries for sweetness. Toasted nuts like pecans or walnuts add crunch and flavor. They also give your dish a festive touch. You might also try seasonal spices. In the fall, cinnamon and nutmeg shine. In spring, you can add fresh herbs like thyme or rosemary for a bright flavor. Adjust the spices to match the season and your taste. Pair your casserole with simple sides. A fresh green salad or roasted vegetables work well. They bring balance to the rich flavors of the dish. Got leftovers? Transform them into a new meal! You can use the casserole as a filling for wraps or tacos. Or, serve it over a bed of greens for a light lunch. The options are endless, and you'll love the variety! For the full recipe, check out the [Full Recipe]. To store leftovers, let the casserole cool first. Once it cools, cover it tightly. You can use plastic wrap or a lid. In the fridge, it stays fresh for up to 4 days. Make sure to check for odors before you eat it again. You can freeze butternut squash casserole before or after baking. If you freeze it before baking, cover it well. Use a freezer-safe container or wrap it with plastic wrap. To freeze after baking, let it cool first, then wrap it. It stays good for about 3 months. To reheat, thaw in the fridge overnight. Bake at 350°F (175°C) until hot. To prevent sogginess, let the casserole cool before storing. Also, avoid covering it too tightly. Use containers that allow some air to escape. Glass or plastic containers with a loose lid work well. This keeps the texture nice and helps the flavors stay fresh. Baking butternut squash casserole takes about 45 to 50 minutes. First, cover it with foil and bake for 30 minutes. Then, remove the foil and bake for another 15 to 20 minutes. This method helps keep it moist and allows the top to get golden brown. Yes, you can prepare the casserole ahead of time. Assemble the dish, cover it, and store it in the fridge for a day. When you are ready to bake, just add a few extra minutes to the cooking time. This makes it easy for busy days. If you want to replace quinoa, try using brown rice or farro. Both options work well and give a nice texture. Just make sure to adjust the cooking time and liquid needed based on what you choose. Yes, butternut squash casserole is quite healthy. It is full of vitamins and minerals from the squash and quinoa. The cheese adds some calcium, while the whole wheat breadcrumbs increase fiber. It is a balanced dish that tastes great too. Yes, you can easily double or halve the recipe. Just adjust the amounts of each ingredient. Use a larger or smaller baking dish based on your serving needs. This flexibility makes it perfect for gatherings or small family meals. This post covered a tasty butternut squash casserole recipe. You learned about each ingredient, from the squash to the toppings. I shared tips on preparation, ensuring perfect texture, and ways to use leftovers. Cooking should be fun and creative. Feel free to experiment with flavors and textures. Enjoy making this dish your own, and share it with others. Happy cooking!](https://roastedflavors.com/wp-content/uploads/2025/08/de4df7fa-b436-47f4-ace5-8c52966e293c.webp)
Easy Butternut Squash Casserole Tasty and Simple Recipe
Are you ready to delight your taste buds with a dish that’s both simple and tasty? My Easy Butternut Squash Casserole is perfect for any

Green Chile Macaroni Sopita Flavorful Comfort Food
Craving a dish that warms your heart and fills your belly? Green Chile Macaroni Sopita is the perfect blend of flavors, comfort, and spice. This
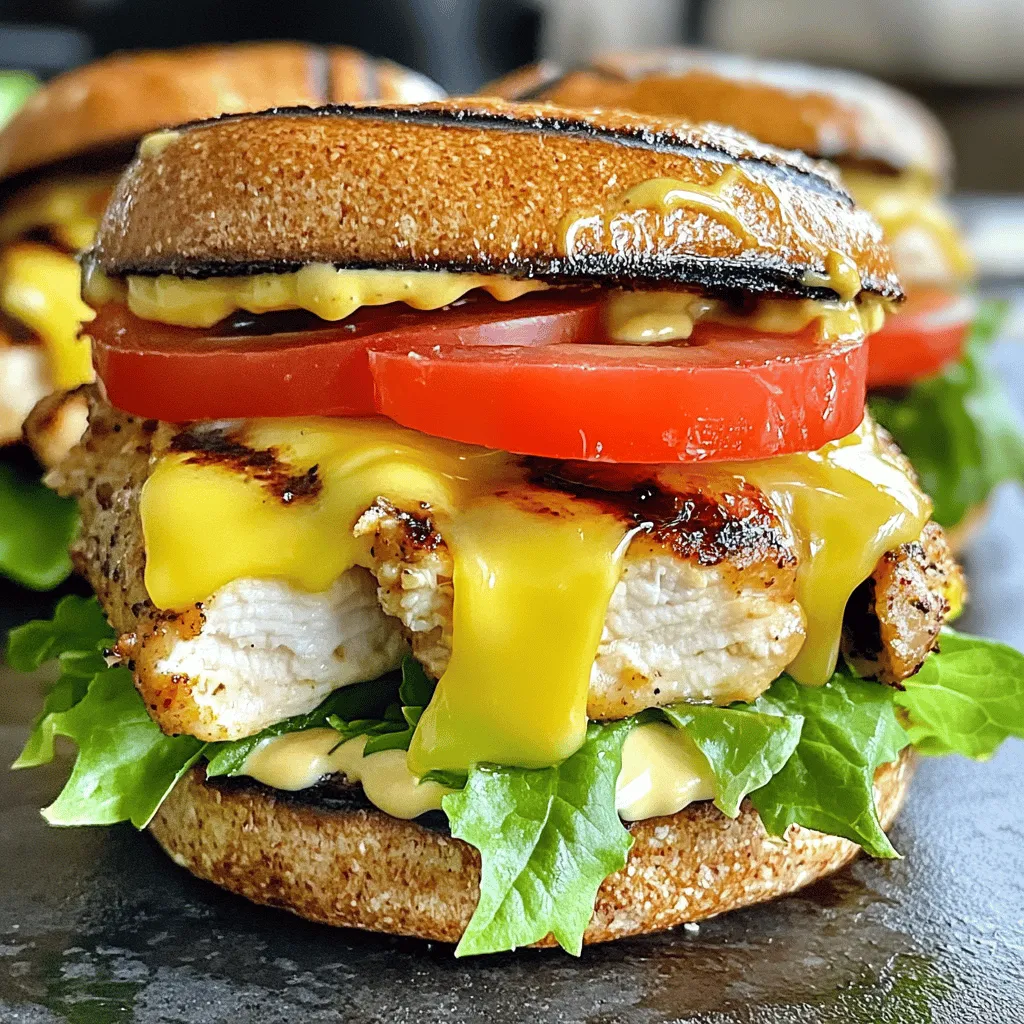
Chick-fil-A Grilled Chicken Club Sandwich Delight
Are you ready to enjoy a tasty twist on a classic sandwich? The Chick-fil-A Grilled Chicken Club Sandwich Delight is your next favorite meal. With
![- 4 slices of hearty whole grain bread - 1 cup of shredded sharp cheddar cheese - 1 cup of shredded mozzarella cheese - 1 tablespoon unsalted butter - 1 (14 oz) can of crushed tomatoes - 1 cup of vegetable broth - 1 small onion, finely diced - 2 cloves of garlic, minced - 1 teaspoon of dried basil - 1 teaspoon of sugar - Salt and black pepper to taste - Fresh basil leaves for garnish (optional) When you gather these ingredients, you set the stage for a tasty meal. The hearty whole grain bread adds a nice base. Sharp cheddar and mozzarella bring a creamy, cheesy flavor to the toast. Butter helps it crisp up nicely. For the tomato soup, crushed tomatoes and vegetable broth create a rich base. The onion and garlic give it depth and warmth. Dried basil adds a nice herbal note. Sugar balances the acidity, making the soup even better. Fresh basil leaves can brighten the dish when you serve. You can find the full recipe in the section above. This dish is perfect for cozy nights or quick lunches. Each bite brings comfort and joy. Enjoy the harmony of flavors! - Sautéing the onion and garlic First, heat a splash of olive oil in a medium pot. Add the diced onion and cook it for about five minutes. The onion should become soft and clear. Then, stir in the minced garlic. Cook for one more minute until it smells great. - Simmering the crushed tomatoes and broth Next, pour in the crushed tomatoes and vegetable broth. Add dried basil, sugar, and a pinch of salt and pepper. Turn up the heat to bring it to a gentle boil. Once it boils, reduce the heat and let it cook for 15 to 20 minutes. Stir it from time to time so it doesn’t stick. - Blending the soup to desired consistency After simmering, blend the soup until smooth. You can use an immersion blender right in the pot. If you don’t have one, carefully transfer it to a stand blender. If the soup is too thick, mix in more vegetable broth. Taste it and adjust the seasonings if needed. - Spreading butter on the bread slices While the soup cooks, take four slices of bread. Spread a thin layer of softened butter on one side of each slice. Make sure to cover it well for a nice golden crust. - Layering the cheese for maximum melt On the unbuttered side of two slices, sprinkle half of the cheddar and mozzarella cheese. Stack another slice on top, with the buttered side facing out. This forms a tasty sandwich. - Grilling the sandwiches to golden perfection Heat a non-stick skillet over medium heat. Once hot, place the sandwiches in the skillet. Cook each side for about three to four minutes. Press down lightly to help the cheese melt. When both sides are golden brown, take them out and let them cool for a moment. Now, you are ready to enjoy this flavorful duo! For more details, check the Full Recipe. To make your tomato soup just right, you can adjust the thickness. If it feels too thick, add vegetable broth. This will help create a smooth texture. You can also enhance flavors with spices. Adding a pinch of red pepper flakes gives a nice kick. Fresh herbs like thyme or oregano can also boost taste. For serving, garnish with fresh basil leaves or a swirl of cream. These small touches make your soup look and taste fancy. You can even top it with croutons for added crunch. Choosing the right type of bread is key. Whole grain bread gives a hearty taste. Sourdough or white bread also works well for a crisp bite. To get an even melt and perfect crispiness, use medium heat. This allows the cheese to melt without burning the bread. Press down gently with a spatula for even cooking. For cheese options, try different varieties. Gouda adds a creamy touch, while pepper jack offers spice. Mixing cheeses can create fun flavors, too! You can use a blend of sharp cheddar and mozzarella for a classic combo. For the full recipe, check out the details above. {{image_4}} You can change the cheese for more fun. Gouda adds a nutty taste. Pepper jack gives a spicy kick. Mixing cheeses can create unique flavors. Try combining cheddar and mozzarella for a classic blend. Or use a mix of gouda and pepper jack for a bold twist. Add veggies to boost nutrition in your soup. Carrots and celery work well. They add texture and flavor. You can also blend in spinach for a fresh taste. If you like heat, sprinkle in red pepper flakes. This gives your soup a nice spicy kick. Customize it to fit your taste. For the full recipe, check here: [Full Recipe]. To store leftover tomato soup, use an airtight container. Glass or plastic containers work well. Allow the soup to cool before sealing. This helps avoid condensation. Store it in the fridge for up to three days. For reheating, pour the soup back into a pot. Heat it on low to medium heat. Stir often to prevent sticking. If it's too thick, add a splash of broth or water. You can also microwave it in a safe bowl. Heat in short bursts, stirring in between. For grilled toast, the best option is freezing. Wrap each sandwich tightly in plastic wrap. Then place them in a freezer bag. This keeps them fresh for up to three months. When you’re ready to eat, remove from the freezer. For reheating, use a skillet for the best texture. Heat over medium-low heat. Cook each side until the bread is crispy. If you're in a hurry, you can use a microwave. But this may not keep the bread crisp. Enjoy your cheesy goodness at its best! Yes, you can make the soup ahead of time. Store it in an airtight container in the fridge for up to three days. This helps the flavors deepen. To reheat, pour the soup into a pot and warm on low heat. Stir often to prevent sticking. If it’s too thick, add a splash of vegetable broth. You can serve a simple salad or crispy veggie sticks. A fresh green salad adds crunch. Pair with a light drink like lemonade or iced tea. Both drinks balance the rich cheese and soup. Yes, this recipe works great for meal prep. You can chop and store veggies in advance. Keep the soup and grilled toast separate until you're ready to eat. Store soup in a jar and grilled toast in a bag. To reheat, warm the soup on the stove and use a skillet for the toast. This keeps everything tasty and fresh. This blog post shares a simple recipe for cheesy grilled toast and tomato soup. I covered the main ingredients, step-by-step instructions, and helpful tips to perfect both dishes. Enjoying this classic comfort meal is easy and flexible with variations. These recipes not only warm you up but also help bring joy to your table. Try new cheeses and spices to make them your own! Happy cooking!](https://roastedflavors.com/wp-content/uploads/2025/07/cb39c959-1481-4f5d-b959-29d45ed7a4e2.webp)
Cheesy Grilled Toast and Tomato Soup Flavorful Duo
You can’t go wrong with the classic combo of cheesy grilled toast and tomato soup. This warm, savory duo is perfect for cozy nights and