Dinner

The base of these energy balls includes: - 1 cup rolled oats - ½ cup pumpkin puree - ¼ cup almond butter (or substitute with peanut butter) - ¼ cup honey or maple syrup - ½ cup vanilla-flavored protein powder - 1 teaspoon ground cinnamon - ½ teaspoon nutmeg - ¼ teaspoon salt These ingredients work together to create a tasty and nutritious snack. The oats give you energy, while the pumpkin puree adds moisture and flavor. You can add a few extras for more taste and crunch: - ¼ cup mini dark chocolate chips - 2 tablespoons chia seeds The chocolate chips bring sweetness, while the chia seeds add a fun texture. Both make these snacks even more enjoyable. - Rolled oats: High in fiber, they help keep you full. - Pumpkin puree: Packed with vitamins A and C, it’s great for your immune system. - Almond butter: Provides healthy fats and protein, giving you lasting energy. - Honey or maple syrup: Natural sweeteners that offer quick energy. - Protein powder: Boosts protein intake, helping with muscle recovery. - Cinnamon and nutmeg: These spices improve flavor and may have health benefits, like anti-inflammatory properties. - Salt: Enhances taste and helps balance flavors. - Chocolate chips: Adds a small treat, making healthy eating more fun. - Chia seeds: Full of omega-3s and fiber, they are great for heart health. Each ingredient plays a role in making these energy balls not just tasty but also nutritious. They fuel your day quickly and keep you satisfied! To start, grab a large mixing bowl. Add 1 cup of rolled oats. Next, pour in ½ cup of pumpkin puree. Then, add ¼ cup of almond butter or peanut butter. Follow this with ¼ cup of honey or maple syrup. Use a spatula to mix everything well until smooth. Now, it’s time for the protein powder. Sprinkle in ½ cup of vanilla-flavored protein powder. Add 1 teaspoon of ground cinnamon, ½ teaspoon of nutmeg, and ¼ teaspoon of salt. Mix again until you see no dry bits of powder left. If you want a sweet kick, fold in ¼ cup of mini dark chocolate chips. You can also add 2 tablespoons of chia seeds for some crunch. When rolling the energy balls, make sure your hands are clean. Take about 1 tablespoon of the mixture. Shape it into a ball. It should feel firm but not too hard. Keep rolling until you use all the mix. You should have around 12 to 15 energy balls. Keep the balls even in size. This helps them chill and firm up equally. If the mix is sticky, dampen your hands slightly. This will make rolling easier. Once you’ve shaped all the energy balls, line a baking sheet with parchment paper. Place the rolled balls on the sheet, leaving space between them. Now, pop the tray in the fridge. Chill for at least 30 minutes. This step is key! It helps the balls firm up and keeps them from falling apart. After chilling, transfer your energy balls to an airtight container. Store them in the fridge. They taste best within a week. Enjoy these tasty bites whenever you need a quick energy boost! To keep your pumpkin protein energy balls fresh, use an airtight container. This keeps moisture out and helps them last longer. Store them in the fridge for up to a week. If you want to enjoy them later, consider freezing them. Just place them in a freezer-safe bag or container. If you like things sweeter, add more honey or maple syrup. You can also use chocolate chips for extra sweetness. For a spice kick, try adding more cinnamon or a pinch of ginger. Taste as you mix, and adjust based on what you love! To make these energy balls ahead of time, roll them as usual. Place them on a baking sheet and freeze them for about an hour. Once firm, transfer the balls to a freezer-safe bag. They can last for up to three months in the freezer. When you want one, just grab it and enjoy! {{image_4}} You can switch up the nut butter in this recipe. Almond butter adds creaminess, but peanut butter works just as well. If you're nut-free, try sunflower seed butter. For sweeteners, honey is great, but maple syrup gives a nice twist. Agave syrup is another good choice. Each option changes the taste a bit, so feel free to experiment and find your favorite. Pumpkin spice is a classic choice. It adds warmth and coziness to your energy balls. You can also mix in chocolate chips for a sweet treat. Adding a pinch of ginger or cloves gives an extra kick. For a fruity twist, try adding dried cranberries or raisins. The options are endless, so have fun mixing and matching flavors! To make these energy balls vegan, simply use maple syrup instead of honey. Use a plant-based protein powder to keep it vegan-friendly. For gluten-free energy balls, ensure all your ingredients are certified gluten-free. Oats are naturally gluten-free but can be processed in facilities with gluten, so check the label. These changes make the recipe fit for everyone! To keep your pumpkin protein energy balls fresh, use an airtight container. Glass or plastic containers work well. Make sure to seal the lid tightly. This keeps moisture out and helps maintain flavor. These energy balls taste best when eaten within a week. Store them in the fridge for optimal freshness. If you want to keep them longer, you can freeze the energy balls. They last for up to three months in the freezer. Just thaw them in the fridge before eating. Check for any changes in smell or color. If they smell sour or look moldy, it’s time to toss them. The texture should remain firm and not sticky. Always trust your senses. If something seems off, don’t eat them! To make these energy balls vegan, simply swap honey for maple syrup. Also, ensure your protein powder is plant-based. Use almond butter or peanut butter, both are vegan. Follow the same steps in the recipe to mix and roll the balls. This way, you keep all the flavor and nutrition but make it vegan-friendly. Yes, you can use a different protein powder. Any flavor works, but vanilla adds a nice touch. Look for a protein powder that you enjoy. Just keep the amount the same, about ½ cup. This keeps the balance of flavors and texture in your energy balls. Pumpkin is full of vitamins and minerals. It has vitamin A, which helps your eyes. Pumpkin also has fiber, which aids digestion. The antioxidants in pumpkin can boost your immune system. Including pumpkin in snacks helps you feel full and satisfied, making it great for energy balls. These energy balls last about one week in the fridge. Store them in an airtight container to keep them fresh. You can also label the container with the date you made them. If you want them to last longer, consider freezing them. They freeze well and can last for up to three months. Pumpkin protein energy balls offer a tasty, healthy snack. We explored key ingredients, their benefits, and easy prep steps. Storing tips and variations help you customize your snacks. Always make sure to adjust sweetness to your taste. With these tips, you can enjoy energy balls tailored to your needs. Remember, fresh ingredients make the best snacks. Now, get creative and make these delicious energy balls!
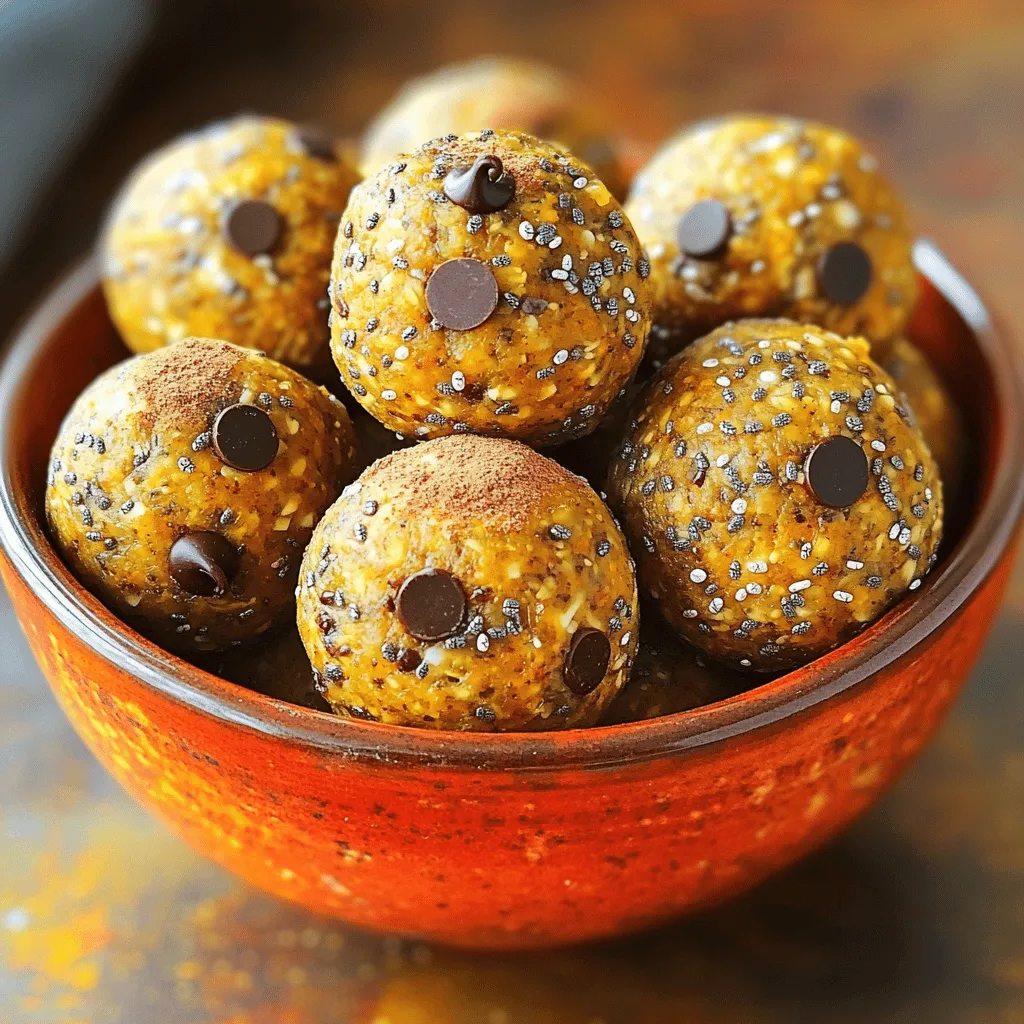
Pumpkin Protein Energy Balls Fuel Your Day Quickly
Looking for a quick energy boost? Pumpkin Protein Energy Balls are your perfect snack! Packed with wholesome ingredients, they offer the taste of fall while
- 15 ounces fresh spinach tortellini - 2 tablespoons olive oil - 2 cloves garlic, minced - 1 cup heavy cream - 1/2 cup grated Parmesan cheese - 1/2 cup ricotta cheese - 1 teaspoon dried oregano - Salt and black pepper to taste - Fresh spinach leaves (for garnish) - A pinch of red pepper flakes (optional for a kick) Each serving of creamy spinach tortellini offers a tasty balance of flavors and nutrients. Here’s a quick breakdown: - Calories: About 480 - Protein: 18g - Fat: 28g - Carbohydrates: 40g - Fiber: 2g - Sugar: 2g This dish is rich in flavor and provides a good source of protein from both cheeses and tortellini. You can easily adjust some ingredients to fit your needs: - Tortellini: Use any stuffed pasta you prefer. Cheese or mushroom-filled versions work well. - Heavy cream: Swap with half-and-half or coconut cream for a lighter option. - Parmesan cheese: Nutritional yeast makes a great vegan substitute. - Ricotta cheese: Cottage cheese can work in a pinch. - Olive oil: Avocado oil or butter are good alternatives for cooking. - Fresh spinach leaves: Arugula or kale can add a different twist for garnish. These swaps let you customize the dish while keeping it delicious. Start by filling a large pot with water. Add a generous pinch of salt. Bring the water to a rolling boil. Once boiling, carefully add 15 ounces of fresh spinach tortellini. Cook them for about 3-4 minutes, or until they are al dente. Be sure to follow the package instructions for best results. After cooking, drain the tortellini well and set them aside in a bowl. In a spacious skillet, pour in 2 tablespoons of olive oil. Heat the oil over medium heat until it shimmers. Then, add 2 cloves of minced garlic. Sauté the garlic for around 30 seconds. Stir constantly to let the aroma fill your kitchen. Make sure not to let the garlic brown. Next, carefully add 1 cup of heavy cream to the skillet. Stir it in slowly, allowing it to heat without boiling. Now, it’s time to make the sauce creamy. Add 1/2 cup of grated Parmesan cheese and 1/2 cup of ricotta cheese. Stir continuously until both cheeses melt into the cream. This creates a rich, smooth texture. Sprinkle in 1 teaspoon of dried oregano. Season the sauce with salt and black pepper to taste. For a little heat, add a pinch of red pepper flakes if you like. Gently add the cooked tortellini to the skillet. Toss them in the creamy sauce until they are well coated. Let the tortellini simmer in the sauce for about 2-3 minutes. This lets all the flavors blend together beautifully. Your creamy spinach tortellini is now ready to serve! For a pop of color, garnish with fresh spinach leaves before plating. Enjoy your flavorful dinner delight! To cook tortellini just right, follow these tips: - Use plenty of water: Fill a large pot with water. Add a good amount of salt. This helps season the pasta. - Boil water first: Wait for the water to boil before adding the tortellini. This keeps them from getting mushy. - Don’t crowd the pot: Cook in batches if needed. This helps each piece cook evenly. - Check doneness: Taste a piece after 3 minutes to see if it’s al dente. It should have a slight bite. To make your sauce smooth and creamy, consider these points: - Heat gently: Add cream slowly to the garlic. Don’t let it boil, as this can make it separate. - Melt cheese properly: Stir in the cheeses until fully melted. This creates a rich, creamy texture. - Season carefully: Taste the sauce before adding more salt or pepper. Balance is key for flavor. - Add herbs last: Mix in oregano at the end for fresh flavor. Dried herbs can lose their taste when cooked too long. To make your dish beautiful and tasty, try these ideas: - Use fresh spinach: Garnish with fresh spinach leaves for color and crunch. It brightens the dish. - Extra cheese: A sprinkle of Parmesan on top adds flavor and looks great. - Red pepper flakes: If you like heat, add a pinch of red pepper flakes. It gives a nice kick. - Plate with care: Serve in shallow bowls for a fancy touch. Drizzle extra sauce on top for visual appeal. {{image_4}} You can make this dish vegan. For a dairy-free sauce, use coconut cream instead of heavy cream. Choose nutritional yeast for a cheesy flavor. You can also replace the cheeses with vegan options. Look for vegan ricotta and Parmesan in stores. These swaps keep the dish creamy and flavorful. Adding protein makes this meal heartier. Cooked chicken breast works well. Simply slice it and mix it with the tortellini. Shrimp is another tasty option. Sauté shrimp until they turn pink, then add them to the creamy sauce. These proteins add texture and taste. Using seasonal vegetables boosts flavor and nutrition. Try adding fresh tomatoes in summer. Their sweetness brightens the dish. In fall, mix in roasted butternut squash for a warm touch. Spinach is perfect here, but feel free to add kale or peas. These veggies make your meal colorful and exciting. To store your creamy spinach tortellini, wait for it to cool. Place it in an airtight container. It will stay fresh in the fridge for up to three days. When you’re ready to eat, just take it out and enjoy! Reheat your tortellini on the stove for the best results. Add a splash of milk or cream in a skillet. This will keep it creamy. Heat on low, stirring gently until warmed through. You can also use the microwave. Place it in a bowl, cover it, and heat for 1-2 minutes. Stir halfway for even warmth. You can freeze creamy spinach tortellini for later. Use a freezer-safe container or bag. It will stay good for up to three months. To reheat, let it thaw in the fridge overnight. Then, warm it on the stove or in the microwave as mentioned above. This way, you can enjoy a delicious meal anytime! To make creamy spinach tortellini from scratch, you need a few key steps. First, create fresh pasta dough. Combine flour and eggs to form a smooth mix. Roll the dough thin and cut it into circles. Next, prepare a filling. You can use ricotta cheese, spinach, and a pinch of salt. Place a small amount of filling in the center of each circle. Fold the dough over and seal the edges to form tortellini. Cook the tortellini in boiling salted water until they float. Then, follow the sauce steps in the recipe for a creamy delight. Yes, you can use frozen tortellini. It is a great time-saver. Just cook the frozen tortellini in boiling water for about 5-7 minutes. Follow the package instructions for the best results. After cooking, drain the tortellini and add them to the creamy sauce. The flavors will still meld well, making a delicious meal. Creamy spinach tortellini pairs well with many sides. Here are a few ideas: - A fresh garden salad with a light vinaigrette. - Garlic bread for a crunchy texture. - Roasted vegetables to add color and nutrients. - A glass of white wine, like Pinot Grigio, enhances the meal. These sides balance the creamy dish and create a delightful dining experience. In this article, we explored the magic of creamy spinach tortellini. We covered the key ingredients and their nutritional value. I shared easy steps to prepare the dish and tips for perfect results. You learned about fun variations and how to store leftovers. Embrace this dish’s flexibility to suit your taste. Enjoy cooking, experimenting, and sharing this delightful meal with friends and family. Simple, tasty, and rewarding, creamy spinach tortellini can elevate any dining experience.
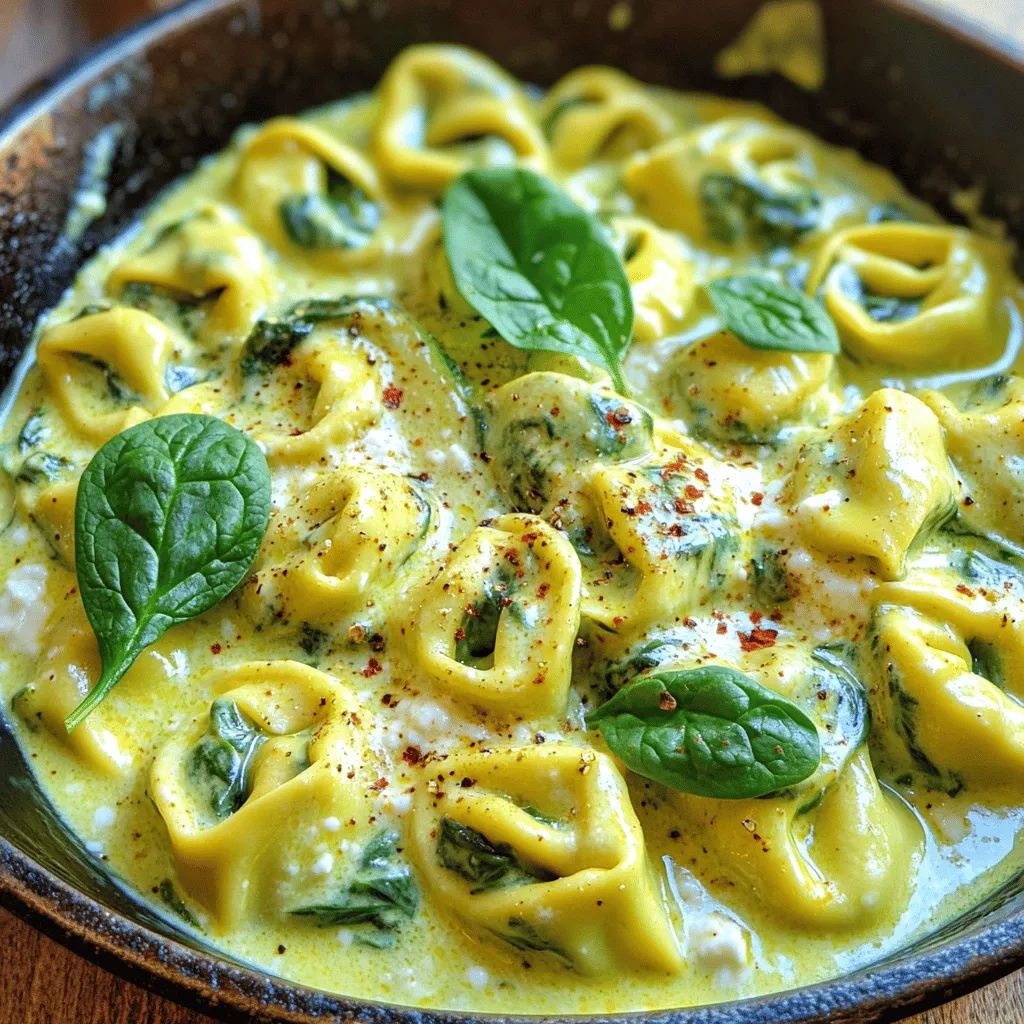
Creamy Spinach Tortellini Flavorful Dinner Delight
Looking for a quick, tasty dinner that shines at the table? You’re in the right place! My Creamy Spinach Tortellini is rich, comforting, and oh-so-delicious.
To make the best chili, gather these key ingredients: - 1 lb ground beef (or turkey for a lighter option) - 1 can (15 oz) kidney beans, thoroughly rinsed and drained - 1 can (15 oz) black beans, thoroughly rinsed and drained - 1 can (28 oz) diced tomatoes with green chilies - 1 medium onion, finely diced - 2 cloves garlic, minced - 1 bell pepper (any color), diced - 2 tablespoons chili powder - 1 teaspoon ground cumin - 1 teaspoon smoked paprika - Salt and freshly ground black pepper to taste - 2 cups beef or vegetable broth - 1 tablespoon olive oil These ingredients blend together to create a rich and hearty dish. Toppings can elevate your chili experience. Here are some tasty options: - Shredded cheese - Sour cream - Chopped cilantro - Sliced jalapeños These extras add flavor and texture. Feel free to mix and match! If you need alternatives, here are some great swaps: - Use ground turkey or chicken instead of beef for a lighter meal. - For a vegetarian version, replace meat with extra beans or lentils. - Swap kidney beans for chickpeas or pinto beans if desired. - Use vegetable broth instead of beef broth for a vegan option. These substitutes help meet various dietary needs while keeping the dish delicious. Start by gathering all your ingredients. You need: - 1 lb ground beef (or turkey) - 1 can (15 oz) kidney beans - 1 can (15 oz) black beans - 1 can (28 oz) diced tomatoes - 1 medium onion - 2 cloves garlic - 1 bell pepper - 2 tablespoons chili powder - 1 teaspoon ground cumin - 1 teaspoon smoked paprika - Salt and pepper - 2 cups broth - 1 tablespoon olive oil Next, chop the onion, garlic, and bell pepper. Rinse the beans in cold water. This helps remove some salt and makes them fresher. You’re ready to cook! Heat the olive oil in a large pot over medium heat. Wait about one minute for the oil to warm. Add the diced onion and bell pepper. Cook them for about 3-4 minutes until soft. The onion should look clear. Then, add the minced garlic. Cook for another minute. You want the garlic to smell great and not burn. This step builds a strong flavor base for the chili. Now, add the ground beef (or turkey) to the pot. Break it apart with a wooden spoon. Cook it for 5-7 minutes until it turns brown. If there is too much fat, drain it. Next, stir in the chili powder, cumin, smoked paprika, salt, and pepper. Cook this mixture for 1-2 minutes. This helps the spices release their flavors into the meat. Pour in the diced tomatoes (with juices), kidney beans, black beans, and broth. Stir everything well to mix. Increase the heat until it boils gently. Once boiling, reduce the heat to low. Let it simmer for about 30 minutes. Stir it occasionally. This helps blend all the great flavors. After 30 minutes, taste the chili. Adjust the seasoning if you need to. If you want a thicker chili, simmer longer. Enjoy your delicious one-pot chili! To boost flavor, use fresh spices. Fresh chili powder packs a punch. Try toasting spices in the pot before adding other ingredients. This step wakes up the flavors. You can also add a dash of hot sauce or a spoonful of sugar to balance flavors. For a smoky taste, consider adding chipotle peppers. They add depth and warmth. One big mistake is cooking meat without browning it. Brown the meat well for deep flavor. Avoid skipping the sauté step for onions and garlic. It builds a solid base. Another common error is not adjusting the seasoning. Always taste and tweak as you cook. If your chili is too salty, add a bit of sugar or more tomatoes. If you want thicker chili, let it simmer longer. This lets the liquid reduce. You can also mash some beans against the pot's side. This thickens the mix naturally. For a thinner chili, add more broth or water. Stir it in slowly until you reach your desired consistency. Always remember to taste as you adjust. {{image_4}} You can easily make this chili vegetarian or vegan. Just swap the meat for plant-based options. Try using lentils or textured vegetable protein (TVP). They absorb flavors well and add a nice texture. For a vegan option, replace beef broth with vegetable broth. The other ingredients remain the same, giving you a hearty dish. If you like heat, add more spice! Chili powder is great, but you can also use cayenne pepper or crushed red pepper flakes. Start with a small amount and taste as you go. For less heat, leave out the jalapeños or use mild chili powder. Balance is key to a tasty chili. Feel free to get creative with your chili. Try adding corn for sweetness or diced zucchini for extra vegetables. Black olives can add a nice briny flavor. You can even toss in some chocolate or cocoa powder for depth. Each addition gives your chili a personal touch, making it your own. To store leftover chili, first let it cool to room temperature. Then, transfer it to a container with a tight lid. Make sure to store it in the fridge if you plan to eat it within a few days. Chili stays fresh for about 3 to 4 days in the fridge. If you want to keep it longer, consider freezing it. To freeze your chili, use freezer-safe containers. Leave some space in each container. This space allows the chili to expand as it freezes. You can freeze chili for up to 3 months. When ready to eat, thaw it in the fridge overnight. Reheat it in a pot over low heat, stirring often. You can also use the microwave. Just heat it in short bursts, stirring in between. The best containers for storing chili are glass or plastic. Look for airtight containers to keep the chili fresh. Glass containers let you see the food inside. They are also great for reheating. If you use plastic, choose BPA-free options. For freezing, use heavy-duty freezer bags. They save space and keep the chili safe from freezer burn. The best meat for chili is ground beef or turkey. Ground beef gives a rich flavor. It also adds a nice texture. However, turkey is a great lighter choice. You can also try ground chicken or even pork for a twist. Each meat brings a unique taste to your chili. One-pot chili lasts about 3 to 5 days in the fridge. Make sure to store it in a sealed container. This keeps it fresh and tasty. If you want to enjoy it later, freeze it. Frozen chili can last up to 6 months. Just remember to thaw it in the fridge before reheating. Yes, you can use canned beans in your chili. They save time and add great flavor. Just make sure to rinse and drain them well. This removes excess sodium and helps prevent a mushy texture. Canned beans are tasty and easy to use in your recipe. You can serve chili with many tasty sides. Cornbread is a classic choice. It pairs well with the chili's spice. You can also serve it with rice or tortilla chips. For a fresh touch, add a simple salad or guacamole. These options make a great meal even better! In this post, I covered how to make the ultimate one-pot chili. We talked about key ingredients, cooking steps, and tips to boost the flavor. You learned about variations, storage, and common questions. Chili can be adjusted to your taste and diet. Remember, each bowl is unique, just like you. So, have fun experimenting and sharing your tasty chili with others!
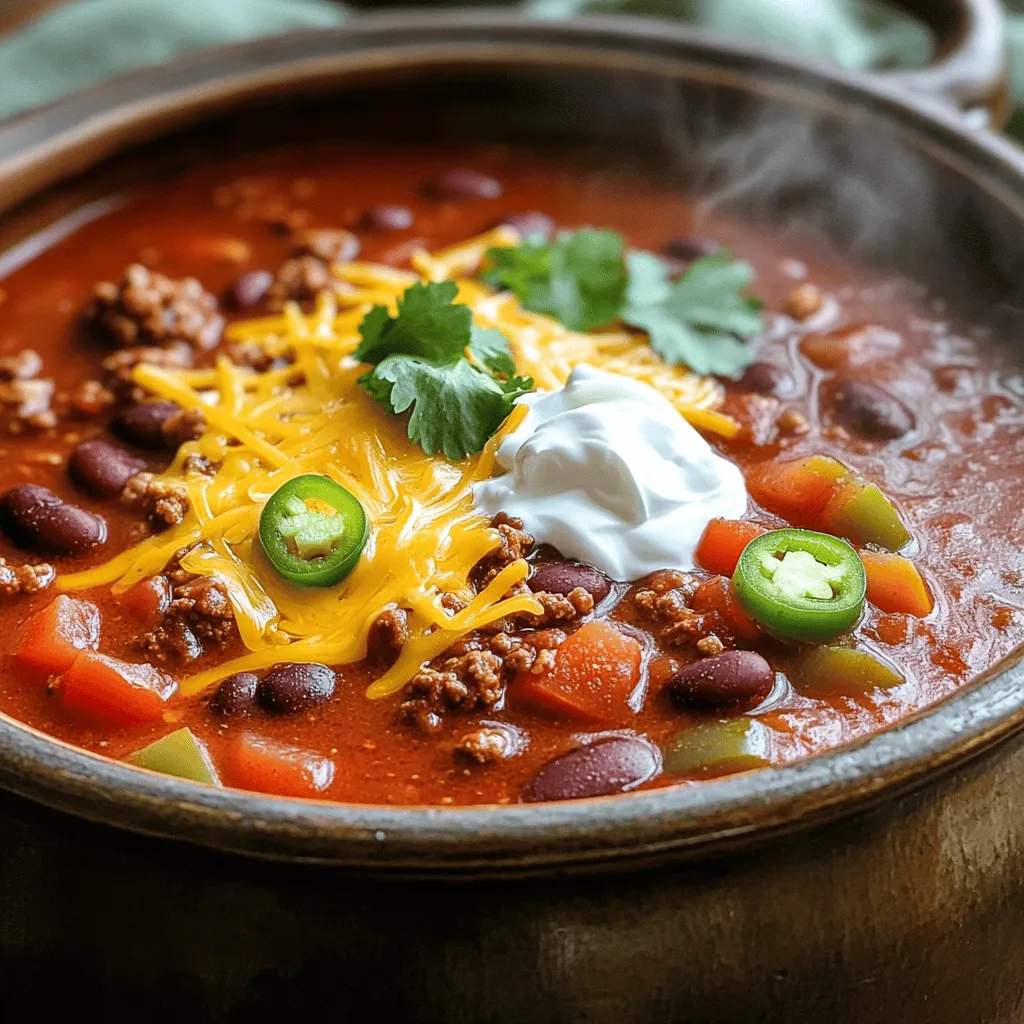
Ultimate One-Pot Chili Easy and Flavorful Recipe
Are you ready for a warm bowl of comfort? My Ultimate One-Pot Chili is easy, flavorful, and perfect for any occasion. Whether you’re a busy
- 4 boneless, skinless chicken thighs - 1 cup fresh broccoli florets - 1 red bell pepper, thinly sliced - 1 cup sugar snap peas - 4 cloves garlic, finely minced - 1/4 cup honey The chicken thighs form the heart of this dish. They stay juicy and tender while cooking. Broccoli, bell pepper, and sugar snap peas add color and crunch. The garlic and honey bring a sweet, rich flavor that ties everything together. - 2 tablespoons low-sodium soy sauce - 1 tablespoon rice vinegar - 1 tablespoon extra virgin olive oil - 1 teaspoon toasted sesame oil - 1/2 teaspoon crushed red pepper flakes (optional for heat) - Salt and freshly cracked black pepper to taste The soy sauce and rice vinegar create a tasty base for the honey garlic sauce. Olive oil and sesame oil help achieve that perfect sear on the chicken. You can add red pepper flakes if you like a bit of heat. - Chopped green onions - Sesame seeds Green onions add a fresh touch and a pop of color. Sesame seeds give a nice crunch and a nutty flavor. Together, they make your dish look and taste amazing. This recipe is all about balance. Each ingredient plays a role in creating a dish that is both flavorful and easy to prepare. 1. In a small bowl, add the honey, low-sodium soy sauce, rice vinegar, minced garlic, and crushed red pepper flakes, if you want some heat. 2. Whisk these ingredients together until the sauce is smooth. This sauce will bring great flavor to the chicken and veggies. 1. Season the chicken thighs well with salt and freshly cracked black pepper on both sides. 2. Heat a large skillet over medium-high heat. Add the extra virgin olive oil and toasted sesame oil. 3. Once the oils shimmer, add the chicken thighs to the pan. 4. Sear them for about 6-7 minutes on each side. You want a golden-brown crust and an internal temperature of 165°F. 1. After the chicken is done, take it out and set it aside on a plate. 2. In the same skillet, add the fresh broccoli florets, sliced red bell pepper, and sugar snap peas. 3. Sauté these veggies for around 4-5 minutes. They should be bright and tender-crisp. 1. Pour the honey garlic sauce over the sautéed vegetables. Stir gently to coat everything well. 2. Let it simmer for 2-3 minutes. This thickens the sauce and blends the flavors nicely. 3. Add the cooked chicken thighs back to the skillet. Nestle them among the veggies and coat them with the sauce. 4. Cook everything together for an extra 2 minutes to heat through. Now you have a delicious one-pan meal ready to enjoy! For great flavor, season the chicken well. Use salt and black pepper on both sides. Don't skip this step; it adds depth to your dish. The honey garlic sauce is vital too. Mix honey, soy sauce, rice vinegar, and garlic in a bowl. Whisk until smooth. If you love spice, add crushed red pepper flakes. This sauce will bring a sweet and savory taste. To sear chicken perfectly, heat your pan on medium-high. Add olive and sesame oil and wait until they shimmer. Place the chicken in the pan and let it cook without moving it. This helps form a nice crust. Cook for about 6-7 minutes each side. Check the chicken's internal temperature; it should reach 165°F (75°C). For the veggies, add them after the chicken is done. Stir-fry them quickly to keep them crunchy. Cook them for about 4-5 minutes. They should stay bright and tender. This will give your dish a fresh taste and great texture. When serving, place the chicken and veggies over fluffy jasmine rice or quinoa. This adds a nice touch and helps soak up the sauce. For extra flair, add a lime wedge on the side. The citrus will brighten your meal. Garnish the dish with chopped green onions and sesame seeds. This adds color and makes your dish look appealing. A well-presented meal makes it even more enjoyable. {{image_4}} You can easily make One Pan Honey Garlic Chicken healthier. Use leaner cuts of chicken. Skinless chicken breasts work well. They are lower in fat but still juicy. For veggies, swap out broccoli or bell pepper for others. Try carrots or zucchini for a different taste. You can even add spinach for extra nutrients. Want to boost the flavor? Add spices or herbs. Fresh ginger adds warmth. Try thyme or rosemary for depth. You can also mix in different sauces. A splash of sriracha gives heat. A bit of hoisin sauce brings sweetness. Experiment to find your favorite mix! Pair your dish with great sides. Jasmine rice or quinoa are perfect. They soak up the sauce well. If you want veggies, serve a fresh salad. A simple green salad adds crunch. You can also try roasted sweet potatoes for a sweet touch. This way, you create a complete meal that everyone will love. Enjoy the tasty balance of flavors and textures! To store your One Pan Honey Garlic Chicken, let it cool first. Place leftovers in an airtight container. This keeps the flavors fresh. You can store it in the fridge for up to three days. When you want to eat it, just reheat it on the stove or microwave. If you plan to enjoy this dish later, freezing works great. Place the cooled chicken and veggies in a freezer-safe bag. Squeeze out the air before sealing. This prevents freezer burn. You can freeze it for up to three months. When you're ready to eat, thaw it in the fridge overnight. Reheat it gently in a pan to keep the chicken juicy. You can also use the microwave, but watch it closely so it doesn't dry out. Enjoy your meal! Yes, you can use chicken breasts. They cook faster and are leaner. However, they may be less juicy compared to thighs. Chicken thighs have more fat, which adds flavor and tenderness. If you choose breasts, watch the cooking time closely. Overcooking can make them dry. To add heat, include crushed red pepper flakes in the sauce. You can also use fresh sliced jalapeños or a dash of hot sauce. Start with small amounts, then adjust to your taste. Experiment to find the heat level you enjoy. Just remember, spice can build over time. Yes, you can prep this dish ahead of time. Marinate the chicken in the sauce for a few hours or overnight. This adds great flavor. You can also chop the vegetables in advance. Store them in the fridge. On cooking day, it will save you time and effort. This blog post covered how to make a tasty honey garlic chicken dish. We explored key ingredients like chicken thighs, fresh veggies, and honey with garlic. I shared tips on seasoning, cooking, and the best presentation ideas. When you follow these steps, you get a great meal. You can also try healthier options or make it spicier. With proper storage, leftovers stay fresh. Enjoy cooking and make it your own!
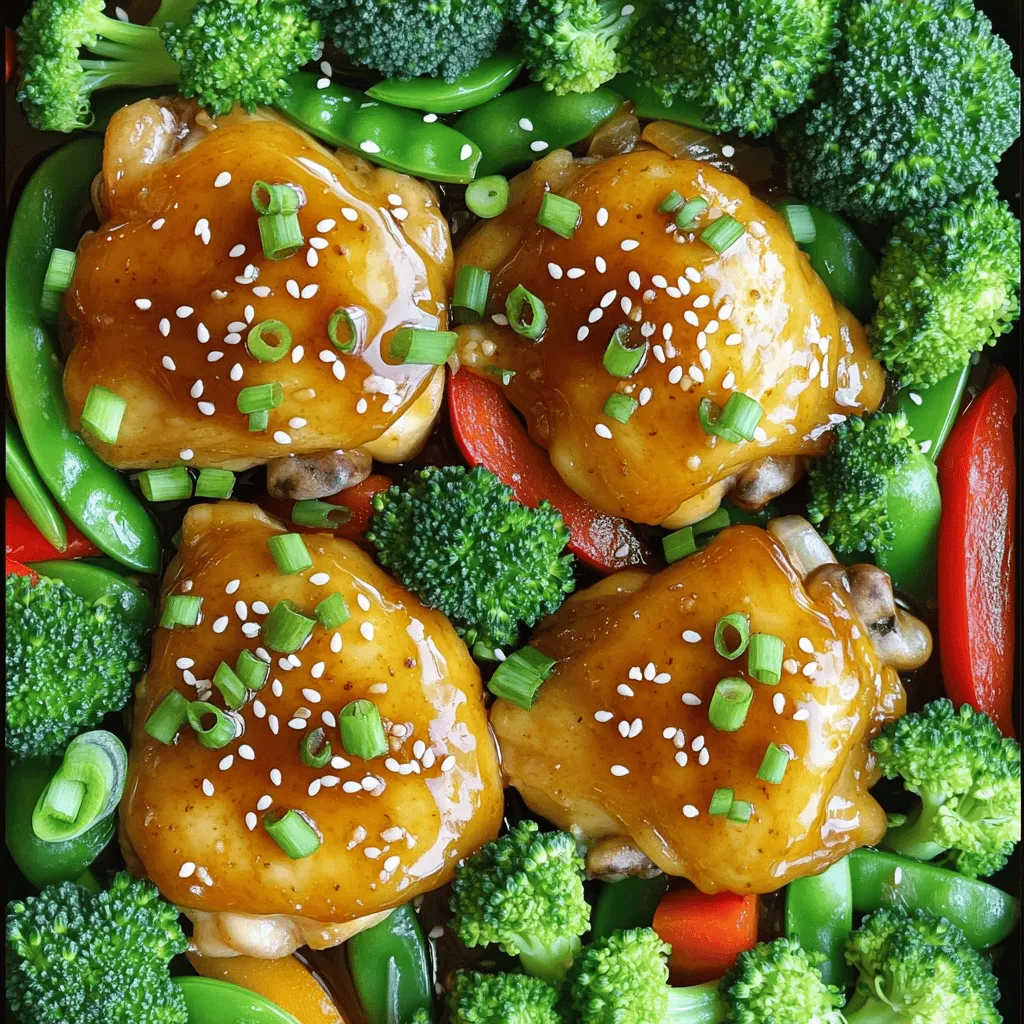
One Pan Honey Garlic Chicken Flavorful and Easy Meal
If you’re looking for a quick, tasty dinner that packs a flavor punch, you’re in the right place! My One Pan Honey Garlic Chicken is
- 1 pound large shrimp, peeled and deveined - 2 tablespoons honey - 4 cloves garlic, finely minced - 2 tablespoons low-sodium soy sauce - 1 tablespoon fresh ginger, grated These main ingredients create a rich and tasty flavor. The shrimp adds protein, while honey gives a touch of sweetness. Garlic and ginger add a zing that makes this dish stand out. The soy sauce brings umami, balancing all the flavors perfectly. - 2 cups cooked jasmine rice - 1 cup broccoli florets - 1 red bell pepper, thinly sliced - 1 carrot, julienned The jasmine rice serves as a soft base. It soaks up all the sauce nicely. Broccoli adds crunch and color. The red bell pepper brings sweetness, while the carrot adds a pop of orange. Together, these veggies keep the dish fresh and vibrant. - 2 green onions, thinly sliced - Toasted sesame seeds - Salt and pepper Garnishes elevate your dish. Green onions add a fresh bite. Toasted sesame seeds bring a nice crunch and nutty flavor. A sprinkle of salt and pepper enhances every bite. These finishing touches make your honey garlic shrimp bowls look and taste great. Start by mixing the marinade. In a medium bowl, combine 2 tablespoons of honey, 4 cloves of finely minced garlic, 2 tablespoons of low-sodium soy sauce, and 1 tablespoon of freshly grated ginger. Whisk these ingredients until you have a smooth and fragrant mix. This blend adds a sweet and savory kick to the shrimp. Now, toss 1 pound of peeled and deveined shrimp in the marinade. Make sure each shrimp gets coated well. Cover the bowl and let it sit for 15-20 minutes. This step allows the shrimp to soak up all those great flavors. Next, heat 1 tablespoon of extra virgin olive oil in a large skillet over medium heat. Once the oil is shimmering, add the marinated shrimp in a single layer. Cook each side for 2-3 minutes until the shrimp turn pink and opaque. Remove the shrimp from the skillet and set them aside. This ensures they stay juicy and tender. In the same skillet, add your vegetables. Use 1 cup of broccoli florets, 1 thinly sliced red bell pepper, and 1 julienned carrot. Stir these for 5-7 minutes until they are tender but still crisp. This adds a nice crunch to your dish. Return the cooked shrimp to the skillet. Mix everything gently and heat through for another minute. Season with salt and freshly ground black pepper to taste. This step melds the flavors beautifully. To serve, scoop 2 cups of cooked jasmine rice into bowls. Top each bowl with the shrimp and vegetable mix. For a final touch, garnish with thinly sliced green onions and a sprinkle of toasted sesame seeds. This presentation makes the dish look inviting and delicious. Marinating shrimp is key. The shrimp should soak in the marinade for 15-20 minutes. This time allows the flavors to soak in. It makes the shrimp taste great. For juicy shrimp, do not overcook them. They only need 2-3 minutes per side. Watch for color changes. When they turn pink and opaque, they are done. For the best texture, cook vegetables just right. Sauté them for 5-7 minutes until they are tender but still crisp. This keeps them colorful and tasty. If you want variety, switch up the veggies. Seasonal options like snow peas or zucchini work well too. Different colors add fun and nutrition. Pair your bowls with sauces for extra flavor. A drizzle of lime juice brightens the dish. You might like a splash of chili oil for heat. Garnish with green onions and toasted sesame seeds for a nice touch. These make your dish look pretty and add crunch. Enjoy your flavorful honey garlic shrimp bowls! {{image_4}} You can easily swap shrimp for chicken or tofu. Both options work well in this dish. If you choose chicken, use about 1 pound of boneless chicken thighs or breasts. Cut them into bite-sized pieces. For tofu, firm tofu is best; press it to remove excess water, then cut it into cubes. Cooking times will change slightly: - Cook chicken for about 6-8 minutes until it reaches 165°F. - Cook tofu for about 4-5 minutes until golden brown on all sides. You can change the rice or noodles based on what you have. Brown rice or quinoa adds more fiber. Rice noodles are a great gluten-free option too. Feel free to adjust the vegetables with the seasons. In spring, try snap peas or asparagus. In fall, use butternut squash or Brussels sprouts. This keeps your meals fresh and exciting. To make this dish gluten-free, use tamari instead of soy sauce. This simple swap keeps the same great taste while meeting dietary needs. For a vegan option, replace shrimp with chickpeas or edamame. Keep the honey swap with maple syrup for sweetness. This way, everyone can enjoy the tasty flavors of honey garlic bowls. To store your honey garlic shrimp bowls, let them cool first. Place the leftovers in an airtight container. This keeps them fresh and tasty. The dish stays good in the fridge for up to three days. Make sure to consume it within that time for the best flavor. Yes, you can freeze honey garlic shrimp bowls! To do this, let them cool completely. Then, pack them in freezer-safe containers. When you are ready to eat, take them out and reheat. Thaw in the fridge overnight. For quick reheating, you can use a microwave or stovetop. Heat until everything is warm and enjoy! Prepare ingredients ahead of time for a quick meal. Chop your veggies and store them in the fridge. Marinate the shrimp a day before cooking for more flavor. When ready to eat, just cook everything together. This makes your meal fast and easy. You can also reheat in a skillet for a fresh taste. To cook shrimp perfectly, follow these steps: - Use fresh shrimp if possible. Fresh shrimp tastes better. - Thaw frozen shrimp before cooking. If you use frozen, run it under cold water. - Heat your pan before adding shrimp. A hot pan will sear the shrimp. - Cook shrimp quickly. It only needs 2-3 minutes per side. - Look for color change. Shrimp turns pink and opaque when done. Cooking shrimp right keeps it juicy and full of flavor. Overcooking shrinks shrimp and makes it tough. To thicken the sauce, try these techniques: - Add cornstarch. Mix 1 tablespoon with cold water and stir it in. - Simmer the sauce longer. This cooks off extra liquid and thickens it. - Add a butter swirl. Mixing in cold butter gives a rich finish and thickens. These methods help you get the perfect sauce texture for your honey garlic shrimp. Yes, you can use frozen shrimp! Here’s how: - Thaw shrimp first. Place it in the fridge overnight or run it under cold water for 10-15 minutes. - Pat dry with a paper towel. This helps the marinade stick better. - Cook from thawed. Cooking from frozen can lead to uneven cooking. Frozen shrimp is convenient and can taste great if handled right. Here are some great sides to pair with shrimp bowls: - Jasmine rice. It soaks up the sauce well. - Steamed vegetables. Broccoli, bell peppers, and carrots are perfect. - Crispy wontons. These add crunch and texture. - Fresh lime wedges. A squeeze of lime brightens the dish. These sides balance the flavors and make your meal more filling. To store and reheat shrimp bowls properly, follow these tips: - Refrigerate leftovers in an airtight container. They stay fresh for up to 3 days. - Reheat gently. Use a skillet over low heat or microwave in short bursts. - Avoid high heat. This can overcook the shrimp and make it tough. Storing and reheating well keeps your meals tasty for later! This blog covered a delicious honey garlic shrimp bowl recipe. You learned about the main ingredients and how to prepare them step by step. Marinating the shrimp and sautéing fresh vegetables are key to great flavor. Remember to experiment with different proteins and vegetables for variety. Proper storage helps maintain taste and texture. Enjoy your cooking, and share your tasty results with others!
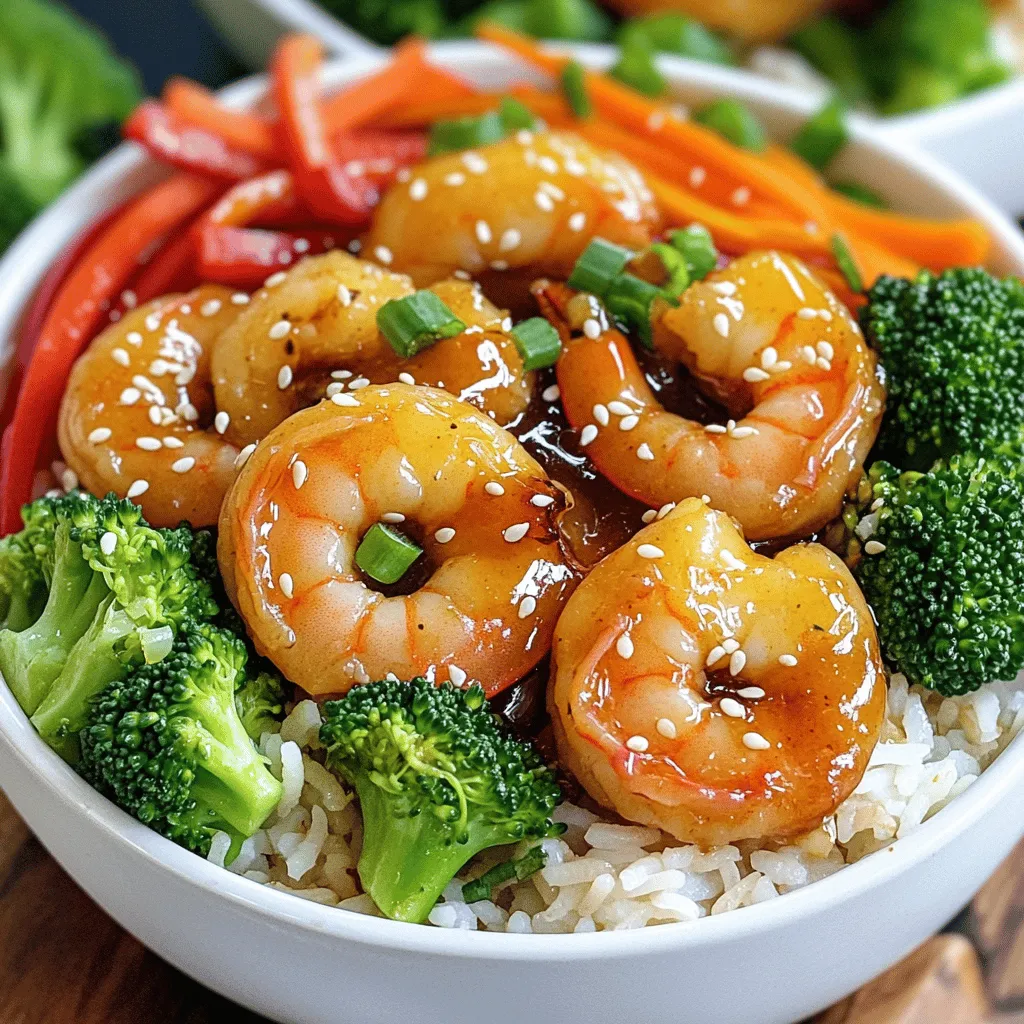
Honey Garlic Shrimp Bowls Flavorful and Easy Meal
If you’re craving a meal that’s both quick and bursting with flavor, you’re in the right place! Honey Garlic Shrimp Bowls are a simple dish
To make Mini Pumpkin Sourdough Bread Bowls, you need these ingredients: - 2 cups all-purpose flour - 1 cup sourdough starter (active and bubbly) - 1 cup pumpkin puree - 1 teaspoon salt - 1 tablespoon honey - 1 tablespoon olive oil - 1/2 teaspoon ground cinnamon - 1/4 teaspoon ground nutmeg - 1/4 teaspoon ground ginger - 1/2 cup warm water (adjust as needed) - Fresh herbs (such as thyme or rosemary) for garnish (optional) Each ingredient plays a key role in flavor and texture. The all-purpose flour gives structure. The sourdough starter adds a tangy taste and helps the bread rise. Pumpkin puree makes the bread moist and adds a rich color. Salt enhances all the flavors, while honey adds a hint of sweetness. Olive oil keeps the dough soft. Spices like cinnamon, nutmeg, and ginger give a warm flavor that pairs well with pumpkin. Warm water helps combine everything. Adjust it to get a smooth dough. If you want to add a touch of elegance, fresh herbs can be a great garnish. They add color and flavor when serving. When you gather these ingredients, you set the stage for a delicious baking adventure. Enjoy the process of making these delightful bowls! First, grab a big mixing bowl. Add the sourdough starter, pumpkin puree, olive oil, honey, and warm water. Mix these ingredients well. You want a smooth and even blend. This mixture gives the bread its soft texture and rich flavor. Now, take another bowl. Whisk together the all-purpose flour, salt, cinnamon, nutmeg, and ginger. Make sure these dry ingredients are well combined. This step helps the spices spread evenly in the dough. The spices will add warmth and depth to your bread bowls. Next, slowly add the dry mix to your wet ingredients. Stir continuously until you see a soft dough forming. If the dough feels too sticky, add a little more flour. If it’s too dry, add a splash of warm water. Transfer the dough to a floured surface. Knead it for about 8-10 minutes. You want the dough to be smooth and elastic. Once kneaded, place the dough in a greased bowl. Cover it with a damp cloth and let it rise in a warm spot for 2-3 hours. It should double in size. Once it has risen, punch down the dough gently to remove air. Divide the dough into four equal pieces. Shape each piece into a small ball, making sure it is smooth on the outside. Arrange the dough balls on a baking sheet lined with parchment paper. Cover them lightly again and let them rest for 30 minutes. While they puff up, preheat your oven to 375°F (190°C). Before baking, use a sharp knife to score the tops of each ball. You can create a fun design. This step allows the bread to expand nicely while baking. Bake the dough balls for 25-30 minutes. They should turn golden brown and sound hollow when tapped. After baking, let them cool for a bit. When cool enough to handle, cut off the tops and scoop out some bread inside to create a bowl shape. Now your mini pumpkin sourdough bread bowls are ready to be filled! To get a perfect rise, keep your dough warm. The best spot is in a cozy kitchen. A good temperature is around 75°F to 80°F. You can use your oven with the light on. This creates a warm space for the dough to grow. Always cover the bowl with a damp cloth. This helps keep moisture in. A well-risen dough is light and airy. Kneading is key for great dough. You want it to be smooth and elastic. Knead the dough for about 8 to 10 minutes. Push the dough away and fold it back. This motion helps build the gluten. If the dough feels sticky, add a bit of flour. If it feels too dry, add some warm water. A perfect texture makes the bread chewy and soft. Scoring adds beauty to your bread bowls. Use a sharp knife for clean cuts. Try simple patterns like a cross or lines. You can also make a fun swirl or leaf shape. Scoring helps the dough expand while baking. It gives your bread a lovely look and texture. Your mini pumpkin sourdough bread bowls will be a hit! {{image_4}} You can fill your mini pumpkin sourdough bowls with many tasty options. Here are some ideas: - Creamy Tomato Soup: This classic pairs perfectly with the pumpkin flavor. - Chili: A hearty chili warms you up and fills the bowl nicely. - Butternut Squash Soup: This soup brings out the sweet notes in the pumpkin. - Spinach Artichoke Dip: This creamy dip adds a fun twist to the bowls. - Cheddar Cheese Sauce: Warm cheese sauce is always a crowd-pleaser. You can add herbs and spices to your dough for extra flavor. Here are a few ideas: - Thyme: This herb adds an earthy taste to your bread. - Rosemary: A bit of rosemary gives a strong, aromatic flavor. - Garlic Powder: This spice gives a nice kick to your dough. - Parmesan Cheese: Mix in some cheese for a savory twist. - Red Pepper Flakes: For those who like spice, this adds heat. Pair your mini bowls with drinks or sides that match the flavors. Here are some tips: - Apple Cider: This drink enhances the fall flavors of the pumpkin. - Red Wine: A light red wine complements the savory fillings well. - Simple Salad: A fresh salad balances the richness of the soup. - Crackers or Breadsticks: These add crunch and texture to your meal. - Roasted Vegetables: A side of roasted veggies adds color and nutrition. To keep your mini pumpkin sourdough bread bowls fresh, store them in a paper bag. Avoid plastic, as it traps moisture and makes the bread soggy. Place the bag in a cool, dry area, like your kitchen counter. These bowls can last for about two days this way. If you want to keep them longer, consider freezing them. Freezing mini pumpkin sourdough bread bowls is simple. First, let the bowls cool completely after baking. Then, wrap each bowl tightly in plastic wrap. After that, place them in a freezer-safe bag or container. They can stay in the freezer for up to three months. To reheat, thaw the bowls in the fridge overnight. Then, heat them in a 350°F (175°C) oven for about 10 minutes. This will make them warm and crusty again. For the best flavor and texture, enjoy your mini pumpkin sourdough bread bowls within two days if stored at room temperature. If frozen, aim to eat them within three months. The sooner you consume them, the fresher the taste will be. Yes, you can try other flours. Some good options are whole wheat flour or bread flour. Whole wheat flour gives a nutty flavor and more fiber. Bread flour has more protein, which makes the bread chewier. If you switch flours, the dough may change in texture. You might need to adjust the water amount too. Always mix and check the dough until it feels right. The dough is ready when it doubles in size. Look for a smooth surface that feels puffy. You can gently press your finger into the dough. If it springs back slowly, it is ready. If it stays flat, it needs more time. Make sure the dough is in a warm spot, away from drafts. This helps it rise well. If you don’t have pumpkin puree, try using butternut squash puree. It has a similar taste and texture. Applesauce can also work, but it will change the flavor. If you want a different spice profile, consider using sweet potato or even mashed bananas. Adjust your spices a bit to match the new puree. This post showed you how to make tasty pumpkin sourdough bread bowls. You learned about the key ingredients, step-by-step instructions, helpful tips, and tasty variations. Remember, the right techniques ensure a great rise and texture. Try different fillings for fun tastes. Store them properly for lasting freshness. Now, it’s your time to bake. Enjoy the process and share your fun creations!
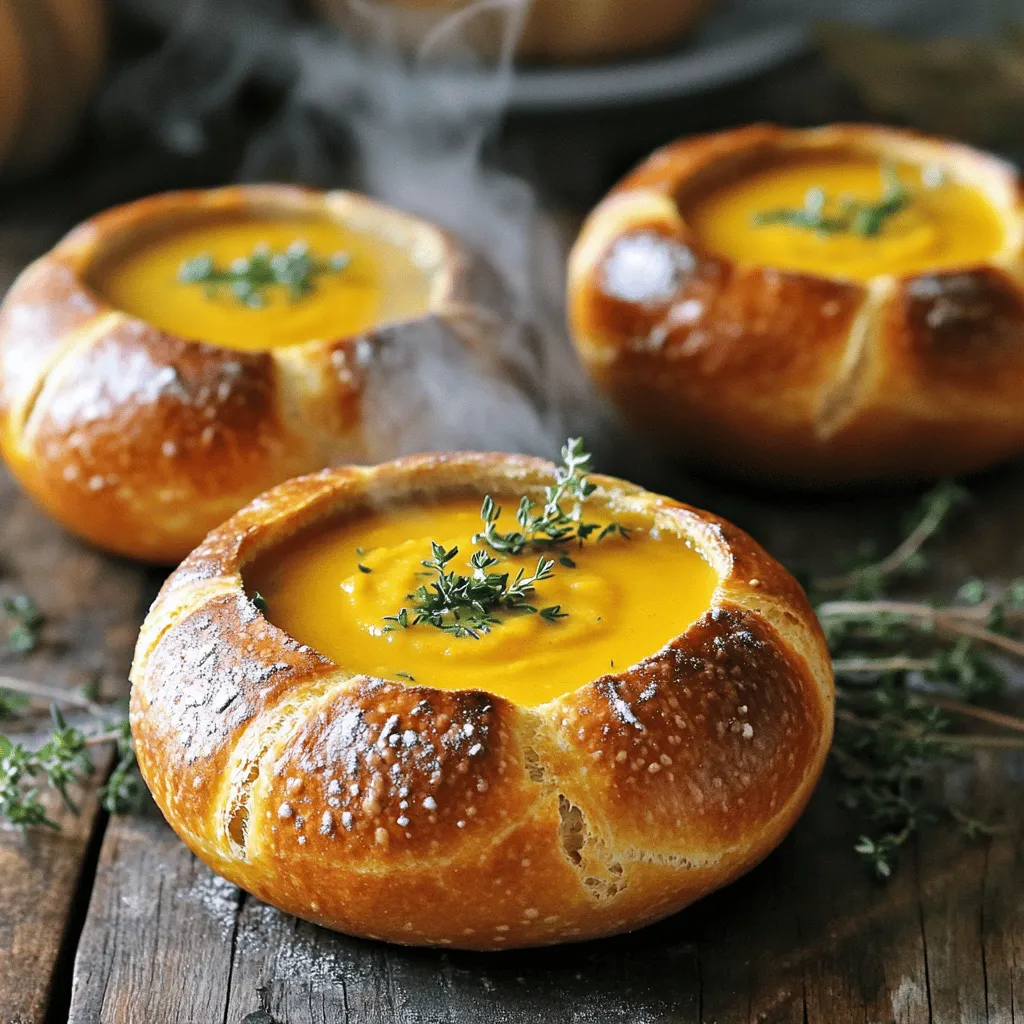
Mini Pumpkin Sourdough Bread Bowls Tasty and Easy Recipe
Are you ready to impress your family and friends with a fun fall recipe? Mini Pumpkin Sourdough Bread Bowls are perfect for serving soups or
- 2 lbs bone-in beef short ribs - 1 large onion, finely diced - 2 medium carrots, diced - 2 celery stalks, diced - 4 cloves garlic, minced - 1 can (14 oz) crushed tomatoes - 2 cups rich beef broth - 2 teaspoons dried thyme - 1 teaspoon dried oregano - Salt and freshly ground black pepper, to taste - 1 bay leaf To make a great short rib ragu, you need quality beef short ribs. The bone adds flavor and richness. Fresh vegetables like onion, carrots, and celery build a solid base. Garlic brings a delightful aroma that enhances the dish. Crushed tomatoes and beef broth form a savory sauce. Thyme and oregano add warmth and depth. Don't forget salt and pepper for taste. The bay leaf helps tie all the flavors together. - 2 cups creamy mashed potatoes (prepared with butter and milk) - 1/2 cup finely grated Parmesan cheese For the Parmesan mash, start with creamy mashed potatoes. Use good butter and milk for smoothness. Grate fresh Parmesan cheese finely. This cheese adds a rich, nutty flavor that mixes well with the potatoes. The combination makes a perfect pairing with the ragu. - Fresh basil leaves - Additional Parmesan cheese for serving Garnishing your dish makes it look special. Fresh basil leaves add a pop of color and a hint of freshness. A sprinkle of extra Parmesan cheese gives a nice touch of flavor and texture. These garnishes elevate your dish to the next level. - Seasoning the ribs: Start by seasoning the beef short ribs with salt and black pepper. Make sure to cover all sides. This step adds rich flavor. - Searing technique for maximum flavor: Heat the olive oil in a heavy pot over medium-high heat. When the oil shimmers, add the ribs. Sear them for about 8-10 minutes until they turn golden brown. This step locks in flavor and gives a nice crust. - Sautéing onions, carrots, and celery: After searing the ribs, lower the heat to medium. Add the diced onion, carrots, and celery. Cook these vegetables for about 5-7 minutes. Stir frequently until they soften and smell great. - Importance of timing for garlic: Add the minced garlic last, cooking it for just one minute. Garlic can burn quickly, so watch it closely. This brings out its sweet, rich flavor. - Combining all ingredients for a cohesive flavor: Return the seared ribs to the pot. Pour in the crushed tomatoes and beef broth. Add dried thyme, oregano, and a bay leaf. Stir everything together well. - Simmering tips for tender meat: Bring the mixture to a gentle simmer, then cover the pot. Lower the heat and let it cook for 2-3 hours. This slow cooking makes the meat tender and full of flavor. - Shredding the meat off the bones: After cooking, take the ribs out and let them cool. Remove the bones, then shred the meat into bite-sized pieces. - Final cooking to meld the flavors: Put the shredded meat back in the pot. Let it simmer for another 15-20 minutes. This helps all the flavors blend nicely. - Techniques for creamy mashed potatoes: While the ragu simmers, prepare your mashed potatoes. Boil potatoes and mash them well. Use butter and milk for that creamy texture. - Incorporating Parmesan cheese effectively: Fold in the grated Parmesan cheese until it’s mixed in well. This adds a rich, cheesy flavor to the mash. - Spoon the ragu over the mash: To serve, place a generous scoop of ragu on top of your creamy mash. The sauce will soak into the potatoes, creating a delicious bite. - Optional presentation tips: For a nice touch, add fresh basil leaves and a sprinkle of extra Parmesan on top. This makes the dish look great and adds fresh flavor. - Selecting the right cut and quality of beef: Look for bone-in beef short ribs. They add flavor and moisture. Choose ribs with good marbling. This fat keeps the meat tender and juicy. - Necessary cooking times for various textures: For tender meat, simmer your short ribs for 2-3 hours. Low heat helps break down tough fibers. Check for doneness; the meat should fall off the bone easily. - Adding wine or other herbs for depth: Red wine adds complexity. A cup of dry red wine can deepen the taste. Fresh herbs like rosemary or thyme can also boost flavor. - Choosing the right beef broth: Use a rich, low-sodium beef broth. This allows you to control the salt level. Homemade broth is best, but store-bought works too. - Techniques to avoid lumps: Use a potato ricer for smooth mash. If you don't have one, mash the potatoes thoroughly. Make sure to incorporate the warm milk and butter slowly. - Flavor variations (e.g., adding garlic or herbs): Try adding roasted garlic for a sweet touch. Fresh chives or parsley can brighten the flavor. Mix in cheese for extra creaminess; it pairs well with the ragu. {{image_4}} You can cook short rib ragu in different ways. The two most common methods are the slow cooker and the traditional pot. Using a slow cooker makes it easy. You can set it and forget it. Just sear the ribs first, then add all ingredients and let it cook for 6-8 hours. This method gives you tender meat and rich flavor. The traditional pot method is faster. It takes about 2-3 hours on the stove. You get to sauté the veggies and sear the meat, adding depth to the taste. Both methods work well, but choose what fits your schedule. If you want a vegetarian ragu, you can use mushrooms or jackfruit. Mushrooms add a meaty texture. Use a mix of shiitake and portobello for the best flavor. Just sauté them like you would the ribs. Jackfruit is another great choice. It mimics the texture of pulled meat. Use canned young jackfruit and shred it after cooking. Add your spices and let it simmer. Both options create a hearty meal without meat. Seasonal ingredients can change your ragu. In spring, add fresh peas or asparagus. In summer, use zucchini or bell peppers. These add bright flavors and colors. In fall, consider using butternut squash or mushrooms for warmth. In winter, root vegetables like parsnips work well. Adjust the veggies based on what you find at the market. This keeps your dish fresh and exciting all year round. To keep your short rib ragu fresh, store it in the fridge. Use airtight containers to prevent spills and keep moisture in. The ragu will last for about three to four days. Make sure to cool it down before sealing it up. For the mashed potatoes, store them in a separate container. They will stay fresh for about three days too. You can freeze both the ragu and the mashed potatoes. For the ragu, let it cool completely. Then, place it in freezer-safe bags. Squeeze out the air before sealing. This helps avoid freezer burn. The ragu can stay frozen for up to three months. For the mashed potatoes, scoop them into a container. Label it with the date before freezing. They will last about two months in the freezer. When you're ready to enjoy your leftovers, you can reheat them easily. For the ragu, heat it in a pot over medium heat. Stir it often to keep it from sticking. You can add a splash of beef broth if it's too thick. For the mashed potatoes, warm them in the microwave. Stir them halfway through to heat evenly. If they seem dry, mix in a little milk or butter. This will keep them creamy and delicious. It takes about 3 hours and 20 minutes to make this dish. You need 20 minutes for prep and 3 hours for cooking. The long simmer helps the meat become tender and juicy. Yes, you can use other meats like chuck roast or lamb shanks. They will work well and give you nice flavors. Just adjust the cooking time based on the meat's tenderness. Pair this dish with a simple green salad or some crusty bread. A light red wine also enhances the meal nicely. These sides balance the rich flavors of the ragu. To serve more people, simply double the ingredients. Ensure you have a large enough pot to cook everything together. Adjust cooking times slightly if needed, but the process stays the same. Absolutely! You can cook the ragu a day before and refrigerate it. The flavors will improve overnight. Just reheat it gently before serving, and enjoy the rich taste! This blog post covered how to make a delicious short rib ragu and creamy Parmesan mash. We discussed key ingredients, preparation steps, and tips for great flavor. I shared ways to enhance your ragu with optional garnishes and variations like vegetarian options. Cooking can be fun and rewarding. Follow these steps to impress your family and friends. Enjoy your meal, and remember that practice makes perfect!
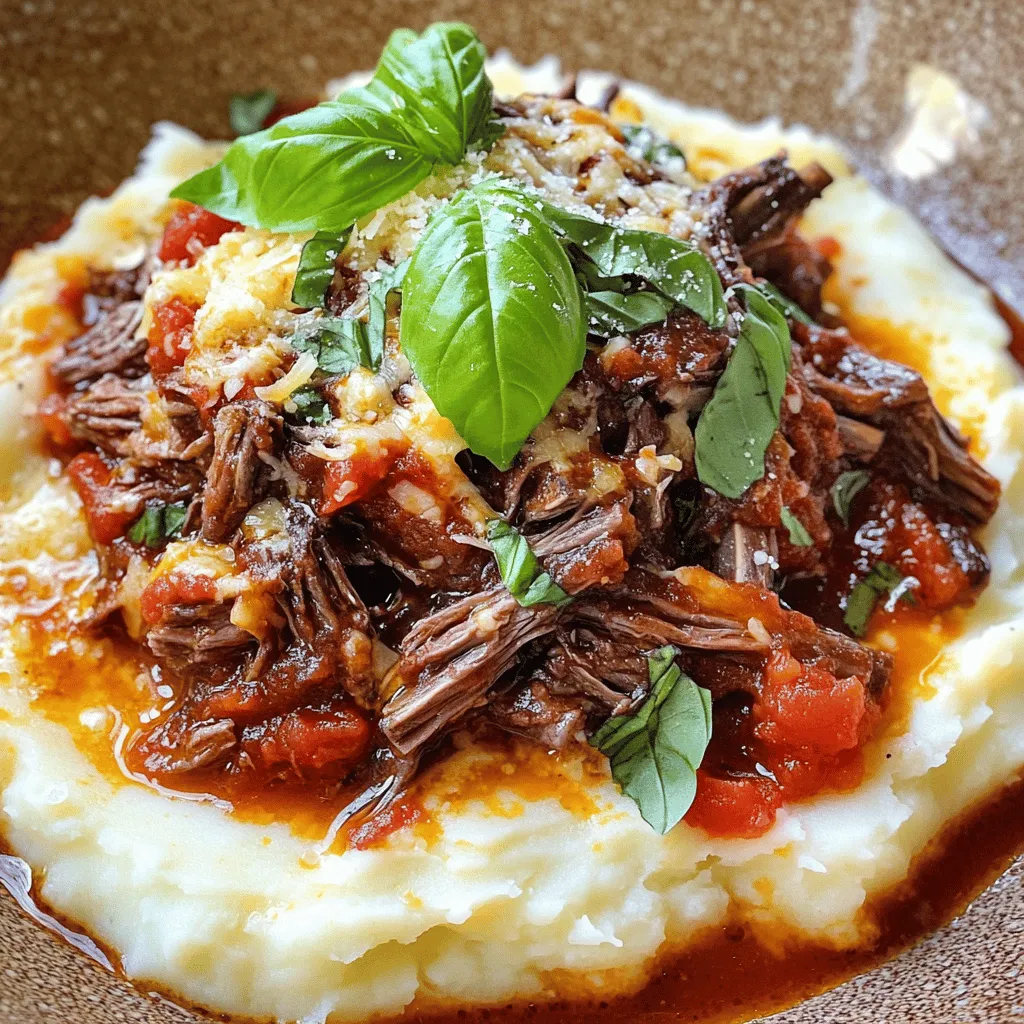
Short Rib Ragu over Parmesan Mash Comforting Delight
Comfort food doesn’t get better than Short Rib Ragu over Parmesan Mash. This dish warms the belly and the heart. Imagine rich, tender beef simmered
- 2 cups butternut squash, peeled and cubed - 1 cup all-purpose flour, plus additional for dusting - 1 large egg - 1/2 teaspoon freshly grated nutmeg - 1/2 teaspoon salt - 1/4 teaspoon freshly ground black pepper - 1 tablespoon olive oil (for roasting) - 8 oz Italian sausage, casings removed - 2 cloves garlic, minced - 1 cup baby spinach, washed and stemmed - 1/2 cup grated Parmesan cheese (optional, for serving) If you can't find butternut squash, you can use sweet potato or pumpkin. For a gluten-free version, almond flour or a gluten-free blend works well. If you prefer plant-based meals, swap the Italian sausage for a meat substitute like lentils or mushrooms. You can skip the egg by using flaxseed meal mixed with water for binding. Nutritional yeast can replace Parmesan cheese for a dairy-free option. This dish serves four and packs a nutritious punch. Each serving contains about: - Calories: 350 - Protein: 12g - Carbs: 52g - Fat: 12g - Fiber: 4g Butternut squash is rich in vitamins A and C. It also provides fiber. The spinach adds iron and calcium. Enjoying this meal gives you a hearty dose of nutrients. To start, preheat your oven to 400°F (200°C). Grab your cubed butternut squash and toss it in a bowl with 1 tablespoon of olive oil and a pinch of salt. This will help the squash roast nicely. Spread the squash on a baking sheet in a single layer. Roast in the oven for about 25 to 30 minutes. You want it to be tender and a bit caramelized. This adds flavor to your gnocchi. After roasting, let the squash cool for a few minutes. Then, mash it in a large bowl with a fork or potato masher. Add one large egg, 1/2 teaspoon of freshly grated nutmeg, 1/2 teaspoon of salt, and 1/4 teaspoon of black pepper. Mix in 1 cup of all-purpose flour until you form a soft dough. If it feels too sticky, sprinkle in a bit more flour. You want it to be easy to handle. Now, lightly flour your work surface. Turn out your gnocchi dough and divide it into four equal parts. Roll each part into a rope that is about 1/2 inch thick. Cut the rope into 1-inch pieces. To give them nice ridges, press each piece with a fork. Next, bring a large pot of salted water to a boil. Drop the gnocchi into the boiling water in batches. They will float to the surface when they are ready, which should take about 2 to 3 minutes. Use a slotted spoon to remove them to a plate and set aside. Now you're ready to combine everything! To start, I heat a drizzle of olive oil in a large skillet over medium heat. I add the Italian sausage, breaking it apart with a spatula. I cook it for about 5-7 minutes until it turns brown and is fully cooked. This step gives the gnocchi a rich, meaty base. Once the sausage is browned, I stir in minced garlic. Cooking the garlic for one more minute adds a wonderful aroma. Then, I toss in a cup of washed baby spinach. I gently stir until the spinach wilts, which only takes 2-3 minutes. This adds a fresh taste and vibrant color to the dish. Now, it's time for the best part! I add the cooked gnocchi to the skillet with the sausage and spinach. I toss everything together gently to heat it through. This mix becomes a lovely, colorful dish that is both filling and tasty. If you like, sprinkle some grated Parmesan cheese on top for a rich finish. {{image_4}} To make great gnocchi, focus on the dough. Use fresh butternut squash. The squash should be soft and slightly sweet. It adds flavor and moisture. - Use the Right Flour: All-purpose flour works best. Don’t overdo it. Too much flour makes gnocchi heavy. - Control the Dough: Mix flour gradually. If it’s too sticky, add more flour. A soft dough is key. - Avoid Overworking: Handle the dough gently. Too much kneading can make gnocchi tough. Watch out for these common errors when making gnocchi: - Not Cooking Squash Enough: Roast it until tender and caramelized. This brings out its best flavor. - Using Cold Ingredients: Room-temperature eggs mix better. Cold eggs can make the dough too firm. - Boiling Water: Always use salted water. This improves flavor. Make sure the water is at a rolling boil before adding gnocchi. Now that your gnocchi is ready, let’s make it shine: - Garnish with Cheese: A sprinkle of grated Parmesan adds a salty kick. - Add Fresh Greens: Toss in more baby spinach or herbs for freshness. - Pair with Simple Sides: A light salad or garlic bread makes a great side. These tips will help you create perfect butternut squash gnocchi with sausage. Enjoy the process! You can easily make this dish vegetarian. Swap the Italian sausage for plant-based sausage. There are many great brands that taste amazing. You can also use sautéed mushrooms for a hearty texture. Adding extra veggies like bell peppers or zucchini gives more flavor and color. If you need a gluten-free version, use gluten-free flour instead of all-purpose flour. Rice flour or almond flour work well. You can also try using store-bought gluten-free gnocchi. Just make sure to check the package for cooking times. This way, you still enjoy the same great taste without the gluten. Seasonal ingredients can enhance your dish. In fall, try adding roasted Brussels sprouts or kale. In winter, consider using parsnips or sweet potatoes for the gnocchi. For spring, asparagus or peas can add a fresh touch. Each swap gives a new flavor to the dish while keeping it fun and exciting. Yes, you can freeze butternut squash gnocchi. After shaping the gnocchi, lay them out on a baking sheet in a single layer. Freeze them for about one hour until firm. Then, transfer the gnocchi to a freezer bag or container. They can stay frozen for up to three months. When you’re ready to cook them, you can drop them directly into boiling water without thawing. To reheat leftover gnocchi, you have a few options. You can sauté them in a skillet with a bit of olive oil. Heat them over medium heat for about 5 minutes, stirring often. Another option is to boil them briefly in water for about 1-2 minutes until heated through. You can also use the microwave, but it may make them a bit softer. Butternut squash gnocchi pairs well with several sides. You can serve a light salad with greens, cherry tomatoes, and a simple vinaigrette. Garlic bread is another great choice. For a heartier meal, consider a roasted vegetable medley or sautéed mushrooms. You can even add a sprinkle of extra Parmesan cheese on top for added flavor. In this post, we explored how to make butternut squash gnocchi. We covered ingredients, cooking techniques, and some great tips. Each step helps create delicious gnocchi paired with sausage. Also, we shared variations and answers to common questions. Remember, cooking is about experimenting and having fun. Whether you try a vegetarian swap or freeze leftovers, enjoy every moment in the kitchen. Happy cooking!
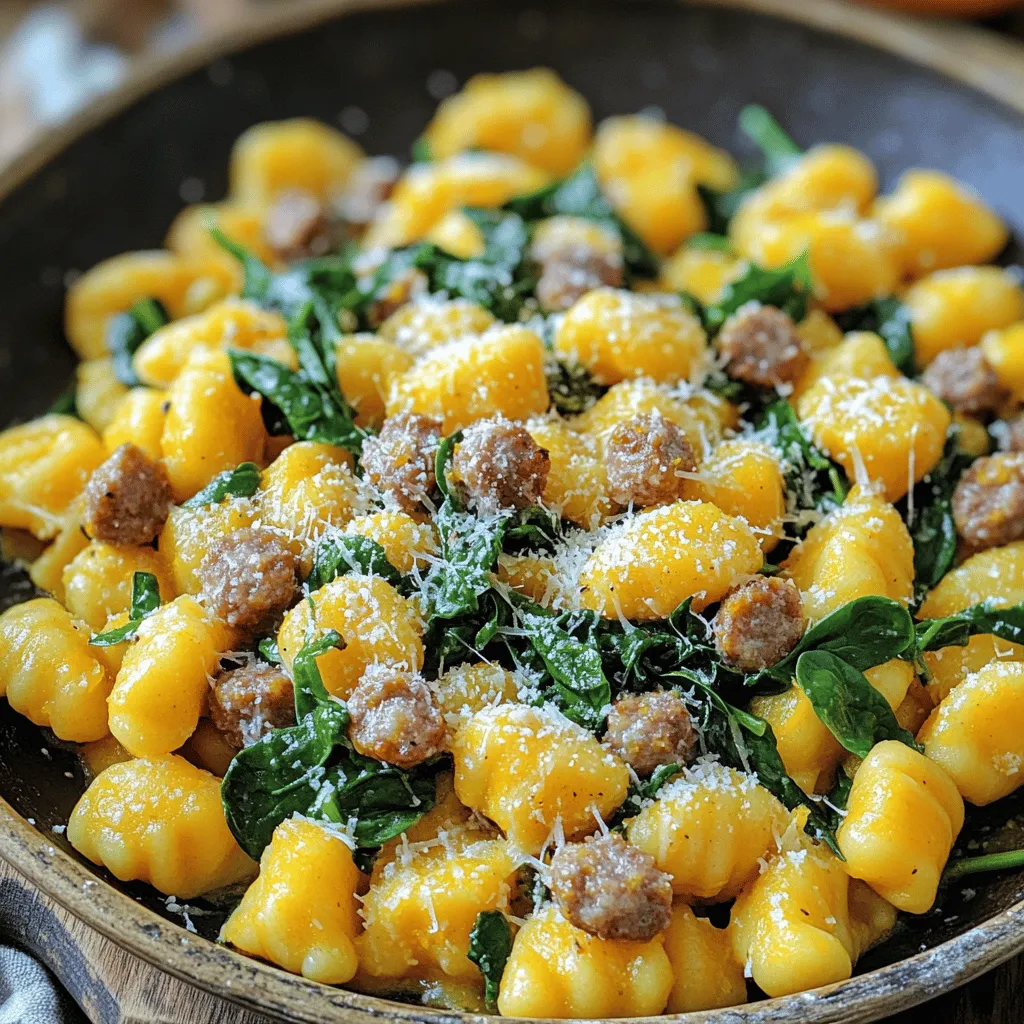
Butternut Squash Gnocchi with Sausage Quick Recipe
Are you ready to switch up your dinner routine? This Butternut Squash Gnocchi with Sausage recipe offers a quick and tasty twist on comfort food.
- 12 oz rigatoni pasta - 1 lb Italian sausage (mild or spicy) - 1 can (14 oz) diced tomatoes These main ingredients are key to a tasty dish. Rigatoni holds sauce well, while Italian sausage adds great flavor. Diced tomatoes bring moisture and a nice balance. - 2 cups chicken broth - 1 cup heavy cream - 1 cup fresh spinach, chopped Chicken broth adds depth to the sauce. Heavy cream makes it rich and smooth. Fresh spinach gives color and nutrients to the dish. - 1 teaspoon Italian seasoning - ½ teaspoon red pepper flakes (optional) - ½ cup freshly grated Parmesan cheese - Fresh basil leaves for garnish Seasoning enhances the flavors. Red pepper flakes can add heat if you like spice. Grated Parmesan adds a cheesy touch, while basil leaves brighten the dish. Start by heating a large skillet over medium heat. Add one tablespoon of olive oil. Once the oil is hot, add one pound of Italian sausage. Break the sausage apart with a spatula. Cook it for about 6-8 minutes until it is nicely browned and cooked through. The sausage should not be pink inside. Next, add one medium diced onion and three cloves of minced garlic to the pan. Stir them in well. Sauté for about 3-4 minutes. You want the onion to become soft and fragrant. This mixture adds great flavor to your dish. Now, it’s time to bring in the juicy goodness. Stir in one can of diced tomatoes, including their juices. Add two cups of chicken broth as well. Sprinkle in one teaspoon of Italian seasoning. Increase the heat to bring everything to a boil. The bubbling will help mix the flavors well. When the mixture is boiling, carefully add 12 ounces of rigatoni pasta. Make sure the pasta is fully submerged in the liquid. Lower the heat to a gentle simmer. Cover your pan with a lid. Cook for about 12-15 minutes. Stir occasionally to keep the pasta from sticking. You want the rigatoni to be al dente, which means it should be firm but cooked. Once your pasta is cooked, lower the heat again. Add one cup of heavy cream and one cup of chopped fresh spinach. Mix everything together well. Allow the cream to warm without boiling. This will create a rich and creamy sauce. Finally, season with salt and black pepper to taste. If you like heat, add a pinch of red pepper flakes. Gradually stir in half a cup of freshly grated Parmesan cheese. This will melt and make your dish even creamier. Let the dish sit for a few minutes before serving. This helps it thicken up a bit. Enjoy your one-pan creamy sausage rigatoni! - Ideal pasta cooking time: Cook the rigatoni for 12-15 minutes. Stir occasionally to avoid sticking. Check for al dente texture. This means the pasta should be firm but not hard. - Adjusting thickness of sauce: If the sauce is too thin, let it simmer longer. This helps it thicken. If it's too thick, add a splash of chicken broth or water. Stir until you reach your desired consistency. - Suggested spices and herbs: To boost flavor, try adding oregano or thyme. Fresh herbs like parsley also work well. If you like heat, add more red pepper flakes. - Cheese variations: While Parmesan is great, you can also use Pecorino Romano or mozzarella. Each cheese adds a unique flavor. Experiment to find what you like best! - Best types of pans to use: A large skillet or frying pan is best. Look for one with high sides to prevent spills. Non-stick pans help with easy cleanup. - Essential utensils: A wooden spoon is perfect for stirring. Use a spatula to break the sausage apart while cooking. A measuring cup is also handy for liquids. {{image_4}} You can easily switch out the sausage. Chicken or turkey works well too. Just cook the meat until it’s golden brown. For a vegetarian twist, use plant-based sausage. This keeps the dish hearty without meat. You can also add beans for protein. If you need gluten-free pasta, there are many options. Look for brown rice or chickpea pasta. Both offer a nice texture. For dairy-free cream, use coconut milk or cashew cream. These alternatives help maintain creaminess without dairy. You can make this dish even better by adding veggies. Bell peppers, zucchini, or mushrooms add great taste and color. You might also mix in kale or broccoli for extra nutrients. Different cheeses can change the flavor too. Try mozzarella for a melty finish, or goat cheese for a tangy kick. To keep your One-Pan Creamy Sausage Rigatoni fresh, use an airtight container. Make sure it seals well. Store it in the fridge for up to three days. The sooner you eat it, the better the taste. If you plan to eat it later, consider freezing it. When you're ready to eat your leftovers, the best way to reheat them is on the stove. Heat the rigatoni in a skillet over low heat. Stir it gently to avoid sticking. If it looks thick, add a splash of chicken broth or water. This keeps the sauce creamy. You can also use the microwave, but be careful not to overheat it. To freeze your dish, let it cool completely first. Then, place it in a freezer-safe container. Leave some space at the top for expansion. It can last up to three months in the freezer. When you're ready to eat, thaw it overnight in the fridge. Reheat it on the stove, adding some cream or broth to restore that creamy texture. One-Pan Creamy Sausage Rigatoni lasts about three to four days in the fridge. Make sure to store it in an airtight container to keep it fresh. When you are ready to eat, just reheat it on the stove or in the microwave. Yes, you can use different pasta shapes! Penne or fusilli works well. If you choose a smaller pasta, reduce the cooking time by a few minutes. Always check for al dente texture before serving. Heavy cream gives a rich and creamy texture, but it’s not required. You can use half-and-half for a lighter option. For a dairy-free choice, try coconut cream or a nut-based cream. Adjust the quantity based on how creamy you want the dish. This blog post covers how to make a delicious One-Pan Creamy Sausage Rigatoni. We explored main ingredients, including rigatoni pasta, sausage, and diced tomatoes. I shared tips on cooking, storage, and easy variations. You can adapt this recipe to fit your taste and needs. Enjoying comfort food shouldn’t be hard. With these steps, you can create a satisfying dish. Dive into your kitchen and impress yourself with this meal!
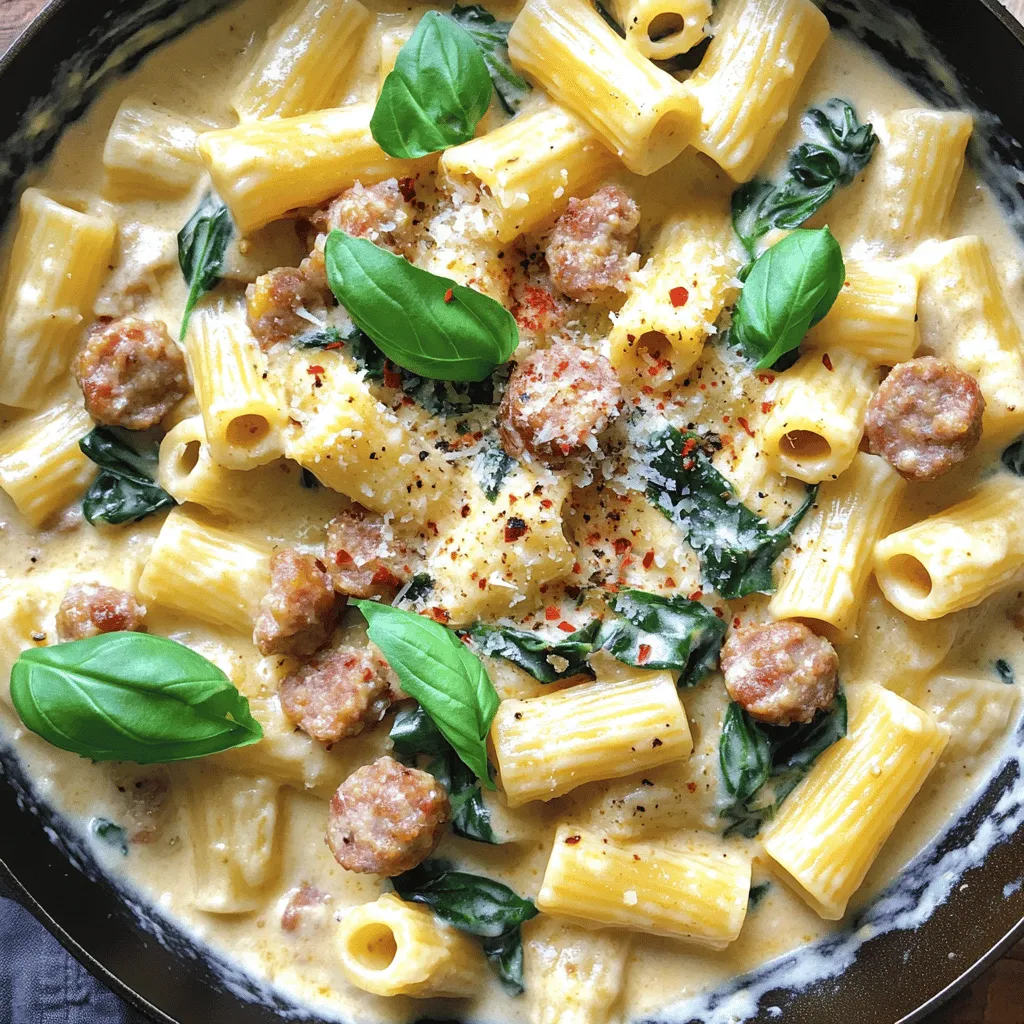
One-Pan Creamy Sausage Rigatoni Tasty Dinner Idea
Looking for a quick and tasty dinner idea? Try my One-Pan Creamy Sausage Rigatoni! This dish combines hearty rigatoni, flavorful Italian sausage, and fresh spinach,
- 2 lbs beef chuck, cut into 2-inch chunks - 1 lb beef shank, cut into large pieces - 4 dried guajillo chiles, stems and seeds removed - 2 dried ancho chiles, stems and seeds removed - 2 cloves garlic, peeled - 1 medium onion, quartered The main ingredients bring rich flavor to birria tacos. Beef chuck and beef shank offer great taste and texture. The two types of meat work well together, giving a nice balance. The dried guajillo and ancho chiles add depth and warmth. They create a sauce that is both spicy and savory. Garlic and onion are key aromatics, enhancing the dish's overall flavor. - 2 cups beef broth or water - 1 tablespoon apple cider vinegar - 1 teaspoon ground cumin - 1 teaspoon dried oregano - 1 bay leaf - Salt and freshly ground black pepper to taste - 12 corn tortillas - 1 cup fresh cilantro, roughly chopped - 1 cup onion, finely diced - Lime wedges for serving - 1 cup shredded cheese (optional, for topping) The additional ingredients round out the dish. Beef broth or water helps cook the meat, keeping it moist. Apple cider vinegar adds a bright note to the rich flavors. Cumin and oregano give an earthy taste that complements the meat. The bay leaf infuses a subtle aroma. For serving, corn tortillas hold the filling well. Fresh cilantro and onion provide freshness and crunch. Lime wedges add a zesty kick, while cheese is optional for creaminess. Toasting the dried chiles Start by heating a dry skillet over medium heat. Add the dried guajillo and ancho chiles. Toast them for about 2 minutes until they smell great. This step brings out their rich flavor. Soaking the chiles in hot water Once toasted, place the chiles in a bowl. Cover them with hot water. Let them soak for about 15 minutes. Soaking softens the chiles, making them easier to blend. Combining ingredients in a pot In a large pot, add beef chuck, beef shank, quartered onion, and peeled garlic. Sprinkle in ground cumin, dried oregano, salt, and black pepper. Pour in enough beef broth to cover the meat. Simmering until fork-tender Bring the pot to a boil over high heat. Once boiling, lower the heat and let it simmer for about 3 hours. The meat should become fork-tender. This long cooking time allows the flavors to blend well. Blending the sauce with drained chiles After the meat is done cooking, drain the softened chiles. Transfer them to a blender with the soaking water. Blend until smooth. This sauce adds depth to your tacos. Shredding the cooked meat and mixing Carefully take the meat out of the pot. Use two forks to shred it into bite-sized pieces. Return the meat to the pot along with the blended chile sauce and apple cider vinegar. Stir everything well and let it simmer for another 30 minutes. This melding of flavors makes each bite special. To ensure tender and flavorful meat, choose the right cuts. I recommend beef chuck and beef shank. These cuts have enough fat and connective tissue, which breaks down during cooking. This makes the meat juicy and easy to shred. For the best flavor, cook the meat low and slow. Simmer it for about three hours. This slow cooking helps the spices mix well with the meat. Stir occasionally to keep things even. When it comes to soaking chiles, time is key. After toasting the guajillo and ancho chiles, soak them for about 15 minutes. This softens them and helps blend them smoothly into the sauce. Don’t rush this step; it makes a difference in taste. Serve your birria tacos with reserved broth for dipping. This adds a rich flavor and keeps the tacos moist. Use small bowls for easy dipping. For garnishing, fresh cilantro and diced onion add a nice touch. You can even sprinkle some shredded cheese on top. Lime wedges are a must! They give a bright taste that enhances the flavors. Arrange the tacos on a platter. This makes them look inviting. Encourage guests to dip their tacos into the warm broth. It’s a fun and tasty experience! {{image_4}} You can use different meats for birria tacos. Lamb and pork are great choices. Both bring their own unique flavors. Lamb offers a rich taste, while pork is sweet and tender. If you prefer a vegetarian option, try jackfruit or mushrooms. They soak up flavors well. Use the same spices and cooking methods to create a tasty dish. You can add fun flavors to your birria sauce. Try spices like smoked paprika or cinnamon for depth. A touch of chipotle can give it a nice kick. Don't be afraid to experiment with fresh herbs too. Fresh thyme or bay leaves can brighten the dish. Toppings are also key to your tacos. Consider adding avocado slices for creaminess. You can also drizzle some salsa verde for a zesty finish. For a crunch, try adding radishes or cabbage. The choices are endless, so mix and match! To keep your birria tacos fresh, refrigerate any leftovers. Place the meat in an airtight container. Store the tortillas separately to keep them from getting soggy. You can freeze the meat too. Use a freezer-safe container and seal it well. When you reheat, add a bit of broth to make the meat juicy again. For reheating, you can use the stove or microwave. If using the stove, heat the meat in a skillet over low heat. This keeps the flavor strong. For the tortillas, warm them in a pan for a few seconds on each side. This keeps them soft and pliable. The beef chuck and beef shank can last up to three days in the fridge. If frozen, they can stay good for up to three months. Dried chiles can last for a year if stored in a cool, dark place. They maintain their flavor well. For fresh cilantro and onion, use them within a week for the best taste. Keep them in the fridge in a sealed bag. If you have leftover tortillas, store them in a cool, dry spot. They last about a week. Follow these tips to keep each part fresh and flavorful! Birria tacos are a Mexican dish. They come from the state of Jalisco. Traditionally, birria uses goat meat, but beef is popular too. The dish features tender meat cooked in a rich, spicy broth. You fill soft corn tortillas with the meat and toppings. The tacos often get served with a side of the flavorful broth for dipping. This style makes them both savory and satisfying. To add more heat, you can use spicier chiles. Try adding dried chipotle chiles or cayenne pepper. Adjust the number of chiles to your taste. Another tip is to add fresh jalapeños or serrano peppers to the mix. You can also serve with hot sauce on the side. This way, everyone can spice their tacos to their liking. Yes, you can make birria tacos ahead of time. Prepare the meat and broth a day before. Store them in the fridge overnight. This helps the flavors meld together. When ready to serve, just heat the broth and meat. Warm the tortillas and assemble your tacos. You can enjoy them fresh and tasty without extra work. Birria tacos are a delicious and rewarding dish. We explored key ingredients like beef chuck and dried chiles, plus tips for perfecting your cooking. You learned how to prepare the meat and blend the sauce. Variations open the door to new flavors and even vegetarian options. Remember to store leftovers properly for the best taste. Enjoy making and sharing these tacos with friends and family. With practice, your birria tacos will impress everyone at the table.
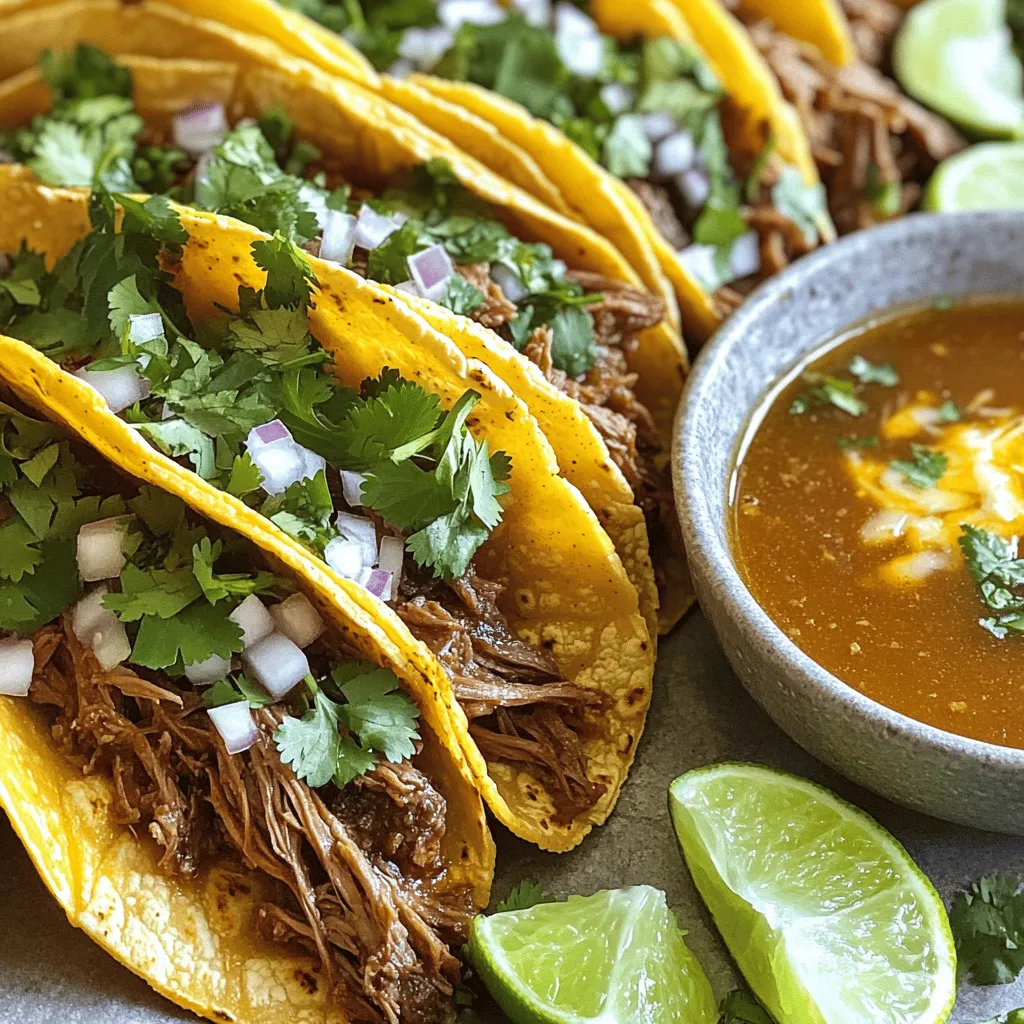
Savory Ultimate Birria Tacos Easy Flavorful Recipe
Are you ready to dive into the delicious world of birria tacos? In this easy recipe, I’ll guide you step-by-step to make savory Ultimate Birria