Desserts
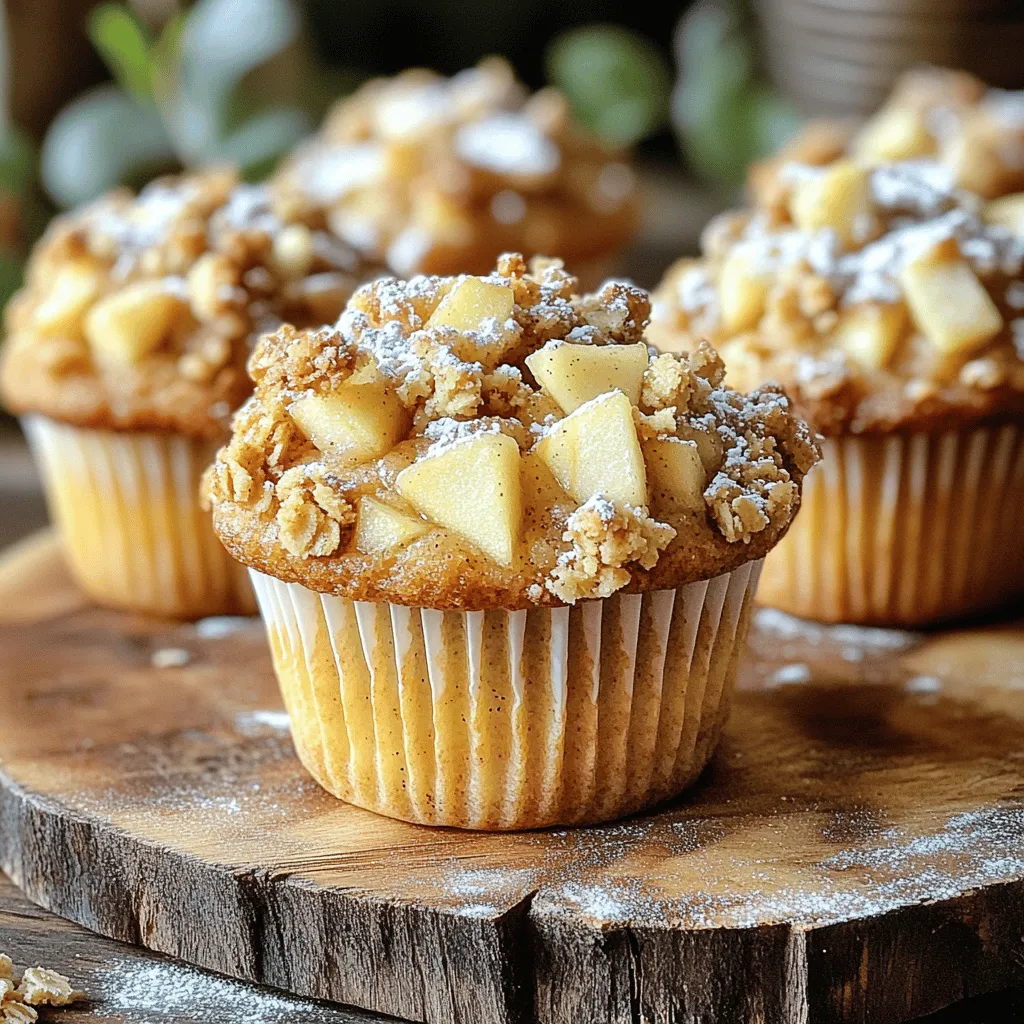
Apple Crumble Muffins Delightful Kitchen Treat
Craving a sweet kitchen treat? Let’s bake Apple Crumble Muffins! These muffins are soft, packed with juicy apples, and topped with a crunchy crumble you’ll
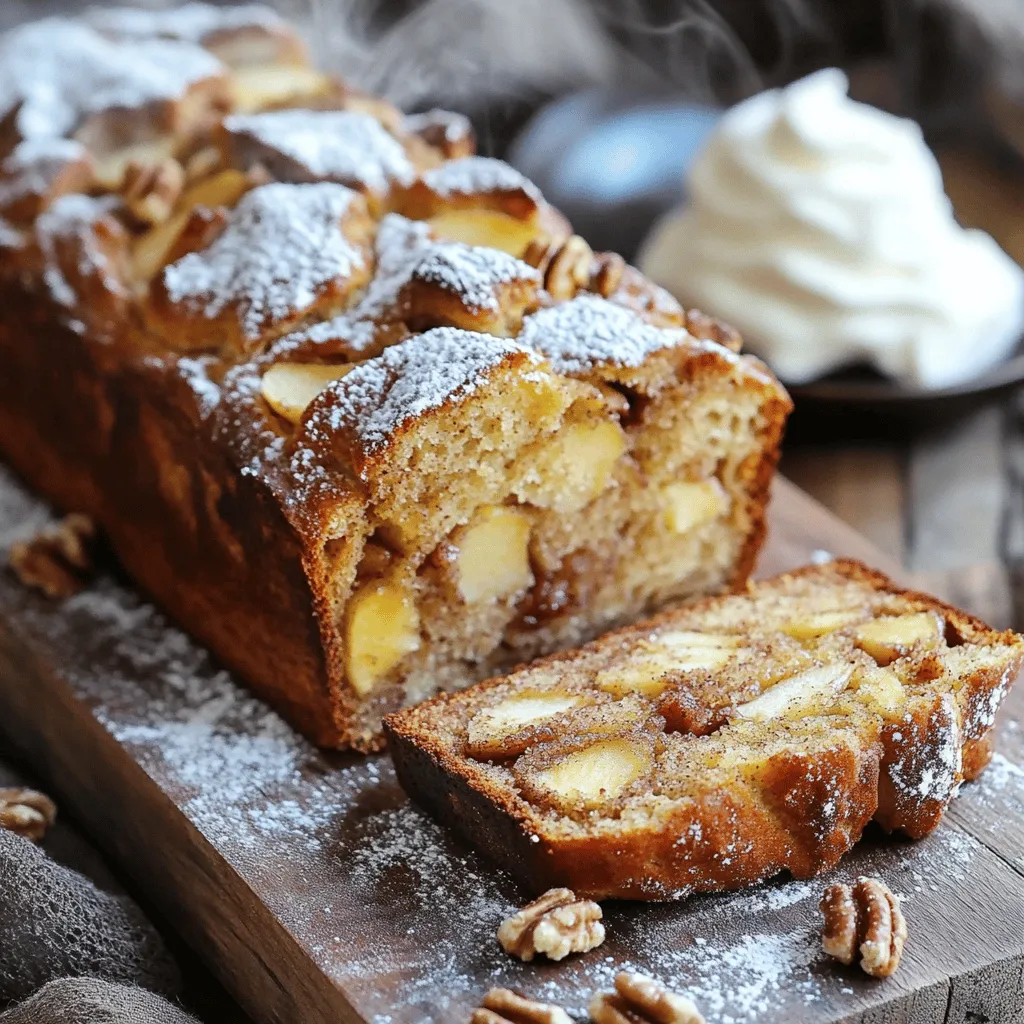
Easy Cinnamon Apple Bread Simple and Delightful Recipe
If you crave a warm, sweet treat that’s simple to make, you’ve found it! My Easy Cinnamon Apple Bread recipe is packed with flavor and
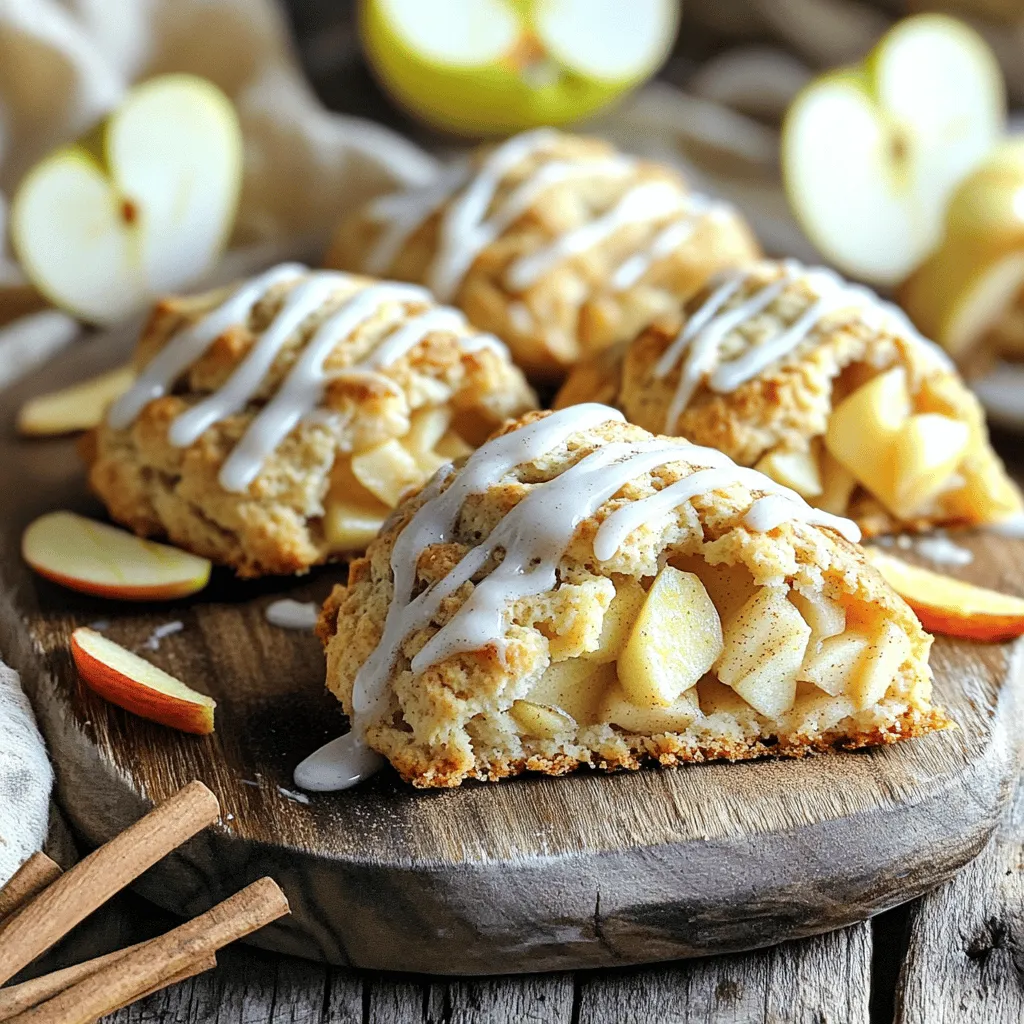
Cinnamon Apple Scones with Vanilla Drizzle Delight
Warm, buttery, and infused with sweet cinnamon, these Cinnamon Apple Scones with Vanilla Drizzle are a treat you won’t forget. In this blog post, I’ll
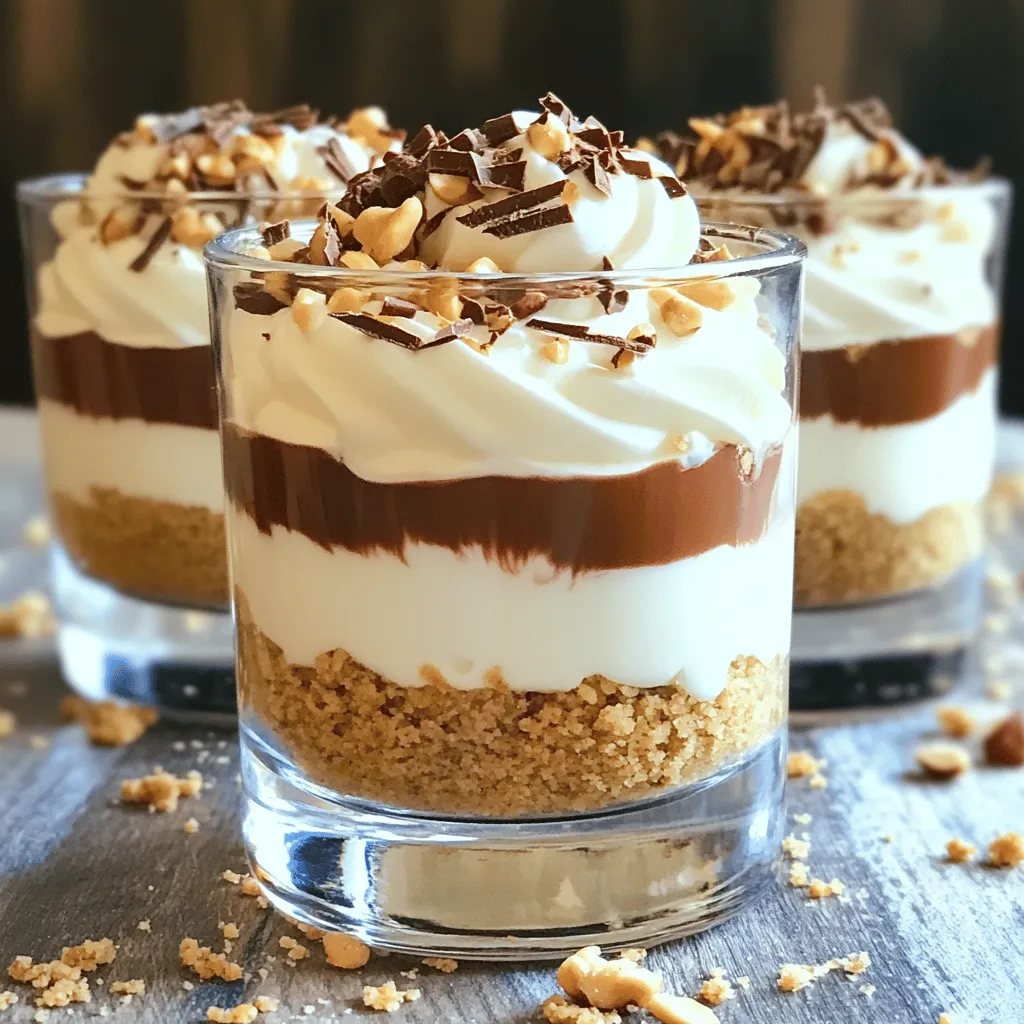
No Bake Nutella Cheesecake Cups Delicious and Easy
Are you ready for a treat that’s both easy and delicious? These No Bake Nutella Cheesecake Cups are perfect for chocolate lovers. With just a
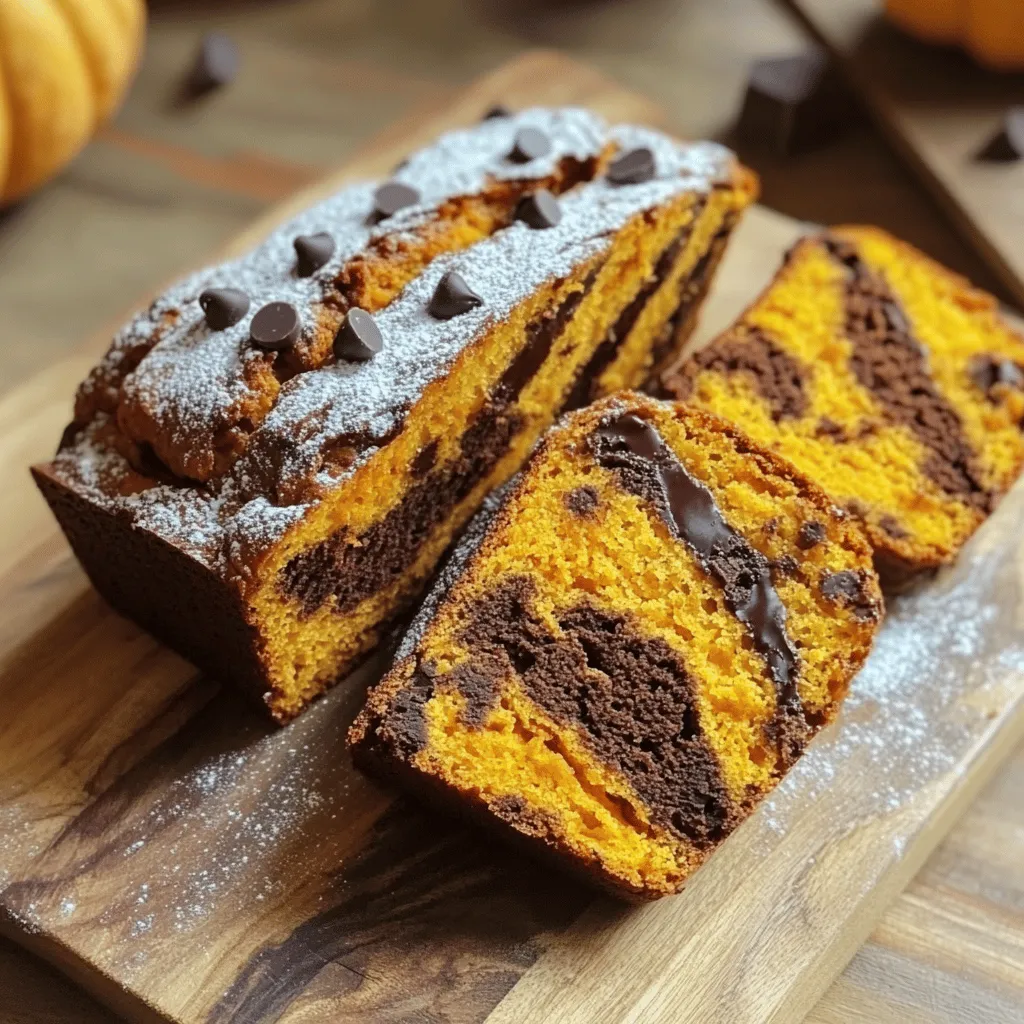
Pumpkin Chocolate Marble Bread Simple and Tasty Treat
Looking for a simple and tasty treat that combines pumpkin and chocolate? You’ve found the right recipe! This Pumpkin Chocolate Marble Bread is moist, flavorful,
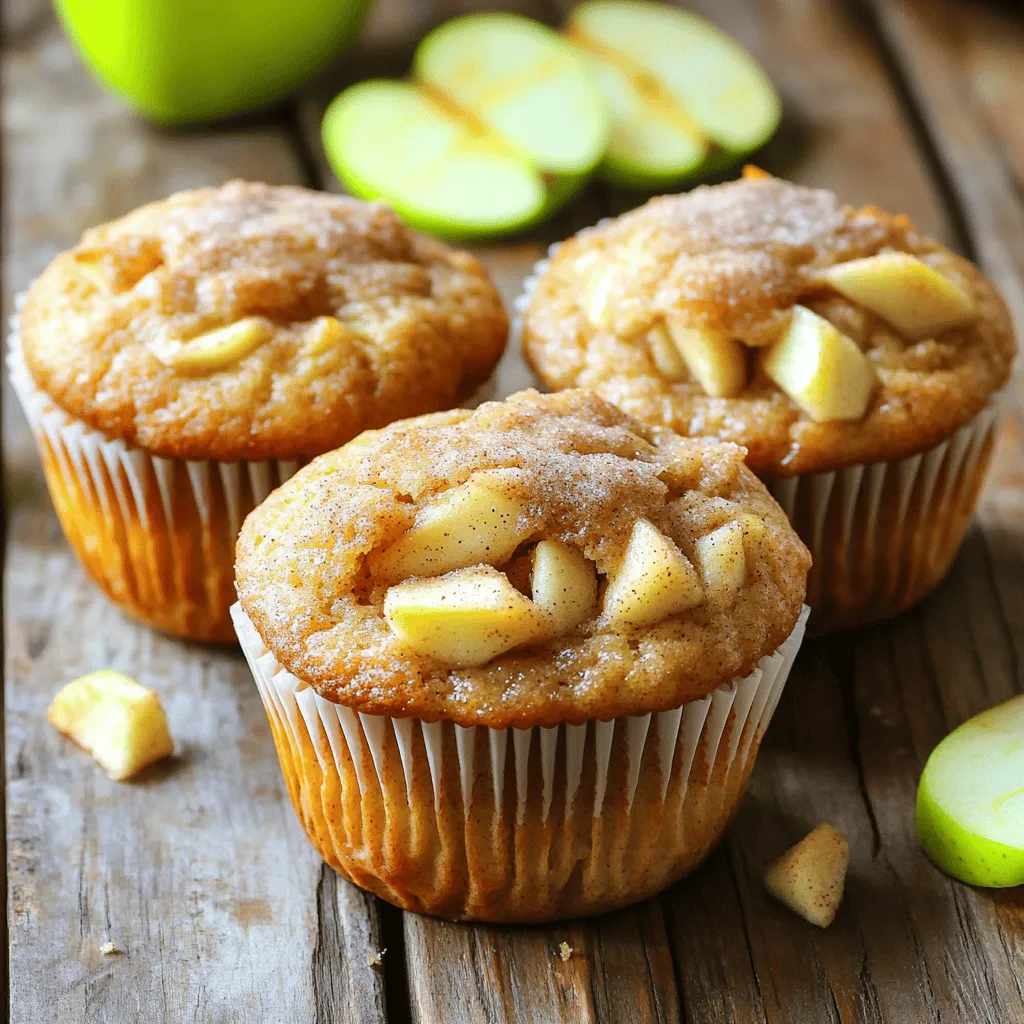
Bakery Style Cinnamon Apple Muffins Irresistible Treat
Who doesn’t love the warm, comforting smell of fresh muffins baking? In this post, I’ll show you how to make Bakery Style Cinnamon Apple Muffins
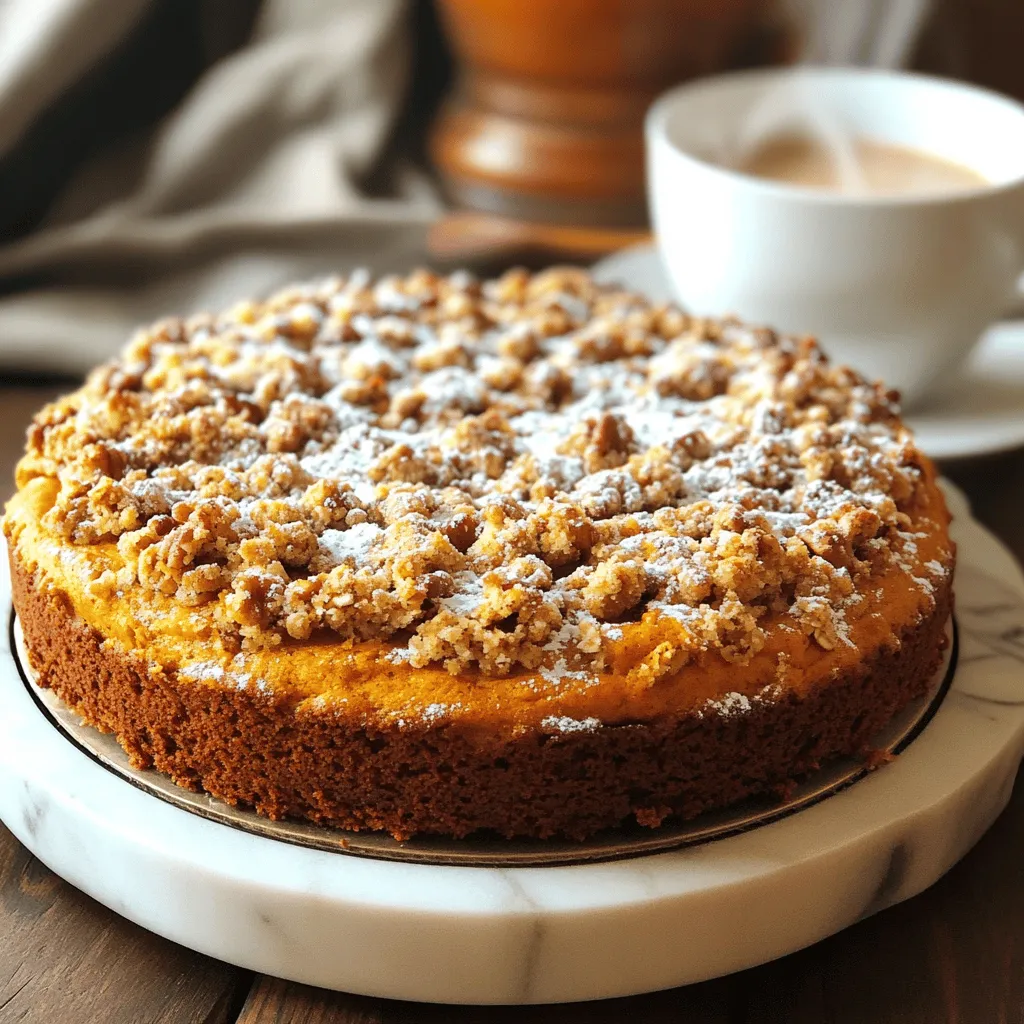
Pumpkin Streusel Coffee Cake Easy Fall Delight
Fall is the perfect time to enjoy warm, spiced treats, and this Pumpkin Streusel Coffee Cake is a must-try! With a soft, moist crumb and

No-Bake Chocolate Peanut Butter Oat Bars Delight
If you crave a sweet treat without the oven, you’re in the right place! My no-bake chocolate peanut butter oat bars are easy to make
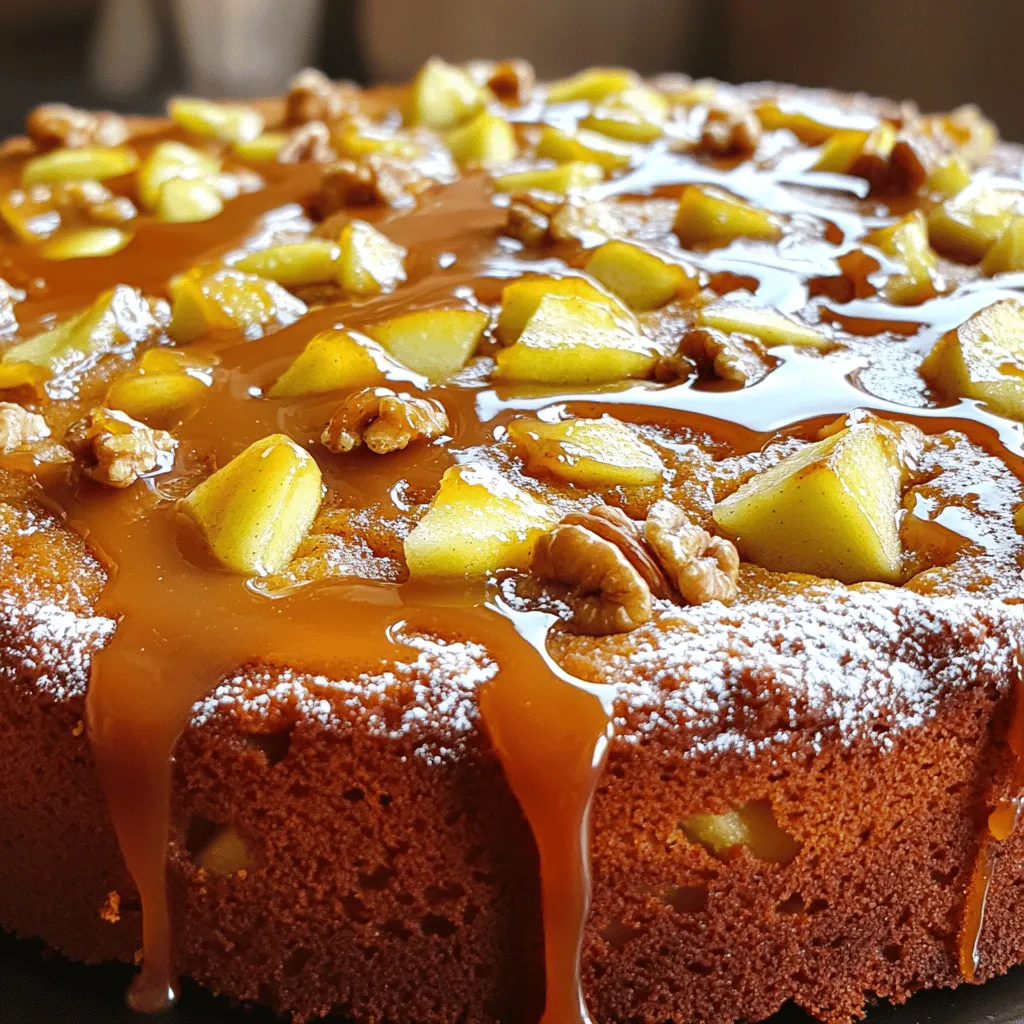
Caramel Apple Coffee Cake Delightful Homemade Treat
If you love warm, cozy flavors, then you’re in for a treat! This Caramel Apple Coffee Cake is an easy, delightful way to bring fall
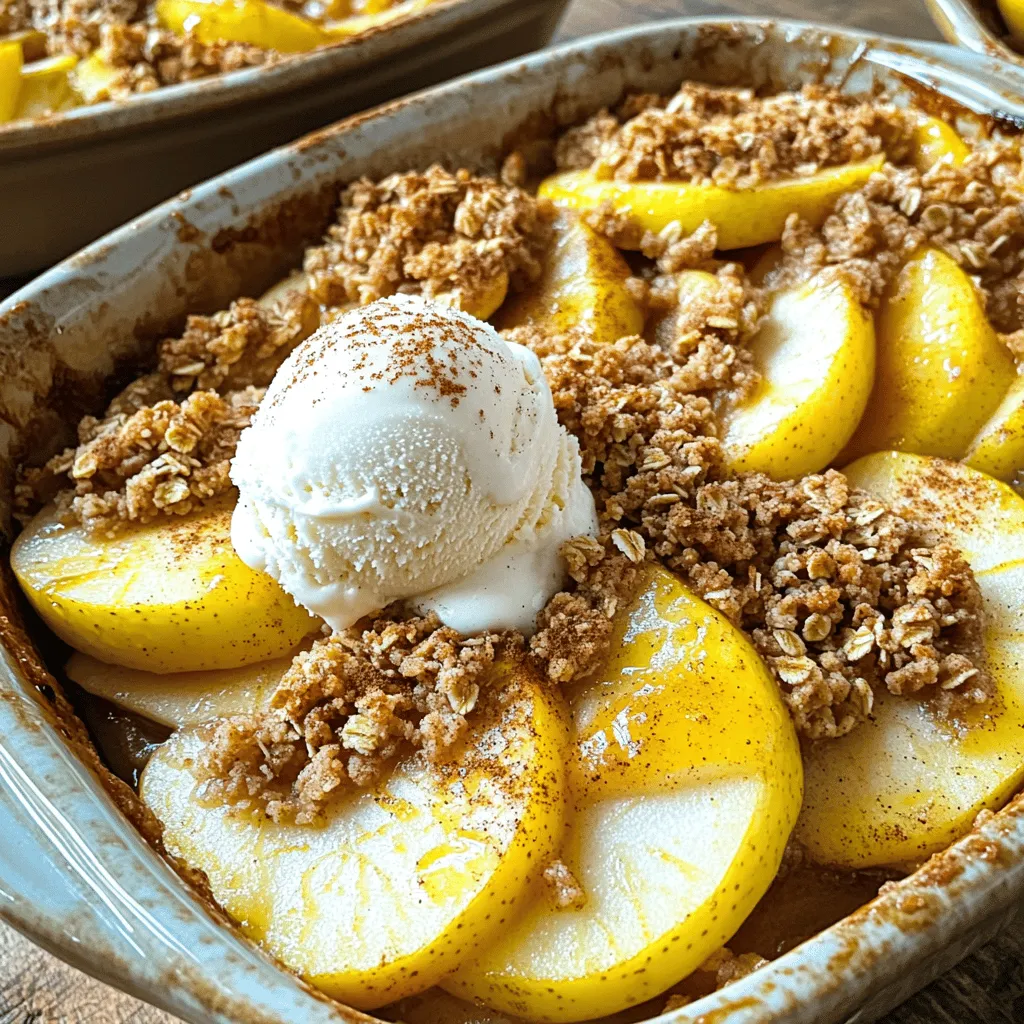
Apple Crisp with Oats Irresistible Dessert Recipe
Looking for a sweet treat that’s easy to make? This Apple Crisp with Oats recipe is perfect for you! Bursting with warm apples, a crunchy