Desserts

- 1 cup canned pumpkin puree - 1/2 cup unsalted butter, softened - 1 cup brown sugar, packed - 1/2 cup granulated sugar - 1 large egg, room temperature - 2 teaspoons pure vanilla extract - 2 cups all-purpose flour - 1 teaspoon baking soda - 1 teaspoon baking powder - 1/2 teaspoon sea salt - 1 teaspoon ground cinnamon - 1/2 teaspoon ground nutmeg - 1/4 teaspoon ground cloves - 1 cup semi-sweet chocolate chips - Substitute chocolate chips with white or dark chocolate - Add nuts or dried fruits for added texture and flavor I love using canned pumpkin puree for these cookies. It gives a rich, warm flavor. The unsalted butter adds a nice creaminess, while the sugars provide sweetness and depth. The egg binds everything together and keeps the cookies soft. The spices are key. Ground cinnamon, nutmeg, and cloves bring out the fall vibes. They make these cookies smell amazing while baking. The semi-sweet chocolate chips add a sweet touch and make them extra delicious. Feel free to switch things up! If you like white chocolate or dark chocolate, go for it. Adding nuts or dried fruits can make the cookies even more fun. - Preheat your oven to 350°F (175°C). - Line your baking sheet with parchment paper. This helps cookies bake well and not stick. - In a large bowl, cream together the softened butter, brown sugar, and granulated sugar. - Mix these for about 2-3 minutes until light and fluffy. - Next, add the pumpkin puree, egg, and vanilla extract. Mix well until smooth. - In another bowl, whisk together the flour, baking soda, baking powder, sea salt, and spices. - This helps spread the flavors evenly. - Slowly fold the dry mix into the wet ingredients. Mix gently, just until combined. A few flour streaks are fine. - Use a cookie scoop or tablespoon to drop rounded dough balls onto the baking sheet. - Make sure to space them about 2 inches apart for even baking. - Bake in the preheated oven for 12-15 minutes. Look for golden edges and soft centers. - Let the cookies rest on the baking sheet for 5 minutes, then move them to a wire rack to cool completely. To make soft pumpkin chocolate chip cookies, avoid overmixing the dough. When you combine the wet and dry ingredients, mix gently. Stop as soon as you see no flour streaks. A few lumps are okay. Overmixing can make cookies tough. Let the cookies cool on the baking sheet for a few minutes. This helps them set slightly and stay soft. After 5 minutes, move them to a wire rack to cool completely. This way, they remain soft and chewy. Chill the cookie dough for 30 minutes before baking. This gives the flavors time to blend and helps the cookies hold their shape. Chilling makes a big difference in taste and texture. Rotate the baking sheet halfway through baking. This helps the cookies bake evenly. Your cookies will come out golden all around, instead of brown on one side. Serve your warm cookies with a light dusting of powdered sugar or cinnamon. This adds a nice touch and enhances the fall flavors. Pair the cookies with seasonal drinks. A warm apple cider or a spiced latte makes for a festive treat. Your guests will love this cozy combination! {{image_4}} You can easily make these cookies gluten-free. Simply substitute the all-purpose flour with a gluten-free flour blend. Look for a blend that has a mix of flours and starches. This way, you can still enjoy the soft texture and rich flavor. Just make sure to follow the same measurements. If you want a vegan version, it’s super simple. Use vegan butter instead of regular butter. For the egg, replace it with flax eggs. To make one flax egg, mix one tablespoon of ground flaxseed with two and a half tablespoons of water. Let it sit for five minutes until it thickens. This will help bind your cookies without any animal products. Feel free to get creative with flavors! You can add different spices like ginger or cardamom. These spices will give your cookies a unique twist. Also, try using various types of chocolate chips or flavored chips. Dark chocolate, white chocolate, or even butterscotch chips can add a fun touch. The options are endless! Keep your soft pumpkin chocolate chip cookies in an airtight container. This keeps them fresh and moist. Store them at room temperature. If you follow this tip, your cookies will stay yummy for several days. You can freeze cookie dough balls. This makes baking quick and easy later. Just scoop the dough and place the balls on a tray. Freeze them until solid, then transfer to a freezer bag. For baked cookies, let them cool completely. Store them in a freezer-safe container for long-term preservation. This way, you can enjoy them anytime! When you want a warm cookie, use the microwave for a few seconds. This warms them up nicely. You can also restore freshness in the oven. Set it to a low temperature and heat for a few minutes. This keeps your cookies soft and tasty! Yes, you can use fresh pumpkin. Start by cooking the pumpkin until it's soft. Then, scoop out the flesh and puree it in a blender. Aim for a smooth texture similar to canned puree. You may need to drain excess water to avoid a soggy dough. Fresh pumpkin brings a bright flavor and a lovely color to your cookies. Look for a few signs to know when your cookies are ready. The edges will turn lightly golden. The centers should look soft and slightly puffy. You can gently press a cookie with your finger. If it springs back, they are done. Remember, cookies will firm up as they cool on the baking sheet. If your cookies spread too much, try these tips. First, chill the dough for at least 30 minutes before baking. This helps the butter firm up. Also, ensure that you measure your flour correctly; too little flour can cause spreading. Lastly, check your oven temperature with a thermometer. An oven that runs hot can lead to flat cookies. Yes, you can prepare the dough ahead of time. After mixing, wrap the dough tightly in plastic wrap. Store it in the fridge for up to three days. If you want to keep it longer, freeze the dough for up to three months. When ready to bake, thaw in the fridge overnight. Then, scoop and bake as usual. These cookies combine simple ingredients for a tasty treat. We explored the essential and optional elements needed, including various flavor boosts. I walked you through the easy steps to bake perfect cookies and shared tips for the right texture. Whether you prefer gluten-free options or vegan adaptations, there’s something for everyone. Keeping cookies fresh is easy with proper storage methods. Enjoy creating these delicious cookies, and remember to have fun while baking!
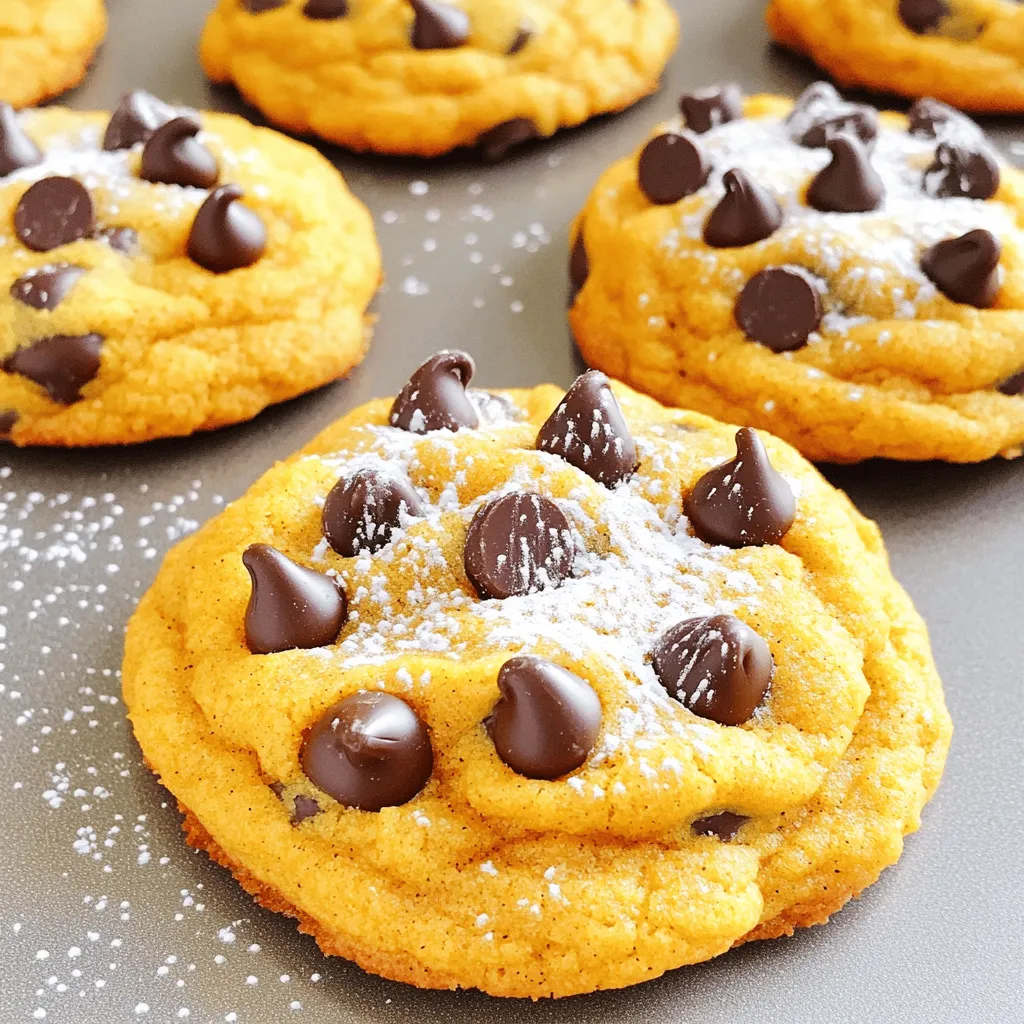
Soft Pumpkin Chocolate Chip Cookies Irresistibly Delicious
Are you ready for a tasty fall treat? These soft pumpkin chocolate chip cookies are not only easy to make, but they also bring the
For ultra moist banana nut bread, gather these key ingredients: - 3 ripe bananas, thoroughly mashed - 1/2 cup coconut oil, melted and slightly cooled - 1 cup packed brown sugar - 2 large eggs, at room temperature - 1 teaspoon pure vanilla extract - 1 teaspoon baking soda - 1/4 teaspoon fine sea salt - 1 1/2 cups all-purpose flour - 1/2 cup walnuts or pecans, roughly chopped - 1/4 teaspoon ground cinnamon (optional, but recommended) - 1/4 cup plain Greek yogurt These ingredients work together to create a rich, moist loaf. Ripe bananas are the star of this recipe. They add natural sweetness and moisture. Choose bananas with brown spots on the peel. These spots mean the sugars have developed fully. This ripeness makes the bread tender and flavorful. Mashed bananas blend easily into the batter. They give the bread that ultra moist texture we all love. Nuts add crunch and flavor to banana nut bread. I recommend using walnuts or pecans. Walnuts bring a nice earthy taste, while pecans offer a sweeter profile. Both nuts work well in the batter. Chop them roughly to ensure even distribution. This way, every slice has a bite of nutty goodness. You can experiment with other nuts too, but stick to these for the best results. First, set your oven to 350°F (175°C). This helps the banana nut bread bake evenly. Next, take a 9x5-inch loaf pan. Grease it with butter or coconut oil. You can also line it with parchment paper. This makes it easy to remove the bread later. In a large bowl, mash 3 ripe bananas until smooth. Add 1/2 cup of melted coconut oil. Mix these together until they are well blended. This step is key to keeping the bread moist. Now, slowly add 1 cup of packed brown sugar. Stir until it's fully mixed in. Next, add 2 large eggs, one at a time. Mix well after each egg. Finally, stir in 1 teaspoon of pure vanilla extract and 1/4 cup of plain Greek yogurt. This adds creaminess and moisture. In another bowl, whisk together 1 1/2 cups of all-purpose flour, 1 teaspoon of baking soda, 1/4 teaspoon of fine sea salt, and 1/4 teaspoon of ground cinnamon if you choose to use it. Make sure these dry ingredients are mixed evenly. Now, gently add the dry mix to the wet ingredients. Use a spatula or wooden spoon to combine. Stir just until mixed. Overmixing can make the bread tough. Pour the batter into the prepared loaf pan. Smooth the top with a spatula to make it even. Place the pan in the oven. Bake for 60 to 70 minutes. To check if it’s done, insert a toothpick into the center. It should come out clean or have a few moist crumbs. Once baked, let the bread cool in the pan for 10 minutes. Then transfer it to a wire rack to cool completely before slicing. To make your banana bread ultra moist, start with ripe bananas. The riper, the better! They add natural sweetness and moisture. Use three bananas and mash them well. Mixing in melted coconut oil helps too. It keeps the bread soft. Avoid overmixing when combining wet and dry ingredients. This keeps the bread tender and fluffy. Adding Greek yogurt to your batter boosts moisture. It also makes the bread richer. Use 1/4 cup of plain Greek yogurt. Mix it in with the wet ingredients. This small step makes a big difference in taste and texture. You will love the creaminess it brings to every bite. One common mistake is using under-ripe bananas. They do not provide enough moisture or sweetness. Another mistake is overmixing the batter. This can make your bread tough. Be sure to fold in the nuts gently. Lastly, remember to check for doneness. Insert a toothpick in the center. It should come out clean or with a few moist crumbs. These tips will help you bake the perfect banana nut bread! {{image_4}} To make gluten-free banana nut bread, swap out the all-purpose flour. Use a gluten-free flour blend instead. Look for one that contains xanthan gum. This helps give the bread structure. You can find many blends at your local store. For a vegan version, replace the eggs with flaxseed meal. Mix 1 tablespoon of flaxseed meal with 2.5 tablespoons of water. Let it sit for five minutes to thicken. Also, swap the Greek yogurt for a plant-based yogurt. This keeps the bread moist while being dairy-free. You can spice up your banana nut bread in many ways. Adding 1/4 teaspoon of nutmeg works well with cinnamon. You can also fold in chocolate chips or dried fruit for a twist. Try mixing in shredded coconut for a tropical touch. Each option adds unique flavor and texture. To keep your banana nut bread fresh, store it at room temperature. Wrap it tightly in plastic wrap or place it in an airtight container. This helps prevent it from drying out. If you plan to eat it within a few days, this method works great. Just remember to keep it away from direct sunlight or heat sources. Freezing banana nut bread is easy. First, let the bread cool completely. Then, slice it into individual pieces. Wrap each slice in plastic wrap. After that, place the wrapped slices in a freezer bag. Squeeze out the air before sealing the bag. This keeps your bread fresh for up to three months. When ready to enjoy, just thaw a slice at room temperature or toast it directly from the freezer. To reheat your banana nut bread, use an oven or toaster. Preheat the oven to 350°F (175°C). Place the bread or slices on a baking sheet. Heat for about 10 to 15 minutes. If using a toaster, toast each slice for a few minutes until warm. This helps restore the moist texture and delicious flavor. Enjoy it warm with a pat of butter or a drizzle of honey! Yes, you can use other oils. You can try vegetable oil or canola oil. They will work fine. You can also use melted butter for a rich flavor. Just remember, different oils can change the taste slightly. To ripen bananas fast, place them in a brown paper bag. This traps the ethylene gas they emit. It speeds up the ripening process. You can also add an apple to the bag for even faster results. If you're in a rush, you can bake unpeeled bananas at 300°F (150°C) for about 15-20 minutes. To check if your banana nut bread is ready, insert a toothpick into the center. If it comes out clean or with a few moist crumbs, it is done. If it has wet batter, bake it a bit longer. Don’t rush this step; it’s key for great bread! Yes, you can make banana nut bread without nuts. Just skip the nuts in the recipe. You can add chocolate chips or dried fruit instead. This keeps the bread moist and tasty while adding a fun twist! This blog focused on making the best banana nut bread. We covered key ingredients, like ripe bananas and nuts, and why they matter. I shared step-by-step instructions to ensure your bread is moist and delicious. You learned simple tips to avoid common mistakes and variations for special diets. In the end, treat this banana nut bread as your canvas. Let your creativity shine with flavors and mix-ins. You’ll enjoy tasty results every time you bake.
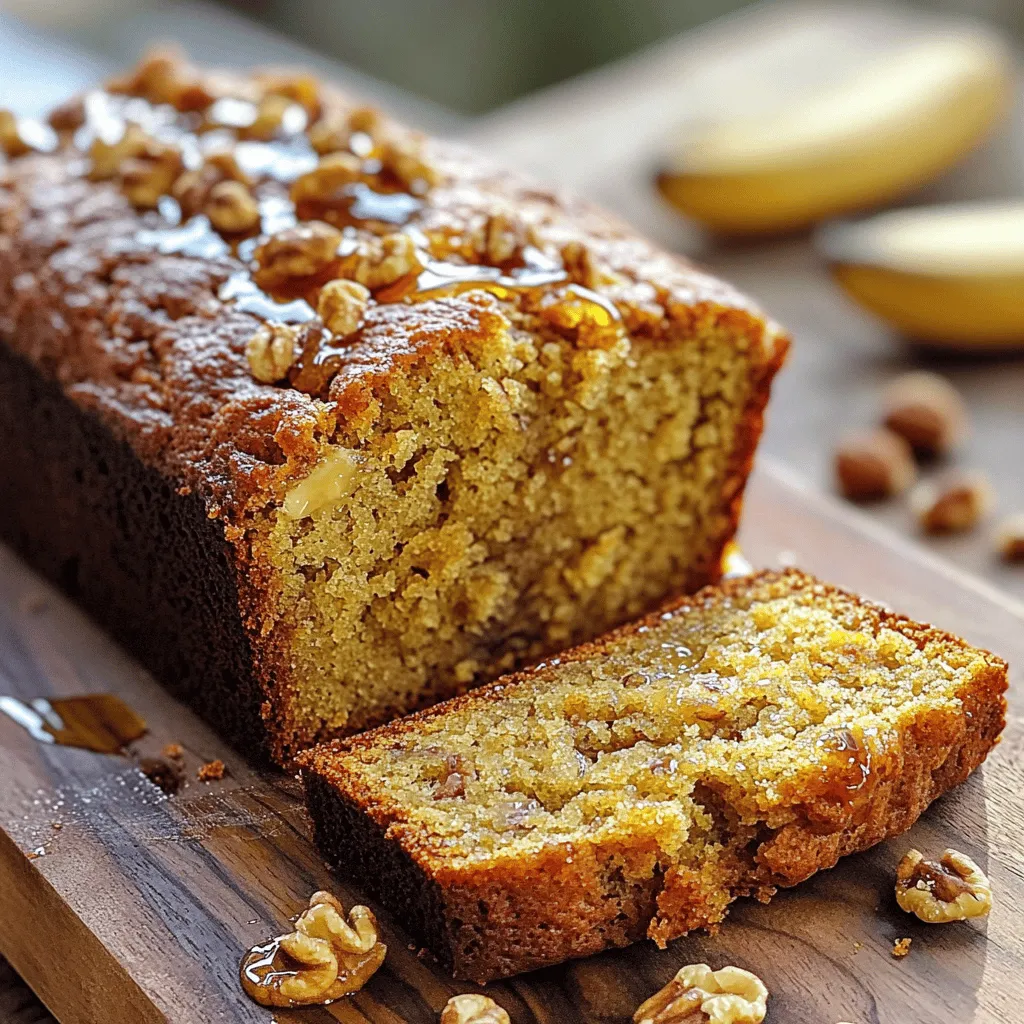
Ultra Moist Banana Nut Bread Simple and Flavorful Recipe
Welcome to my kitchen, where I’ll show you how to make ultra moist banana nut bread! This simple and flavorful recipe is perfect for breakfast
- 3 cups peeled and diced apples - 1 tablespoon freshly squeezed lemon juice - 1 teaspoon ground cinnamon - ¼ teaspoon freshly grated nutmeg - 1 cup rolled oats (whole or gluten-free) - ½ cup all-purpose flour (or gluten-free alternative) - ½ cup packed brown sugar - ½ cup unsalted butter, softened - ¼ teaspoon sea salt - Optional: 1 cup coarsely chopped walnuts or pecans The apples are the star of this recipe. I love using Granny Smith or Honeycrisp apples. They strike a perfect balance between sweet and tart. The lemon juice adds brightness to the apples. It helps keep the apples fresh. Cinnamon and nutmeg bring warmth and depth to the filling. These spices create a cozy flavor that makes the bars feel special. For the crust, I combine oats, flour, and brown sugar. This mix creates a delicious base and a crunchy topping. If you want to add a bit of crunch, toss in some chopped walnuts or pecans. They add a nice texture. Using unsalted butter is key. It lets you control the salt in the recipe. The sea salt enhances the sweetness of the bars. By using gluten-free flour or oats, you can make this recipe accessible to everyone. This way, everyone can enjoy these tasty treats! - Preheat the oven to 350°F (175°C). - Line a 9x9 inch baking pan with parchment paper. Leave some paper hanging over the edges. This makes it easy to lift the bars out later. - In a bowl, combine 3 cups of diced apples with 1 tablespoon of lemon juice. - Add 1 teaspoon of ground cinnamon and ¼ teaspoon of freshly grated nutmeg. - Toss the apples until they are evenly coated. Set this mixture aside for now. - In another bowl, mix 1 cup of rolled oats, ½ cup of flour, and ½ cup of brown sugar. - Add ½ cup of softened butter and ¼ teaspoon of sea salt. - Blend these ingredients with your hands or a pastry cutter until the mixture looks crumbly. - Set aside 1 cup of this oat mixture for the topping. Press the rest into the bottom of the lined pan to create a crust. - Pour the apple mixture evenly over the oat crust. - Sprinkle the reserved oat topping over the apples. If you like, add some chopped walnuts or pecans for extra crunch. - Place the pan in your preheated oven. Bake for 30-35 minutes until the top is golden brown. - Once done, let it cool in the pan for 10 minutes. After that, carefully lift the bars out using the parchment paper. Transfer them to a wire rack to cool completely before slicing. When making apple crisp bars, choose apples that are crisp and flavorful. I recommend using Granny Smith or Honeycrisp apples. These apples give a great balance of tartness and sweetness. They hold their shape well when baked, which is key for a good texture. Lemon juice is also important. It helps prevent the apples from browning and adds a nice zing to the flavor. Just one tablespoon mixed with your apples does wonders. Feel free to add your favorite spices to the filling. Ground ginger or allspice can enhance the flavor. You could also mix in other fruits, like sliced pears or berries, for added variety. If you need gluten-free options, swap out regular flour for a gluten-free flour blend. You can use gluten-free oats to keep the recipe safe for those with gluten sensitivities. For a delightful touch, serve the bars warm with a scoop of vanilla ice cream or a dollop of whipped cream on top. This contrast in temperature and texture is simply amazing. To make your bars look fancy, dust them lightly with powdered sugar before serving. This gives a beautiful finish to your apple crisp bars, making them even more tempting. {{image_4}} You can easily make these apple crisp bars nut-free. Just leave out the walnuts or pecans. You can also add seeds for texture. Sunflower seeds work great, or try pumpkin seeds for a fun twist. Feel free to switch up the fruit based on the season. You can use berries like blueberries or strawberries in spring and summer. For fall, consider adding sliced peaches or plums. Adjust your spices too! Use cardamom for a warm flavor in winter or lemon zest for brightness in summer. Want a healthier version? Reduce the sugar by half. You can also use applesauce instead of butter. It keeps the bars moist while cutting down on fat. Just replace half of the butter with applesauce. This way, you can enjoy a delicious treat with less guilt! To keep your apple crisp bars fresh, follow these tips: - Cool Completely: Let the bars cool down fully before storing. - Use Airtight Containers: Store them in airtight containers to prevent drying out. - Layer with Parchment: If stacking, place parchment paper between layers to avoid sticking. - Keep in a Cool Place: Store in a cool, dry spot or the fridge for extra freshness. Freezing is a great way to save apple crisp bars for later. Here are the steps to freeze: 1. Cool Bars First: Make sure the bars are completely cool. 2. Wrap Tightly: Wrap them in plastic wrap or aluminum foil. 3. Use Freezer Bags: Place the wrapped bars in freezer-safe bags. 4. Label and Date: Write the date on the bag so you remember when you froze them. For thawing: - Thaw in the Fridge: The best way is to move them to the fridge for several hours or overnight. - Reheat for Warmth: If you want them warm, reheat in the oven at 350°F (175°C) for about 10 minutes. These methods help maintain the flavor and texture of your delicious apple crisp bars! Yes, you can make Apple Crisp Bars ahead of time. To do this, prepare the bars as instructed and let them cool completely. Once cooled, cut them into squares and store them in an airtight container. They will stay fresh for up to three days. You can also freeze the bars for up to three months. Just wrap them tightly in plastic wrap and place them in a freezer-safe bag. When you want to enjoy them, simply thaw in the fridge overnight. To tell if your bars are done, look for a golden brown top. The apples should be soft but not mushy. You can also check by inserting a toothpick into the center. If it comes out clean or with a few crumbs, your bars are ready. The wonderful smell of baked apples and cinnamon will fill your kitchen, too! Absolutely! While Granny Smith and Honeycrisp are great choices, many apples work well in this recipe. Fuji, Gala, or Braeburn apples add sweetness and flavor. Mixing different apple types can create a more complex taste. Just make sure to peel and dice them before using. To cut your bars neatly, let them cool completely on a wire rack. Use a sharp knife for clean slices. If you want to serve them warm, heat each piece in the microwave for a few seconds. Pair them with a scoop of vanilla ice cream or a dollop of whipped cream for a treat everyone will love! You can dust the top with powdered sugar for an extra touch. You've learned how to create delicious apple crisp bars using simple ingredients and easy steps. By choosing the right apples and personalizing your mix, you can make a treat that suits your taste. Don't forget to store leftovers properly or freeze them for later. Enjoy these bars on their own or with your favorite toppings. With these tips, you can impress friends and family. Bake a batch today and savor every bite. It’s a tasty way to enjoy apples!
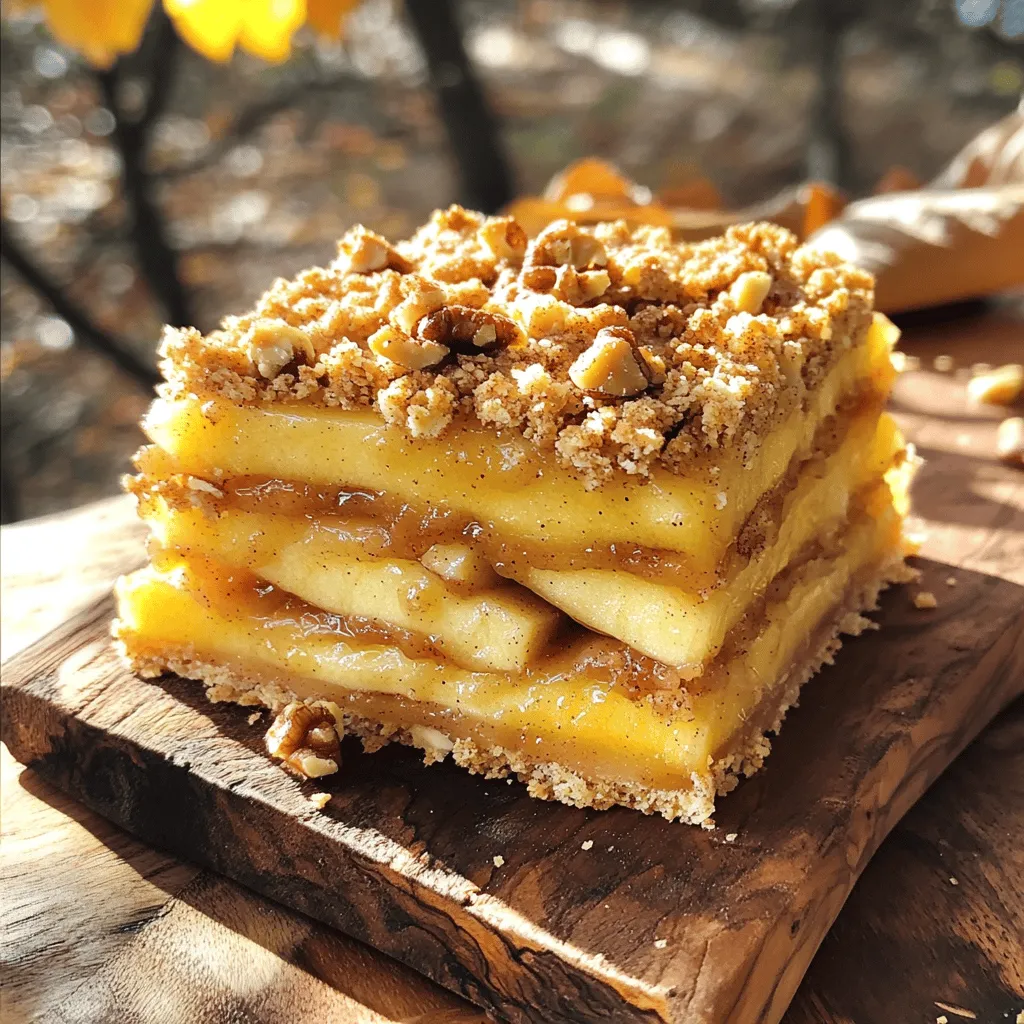
Easy Apple Crisp Bars Delicious and Homemade Treat
If you’re craving a warm, homemade treat, these Easy Apple Crisp Bars are just what you need. Imagine biting into a chewy oat crust, layered
- 1 ½ cups all-purpose flour - 1 teaspoon baking powder - ½ teaspoon baking soda - ½ teaspoon salt - 1 teaspoon ground cinnamon - ¾ cup unsalted butter, melted - 1 cup brown sugar, packed tightly - 2 large eggs, at room temperature - 1 teaspoon vanilla extract - 1 large apple, peeled and finely diced (approximately 1 cup) - ½ cup chopped walnuts (optional, for added crunch) - 1 cup powdered sugar, sifted - 3 tablespoons pure maple syrup - 1 tablespoon milk (add more as needed for desired consistency) - Pinch of salt Gather these items before you start. Each ingredient plays a key role in the taste and texture of your blondies. The all-purpose flour gives structure, while baking powder and baking soda help them rise. Salt and ground cinnamon bring out the sweetness. For the wet ingredients, melted butter adds richness. Brown sugar gives a lovely caramel flavor. Eggs bind everything together, and vanilla adds a warm note. The diced apple adds moisture and a fruity bite, while walnuts give a nice crunch. You can skip them if you prefer. For the maple glaze, powdered sugar creates a sweet topping. Pure maple syrup adds a deep flavor, and milk helps thin the glaze to your liking. A pinch of salt balances the sweetness. Make sure to have everything ready before you mix. This way, you can focus on creating these delicious Apple Cinnamon Blondies with Maple Glaze. Enjoy the process! - Preheat the oven to 350°F (175°C). - Grease an 8x8 inch baking dish and line it with parchment paper. In a medium bowl, whisk together these dry ingredients: - 1 ½ cups all-purpose flour - 1 teaspoon baking powder - ½ teaspoon baking soda - ½ teaspoon salt - 1 teaspoon ground cinnamon Mix them until they are well combined, then set the bowl aside. In a large bowl, combine: - ¾ cup melted unsalted butter - 1 cup packed brown sugar Whisk them together until smooth. Then add: - 2 large eggs (at room temperature) - 1 teaspoon vanilla extract Mix until everything is blended well. Gently fold in: - 1 large apple, peeled and finely diced - ½ cup chopped walnuts (if desired) Now pour the dry mixture into the wet mixture. Stir gently until just combined. Be careful not to overmix; it's okay if some lumps remain. Transfer the batter to the prepared baking dish. Spread it evenly and bake for 25-30 minutes. Check for doneness by inserting a toothpick; it should come out clean or have a few moist crumbs. Let the blondies cool in the pan for about 10 minutes. Then move them to a wire rack to cool completely. To make the maple glaze, mix in a small bowl: - 1 cup sifted powdered sugar - 3 tablespoons pure maple syrup - 1 tablespoon milk - A pinch of salt Whisk until smooth. Drizzle the glaze over the cooled blondies, letting it set for 15 minutes. Cut the blondies into squares and enjoy! To make great blondies, you must avoid overmixing the batter. Overmixing can cause them to get tough. Mix until just combined. You want some lumps in the batter for a nice texture. Checking for doneness is key. Insert a toothpick in the center. If it comes out clean or with a few crumbs, they are ready. If it has wet batter, bake a few minutes longer. You can add spices or nuts to boost flavor. A pinch of nutmeg or ginger can add warmth. Chopped walnuts give a nice crunch and nutty taste. Feel free to mix and match! Using different apple varieties changes the taste too. Sweet apples like Fuji or Honeycrisp work well. Tart apples like Granny Smith add a nice zing. Dusting with powdered sugar adds a lovely touch. It makes the blondies look fancy and inviting. Use a fine sieve for even coverage. Garnishing with apple slices creates a beautiful plate. Arrange them next to the blondies. This adds color and freshness to your dessert. Enjoy! {{image_4}} You can change up the maple glaze for a twist. Here are two great ideas: - Chocolate glaze: Melt some chocolate chips with a bit of cream. Stir until smooth. Drizzle this over your blondies. It adds a rich flavor that pairs well with apples. - Cream cheese frosting: Mix cream cheese, powdered sugar, and a little vanilla. This frosting is thick and sweet. Spread it on top for a tangy taste that complements the spices. You can make these blondies fit your diet. Here are some swaps: - Gluten-free: Use a gluten-free flour blend. This works well and keeps the blondies soft. - Vegan: Replace eggs with flax eggs. Mix 1 tablespoon of ground flaxseed with 2.5 tablespoons of water per egg. Let it sit until it thickens. Use coconut oil instead of butter, and your blondies will be vegan! Make your blondies special for any time of year. Here are two ideas: - Adding cranberries: Mix in dried cranberries for a fall twist. They add a tart flavor that balances the sweetness. - Incorporating pumpkin: Fold in some pure pumpkin puree for a holiday flavor. It gives a nice color and moist texture. Plus, it’s a festive treat! To keep your apple cinnamon blondies fresh, use an airtight container. This helps prevent them from drying out. You can store them at room temperature for up to three days. If you prefer, you can also refrigerate them. Just make sure they are in an airtight container. Refrigeration may change their texture slightly, making them a bit firmer. If you want to save your blondies for later, freezing is a great option. First, let them cool completely. Then, wrap them tightly in plastic wrap. Next, place the wrapped blondies in a freezer-safe bag or container. This will help keep them fresh. When you're ready to enjoy them, take them out and let them thaw at room temperature. You can also warm them up in the microwave for a few seconds. When stored properly, your apple cinnamon blondies can last up to one week at room temperature. In the fridge, they can stay fresh for about ten days. If you freeze them, they will keep for about three months. Just remember to label your container with the date, so you know when you made them! Yes, you can. For a gluten-free option, try using almond flour or a gluten-free blend. Both work well in blondies. If you want a heartier taste, whole wheat flour is a good choice. Just keep in mind that it may change the texture slightly. To reduce sweetness, cut the brown sugar by a quarter cup. You can also use less maple glaze on top. If you want it sweeter, add a bit more sugar or maple syrup to the batter. Always taste before baking to get it just right. If you're looking for vegan options, use flax eggs. Mix one tablespoon of ground flaxseed with three tablespoons of water. Let it sit for a few minutes until it thickens. You can also use unsweetened applesauce; one quarter cup replaces one egg. Absolutely! You can add more apples for extra flavor. Diced pears or chopped peaches work well too. For a fun twist, try adding a handful of dried cranberries. They add a nice chewiness and tartness. Let the blondies cool in the pan for about 10 minutes. Then, transfer them to a wire rack to cool completely. This step helps the glaze set better and keeps it from melting. Wait at least 15 minutes after glazing before cutting. You now know how to make delicious blondies with a maple glaze. I covered key ingredients, tips for perfect texture, and storage advice. Remember, don’t overmix the batter for the best result. Feel free to adjust the recipe based on your taste and dietary needs. Experiment with different flavors and enjoy the process of baking. Your kitchen will smell amazing, and the blondies will impress everyone. Get ready to share these treats with family and friends!
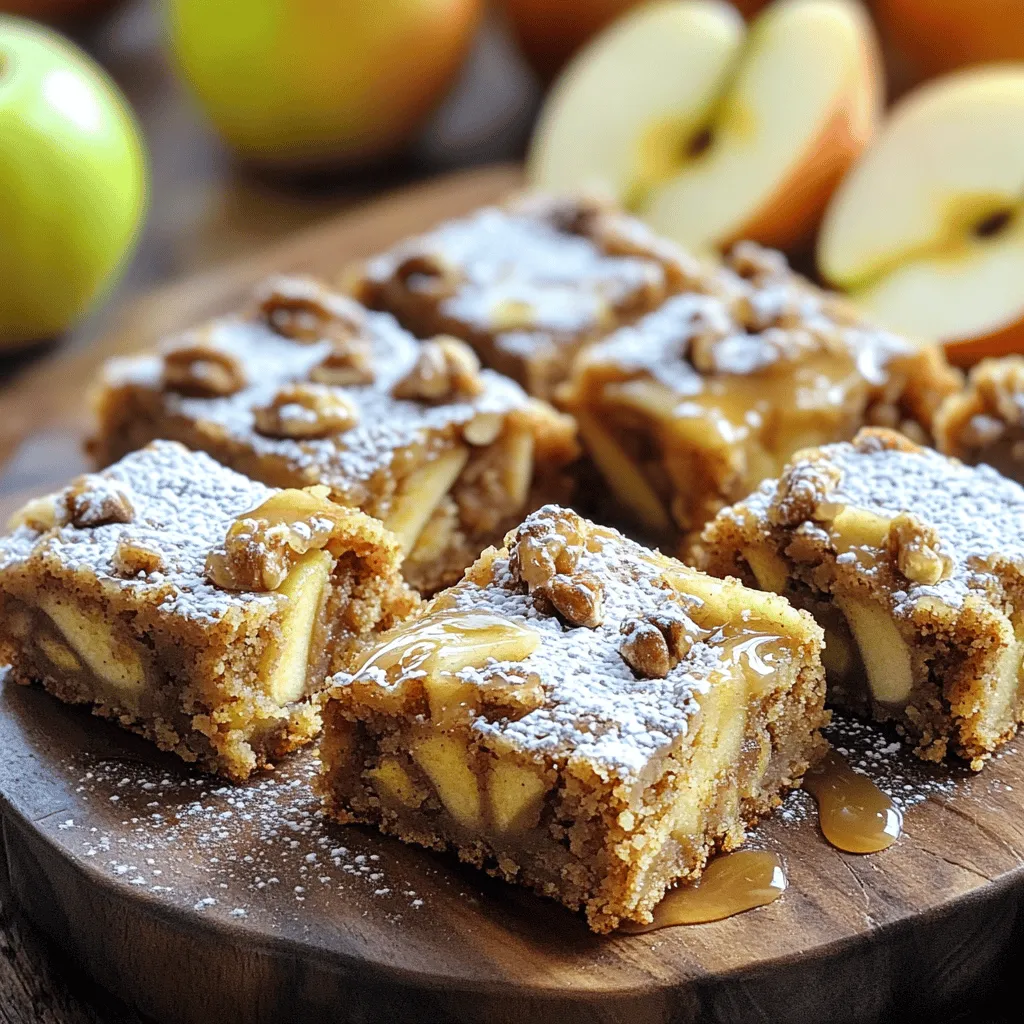
Apple Cinnamon Blondies with Maple Glaze Delight
Love the warm flavors of fall? You’ll adore my Apple Cinnamon Blondies with Maple Glaze! These chewy blondies combine sweet apples and spices, topped with
- 1 cup canned pumpkin puree - 2 ripe bananas, well mashed - 2 large eggs - 1/4 cup honey or maple syrup - 1/4 cup unsweetened applesauce - 1 teaspoon pure vanilla extract - 1 1/2 cups whole wheat flour - 1 teaspoon baking powder - 1/2 teaspoon baking soda - 1 teaspoon ground cinnamon - 1/2 teaspoon ground nutmeg - 1/4 teaspoon salt - 1/2 cup dark chocolate chips These muffins are packed with goodness. Pumpkin provides beta-carotene, which is great for your eyes. Bananas offer potassium, good for your heart. Eggs add protein, helping you feel full. Whole wheat flour gives fiber, aiding digestion. Dark chocolate chips add antioxidants, making these treats even better. Using honey or maple syrup gives natural sweetness with added minerals. Applesauce keeps the muffins moist without extra fat. You can make swaps if needed. For the pumpkin puree, you can use homemade if you have it. If you don’t have bananas, try unsweetened yogurt or another fruit puree. You can use flax eggs instead of regular eggs for a vegan option. If you want a gluten-free version, swap the whole wheat flour for almond or oat flour. For sweeteners, agave syrup works well too. Start by preheating your oven to 350°F (175°C). While it warms up, grab a muffin tin. You can line it with paper liners or lightly grease it. This step helps prevent sticking. In a large bowl, mix the wet ingredients. Combine 1 cup of canned pumpkin puree with 2 mashed bananas. Add in 2 large eggs, 1/4 cup of honey or maple syrup, 1/4 cup of unsweetened applesauce, and 1 teaspoon of pure vanilla extract. Stir until the mixture is smooth and well blended. In another bowl, whisk together the dry ingredients. Use 1 1/2 cups of whole wheat flour, 1 teaspoon of baking powder, 1/2 teaspoon of baking soda, 1 teaspoon of ground cinnamon, 1/2 teaspoon of ground nutmeg, and 1/4 teaspoon of salt. Mix until everything is combined well. Now, it's time to combine the wet and dry mixtures. Gradually add the dry mixture to the wet ingredients, stirring gently. Mix just until combined. The batter should still be slightly lumpy. This ensures your muffins turn out soft and fluffy. Next, fold in 1/2 cup of dark chocolate chips. Make sure they are evenly mixed throughout the batter. You can use dairy-free chips if you prefer. Use a spoon or scoop to fill each muffin cup about 2/3 full. This allows space for the muffins to rise as they bake. Place the muffin tin in your preheated oven. Bake for 18 to 20 minutes. To check if they are done, insert a toothpick into the center of a muffin. If it comes out clean, they are ready. Once baked, let the muffins cool in the pan for 5 minutes. Then, transfer them to a wire rack to cool completely. To get the best muffin texture, mix your wet and dry ingredients gently. Overmixing can lead to tough muffins. You want the batter to be a little lumpy. This keeps it soft and fluffy. If you notice some flour pockets, that's okay. They will disappear as the muffins bake. Make sure your oven is preheated to 350°F (175°C) before you bake. This helps the muffins rise evenly. Use a muffin tin lined with paper cups or greased lightly. This prevents sticking and helps with easy removal. Bake for 18-20 minutes, but start checking at 18 minutes. Insert a toothpick into the center. If it comes out clean, your muffins are done! Serve these muffins warm for the best taste. Try adding a pat of almond butter on top for extra flavor. You can also sprinkle a few chocolate chips on top before baking for a fun look. These muffins pair well with a hot cup of coffee or tea. They make a great snack or breakfast choice. Enjoy sharing them with family or friends! {{image_4}} You can easily make these muffins gluten-free. Simply replace whole wheat flour with a gluten-free flour blend. Look for one that includes xanthan gum, as it helps with texture. You may need to adjust the liquid slightly. Add a little more applesauce if the batter feels too dry. To make these muffins vegan, swap the eggs for flax eggs. Mix one tablespoon of ground flaxseed with three tablespoons of water. Let it sit for five minutes until it thickens. Use maple syrup instead of honey for sweetness. This keeps the muffins plant-based and still delicious. You can enhance the flavor of your muffins with add-ins. Consider mixing in nuts like walnuts or pecans for a crunch. Add a tablespoon of pumpkin spice for extra warmth. You can also toss in dried fruit like cranberries or raisins. Each option brings a new taste to your muffins. To keep your healthy pumpkin chocolate chip muffins fresh, store them in an airtight container. This helps to keep moisture in and prevents them from drying out. Place a paper towel at the bottom of the container to absorb excess moisture. You can keep them at room temperature for up to three days. If you want them to last longer, consider refrigerating them. They will stay good for about a week in the fridge. When you are ready to enjoy your muffins again, reheating is simple. You can use a microwave for quick results. Place a muffin on a plate and heat it for about 15-20 seconds. This warms it up nicely. If you prefer a crispier texture, try using an oven. Preheat it to 350°F (175°C), then warm the muffins for about 5-10 minutes. This will bring back that fresh-baked taste. Freezing is a great way to save muffins for later. Allow the muffins to cool completely before freezing. Wrap each muffin in plastic wrap or foil. Then, place them in a freezer-safe bag or container. They can last up to three months in the freezer. When you're ready to eat them, take out a muffin and let it thaw in the fridge overnight. For quicker thawing, you can microwave it for 30-40 seconds. Enjoy your tasty treat anytime! Yes, you can use fresh pumpkin. Start by roasting the pumpkin. Cut it in half, scoop out the seeds, and roast it in the oven until soft. Once it's cool, mash it up. This method adds great flavor. Just remember to use the same amount as canned pumpkin. To lower the sugar, reduce the honey or maple syrup. You can cut it to 2 tablespoons. You can also replace some of it with more applesauce. This keeps the muffins moist while cutting down on sugar content. If you need a banana substitute, use unsweetened applesauce. You can also use 1/4 cup of yogurt. Another option is 1/4 cup of silken tofu, blended until smooth. Each of these will keep muffins moist. Check for doneness by inserting a toothpick into the center of a muffin. If it comes out clean, they are ready. The muffins should also spring back when lightly pressed. If they look golden brown, that's a good sign too! You learned about key ingredients for delicious muffins and their nutritional perks. The step-by-step guide makes baking easy. With tips for texture and best practices for storage, you can enjoy fresh muffins anytime. Don’t forget the fun variations to make them your own. Experimenting will help you find your favorites. Muffins can fit many diets and tastes. Dive in and enjoy baking delicious treats!
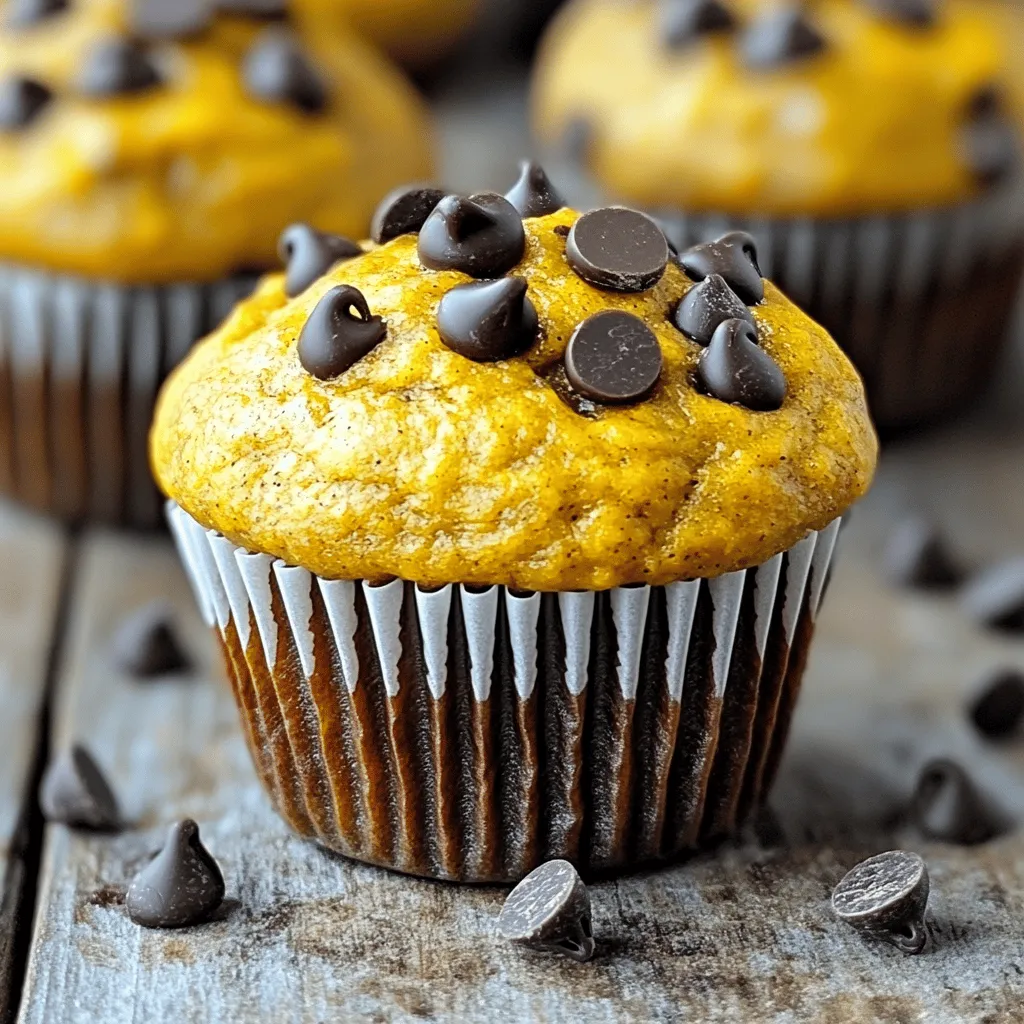
Healthy Pumpkin Chocolate Chip Muffins Delectable Treat
Are you ready to indulge in a tasty treat that’s also good for you? My Healthy Pumpkin Chocolate Chip Muffins are perfect for breakfast or
- 1 ½ cups oat flour - 1 cup canned pumpkin puree - ½ cup maple syrup - ¼ cup coconut oil, melted - 2 large eggs - 1 tsp vanilla extract - 1 tsp baking powder - 1 tsp baking soda - 1 tsp ground cinnamon - ½ tsp ground nutmeg - ¼ tsp ground ginger - ¼ tsp salt - ½ cup chopped walnuts (optional) - ¼ cup dark chocolate chips (optional) To make these oat flour pumpkin muffins, gather your ingredients. Oat flour acts as a great base. It adds a nutty flavor and keeps the muffins light. Canned pumpkin puree provides moisture and a lovely color. Maple syrup sweetens the muffins naturally. Coconut oil gives a rich taste and keeps them soft. Eggs are key for binding. Vanilla extract adds warmth. Baking powder and baking soda help the muffins rise. Spices like cinnamon, nutmeg, and ginger give that cozy fall flavor. Salt balances everything out. You can add walnuts for crunch or dark chocolate chips for sweetness. Both options make the muffins even more delicious. Enjoy the blend of flavors and textures in each bite! Start by preheating your oven to 350°F (175°C). This ensures your muffins bake evenly. Next, prepare a muffin tin. You can use paper liners or lightly grease each cup with coconut oil or cooking spray. This step helps the muffins release easily after baking. In a large mixing bowl, combine 1 ½ cups of oat flour, 1 tsp baking powder, 1 tsp baking soda, and the spices. I recommend 1 tsp of ground cinnamon, ½ tsp of ground nutmeg, ¼ tsp of ground ginger, and ¼ tsp of salt. Whisk these ingredients together well. This mix creates a flavorful base for your muffins. In another bowl, blend together 1 cup of canned pumpkin puree, ½ cup of maple syrup, ¼ cup of melted coconut oil, 2 large eggs, and 1 tsp of vanilla extract. Use a whisk or an electric mixer. Mix until everything is smooth and creamy. This blend adds moisture and sweetness to your muffins. Now, gently fold the dry ingredients into the wet mixture. Use a spatula to combine them without overmixing. Mixing too much can make your muffins dense. Aim for a few lumps; this keeps your muffins light and fluffy. If you want extra flavor and texture, fold in ½ cup of chopped walnuts and ¼ cup of dark chocolate chips. Make sure they are evenly spread throughout the batter. These add a nice crunch and sweetness that pairs well with pumpkin. Spoon the batter into the prepared muffin tin, filling each cup about ¾ full. This allows room for the muffins to rise. Bake in the preheated oven for 20-25 minutes. To check if they are done, insert a toothpick into the center of a muffin. If it comes out clean, they are ready. Let them cool in the pan for 5 minutes before transferring them to a wire rack. To make muffins that rise and stay light, avoid overmixing. When you combine the wet and dry ingredients, mix just until you see no flour. This keeps air in the batter. To check if your muffins are done, use a toothpick. Insert it into the center of a muffin. If it comes out clean, your muffins are ready. If it has batter on it, bake for a few more minutes. If you run out of maple syrup, try honey or agave syrup. Both add sweetness and keep the muffins moist. For a vegan option, replace the eggs with flax eggs. Mix one tablespoon of ground flaxseed with two and a half tablespoons of water. Let it sit for five minutes, and it will thicken. To make your muffins look special, serve them on a rustic wooden board. Dust them lightly with powdered sugar for a sweet touch. You can also add a small bowl of toasted pumpkin seeds beside the muffins. A sprig of fresh rosemary adds color and a nice aroma. Pair your muffins with coffee or a warm chai tea for a cozy treat. {{image_4}} You can make these muffins even more exciting! Here are some simple ideas: - Add Spices: Try adding cardamom or allspice to the batter. These spices bring warmth and depth. A little goes a long way, so start with 1/4 teaspoon. - Incorporate Fruits: Toss in fresh or dried fruits like blueberries or cranberries. They add brightness and a burst of flavor. Use about 1/2 cup, and fold them in gently to avoid breaking them. You can easily adjust this recipe to fit different diets: - Gluten-Free Adaptations: Oat flour is naturally gluten-free, but make sure it is certified as such. You can also mix in almond flour or coconut flour for added texture. - Nut-Free Options: If you need a nut-free version, skip the walnuts. You can replace them with seeds like sunflower or pumpkin seeds for crunch. Make your muffins festive with these seasonal twists: - Holiday-Themed Additions: For a cozy touch, add nutmeg or cloves, especially around the fall and winter. These spices make your kitchen smell amazing and taste even better. Just a pinch will do! To keep your muffins fresh, store them in an airtight container. You can also use a zip-top bag. Place a piece of parchment paper between muffins to avoid sticking. The ideal temperature for storage is room temperature. Avoid direct sunlight and heat. This will help maintain their soft texture. To freeze your muffins, let them cool completely first. Wrap each muffin in plastic wrap, then place them in a freezer-safe bag. Make sure to remove as much air as possible. For thawing, take a muffin out and leave it at room temperature. You can also heat it in the microwave for about 15-20 seconds for a warm treat. At room temperature, your oat flour pumpkin muffins last about 3-4 days. If you refrigerate them, they can last for about a week. Just remember to keep them in a sealed container to stay fresh. Enjoy your muffins while they are still soft and tasty! Oat flour is a great option for many reasons. First, it is high in fiber. Fiber helps digestion and keeps you full. Second, it contains vitamins and minerals. These include magnesium and iron. These nutrients support energy and overall health. Third, oat flour is gluten-free, making it safe for those with gluten issues. It also has a low glycemic index, which can help manage blood sugar. This makes oat flour a smart choice for a healthy treat. Yes, you can use homemade pumpkin puree! To make it, start with a small pumpkin. Cut it in half and remove the seeds. Roast the pumpkin halves face down on a baking sheet until soft. Let it cool, then scoop out the flesh. Blend the flesh until smooth. Be sure to measure your puree to match the recipe. Homemade puree can taste fresher and richer than canned. You can easily make these muffins vegan! Replace the two eggs with flaxseed meal. Mix 2 tablespoons of flaxseed meal with 6 tablespoons of water. Let it sit for 5 minutes to thicken. You can also swap maple syrup for agave syrup or coconut sugar. Use melted coconut oil instead of butter. These swaps keep your muffins tasty and plant-based. Absolutely! You can customize your muffins with fun mix-ins. Try adding chopped nuts like pecans or almonds for crunch. Dried fruit, like cranberries or raisins, adds sweetness. You can even throw in some chocolate chips for a treat! Just make sure to keep the mix-ins balanced so the muffins stay light and fluffy. If your muffins are too dense, you may have overmixed the batter. Mix until just combined. If they are too moist, check your oven temperature. Make sure it is set correctly. You can also bake them a bit longer. If your batter is too wet, add a little more oat flour to achieve the right consistency. Adjustments like these can help you bake perfect muffins! We explored how to make delicious pumpkin oat muffins with simple and healthy ingredients. You learned the step-by-step process, from mixing the batter to baking them perfectly. We also shared tips for variations, storage, and troubleshooting common baking issues. These muffins are fun to make and full of flavor. Enjoy them with your favorite drink or share them with friends. Happy baking!
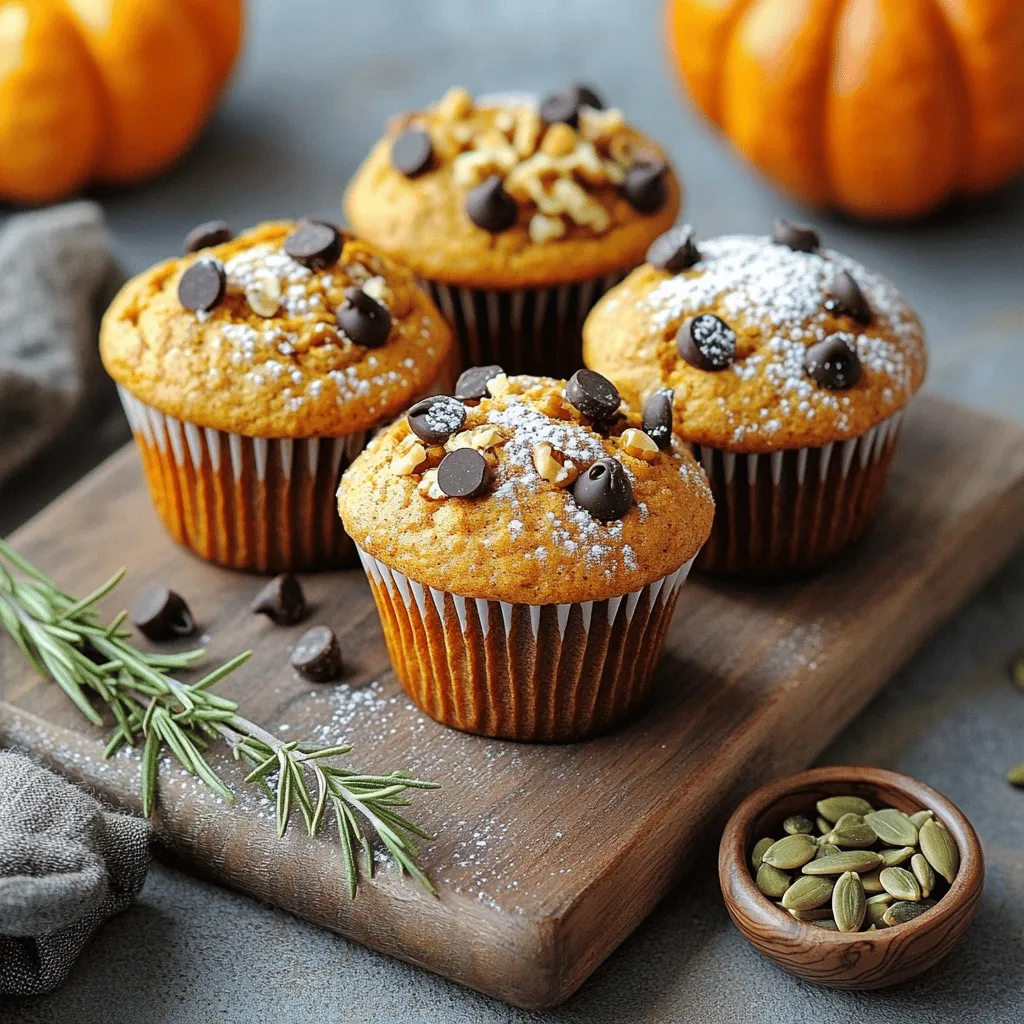
Oat Flour Pumpkin Muffins Easy and Delicious Treat
Are you ready to whip up a treat that’s both easy and delicious? Oat flour pumpkin muffins are the perfect choice! They bring the cozy
- 4 medium apples, peeled, cored, and thinly sliced - 1 cup of rolled oats - 1 cup of packed brown sugar - 1/2 cup of all-purpose flour - 1 teaspoon of ground cinnamon - 1/2 teaspoon of salt - 1/2 cup of unsalted butter, melted - 1/4 cup of chopped walnuts (optional) What can I use instead of brown sugar? You can try maple syrup or honey. Both add sweetness but change the texture a bit. For a gluten-free option, you can use almond flour or gluten-free all-purpose flour. This keeps your crisp tasty and safe for gluten-free diets. If you want a nut-free apple crisp, skip the walnuts. You can add seeds like pumpkin or sunflower for crunch without the nuts. - Preheat the oven: Start by setting your oven to 350°F (175°C). This ensures that your Apple Crisp bakes evenly. - Coating the apples with sugar and cinnamon: In a large bowl, mix the sliced apples with 1/2 cup of brown sugar and 1 teaspoon of cinnamon. Toss until all apple slices are coated. This step adds sweetness and flavor to the apples. - Mixing dry ingredients: In another bowl, combine 1 cup of rolled oats, the remaining 1/2 cup of brown sugar, 1/2 cup of all-purpose flour, and 1/2 teaspoon of salt. This mixture forms the base of your topping. - Combining with melted butter and nuts: Pour in 1/2 cup of melted unsalted butter. If you like, add 1/4 cup of chopped walnuts for extra crunch. Stir until the mix is crumbly and well-blended. - Layering the apple mixture and topping: Spread the coated apples evenly in a greased 9x13-inch baking dish. Sprinkle the crumble topping over the apples, covering them completely. This ensures that every bite is delicious. - Baking time and temperature: Place the dish in your preheated oven. Bake for 30-35 minutes. The Apple Crisp is ready when the apples are soft and the topping turns golden brown. Enjoy the warm, sweet aroma that fills your kitchen! Choosing the right apples makes a big difference. I recommend using tart apples like Granny Smith. Their firm texture holds up well in baking. You want apples that won't turn mushy. Avoid soft apples like Red Delicious for this recipe. To avoid a soggy base, layer the apples evenly. This helps them cook uniformly. Don't over-saturate the apples with sugar. Too much moisture can lead to a soggy bottom. You can prepare this apple crisp in advance. Mix the apple layer and topping before baking. Store them separately in the fridge. When you're ready, assemble and bake. This makes it easy for last-minute guests. For reheating, place the crisp in the oven. Heat it at 350°F for about 15-20 minutes. This keeps the topping crispy. You can also use a microwave, but the texture may change. Serve warm portions in individual bowls. A scoop of vanilla ice cream on top adds a creamy touch. The warm crisp and cold ice cream create a delightful contrast. Garnish with a dusting of cinnamon or nutmeg. You can also add a few chopped walnuts for extra crunch. This makes your dish look and taste even better. {{image_4}} You can change the fruit in this crisp to fit your taste. Try using pears for a sweet twist. Berries, like blueberries or raspberries, add a nice tartness. Seasonal fruits also work well. In fall, use apples and pears. In summer, mix in berries for a colorful treat. Add a dash of vanilla for extra warmth in flavor. Nutmeg is another great choice that adds depth. You can also mix in more nuts or seeds. Chopped almonds or sunflower seeds give a nice crunch. This makes your crisp even more delicious and fun. You can easily make this recipe vegan. Just swap the regular butter for plant-based butter. For a sugar replacement, try maple syrup or coconut sugar. Both work well and taste great. These changes keep the crisp tasty while meeting dietary needs. To keep your apple crisp fresh, store it properly. Place the cooled apple crisp in an airtight container. This helps lock in moisture and flavor. You can keep it in the fridge for up to three days. If you want to save it longer, freezing is a great option. For freezing, let the apple crisp cool completely. Then, wrap it tightly in plastic wrap and foil. This prevents freezer burn. You can freeze it for up to three months. When you're ready to enjoy it, simply thaw it in the fridge overnight. Reheating apple crisp can be simple and quick. The best method is to use the oven. Preheat your oven to 350°F (175°C). Place the crisp in a baking dish and cover it with foil. This keeps it moist while it heats. Bake for about 15-20 minutes until it's warm. If you're short on time, you can use a microwave. Place a portion in a microwave-safe bowl. Heat it for 30 seconds to 1 minute. Check to see if it's warm. This method may not keep the topping as crispy, but it works in a pinch. To preserve texture and flavor, always avoid overheating. You want the apples tender and the topping still crumbly. This way, every bite remains delightful. Yes, you can! Feel free to mix other fruits in your apple crisp. Here are some tasty options: - Pears: They add a sweet and juicy flavor. - Berries: Blueberries or raspberries bring a nice tartness. - Peaches: These add a lovely summer twist. - Cherries: They lend a rich, sweet flavor. Mixing fruits can change the taste and texture. Just ensure you balance sweetness. For example, if using tart berries, you might need extra sugar. Making this apple crisp gluten-free is simple. Here are some swaps: - Use gluten-free flour instead of all-purpose flour. Almond flour or oat flour works well. - Ensure the rolled oats are certified gluten-free. Some oats may contain gluten. - Check the brown sugar for any additives that might not be gluten-free. These changes keep the taste and texture great while making it safe for gluten-free diets. Serving apple crisp with a few extras makes it even better. Here are some ideas: - Vanilla Ice Cream: The warm crisp pairs perfectly with cold ice cream. - Whipped Cream: This adds a light, creamy touch. - Caramel Sauce: Drizzle some on top for added sweetness. - Coffee or Tea: A warm drink complements the dish nicely. These pairings enhance the flavors and create a delightful dessert experience. In this post, I covered how to make a tasty apple crisp. You learned about the ingredients, how to prepare them, and tips for perfecting the dish. I also shared variations and storage tips. Try new fruits or toppings to make your crisp unique. Remember, a warm bowl with ice cream is a great way to enjoy it. With this guide, you can create a delicious dessert that wows everyone. Enjoy making your apple crisp!
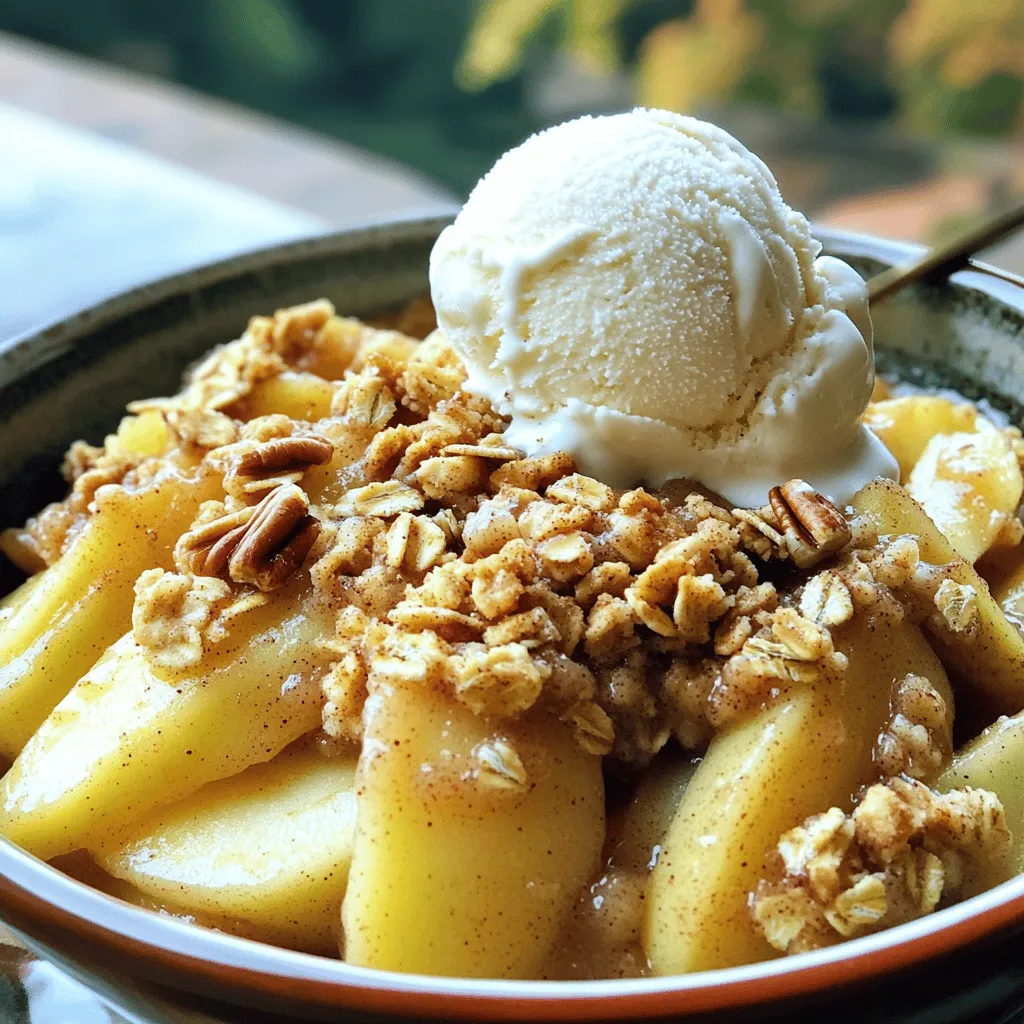
Super Simple Apple Crisp Delight in Every Bite
Ready to treat yourself with a delicious dessert? My Super Simple Apple Crisp will have you savoring every bite. With just a few ingredients and
- 2 cups all-purpose flour - 1 cup granulated sugar - 1/2 cup unsalted butter, softened - 1 cup buttermilk, at room temperature - 2 large eggs, at room temperature - 2 teaspoons baking powder - 1 teaspoon baking soda - 1/2 teaspoon salt - 1 teaspoon pure vanilla extract - 1 cup pecans, roughly chopped - 1/2 cup pure maple syrup - 1/4 cup packed brown sugar - 1 teaspoon ground cinnamon For the best Maple Pecan Coffee Cake, each ingredient plays a part. The all-purpose flour gives the cake structure. The granulated sugar adds sweetness and helps with browning. Unsalted butter adds richness and moistness. Buttermilk makes the cake tender and soft. The eggs help bind everything together and add moisture. The baking powder and baking soda are key for rise and fluffiness. Salt balances the sweetness. Vanilla extract gives a warm flavor. The pecans add crunch and nutty taste. Maple syrup provides depth and sweetness. Brown sugar enhances the caramel flavor. Finally, cinnamon adds warmth and spice. If you need a gluten-free option, use a gluten-free all-purpose flour mix. For a dairy-free choice, swap the buttermilk with almond milk plus a splash of vinegar. Instead of eggs, you can use flax eggs or applesauce. If you want to cut sugar, use a sugar substitute like stevia. Always check labels to ensure they fit your dietary needs. First, gather all your ingredients. You need flour, sugar, butter, buttermilk, eggs, and more. It is best to use room temperature ingredients for better mixing. Preheat your oven to 350°F (175°C) and grease your baking pan. This helps the cake come out easily. 1. In a large bowl, cream the softened butter and sugar. Use an electric mixer for this step. Mix until the blend is light and fluffy. 2. Add the eggs one by one. Mix well after each addition. Pour in the vanilla extract and combine. 3. In another bowl, whisk the flour, baking powder, baking soda, and salt together. Make sure these dry ingredients are mixed well. 4. Gradually mix the dry ingredients into the wet mix. Alternate this with the buttermilk. Mix just until combined. Overmixing can make the cake dense. 5. For the filling, mix chopped pecans, brown sugar, maple syrup, and cinnamon in a small bowl. 6. Pour half of the batter into the pan. Spread it evenly. Add the pecan filling on top. Then, pour the rest of the batter over the filling. Smooth it out carefully. 7. Bake for 30 to 35 minutes. Check if it is done by inserting a toothpick. If it comes out clean or with a few crumbs, it’s ready. Once baked, let the cake cool in the pan for about 10 minutes. After that, transfer it to a wire rack to cool completely. Drizzle with extra maple syrup before serving. For a pretty touch, add whole pecans and a sprinkle of powdered sugar on top. Enjoy your delicious Maple Pecan Coffee Cake! To get the best texture for your Maple Pecan Coffee Cake, follow these tips: - Use room temperature butter and eggs. This helps the batter mix well. - Don't overmix the batter. Mix just until combined for a light cake. - Check the cake early. Start testing for doneness at 30 minutes. To bring out that rich maple flavor, try these ideas: - Use pure maple syrup. It adds depth and sweetness. - Add a splash of maple extract for an extra kick. - Toast pecans lightly before mixing. Toasting boosts their nutty flavor. Having the right tools makes baking easier and more fun: - A 9x13 inch baking pan works best for this cake. - A whisk helps combine dry ingredients smoothly. - An electric mixer saves time when creaming butter and sugar. - Use a spatula to spread batter evenly in the pan. - A toothpick is your best friend for checking doneness. {{image_4}} You can make this cake gluten-free by using a gluten-free flour blend. Look for a blend that has a good mix of starches and fibers. Replace the all-purpose flour with an equal amount of gluten-free flour. This will keep the cake moist and fluffy. Check the baking powder to ensure it is gluten-free as well. To make this cake vegan, swap the eggs with flax eggs. Use one tablespoon of ground flaxseed mixed with three tablespoons of water for each egg. Replace the buttermilk with plant-based milk mixed with a tablespoon of lemon juice. Use vegan butter instead of regular butter. This will keep the rich flavor with a vegan twist. You can add seasonal flavors to your coffee cake. In fall, mix in some pumpkin puree and spices like nutmeg. For summer, try adding fresh berries like blueberries or raspberries. You could also stir in chocolate chips for a sweet treat. Each variation brings a new taste to this classic recipe. To keep your Maple Pecan Coffee Cake fresh, wrap it tightly. Use plastic wrap or aluminum foil. You can also store it in an airtight container. This method keeps the cake moist and tasty. Place the cake at room temperature for up to three days. If you live in a humid area, consider refrigerating it. This will help avoid spoilage. For longer storage, freeze your cake. First, let it cool completely. Then wrap the cake in plastic wrap. After that, place it in a freezer bag or container. Label it with the date. You can freeze the cake for up to three months. When you're ready to enjoy it, simply thaw it in the fridge overnight. To reheat your cake, preheat your oven to 350°F (175°C). Take the cake out of the fridge or freezer. If frozen, let it thaw first. Place the cake on a baking sheet. Warm it for 10 to 15 minutes. This will help restore its soft texture. For added flavor, drizzle some maple syrup on top before serving. Enjoy your warm slice of coffee cake! Maple pecan coffee cake stays fresh for about 3 to 4 days at room temperature. Make sure to store it in an airtight container. If you want it to last longer, you can keep it in the fridge for up to a week. Just remember that the texture might change a bit. If you want to enjoy it longer, freezing is a great option, too. Wrap it well in plastic wrap and store it in a freezer bag. It can last up to 3 months in the freezer. Yes! You can swap pecans for walnuts or almonds if you prefer. Each nut adds a unique flavor and crunch. If you're feeling adventurous, try adding chocolate chips or dried fruit for a twist! You can also replace maple syrup with honey or agave nectar. Just keep in mind that this may change the taste a bit. Experimenting is part of the fun in baking! This cake pairs well with coffee or tea, making it perfect for breakfast or brunch. You can also serve it with whipped cream or a scoop of vanilla ice cream for dessert. Fresh fruits like berries or sliced bananas add a nice touch. If you want a savory contrast, try it with a cheese plate. The flavors work great together! You learned about making a delicious maple pecan coffee cake. We talked about key ingredients and how to swap them for diets. I provided clear steps for baking and tips to make it perfect. Plus, we explored variations like gluten-free and vegan options. In the end, this cake is easy to store and reheat. You'll impress your friends and family with this treat. Enjoy the process and have fun baking. With a few simple steps, you can create something truly special.
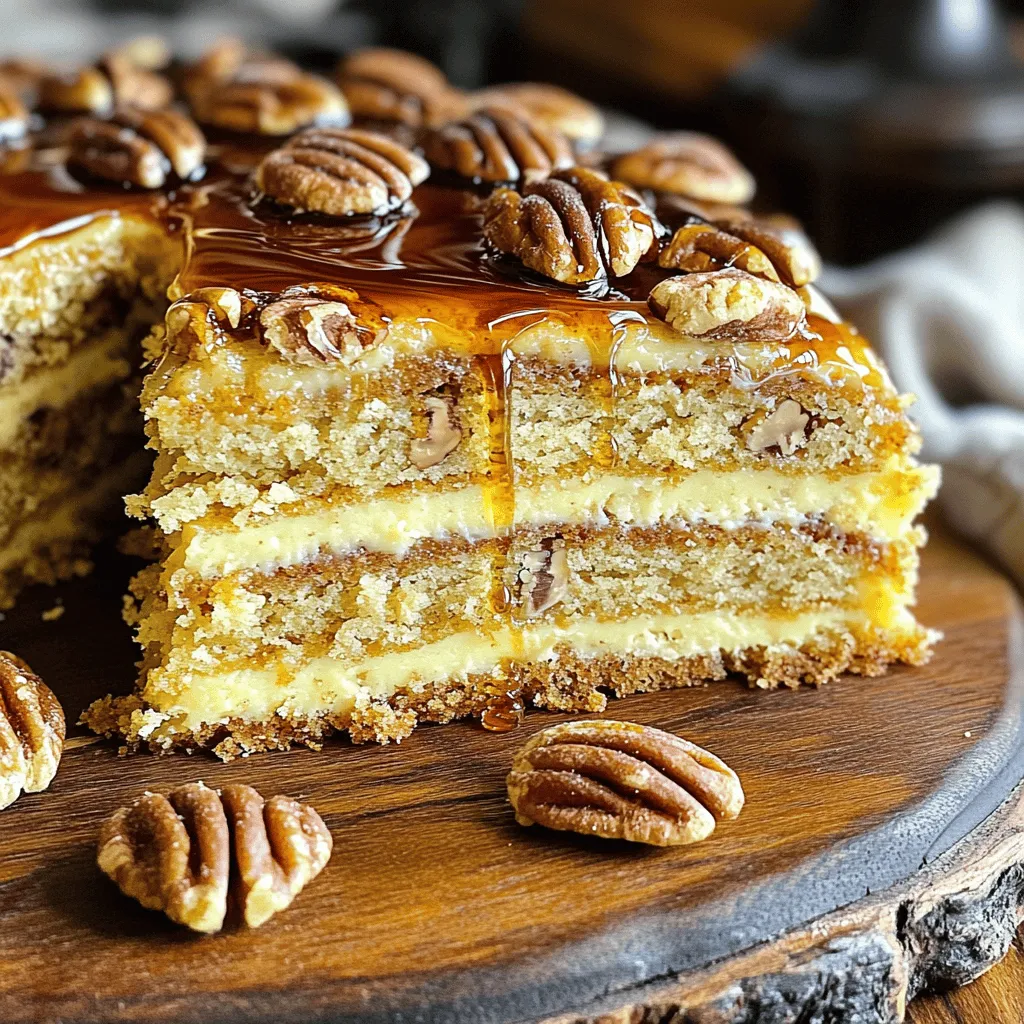
Maple Pecan Coffee Cake Rich and Flavorful Recipe
Craving a delicious treat that brightens your mornings? Look no further! My Maple Pecan Coffee Cake recipe is rich, flavorful, and easy to make. With
To make these delightful cheesecake bars, you will need: - 1 cup graham cracker crumbs - 1/2 cup unsalted butter, melted - 1/4 cup granulated sugar - 2 cups cream cheese, softened - 1 cup powdered sugar - 1 teaspoon vanilla extract - 1 cup heavy whipping cream - 1/2 cup pistachios, finely chopped - 1/2 teaspoon ground cinnamon - 1/2 cup honey - Extra chopped pistachios for garnish The crust is key for a great base. I use graham cracker crumbs, melted butter, and sugar. This mix creates a firm, sweet layer. The cheesecake filling is rich and creamy. It starts with softened cream cheese and powdered sugar. You add vanilla for flavor. Whipped cream adds a light texture. Pistachios give a nutty crunch. They offer flavor and color. Ground cinnamon adds warmth to the filling. Honey is drizzled on top for a sweet finish. You can make these bars even better. Consider adding more chopped pistachios on top. This adds a nice crunch and looks great. Another idea is to drizzle extra honey around the bars when serving. This creates a beautiful presentation. You can also serve with fresh fruit or a berry sauce for added color and flavor. To start, grab a medium bowl. Combine 1 cup of graham cracker crumbs, 1/2 cup of melted unsalted butter, and 1/4 cup of granulated sugar. Mix until it looks like wet sand. This mixture becomes the base of your cheesecake bars. Next, press this mixture firmly into the bottom of a 9x9 inch baking pan. Make sure it is even and compact. After that, place the pan in the refrigerator for about 15 minutes. This helps the crust set well. In a large bowl, take 2 cups of softened cream cheese and 1 cup of powdered sugar. Beat them together with an electric mixer on medium speed. You want it to be smooth and creamy. Once mixed, add 1 teaspoon of vanilla extract and beat again. Next, in a separate bowl, whip 1 cup of heavy cream until it forms stiff peaks. This makes the filling light and fluffy. Gently fold the whipped cream into the cream cheese mixture with a spatula. Be careful not to deflate the whipped cream. Then, fold in 1/2 cup of finely chopped pistachios and 1/2 teaspoon of ground cinnamon. This adds a lovely flavor. Now, it’s time to layer the cheesecake. Carefully pour the cheesecake filling over the chilled graham cracker crust. Use a spatula to spread it evenly. After that, drizzle 1/2 cup of honey over the top. For a pretty touch, swirl the honey into the cheesecake with a knife. Cover the pan with plastic wrap and place it in the refrigerator. Let it chill for at least 4 hours until it's fully set. Once chilled, remove the cheesecake from the fridge. Use a sharp knife to cut it into bars. For a nice finish, sprinkle extra chopped pistachios on top before serving. To make a smooth cheesecake filling, start with room-temperature cream cheese. This helps it blend easily. Beat the cream cheese and powdered sugar together until creamy. Then, whip the heavy cream until it forms stiff peaks. Gently fold this into your cream cheese mix. Be careful not to stir too hard. You want to keep the air in the whipped cream for a light texture. When layering the cheesecake, pour the filling over the crust slowly. Use a spatula to spread it evenly. This helps avoid mixing the layers. For the honey drizzle, use a small squeeze bottle or a spoon. Drizzle lightly across the top of the cheesecake. To create a nice swirl, use a knife or toothpick to gently mix the honey in. This makes it look pretty and adds flavor. A common mistake is using cold cream cheese. It clumps and does not blend well. Always soften it first. Another mistake is overmixing the whipped cream. If you mix too much, it loses air and becomes dense. Lastly, don't skip chilling the bars. This step is key for a firm texture. If you cut them too soon, they may fall apart. {{image_4}} You can swap out pistachios for other nuts. Try walnuts or almonds for a different flavor. Each nut adds its own taste and crunch. You can also use different spices. For example, swap ground cinnamon for nutmeg or cardamom. These spices add warmth and depth to the cheesecake bars. To make these bars gluten-free, change the graham cracker crumbs. Use gluten-free cookie crumbs or almond flour instead. Both options work well and still give a tasty crust. Make sure to check the labels on all ingredients. This ensures they are gluten-free. Enjoy the same great flavor with no gluten! If you want smaller treats, make mini versions. Use a muffin tin with liners for easy serving. Just follow the same steps but fill each cup with the cheesecake mixture. This way, everyone can enjoy their own little piece. They are perfect for parties or as a fun treat for kids. To keep your no-bake pistachio baklava cheesecake bars fresh, store them in the fridge. Place any leftover bars in an airtight container. Make sure to seal it well to keep out air. They will stay fresh for up to five days. If you have leftover honey, store it in a separate jar. It stays good at room temperature. You can freeze these cheesecake bars for longer storage. First, cut them into bars as usual. Place each bar on a baking sheet lined with parchment paper. Freeze them for about two hours until firm. Then, transfer the bars to a freezer-safe container or wrap them in plastic wrap. They can last for two to three months in the freezer. To enjoy your frozen cheesecake bars, take them out of the freezer. Place them in the fridge for a few hours to thaw slowly. This helps keep their texture nice. If you need them quicker, leave them at room temperature for about 30 minutes. Once thawed, drizzle with fresh honey and sprinkle some chopped pistachios for the best taste. Yes, you can use Greek yogurt instead of cream cheese. Greek yogurt offers a tangy flavor. It can make your bars lighter and a bit healthier. However, the texture may be less creamy. If you choose yogurt, use full-fat for the best results. These cheesecake bars will stay fresh for about 5 days in the refrigerator. Make sure you cover them well to keep out air and moisture. This will help maintain their flavor and texture. Serve these bars chilled for the best taste. Cut them into squares and place on a nice platter. Drizzle extra honey on top for sweetness. A sprinkle of chopped pistachios adds a nice crunch and visual appeal. Enjoy them with friends or family for a special treat! You now know how to make No-Bake Pistachio Baklava Cheesecake Bars. We discussed the ingredients, steps, and tips to ensure success. Remember, the right balance of the key components is crucial for flavor and texture. Variations allow you to customize the bars, making them unique. Store leftovers properly to enjoy them later. This dessert combines rich flavors and creamy textures, perfect for any occasion. Enjoy making and sharing these delicious treats!
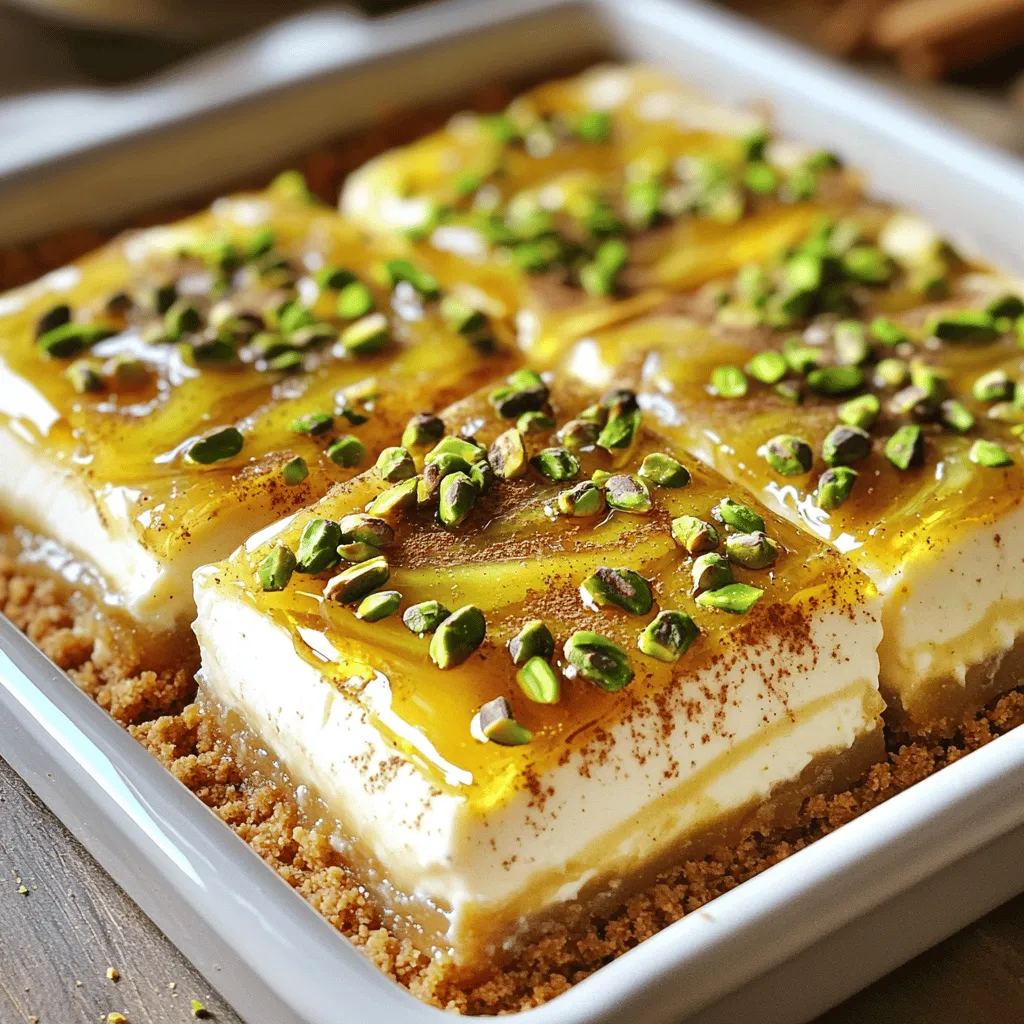
No-Bake Pistachio Baklava Cheesecake Bars Delight
If you’re craving a sweet treat that’s easy and delightful, I’ve got the perfect recipe for you: No-Bake Pistachio Baklava Cheesecake Bars! These bars combine
- 2 medium-sized apples (like Granny Smith or Honeycrisp), peeled, cored, and diced - 1 cup all-purpose flour - 1 teaspoon baking powder - 1/2 teaspoon baking soda - 1/2 teaspoon ground cinnamon - 1/4 teaspoon ground nutmeg - 1/4 teaspoon salt - 1/3 cup granulated sugar - 1/2 cup milk (whole or 2%) - 1 large egg - 1 teaspoon vanilla extract - 1/2 cup powdered sugar (for the glaze) - 2 tablespoons warm water (to thicken the glaze) - Vegetable oil (for frying) You can swap some ingredients based on what you have. For apples, any sweet variety works. Try Fuji or Gala apples if you like. Use almond milk or oat milk if you want a dairy-free option. If you have no granulated sugar, brown sugar can add a nice flavor. For the egg, use a flax egg or applesauce as a substitute. This keeps the fritters moist and tasty. You’ll need a few basic tools: - Mixing bowls - A whisk - A spoon or small ice cream scoop for dropping batter - A deep frying pan or Dutch oven - A thermometer to check oil temperature - Paper towels for draining - A small bowl for the glaze These tools help make the process easy and fun. Enjoy cooking with them! First, peel the apples. I like to use Granny Smith or Honeycrisp for their flavor. Next, remove the cores and dice the apples into small cubes. Aim for about half an inch in size. Set them aside in a bowl. This step is key to adding juicy bites in each fritter. In a large bowl, combine the dry ingredients. Add one cup of all-purpose flour, one teaspoon of baking powder, and half a teaspoon of baking soda. Next, toss in half a teaspoon of ground cinnamon, a quarter teaspoon of ground nutmeg, and a quarter teaspoon of salt. Finally, mix in one-third cup of granulated sugar. Use a whisk to blend everything well, until there are no lumps. In another bowl, you will mix the wet ingredients. Pour in half a cup of milk, add one large egg, and include one teaspoon of vanilla extract. Whisk these together until the mixture is smooth. This will help your fritters stay moist and flavorful. Now, it’s time to make the batter. Gradually pour the wet mix into the dry ingredients. Stir gently until just combined. Don't overmix; some lumps are okay! After that, carefully fold the diced apples into the batter. This ensures each fritter has tasty apple pieces. In a deep frying pan, pour enough vegetable oil to cover about an inch of the bottom. Heat the oil over medium heat until it reaches around 350°F (175°C). To test if it’s ready, drop a small spoonful of batter into the oil. If it bubbles and floats, you're good to go! Spoon heaping amounts of batter into the hot oil. Make sure not to crowd the pan. Fry each fritter for about 2-3 minutes per side. Look for a golden brown color. When they are done, place them on a paper towel-lined plate to drain excess oil. While the fritters cool slightly, prepare the glaze. In a small bowl, whisk half a cup of powdered sugar with two tablespoons of warm water. Mix until you have a smooth, creamy glaze. If you like it thicker, add more powdered sugar bit by bit until it’s perfect. When the fritters are warm, glaze them. You can either drizzle the glaze over the fritters or dip each one into the glaze for full coverage. Let the glaze set for a few minutes before serving. Enjoy the warm, sweet, and apple-filled bites! To get a perfect fritter, focus on the batter. - Less is more: Mix the wet and dry ingredients gently. Lumps are okay. - Diced apples: Cut your apples into small cubes. This helps distribute their taste. - Rest the batter: Let it sit for about 10 minutes before frying. This gives a better rise. Frying is key to great apple fritters. - Oil temperature: Heat oil to 350°F (175°C). Test with a small batter drop. - Do not crowd: Fry only a few fritters at once. This keeps the oil hot. - Golden brown: Fry until they turn a nice golden color. This means they are cooked inside. You can change up the flavors in your fritters. - Spices: Try adding more cinnamon or some ginger for warmth. - Nuts: Chopped walnuts or pecans give a nice crunch. - Fruits: Mix in other fruits like blueberries or pears for fun twists. These tips will help you make the best bakery-style apple fritters at home! Enjoy the process and have fun experimenting! {{image_4}} You can swap apples for other fruits in fritters. Try pears for a sweet twist. Peaches or berries can add tartness and color. Just make sure to chop them small. This keeps the batter light and fluffy. You can also mix different fruits for a fun medley. To make gluten-free apple fritters, use gluten-free all-purpose flour. Most blends work well in this recipe. You may need to add a bit more liquid. Try almond milk in place of regular milk. This keeps them moist and tasty. Follow the same steps for frying and glazing. For vegan fritters, replace the egg with flaxseed meal. Mix one tablespoon of flaxseed with three tablespoons of water. Let it sit until it thickens. Use plant-based milk instead of regular milk. Coconut or almond milk adds great flavor. The rest of the recipe stays the same. You'll love the taste! To store leftover apple fritters, let them cool completely. Place them in an airtight container. You can keep them at room temperature for up to two days. If you want them fresh longer, move them to the fridge. They stay good there for about a week. To reheat apple fritters, use an oven for the best results. Preheat the oven to 350°F (175°C). Place fritters on a baking sheet. Heat them for about 5-7 minutes until warm. You can also use a microwave, but the fritters may get soft. Try heating them for 10-15 seconds at a time. If you want to freeze apple fritters, first let them cool completely. Lay them in a single layer on a baking sheet. Freeze them for about two hours until firm. Then, transfer them to a freezer bag or container. They will stay fresh for up to three months. When ready, thaw them in the fridge overnight before reheating. You can check the oil temperature easily. Heat the oil to about 350°F (175°C). To test, drop a small spoonful of batter into the oil. If it bubbles and floats, the oil is ready. This means your fritters will cook perfectly. Yes, you can use different apple types. Sweet apples like Fuji or Gala work great. Tart apples like Granny Smith add a nice zing. Choose any apple you love to eat. If you need a milk substitute, use almond or oat milk. You can also use water or a dairy-free milk option. This makes the recipe more flexible for different diets. Apple fritters taste best fresh but can last up to two days. Store them in an airtight container. Keep them at room temperature for the best flavor and texture. You can prepare the batter ahead of time. Keep it in the fridge for up to an hour. Just remember to fold in the apples just before frying to keep the batter fresh. In this post, we explored how to make bakery-style apple fritters. We covered essential ingredients, tools, and step-by-step instructions for perfecting your fritters. I shared tips for the best texture and frying practices, along with variations for different diets. Remember, the key lies in using fresh ingredients and proper frying methods. Your apple fritters can shine with the right techniques. Enjoy preparing and sharing these treats with friends and family. Happy cooking!
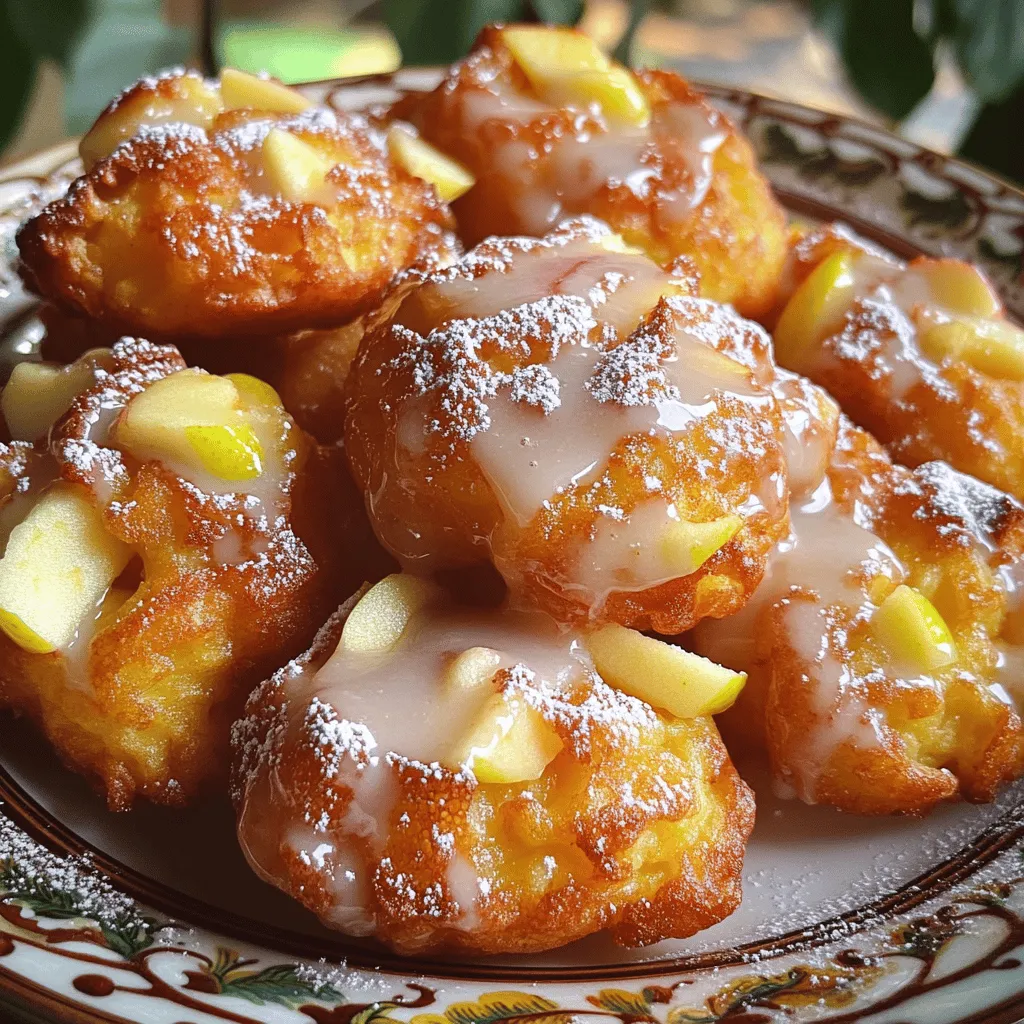
Bakery-Style Apple Fritters Tasty and Quick Recipe
Are you ready to whip up some delicious bakery-style apple fritters? In this quick recipe, you’ll learn how to make these warm, crispy treats from