Desserts
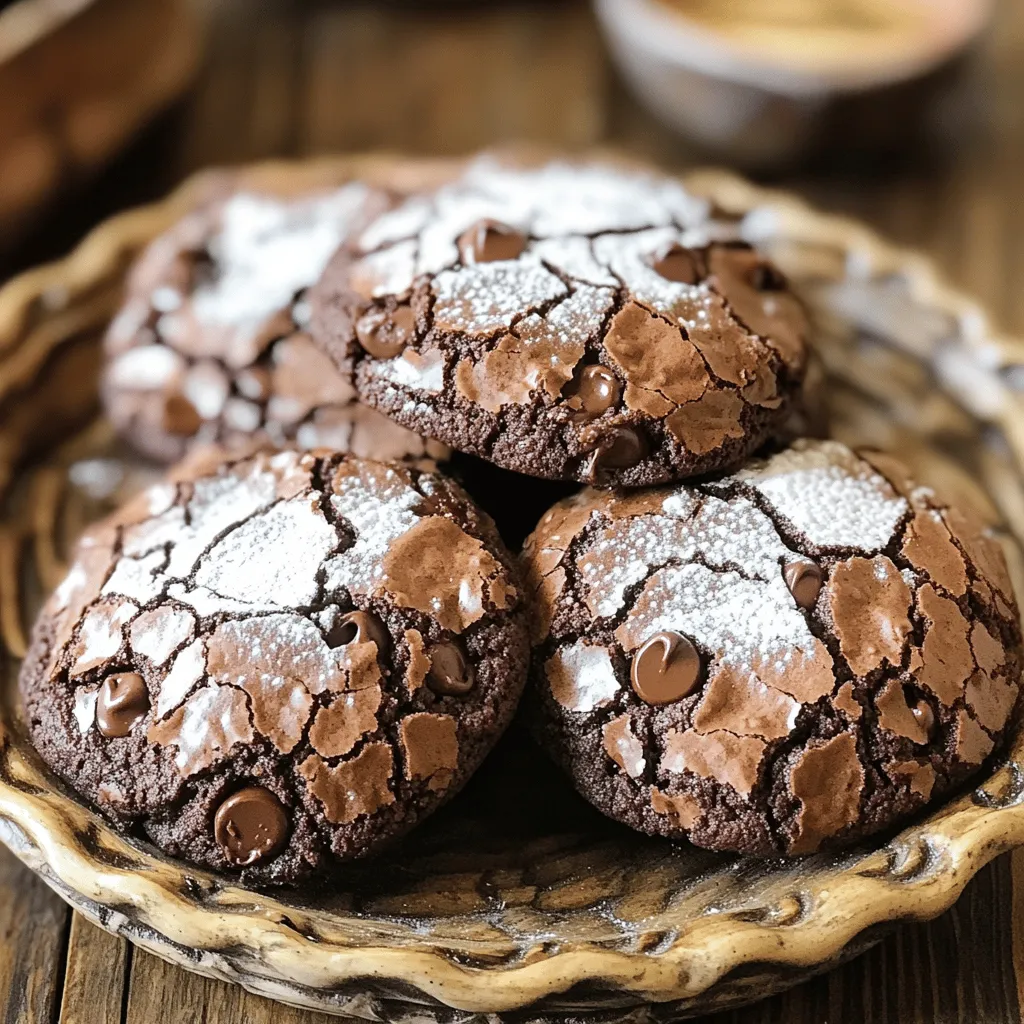
Fudgy Chocolate Brownie Cookies Easy and Delicious Treat
If you’re craving a sweet treat that’s easy to make, you’ve found it! These fudgy chocolate brownie cookies are the perfect blend of rich chocolate
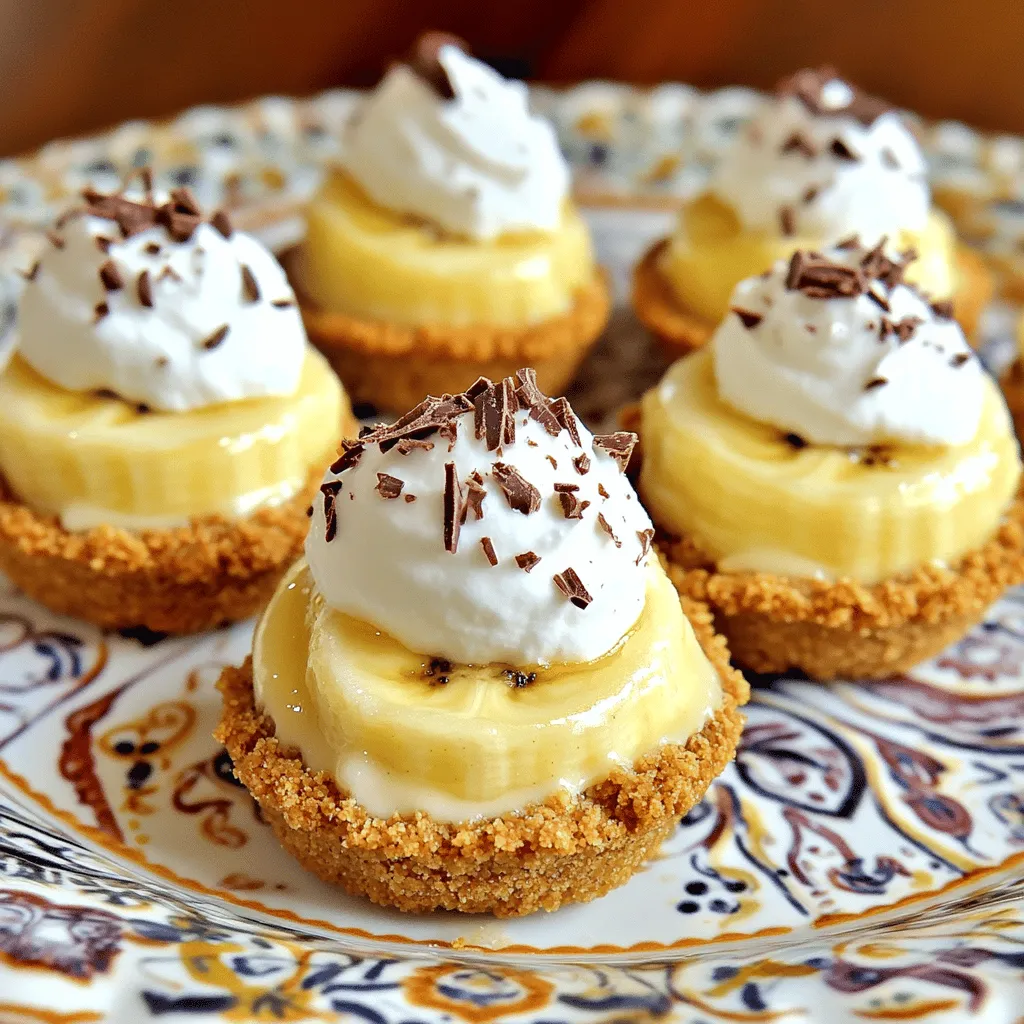
No-Bake Mini Banana Cream Pies Delightful Treats
Craving a sweet treat that’s easy to make? No-bake mini banana cream pies are here to satisfy! Packed with creamy goodness, these delightful mini desserts
![- 2 cups cream cheese - 3 large eggs - 1 cup fresh mango puree The cream cheese gives the cake its rich texture. Make sure to use softened cream cheese for a smooth mix. Eggs add structure and help the cheesecake set. Fresh mango puree brings a sweet, tropical flavor that shines through. - 1 ½ cups graham cracker crumbs - ½ cup unsalted butter, melted Graham cracker crumbs create a crunchy base. The melted butter helps bind the crumbs together. Press this mixture firmly into the pan for a sturdy crust. - 1 cup heavy whipping cream - Fresh mango slices - Mint leaves Whipping cream adds lightness and creaminess on top. Fresh mango slices enhance the tropical vibe. Mint leaves add a pop of color and freshness to each slice. For the full recipe, check out the complete instructions. - Preheat the oven to 325°F (160°C). - Grease the springform pan with butter or cooking spray. Start by setting your oven temperature. Preheating is key. A hot oven helps the cheesecake rise well. Greasing the pan makes it easy to remove the cheesecake later. - Combine graham cracker crumbs and butter. - Bake for 10 minutes. In a bowl, mix the graham cracker crumbs with melted butter. Stir until it looks like wet sand. Press this mix into the bottom of your springform pan. Bake it for 10 minutes. This gives the crust a nice, firm base. - Beat cream cheese until smooth. - Add sugar, eggs, and flavor elements. - Incorporate fresh mango puree. Next, grab a big bowl. Beat the cream cheese until it’s smooth. This takes about 2-3 minutes. Slowly mix in the sugar. Add the eggs one by one, mixing gently. You want a creamy texture. Finally, fold in the fresh mango puree. This adds a sweet, fruity taste. - Pour filling over the crust. - Bake and check for doneness. Pour that creamy filling over your cooled crust. Bake it for 50 to 60 minutes. The center should be slightly jiggly. It will firm up as it cools. - Cool in the oven for 1 hour. - Chill in the refrigerator. Once done, turn off the oven. Leave the door slightly open for about an hour. This step helps prevent cracks. After cooling, let it sit at room temperature. Then, place the cheesecake in the fridge for at least 4 hours. Overnight is best for flavor. - Whip heavy cream topping. - Add garnishes before serving. Before serving, whip the heavy cream until soft peaks form. Spread it over the cheesecake. Garnish with fresh mango slices and mint leaves. These add a nice touch and burst of color. For the full recipe, check the earlier section. Enjoy your tropical mango cheesecake! To make the best tropical mango cheesecake, use room temperature ingredients. This includes cream cheese and eggs. When they are at room temperature, they mix better. This helps create a smooth and creamy filling. It also helps avoid lumps in your cheesecake. Next, be careful not to overmix the batter. When mixing, go slow after adding eggs. Mix just until blended. Overmixing can introduce too much air and cause cracks during baking. Cooling your cheesecake is key to avoiding cracks. After baking, turn off the oven and crack the door open. Let the cheesecake cool in the oven for one hour. This gentle cooling helps it set without sudden temperature changes. When you take it out, let it cool at room temperature. Avoid moving it around too much. If you handle it gently, you’ll keep it smooth and pretty. Choosing ripe mangoes makes a big difference. Look for mangoes that give a little when you squeeze them. They should smell sweet and fruity. A ripe mango adds natural sweetness and flavor to your cheesecake. Using fresh lime juice brightens the taste. Squeeze the lime right before adding it. The zest adds a burst of flavor too. These fresh ingredients make your tropical mango cheesecake taste amazing. For the full recipe, check the instructions above. {{image_4}} You can enhance your mango cheesecake by adding other fruits. Pineapple adds a sweet and tart flavor. Passion fruit gives a tangy kick that pairs well with mango. Mixing flavors can create a unique twist that surprises your taste buds. Try adding a layer of fresh fruit on top. It makes your cheesecake look bright and inviting. If you want a different sweet taste, consider using honey or agave syrup. These options add a floral note that pairs nicely with mango. You can also use sugar substitutes if you want a healthier choice. Stevia or monk fruit sweetener can work well in this recipe. Just remember to adjust the amount based on the sweetness level of the substitute. Your crust can change the whole experience of the cheesecake. For a gluten-free option, use almond flour or gluten-free cookies. Nut-based crusts add a rich flavor that complements the mango. You can also sprinkle spices like cinnamon or nutmeg into the crust for extra warmth. This small change can really elevate your cheesecake game. To keep your Tropical Mango Cheesecake fresh, use an airtight container. This helps prevent air and moisture from affecting the cake. Plastic wrap also works, but it may not seal as tightly. For the best taste, refrigerate your cheesecake within two hours of making it. It tastes best when chilled, so aim to store it right away. You can freeze your cheesecake for longer storage. First, let it cool completely in the fridge. Next, wrap it tightly in plastic wrap, then place it in a freezer-safe container. This will help protect it from freezer burn. When you want to enjoy it, move it to the fridge to thaw overnight. This helps maintain its creamy texture. In the fridge, your Tropical Mango Cheesecake will stay good for about five days. Keep an eye out for signs of spoilage. If you see any mold or notice an off smell, it’s best to discard it. Enjoy your cheesecake fresh to savor all the flavors! For the full recipe, check [Full Recipe]. Yes, you can make this cheesecake ahead of time. I suggest chilling it for at least 4 hours. For the best taste and texture, refrigerate it overnight. This allows the flavors to blend well. Cover it tightly with plastic wrap. This will keep it fresh and prevent it from absorbing odors. Cheesecake dates back to ancient Greece. The Greeks served it to athletes during the first Olympic Games. It later spread to Rome and then to Europe. Tropical flavors, like mango, add a fun twist to the classic recipe. Today, people enjoy different styles and flavors of cheesecake worldwide. The cheesecake is done when the center is set yet slightly jiggly. This means it will firm up as it cools. Look for a light golden color on the edges. If it cracks, it may have overbaked. Always keep an eye on the time while baking. Yes, you can use frozen mango in this recipe. Just make sure to thaw and drain any excess liquid. This helps to maintain the cheesecake's texture. Frozen mango is great when fresh mango is out of season. It still provides that sweet, tropical flavor. For mango cheesecake, I recommend a light whipped cream topping. This adds a smooth texture and balances the flavors. Fresh mango slices add a pretty touch. Mint leaves provide a fresh contrast. You can also sprinkle some toasted coconut for an extra crunch. This mango cheesecake recipe brings exciting flavors and textures together. You learned about the main ingredients, steps, and various tips to ensure a perfect treat. Remember the importance of ripe mangoes and room temperature ingredients for the best results. Feel free to explore variations and fun add-ins. Proper storage will keep your cheesecake fresh. Enjoy sharing this delightful dessert with friends and family. Happy baking!](https://roastedflavors.com/wp-content/uploads/2025/05/1d4b3c29-d316-46b7-8edf-f902819f8c6b.webp)
Tropical Mango Cheesecake Delightful and Creamy Treat
Are you ready for a sweet escape? This Tropical Mango Cheesecake is a creamy delight that combines the rich taste of cream cheese with the
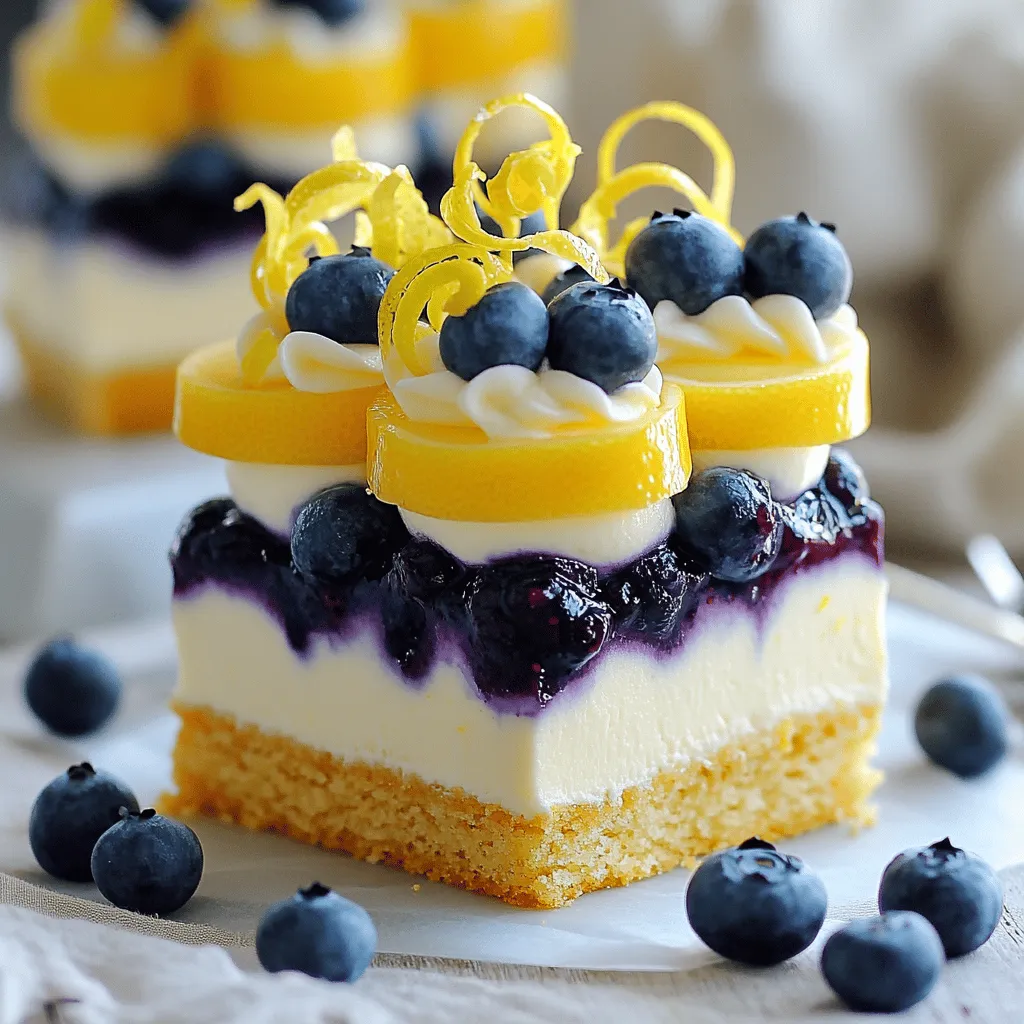
Lemon Blueberry Shortbread Mousse Cake Delight
Prepare to indulge in a sweet, tangy treat with my Lemon Blueberry Shortbread Mousse Cake Delight! This delightful dessert combines rich lemon mousse, fresh blueberries,
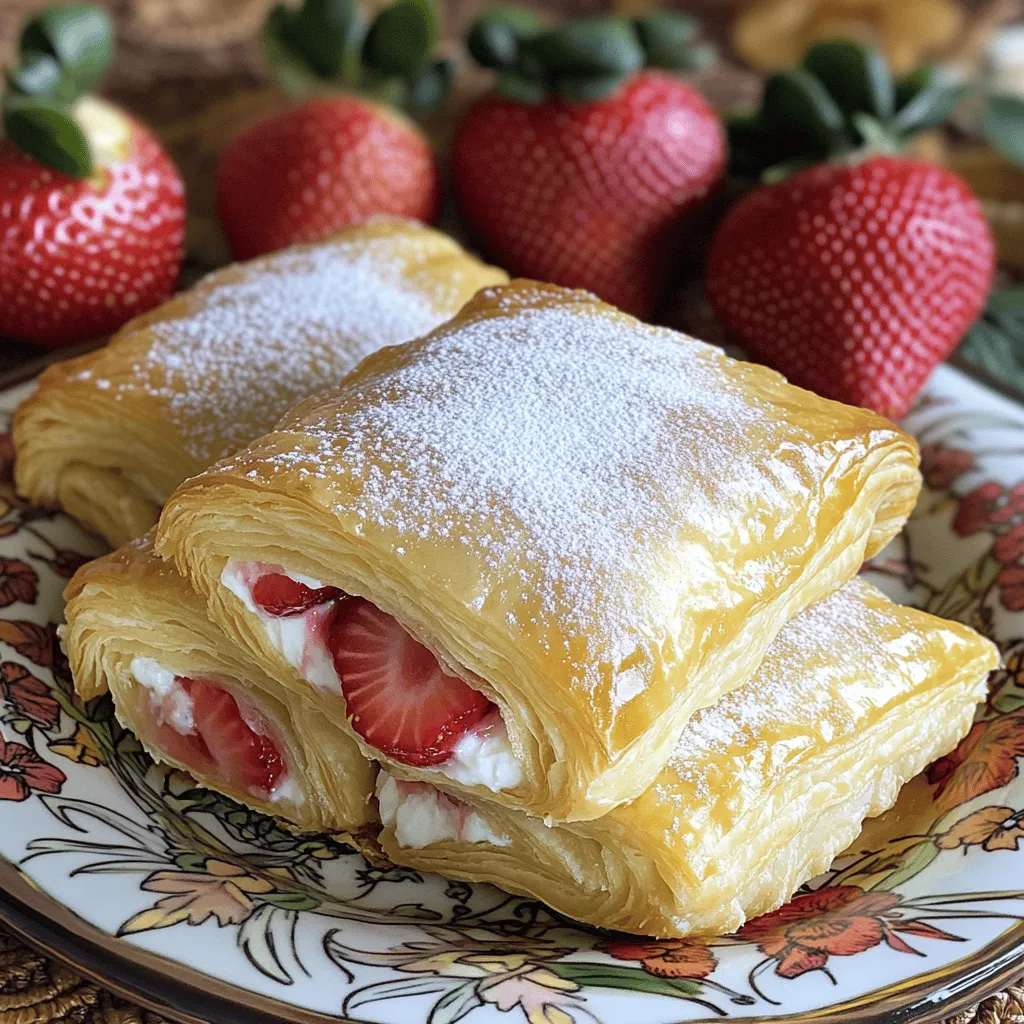
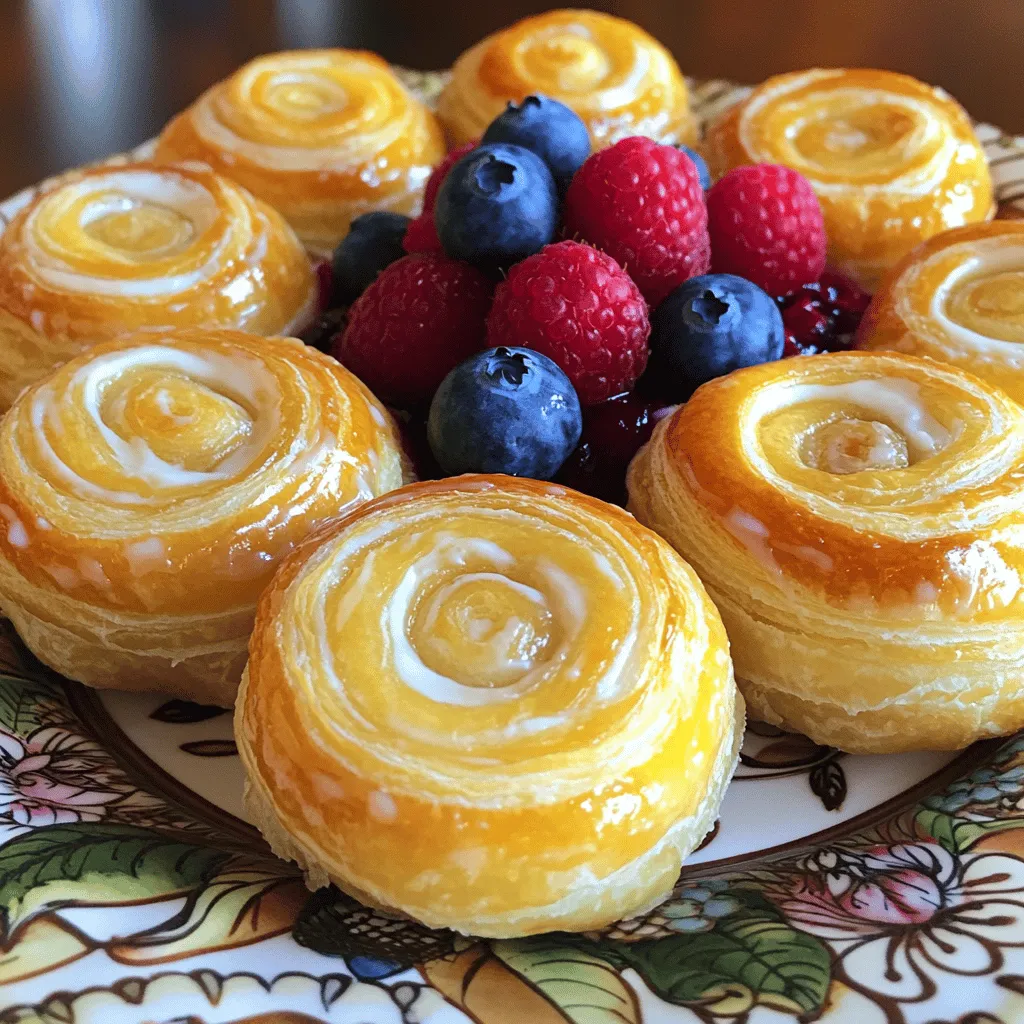
Strawberry Danish Delight Easy Pastry Recipe
Welcome to your new favorite treat! This Strawberry Danish recipe is easy to follow and bursting with fresh flavor. With just a few simple ingredients,
![- 1 ½ cups graham cracker crumbs - ½ cup unsalted butter, melted - 2 tablespoons granulated sugar - 12 oz white chocolate, coarsely chopped - 1 cup heavy cream - 1 teaspoon pure vanilla extract - 3 large eggs, separated - Pinch of sea salt - Zest of 1 lemon - Assorted fresh berries - Fresh mint leaves - 9-inch tart pan - Mixing bowls - Electric mixer - Spatula - Double boiler or heatproof bowl Gather all the ingredients before you start. Fresh berries and mint leaves give a nice touch on top. The equipment is simple, but make sure you have a good mixer. A 9-inch tart pan works best for this recipe. A double boiler helps melt the chocolate without burning it. Mixing bowls of different sizes will help keep things organized. 1. Oven Preheating: Start by preheating your oven to 350°F (175°C). This step is key for a perfect crust. 2. Mixing and Pressing Crust Ingredients: In a large bowl, mix 1 ½ cups graham cracker crumbs, ½ cup melted unsalted butter, and 2 tablespoons granulated sugar. Stir until the mix looks like wet sand. Press the mixture firmly into a 9-inch tart pan. Make sure it covers the bottom and sides well. 3. Baking and Cooling the Crust: Bake the crust for 10 minutes until it turns lightly golden. Once baked, take it out and let it cool completely on a wire rack. 1. Melting the White Chocolate: For this, set a heatproof bowl over a pot of simmering water. Add 12 ounces of coarsely chopped white chocolate. Stir until it melts smoothly. Remove from the heat and let it cool just a bit. 2. Whipping the Cream and Vanilla: In a medium bowl, whip 1 cup of heavy cream with 1 teaspoon pure vanilla extract. Whip until soft peaks form. 3. Preparing the Egg Yolks: In another bowl, whisk 3 large egg yolks with a pinch of sea salt until they are pale and creamy. 1. Folding in Whipped Cream: Gently fold the whipped cream into the cooled chocolate mixture. Use a spatula and be careful to keep it light. 2. Whipping Egg Whites: In a clean bowl, beat the egg whites until stiff peaks form. This will make your mousse airy and light. 3. Incorporating Egg Whites into Mousse: Gradually fold the whipped egg whites into the mousse mixture. Do this in two batches to keep it fluffy. 1. Filling the Cooled Tart Shell: Spoon the mousse into the cooled tart shell. Spread it evenly with a spatula. 2. Tapping to Remove Air Bubbles: Gently tap the tart pan on your countertop. This will help remove any air bubbles trapped in the mousse. 3. Chilling the Tart: Cover the tart with plastic wrap or foil. Chill in the fridge for at least 3 hours, or until the mousse sets firm. For the full recipe, check out the [Full Recipe]. To get the best mousse, use room temperature ingredients. Cold eggs and cream do not mix well. They will not whip up light and fluffy. When you fold the whipped cream into the chocolate mix, do it gently. Use a spatula to lift and fold. This keeps the air in the mousse, making it light. Pay close attention to the timing when you whip the egg whites. You want stiff peaks, but not too dry. Whip until the egg whites look shiny and hold their shape. This is key for a perfect texture. Garnish your tart with fresh berries. Strawberries, raspberries, or blueberries add color and taste. They make the tart look even more inviting. You can serve each slice with a dollop of whipped cream. This adds creaminess and balances the sweetness of the mousse. For a touch of brightness, use lemon zest on top. It enhances the flavor and makes the dish pop. You can also sprinkle some zest on your whipped cream. For the full recipe, check out the complete instructions and enjoy this rich white chocolate mousse tart! {{image_4}} You can change the flavor of your tart to keep things fun. Here are some ideas: - Citrus Zest: Add zest from an orange or lime. This will give a bright twist. - Liqueurs: Mix in a splash of Grand Marnier or amaretto. These will add depth and warmth. - Chocolate Mix: Blend white chocolate with dark chocolate. This creates a rich, layered flavor. Making this tart fit your needs is easy! Here are some options: - Gluten-Free Crust: Use almond flour or gluten-free cookies for the crust. This keeps it tasty and safe for gluten-free eaters. - Vegan Mousse: Replace eggs with aquafaba, the liquid from canned chickpeas. Use coconut cream instead of heavy cream for a vegan touch. These variations and modifications help you make this dessert yours. You can explore the Full Recipe for more details and inspiration! To keep your Rich White Chocolate Mousse Tart fresh, store it in the fridge. Use an airtight container or cover it tightly with plastic wrap. This helps prevent the tart from absorbing any other odors in the fridge. The tart will stay good for up to 3 days. Make sure you enjoy it within this time for the best taste. You can freeze the mousse tart if you need to keep it longer. First, wrap it well in plastic wrap and then place it in a freezer-safe container. This prevents freezer burn and keeps the mousse safe. When you’re ready to enjoy, thaw it in the fridge overnight. Keep in mind that freezing might change the texture a bit. The mousse may become less creamy after thawing. However, the flavor will still be delightful! If you want the best taste and texture, it's best to consume the tart fresh. White chocolate mousse needs at least 3 hours to set. This time allows it to firm up well. If you can wait longer, it will taste even better. I often chill mine overnight for the best texture. Yes, you can make the tart crust ahead of time. Just cool it completely and store it in an airtight container. This way, you can save time when making the mousse later. I usually prepare my crust a day in advance for ease. You can use coconut cream as a dairy-free option. It adds a lovely flavor and texture. If you prefer a lower-fat option, try whole milk, but the mousse may be less rich and creamy. Yes, you can make this dessert without eggs. Replace the egg whites with aquafaba, the liquid from canned chickpeas. Whip it until it's fluffy, just like egg whites. This keeps the mousse airy without using eggs. The mousse is fully set when it feels firm to the touch. If you gently press on it, it should not jiggle. You can also insert a toothpick; if it comes out clean, your mousse is ready. Enjoy the rich texture of this mousse tart! For the detailed process, check the Full Recipe. This blog post shared a simple guide to making white chocolate mousse tart. We covered ingredients, step-by-step instructions, and handy tips. The right tools help you create this delightful dessert. Remember to customize flavors and adapt for dietary needs. With practice, your mousse tart will impress. Enjoy the sweet satisfaction of your creation and share it with loved ones. Happy baking!](https://roastedflavors.com/wp-content/uploads/2025/05/1df884e9-05de-4a90-b807-b8d65cfe69a0.webp)
Rich White Chocolate Mousse Tart Delightful Recipe
Indulge your senses with this Rich White Chocolate Mousse Tart! This dessert blends creamy white chocolate with a crisp crust for a dreamy treat. Whether
Cheese Danishes Delightful and Easy to Make
If you love pastries, Cheese Danishes are a must-try! They are delightful and easy to make at home. With just a few simple ingredients and
![- All-purpose flour: 1 cup - Granulated sugar: Total of 1 cup (3/4 cup + 1/4 cup) - Baking powder: 2 teaspoons - Salt: 1/4 teaspoon - Whole milk: 1 cup - Unsalted butter: 1/2 cup, melted and slightly cooled - Freshly squeezed lemon juice: 1/4 cup - Lemon zest: Zest from 1 large lemon - Pure vanilla extract: 1/2 teaspoon - Optional garnish: Powdered sugar for dusting This simple recipe uses common ingredients that you might already have at home. The all-purpose flour gives the cobbler its structure. The two types of sugar add both sweetness and texture. Baking powder helps the cobbler rise, while salt enhances the flavors. Whole milk keeps the mixture creamy and rich. The star of the show is the freshly squeezed lemon juice and zest. These ingredients bring a bright, tangy flavor. They make the cobbler refreshing and lively. The pure vanilla extract adds a warm note that balances the tartness of the lemon. If you want a sweet touch, a dusting of powdered sugar on top makes it extra special. Use this detailed list to gather your ingredients, and you’ll be ready to enjoy a delightful treat. For the full recipe, check out the instructions later in the article! - Preheat oven: Set to 350°F (175°C). - Prepare baking dish: Grease a 9x13-inch baking dish. - Combine dry ingredients: In a bowl, mix flour, 3/4 cup sugar, baking powder, and salt. - Add wet ingredients: Pour in milk, melted butter, lemon juice, zest, and vanilla. - Pour the batter into the baking dish: Make sure it spreads evenly. - Creating the ‘magic’: Mix 1/4 cup sugar with 1 cup water. Pour this over the batter gently. - Bake time: Cook for 45-50 minutes until golden brown. - Cooling period before serving: Let it cool for a few minutes before digging in. This step-by-step guide helps you create a delightful Magic Lemon Cobbler. Each step builds the dish's unique flavor and texture. Remember, the magic happens when that sweet water mixture goes on top! Follow the [Full Recipe] for all the details. To make the best Magic Lemon Cobbler, follow these simple tips. First, do not mix the sugar-water with the batter. This step is key for the cobbler's magic. When baked, the water turns into a sweet, gooey layer. It creates a delightful contrast with the fluffy cake on top. Next, always check for doneness with a toothpick. Insert it into the center of the cobbler. If it comes out clean, your cobbler is ready. If it has batter on it, bake a bit longer. Serving your cobbler can be as fun as making it! Place the warm cobbler in individual bowls. Dust the top with powdered sugar for a pretty finish. You can also serve it on elegant plates for a special occasion. For a tasty touch, add whipped cream or a scoop of vanilla ice cream on top. The cold cream pairs well with the warm cobbler. It enhances the lemon flavor and makes each bite a treat. Want to take your cobbler to the next level? Try adding extra lemon zest. It adds brightness and extra zing. You can also use a touch of almond extract. This adds a lovely depth of flavor, making your dessert even more special. When it comes to drinks, serve your cobbler with sweet tea or lemonade. Both drinks complement the lemony taste. They make the perfect pairing for this refreshing dessert. {{image_4}} You can change the flavor of your cobbler by using different fruits. For a twist, try substituting lemon with lime or orange. The zest and juice from these fruits create a bright and fresh taste. They add fun notes that make your dessert unique. You can also make a mixed fruit cobbler. Adding berries like blueberries, raspberries, or strawberries brings a sweet and tart flavor. This mix of fruits makes it colorful and even more delicious. If you need a gluten-free version, switch to almond flour or gluten-free all-purpose flour. Both options work well and keep the cobbler tasty. You won’t miss the wheat at all! For those who want a dairy-free option, use plant-based milk and butter. Almond milk or coconut milk can be great choices. This change still keeps the cobbler rich and satisfying. You can serve this cobbler warm or chilled. Warm cobbler brings out the flavors and feels cozy. If you prefer a cool treat, let it chill in the fridge before serving. Leftover cobbler can be reheated easily. Place it in the oven for a few minutes at 350°F to warm it back up. You can also use a microwave for quick reheating. Just be careful to not overheat it, so it stays soft. Feel free to explore these variations and make the Magic Lemon Cobbler your own! For the full recipe, check out the main section above. To store leftovers, place them in an airtight container. Keep the container at room temperature. This helps maintain the cobbler's delightful texture. The recommended duration for short-term storage is 2-3 days. For long-term storage, you can freeze the cobbler. First, cut it into pieces. Wrap each piece tightly in plastic wrap. Then, place the wrapped pieces in a freezer-safe bag. This keeps them fresh and tasty. When you want to enjoy your cobbler, you need to thaw it. The best practice is to transfer it to the fridge overnight. This method ensures even thawing. Reheating in the oven gives the best texture. Preheat your oven to 350°F (175°C). Place the cobbler in an oven-safe dish, then heat for 15-20 minutes. Keep it covered with foil to prevent drying out. If you're in a hurry, use a microwave. Heat it in short bursts of 30 seconds, checking after each burst. This way, you get a warm serving quickly. For the full recipe, check the earlier section. Enjoy your Magic Lemon Cobbler, whether fresh, frozen, or reheated! This recipe is called "Magic Lemon Cobbler" because of its unique layering. You mix the batter and pour it into a dish. Then, you add a sweet water mixture on top. During baking, the batter rises, and the sweet layer sinks. This creates a fluffy top and a creamy lemon layer below. The flavors blend perfectly, giving you a bright and zesty dessert. You can use bottled lemon juice, but fresh juice is best. Fresh lemon juice has a bright and bold taste. It also adds a fresh aroma that bottled juice lacks. Using fresh juice helps bring out the magic in your cobbler. If you must use bottled, look for one with no added sugar or preservatives. To tell if your cobbler is done, look for a golden brown top. You can also use a toothpick. Insert it into the center; if it comes out clean, it’s ready. The cobbler should feel firm and spring back when you touch it. These cues show it has baked perfectly. Yes, you can add more sugar if you like it sweeter. I suggest adding a little at a time. Taste the batter after each addition. Keep in mind that too much sugar can change the texture. You want a nice balance between sweetness and the tangy lemon flavor. This recipe is great for meal prep! You can bake it a day ahead and store it. Just cool it completely and cover it well. Keep it in the fridge for up to three days. To serve, warm it in the oven for the best taste. It’s perfect for parties or family gatherings! For the [Full Recipe], check the earlier sections. This blog post shared everything you need to know to make Magic Lemon Cobbler. You learned about the key ingredients, detailed steps for prep, and baking. I also provided tips for perfecting your cobbler and offered variations for different diets. Remember, the magic lies in layering and patience. Enjoy your delicious dessert warm, topped with whipped cream or powdered sugar. You can store leftovers for a few days or freeze them for later. Now, gather your ingredients and create a sweet treat that will impress!](https://roastedflavors.com/wp-content/uploads/2025/05/aeed2cb9-b46c-4509-ab89-6dab6bc4f92e.webp)
Magic Lemon Cobbler Delightful and Simple Dessert
Are you craving a simple yet delightful dessert? Let me introduce you to Magic Lemon Cobbler! This recipe combines fresh lemon flavor with a unique
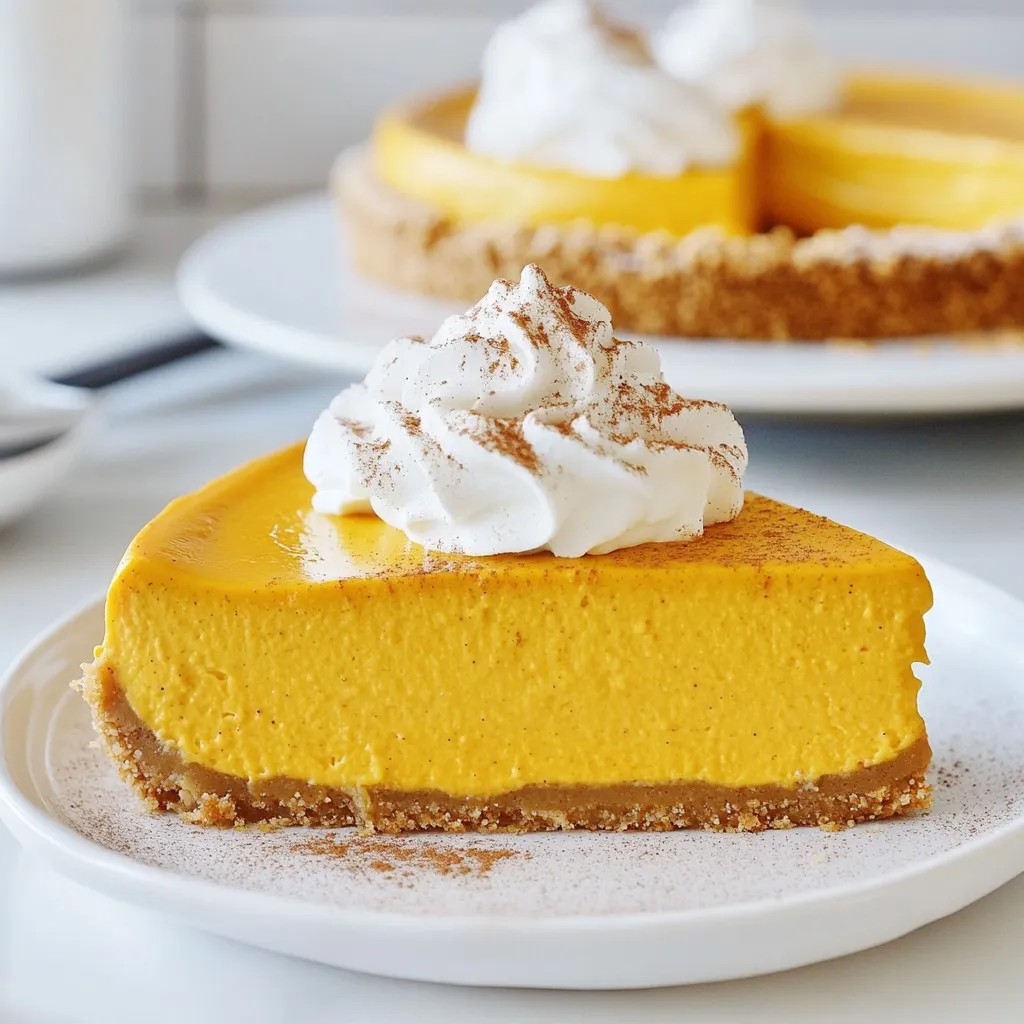
Best Ever Pumpkin Cheesecake Delightful Fall Treat
If you’re craving the ultimate fall dessert, look no further than this Best Ever Pumpkin Cheesecake. With its creamy texture and rich pumpkin flavor, it’s
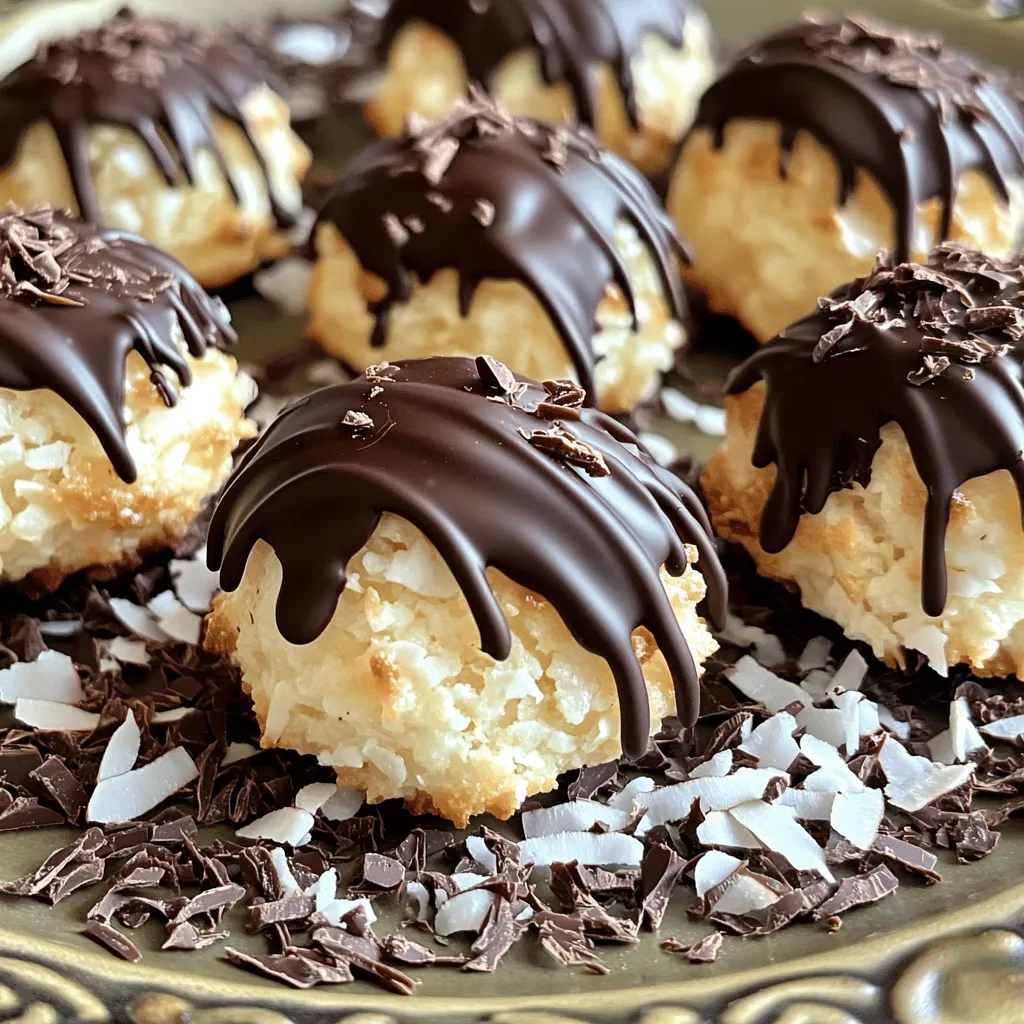
Coconut Macaroons with Dark Chocolate Delight
Get ready to indulge in a treat that combines chewy coconut and rich dark chocolate! In this post, I’ll guide you through making delicious Coconut