Desserts
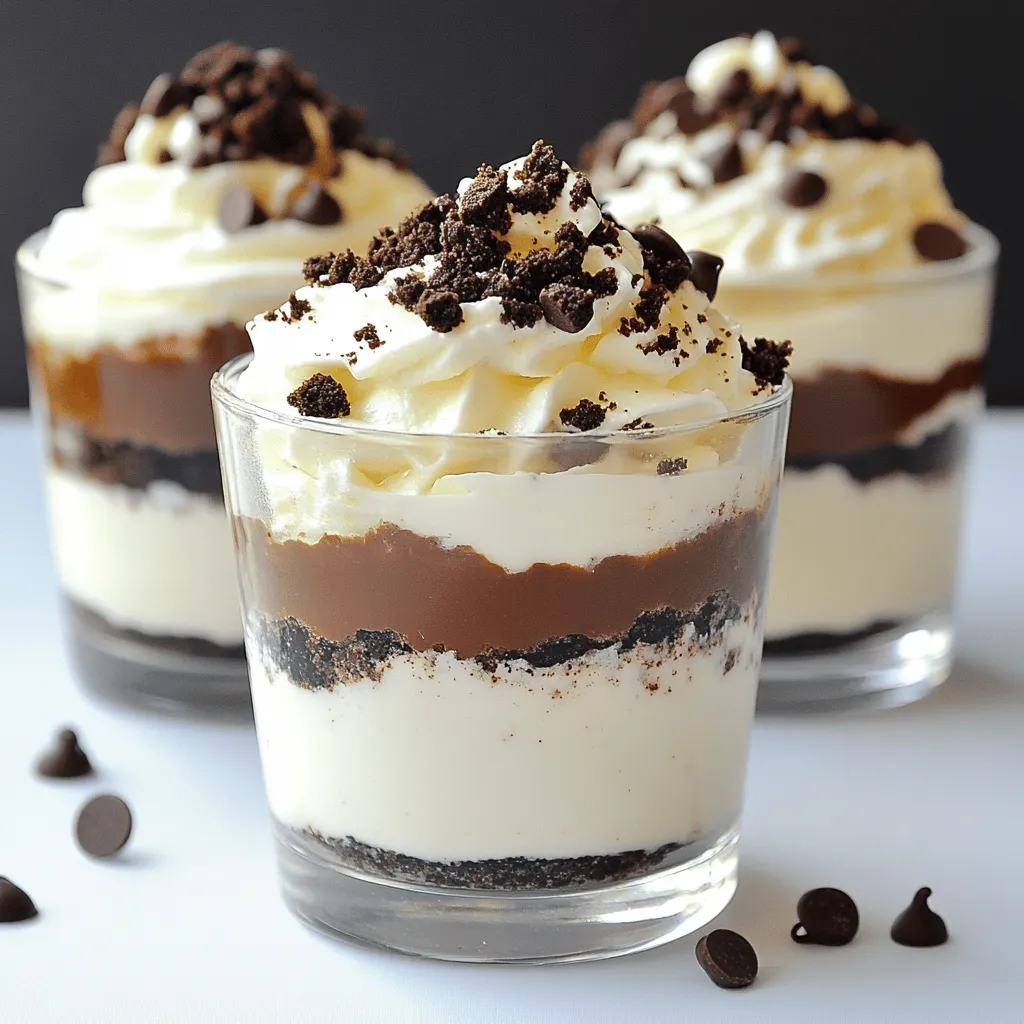
Oreo Dessert Cups Irresistible No-Bake Treats
Indulging in sweet treats has never been easier with these Oreo Dessert Cups. They’re delicious, creamy, and completely no-bake! Perfect for gatherings or a fun
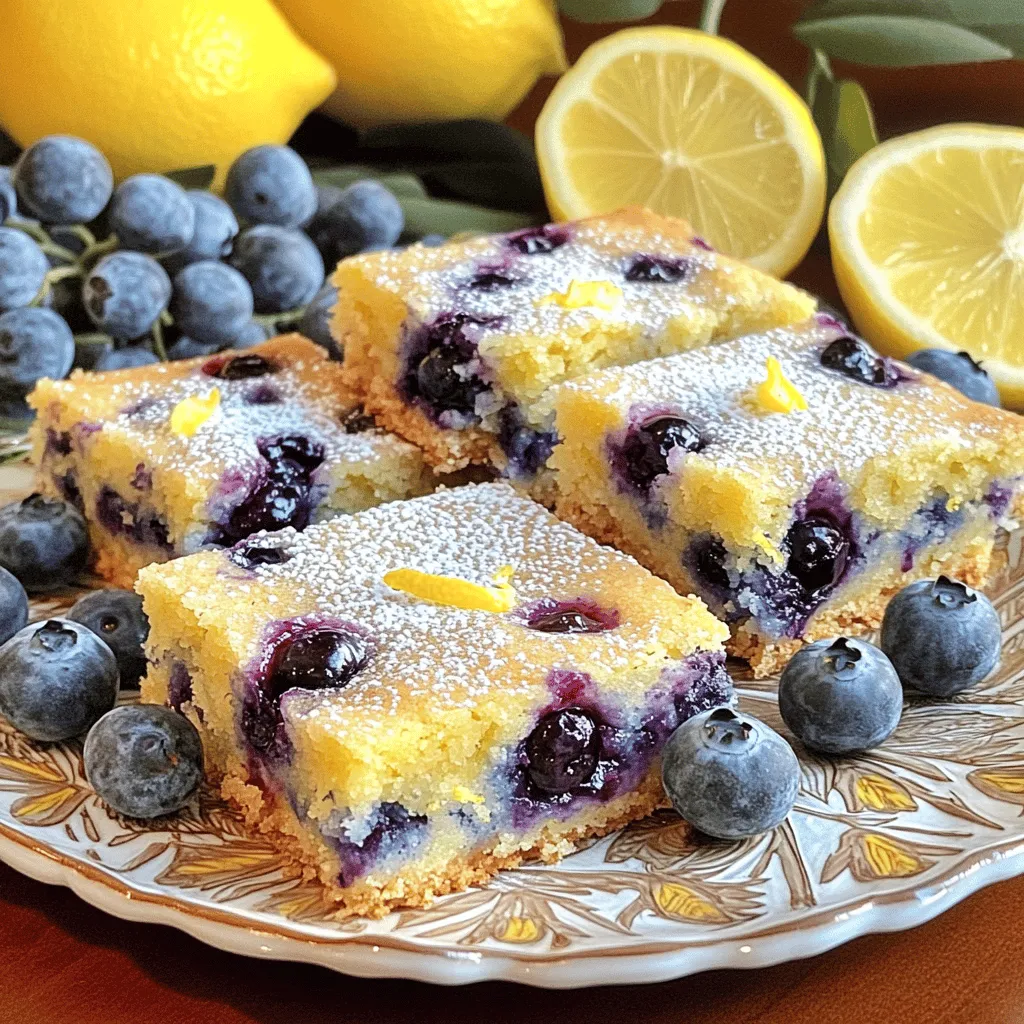
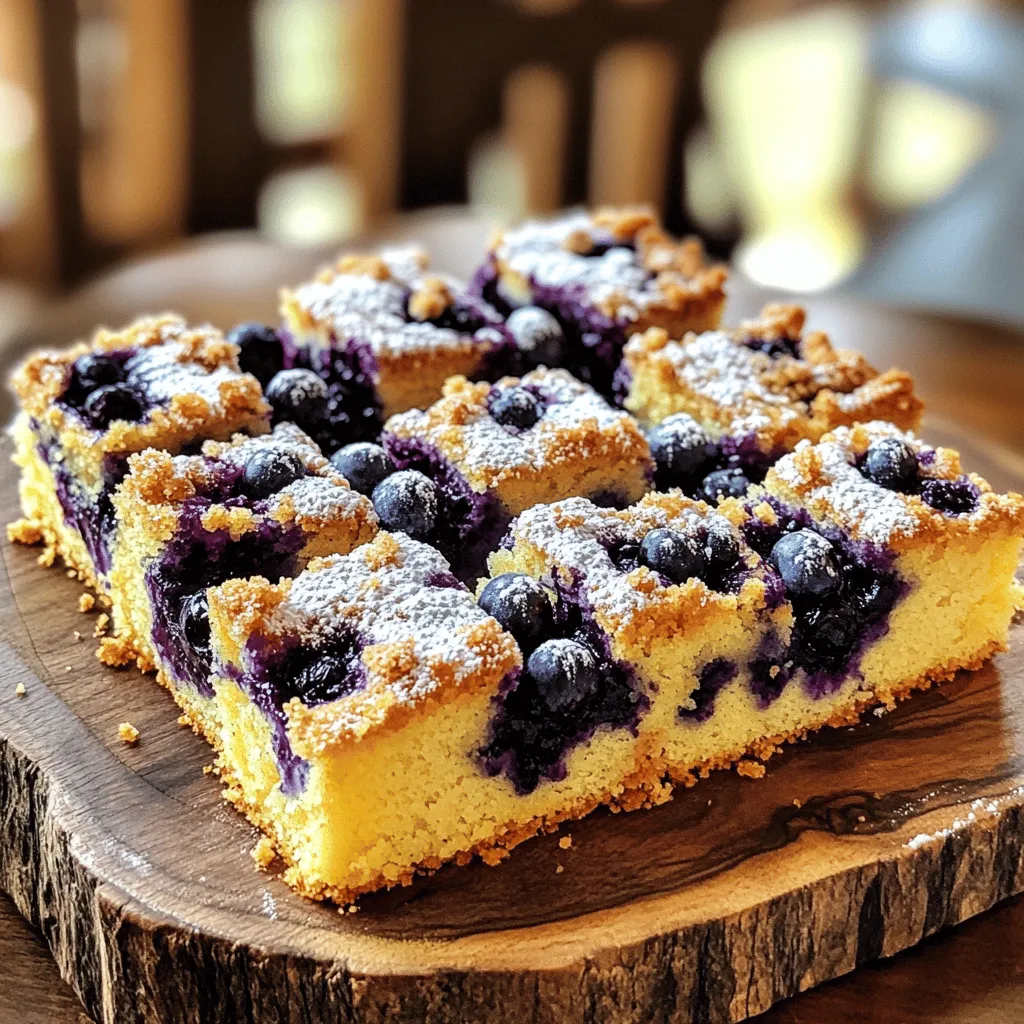
Blueberry Lemon Cookie Bars Delightful and Easy Treat
Are you ready to indulge in a sweet, tangy treat? These Blueberry Lemon Cookie Bars are a delightful and simple dessert you can whip up
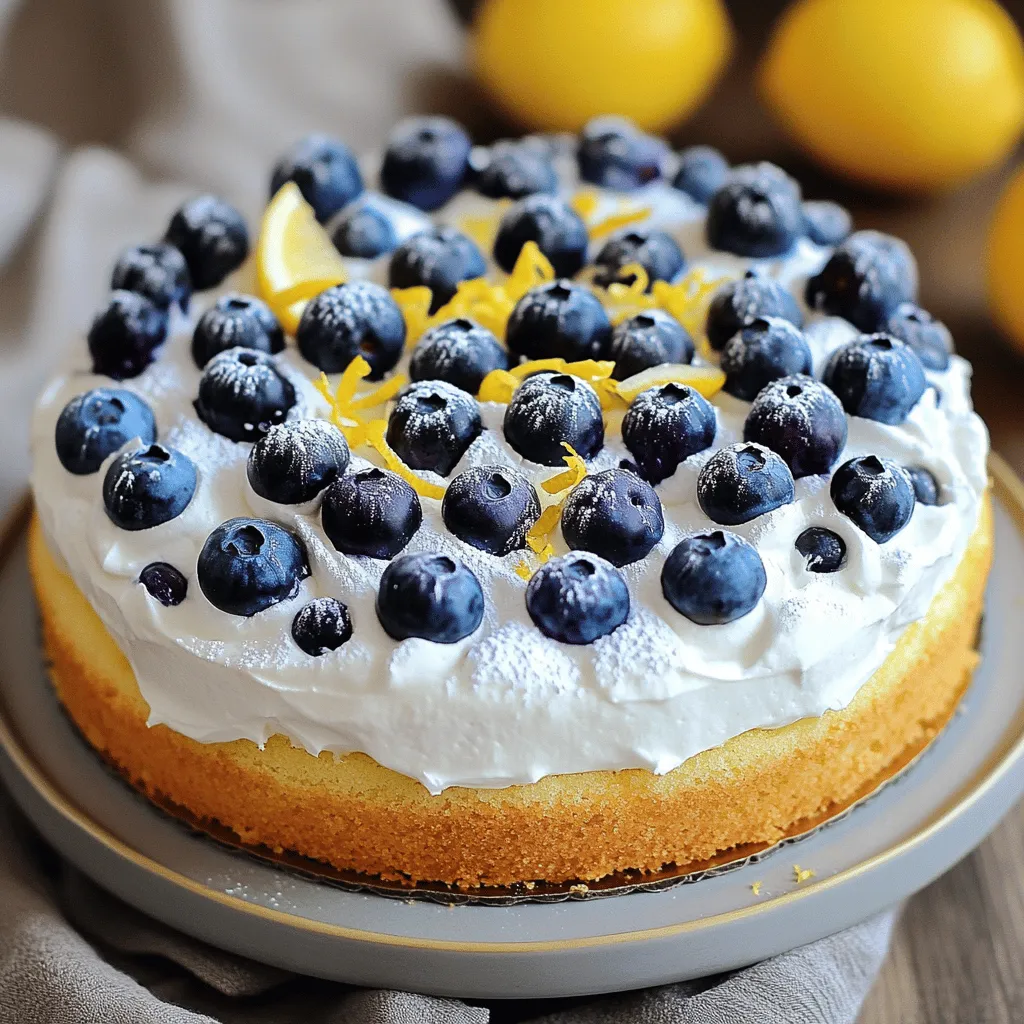
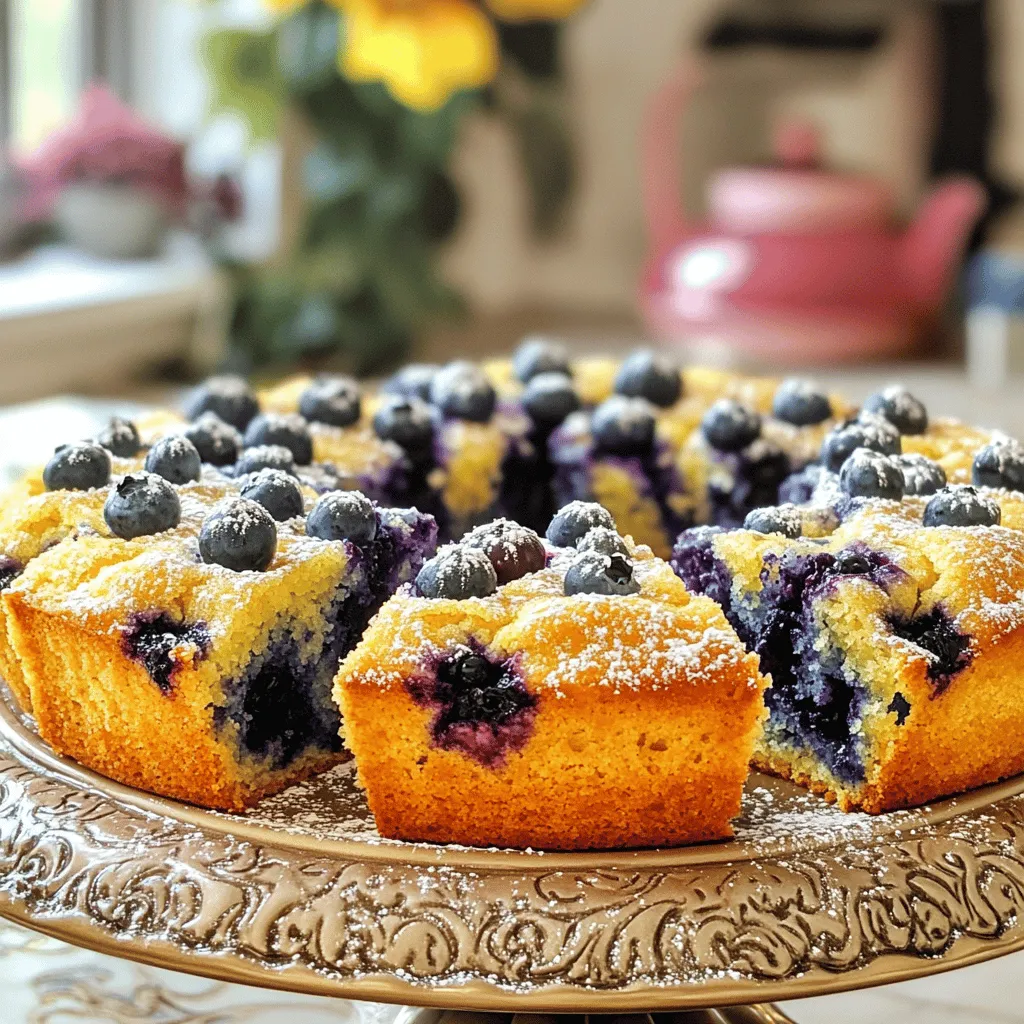
Blueberry Lemon Crème Cake Delightful and Fresh Treat
If you’re craving a dessert that bursts with flavor, look no further than this Blueberry Lemon Crème Cake. Combining fresh blueberries with zesty lemon, this
![To make delicious blueberry lemon blondies, gather these simple items: - 1 cup unsalted butter, melted - 1 ½ cups packed brown sugar - 2 large eggs - 2 teaspoons vanilla extract - 1 teaspoon baking powder - ½ teaspoon baking soda - ½ teaspoon sea salt - 2 cups all-purpose flour - Zest of 1 large lemon - 1 cup fresh blueberries (or frozen if needed) - ½ cup white chocolate chips (optional) You can easily swap some ingredients. If you need a dairy-free option, use coconut oil instead of butter. For a lighter flavor, try using light brown sugar. Eggs can be replaced with flax eggs or applesauce for a vegan version. If fresh blueberries are not available, frozen ones work well too. They might make the batter a bit moister but still taste great! When measuring flour, spoon it into the cup and level it off. This keeps your blondies from being too dense. For the lemon zest, use a fine grater to get the oils and flavor. When mixing, be gentle. Over-mixing can change the texture. Always check for doneness by inserting a toothpick. If it comes out with a few moist crumbs, your blondies are ready! For the best taste, serve them after they cool completely. Enjoy your baking! 1. First, preheat your oven to 350°F (180°C). Line a 9x13 inch baking pan with parchment paper. Leave some paper hanging over the sides. This helps you lift the blondies out later. 2. In a large bowl, mix the melted butter and packed brown sugar. Whisk them until smooth. 3. Add the eggs one at a time. Make sure each one mixes in well before adding the next. Then stir in the vanilla extract. 4. In another bowl, mix the baking powder, baking soda, sea salt, and all-purpose flour. Gradually add this dry mix to the wet mixture. Stir gently until just combined. Don't over-mix, or the blondies may turn out tough. 5. Use a spatula to fold in the lemon zest, fresh blueberries, and white chocolate chips if you choose to add them. Make sure they spread evenly in the batter. 6. Pour the batter into the prepared pan. Spread it out evenly with your spatula. 7. Bake for about 25-30 minutes. The edges should turn golden, and the center should set. A toothpick inserted in the middle should come out with some moist crumbs but not wet batter. 8. Let the blondies cool in the pan for 15 minutes. Use the parchment paper to lift them out onto a wire rack. Let them cool completely before cutting into squares. - Large mixing bowls - Whisk - Spatula - 9x13 inch baking pan - Parchment paper - Toothpick or cake tester - Wire rack - Prepping the pan: 5 minutes - Mixing wet ingredients: 5 minutes - Mixing dry ingredients: 5 minutes - Combining mixtures: 5 minutes - Baking: 25-30 minutes - Cooling: 15 minutes - Total time: Approximately 45 minutes Enjoy your delicious Blueberry Lemon Blondies by following this simple guide. For the complete recipe, check out the Full Recipe. To bake perfect blueberry lemon blondies, follow these tips: - Use room temperature ingredients. This helps mix everything well. - Do not over-mix the batter. Stir gently to keep it light and fluffy. - Check the oven temperature. Use an oven thermometer if needed. - Use parchment paper. It makes it easy to lift out the blondies. Here are some common mistakes when baking blondies: - Using cold eggs or butter. This can make the batter hard to mix. - Not measuring flour correctly. Too much flour can make blondies dry. - Overbaking. Check them a few minutes early for the best texture. - Skipping the lemon zest. It adds essential flavor and brightness. To make your blondies even better, try these ideas: - Add nuts. Walnuts or pecans give a nice crunch. - Mix in spices. A pinch of cinnamon or nutmeg can add warmth. - Use flavored chocolate. White chocolate with lemon or blueberry flavors can enhance sweetness. - Serve with a drizzle. A lemon glaze can add a zesty touch. For the full recipe, check out the [Full Recipe]. {{image_4}} You can change the flavor of your blondies by using different fruits. In summer, try using peaches or cherries. They add a sweet and juicy burst. In fall, you might want to use apples or pears for a cozy taste. Each fruit gives a new twist, making it fun to experiment. If you want gluten-free blondies, swap all-purpose flour for almond or coconut flour. These flours work well and keep the blondies moist. For vegan options, replace eggs with flax eggs. Mix one tablespoon of ground flaxseed with three tablespoons of water. Let it sit for five minutes. Use plant-based butter in place of regular butter for a rich flavor. You can make your blondies even more special with fun mix-ins. Try adding nuts like walnuts or pecans for crunch. You can also mix in shredded coconut for a tropical vibe. If you love chocolate, consider adding dark chocolate chips or chunks. Each choice adds a new layer of taste to your blondies. For the full recipe, check out the Berry Zesty Lemon Blondies 🫐. To keep your Blueberry Lemon Blondies fresh, store them in an airtight container. Place a piece of parchment paper between layers to prevent sticking. They will stay good at room temperature for about three days. If you want to keep them longer, consider refrigerating them. This will extend their freshness to about a week. Freezing is a great option for long-term storage. Start by letting the blondies cool completely. Then, cut them into squares. Wrap each piece tightly in plastic wrap. Place the wrapped blondies in a freezer-safe bag or container. They can last up to three months in the freezer. When you want to enjoy them, just take out the amount you need. Reheating your blondies can make them taste fresh again. For the best result, preheat your oven to 350°F (180°C). Place the blondies on a baking sheet and cover them with foil. Heat for about 10 to 15 minutes. If you prefer a microwave, heat one piece at a time for about 15 seconds. Enjoy them warm for a cozy treat! Blueberry lemon blondies have a soft and chewy texture. They are dense yet moist. You will love the slight crispness on the edges. The middle stays soft, thanks to the butter and sugar. The blueberries add little bursts of juiciness throughout. The lemon zest gives a nice, bright flavor that balances the sweetness. To check if the blondies are done, look for golden edges and a set center. Insert a toothpick into the middle. It should come out with a few moist crumbs, not wet batter. If the toothpick is clean, it may be overbaked. Bake for about 25-30 minutes, but keep an eye on them towards the end. Yes, you can use frozen blueberries in this recipe. Just make sure to add them straight from the freezer. Do not thaw them, as this can make the batter too wet. Frozen blueberries might bleed a bit more color, making your blondies look even more inviting. They pack the same great flavor and will still taste amazing. For the complete recipe, check the Full Recipe section. You learned how to make tasty blueberry lemon blondies. We covered ingredients, cooking steps, and essential tips. Remember the importance of using fresh fruits and avoiding common mistakes. Try different variations to suit your taste. Store them properly to enjoy later. These blondies are fun and easy to bake! Enjoy sharing them with friends and family. Happy baking!](https://roastedflavors.com/wp-content/uploads/2025/05/e0ba88e7-13fd-4833-bd2b-9509ddaddd87.webp)
Blueberry Lemon Blondies Delightful Sweet Treat
Craving a sweet treat that bursts with flavor? Let me introduce you to Blueberry Lemon Blondies! These delightful bites blend juicy blueberries with fresh lemon
Ultimate Blueberry Coffee Cake Delightful and Easy Treat
Do you crave a warm, sweet treat that pairs perfectly with your morning coffee? Look no further! My Ultimate Blueberry Coffee Cake is here to
Blueberry Muffin Cake Simple and Delightful Recipe
Are you ready to bake a treat that’s simple yet oh-so-delightful? This Blueberry Muffin Cake is just that! With juicy blueberries and a hint of
Irresistible Blueberry Sour Cream Coffee Cake Recipe
If you’re craving a sweet treat that’s both delicious and easy to make, look no further! This Irresistible Blueberry Sour Cream Coffee Cake will have
![- 2 cups fresh blueberries - 1 cup heavy whipping cream - 1/2 cup lemon curd - 1/2 cup powdered sugar - 1 teaspoon pure vanilla extract - Zest of 1 lemon - Fresh mint leaves for garnish For this Lemon Blueberry Fluff recipe, fresh ingredients are key. Using ripe blueberries gives a sweet burst of flavor. The heavy cream adds richness, while the lemon curd brings a bright tang. You will also need some pantry staples. Powdered sugar sweetens the fluff without adding graininess. Pure vanilla extract enhances the overall taste. If you want to elevate your dessert, consider optional garnishes. Lemon zest adds a refreshing aroma and bright color. Fresh mint leaves offer a beautiful touch and a hint of freshness. For the full recipe and more details, check out the [Full Recipe]. Enjoy creating this delightful treat! First, take a large mixing bowl. Add the heavy whipping cream and vanilla extract. Use a handheld mixer or a stand mixer with a whisk attachment. Whip the cream on medium-high speed. Keep going until soft peaks form, which takes about 2-3 minutes. Once soft peaks form, sprinkle the powdered sugar in slowly. Continue to whip until you see stiff peaks. Be careful not to overwhip the cream. Overwhipping can make it grainy, and no one wants that! In a separate medium bowl, mix the lemon curd and lemon zest. Stir them well until they combine smoothly. Next, gently fold this lemon mixture into the whipped cream. Use a spatula for this step. Be careful to avoid deflating the whipped cream. Keep folding until you see no streaks of lemon. Now it's time to add the fresh blueberries. Gently mix them into the lemon cream. Ensure all the blueberries are evenly spread throughout the fluff. If you want, save a few blueberries for garnish later. To prevent deflation, use a light hand while mixing. Folding is key here. This step keeps your dessert light and fluffy, just like the name suggests! For the complete method, check out the Full Recipe. To make the best Lemon Blueberry Fluff, avoid whipping the cream too long. Overwhipping can make it grainy and less creamy. You want soft peaks first, then stiff peaks. This texture is key for a light and airy feel. Once you've mixed the cream, let it chill. Chilling for at least 30 minutes helps the flavors blend well. This waiting time is crucial for a tasty dessert. The flavors will meld, giving you a refreshing bite with every spoonful. When it's time to serve, think about how to present your fluff. Use clear dessert bowls or elegant glasses to show off those bright blueberries. This makes your dish look more appealing. For extra flavor, add toppings. A drizzle of lemon curd on top can enhance the taste. You could also sprinkle more lemon zest for a vibrant look. Fresh mint leaves make a great garnish too. They add color and a nice aroma that brightens the dish. {{image_4}} You can switch things up with this recipe. Instead of lemon curd, try lime curd. Lime gives a nice twist. You can also use orange curd for a sweeter taste. If you want more depth, add a hint of almond or coconut extract. A little can make a big difference. Just a few drops will elevate the flavors. Experiment and find your favorite mix! If you have a larger crowd, you can easily scale this recipe. Just double or triple the ingredients. This dish works well for parties or family gatherings. For smaller servings, consider using mini dessert cups. This way, everyone can have their own small treat. You’ll impress your guests with these cute, individual servings. For the full recipe, check the complete instructions above. To keep your Lemon Blueberry Fluff fresh, use clear containers with tight lids. Glass or plastic containers work well. Always let the fluff cool down before you seal it. This helps avoid condensation inside the container. Store it in the fridge to keep it safe and tasty. You can store Lemon Blueberry Fluff in the fridge for about three days. After that, it may lose its fluffiness. Look out for any changes in smell or color. If you see any signs of spoilage, like mold or an off smell, it’s best to toss it. Enjoy your dessert while it’s fresh for the best taste! Can I use frozen blueberries instead of fresh? Yes, you can use frozen blueberries. They work well in this recipe. However, frozen blueberries may release more juice. This can change the fluff's texture slightly. You might get a bit more color too. If you use frozen, let them thaw first. Drain any excess juice to keep the fluff thick. How to make Lemon Blueberry Fluff dairy-free? To make this fluff dairy-free, use coconut cream instead of heavy whipping cream. You can also use a dairy-free lemon curd. This keeps the same great flavor while making it suitable for those who avoid dairy. What is the best way to whip cream effectively? To whip cream well, start with cold equipment. Chill your bowl and beaters in the fridge for 10 minutes. This helps the cream whip faster. Beat on medium-high speed until soft peaks form. Add sugar slowly to prevent graininess. Keep whipping until stiff peaks form, but don’t overwhip. Can leftovers be frozen for later use? You can freeze leftovers, but the texture may change. Thaw them in the fridge before serving. The fluff might lose some of its lightness. For best results, enjoy it fresh. In this post, we explored how to make Lemon Blueberry Fluff. We covered all essential ingredients, from fresh blueberries to rich vanilla. I shared step-by-step instructions to whip cream and combine flavors. We also discussed variations, serving tips, and storage methods. This dessert is not just tasty; it's flexible too. You can adapt it to your own taste and needs. Enjoy making this easy and delightful treat!](https://roastedflavors.com/wp-content/uploads/2025/05/ae11f4be-34a5-40cb-87f5-374fc898fc62.webp)
Lemon Blueberry Fluff Delightful and Easy Dessert Recipe
Looking for a simple yet delicious dessert? This Lemon Blueberry Fluff combines fresh blueberries, creamy whipped cream, and zesty lemon curd for a delightful treat.

Cannoli with Mascarpone Filling Delightfully Simple Recipe
Are you ready to impress your friends and family with a treat that’s both simple and delicious? In this recipe, I’ll guide you through making
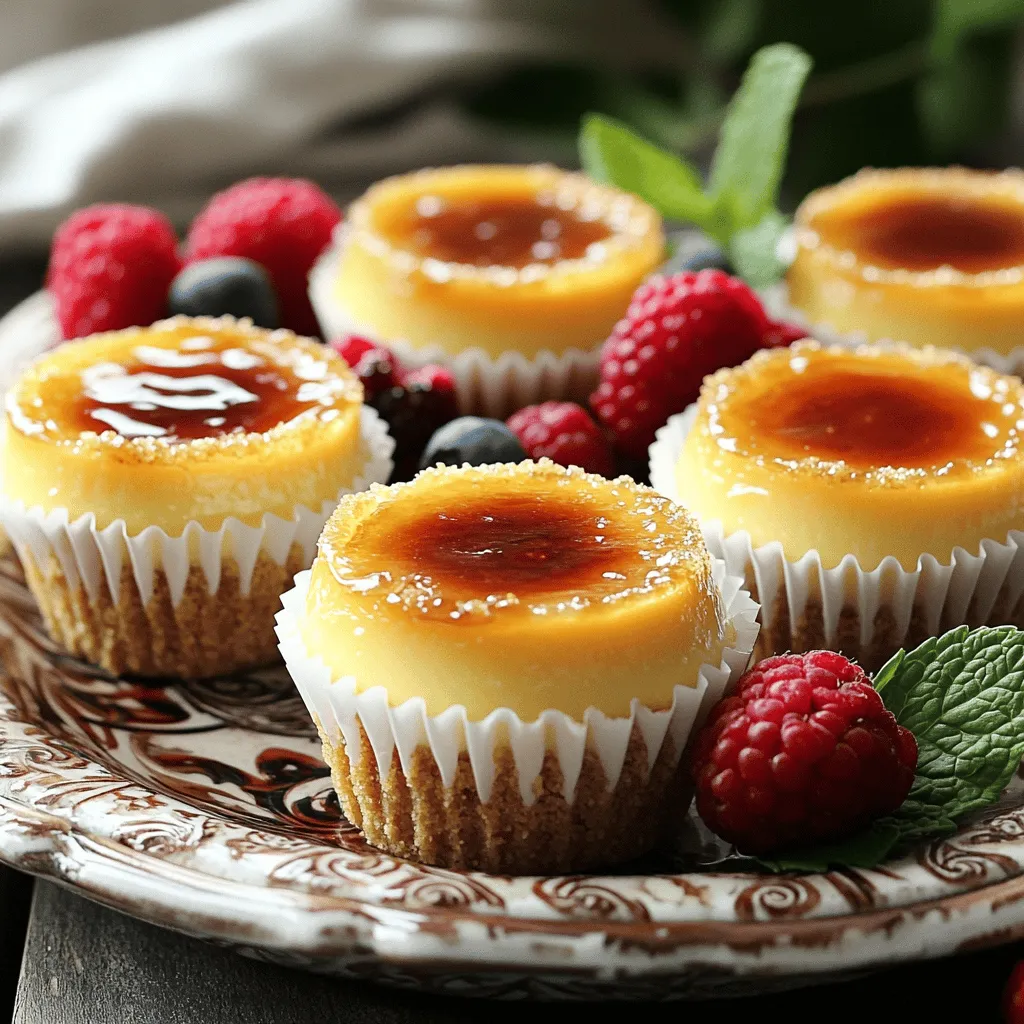
Mini Crème Brûlée Cheesecakes Creamy Delightful Treat
Craving a creamy dessert that wows your taste buds? Try these Mini Crème Brûlée Cheesecakes! They combine the rich flavor of cheesecake with a crunchy