Desserts
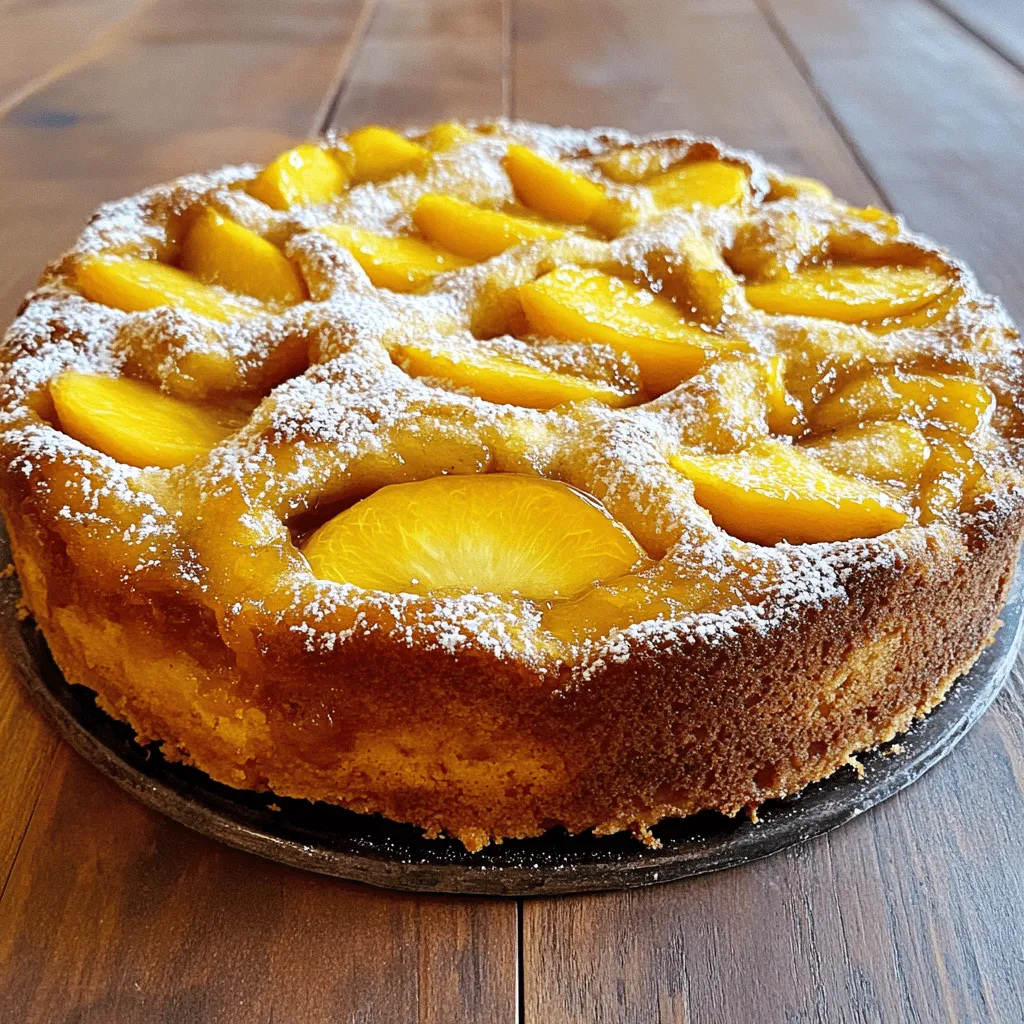
Peach Upside-Down Cake Delightful and Simple Recipe
Looking for a delightful dessert that impresses your family and friends? You’ve found it! This Peach Upside-Down Cake is easy to make and bursting with

The Perfect Peach Pie Flavorful and Simple Recipe
Are you ready to bake the perfect peach pie? This recipe brings the taste of summer into your kitchen with just a few simple steps.
![To make this easy Southern peach cobbler, gather these main ingredients: - 4 cups fresh peaches, peeled and sliced - 1 cup granulated sugar, divided - 1 teaspoon pure vanilla extract - 1 teaspoon ground cinnamon - 1 tablespoon freshly squeezed lemon juice - 1 cup all-purpose flour, sifted - 1 tablespoon baking powder - 1/2 teaspoon fine salt - 1 cup whole milk, at room temperature - 1/2 cup unsalted butter, melted and slightly cooled These ingredients combine to create a sweet and comforting dessert that makes everyone smile. You can also add some optional ingredients for extra flavor: - 1 teaspoon ground nutmeg (for a warm spice) - Vanilla ice cream (for serving, highly recommended) Using nutmeg gives a nice aroma to the cobbler. Serving it with ice cream makes it even better! If you don’t have some ingredients, here are some substitutions: - Use frozen peaches instead of fresh ones. Just thaw and drain them well. - Swap granulated sugar for brown sugar for a deeper flavor. - For a dairy-free option, use almond milk or coconut milk instead of whole milk. - You can replace all-purpose flour with gluten-free flour for a gluten-free version. These swaps can help you make the recipe suit your needs. Enjoy this delightful treat with your own twist! For the complete recipe, check out the [Full Recipe]. Start by washing and peeling 4 cups of fresh peaches. Slice them into thin wedges. In a big bowl, mix the peach slices with 1/2 cup of granulated sugar, 1 teaspoon of vanilla extract, 1 teaspoon of ground cinnamon, and 1 tablespoon of lemon juice. Toss gently to coat the peaches well. Let this sit for about 10 minutes. This step lets the peaches soak in the sugar and spices, making them sweeter and tastier. In another bowl, whisk together 1 cup of sifted all-purpose flour, 1 tablespoon of baking powder, 1/2 teaspoon of fine salt, and the remaining 1/2 cup of sugar. This dry mix is the base for your batter. Slowly add 1 cup of whole milk while stirring gently. Mix just until combined; be careful not to overmix. Finally, fold in 1/2 cup of melted and slightly cooled unsalted butter. This will make your batter smooth and rich. Pour the batter into a greased 9x13-inch baking dish. Spread it evenly across the bottom. Next, spoon the marinated peach mixture over the batter. Do not stir; this helps create those lovely layers in the cobbler. If you like, sprinkle some ground nutmeg on top for extra flavor. Place the dish in an oven preheated to 350°F (175°C) and bake for 40-45 minutes. Look for a golden brown top and bubbly surface. Once done, let it cool for a few minutes before serving. This lets the flavors deepen and makes it easier to scoop out. You can find the full recipe [here](#). Pick ripe peaches for the best taste. Look for peaches that are soft but not mushy. They should smell sweet and fragrant. A little give when you press them means they are ready. Avoid peaches with bruises or dark spots. You want to enjoy the fresh, juicy flavor in your cobbler. One mistake is overmixing the batter. This can lead to a tough cobbler. Mix just until combined for a light texture. Another common error is using unripe peaches. This can make your cobbler less sweet and flavorful. Always taste your peaches before adding them. Lastly, don’t stir the peach mixture into the batter. Just layer it on top for that perfect cobbler effect. To get great texture, use cold butter in your batter. This helps create a light, flaky crust. Adding lemon juice brightens the peach flavor. Also, don’t skip the vanilla! It adds warmth and depth to the dish. For extra flavor, sprinkle nutmeg on top before baking. This will enhance the sweet peach taste. Follow these tips for a truly delightful peach cobbler experience. Check the Full Recipe for more details! {{image_4}} You can add other fruits to your peach cobbler for a fun twist. Try using berries, like blueberries or raspberries, alongside the peaches. Apples also work great. Just keep the same amount of fruit. Mix the fruits in with your peaches, and enjoy a burst of flavors. If you need a gluten-free option, swap the all-purpose flour for a gluten-free blend. Many stores sell these blends. Make sure it has a good mix of flours for the best results. Follow the same instructions as the original recipe. You will still get a tasty cobbler! To make this recipe vegan, replace the butter with coconut oil or a vegan butter. You can also use almond milk or soy milk instead of whole milk. For the eggs, you can try using flaxseed meal mixed with water. Just mix one tablespoon of flaxseed meal with three tablespoons of water and let it sit until it thickens. These changes keep the cobbler delicious and plant-based. For the full recipe, check out the earlier section. To keep your leftover peach cobbler fresh, store it in an airtight container. Place it in the fridge. This will help maintain its taste and texture. Try to eat it within three to four days for the best flavor. If you want to save some cobbler for later, freezing is a great option. First, let the cobbler cool completely. Then, cut it into portions. Wrap each piece tightly in plastic wrap, then place them in a freezer-safe bag. You can freeze it for up to three months. To reheat, take a piece out and let it thaw in the fridge overnight. Then, warm it in the oven at 350°F for about 15 minutes. This keeps it soft and tasty. Leftover peach cobbler is delicious on its own, but you can make it even better. Serve it warm with a scoop of vanilla ice cream. The cold ice cream melts into the warm cobbler, creating a tasty mix. You can also top it with whipped cream or a sprinkle of cinnamon for extra flavor. If you're feeling adventurous, add some nuts for crunch. Enjoy the cozy taste of Southern peach cobbler even after the main meal! You can serve peach cobbler with many tasty sides. Here are some ideas: - Vanilla ice cream adds a creamy touch. - Whipped cream gives it a lightness. - Fresh mint leaves add a pop of color and flavor. - A sprinkle of cinnamon enhances the warm spices. These sides make each bite even better. Yes, you can use canned peaches. They save time and are easy to find. Just make sure to drain them well. Here’s how to adapt the recipe: - Use about 3 cups of canned peaches. - Reduce the sugar by a bit since canned peaches are sweet. This way, you still get that delicious cobbler taste. You can tell if the cobbler is done by looking and testing. Here are some signs: - The top should be golden brown. - The edges should be bubbly. - A toothpick inserted into the center should come out clean. If these signs are met, your cobbler is ready to enjoy! This blog post covered all you need to know about making easy Southern peach cobbler. We looked at the key ingredients, from peaches to optional flavors. I shared step-by-step instructions to prep, mix, and bake the cobbler perfectly. You learned tips to pick ripe peaches and avoid common mistakes. We explored fun variations, storage tips, and answered your FAQs. With this knowledge, you can create a delicious peach cobbler, perfect for any occasion. Enjoy your baking!](https://roastedflavors.com/wp-content/uploads/2025/06/ddd95508-cccc-4f9a-bba0-9a156b28bb1c.webp)
Easy Southern Peach Cobbler Delightful and Simple Recipe
Are you ready to bring a taste of the South into your kitchen? My Easy Southern Peach Cobbler recipe is both delightful and simple. Fresh
![When making Bisquick peach cobbler, you need to gather some simple items. Here’s what you will need: - 4 cups fresh peaches, peeled and sliced - 1 cup granulated sugar (divided: ¾ cup for peaches, ¼ cup for batter) - 1 tablespoon fresh lemon juice - 1 ½ cups Bisquick mix - ¾ cup whole milk - ½ cup unsalted butter, melted and slightly cooled - 1 teaspoon baking powder - ½ teaspoon pure vanilla extract - ½ teaspoon ground cinnamon - Pinch of salt Each ingredient plays an important role in making this dessert taste amazing. Fresh peaches are the star, bringing a sweet and juicy flavor. The sugar helps to enhance the peaches' natural sweetness. The lemon juice adds a nice zing, balancing the flavors. The Bisquick mix makes this recipe quick and easy. It saves time while still giving you a fluffy texture. Whole milk and melted butter add richness. Baking powder makes the batter rise and stay light. Vanilla extract and ground cinnamon add warmth and depth to the flavor. This simple list gives you everything you need to create a delicious Bisquick peach cobbler. For the complete instructions, check out the Full Recipe. First, we need to prepare the peaches. Take your fresh peaches, peel, and slice them. In a large bowl, toss the peaches with ¾ cup of granulated sugar and 1 tablespoon of fresh lemon juice. This step is called maceration. It helps release juice and brings out the peach's sweetness. Let the peaches sit for about 10 minutes. You will see them become syrupy and even sweeter. While the peaches sit, let’s make the batter. In another bowl, mix together 1 ½ cups of Bisquick mix, ¼ cup of sugar, and 1 teaspoon of baking powder. Next, add ¾ cup of whole milk, ½ cup of melted butter (make sure it’s not hot), ½ teaspoon of pure vanilla extract, ½ teaspoon of ground cinnamon, and a pinch of salt. Whisk everything together until the batter is smooth. This is the base for our cobbler. Now, pour the prepared batter into a greased 9x13 inch baking dish. Spread it evenly across the bottom. Carefully spoon the peach mixture on top of the batter, along with all the juices. Do not stir! It’s important to keep that layered look. This will give the cobbler a beautiful and inviting appearance. Preheat your oven to 350°F (175°C). Once it’s hot, place the cobbler in the oven. Bake for 45 to 50 minutes. You know it’s done when the top is golden brown. Insert a toothpick in the center; it should come out clean. After baking, remove the cobbler from the oven and let it cool for at least 15 minutes. This cooling time helps set the cobbler for easier serving. For the full recipe, you can refer to "Peachy Dreams Bisquick Cobbler ". To keep your cobbler fresh, store it in the fridge. Place it in an airtight container. It will last about three days. If you want to reheat it, use an oven. Preheat to 350°F. Cover the cobbler with foil to keep it moist. Heat for about 15 minutes. This ensures it stays soft and golden. Serve your cobbler warm for the best taste. It pairs perfectly with vanilla ice cream or whipped cream. The cold cream contrasts nicely with the warm cobbler. For a pretty touch, add fresh peach slices on top. This adds color and extra peach flavor. To make your cobbler even tastier, try adding spices. A dash of nutmeg or ginger can bring warmth. You can also use almond extract for a nutty twist. For texture, consider adding nuts or coconut flakes. They add crunch and depth to every bite. {{image_4}} You can change up this Bisquick peach cobbler with other fruits. Berries like blueberries or raspberries work well. Apples are also a great choice in the fall. Just remember to adjust the sugar based on the fruit's sweetness. You can mix fruits, too! This makes your cobbler even more fun. In summer, use fresh berries. In winter, try apples or pears. Seasonal fruits keep your dessert exciting and tasty. If you need a gluten-free version, it’s easy to swap the Bisquick mix. Use a gluten-free baking mix instead. Make sure to check the package for the right amount to use. Baking times may change slightly, so keep an eye on your cobbler. The texture might differ, but it can still be delicious. Always test with a toothpick to check for doneness. Gluten-free options allow everyone to enjoy this treat! Do you want a sweeter cobbler? Try adding caramel or brown sugar to the peach mix. This gives your dessert a rich flavor. You can also sprinkle a streusel topping on top before baking. This adds crunch and texture. A mix of oats, butter, and sugar creates a lovely topping. These small changes bring a whole new level of yum! You can make this cobbler your own with just a few tweaks. For the complete recipe, check out the [Full Recipe]. Enjoy experimenting with your Bisquick peach cobbler! You can freeze peach cobbler for later enjoyment. First, let it cool completely. Then, wrap it tightly in plastic wrap or aluminum foil. You can also use an airtight container. This helps keep it fresh and tasty. When stored properly, peach cobbler lasts up to three months in the freezer. To thaw, place the cobbler in the fridge overnight. This method keeps the texture nice and moist. If you’re in a rush, you can microwave it on low power for a few minutes. Just be careful not to overheat. Refrigerated peach cobbler stays fresh for about three to four days. Store it in a covered dish to prevent it from drying out. Check for signs of spoilage before eating. If you see mold or any unusual smells, it’s best to toss it. You might also notice changes in texture. If it feels too dry or hard, it may not taste good anymore. Yes, you can use canned peaches. However, they might change the texture. Canned peaches are softer than fresh ones. To fix this, drain the syrup well. You can also reduce the sugar a bit to balance the sweetness. Fresh peaches give a firmer bite. They add a bright flavor that canned peaches may lack. So, if you want a classic taste, fresh is best. To keep your cobbler from being soggy, follow a few steps. Use the right peach-to-batter ratio. If you have too many peaches, they can release too much juice. Make sure to macerate the peaches for only 10 minutes. This helps keep their texture. Also, bake the cobbler until it turns golden brown. This ensures the batter cooks well. Let it cool for a bit before serving. This resting time helps it set nicely. You can mix in many flavors to make your cobbler special. Try adding a bit of nutmeg or ginger for warmth. You can also toss in some blueberries or raspberries for a fruity twist. If you like nuts, chopped pecans or almonds add a nice crunch. Coconut flakes can add a fun texture and flavor. Don’t be afraid to experiment and find your favorite combo! For complete instructions, check out the “Peachy Dreams Bisquick Cobbler ”. In this article, we explored a delicious peach cobbler recipe using Bisquick. We discussed ingredients, preparation, baking steps, and tips for serving. Remember that you can customize this recipe with different fruits or flavors. Don’t forget to store leftovers properly for later enjoyment. Making this cobbler is simple and fun, whether you're a novice or an expert. Try it out, and see how amazing it tastes! Enjoy your baking journey and share this treat with loved ones!](https://roastedflavors.com/wp-content/uploads/2025/06/212eb43e-1438-49bc-9d35-ff3066ccb790.webp)
Bisquick Peach Cobbler Delightful and Easy Recipe
Are you ready to whip up a delicious and easy Bisquick Peach Cobbler? This recipe is a game changer, bringing the sweetness of fresh peaches
![To make Pina Colada Zucchini Bread, gather these key ingredients: - 1 ½ cups grated zucchini (about 2 medium zucchini) - 1 cup crushed pineapple (drained well) - 2 large eggs (beaten) - ½ cup coconut oil (melted and slightly cooled) - 1 cup brown sugar (packed) - ½ cup granulated sugar - 1 teaspoon vanilla extract - 1 teaspoon coconut extract - 2 cups all-purpose flour - 1 teaspoon baking soda - ½ teaspoon baking powder - ½ teaspoon salt - 1 teaspoon ground cinnamon - ½ cup unsweetened shredded coconut - ½ cup chopped walnuts (optional) These ingredients blend together to create a moist and rich bread with tropical flavors. You can customize your zucchini bread with a few fun add-ins. Try adding: - ½ cup chopped macadamia nuts for crunch - ½ cup dried coconut flakes for more texture - A handful of dark chocolate chips for sweetness These options can enhance the flavor and give your bread a unique twist. Freshness is key to a delicious bread. Choose firm zucchini, as it provides more moisture. The pineapple should be ripe and juicy. After baking, store the bread in an airtight container. This keeps it soft and fresh. You can also freeze it if you want to enjoy it later. Just remember to wrap it well! For the best taste, consume within a week. If you want to make it last longer, freeze slices for up to three months. Enjoy your tropical treat! To start, gather your ingredients for the Pina Colada Zucchini Bread. You need 1 ½ cups of grated zucchini, which is about 2 medium zucchinis. Next, grab 1 cup of crushed pineapple and drain it well. Keep the juice for later. You also need 2 large eggs, ½ cup of melted coconut oil, and both brown and granulated sugar. Don’t forget the vanilla and coconut extracts! In a large bowl, mix the grated zucchini, crushed pineapple, beaten eggs, coconut oil, brown sugar, granulated sugar, vanilla extract, and coconut extract. Stir until everything is smooth. In another bowl, whisk together 2 cups of all-purpose flour, 1 teaspoon of baking soda, ½ teaspoon of baking powder, ½ teaspoon of salt, and 1 teaspoon of ground cinnamon. Now, slowly add the dry mix to the wet mix. Stir gently until just combined to keep the bread light. If you like, fold in ½ cup of shredded coconut and ½ cup of chopped walnuts for some crunch. Preheat your oven to 350°F (175°C). Prepare a 9x5 inch loaf pan by greasing it or lining it with parchment paper. Pour the batter into the loaf pan and smooth the top with a spatula. Bake the bread for 60 to 70 minutes. Around the 55-minute mark, check the bread. Insert a toothpick into the center. If it comes out clean, the bread is ready. If not, bake for a few more minutes. When done, let the bread cool in the pan for 10 minutes, then move it to a wire rack to cool completely. Enjoy the tropical scent as it fills your kitchen! To get the best texture in your Pina Colada Zucchini Bread, you need to squeeze the zucchini first. Use a clean cloth to remove excess moisture. This step helps your bread rise well and stay light. Also, remember not to overmix the batter. Overmixing makes the bread dense and tough. Stir gently until the dry ingredients just blend into the wet ones. For a flavor boost, use fresh extracts. Instead of regular vanilla extract, opt for pure vanilla for a richer taste. You can also add a splash of the reserved pineapple juice to the batter. This adds a sweet touch and keeps the bread moist. If you love coconut, consider adding extra shredded coconut or using coconut flour for part of the all-purpose flour. Avoid using too much zucchini, as it can make the bread soggy. Stick to the recommended 1 ½ cups of grated zucchini. Another common mistake is skipping the cooling time. Letting the bread cool fully ensures better slicing and taste. Lastly, don’t forget to check the oven temperature. An oven that is too hot can burn the edges before the center cooks through. For the full recipe, you can refer to the earlier section. Enjoy your baking! {{image_4}} You can make your Pina Colada Zucchini Bread even more fun! Add some tropical fruits like mango or banana. Diced mango gives a sweet touch, while banana adds moisture. You can mix in some macadamia nuts for a crunchy bite. They fit the tropical theme perfectly and boost the flavor. If you want to switch things up, try using different flours. Almond flour works great for a nutty taste. Coconut flour can also add a nice flavor, but remember to adjust the liquid. You may need to add more egg or a splash of milk. This helps keep the bread moist and fluffy. Want to make this recipe vegan? It’s simple! Replace the eggs with flaxseed meal. Mix one tablespoon of flaxseed with three tablespoons of water. Let it sit for five minutes to thicken. Use coconut yogurt instead of eggs for a creamy texture. You can also swap the coconut oil for a plant-based butter. These changes keep the tropical vibes while making it vegan-friendly. Check out the Full Recipe for all the details and to get started! To keep your Pina Colada Zucchini Bread fresh, wrap it well. Use plastic wrap or foil. Store it at room temperature for up to three days. If you want it to last longer, place it in the fridge. In the fridge, it stays good for about a week. Always check for any signs of spoilage before enjoying. You can freeze this tasty bread to enjoy later. First, let it cool completely. Then, wrap it tightly in plastic wrap. After that, place it in a freezer-safe bag or container. This bread can stay frozen for up to three months. When you want to eat it, just thaw it in the fridge overnight. To reheat your Pina Colada Zucchini Bread, slice off the amount you want. You can warm it in the microwave for about 10-15 seconds. For a crispier texture, pop it in the oven at 350°F (175°C) for 5-10 minutes. Enjoy it warm to bring out the flavors! For more details, refer to the Full Recipe. Yes, you can use frozen zucchini. Just thaw it first and squeeze out extra water. This will help keep the bread moist without being too soggy. Frozen zucchini works well in this recipe, especially if you have leftovers from the summer harvest. Pina Colada Zucchini Bread can be a healthy choice. It uses zucchini, which is low in calories and high in fiber. The crushed pineapple adds sweetness without extra sugar. Plus, coconut oil has healthy fats. To make it even healthier, you can cut back on sugar or swap in whole wheat flour. This bread tastes like a tropical vacation. The flavors of coconut and pineapple shine through. You’ll enjoy the sweetness from the sugars, balanced by the savory zucchini. The texture is moist and tender, thanks to the zucchini and pineapple. Each bite feels like a treat, perfect for breakfast or dessert. For the full experience, try the [Full Recipe]. This blog post covers how to make Pina Colada Zucchini Bread. We discussed the key ingredients, preparation steps, and tips for perfect texture and flavor. You now know optional add-ins to customize your bread and how to store and reheat it. Remember to avoid common mistakes for the best results. This recipe is fun and easy, even for new bakers. Enjoy your baking adventure!](https://roastedflavors.com/wp-content/uploads/2025/06/1b1fc2a3-5805-4638-a3e9-ce194874a8a7.webp)
Pina Colada Zucchini Bread Tasty Tropical Treat
Craving a slice of paradise? Dive into my Pina Colada Zucchini Bread, a delightful way to bring tropical vibes to your kitchen! This easy recipe
![To make this easy homemade peach cobbler, gather these key ingredients: - 4 cups fresh peaches, peeled, pitted, and sliced - 1 cup granulated sugar, divided into two 1/2 cup portions - 1 teaspoon ground cinnamon - 1 teaspoon fresh lemon juice - 1 cup all-purpose flour - 1 teaspoon baking powder - 1/2 teaspoon salt - 1 cup whole milk - 1/2 cup unsalted butter, melted and slightly cooled - 1 teaspoon pure vanilla extract These ingredients work together to create a sweet, juicy filling and a fluffy, golden topping. The sugar and lemon juice bring out the peach flavor. The butter and milk help form a tender batter. When choosing fresh peaches, look for these signs of ripeness: - A sweet aroma that fills the air. - A slight give when you gently press the skin. - A rich, golden color, especially near the stem. Avoid peaches that feel too hard or have blemishes. Ripe peaches create a delicious cobbler with a vibrant, juicy taste. If they are not in season, you can use frozen peaches as a substitute. If you need to make changes, here are some easy swaps: - For granulated sugar, use brown sugar for a deeper flavor. - Instead of whole milk, almond milk or oat milk works well. - You can replace all-purpose flour with gluten-free flour for a gluten-free option. These substitutions keep the essence of peach cobbler while allowing for dietary needs. You can still enjoy a delightful treat with these options. Check the [Full Recipe] for more details on making this dessert your own! Start with fresh peaches. Use four cups of ripe peaches. Peel, pit, and slice them. In a medium bowl, mix the peaches with 1/2 cup of sugar, cinnamon, and lemon juice. Stir gently to coat the peaches. Let them sit for about ten minutes. This helps the peaches release their juices. It also boosts their flavor. In a large bowl, whisk together flour, baking powder, salt, and the other 1/2 cup of sugar. Mix well until combined. Pour in the milk, melted butter, and vanilla extract. Stir gently until the batter comes together. It’s fine if it looks a bit lumpy. Just don’t overmix; this keeps the cobbler light. Grease a 9x13-inch baking dish with butter. Pour the batter into the dish and smooth it out. Spoon the peach mixture on top, including all the juices. Spread the peaches evenly but don’t stir the layers. Bake in a preheated oven at 350°F for 35-40 minutes. The cobbler should be golden brown and bubbly. Check with a toothpick; it should come out clean. Let it cool for a few minutes before serving. For the full recipe, refer to the earlier section. To make your cobbler fluffy, be sure to mix the batter gently. Overmixing can lead to a dense texture. When you add the milk and butter, stir until just combined. It’s okay if the batter looks lumpy. This helps keep it light and airy. Ovens can vary, so keep an eye on your cobbler. Check it after 35 minutes. If it's not golden brown yet, let it bake a few more minutes. If the edges brown too fast, you can cover them with foil. Baking at 350°F (175°C) is key for even cooking. Peach cobbler shines when served warm. A scoop of vanilla ice cream on top makes it even better. The cold ice cream melts into the warm cobbler, creating a creamy delight. For a fun twist, try adding a sprinkle of cinnamon or a drizzle of caramel sauce on top. For the full recipe, refer back to the earlier section. Enjoy your baking! {{image_4}} You can switch out peaches for other fruits. Try using apples, berries, or cherries. Each fruit brings its own flavor. Apples add a crunch, while berries give a sweet-tart taste. If you want a tropical twist, use pineapple or mango. Adjust the sugar based on fruit sweetness. This way, your cobbler stays tasty and balanced. Making this recipe gluten-free is easy. Use almond flour or coconut flour instead of all-purpose flour. For a dairy-free option, swap whole milk with almond or oat milk. You can also use coconut oil instead of butter. These changes keep the texture nice. You’ll still get that warm, gooey goodness without the gluten or dairy. Spice up your cobbler with cinnamon or nutmeg for warmth. If you love zest, add lemon or orange zest to the fruit mixture. This makes the flavors pop. For a unique touch, mix in a splash of bourbon or rum. It adds depth to the taste. You can also try adding vanilla bean seeds for a richer flavor. These small changes make a big difference in each bite. For the full recipe, check out the delightful peach cobbler section above! To keep your peach cobbler fresh, let it cool down to room temperature. Then, cover it tightly with plastic wrap or foil. You can also place it in an airtight container. Store it in the fridge for up to three days. This way, you can enjoy this delicious dessert later. When you’re ready to enjoy the cobbler again, preheat your oven to 350°F (175°C). Place the cobbler in an oven-safe dish. Heat it for about 15-20 minutes until it’s warm and bubbly. This will bring back its lovely texture and flavor. You can also use the microwave, but be careful. Heat it in short bursts of 30 seconds to avoid sogginess. If you want to save some cobbler for later, freezing is a great option. Cut the cobbler into individual portions. Wrap each piece in plastic wrap and then place them in a freezer bag. Be sure to remove as much air as possible. You can freeze it for up to three months. When you want some, thaw it overnight in the fridge and reheat as mentioned above. Enjoy your homemade peach cobbler whenever you like! Cobbler has a soft, biscuit-like topping. Crisp features a crunchy topping, often made with oats. Both are fruity desserts, but their textures set them apart. Cobbler’s topping is thicker and cakier, while crisp is crumbly and light. You can enjoy both, but know the texture you prefer. Yes, you can use canned peaches. Just remember to drain them well. Canned peaches are sweet and soft, which makes them a good choice. They will work great in the recipe. You may want to reduce the sugar a bit due to their sweetness. Keep in mind that fresh peaches add a brighter flavor. Peach cobbler lasts about 3 to 5 days in the fridge. Make sure to cover it well to keep it fresh. If you want to enjoy it later, consider freezing it. When you reheat it, the cobbler will still taste great. I suggest warming it in the oven for the best results. You learned how to make a delicious peach cobbler from scratch. We covered ingredient choices, baking steps, and tips to make it great. You can even try fun variations or store leftovers. Remember, fresh peaches and a few key tricks will help you shine in the kitchen. Enjoy your homemade treat, and get creative with flavors. Your perfect peach cobbler awaits!](https://roastedflavors.com/wp-content/uploads/2025/06/2f6efba3-1a60-4716-8870-d968c4ac7b9d.webp)
Easy Homemade Peach Cobbler Delicious Dessert Recipe
Calling all dessert lovers! Are you ready to indulge in a warm, juicy peach cobbler that’s easy to make? I’ll guide you through each step,
![- 1 cup grated zucchini - 1 cup whole wheat flour - 1/2 cup unsweetened cocoa powder - 1/2 cup dark chocolate chips - 1/4 teaspoon ground cinnamon What is the nutritional value of zucchini? Zucchini is low in calories and high in water. It provides vitamins A and C. This veggie also has fiber, which helps digestion. Adding zucchini makes the bread moist and adds nutrients. What are the advantages of whole wheat flour? Whole wheat flour is rich in fiber and protein. It offers more nutrients than white flour. This flour helps keep you full longer and supports heart health. It adds a nutty flavor that complements chocolate. What are the benefits of using natural sweeteners? Natural sweeteners like honey or maple syrup have vitamins and minerals. They can be healthier than refined sugar. These sweeteners also add moisture and enhance flavor. They balance the bitterness of cocoa well. Ready to bake? For the full recipe, check the complete guide to Healthy Chocolate Zucchini Bread. First, preheat your oven to 350°F (175°C). This step is key for even baking. Next, prepare a 9x5 inch loaf pan. Grease it well or line it with parchment paper. This helps to release the bread after baking. In a large bowl, combine the grated zucchini, honey or maple syrup, unsweetened applesauce, beaten eggs, and vanilla extract. Stir everything together until it looks smooth. Make sure the zucchini is well mixed in. This blend adds moisture and flavor to your bread. In another bowl, sift together whole wheat flour, cocoa powder, baking soda, baking powder, salt, and cinnamon if you like. Sifting is very important. It breaks up clumps and helps air in. This makes your bread fluffy and light. Now, add the dry mix to the wet mixture. Stir gently with a spatula or wooden spoon. Stop mixing as soon as you don’t see any dry flour. Overmixing can make the bread dense. If you want, fold in dark chocolate chips for extra richness. Then, pour the batter into your prepared loaf pan. Use a spatula to smooth the top. This ensures even baking and a nice shape. Now you’re ready to bake! Follow the [Full Recipe] for baking time and cooling tips. Enjoy your delicious creation! Pick zucchini that feels firm. Look for ones that are shiny and bright. Avoid those with soft spots or blemishes. Smaller zucchinis have a sweeter flavor and tender texture. Before use, wash them well. Grate the zucchini right before you mix it into the batter. This keeps it fresh and juicy for your bread. To tell if your zucchini bread is done, use a toothpick. Insert it into the center; it should come out clean. If not, give it a few more minutes. For a moist loaf, do not overmix the batter. Mix until just combined for the best texture. Also, consider adding a bit more applesauce if you want extra moisture. Serve your healthy chocolate zucchini bread warm. Slice it and dust with powdered sugar for a pretty touch. A spread of nut butter adds creaminess and flavor. Pair it with tea or coffee for a cozy treat. You can even top it with fresh fruit for a lovely plate. Enjoy the beautiful blend of flavors! {{image_4}} You can easily adjust this recipe to fit your diet. If you need a gluten-free option, substitute whole wheat flour with almond flour or gluten-free flour blends. Both will work well and keep the bread moist. For a vegan version, replace the eggs with flaxseed meal or unsweetened applesauce. Use 1 tablespoon of flaxseed meal mixed with 2.5 tablespoons of water for each egg. Let it sit for a few minutes to thicken before adding it to your wet ingredients. You can make this zucchini bread even tastier. Consider adding chopped nuts like walnuts or pecans for crunch. You can also try adding spices, such as nutmeg or cardamom, to give it a warm flavor. If you want to switch things up, use different sweeteners. Maple syrup or coconut sugar can add unique tastes. Adjust the amounts based on your sweetness preference. Personalize your bread with fun mix-ins. Try adding dried fruits like raisins or cranberries for a chewy texture. You can also fold in shredded coconut for a tropical twist. For a richer flavor, consider adding a splash of espresso or coffee. It enhances the chocolate taste and makes your bread even more decadent. For the full recipe, check out the delicious steps that lead to your perfect healthy chocolate zucchini bread! To keep your healthy chocolate zucchini bread fresh, let it cool completely. Wrap it in plastic wrap or foil. Store it in an airtight container at room temperature. This keeps the bread moist and tasty. If you use a container, make sure it is tightly sealed. Avoid direct sunlight or heat, as this can dry it out. You can freeze this delicious bread for later. First, let it cool fully. Then, slice the bread to make it easier to thaw. Wrap each slice in plastic wrap and place them in a freezer bag. Squeeze out as much air as possible before sealing. You can freeze it for up to three months. When ready to eat, just take out a slice and let it thaw at room temperature. You can also warm it in the microwave for a quick treat. When stored properly, the bread lasts about 3 to 5 days at room temperature. In the fridge, it can last up to a week. Be sure to check for any signs of spoilage before enjoying. If you notice any mold or off smell, it’s best to toss it. Keeping your bread fresh is key to enjoying every bite of this tasty treat. For the full recipe, check the section above! Yes, you can use frozen zucchini. First, thaw it completely. Place it in a bowl to let it sit at room temperature. Once it's thawed, drain it well. Squeeze out excess water with a clean kitchen towel. This step keeps your bread from getting too soggy. You have a few options for sweeteners. You can use agave syrup or coconut sugar. Brown sugar is also a good choice. Just remember, each sweetener may change the taste a bit. Adjust the amount based on your preference for sweetness. Look for a few signs to know when your bread is done. The top should look set and spring back when lightly pressed. A toothpick inserted in the center should come out clean or with a few moist crumbs. The edges may start pulling away from the pan, which is a good sign too. This blog post detailed how to make delicious zucchini bread. We reviewed key ingredients like grated zucchini and whole wheat flour. I shared health benefits and helpful tips for baking success. You learned about variations for dietary needs and how to store your bread for long-lasting freshness. Making zucchini bread is fun and rewarding. Experiment with flavors and enjoy your creation! Happy baking!](https://roastedflavors.com/wp-content/uploads/2025/06/2a2df1f7-fb61-4065-8f4c-7d4d44353a86.webp)
Healthy Chocolate Zucchini Bread Delicious and Easy Recipe
Are you ready to enjoy a guilt-free treat? This Healthy Chocolate Zucchini Bread recipe is both delicious and easy to make! With simple ingredients like
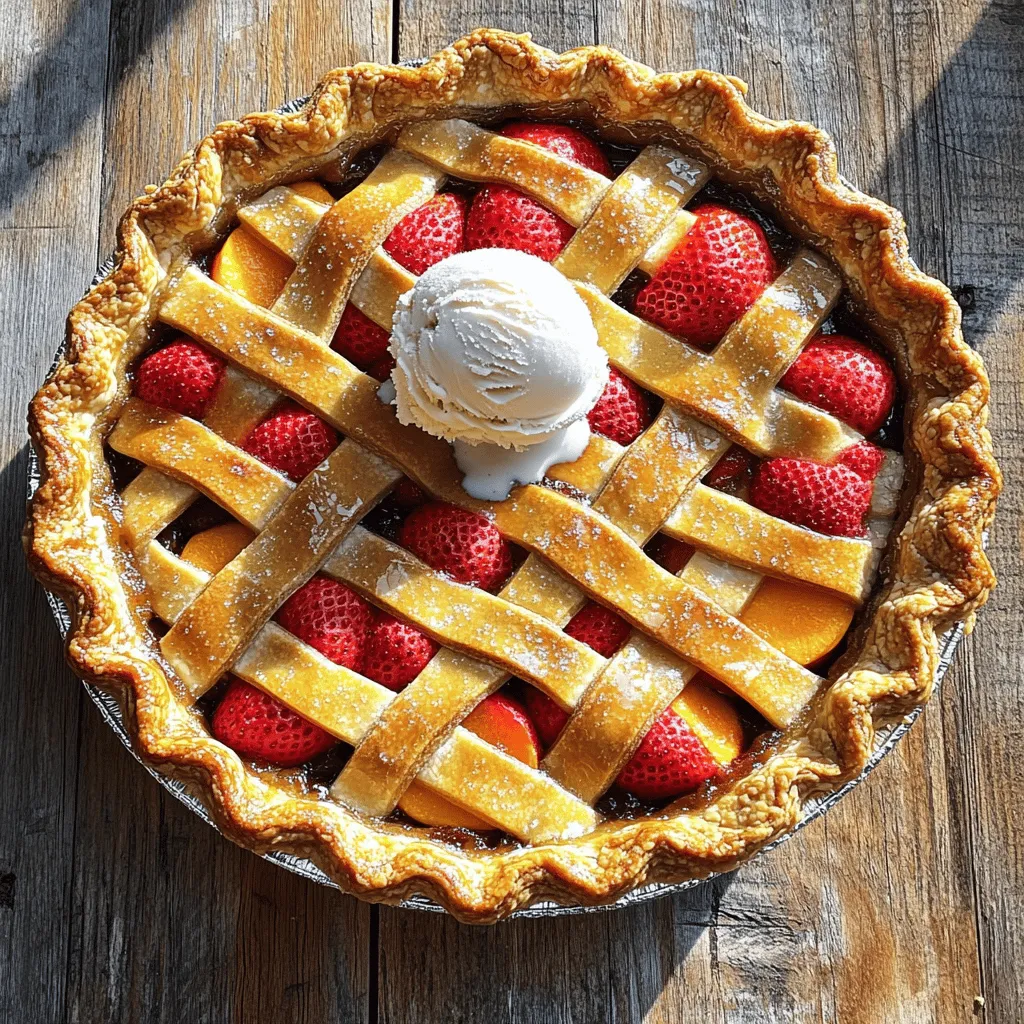
Brown Butter Strawberry Peach Pie Delightful Recipe
Are you ready to create a dessert that shines with flavor? My Brown Butter Strawberry Peach Pie combines juicy fruits and rich, nutty butter for
![To make a tasty cake mix peach cobbler, you need a few key ingredients: - 2 cans (15 oz each) sliced peaches in syrup (or 4 cups fresh peaches, sliced) - 1 cup granulated sugar (adjust if your peaches are sweet) - 1 teaspoon ground cinnamon - 1 box (15.25 oz) yellow cake mix - 1/2 cup unsalted butter, melted - 1/2 cup water - 1 teaspoon vanilla extract - Ice cream or whipped cream (optional for serving) Each ingredient plays a vital role. The peaches provide sweetness and juice. Sugar adds more sweetness and balances the flavors. Cinnamon gives a warm spice that enhances the peach taste. The cake mix forms the topping, while butter and water create a moist texture. Vanilla adds depth to the flavor. When choosing your ingredients, quality matters. Use ripe, fresh peaches if you can. They bring a vibrant taste. If using canned peaches, pick those in light syrup. This choice keeps the flavor bright without being overly sweet. Check the cake mix for freshness; an expired mix may not rise well. Always choose unsalted butter for a balanced taste. For the best experience, serve your warm peach cobbler with a scoop of vanilla ice cream. The cold ice cream melts into the warm cobbler, creating a delightful contrast. Alternatively, a dollop of whipped cream adds a light and fluffy texture. You can also sprinkle some extra cinnamon on top for a touch of spice. Enjoy the mix of flavors and textures! First, you need to get your oven ready. Set it to 350°F (175°C). This heat makes the cobbler bake perfectly. While the oven warms up, grab a 9x13-inch baking dish. It needs to be greased. I like to use butter or cooking spray. This step keeps the cobbler from sticking. Now, let’s focus on the peaches. If you’re using canned peaches, open two cans (15 oz each). Pour the peaches and syrup into a large bowl. For fresh peaches, you’ll need four cups, sliced. Add 1 cup of granulated sugar to the bowl. You can adjust the sugar based on how sweet your peaches are. Next, sprinkle in 1 teaspoon of ground cinnamon. Mix everything well. This blend adds great flavor. Once mixed, pour it into your greased baking dish. Spread it out evenly across the bottom. In a separate bowl, grab a box of yellow cake mix (15.25 oz). Add 1/2 cup of melted unsalted butter, 1/2 cup of water, and 1 teaspoon of vanilla extract. Use a whisk to mix it all together. Make sure not to overmix. You want it just combined for the best texture. When ready, slowly pour the cake batter over the peach layer. Use a spatula to spread it evenly. This will help the peaches stay covered during baking. For the full recipe, make sure to follow the detailed steps and enjoy your delicious creation! Set your oven to 350°F (175°C). This is the perfect temperature for baking your cobbler. It helps the peaches soften and the cake mix bake evenly. Bake the cobbler for 35 to 40 minutes. You want the top to turn golden brown and look delicious. Check the cobbler for a golden crust. Insert a toothpick into the center. If it comes out clean, your cobbler is ready. If not, give it a few more minutes in the oven. The smell will fill your kitchen, making it hard to wait! When your cobbler is baked, take it out of the oven. Let it cool for about 10 minutes. This helps the juices settle. Serve it warm for the best taste. You can add a scoop of ice cream or whipped cream on top. This makes every bite even better. Enjoy your cake mix peach cobbler! For the full recipe, check the earlier section. {{image_4}} To get a great texture in your cake mix peach cobbler, do not overmix. When you blend the cake mix, butter, and water, stop once everything is combined. This keeps the batter light and fluffy. Also, use room temperature ingredients. They mix better and help create a tender crumb. One common mistake is using cold butter. Melted butter is key for a smooth batter. Another mistake is pouring the cake batter too quickly over the peaches. Take your time and spread it evenly. This helps the cake bake nicely and prevents sogginess. Adding spices can take your cobbler to the next level. Besides cinnamon, consider a pinch of nutmeg or allspice. They add warmth and depth. You can also mix in a bit of lemon zest for a fresh twist. Don't forget to keep tasting your peach mixture. Adjust the sugar or spices to suit your taste. For more tips, check out the Full Recipe. You can swap peaches for other fruits. Try using blueberries, cherries, or even apples. Each fruit brings a different flavor and sweetness. Apples can add a nice crunch. Berries offer a tart kick. Choose what you love or what you have on hand. While yellow cake mix is classic, feel free to experiment. Chocolate cake mix adds a rich twist. Spice cake mix gives a warm flavor. Lemon cake mix adds a bright zing. Mix and match to find your favorite combo. You might just create a new family favorite! Want to make your cobbler a bit lighter? You can use sugar substitutes like honey or maple syrup. Whole wheat cake mix can give more fiber. You can also replace butter with coconut oil for a healthier fat. Adjust these items to fit your diet while keeping the taste yummy. For the full recipe, check out the delightful cake mix peach cobbler. Yes, you can use fresh peaches. If you have fresh peaches, slice about 4 cups. Peel them if you want a smoother texture. Mix them with sugar and cinnamon just like canned peaches. Fresh peaches add a bright taste and lovely texture. Store leftover peach cobbler in an airtight container. Keep it in the fridge for up to 3 days. If you want to freeze it, wrap it well in plastic wrap. It can last for a month in the freezer. Just remember to let it cool before storing. Yes, you can prepare this recipe ahead of time. You can mix the peach filling and cake batter and store them separately in the fridge. Just bake it the day you want to serve it. This way, you save time and enjoy a fresh dessert. For the complete recipe, check [Full Recipe]. In this blog post, we covered how to make a delicious cake mix peach cobbler. We talked about the key ingredients, baking steps, and tips for a perfect texture. Remember to choose fresh, quality ingredients for the best flavor. You can also try different fruits and cake mixes to switch things up. Don’t forget to watch for signs that your cobbler is done. Enjoy serving this sweet treat warm or with ice cream. Have fun baking and sharing this cozy dessert!](https://roastedflavors.com/wp-content/uploads/2025/06/12654274-f479-4805-89a1-396960a02dc7.webp)
Cake Mix Peach Cobbler Simple and Delicious Recipe
Looking for a sweet treat that’s easy to make? You’re in the right place! This Cake Mix Peach Cobbler is simple, delicious, and perfect for

Easy Peach Cobbler Delightful and Simple Dessert
Are you craving a sweet, warm dessert that’s easy to make? Look no further! This Easy Peach Cobbler is the perfect treat for any occasion.