Desserts

Easy Italian Peach Crumb Cake Delightful and Simple Recipe
Are you ready to bake a treat that will impress everyone? Look no further than this Easy Italian Peach Crumb Cake. You’ll love how simple
Delicious Double Chocolate Zucchini Bread Recipe
Are you ready to enjoy a treat that’s both rich and healthy? My Double Chocolate Zucchini Bread is the perfect way to satisfy your sweet

Healthy Chocolate Zucchini Muffins Simple and Tasty
Looking for a tasty treat that’s also good for you? You’re in the right place! These Healthy Chocolate Zucchini Muffins are simple to make and
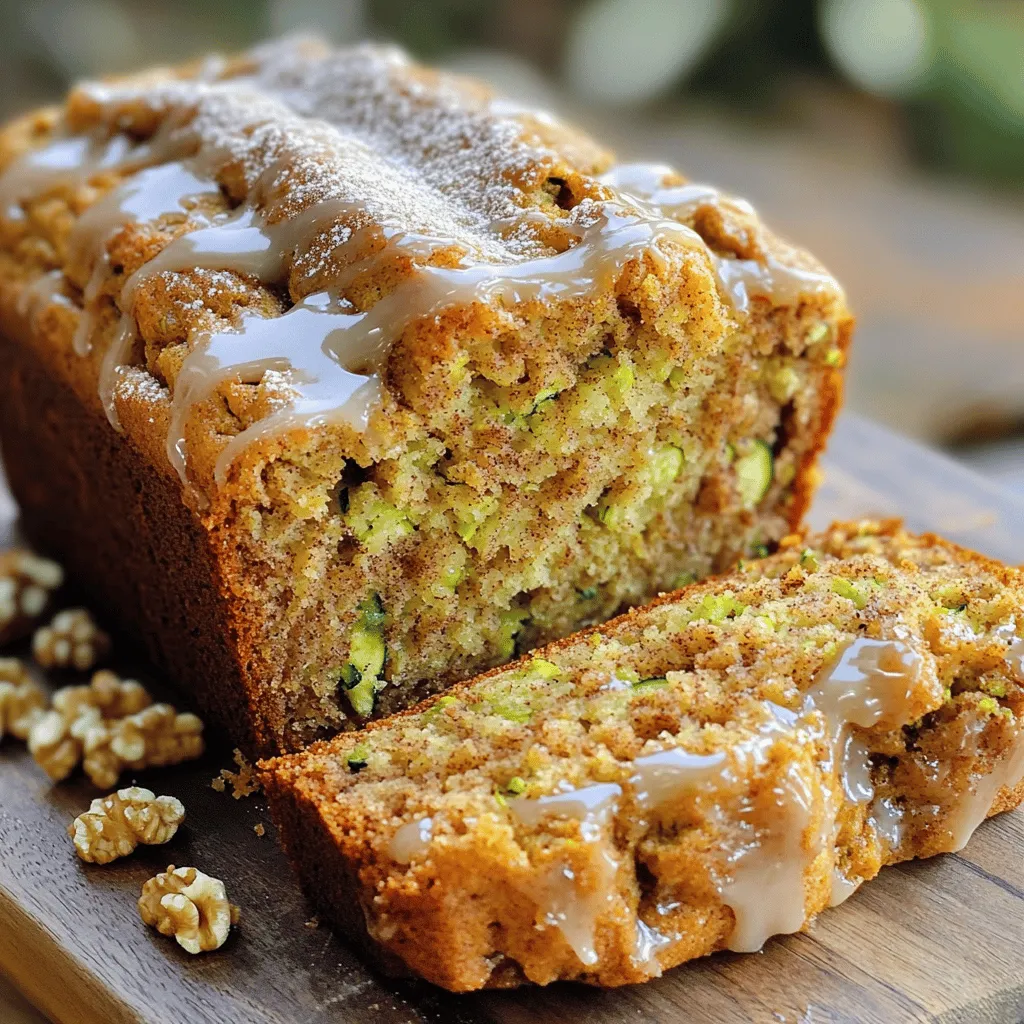
![- 1 cup finely grated zucchini (approximately 1 medium zucchini) - 1 cup finely grated carrot (approximately 2 medium carrots) - 1 cup rolled oats - 1 cup whole wheat flour - 1 teaspoon baking powder - 1/2 teaspoon baking soda - 1/2 teaspoon ground cinnamon - 1/4 teaspoon ground nutmeg - 1/4 teaspoon salt - 1/2 cup brown sugar (or coconut sugar for a healthier alternative) - 1/2 cup unsweetened applesauce - 1/4 cup honey or maple syrup - 1/4 cup vegetable oil or melted coconut oil These ingredients come together to create tasty and healthy muffins. The zucchini and carrot add moisture and sweetness. Oatmeal provides a hearty texture and fiber. The dry ingredients, like whole wheat flour and spices, give extra flavor. Lastly, the wet ingredients help bind everything while adding natural sweetness. This mix is simple, yet so rewarding. For the full recipe, check out the details above. - Preheat your oven to 350°F (175°C). - Prepare a muffin tin by lining it with paper liners or lightly greasing it with oil. - In a large bowl, combine: - 1 cup rolled oats - 1 cup whole wheat flour - 1 teaspoon baking powder - 1/2 teaspoon baking soda - 1/2 teaspoon ground cinnamon - 1/4 teaspoon ground nutmeg - 1/4 teaspoon salt - Mix these dry ingredients well until there are no lumps. - In another bowl, blend: - 1/2 cup brown sugar (or coconut sugar) - 1/2 cup unsweetened applesauce - 1/4 cup honey or maple syrup - 1/4 cup vegetable oil or melted coconut oil - Whisk until the mixture is smooth and uniform. - Pour the wet mixture into the bowl with the grated zucchini and carrot. Gently stir until mixed. - Gradually fold in the dry ingredients until just combined. Avoid over-mixing to keep the muffins fluffy. - If you want to add more texture, fold in: - 1/2 cup chopped walnuts or pecans (optional) - 1/2 cup raisins or dairy-free chocolate chips (optional) - Divide the batter evenly among the muffin cups, filling each about two-thirds full. - Bake in the preheated oven for 18-20 minutes. Check if a toothpick comes out clean from the center. - Once done, let the muffins cool in the pan for about 5 minutes, then transfer them to a wire rack. For the full recipe and additional details, you can refer back to the Full Recipe section. Enjoy making these tasty treats! To get the best texture in your muffins, avoid over-mixing the batter. When you stir too much, your muffins can turn out dense and tough. Mix just until the dry and wet ingredients come together. This keeps them light and fluffy. Next, ensure even distribution of ingredients. When you fold in the grated zucchini and carrots, make sure they are spread throughout the batter. This helps each muffin have a nice balance of flavor and texture. Serve your muffins warm to enhance their taste. Warm muffins taste better and feel cozy. To make them more appealing, dust them lightly with powdered sugar. You can also add a dollop of Greek yogurt for creaminess. For a beautiful display, arrange the muffins on a platter. Garnish with fresh slices of carrot and zucchini. This adds a colorful touch that catches the eye. If you want to reduce sugar, consider using sugar substitutes. Coconut sugar is a great choice. It has a lower glycemic index than regular sugar. You can also use applesauce to cut back on sweetness while keeping moisture. When it comes to oil, you have options too. Instead of vegetable oil, try melted coconut oil. It adds a nice flavor and is a healthier fat choice. These small changes can make your muffins even better for you without losing taste. For the full recipe, check the section above. {{image_4}} - For a gluten-free option, use almond flour or a gluten-free flour blend. - To make these muffins dairy-free, swap regular milk for almond or oat milk. - You can add spices like ginger or allspice for extra warmth. - Consider mixing in dried fruits like cranberries or apricots for sweetness. - For a chocolatey twist, add dairy-free chocolate chips to the batter. - If you prefer mini muffins, use a mini muffin tin and adjust baking time to 10-12 minutes. - For jumbo muffins, fill the cups more and bake for 22-25 minutes. These variations will help you customize the Zucchini Carrot Oatmeal Muffins to your taste. Enjoy the process! For the full recipe, refer to the earlier instructions. You can store unbaked muffin batter in the fridge. Use an airtight container to keep it fresh. It’s best to use the batter within 24 hours. This way, the muffins will rise and taste their best. For baked muffins, you can keep them at room temperature. Put them in a covered container. They stay fresh for about two days. If you want to keep them longer, store them in the fridge. They will last up to a week there. For even more time, freeze the muffins. Wrap them well in plastic wrap or foil. Put them in a freezer bag. They can stay frozen for up to three months. To reheat muffins, use the oven or microwave. If using the oven, preheat it to 350°F (175°C). Place muffins on a baking sheet and heat for about 10 minutes. This keeps them soft and warm. In the microwave, heat one muffin for 15 to 20 seconds. This method is quick and keeps them moist. Avoid overcooking, as this can make them tough. Enjoy fresh muffins anytime with these easy methods! Yes, you can use other vegetables. Carrots work well as a base. You can also try finely grated sweet potato or butternut squash. These options add sweetness and moisture, similar to zucchini. To make these muffins vegan, swap the eggs with flaxseed meal or chia seeds. Use plant-based milk instead of cow's milk. For sweeteners, choose maple syrup or agave nectar. This keeps the muffins tasty and plant-based. If you don't have whole wheat flour, you can use all-purpose flour. Gluten-free flour blends also work if needed. Oat flour is another great option. Just make sure to adjust the liquid if you use a different flour. For the full recipe, check out the [Full Recipe]. You learned how to make healthy muffins using simple ingredients. Start with zucchini, carrots, and oats for flavor and nutrition. Mix wet and dry ingredients carefully. Remember, don’t over-mix for the best texture. Explore variations to cater to your taste, from mini to jumbo sizes. Store your muffins properly for freshness and enjoy them warm. Experiment with different flavors and substitutions to make these muffins your own. Happy baking!](https://roastedflavors.com/wp-content/uploads/2025/07/a9ff15b8-30b8-49e4-828a-f64b73c3756d.webp)
Zucchini Carrot Oatmeal Muffins Healthy and Delicious
Are you ready to dive into a delicious, healthy treat? These Zucchini Carrot Oatmeal Muffins are perfect for breakfast or a snack. They blend the
Cinnamon Roll Zucchini Bread Delicious and Easy Recipe
If you’re looking for a tasty twist on a classic favorite, you need to try this Cinnamon Roll Zucchini Bread recipe. It’s moist, packed with
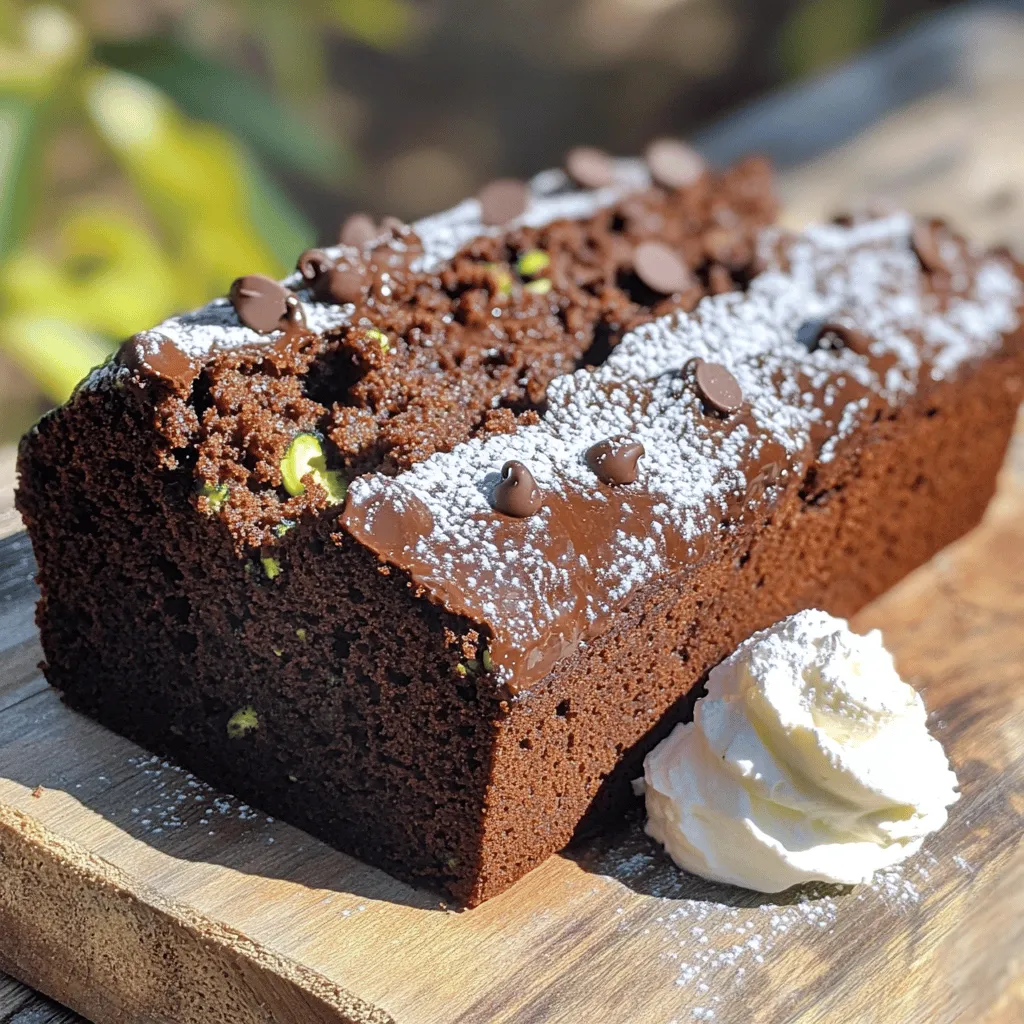
![- Zucchini: Use finely grated zucchini. This helps keep the cake moist and tender. Grating it finely ensures even distribution. It also adds nutrients without changing the cake’s taste. - Cocoa Powder: Choose high-quality unsweetened cocoa powder. This gives the cake its deep chocolate flavor. The better the cocoa, the richer the taste of your cake. Look for brands that use pure cocoa beans for the best results. - Optional Ingredients: You can add walnuts for crunch and chocolate chips for extra sweetness. Walnuts bring a nutty flavor and a nice texture contrast. Chocolate chips melt slightly and enhance the chocolatey goodness. These simple ingredients combine to create a rich and moist dessert that delights every time. For the full recipe, refer to the section below. Start by preheating your oven to 350°F (175°C). This step is vital. A warm oven helps the cake rise well. Next, grab a 9x13 inch baking pan. Grease it lightly with butter or oil. This helps the cake come out easily. You can also dust it with flour or line it with parchment paper. Both methods work well for easy removal. Now, let’s mix our dry ingredients. In a large bowl, combine the all-purpose flour, granulated sugar, cocoa powder, baking powder, baking soda, and salt. Use a whisk to mix them well. This step helps to break up any lumps. Next, we’ll work on the wet ingredients. In a separate bowl, crack the eggs and whisk them until smooth. Slowly add the vegetable oil and vanilla extract. Mix until everything is combined and smooth. This step ensures that your cake is rich and moist. Pour the wet mixture into the bowl of dry ingredients. Use a spatula or wooden spoon to stir gently. Make sure to fold in the ingredients without overmixing. Overmixing can make the cake tough. Once combined, fold in the grated zucchini, chocolate chips, and walnuts if you like. This adds flavor and texture. Next, transfer the batter to your prepared pan. Spread it evenly for even cooking. Bake in the preheated oven for 30-35 minutes. To check for doneness, insert a toothpick into the center. It should come out clean or with a few moist crumbs. After baking, allow the cake to cool in the pan for about 10 minutes. Then, move it to a wire rack to cool completely. This cooling step helps the cake set perfectly. For the complete instructions, check the Full Recipe. How do I handle moisture from zucchini? To keep the cake light, you must remove excess moisture from the zucchini. After grating, place it in a clean kitchen towel. Twist the towel to squeeze out unwanted liquid. This simple step makes a big difference in texture. What is the best egg temperature? Use eggs at room temperature. They mix better with other ingredients. Take them out of the fridge 30 minutes before baking. This helps the batter blend smoothly. What types of cocoa powder should I consider? Use high-quality unsweetened cocoa powder. Dutch-processed cocoa gives a rich flavor. Regular cocoa has a strong chocolate taste. Both options work well, so choose based on your taste. What role do chocolate chips play? Chocolate chips add bursts of flavor. You can use semi-sweet, dark, or even white chocolate chips. Each type offers a different taste. For a twist, try flavored chips, like mint or caramel. What are some serving ideas? You can dust the cake with powdered sugar for a classic look. Alternatively, serve it with whipped cream for a rich touch. Both options make the cake more appealing. What creative garnish options can I use? Fresh berries or mint leaves add color and freshness. You can also drizzle melted chocolate on top. This adds elegance and extra chocolate flavor to your dessert. For the full recipe, check the Chocolate Zucchini Delight Cake section. Enjoy the process and have fun! {{image_4}} You can easily make a vegan chocolate zucchini cake. Replace the eggs with flaxseed meal or applesauce. Use 1 tablespoon of flaxseed mixed with 3 tablespoons of water for each egg. This mixture helps bind the ingredients. For dairy, swap milk with almond or coconut milk. You can also use plant-based yogurt for extra moisture if needed. These swaps keep the cake rich and tasty while staying true to vegan principles. If you need a gluten-free cake, choose flour carefully. Almond flour and coconut flour work well. You can also use a gluten-free all-purpose blend. When using these flours, adjust the baking time. Cakes made with almond flour may need less time. Keep an eye on your cake to check for doneness. A toothpick should come out clean or with some crumbs. This way, you can enjoy a delicious treat safe for everyone. Get creative with flavors in your chocolate zucchini cake! Adding spices like cinnamon or nutmeg can elevate the taste. Just a teaspoon of cinnamon adds warmth and depth. You can also experiment with different types of chocolate. Try using milk chocolate or even white chocolate chips for a twist. Each change gives your cake a unique flavor. Don’t hesitate to mix and match until you find your perfect blend! For the complete recipe, check out the [Full Recipe]. To keep your chocolate zucchini cake fresh, store it properly. You can refrigerate or freeze it. If you choose to refrigerate, place the cake in an airtight container. This helps prevent it from drying out. If you want to save it for longer, freezing is a great option. Wrap the cake tightly in plastic wrap first. Then, place it in a freezer-safe bag. This way, it will stay moist even in the freezer. Want to enjoy your cake warm again? Reheating is simple. Preheat your oven to 350°F (175°C). Place the cake in the oven for about 10-15 minutes. This warms it up nicely without drying it out. You can also use the microwave. Just heat a slice for about 15-20 seconds. Be careful not to overheat, as that can change the texture. To keep it moist, cover the cake with a damp paper towel while microwaving. How long does the cake stay fresh? If stored in the fridge, it lasts about 5-7 days. When frozen, it can last up to 3 months. Always check for signs of spoilage. Look for any mold or off smells. If the cake feels dry or hard, it’s time to toss it. Enjoy your chocolate zucchini cake while it's still fresh for the best taste! You can find the full recipe to make this delightful treat again. Yes, you can use frozen zucchini! Start by thawing it completely. After thawing, squeeze out the extra water using a clean towel. This step helps keep your cake light and fluffy. Frozen zucchini can work well in this recipe as long as you remove excess moisture. To keep your cake moist, use fresh ingredients. Ensure your eggs are at room temperature. This makes mixing easier and better blends the batter. Do not overmix once you combine wet and dry ingredients. Overmixing can lead to a dry texture. Also, check your cake at the 30-minute mark. Remove it when a toothpick comes out with a few moist crumbs. This cake serves about 12 people. Each slice contains around 250 calories. It has about 15 grams of sugar, plus essential nutrients. You get fiber from the zucchini and some protein from the eggs. The chocolate adds a touch of iron. Always check for specific brands for exact nutrition info. Yes, you can use a sugar substitute! Options like stevia or monk fruit can work. These may change the cake's taste and texture slightly. Always follow the conversion chart on the package for best results. Remember that some substitutes can be sweeter than regular sugar. This blog post covered how to make a delicious chocolate zucchini cake. You learned about key ingredients, mixing techniques, and tips for great texture. We explored variations for vegan and gluten-free options. I also shared storage tips to keep your cake fresh. Remember, small changes can greatly improve your cake. Enjoy baking and tailoring this recipe to your taste. This cake is not just tasty; it's fun to make and share. Happy baking!](https://roastedflavors.com/wp-content/uploads/2025/07/75b148bd-12d0-4474-a0fd-2c96bf2af94b.webp)
Chocolate Zucchini Cake Rich and Moist Dessert Delight
If you think chocolate cake can’t be healthy, I’m here to change your mind! My Chocolate Zucchini Cake is rich, moist, and packed with hidden

The Most Delicious Low Sugar Zucchini Bread Recipe
Zucchini bread can be both tasty and healthy! In this post, I’ll show you how to make the most delicious low sugar zucchini bread. With

Chocolate Zucchini Bread Rich and Moist Delight
Are you ready to bake a treat that combines rich chocolate and healthy zucchini? My Chocolate Zucchini Bread is a game-changer. This moist delight is

Peach Crisp Delightful and Easy Summer Treat
Nothing says summer like a warm, delightful Peach Crisp. Juicy, ripe peaches pair perfectly with a crunchy, buttery topping, creating a treat that makes your

The Best Chocolate Chip Zucchini Muffins Irresistible Treat
Are you ready to dive into a delicious treat that’s both sweet and wholesome? These chocolate chip zucchini muffins are the perfect way to sneak