Desserts
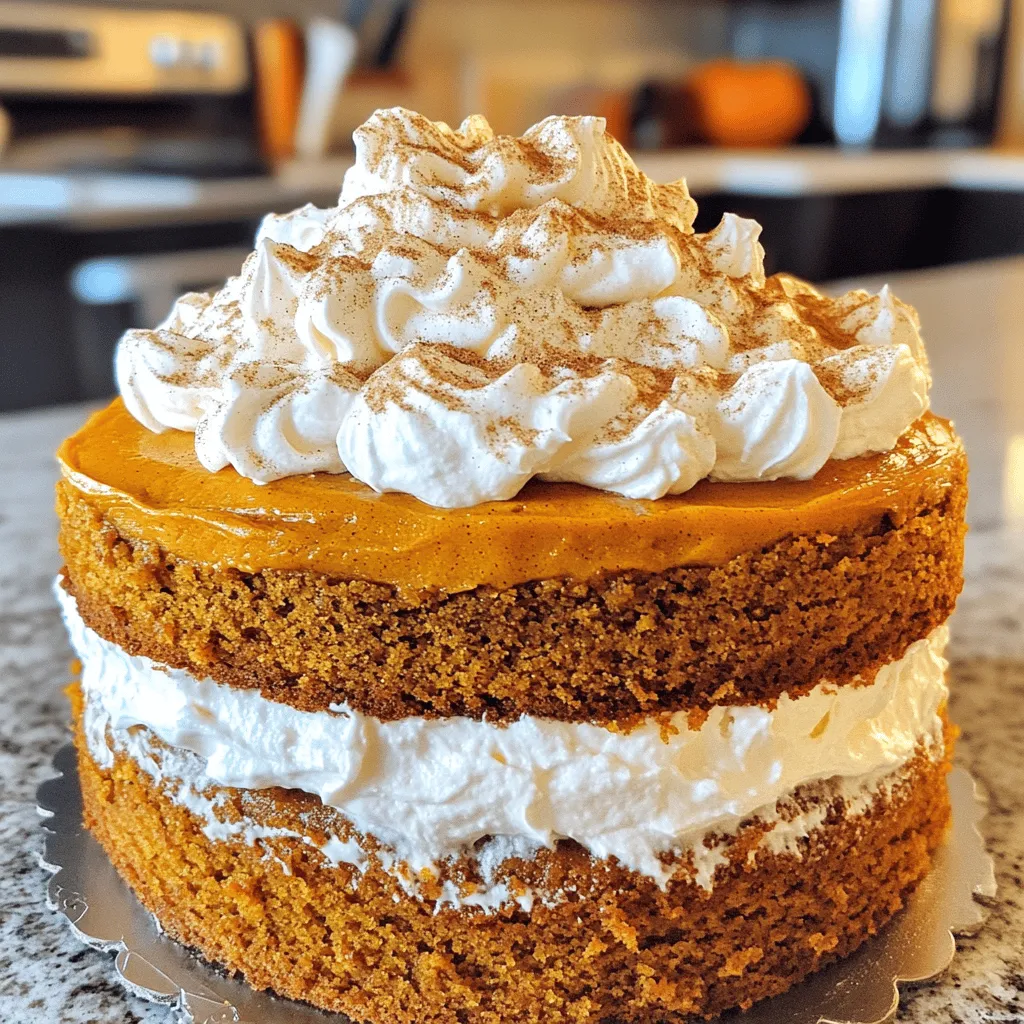
Pumpkin Spice Latte Cake Perfect for Fall Gatherings
Fall is here, and what better way to celebrate than with a Pumpkin Spice Latte Cake? This delicious treat combines the warm flavors of pumpkin

Halloween Cookies Delightfully Spooky Treats
Get ready to bake some delightfully spooky Halloween cookies! In this guide, I’ll share my favorite recipes and tips to create treats that are both
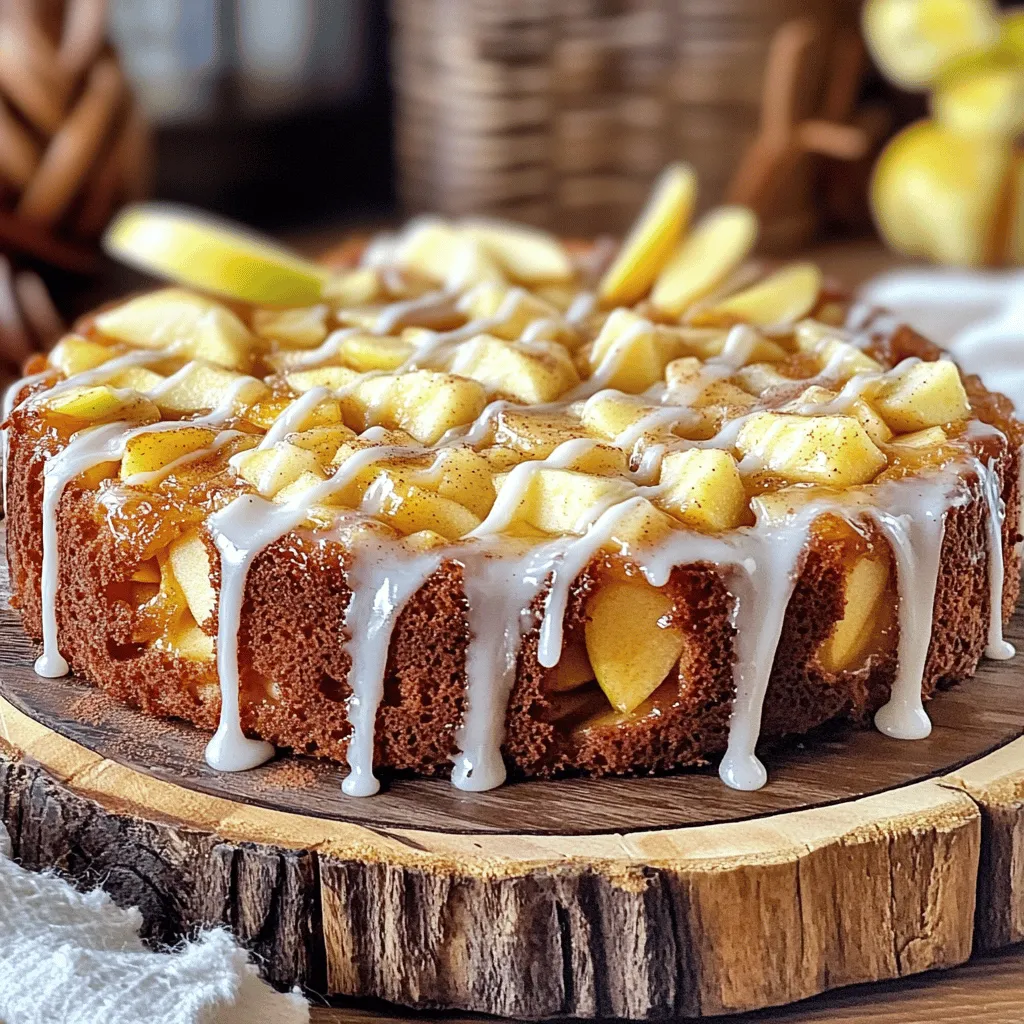
Apple Fritter Cake Delightfully Sweet and Easy Recipe
If you love sweet treats, you’re in for a real joy with this Apple Fritter Cake. This recipe combines soft cake and warm spices with
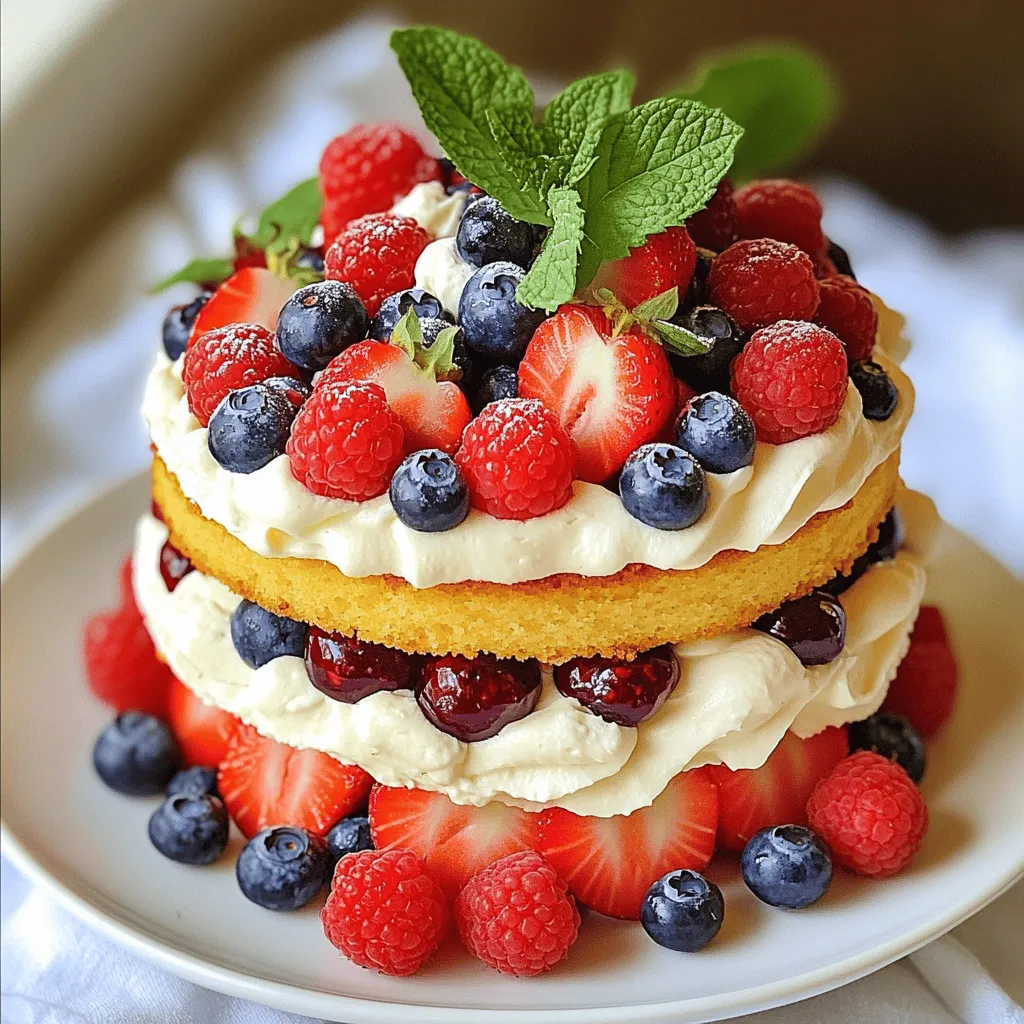
Berry Chantilly Cake Delightful Treat Recipe
Are you ready to treat yourself to a delightful Berry Chantilly Cake? This sweet, fluffy cake combines layers of soft vanilla cake with a rich,
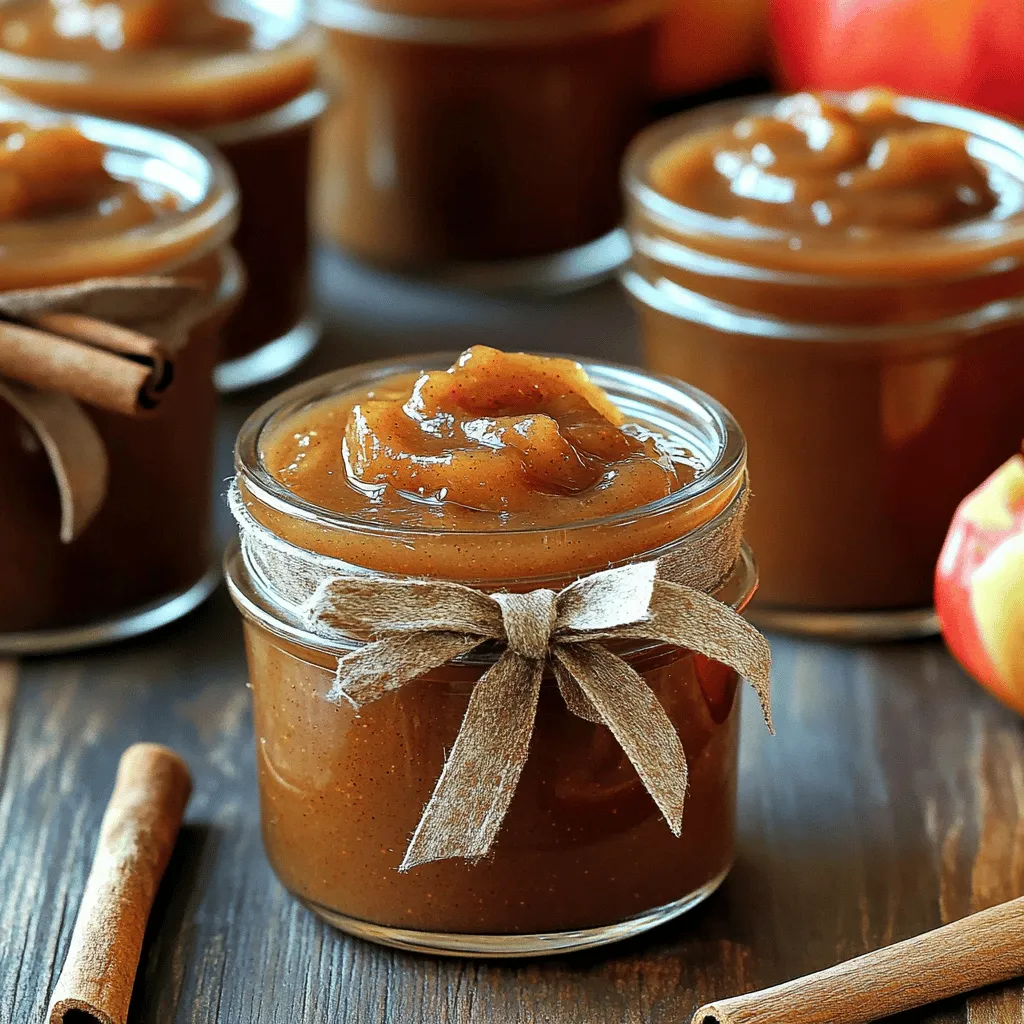
Heartwarming Traditional Apple Butter Recipe Guide
Are you ready to create a delicious treat that warms the heart? In this guide, I’ll share my best traditional apple butter recipe, perfect for
![- 1 medium butternut squash - 2 large apples (Granny Smith or Honeycrisp) - 1/4 cup packed brown sugar - 1 teaspoon ground cinnamon - 1/2 teaspoon ground nutmeg - 1/4 teaspoon ground ginger - 1/4 cup pure maple syrup - 2 tablespoons extra virgin olive oil - 1/2 cup chopped pecans (optional) - 1/4 teaspoon sea salt - 1/2 cup dried cranberries (optional) I love cooking with fresh and simple ingredients. For this dish, the butternut squash shines. It adds a sweet, nutty flavor. The apples bring a tartness that balances the sweetness. I prefer Granny Smith or Honeycrisp apples for their crisp texture. Using brown sugar in this recipe gives a rich sweetness. The ground cinnamon, nutmeg, and ginger add warmth. These spices remind me of cozy fall days. Maple syrup enhances the natural sweetness and adds depth. Olive oil helps to roast the squash and apples perfectly. If you like crunch, add pecans. They bring a nice texture. Dried cranberries can add a sweet and tangy bite. They make this dish even more special. I recommend using high-quality ingredients. This will enhance the flavor and make your dish shine. For the full recipe, check out the [Full Recipe]. - Preheat the oven to 375°F (190°C). This step is key for even cooking. - Peel and cube butternut squash into bite-sized pieces. This helps it cook faster. - Core and slice apples into thin wedges. Use sweet varieties for a tasty mix. - Combine squash and apples in a large bowl. Make sure they mix well. - Prepare the sauce mixture by whisking brown sugar, spices, maple syrup, olive oil, and sea salt in a small bowl. This blend adds depth of flavor. - Coat the squash and apples with the sauce mixture. Stir gently to cover all pieces. - Transfer to baking dish and spread it evenly. This ensures all parts cook well. - Bake and cover the dish tightly with aluminum foil. Bake for 25 minutes. Then, remove the foil and bake for another 15-20 minutes. Check for tenderness and a golden top. For the full recipe, refer to the detailed instructions provided earlier. To make your butternut squash apple bake just right, adjust sweetness to your taste. If you like it sweeter, add more brown sugar or maple syrup. You can also enhance flavors with spices. Try adding a pinch of cloves or allspice for a warm touch. For a beautiful presentation, serve the warm bake in individual bowls. Drizzle extra maple syrup on top for added sweetness. You can garnish with chopped pecans or dried cranberries for color and crunch. This dish pairs well with proteins like roasted chicken or pork. It also works great alongside a fresh salad for a light meal. To check for doneness, pierce the squash with a fork. It should feel tender when done. Avoid overbaking, as this can make the squash mushy. Keep an eye on it in the last few minutes of baking. This way, you get a perfect texture and flavor. For the full recipe, refer to the main recipe section. {{image_4}} You can switch apples or squashes to change the taste. Try using Fuji apples or acorn squash. Both will add their unique flavor. You can also mix in different nuts or dried fruits. Almonds or walnuts can replace pecans. Dried cherries or apricots can add a sweet twist. These simple swaps keep the dish fresh and exciting. Fall is a great time to add seasonal spices. Try using allspice or cardamom for a warm flavor. These spices complement the squash and apples beautifully. You can also make it festive for holidays. Adding a touch of orange zest or nutmeg gives it a holiday feel. These small changes make your Butternut Squash Apple Bake more fun. If you want a vegan version, replace the maple syrup with agave nectar. For gluten-free options, ensure your ingredients are certified gluten-free. You can also cut back on sugar if you prefer a lighter dish. Use stevia or monk fruit as a low-sugar alternative. These adjustments help everyone enjoy this dish. For the full recipe, visit the provided link. After you bake the dish, let it cool. Place leftovers in an airtight container. Store them in the fridge. The Butternut Squash Apple Bake lasts up to five days. For longer storage, you can freeze the bake. First, let it cool completely. Then, portion it into freezer-safe containers. Label each container with a date. It can last up to three months in the freezer. When ready to eat, thaw it overnight in the fridge. Reheat in the oven at 350°F (175°C) until warm. You can get creative with leftovers. Try mixing it into oatmeal for breakfast. You can also use it as a topping for pancakes. If you want a savory twist, blend it into a soup. The flavors will shine through in any dish! For more ideas, check out the Full Recipe for inspiration. Bake your Butternut Squash Apple Bake for about 40 to 45 minutes. Start by covering it with foil and baking for 25 minutes. Then, remove the foil and bake for another 15 to 20 minutes. This method helps the squash cook through while allowing a nice caramelization on top. Yes, you can prepare this dish ahead of time. Mix the squash and apples with the sauce, then cover the dish. Store it in the fridge for up to a day. When ready to bake, just pop it in the oven. This is a great way to save time on busy days. The best apples for this recipe are Granny Smith and Honeycrisp. Granny Smith adds a tart flavor, balancing the sweetness of the squash and sugar. Honeycrisp offers a sweet and juicy bite, perfect for baking. You can mix and match these for great flavor. Yes, Butternut Squash Apple Bake is a healthy choice. Butternut squash is rich in vitamins A and C. Apples provide fiber and antioxidants. You can control the sugar levels too. Using less sugar or natural sweeteners makes it even healthier. Absolutely! You can use maple syrup or honey instead of brown sugar. These options add their own unique flavor. Adjust the amount to taste, as some sweeteners are sweeter than others. This keeps the dish delicious and still healthy. You’ll know the bake is done when the squash is tender. Use a fork to check for softness. The top should be golden and slightly caramelized, which adds to the flavor. If it’s not ready, bake for a few more minutes and check again. For the full recipe, refer to the previous section. This blog post covers a delicious butternut squash apple bake. We explored the essential ingredients, easy steps, and helpful tips to make it great. You learned about variations, storage, and frequently asked questions. In the end, you can adjust this dish to fit your taste. Whether for a holiday or a cozy meal, this recipe offers warmth and flavor. Enjoy creating this tasty bake and share it with friends and family!](https://roastedflavors.com/wp-content/uploads/2025/07/863505b3-fa7d-460f-bec4-4f4716a19719.webp)
Butternut Squash Apple Bake Flavorful Fall Dish
Looking for a warm, tasty dish to celebrate fall? My Butternut Squash Apple Bake is a delightful mix of sweet and savory that will make
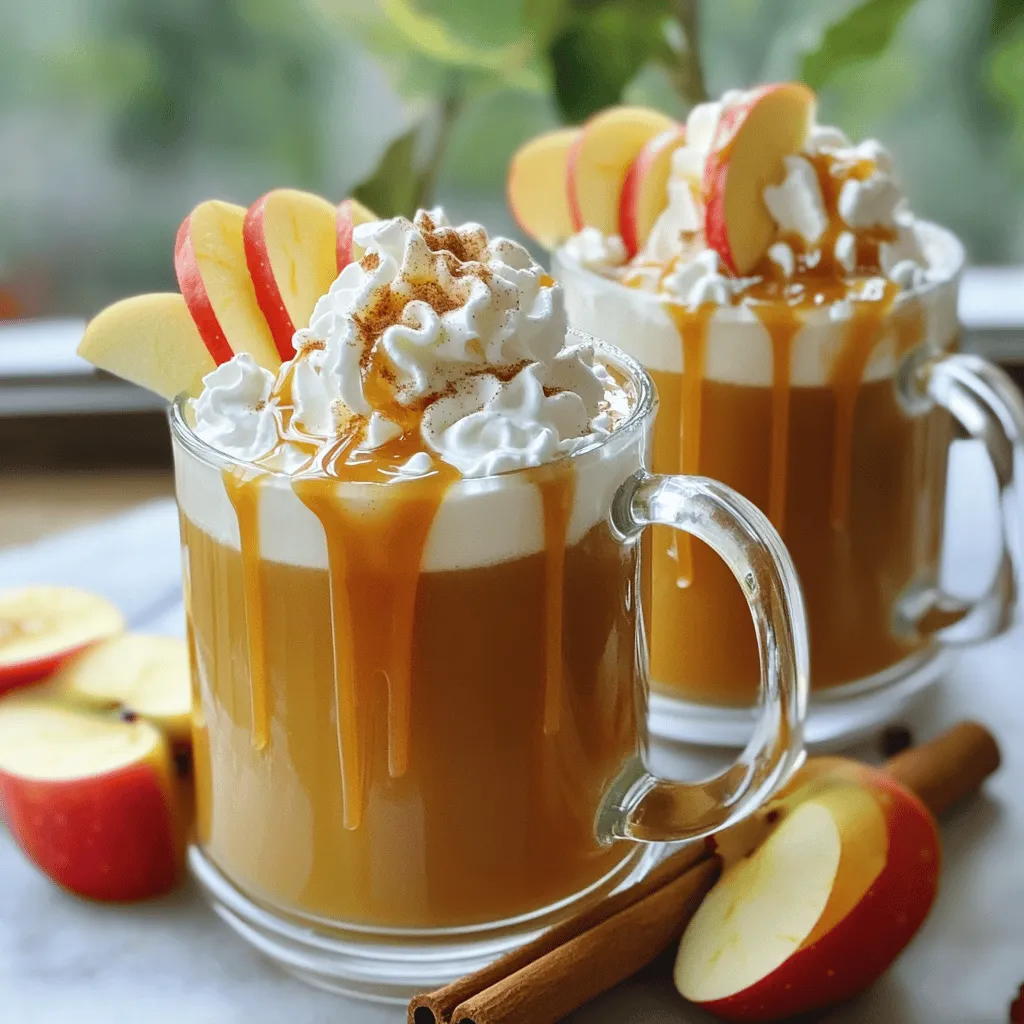
Caramel Apple Cider Delightful Fall Flavor Drink
As the leaves change and the days grow cooler, nothing warms you up quite like Caramel Apple Cider. This drink blends sweet caramel with spiced
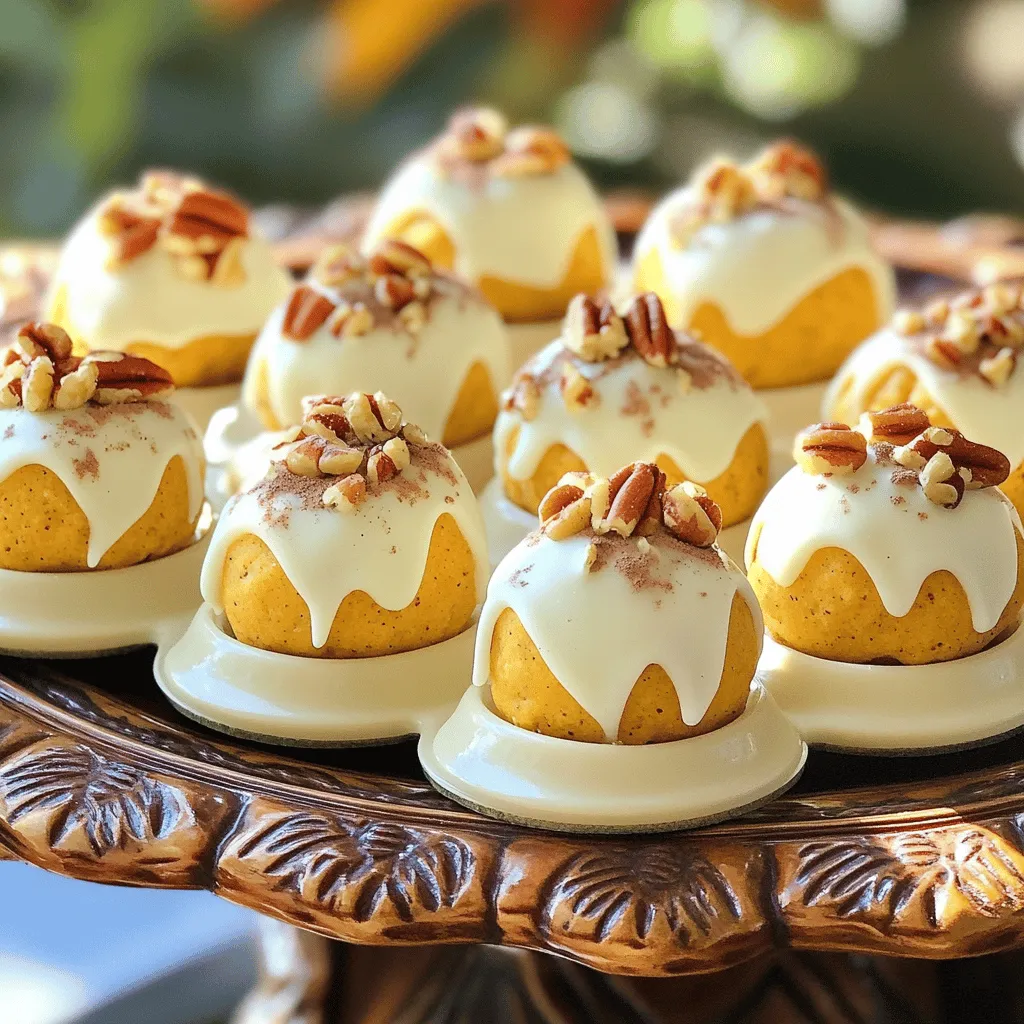
No Bake Pumpkin Cheesecake Balls Quick and Easy Treat
Craving a sweet treat that’s quick and easy? You’re in the right place! I’ll show you how to whip up delicious No Bake Pumpkin Cheesecake
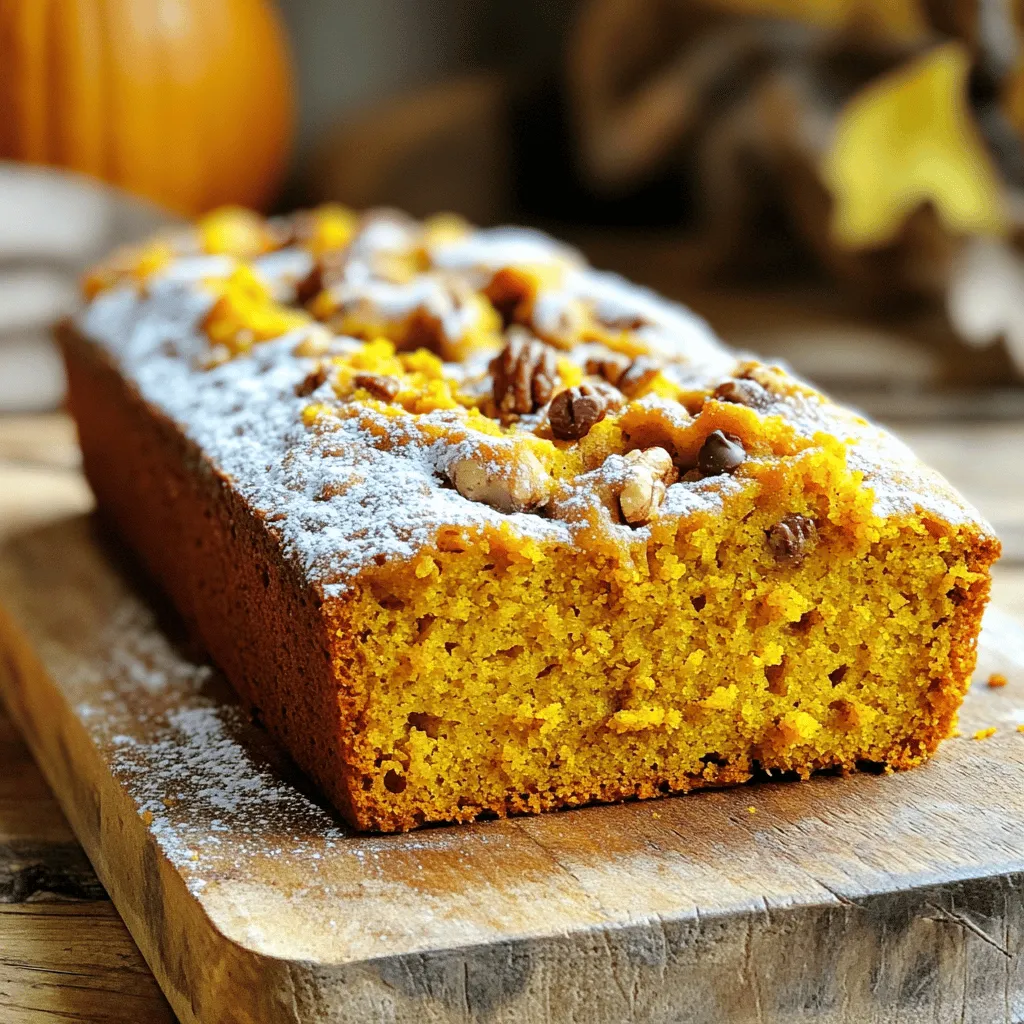
Delicious Vanilla Pudding Pumpkin Bread Recipe
Are you ready to embrace fall with a warm and delicious treat? This Vanilla Pudding Pumpkin Bread is a game-changer for your baking routine! With
![- 4 medium-sized apples (Honeycrisp or Granny Smith for a tart flavor) - 1 cup granulated sugar - 1/2 cup unsalted butter (cut into pieces for easier melting) - 1/2 cup heavy cream (at room temperature) - 1 teaspoon pure vanilla extract - 1 teaspoon ground cinnamon - 1/2 teaspoon ground nutmeg - 1/4 teaspoon fine sea salt - 1 cup chopped nuts (walnuts or pecans, toasted for extra flavor) - 1/2 cup mini chocolate chips (optional, for added sweetness) - 4 wooden craft sticks Caramel apples are a delightful fall treat. For the best flavor, choose fresh, crisp apples. Honeycrisp apples give a sweet and tart taste, while Granny Smith apples add a nice zing. To prepare the caramel, you'll need simple ingredients. Granulated sugar provides the base, and unsalted butter adds creaminess. Heavy cream makes the caramel smooth. Vanilla extract enhances the flavor. Spices like cinnamon and nutmeg bring warmth to the mix. A pinch of sea salt helps balance the sweetness. You can add chopped nuts for crunch and mini chocolate chips for extra fun. Use wooden craft sticks to hold the apples while you coat them in caramel. These ingredients together create a tasty treat full of flavor and texture. For the full recipe, see the detailed instructions above. Start by rinsing the apples under cold water. This removes any wax or dirt. After rinsing, pat them dry with a clean cloth. Dry apples help the caramel stick better. Next, take a wooden stick and insert it into the top of each apple. Push the stick halfway down for a secure hold. Set the apples aside once they are ready. In a medium saucepan, combine 1 cup of granulated sugar and 1/2 cup of unsalted butter. Place the pan over medium heat. Stir with a wooden spoon until the mixture melts completely. Keep stirring to prevent burning. When it starts to bubble, you know you are close. Gradually pour in 1/2 cup of heavy cream while still stirring. This part can cause bubbling, so be careful. Then, mix in 1 teaspoon of pure vanilla extract, 1 teaspoon of ground cinnamon, 1/2 teaspoon of ground nutmeg, and 1/4 teaspoon of fine sea salt. Stir well to blend everything. Cook for about 5 minutes until the caramel thickens slightly. It should coat the back of a spoon. Remove the caramel from heat. Dip each apple into the warm caramel. Swirl and roll the apple to coat it fully. Allow any extra caramel to drip back into the pot. While the caramel is still warm, roll the bottom half of each apple in 1 cup of chopped nuts. Press gently to make sure they stick. If you want extra sweetness, sprinkle 1/2 cup of mini chocolate chips on top. Now, place the coated apples upright on a baking sheet lined with parchment paper. This keeps them from sticking. Let them cool at room temperature for about 30 minutes. This allows the caramel to harden completely. You can find the Full Recipe for these autumn spice caramel apples at the beginning of this article. Enjoy the fun of making these delicious treats! How to avoid burning sugar: To prevent burning sugar, use a heavy saucepan. Keep the heat low to medium. Stir the sugar constantly while it melts. Watch closely as it changes color. Once it turns amber, remove it from heat quickly. Signs your caramel is ready: Your caramel is ready when it thickens and coats the back of a spoon. It should have a deep golden color. If it hardens too much, you can add a little cream to adjust it. Suggestions for adding spices: Try adding spices like ginger or allspice to your caramel. They bring warmth to the dish. A pinch of cayenne can also add a fun kick! Pairing apple varieties with toppings: Use Honeycrisp apples for a sweet-tart bite. Granny Smith adds a nice tang. Pair them with toppings like toasted walnuts or chocolate chips for a delightful mix. Creative serving suggestions: For a fun twist, place your caramel apples on a cake stand. Add fresh leaves or flowers around them for color. You can also slice them into wedges for easy sharing. Drizzling extra caramel: Drizzle extra caramel over your apples for a lovely finish. This makes them look fancy and inviting. Sprinkle some sea salt on top for a sweet-salty flavor contrast. {{image_4}} Fall is the best time to explore fun flavors in caramel apples. You can add seasonal spices like: - Ground ginger - Cloves - Pumpkin spice These spices give the apples a warm, cozy taste. You might also try mixing in a splash of apple cider for a fruity twist. For toppings, think outside the box! Instead of just nuts, consider: - Crushed cookies - Sprinkles - Shredded coconut These add texture and color, making your apples pop. If you want nut-free choices, consider using seeds like pumpkin or sunflower seeds. They provide crunch without the risk of allergies. For those who follow a vegan diet, you can make caramel using coconut milk or almond milk. Just replace the heavy cream in the recipe with one of these options. The result is just as creamy and delicious! For Halloween, you can make spooky caramel apples. Use black or orange sprinkles for a festive touch. You can also drizzle melted white chocolate on top to create ghostly faces. At fall festivals, present your apples on wooden platters. Add some leaves or mini pumpkins around them for charm. A simple touch like this makes your treats perfect for any gathering. For more ideas, check out the Full Recipe for Autumn Spice Caramel Apples. To keep your caramel apples fresh, place them in an airtight container. This helps prevent moisture and keeps them from getting sticky. You should store them at room temperature if you plan to eat them within a day. If you want to save them longer, put them in the fridge. Just ensure they are in a container to avoid absorbing odors. Caramel apples last about 1-2 days at room temperature. They may become soft after this, but they will still taste good. If you refrigerate them, they can last up to a week. Just remember, the caramel may get a bit hard, so let them sit at room temp for a few minutes before enjoying. When it comes to giving caramel apples as gifts, make them extra special. Wrap them in clear cellophane and tie with a ribbon. You can also place them in small cardboard boxes for a fun touch. Adding a personalized tag makes it even better. These thoughtful touches show you care and make your gifts memorable. For a delightful recipe, check out the [Full Recipe]. I love using Honeycrisp or Granny Smith apples. They have the right balance of sweet and tart. The crisp texture holds up well under the caramel. Other great choices include Fuji and Gala apples. They are sweet and very juicy too. Make sure to choose firm apples, as they will give you the best crunch. Yes, you can prep caramel apples ahead of time. You can make the caramel a day before. Just store it in a cool place. Coat the apples and let them set before wrapping. Keep them in an airtight container to stay fresh. Just remember, they are best eaten within a couple of days. If your caramel turns grainy, it might have crystallized. To fix this, you can add a little water and reheat it gently. Stir until smooth. Always use a clean pot and utensils to avoid extra sugar crystals. Be sure to watch the heat and stir constantly while cooking. Absolutely! Store-bought caramel can save you time. Look for caramel sauce in the baking aisle. Just warm it slightly to make it easier to dip the apples. You can still add your own toppings for a personal touch. This is a great option when you need a quick treat. To help the caramel stick, dry the apples well after washing. Insert the sticks firmly into the apples. Dip them into warm caramel and let the excess drip off. You can roll them in nuts or toppings while the caramel is still warm. This helps everything adhere nicely. Making caramel apples is fun and tasty. We covered the best ingredients, from apples to toppings. You learned how to prepare, dip, and cool your apples. The tips helped perfect your caramel and enhance flavors. Don’t forget the fun variations and storage ideas! Caramel apples are a great treat for all seasons. Enjoy creating your own unique versions and sharing them with friends. With the right methods, anyone can make these sweet delights. Happy cooking!](https://roastedflavors.com/wp-content/uploads/2025/07/22f08fd9-1f5e-4d28-95a0-943a9b44f416.webp)
Caramel Apples Ideas for Fall Tasty Seasonal Treats
Are you ready to make fall even sweeter? Caramel apples are a classic treat perfect for this season! In this post, I’ll share my favorite