Desserts
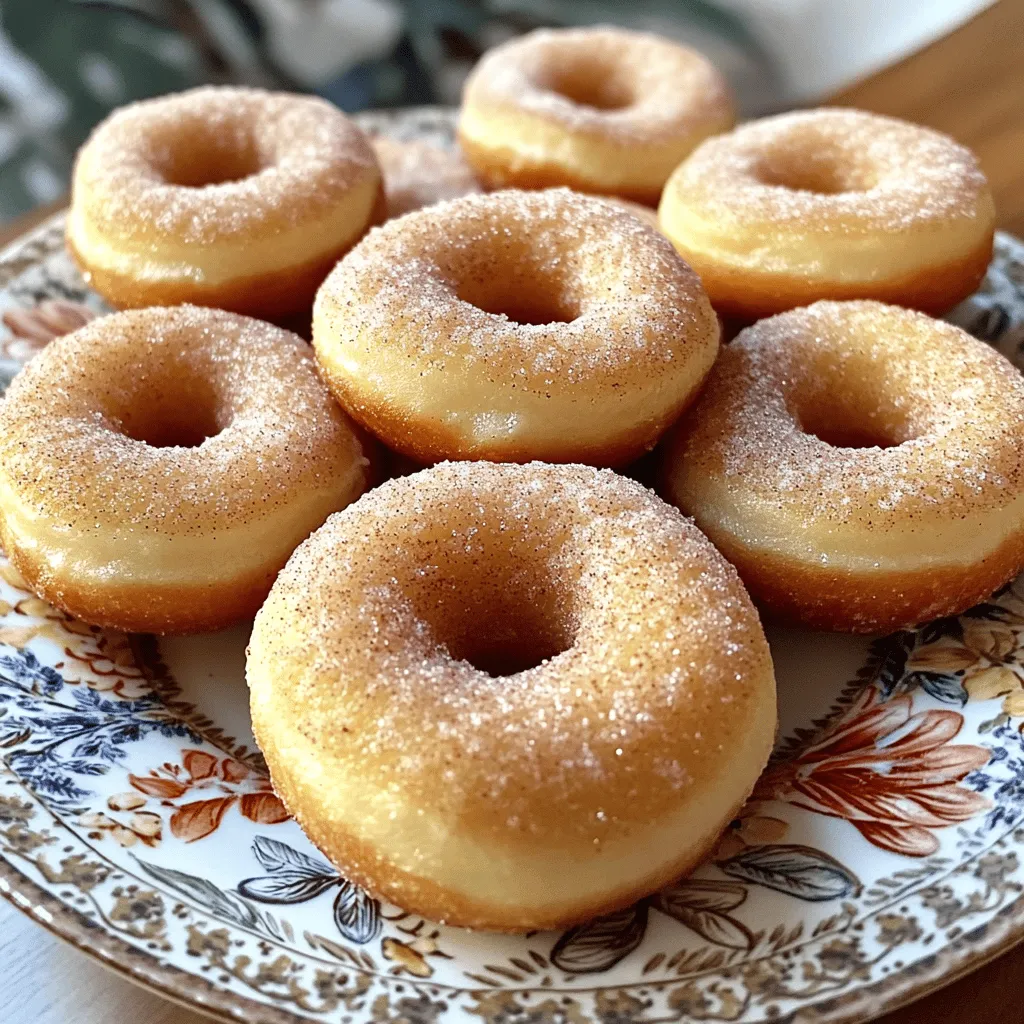
Gluten Free Apple Cider Donuts Simple and Delicious Recipe
Craving a sweet treat that’s gluten-free? You’re in luck! My simple and delicious recipe for gluten-free apple cider donuts is easy to follow, and you
![- 1 ½ cups graham cracker crumbs - ½ cup unsalted butter, melted - ¼ cup granulated sugar - 3 packages (8 oz each) cream cheese, softened - 1 cup granulated sugar - 3 large eggs, at room temperature - 1 teaspoon pure vanilla extract - 1 teaspoon ground cinnamon - 3 cups apples, peeled, cored, and thinly sliced - ½ cup packed brown sugar - 1 tablespoon fresh lemon juice - 1 teaspoon ground cinnamon - 1 cup old-fashioned oats - ½ cup all-purpose flour - ½ cup packed brown sugar - ½ cup unsalted butter, softened - 1 teaspoon ground cinnamon To make this Apple Crisp Cheesecake, start with the crust. Mix graham cracker crumbs, melted butter, and sugar. Press the mix into a springform pan. Next, for the cheesecake filling, beat cream cheese until smooth. Then, add sugar and eggs, mixing well. Finally, blend in vanilla and cinnamon. For the apple topping, toss sliced apples with brown sugar, lemon juice, and cinnamon. This adds sweetness and zest. The crisp topping is made with oats, flour, brown sugar, butter, and cinnamon. Mix until crumbly. You can find the full recipe for more detailed steps. Each layer brings flavor and texture, making this dessert a hit! First, preheat your oven to 325°F (160°C). This step is crucial for even baking. In a medium mixing bowl, combine the graham cracker crumbs, melted butter, and granulated sugar. Mix until the crumbs are well coated. Press this mixture firmly into the bottom of a 9-inch springform pan. Bake for 10 minutes, then let it cool completely. In a large mixing bowl, beat the softened cream cheese until it is smooth. Gradually mix in the granulated sugar until combined. Add the eggs one at a time, mixing well after each addition. Finally, stir in the vanilla extract and ground cinnamon until just blended. Pour the cheesecake filling over the cooled crust. Use a spatula to smooth the top evenly. This will help create a nice finish. In a separate bowl, toss the sliced apples with packed brown sugar, lemon juice, and ground cinnamon. Make sure the apples are well-coated. Spread this mixture evenly over the cheesecake filling. In another bowl, combine old-fashioned oats, all-purpose flour, packed brown sugar, softened butter, and ground cinnamon. Mix until the mixture is crumbly but sticks together. Sprinkle this topping evenly over the layer of apples. Carefully place the cheesecake in the oven. Bake for about 50 to 60 minutes. The edges should look set, while the center may still jiggle slightly. After baking, let the cheesecake cool at room temperature for an hour. Then, refrigerate for at least 4 hours or overnight. This helps the flavors meld. When ready, run a knife around the edges of the pan. Remove the sides of the pan, slice, and enjoy your delicious apple crisp cheesecake! For the complete recipe, check the [Full Recipe]. To get the best texture in your Apple Crisp Cheesecake, follow these steps: - Use Room Temperature Ingredients: Make sure your cream cheese and eggs are at room temperature. This helps them blend smoothly. - Don't Overmix: When mixing the cheesecake batter, blend until just combined. Overmixing can lead to cracks. - Water Bath: Baking in a water bath helps keep the cheesecake moist. Place your springform pan in a larger pan filled with water. When it's time to slice your cheesecake, keep these tips in mind: - Use a Hot Knife: Dip your knife in hot water and wipe it dry before slicing. This gives you clean cuts. - Chill Before Slicing: Let the cheesecake chill overnight. This makes it easier to slice and enhances the flavors. - Garnish for Flair: Add a drizzle of caramel and a mint sprig on each slice. It makes for a beautiful presentation. Avoid these common pitfalls to ensure your cheesecake turns out great: - Skipping the Cooling Time: Don’t rush to slice your cheesecake. Cooling it properly helps set the filling. - Wrong Apple Choice: Use firm apples like Granny Smith or Honeycrisp. Softer apples can turn mushy. - Not Checking for Doneness: The cheesecake should be set around the edges but still jiggles slightly in the center. If it's too firm, it may be overbaked. For the complete recipe, check out the [Full Recipe]. {{image_4}} You can switch up the flavors in your apple crisp cheesecake. Try adding pumpkin puree for a fall twist. Mix in some caramel sauce for a sweet kick. Each change adds a unique taste to your dessert. You can also add spices like nutmeg or ginger for warmth. The key is to experiment and find what you love best. If you need gluten-free options, use gluten-free graham crackers for the crust. You can also swap the all-purpose flour in the crisp topping with almond flour. For a vegan version, use plant-based cream cheese and eggs. Replace butter with coconut oil. These tweaks keep the flavor rich without using animal products. When it comes to serving, the presentation matters. You can top each slice with whipped cream or a drizzle of caramel. Fresh berries make a colorful addition too. For a festive look, sprinkle some chopped nuts on top. You can even serve it warm with vanilla ice cream. Each bite of this apple crisp cheesecake bursts with flavor. Check out the Full Recipe for more tips and ideas! To keep leftover cheesecake fresh, cover it well. Use plastic wrap or foil to seal it. You can also place it in an airtight container. Store it in the fridge. This keeps it cool and tasty for up to five days. If you want to save your cheesecake for later, freezing works great. First, let it cool completely. Then, slice it into portions. Wrap each slice in plastic wrap. After that, place the slices in a freezer-safe bag or container. They will stay fresh for about three months. When you are ready to eat, thaw it in the fridge overnight. The cheesecake stays good in the fridge for about five days. When frozen, it can last for three months. However, the texture might change after thawing. For the best taste, enjoy your cheesecake fresh or within the recommended time. For the full recipe, check the details above. To make Apple Crisp Cheesecake from scratch, start with the crust. Mix graham cracker crumbs, melted butter, and sugar. Press this into a springform pan. Bake it for ten minutes. For the filling, beat cream cheese, sugar, and eggs until smooth. Add vanilla and cinnamon. Layer the filling over the cooled crust. For the apple topping, mix sliced apples with brown sugar, lemon juice, and cinnamon. Place this on top of the cheesecake filling. Finally, prepare the crisp topping with oats, flour, brown sugar, and softened butter. Bake everything together until set. You can find the full recipe above. The best apples for this recipe are Granny Smith or Honeycrisp. These apples provide a nice balance of sweet and tart. Granny Smith apples offer a firm texture and bright flavor. Honeycrisp apples are sweet and juicy, adding depth to the dish. You can mix these apples if you want more flavor complexity. Using fresh, crisp apples will make your cheesecake shine. Yes, you can use a different crust if you prefer. Some great alternatives include Oreo cookies, digestive biscuits, or even a nut-based crust. For a gluten-free option, try using almond flour mixed with melted butter. Each crust adds its unique flavor and texture. Just ensure to adjust the sugar based on the crust's sweetness. To check if the cheesecake is done baking, look for the edges. They should be set and firm. The center may still jiggle slightly, which is okay. When it cools, it will firm up. You can also use a toothpick to test. Insert it into the center; if it comes out mostly clean, the cheesecake is ready. Remember, overbaking can lead to cracks, so keep an eye on it! You learned how to make a delicious Apple Crisp Cheesecake. We covered all the key steps, from selecting ingredients to baking tips. Remember to store leftovers properly to keep them fresh. You can explore many variations to fit your taste and dietary needs. Baking this dessert is fun, and it can impress your friends. Enjoy making it your own and sharing it with others. You now have the tools to create a perfect cheesecake every time!](https://roastedflavors.com/wp-content/uploads/2025/07/a98e2353-9de3-4e1f-b690-a2d28b6d6b5d.webp)
Apple Crisp Cheesecake Flavorful and Easy Dessert Treat
If you’re craving a dessert that’s both easy to make and packed with flavor, look no further! My Apple Crisp Cheesecake combines creamy cheesecake with
. Enjoy making these soft blueberry cookies! To get soft blueberry cookies, follow these simple tips. First, use room temperature butter. This helps the dough mix well. Second, do not overmix the dough. Mixing too much can make the cookies tough. Mix until just combined. Lastly, take the cookies out of the oven while they still look soft. They will firm up as they cool. Avoid these common mistakes to ensure your cookies turn out great. One common mistake is skipping the parchment paper. This can lead to sticking and burning. Another mistake is not measuring ingredients properly. Use measuring cups and spoons for accuracy. Lastly, don’t bake the cookies too long. Keep an eye on them, as every oven is different. To make your cookies even tastier, consider these flavor boosts. Add a teaspoon of lemon zest for a fresh twist. You can also mix in chopped nuts like walnuts or pecans for crunch. If you want a richer taste, use dark brown sugar instead of light brown sugar. For a fun touch, try adding a sprinkle of cinnamon to the dough. Check out the Full Recipe for more ideas! {{image_4}} You can make soft blueberry cookies gluten-free! Use a gluten-free all-purpose flour blend. Look for one that includes xanthan gum. This helps keep the cookies soft and chewy. Always check the packaging, as some blends work better than others. Want to switch things up? Consider adding chocolate chips for a sweet twist. You can also mix in chopped nuts like walnuts or pecans for crunch. If you enjoy spices, try adding a pinch of cinnamon. It pairs well with blueberries and gives a warm flavor. Feel free to get creative with flavors! Swap out some blueberries for raspberries or blackberries. They will add a tart taste. You could also use lemon zest for a fresh citrus kick. For a richer flavor, add a bit of almond extract along with the vanilla. Check out the Full Recipe for more ideas! To keep your soft blueberry cookies fresh, store them in an airtight container. This helps keep moisture in, so your cookies stay soft. Place a piece of wax paper between layers to avoid sticking. For best taste, eat them within a week. If your cookies lose their softness, you can easily bring them back. Preheat your oven to 350°F (175°C). Place the cookies on a baking sheet and heat for about 5 minutes. This will warm them up and restore their soft texture. You can also use the microwave. Just heat them for 10 to 15 seconds, but be careful not to overheat. You can freeze these cookies for later enjoyment. First, let them cool completely. Then, place them in a single layer on a baking sheet and freeze for about 1 hour. After freezing, transfer them to a freezer bag. They can stay fresh for up to three months. When you are ready to eat, just thaw at room temperature or reheat as mentioned before. Enjoy your delicious treat anytime! To boost flavor, add more vanilla or almond extract. You can also mix in lemon zest. This adds a bright, fresh taste that pairs well with blueberries. Try using different types of sugar, like brown or coconut sugar, for a richer flavor. You can also fold in spices like cinnamon or nutmeg for warmth. Yes, you can use frozen blueberries. Just make sure to thaw them first, and gently pat them dry. This helps prevent excess moisture in the dough. Keep in mind that frozen berries may burst easier, so fold them in carefully to maintain their shape. Soft cookies come from using more fat and less flour. Ensure you measure your flour correctly, as too much can lead to a dry texture. Also, don’t overbake your cookies. They should be soft when you take them out of the oven. Let them cool on the baking sheet for a few minutes for the best soft texture. For a detailed recipe, check the Full Recipe for Soft Blueberry Cookies. This blog post covers key ingredients and helpful tips for cookie baking. You learned how to prepare, mix, and bake blueberry cookies. I shared substitutions and common mistakes to avoid. Plus, I provided storage methods and fun variations. Baking cookies should be fun and easy. Experimenting can lead to tasty treats. Enjoy the process and your sweet results! With these tips, you can create delicious cookies everyone will love.](https://roastedflavors.com/wp-content/uploads/2025/07/12b0e2f7-c1be-499a-b5ab-bb0b9045e706.webp)
Soft Blueberry Cookies Delightful and Easy Recipe
Get ready to bake some delicious soft blueberry cookies! This easy recipe brings a burst of flavor with every bite. You’ll love how soft and
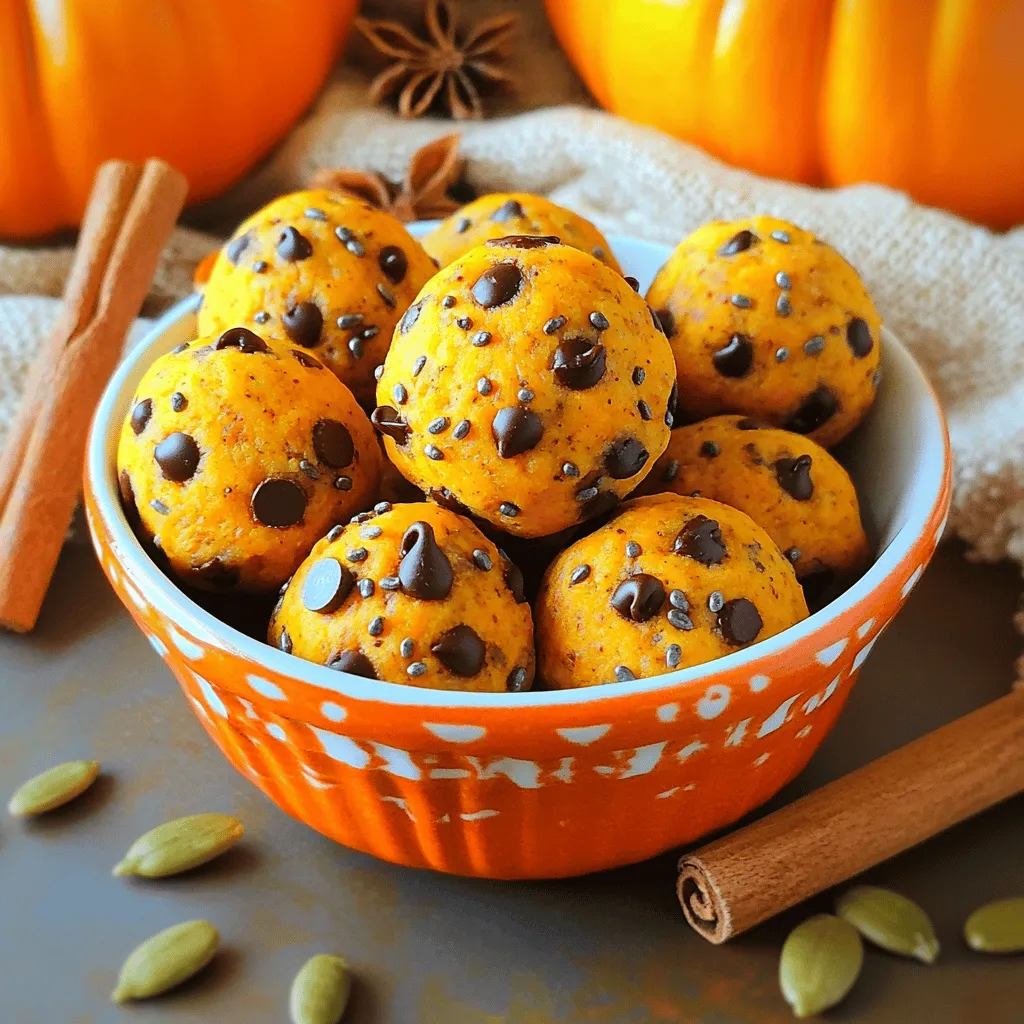
![To make these No-Bake Pumpkin Cheesecake Balls, you need: - 1 cup cream cheese, softened to room temperature - 1 cup canned pumpkin puree - 1/2 cup powdered sugar - 1 teaspoon vanilla extract - 1 teaspoon ground cinnamon - 1/2 teaspoon ground nutmeg - 1/4 teaspoon ground ginger - 1 cup graham cracker crumbs - 1/3 cup chopped pecans (optional) - 1/2 cup white chocolate or dark chocolate chips You can add your own twist to these treats. Here are some ideas: - Use maple syrup instead of powdered sugar for a richer flavor. - Swap in almond flour for graham cracker crumbs for a nutty touch. - Try adding a pinch of salt for balance. - Use dark chocolate for a richer coating flavor. If you run out of an ingredient, here are some easy swaps: - Cream cheese can be replaced with mascarpone cheese for a creamier texture. - Canned pumpkin puree can be swapped with homemade pumpkin puree. - If you don’t have graham crackers, use crushed cookies or nuts as a base. - For a dairy-free option, use a plant-based cream cheese. These ingredients make your No-Bake Pumpkin Cheesecake Balls both simple and scrumptious. Each element adds to the flavor, so feel free to experiment a little! For the full recipe, check it out. Start by gathering your ingredients. You need cream cheese, pumpkin puree, and powdered sugar. Mixing these first gives you a smooth base. Use a large bowl and a hand mixer. Beat the cream cheese and pumpkin together until creamy. Make sure there are no lumps. Next, add powdered sugar, vanilla extract, and spices like cinnamon and nutmeg. Mix until fluffy and well combined. Adding spices brings warmth to the flavor. Finally, stir in graham cracker crumbs. This will thicken the mix and help shape your balls. If you like, add chopped pecans for crunch. Once the mixture is ready, it’s time to shape the balls. Use clean hands to scoop about a tablespoon of the mix. Roll it between your palms until it forms a smooth ball. This part is fun! Place each ball on a baking sheet lined with parchment paper. Keep rolling until you use all the mixture. This should give you 12 to 15 balls. After shaping, freeze them for about 30 minutes. Chilling makes the balls firm and easier to coat in chocolate. While the balls chill, melt your chocolate. You can use white or dark chocolate, depending on your taste. Place chocolate chips in a microwave-safe bowl. Heat in 30-second intervals, stirring in between. This ensures the chocolate melts evenly. After 30 minutes, take the cheesecake balls out of the freezer. Dip each ball into the melted chocolate, making sure to coat it fully. Let any extra chocolate drip off. Then place the coated balls back on the baking sheet. For a festive touch, sprinkle some graham cracker crumbs on top while the chocolate is still soft. Finally, chill the coated balls in the fridge for 15 minutes. This helps the chocolate set perfectly. Enjoy your delicious No-Bake Pumpkin Cheesecake Balls! For the full recipe, check [Full Recipe]. To make a smooth mixture, start with room-temperature cream cheese. Soft cream cheese blends easier with pumpkin puree. Use a hand mixer on medium speed to beat both together. Mix until there are no lumps. This ensures a creamy base for your cheesecake balls. Chilling is key for firmness. After rolling your mixture into balls, place them on a parchment-lined baking sheet. Freeze them for about 30 minutes. This makes them easier to coat in chocolate. If you skip this step, the balls might fall apart. To boost flavor, add spices like cinnamon and nutmeg. These spices bring warmth to your treats. For a pop of color, sprinkle extra graham crumbs on top of the chocolate coating. Drizzling melted chocolate over the balls adds elegance. This makes your pumpkin cheesecake balls fun and festive! You can find the full recipe [here]. {{image_4}} You can get creative with the coatings for your cheesecake balls. While I love using white or dark chocolate, you can try other options. Here are some ideas: - Chocolate Sprinkles: Roll the balls in colorful sprinkles for a fun look. - Crushed Nuts: Use walnuts or almonds for a crunchy texture. - Cocoa Powder: Dust the balls lightly for a rich chocolate flavor. - Coconut Flakes: Roll in unsweetened coconut for a tropical twist. You can add different flavors to make your cheesecake balls unique. Here are some options: - Maple Syrup: Swap some powdered sugar for maple syrup for a sweet twist. - Orange Zest: Add a bit of zest for a fresh, fruity flavor. - Chocolate Chips: Mix in mini chocolate chips for added sweetness. - Spices: Experiment with allspice or clove for a warmer taste. Customizing for dietary needs is easy with these adaptations: - Dairy-Free: Use vegan cream cheese and dairy-free chocolate for a dairy-free option. - Gluten-Free: Choose gluten-free graham crackers to keep this treat safe for all. - Nut-Free: Skip the nuts or use seeds like sunflower for a nut-free version. - Low Sugar: Use a sugar substitute like stevia to cut down on sugar content. These variations make the no-bake pumpkin cheesecake balls flexible and fun. You can mix and match to suit your taste or dietary needs. Enjoy making them your own! For the full recipe, check out the details above. To store leftover No-Bake Pumpkin Cheesecake Balls, place them in an airtight container. Layer them with parchment paper to avoid sticking. Keep the container in the fridge. They stay fresh and tasty for a few days. Enjoy them cold for a refreshing treat. You can freeze these cheesecake balls for longer storage. First, place them on a baking sheet in a single layer. Freeze them for about an hour until firm. Then, transfer the frozen balls into a freezer-safe bag or container. Label it with the date. They can last up to three months in the freezer. When ready to eat, thaw them in the fridge overnight. These pumpkin cheesecake balls are best enjoyed within a week when stored properly in the fridge. The flavors get better over time, but they may lose texture if left too long. For the best taste, enjoy them fresh. Avoid leaving them out at room temperature for too long to keep them safe and delicious. No-Bake Pumpkin Cheesecake Balls stay fresh for 3 to 5 days in the fridge. Store them in an airtight container. If you want to keep them longer, you can freeze them. They can last up to 3 months in the freezer. Just let them thaw in the fridge before serving. Yes, you can use fresh pumpkin. Just make sure to cook and puree it first. Drain any excess water to avoid a soggy mix. Canned pumpkin puree is easier, but fresh can add a nice flavor. It all depends on what you have on hand! These treat balls are perfect for parties or fall gatherings. You can serve them on a nice platter. Drizzle some melted chocolate or caramel sauce over them for a fun touch. Adding a sprinkle of cinnamon or graham cracker crumbs makes them look festive. You can also pair them with coffee or tea for a cozy treat. For the full recipe, check out the section above! In this post, we explored how to make no-bake pumpkin cheesecake balls. We covered ingredients, mixing, forming, and coating tips. You learned variations and storage methods to keep your treats fresh. Remember, you can adjust flavors and coatings to fit your taste. With these easy steps, you can create fun and tasty treats for any occasion. Enjoy making these delightful bites!](https://roastedflavors.com/wp-content/uploads/2025/07/c951cbdd-d9e8-4d3b-bc45-384edb7690cd.webp)
No-Bake Pumpkin Cheesecake Balls Easy Fall Treat
Fall is here, and it’s time for a tasty treat! No-bake pumpkin cheesecake balls are easy to make and packed with flavor. In this post,
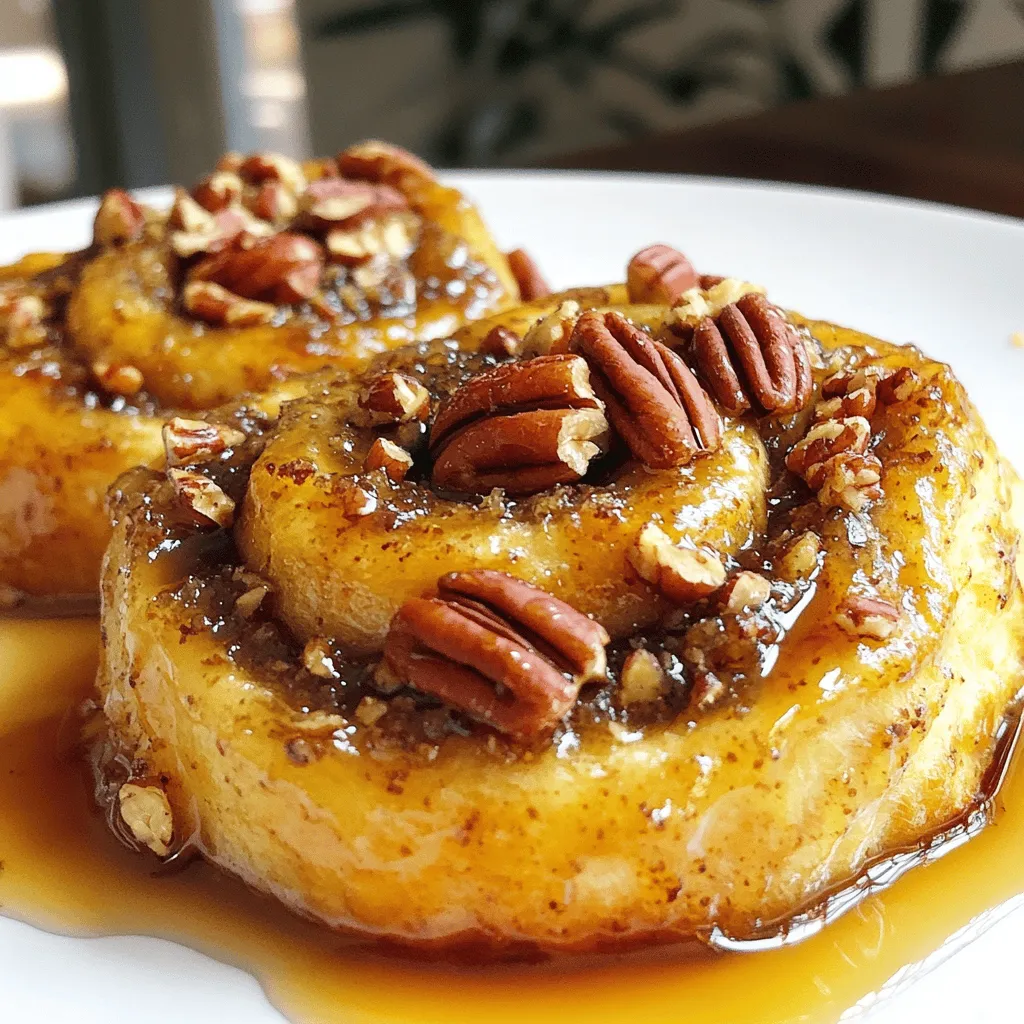
Big Fat Pecan Sticky Buns Irresistibly Sweet Recipe
If you’ve never tasted Big Fat Pecan Sticky Buns, get ready for a treat! These sweet gems are the perfect blend of gooey and crunchy.
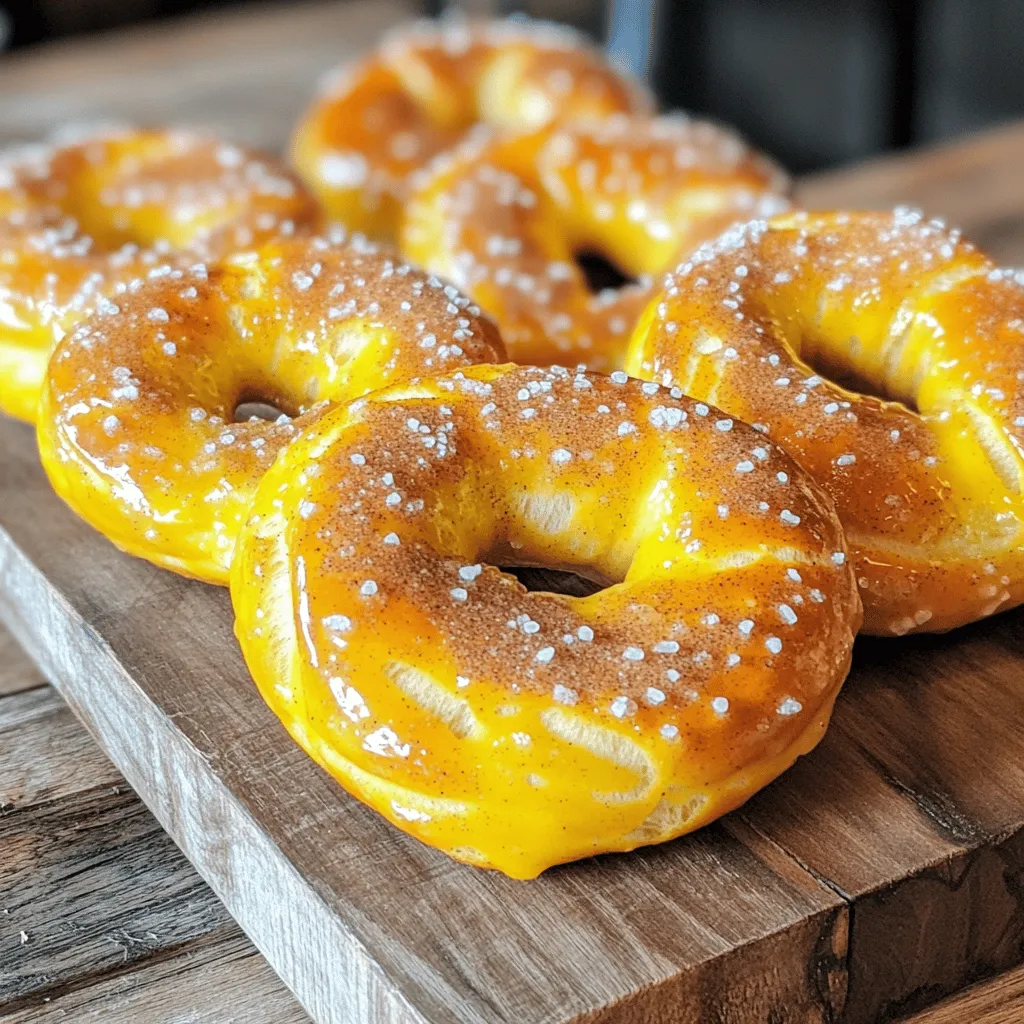
Apple Pie Spiced Pretzels Irresistible Flavor Twist
Craving a fun twist on a classic favorite? Dive into my Apple Pie Spiced Pretzels! These soft, warm pretzels blend the cozy flavors of apple
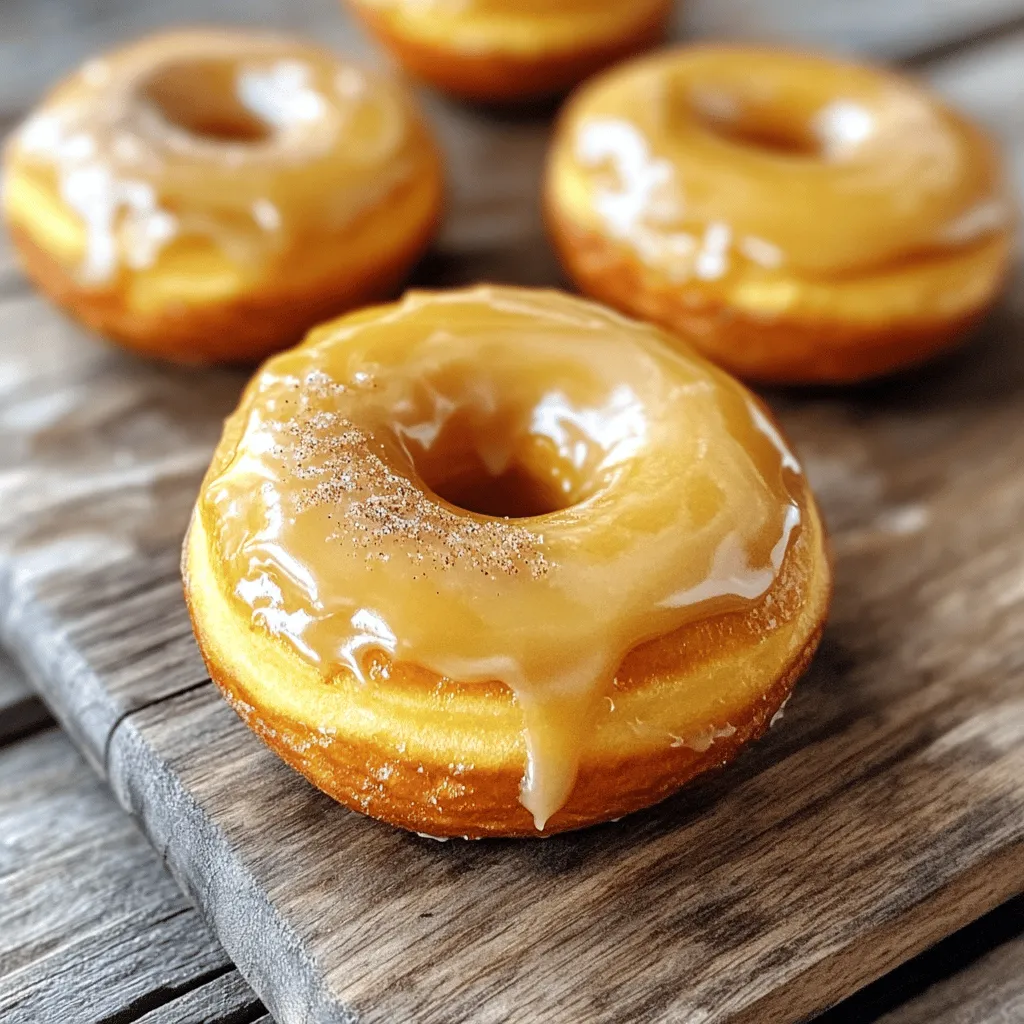
Savory Pumpkin Buttermilk Donuts Easy to Make
Ready to enjoy a tasty treat? These savory pumpkin buttermilk donuts are easy to make and full of flavor! With simple steps and common ingredients,
Easy Pumpkin Protein Bites Nutritious and Simple Snack
Looking for a quick and healthy snack? These Easy Pumpkin Protein Bites offer rich flavor and nutrition in every bite. You only need simple ingredients

The Best Apple Cider Donut Bundt Cake Delight
Fall is the perfect time for cozy treats, and nothing says autumn like a warm, spiced donut. But what if I told you that you
![To make this cake, you need a few key ingredients. Here is the list: - 2 cups all-purpose flour - 1 cup granulated sugar - 1 tablespoon baking powder - 1/2 teaspoon salt - 1/4 cup unsalted butter, melted - 2 large eggs - 1 cup milk - 1 teaspoon vanilla extract - 2 apples, peeled and diced (like Granny Smith or Honeycrisp) - 1 tablespoon lemon juice - 1 teaspoon ground cinnamon - 1/2 cup brown sugar These ingredients come together to create a soft and sweet cake that bursts with apple flavor and warm spices. You can also add some optional ingredients to take your cake to the next level. Consider these: - 1/4 cup chopped pecans (for added crunch) - A sprinkle of powdered sugar (for serving) - A scoop of vanilla ice cream (to enhance the dessert) These ingredients can add fun textures and flavors to the cake, making it even more enjoyable. To prepare your apple cinnamon roll cake, gather these tools: - Mixing bowls (a large one and a small one) - Whisk (for mixing wet and dry ingredients) - Knife (for chopping apples) - Baking pan (9x13-inch works best) - Parchment paper (optional, for easy removal) - Toothpick (to check if the cake is done) Having the right tools makes the process smoother and helps you create a stunning cake. For the full recipe, check out the details above. Start by preheating your oven to 350°F (175°C). This step is key to baking a great cake. Next, grab a 9x13-inch baking pan. Grease it well or line it with parchment paper. This will help the cake come out easily after baking. Take two apples, like Granny Smith or Honeycrisp. Peel and dice them into small pieces. In a bowl, mix the diced apples with one tablespoon of lemon juice and one teaspoon of ground cinnamon. Toss them gently, so the apples are well coated. Set them aside to let the flavors blend. In a large bowl, whisk together two cups of all-purpose flour, one cup of granulated sugar, one tablespoon of baking powder, and half a teaspoon of salt. Make sure they mix well. This helps the cake rise evenly when baked. In another bowl, mix a quarter cup of melted unsalted butter, two large eggs, one cup of milk, and one teaspoon of vanilla extract. Whisk until smooth. This mixture adds moisture and flavor to your cake. Slowly pour the wet mixture into the dry ingredients. Stir gently until they combine. It’s okay if some lumps remain; they help keep the cake tender. Now, pour half of the batter into your prepared pan. Spread it out evenly. Take the apple mixture and spread it over the batter. Sprinkle half a cup of brown sugar on top. If you like, add a quarter cup of chopped pecans for extra crunch. Finally, pour the rest of the batter over the apples and smooth it out. Using a knife or skewer, swirl through the batter to mix in the apple and cinnamon. This adds a nice marbled look. Place the pan in the oven and bake for 30-35 minutes. Check with a toothpick to see if it comes out clean. Keep an eye on it to avoid overbaking. Enjoy making this delicious Apple Cinnamon Roll Cake with the full recipe! To keep your cake moist, use fresh apples. They add natural moisture. I recommend Granny Smith or Honeycrisp apples. They balance sweet and tart flavors. Mixing the batter just enough is key. You want it combined but still slightly lumpy. Overmixing can make the cake dense. Also, don't skip the lemon juice. It brightens the flavors and helps the apples stay fresh. One common mistake is not measuring ingredients properly. Use measuring cups for accuracy. If you pack the flour, it can weigh too much. Another mistake is opening the oven door too often. This lets heat escape and affects baking time. Lastly, avoid using cold eggs or milk. They should be at room temperature for the best results. When swirling, use a knife or skewer. Start from the center and move outwards. Do this gently to avoid mixing too much. You want a nice marbled look. If you swirl too hard, you lose the layers. Aim for a pretty pattern that shows the apple and cinnamon mix. It adds visual appeal and flavor depth to your cake. For more detailed steps, check out the Full Recipe. {{image_4}} One tasty way to enjoy this cake is with cream cheese frosting. The tangy cream cheese pairs well with the sweet apples. To make the frosting, mix together cream cheese, butter, powdered sugar, and vanilla extract. Spread this over the cooled cake for a rich finish. You can also add a pinch of cinnamon for extra flavor. This frosting makes each bite even more indulgent. If you need a gluten-free option, swap the all-purpose flour for a gluten-free blend. Many brands offer one-to-one substitutes that work well in this recipe. Make sure your baking powder is gluten-free, too. The rest of the ingredients stay the same. This way, everyone can enjoy the cake, without any worries. You can change up the fruit in this cake based on the season or your mood. Pears, peaches, or berries can replace the apples. Simply adjust the spices to match the fruit. For example, try adding nutmeg with pears for a warm flavor. With these simple swaps, you create a new treat each time, keeping it exciting for your taste buds. For the complete recipe, check out the [Full Recipe]. To store your Apple Cinnamon Roll Cake, let it cool completely. Once cooled, cover it tightly with plastic wrap or aluminum foil. You can also place it in an airtight container. This keeps the cake fresh for up to three days at room temperature. If your kitchen is warm or humid, it is best to store it in the fridge. In the fridge, it stays good for about five days. If you want to save the cake for later, freezing is a great option. First, let the cake cool completely. Then, slice it into pieces. Wrap each slice in plastic wrap, then place them in a freezer bag. Remove as much air as possible before sealing. This method keeps the cake fresh for up to three months. When you’re ready to enjoy it, just thaw it in the fridge overnight. When reheating, I suggest using the oven for the best results. Preheat your oven to 350°F (175°C). Place the slice on a baking sheet and cover it with aluminum foil. Heat for about 10-15 minutes, until warmed through. You can also microwave a slice for about 30 seconds, but this may make it a bit soggy. Enjoy it warm to bring out the flavors of apple and cinnamon. For the full recipe, check out the detailed instructions! Yes, you can use other fruits! Pears, peaches, or berries work great. Just chop them small like apples. Adjust the sugar if the fruits are sweeter or tarter. This gives you lots of options to mix flavors in your cake. To make this cake healthier, you can use whole wheat flour instead of all-purpose flour. You can also replace sugar with honey or maple syrup. Using applesauce can cut down on butter. These swaps keep the taste while adding nutrients. Store leftovers in an airtight container at room temperature. You can also refrigerate them for longer freshness. To serve, warm slices in the microwave for about 15 seconds. This brings back the fresh-baked taste and makes it cozy to enjoy. Yes, you can prepare the batter ahead of time! Mix the dry and wet ingredients separately. Combine them just before baking to keep the cake light and fluffy. This way, you save time when you want to bake. If you don't have pecans, walnuts or almonds work well too. You can also skip nuts if you prefer. For a nut-free option, add more apples or sprinkle some oats for crunch. These changes keep your cake tasty and enjoyable. This blog post covered how to make a delicious Apple Cinnamon Roll Cake. We discussed key and optional ingredients, along with handy tools. I provided clear, step-by-step instructions from prep to baking. I shared tips to avoid common mistakes and ensure a moist cake. You can explore fun variations and learn how to store it properly. In the end, this cake is easy to make and enjoyable. Feel free to experiment with flavors and share your results!](https://roastedflavors.com/wp-content/uploads/2025/07/38b7ffb6-4fb5-41f4-a699-1404af864ed9.webp)
Indulgent Apple Cinnamon Roll Cake Flavorful Treat
Get ready to dive into a warm, sweet treat that’s perfect for any occasion! This Apple Cinnamon Roll Cake combines the classic flavors you love,