Desserts

To make caramelized apple cinnamon blondies, gather these simple ingredients: - 1 cup unsalted butter, melted - 1 cup packed brown sugar - 1/2 cup granulated sugar - 2 large eggs - 2 teaspoons vanilla extract - 2 cups all-purpose flour - 1 teaspoon baking powder - 1/2 teaspoon baking soda - 1/2 teaspoon salt - 1 tablespoon ground cinnamon - 2 medium Granny Smith apples, peeled, cored, and diced - 1 tablespoon lemon juice - 1/2 cup chopped walnuts or pecans (optional) - 1/4 cup caramel sauce (for drizzling) These ingredients come together to create a warm, sweet treat. The unsalted butter gives a rich base. The mix of brown and granulated sugar adds depth to the flavor. Eggs and vanilla bind everything and add moisture. Next, all-purpose flour, baking powder, baking soda, and salt give structure. Ground cinnamon brings warmth and spice. Granny Smith apples add a tart bite, while lemon juice keeps them fresh. You can toss in walnuts or pecans for crunch. Lastly, caramel sauce drizzles over the top, making it extra special. This blend of flavors and textures makes these blondies a delightful treat. Enjoy the process of gathering ingredients and baking! First, heat your oven to 350°F (175°C). Next, grab a 9x13 inch baking pan. Grease it or line it with parchment paper. This will help you lift the blondies out easily later. In a big bowl, combine 1 cup of melted unsalted butter, 1 cup of packed brown sugar, and 1/2 cup of granulated sugar. Whisk them together until they blend well. Add 2 large eggs, one at a time. Mix well after each egg. Finally, stir in 2 teaspoons of vanilla extract. Take another bowl and whisk together 2 cups of all-purpose flour, 1 teaspoon of baking powder, 1/2 teaspoon of baking soda, 1/2 teaspoon of salt, and 1 tablespoon of ground cinnamon. Slowly fold the dry mix into the wet mix. Stir until no dry spots remain, but don’t overmix. Peel, core, and dice 2 medium Granny Smith apples. To stop them from browning, toss the diced apples with 1 tablespoon of lemon juice. This keeps the apples fresh for your blondies. In a skillet, heat 1 tablespoon of butter over medium heat. Add the diced apples, 1 tablespoon of brown sugar, and a pinch of cinnamon. Sauté for about 5-7 minutes. You want the apples to be soft and caramelized. Let them cool a bit before folding into the batter. Pour the batter into the prepared baking pan. Spread it evenly using a spatula. Bake for 25-30 minutes. Check if they are done by inserting a toothpick in the center. If it comes out clean or with a few moist crumbs, they’re ready. Remove the pan from the oven and let the blondies cool completely on a wire rack. Once cool, cut them into squares. For a tasty touch, drizzle caramel sauce over the blondies before serving. They look great on a rustic wooden board! To get the best flavor from your apples, choose Granny Smith apples. They are tart and hold their shape well. Start by peeling and dicing them into small pieces. Use a medium skillet and heat 1 tablespoon of butter over medium heat. Once the butter melts, add the diced apples, 1 tablespoon of brown sugar, and a pinch of cinnamon. Cook for 5-7 minutes. Stir gently until the apples soften and turn golden. This process makes them sweet and rich. Overmixing can make your blondies tough. When you mix your wet and dry ingredients, do it gently. Stir until just combined. You should still see some flour bits. It's okay! This keeps your blondies soft and chewy. Remember, the goal is to mix without losing that tender texture. Preheat your oven to 350°F (175°C). Bake your blondies for 25-30 minutes. Check for doneness by inserting a toothpick in the center. If it comes out clean or with a few moist crumbs, they are ready. Keep an eye on them to prevent overbaking. The edges should be golden, while the center remains soft. Serve your blondies on a rustic wooden board for a homey feel. Drizzle caramel sauce over the top for a sweet touch. A light dusting of ground cinnamon adds warmth and looks nice. Cut them into squares and arrange them neatly. You can also add a scoop of vanilla ice cream on the side for a delightful treat. {{image_4}} You can easily swap ingredients to fit your needs. If you want a dairy-free option, use coconut oil instead of butter. For a healthier choice, try using coconut sugar in place of brown sugar. Applesauce can replace eggs if you are vegan. Nuts add crunch and flavor. You can use walnuts or pecans, but feel free to explore! Almonds or hazelnuts also work well. Just chop them up and mix them into the batter for added texture. Add extra fun with flavor enhancements! Chocolate chips bring sweetness and richness. Dried fruit, like cranberries or raisins, can add a chewy touch. You can also sprinkle some sea salt on top for a sweet and salty contrast. For a gluten-free version, swap all-purpose flour with almond flour or a gluten-free blend. Make sure the baking powder you use is gluten-free. This way, everyone can enjoy these tasty blondies! To keep your blondies fresh, let them cool completely. Then, cut them into squares. Place them in an airtight container. You can store them at room temperature for up to three days. If you want them to last longer, refrigerate them. They will be good for about a week. If you have extra blondies, freezing is a great option. Wrap each square in plastic wrap tightly. Then, place them in a freezer-safe bag. Label the bag with the date. You can keep them in the freezer for up to three months. When you're ready to eat, just thaw them in the fridge overnight. To reheat, you can use the microwave or the oven. For the microwave, place a blondie on a plate and heat for about 10-15 seconds. Check to ensure it's warm but not too hot. For the oven, preheat it to 350°F. Place the blondies on a baking sheet for about 5-10 minutes. This helps them regain their soft texture. Enjoy your warm, gooey blondies! You can use white sugar or coconut sugar. White sugar will make your blondies less chewy. Coconut sugar gives a similar flavor, but it is less sweet. Yes, you can use other apples. Honeycrisp or Fuji apples work well. They add sweetness and flavor to the blondies. Just make sure they are firm and not too soft. The blondies are done when the top is golden brown. You can test with a toothpick. If it comes out clean, they are ready. A few moist crumbs are okay. Yes, you can mix the batter and store it. Keep it in the fridge for up to 24 hours. Just remember to let it warm slightly before baking. Blondies are made with brown sugar and butter, giving them a butterscotch flavor. Brownies use cocoa powder, making them chocolatey. Blondies are lighter and sweeter than brownies. This blog covered how to make delicious blondies with caramelized apples. We started with a list of key ingredients, including butter, sugars, and apples. I walked you through step-by-step instructions to prepare and bake them perfectly. I also shared tips to enhance your blondies and ideas for storing leftovers. In the end, these blondies are tasty and easy to customize. Enjoy your baking adventure!
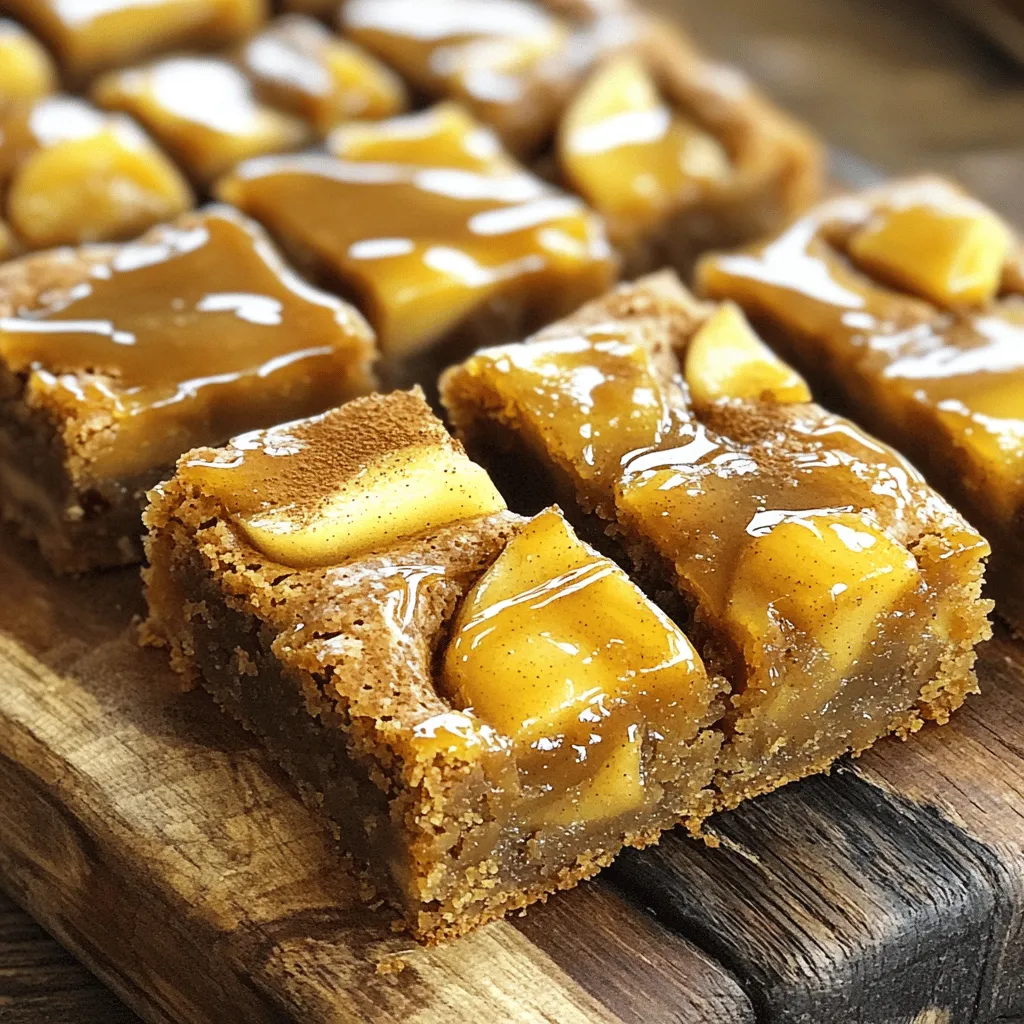
Caramelized Apple Cinnamon Blondies Delightful Treat
Are you ready to indulge in a warm, gooey treat? These Caramelized Apple Cinnamon Blondies are the perfect blend of sweet apples and rich cinnamon.
- 3 cups all-purpose flour - 1 cup granulated sugar (for the batter) - 1/2 cup unsalted butter, softened - 2 large eggs - 1 cup buttermilk - 1 teaspoon vanilla extract You need these main ingredients to make a great cinnamon sugar donut bread. The all-purpose flour gives it structure. The granulated sugar adds sweetness. Softened butter keeps the bread moist and rich. The eggs help bind everything together. Buttermilk makes the bread tender and fluffy. Finally, vanilla extract adds a warm flavor that complements the cinnamon. - 1/2 cup granulated sugar (for topping) - 1 tablespoon ground cinnamon (for topping) - 1 tablespoon melted butter (for brushing) These topping ingredients give the bread its signature sweet crust. The sugar and cinnamon create a delightful layer on top. Brushing melted butter makes it shiny and even more tempting. - Nuts or chocolate chips - Vegan substitutions (e.g., plant-based butter, flax eggs) You can customize your cinnamon sugar donut bread with add-ins. Nuts add crunch, while chocolate chips bring a sweet surprise. For a vegan version, use plant-based butter and flax eggs. This keeps the bread tasty for everyone! - Preheat oven to 350°F (175°C). - Grease or line a 9x5-inch loaf pan. In a large bowl, combine: - 3 cups all-purpose flour - 1 tablespoon baking powder - 1 teaspoon baking soda - 1 teaspoon salt - 1 teaspoon ground cinnamon - 1/2 teaspoon nutmeg Whisk these dry ingredients well. Set the bowl aside for later. In another bowl, use an electric mixer to cream: - 1/2 cup unsalted butter, softened - 1 cup granulated sugar Beat this mixture on medium speed for about 3-4 minutes until it looks light and fluffy. Next, add: - 2 large eggs (one at a time) - 1 cup buttermilk - 1 teaspoon vanilla extract Mix well until everything blends smoothly. Gradually add the dry mix to the wet mix. Stir gently with a spatula or wooden spoon. Be careful not to overmix, as this could change the bread's texture. Pour the batter into the prepared loaf pan. Smooth the top with a spatula. In a small bowl, mix: - 1/2 cup granulated sugar - 1 tablespoon ground cinnamon Sprinkle half of this cinnamon sugar on the batter. Use a knife to swirl it in gently. Add the rest of the batter on top and finish with the remaining cinnamon sugar. Bake the loaf in your preheated oven for 45-50 minutes. Check if it’s done by inserting a toothpick into the center. If it comes out clean, your bread is ready. To make the best cinnamon sugar donut bread, keep these tips in mind: - Avoid overmixing the batter: When you mix the wet and dry ingredients, stop mixing as soon as they blend. Overmixing makes the bread tough. Gently fold the batter until you see no dry flour. - Use room temperature ingredients: Room temperature butter, eggs, and buttermilk mix better. It helps create a fluffy texture. Take these items out of the fridge an hour before you start. - What to do if the bread is too dense: If your bread turns out dense, it may be due to too much flour or not enough mixing. Try using a kitchen scale for precise measurements. Also, ensure you mix just enough to combine. - Adjusting baking time for altitude: If you live at a high altitude, your bread may need a few extra minutes to bake. Start checking for doneness after 40 minutes. Use a toothpick to test if it’s done. - Ideal pairings for serving: This bread pairs well with coffee or tea. You can also serve it with a scoop of vanilla ice cream for a sweet treat. - Garnishing options for presentation: For a lovely touch, sprinkle extra cinnamon sugar on top. You can also drizzle some icing for added sweetness. Serve the bread on a rustic wooden board for a cozy feel. {{image_4}} To make a gluten-free version, use gluten-free flour. I recommend a blend with xanthan gum. This helps mimic the texture of regular flour. You may need to adjust the liquid. Gluten-free flours can absorb more moisture. Add a bit more buttermilk or milk if needed. For a vegan version, swap butter for plant-based butter. Use flax eggs instead of regular eggs. To make flax eggs, mix one tablespoon of flaxseed meal with three tablespoons of water. Let it sit for a few minutes until thickened. Instead of buttermilk, use almond milk with a splash of lemon juice. You can add spices or extracts to enhance flavor. Nutmeg gives a warm touch, while almond extract adds depth. For fruity twists, consider adding apples or ripe bananas. Chop them into small pieces and fold them into the batter. This adds moisture and unique flavors to your bread. To keep your Cinnamon Sugar Donut Bread fresh, place it in an airtight container. This helps keep moisture in and prevents the bread from drying out. If you don’t have an airtight container, wrap it tightly in plastic wrap. For longer storage, you can freeze it. To freeze your bread, slice it first. This makes it easier to thaw only what you need. Wrap each slice in plastic wrap, then place the slices in a freezer bag. Remove as much air as possible before sealing. Your bread will stay fresh in the freezer for up to three months. Cinnamon Sugar Donut Bread lasts about 4 to 5 days at room temperature when stored properly. If you refrigerate it, it may last a week. However, refrigeration can change the texture and make it a bit drier. Look for signs of spoilage. If the bread feels hard or dry, it is past its prime. Mold is another clear sign that the bread is no longer good. If you see any mold, throw the bread away. To reheat your bread and keep it soft, use the oven. Preheat your oven to 350°F (175°C). Place the slices on a baking sheet and cover them with foil. Heat for about 10 minutes. This method helps keep the bread moist. You can also use a microwave if you're in a hurry. Place a slice on a microwave-safe plate. Cover it with a damp paper towel to keep it from getting tough. Heat for 15 to 20 seconds. For a warm serving tip, spread a little butter on the slice after reheating. This adds a nice touch and enhances the flavor. Enjoy your warm, cinnamon sugar delight! Yes, you can make this recipe dairy-free. Use plant-based milk instead of buttermilk. You can mix any plant milk with a tablespoon of lemon juice to create a dairy-free buttermilk. Use vegan butter to replace the unsalted butter. This way, you keep the rich flavor while making it suitable for a dairy-free diet. You can use alternative flours, like almond or coconut flour. However, these flours behave differently. They may absorb more liquid or create a denser texture. If using gluten-free flour, check if it has binding agents. This helps achieve a better result. Always keep an eye on the batter's consistency. Leftover Cinnamon Sugar Donut Bread can be used in various fun ways. You can turn it into bread pudding for a sweet dessert. Slice it and make French toast for a special breakfast. It also works great as a base for a sweet sandwich with cream cheese or fruit. You can even freeze slices for later enjoyment. To speed up the process, prepare the dry and wet ingredients in advance. Measure them out the night before. You can mix the batter quickly in the morning. Instead of waiting for the butter to soften, microwave it for a few seconds. Use a microwave-safe bowl to avoid overheating. These tips help you save time without losing taste. This blog highlights how to make delicious Cinnamon Sugar Donut Bread. You learned about key ingredients, step-by-step instructions, and variations for different diets. With tips to perfect your loaf, you can avoid common problems. Remember, whether you want to add nuts or go vegan, this recipe adapts easily. Enjoy the warm bread fresh or saved for later. You have all the tools to create a tasty treat. Happy baking!
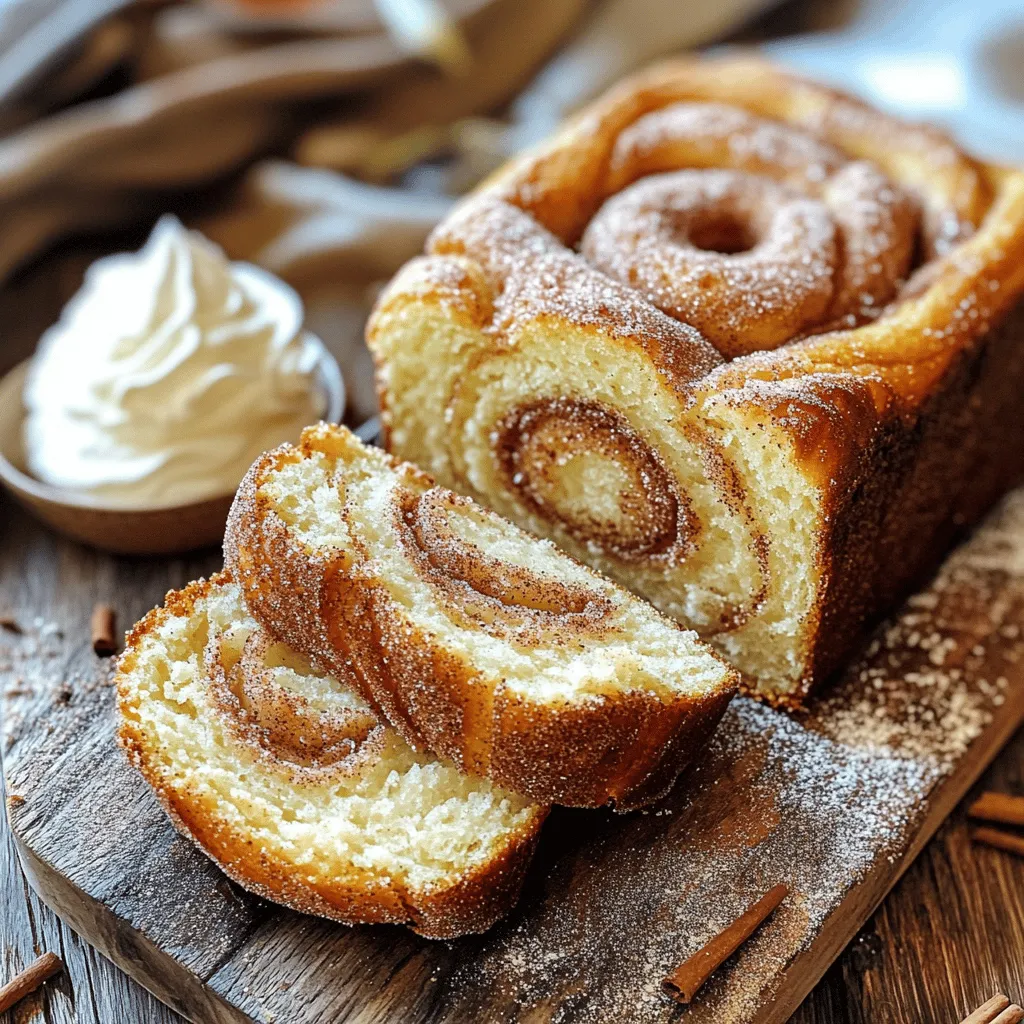
Cinnamon Sugar Donut Bread Irresistible Sweet Treat
Craving a sweet treat that feels like a warm hug? Look no further! My Cinnamon Sugar Donut Bread is your new go-to recipe. With its
- Canned pumpkin puree Canned pumpkin puree is the star of this recipe. It adds moisture and flavor. You can also use fresh pumpkin, but canned is easy and quick. - Cream cheese Cream cheese gives the bread a rich and creamy texture. Make sure it is softened before mixing. This helps it blend easily into the batter. - Sugars and oil Brown sugar adds depth and sweetness. Granulated sugar balances this sweetness. Vegetable oil keeps the bread moist and tender. - Eggs and dry ingredients Three large eggs bind the ingredients and help the bread rise. The dry ingredients include flour, baking soda, baking powder, salt, and spices like cinnamon, nutmeg, and ginger. - Optional mix-ins Chopped walnuts or pecans can add crunch and flavor. Feel free to mix in chocolate chips for a sweet twist. Adjust these to suit your taste! - Preheat your oven to 350°F (175°C). - Grease a 9x5 inch loaf pan with cooking spray or butter. Ensure all sides are coated for easy removal later. - In a large bowl, use an electric mixer to beat the cream cheese until smooth. You want it creamy and free of lumps. - Add the canned pumpkin, vegetable oil, brown sugar, and granulated sugar. Mix until everything is well blended and smooth. - Add the eggs to the cream cheese mixture one at a time. Mix well after each egg. This helps keep the batter light and fluffy. - In another bowl, whisk the flour, baking soda, baking powder, salt, cinnamon, nutmeg, and ginger together. This ensures they are evenly mixed and ready to fold in. - Gradually add the dry mix to the wet mix, folding gently. Be careful not to overmix, as this can lead to dense bread. - Pour the batter into the prepared loaf pan. Use a spatula to smooth the top for an even finish. - Place the loaf pan in the preheated oven and bake for 60 to 70 minutes. Check with a toothpick; it should come out clean or with a few moist crumbs. - After baking, let the bread cool in the pan for about 10 minutes. Then, transfer it to a wire rack to cool completely. To make your cream cheese pumpkin bread perfect, avoid overmixing the batter. When you combine the wet and dry ingredients, mix until just combined. This keeps the bread light and fluffy. If you mix too much, the bread can become dense and tough. The correct baking time is key. Bake your bread for about 60 to 70 minutes at 350°F (175°C). To check for doneness, insert a toothpick into the center. If it comes out clean or with a few moist crumbs, your bread is ready. For a great presentation, slice the bread and serve it warm or at room temperature. A light dusting of powdered sugar adds a nice touch. You can also serve it with whipped cream cheese on the side. This makes each slice even more delightful. Consider pairing your bread with toppings like pumpkin spice butter or maple syrup. These flavors complement the pumpkin and cream cheese nicely. One common mistake is using cold ingredients. Always let your cream cheese and eggs come to room temperature before mixing. This helps them blend better and gives a smoother batter. If you live at a high altitude, you may need to adjust your recipe. Bake times and ingredient amounts can change. Follow local baking guidelines to ensure success. {{image_4}} If you need a gluten-free version, use a blend of gluten-free flours. Almond flour and coconut flour work well together. You can also try a store-bought gluten-free flour mix. Just make sure it has xanthan gum for the right texture. To make this bread lighter, reduce the sugar by half. You can also use unsweetened applesauce instead of some oil. This swap keeps the bread moist while cutting calories. For a boost in nutrition, add pumpkin seeds or flaxseeds. They add fiber and healthy fats. Want to spice things up? Try adding more spices. A pinch of allspice or cloves can deepen the flavor. You can also mix in chocolate chips or dried fruit. These add sweetness and texture, making every bite exciting. - How to store leftovers: Let the bread cool completely. Wrap it tightly in plastic wrap or foil. You can also place it in an airtight container. This keeps the bread fresh and moist. - Tips for freezing: For longer storage, slice the bread first. Wrap each slice in plastic wrap. Then, place the wrapped slices in a freezer bag. This helps prevent freezer burn. When ready to eat, thaw at room temperature or warm in the oven. - How long it lasts at room temperature: Cream cheese pumpkin bread can last 2 to 3 days at room temperature. Store it in a cool, dry place away from direct sunlight. - Refrigeration vs. freezing: In the fridge, it lasts about a week. Freezing extends the life to 2 to 3 months. Just remember to wrap it well! Yes, you can use fresh pumpkin. Start by roasting or steaming it until soft. Then, mash it until smooth. You will need about 1 cup of fresh pumpkin for this recipe. Just remember to drain any extra moisture to keep the bread from becoming too wet. You can check if the bread is done by inserting a toothpick into the center. If it comes out clean or with a few moist crumbs, the bread is ready. It usually takes about 60 to 70 minutes in the oven. Absolutely! If you want to make more, just double each ingredient. Use two loaf pans or a larger pan. Keep an eye on the baking time, as it may change with a larger batch. If you need a substitute, you can use Greek yogurt or ricotta cheese. Both will give a creamy texture. However, the flavor will change slightly, so keep that in mind when making your choice. Slice the bread and serve it warm or at room temperature. It pairs well with a dusting of powdered sugar or a dollop of whipped cream cheese. For a cozy touch, enjoy it with a hot drink like coffee or tea. This blog post covered every step to make cream cheese pumpkin bread. We explored key ingredients, mixing methods, and baking tips. You learned about storing leftovers and variations for dietary needs. Remember, avoiding overmixing and using room temperature ingredients can make a huge difference. Don't hesitate to experiment with flavors and mix-ins. This recipe is simple and fun. Trust your instincts in the kitchen, and enjoy baking. Your creation will be a hit!
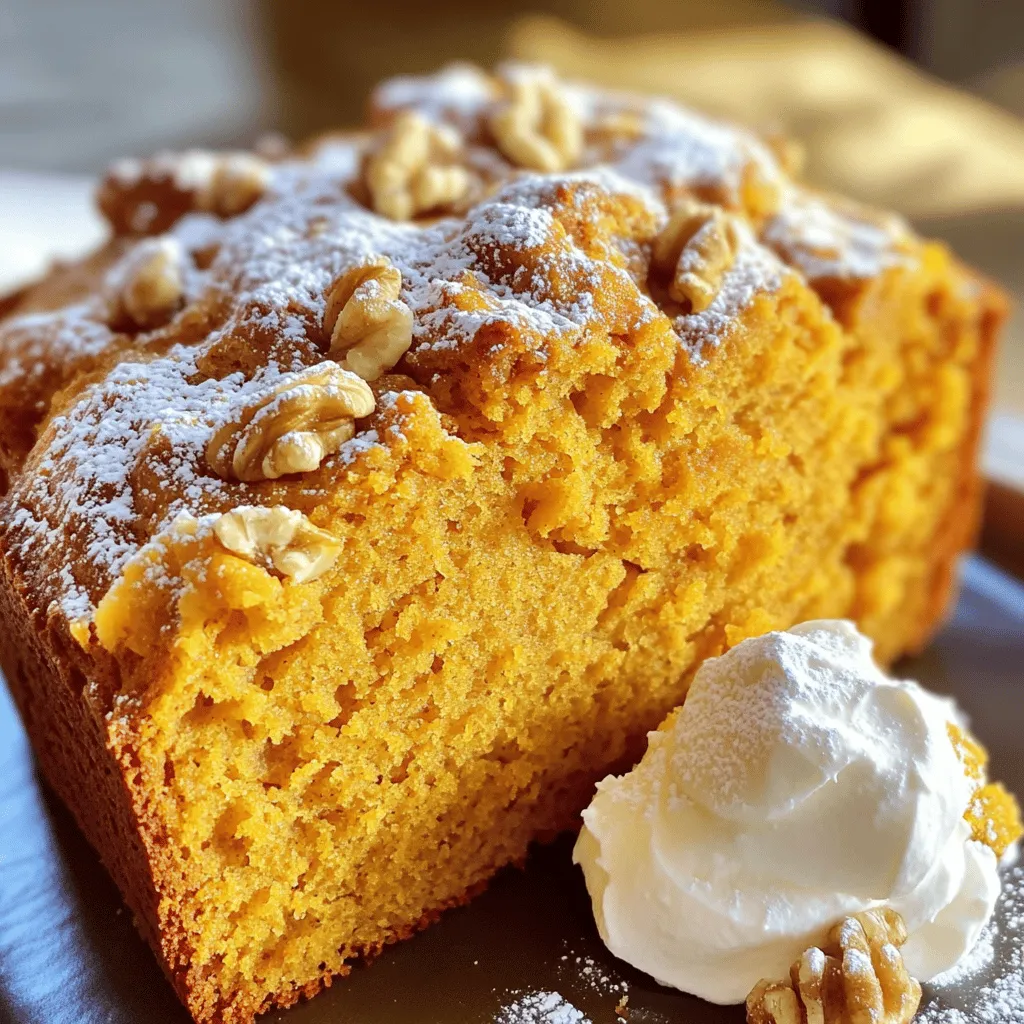
Cream Cheese Pumpkin Bread Rich and Cozy Delight
Are you ready for a warm, cozy treat? My Cream Cheese Pumpkin Bread recipe combines rich flavors and a moist texture, perfect for autumn days.
- 1 cup all-purpose flour - 1/2 cup granulated sugar - 1/2 teaspoon baking powder - 1/4 teaspoon salt - 1/4 cup unsalted butter, melted - 1 large egg - 1 teaspoon vanilla extract - 8 oz cream cheese, softened - 1/4 cup packed brown sugar - 1 teaspoon ground cinnamon - 1/4 teaspoon freshly grated nutmeg - 1/4 cup sour cream - 1/4 cup powdered sugar (for topping) - 2 tablespoons cinnamon sugar (for dusting) To make churro cheesecake bars, you need some simple ingredients. Start with the basics like flour and sugar. You will also need butter, an egg, and vanilla for flavor. The cream cheese gives the bars that rich, creamy taste. Brown sugar adds sweetness and a hint of caramel. Spices like ground cinnamon and nutmeg make these bars special. You don’t want to skip the sour cream; it keeps the cheesecake smooth. Finally, powdered sugar is great for topping, and a sprinkle of cinnamon sugar makes it look nice. Gather all these items, and you will be ready to start baking! - Preheat the oven to 350°F (175°C). - Prepare an 8x8-inch baking dish with parchment paper. This helps with easy lifting later. - In a medium bowl, whisk together: - 1 cup all-purpose flour - 1/2 cup granulated sugar - 1/2 teaspoon baking powder - 1/4 teaspoon salt - In another bowl, combine: - 1/4 cup melted unsalted butter - 1 large egg - 1 teaspoon vanilla extract - Mix wet and dry ingredients until just combined. Be careful not to overmix. - Beat 8 oz softened cream cheese until creamy. - Mix in: - 1/4 cup packed brown sugar - 1 teaspoon ground cinnamon - 1/4 teaspoon freshly grated nutmeg - 1/4 cup sour cream - 1/4 cup powdered sugar - Pour this cheesecake mixture over the crust, smoothing it out. - Place the dish in the oven and bake for 25-30 minutes. The edges should set, and the center should jiggle slightly. - Cool the dish for 15 minutes. Then, chill it in the refrigerator for at least 2 hours. - Once chilled, pull the bars from the dish using the parchment overhang. - Slice into squares and dust each square with 2 tablespoons of cinnamon sugar. Enjoy your delicious creation! - Avoid overmixing the crust for a tender texture. - Ensure cream cheese is fully softened for a smooth mixture. When you mix the crust, stop as soon as it blends. This keeps it light and crumbly. If the cream cheese is cold, your cheesecake will be lumpy. Let it sit out for about an hour before mixing. This step makes a big difference in texture. - Serve with whipped cream or chocolate sauce. - Arrange on a stylish plate with extra cinnamon sugar for dipping. I love to add a dollop of whipped cream on top. It makes each bite richer. You can drizzle chocolate sauce over the bars for a fun twist. The extra cinnamon sugar adds a nice touch too. It’s like having a churro with each bite! - Not cooling adequately before slicing. - Skipping the chilling step. If you slice the bars too soon, they will fall apart. Let them cool for 15 minutes after baking. Then, chill them in the fridge for at least 2 hours. This step helps them set up perfectly. {{image_4}} You can make churro cheesecake bars even more exciting. One option is to mix chocolate chips into the cheesecake layer. This choice adds a rich, sweet taste. You can also try adding a hint of orange zest. This gives the dessert a refreshing citrus twist that brightens the flavor. If you need a gluten-free option, use gluten-free flour instead of all-purpose flour. This swap keeps the bars tasty for everyone. For a lighter version, substitute low-fat cream cheese. You will still enjoy a creamy texture but with fewer calories. Want to change how you serve these bars? Transform them into bite-sized cheesecake bites. This makes a fun treat for parties. You can also use mini muffin tins for individual servings. This way, everyone gets their own little cheesecake to enjoy. Store your churro cheesecake bars in an airtight container in the refrigerator. This keeps them fresh and tasty. They can last up to 5 days. If you want to save some for later, freeze the bars. Wrap each bar individually in plastic wrap. Then, place them in an airtight container. They will stay good for up to 3 months. When you're ready to enjoy a frozen bar, thaw it overnight in the refrigerator. If you want it warm, pop it in the microwave for a few seconds. This way, you can enjoy that creamy goodness just like fresh! Yes, you can make these bars a day ahead. Just store them in the refrigerator. This makes them perfect for parties or potlucks. The flavors blend nicely when chilled. You will enjoy them even more after a day! Yes, you can easily substitute some ingredients. For a lighter version, use low-fat cream cheese. If you need a gluten-free option, swap in gluten-free flour. This way, you can tailor the recipe to fit your needs and still enjoy the deliciousness. To slice the bars neatly, use a sharp knife. Wipe the knife clean between cuts. This helps keep the edges smooth and makes the bars look nice. A clean cut gives your dessert a professional look when serving! This blog post covered the ingredients and steps to make delicious Churro Cheesecake Bars. You learned how to create a tasty crust, a smooth cheesecake layer, and tips for serving. Remember to let your bars cool and chill for the best taste. Feel free to try different flavors or dietary swaps to make this recipe your own. Enjoy making these bars, and share them with friends and family for a sweet treat anyone will love!
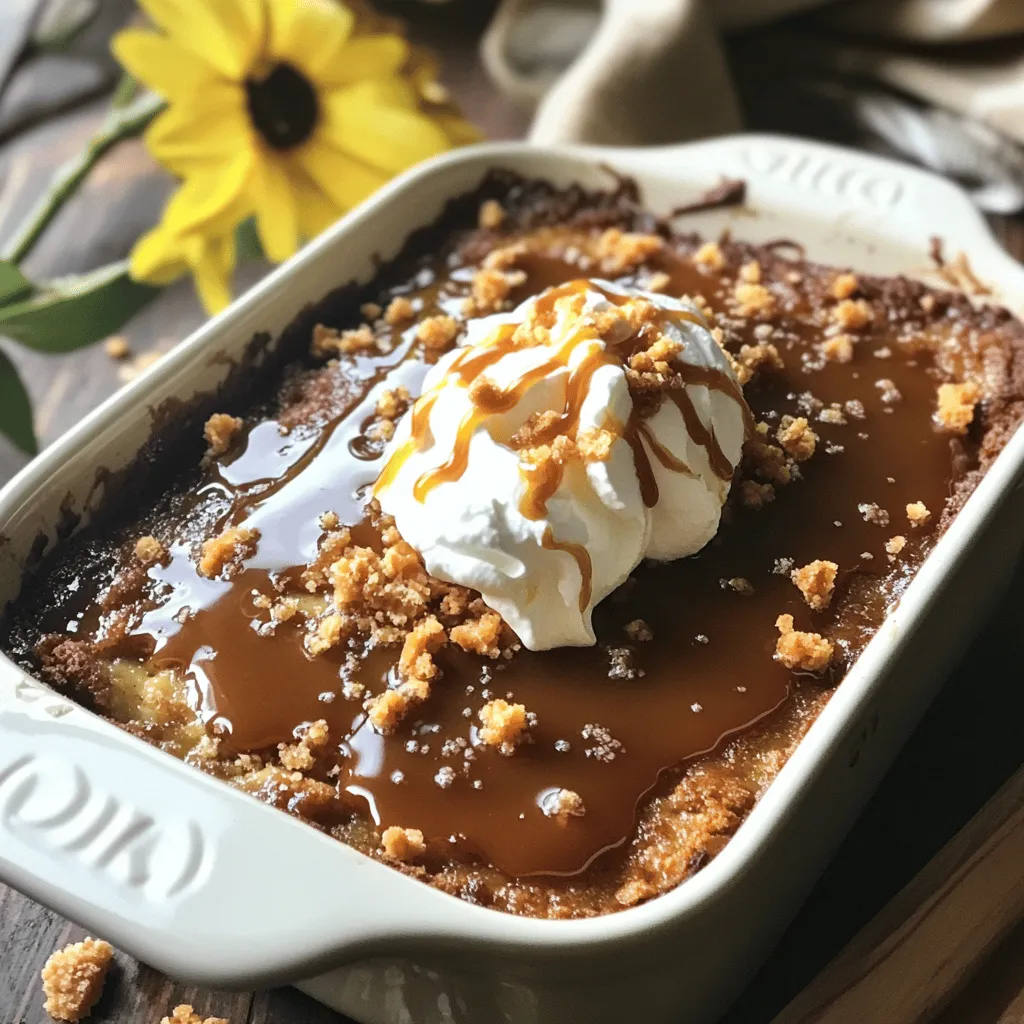
Churro Cheesecake Bars Delightful Sweet Treat Recipe
Get ready for a sweet treat that will make your taste buds dance! I’m excited to share my Churro Cheesecake Bars recipe, where creamy cheesecake
To make Sticky Butterbeer Pudding, you need a few key ingredients. Each one brings its own magic to the dish. Here’s what you’ll need: - 1 cup butterscotch sauce (can be store-bought or homemade) - 1 cup heavy cream - 1/2 cup whole milk - 1/4 cup packed brown sugar - 3 large eggs - 1 teaspoon pure vanilla extract - 1/2 teaspoon baking powder - Pinch of salt - Whipped cream, for serving - Caramel sauce, for drizzling - Optional: Crushed toffee bits for garnish Let’s break these down. The butterscotch sauce is the star. It adds that rich, sweet flavor. You can buy it or make your own. I love making it from scratch. Heavy cream and whole milk create a smooth base. The brown sugar adds a touch of warmth and sweetness. Eggs are crucial for binding the pudding. They give it that nice, creamy texture. Vanilla extract enhances the flavor, making it even more delightful. Baking powder helps the pudding rise slightly, while a pinch of salt balances the sweetness. For serving, whipped cream is a must. It adds a light touch. Caramel sauce is perfect for drizzling on top. If you want a crunchy element, add crushed toffee bits. They give a nice texture contrast. Gather these ingredients, and you are ready to create a rich and creamy delight! First, preheat your oven to 350°F (175°C). This step is key for even baking. While it heats up, prepare a large roasting pan. Fill it with hot water to create a water bath. This will keep your pudding moist. In a medium bowl, mix together the heavy cream, whole milk, and butterscotch sauce. Whisk it well until everything blends smoothly. This creamy base is the heart of your pudding. Add the packed brown sugar, eggs, vanilla extract, baking powder, and a pinch of salt to the bowl. Whisk again until the batter is smooth and well combined. Each ingredient adds depth to the flavor, making your pudding rich. Grease an 8x8-inch baking dish. This will help prevent sticking. Pour the custard mixture into the dish. Make sure it spreads evenly across the bottom. Carefully place your baking dish in the center of the roasting pan. Pour hot water into the pan until it reaches halfway up the sides of your pudding dish. This water bath helps to bake the pudding gently. Now, transfer everything to the preheated oven. Bake for 35 to 40 minutes. The edges should be set, but the center should still jiggle slightly. This means it's perfectly cooked. After baking, remove the pudding from the water bath. Let it cool for a few minutes. Cut the pudding into squares and enjoy it warm or chilled. Top each piece with whipped cream, caramel sauce, and maybe some toffee bits. This will make your dessert even more delightful! You can use store-bought butterscotch sauce to save time. It’s quick and tasty. If you prefer homemade, I have a simple recipe. Just melt brown sugar, butter, and heavy cream together. Stir until smooth. This gives your pudding a rich and deep flavor. Always taste before using it. This ensures it matches your sweet tooth. Baking this pudding requires care. The water bath helps keep it moist. Make sure the edges set while the center jiggles a bit. This means it’s just right. If you overbake, it can turn dry. Keep an eye on the time, but also look for that perfect jiggle. Serve this pudding warm or chilled. Both ways are delicious! Top it with whipped cream for a creamy finish. Drizzle caramel sauce on top to add sweetness. If you want a bit of crunch, sprinkle some crushed toffee bits. It adds a nice texture and look. Enjoy this treat with friends or family for a cozy dessert gathering. {{image_4}} You can easily make this pudding vegan. Start by swapping the heavy cream and milk for almond or coconut milk. Use a vegan butterscotch sauce or make your own with coconut sugar and dairy-free butter. For eggs, use flax eggs. Mix 1 tablespoon of ground flaxseed with 3 tablespoons of water for each egg. This change keeps the pudding creamy and rich without animal products. To make this pudding gluten-free, simply ensure that your butterscotch sauce is gluten-free. Most brands are safe, but check the label. Use gluten-free baking powder to avoid any gluten. The other ingredients are naturally gluten-free, making this dessert a hit for everyone! You can add extra flavor to your pudding. Try mixing in a teaspoon of cinnamon or nutmeg for warmth. A splash of bourbon or rum can give it a fun twist. For a caramel note, drizzle some caramel sauce into the mix before baking. You can also fold in some chocolate chips or toffee bits for extra texture and sweetness. These changes make each bite unique and exciting! To keep your Sticky Butterbeer Pudding fresh, let it cool first. Once cooled, cover the dish tightly with plastic wrap or foil. You can also place it in an airtight container. This helps keep it moist and tasty. Store it in the fridge for up to three days. If you see any signs of spoilage, it's best to toss it. When you want to enjoy your pudding again, you can reheat it easily. Cut a piece and place it on a microwave-safe plate. Heat in the microwave for 20-30 seconds. Check if it is warm. If not, heat for a few more seconds. You can also warm it in an oven. Preheat the oven to 350°F (175°C). Place the pudding in an oven-safe dish and cover it with foil. Heat for about 10-15 minutes. This method keeps the pudding nice and soft. If you want to save some for later, freezing is a great option. Cut the pudding into squares. Wrap each piece tightly with plastic wrap, then place them in a freezer bag or container. Be sure to label it with the date. You can freeze the pudding for up to two months. When ready to eat, thaw it in the fridge overnight. Reheat as needed. This way, you can enjoy the rich and creamy delight anytime! Sticky Butterbeer Pudding is a warm, creamy dessert inspired by the famous drink from the wizarding world. It has a rich butterscotch flavor with a soft, custardy texture. The pudding combines simple ingredients like heavy cream, milk, and eggs. It’s perfect for anyone who loves sweet treats. Yes, you can prepare the pudding ahead of time. Bake it, cool it, and then store it in the fridge. It will stay fresh for up to three days. When you’re ready to serve, warm it up in the oven or microwave. You’ll know the pudding is done when the edges are set, and the center has a slight jiggle. It should not be runny. The baking time is usually around 35 to 40 minutes. Keep an eye on it to avoid overbaking. If you need a substitute for butterscotch sauce, you can use caramel sauce. The flavor will change slightly, but it will still be sweet and delicious. Another option is to make a homemade version using brown sugar and butter. Yes, this recipe contains several allergens. It includes dairy from the cream and milk and eggs. If you have allergies, consider using dairy-free milk and egg substitutes. Always check labels on store-bought sauces for hidden allergens. This recipe for Sticky Butterbeer Pudding covers everything you need. We explored the ingredients and how to make it step-by-step. You learned tips for success and variations to try. Storing and reheating the dessert can keep it fresh and tasty. Remember, this delightful pudding can surprise and please any crowd. Enjoy your baking adventure and share it with friends!
Sticky Butterbeer Pudding Rich and Creamy Delight
Are you ready to treat your taste buds? This Sticky Butterbeer Pudding brings rich, creamy flavors that will win over any dessert lover. Imagine warm
- 1 cup canned pumpkin puree - 1 cup all-purpose flour - 1/2 cup granulated sugar - 1/2 cup packed brown sugar - 1/2 teaspoon baking powder - 1/2 teaspoon baking soda - 1 teaspoon ground cinnamon - 1/2 teaspoon ground nutmeg - 1/4 teaspoon ground ginger - 1/4 teaspoon salt - 1/2 cup vegetable oil - 2 large eggs - 1 teaspoon vanilla extract These ingredients make a moist and spiced pumpkin cake. Canned pumpkin puree gives it a rich flavor. The blend of spices creates warmth and comfort in every bite. - 1 cup white chocolate chips (for coating) - 1 tablespoon coconut oil (to thin out the chocolate) - Sprinkles (for a festive finish) You can coat the cake pops in white chocolate. Adding coconut oil makes the chocolate smooth. Sprinkles add color and fun to your treats. - 9x9 inch baking dish - Mixing bowls - Whisk - Baking sheet - Parchment paper - Lollipop sticks - Styrofoam block or sturdy cup Using the right tools makes the process easier. A baking dish helps shape the cake, while a whisk mixes ingredients well. A parchment-lined baking sheet makes cleanup a breeze. Start by preheating your oven to 350°F (175°C). This step is key to baking the cake evenly. Grease a 9x9 inch baking dish or use parchment paper. This will help the cake come out easily after baking. In a large bowl, mix the dry ingredients first. Combine 1 cup of flour, 1/2 cup of granulated sugar, 1/2 cup of brown sugar, 1/2 teaspoon of baking powder, and 1/2 teaspoon of baking soda. Add in 1 teaspoon of cinnamon, 1/2 teaspoon of nutmeg, 1/4 teaspoon of ginger, and 1/4 teaspoon of salt. Whisk until there are no lumps. In another bowl, mix the wet ingredients. Combine 1 cup of pumpkin puree, 1/2 cup of vegetable oil, 2 eggs, and 1 teaspoon of vanilla extract. Whisk until smooth. Now, slowly add the wet mix to the dry mix. Stir gently until just combined. Over-mixing can make the cake dense, so be careful. Pour the batter into your prepared baking dish. Spread it evenly across the dish. Bake for 25-30 minutes. Use a toothpick to check doneness; it should come out clean. Once baked, let it cool completely in the dish. Once the cake is cool, crumble it into a large bowl. Use your hands or a fork to make fine crumbs. This helps shape the cake balls. Next, form small balls about 1 inch wide. Place them on a baking sheet lined with parchment paper. Refrigerate the cake balls for about 30 minutes. This will help them firm up and make coating easier. In a microwave-safe bowl, combine 1 cup of white chocolate chips with 1 tablespoon of coconut oil. Microwave in 30-second intervals, stirring in between, until smooth. Dip the end of each lollipop stick into the melted chocolate. Then, insert it into the center of each cake ball. Now, dip the whole ball into the melted chocolate until coated. Let any excess chocolate drip off. While the chocolate is still wet, sprinkle your favorite decorations on top. To keep the cake pops upright, place them in a styrofoam block or a sturdy cup. Let the chocolate harden either at room temperature or in the fridge for about 15 minutes. To get the best cake texture, focus on mixing. Start with dry ingredients. Whisk flour, sugars, baking powder, baking soda, and spices well. This helps them blend. Mix wet ingredients next, making sure the pumpkin puree is smooth. Combine the two mixtures gently. Over-mixing makes the cake dense, which we want to avoid. Bake until a toothpick comes out clean. Let it cool completely before crumbling. Coating your cake pops right is key. After shaping the cake balls, chill them for 30 minutes. This makes them firm and easier to coat. Melt white chocolate with coconut oil in short bursts in the microwave. Dip a stick into the chocolate, then poke it into each cake ball. This helps hold the stick in place. Next, dip the entire ball into the melted chocolate. Let the excess drip off before placing it on parchment paper. Decorating cake pops can be fun! While the chocolate is still wet, sprinkle colorful sprinkles on top. You can also use crushed nuts or coconut flakes for a twist. If you want to be fancy, drizzle melted chocolate in a contrasting color over the pops. For a festive touch, dust a bit of cinnamon on top. These small details make your cake pops stand out and look special. {{image_4}} You can mix things up with pumpkin cake pops. Try adding chocolate to the batter. It makes them rich and sweet. Another fun idea is to mix in peppermint flavor. This adds a cool twist, perfect for holidays. You can also try spices like cardamom for a unique taste. If you need gluten-free options, swap the all-purpose flour for almond or oat flour. This keeps the texture light and fluffy. For a vegan version, replace eggs with flax eggs. Just mix one tablespoon of flaxseed meal with three tablespoons of water. Let it sit until thick. You can also use plant-based oil instead of vegetable oil. Add some fun with seasonal items. Chopped nuts like walnuts or pecans give a nice crunch. Dried fruit like cranberries or raisins adds sweetness. You can also sprinkle in some mini chocolate chips for extra flavor. These add-ins bring variety and make each bite exciting. To keep your pumpkin cake pops fresh, store them in an airtight container. Line the bottom of the container with parchment paper. This prevents any sticking. Place the cake pops in a single layer, if possible. If you have many, add layers of parchment between them. This keeps them safe and keeps the chocolate coating intact. You can freeze cake pops for up to three months. First, let the cake pops cool completely. Then, place them on a baking sheet. Make sure they do not touch each other. Freeze them for about an hour. Once they are firm, transfer them to a freezer-safe bag. Remove as much air as possible. Label the bag with the date. To thaw frozen cake pops, move them from the freezer to the fridge. Let them sit in the fridge for about 2 hours. This slow thawing helps keep the texture nice. Avoid thawing them at room temperature, as this can cause condensation. If you plan to eat them soon, just take out what you need. You can use dark chocolate or milk chocolate. Both pair well with pumpkin. You might also try candy melts. They come in many colors and flavors. Just melt them down like white chocolate. Yes, you can make them a day in advance. Just keep them in the fridge. This helps them stay fresh and tasty. Cake pops last about a week at room temperature. If you store them in the fridge, they can last up to two weeks. Just make sure to seal them well to keep them moist. Yes, you can sell them! Make sure to check local laws on food sales. Packaging them nicely can help attract buyers. Share your tasty pumpkin cake pops with everyone! In this article, we covered how to make delicious pumpkin cake pops. We discussed the main and optional ingredients, along with tools you need. You learned step-by-step instructions for mixing, baking, and shaping your cake pops. Tips helped you perfect the texture and coating. We also explored fun variations and storage methods. With these insights, you can create tasty treats for any occasion. Enjoy making your pumpkin cake pops!
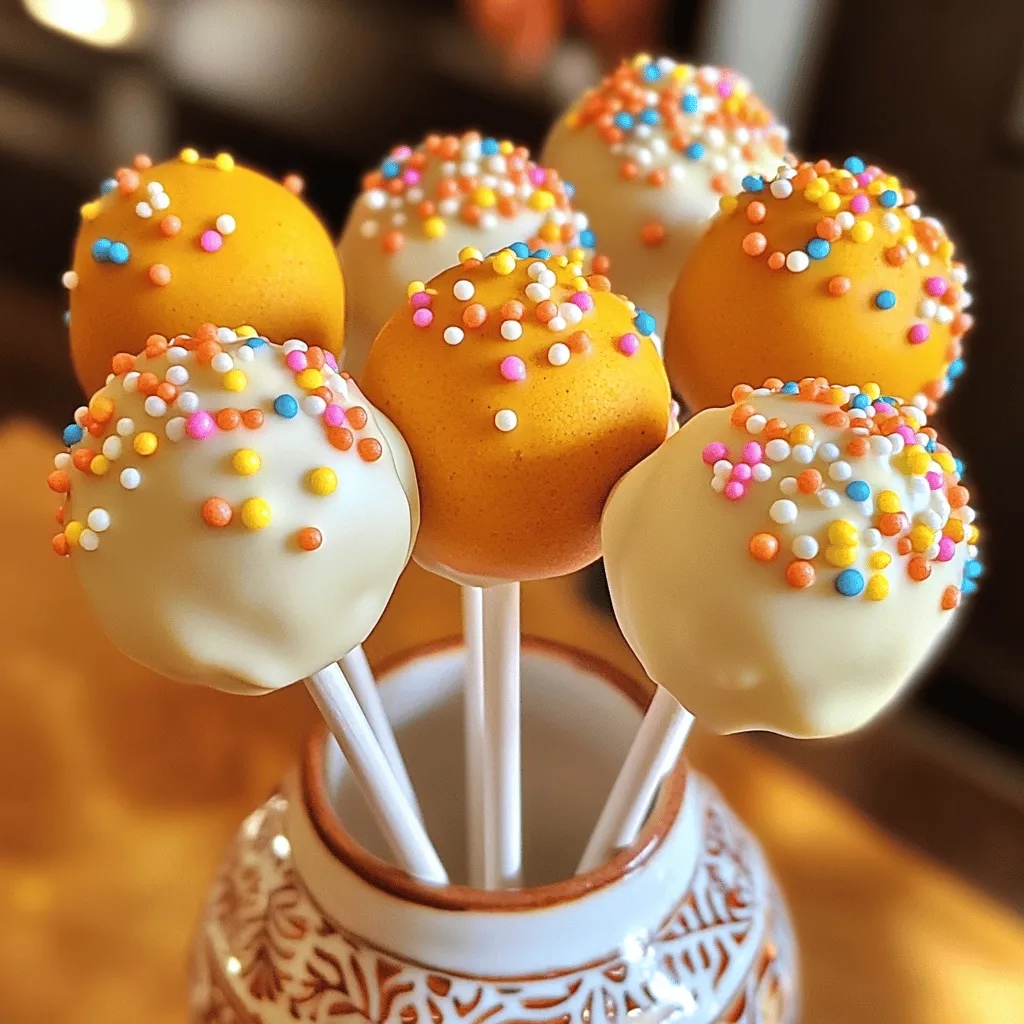
Pumpkin Cake Pops Simple and Tasty Treats to Make
Looking for a fun, tasty treat to impress your friends and family? I’m here to share my simple recipe for pumpkin cake pops! These sweet
To make the Apple Pecan Cake, gather these key items: - 2 cups all-purpose flour - 1 teaspoon baking powder - ½ teaspoon baking soda - ½ teaspoon salt - 1 cup unsalted butter, softened - 1 cup packed light brown sugar - ½ cup granulated sugar - 4 large eggs, at room temperature - 2 teaspoons pure vanilla extract - 2 cups finely grated apples (about 2 medium apples) - 1 cup walnuts, roughly chopped - 1 teaspoon ground cinnamon - ½ teaspoon ground nutmeg These ingredients create a soft and moist cake that is full of flavor. The apples add sweetness, and the pecans give a nice crunch. To make the sweet caramel glaze, you will need: - 1 cup packed light brown sugar - ½ cup unsalted butter - ¼ cup heavy cream - 1 teaspoon pure vanilla extract This glaze brings a rich, buttery taste that pairs perfectly with the cake. When picking apples, look for firm ones with smooth skin. Fresh apples should smell sweet and fruity. Avoid any with bruises or soft spots. For pecans, choose whole nuts that are plump and crisp. Check for any signs of mold or rancidity. Storing them in a cool, dry place keeps them fresh longer. Using the best ingredients makes your cake taste even better. Start by preheating your oven to 350°F (175°C). Choose your pans wisely. I prefer a 9x13 inch baking pan for easy serving. If you like layers, use two 9-inch round cake pans. Grease the pans with butter, then dust with flour. This step helps the cake slide right out. In a medium bowl, mix the dry ingredients. Combine 2 cups of all-purpose flour, 1 teaspoon of baking powder, ½ teaspoon of baking soda, ½ teaspoon of salt, 1 teaspoon of ground cinnamon, and ½ teaspoon of ground nutmeg. Whisk these together until they are well mixed. Set this bowl aside for now. In a large mixing bowl, start creaming your butter and sugars. Use an electric mixer to beat 1 cup of softened unsalted butter, 1 cup of packed light brown sugar, and ½ cup of granulated sugar. Mix on medium speed for about 3-4 minutes. You want a light and fluffy texture. This step is key for a tender cake. Next, add the eggs one at a time. Use 4 large eggs at room temperature. Make sure each egg blends well before adding the next. Then, mix in 2 teaspoons of pure vanilla extract. Once that is done, gradually add your dry mix to the wet mix. Stir gently until just combined. Do not overmix; this can make your cake tough. Now it’s time to bake! Carefully fold in 2 cups of finely grated apples and 1 cup of roughly chopped pecans. Pour the batter into your prepared pan(s). Use a spatula to smooth the top. Bake for 30-35 minutes for round pans or 40-45 minutes for a rectangular pan. Check if it’s done by inserting a toothpick. It should come out clean. While your cake bakes, make the caramel glaze. In a medium saucepan, combine 1 cup of packed light brown sugar, ½ cup of unsalted butter, and ¼ cup of heavy cream. Cook over medium heat, stirring constantly. When it reaches a gentle boil and thickens slightly, remove it from the heat. Add 1 teaspoon of pure vanilla extract for flavor. To keep your cake moist, use fresh apples. Grating them releases juices into the batter. This step adds flavor and moisture. Don't skip the eggs; they help bind and add richness. Make sure your butter is soft. This helps create a fluffy, airy batter. Avoid overmixing as it can make the cake dense. One common mistake is not measuring ingredients correctly. Always use the right tools for accurate measurements. Overbaking is another issue. Keep an eye on the clock and check with a toothpick. If it comes out clean, your cake is done. Lastly, don’t forget to let the cake cool before serving. This helps the flavors settle. When you melt caramel, use medium heat. This prevents burning and helps achieve a smooth texture. Stir often to avoid hot spots. Combine brown sugar, butter, and cream in a saucepan. Once it bubbles, it’s almost ready. Remove it from heat and add vanilla for extra flavor. Let it cool slightly before drizzling on your cake. {{image_4}} You can swap pecans for other nuts. Walnuts add a rich taste. Almonds bring a light crunch. Hazelnuts give a unique twist. Each nut changes the flavor and texture. Choose the one you like best. Just ensure the nuts are chopped well. This keeps the cake consistent. Spices can enhance your cake. Try adding ginger for warmth. Cardamom gives a floral note. Cloves add depth and richness. A pinch of allspice can also work. Remember to start with small amounts. You can always add more later. These spices will make your cake special. You can make this cake vegan. Use flax eggs instead of real eggs. Replace butter with coconut oil or vegan butter. For gluten-free options, use a gluten-free flour blend. Make sure it has a binding agent. These swaps keep the cake tasty and moist. Enjoy this cake in any way that suits your diet! To keep your leftover apple pecan cake fresh, wrap it tightly in plastic wrap. You can also place it in an airtight container. This will help avoid dryness and keep the cake moist. Store it at room temperature for up to three days. If you want it to last longer, the fridge is a good option, but it may dry out a bit. If you want to save your cake for a special occasion, freezing is a great choice. First, let the cake cool completely. Then, wrap it in plastic wrap and a layer of aluminum foil. This method helps prevent freezer burn. You can freeze it for up to three months. Just remember to label it with the date! When you're ready to enjoy the cake again, reheating is easy. Preheat your oven to 350°F (175°C). Remove the cake from the fridge or freezer and unwrap it. Heat it for about 10-15 minutes until warm. If you froze it, let it thaw in the fridge overnight before reheating. This cake tastes best warm! Yes, you can use different types of apples. I love using Granny Smith for their tartness. Honeycrisp apples add sweetness and crunch. Feel free to mix varieties for more flavor. Just make sure they are fresh and firm for the best texture. To check if the cake is done, use a toothpick. Insert it into the center of the cake. If it comes out clean, the cake is ready. You can also lightly touch the top; it should spring back. Keep an eye on the time and adjust as needed. This cake is delicious on its own. You can serve it with whipped cream or vanilla ice cream for extra indulgence. A scoop of yogurt can add a nice balance. Pair it with a cup of coffee or tea for a cozy treat. The caramel glaze can last up to a week in the fridge. Store it in an airtight container to keep it fresh. When ready to use, warm it gently on the stove or in the microwave. This brings back its smooth texture and flavor. In this post, we covered how to bake a tasty cake with caramel glaze. We started with the main ingredients, tips for choosing fresh apples and pecans, and step-by-step baking instructions. I shared helpful tips for keeping your cake moist and avoiding common mistakes. You can also explore fun variations, from different nuts to vegan options. Finally, I detailed how to store and reheat leftover slices. Enjoy baking this cake and making it your own!
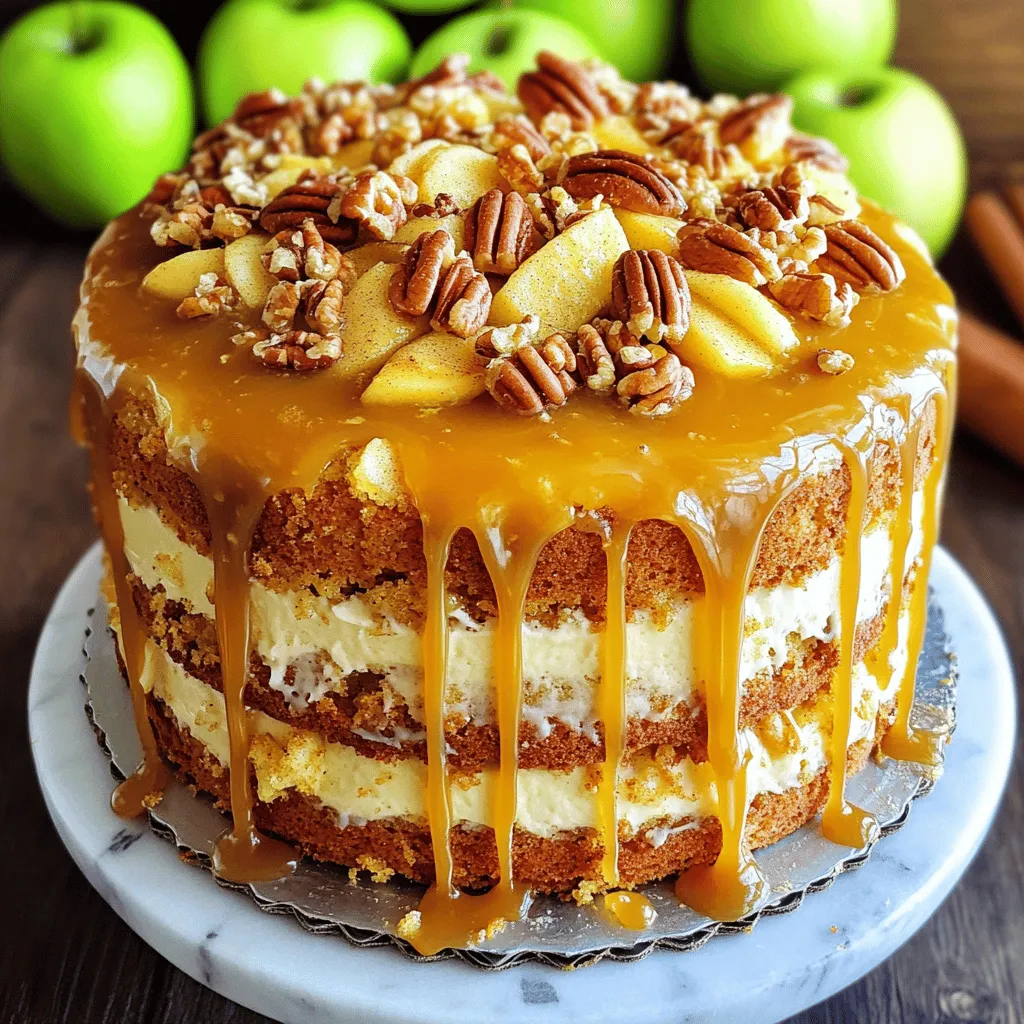
Apple Pecan Cake With Caramel Glaze Heavenly Treat
Get ready for a treat that blends sweet apples and crunchy pecans! This Apple Pecan Cake with Caramel Glaze is a showstopper for any occasion.
- 1 ½ cups all-purpose flour - 1 cup granulated sugar - ½ cup packed brown sugar - ½ cup unsalted butter, softened - 1 cup canned pure pumpkin puree - 2 large eggs, at room temperature - 1 cup brewed coffee, cooled - 1 teaspoon pure vanilla extract - 2 teaspoons baking powder - 1 teaspoon baking soda - 1 teaspoon ground cinnamon - 1 teaspoon ground nutmeg - ¼ teaspoon ground ginger - ¼ teaspoon allspice - ½ teaspoon salt - 1 cup powdered sugar (for frosting) - 2 tablespoons milk (for frosting) - Optional: Whipped cream for topping, and ground cinnamon for garnish When measuring flour, spoon it into the cup and level it off. This method prevents compacting. For the sugars, pack the brown sugar firmly into the cup for accuracy. Use room temperature eggs and butter for better mixing. Brew your coffee ahead and let it cool for best flavor. - Pumpkin puree: This adds moisture and a rich, warm flavor. - Spices: Ground cinnamon, nutmeg, ginger, and allspice create the classic pumpkin spice flavor. - Coffee: Brewed coffee enhances the cake's depth, giving it that signature latte taste. - Vanilla extract: This adds sweetness and rounds out the flavors beautifully. These ingredients work together to create a cake that is moist, flavorful, and perfect for fall. 1. Preheat your oven to 350°F (175°C). 2. Grease two 8-inch round cake pans with butter. Dust them with flour to prevent sticking. 3. In a large bowl, cream together ½ cup unsalted butter, 1 cup granulated sugar, and ½ cup packed brown sugar. Mix until light and fluffy. 4. Add 1 cup pumpkin puree and 2 large eggs to the butter mix. Stir until smooth. 5. Pour in 1 cup cooled brewed coffee and 1 teaspoon pure vanilla extract. Mix until combined. 6. In a separate bowl, whisk together 1 ½ cups all-purpose flour, 2 teaspoons baking powder, 1 teaspoon baking soda, 1 teaspoon ground cinnamon, 1 teaspoon ground nutmeg, ¼ teaspoon ground ginger, ¼ teaspoon allspice, and ½ teaspoon salt. 7. Gradually add the dry mix to the wet mix. Fold gently with a spatula until just combined. 8. Distribute the batter evenly between the two pans. Smooth the tops with a spatula. 9. Bake for 25-30 minutes. Check with a toothpick; it should come out clean. 10. Let the cakes cool in the pans for about 10 minutes. Then transfer them to wire racks to cool completely. 11. For the frosting, mix 1 cup powdered sugar and 2 tablespoons milk in a medium bowl. Whisk until smooth. 12. Place one cake layer on a serving plate. Spread frosting on top. 13. Add the second layer and frost the top and sides of the whole cake. 14. For a final touch, add whipped cream and sprinkle ground cinnamon on top. Now, you have a delicious Pumpkin Spice Latte Cake ready to enjoy! To bake a moist pumpkin spice latte cake, follow some simple steps. First, use room temperature ingredients. This applies to butter, eggs, and pumpkin. It helps your cake mix together better. Second, do not overmix the batter. Mix until just combined for a light texture. Lastly, check your oven's temperature with a thermometer. Ovens can vary, so this ensures even baking. For a smooth frosting, make sure your cake is completely cool. A warm cake can melt the frosting. Use a spatula to spread the frosting evenly. Aim for thick layers between the cake layers. This gives it a nice look and taste. If you want a fun twist, add a pinch of cinnamon to the frosting for extra flavor. One common mistake is skipping the greasing step. Always grease your pans well to prevent sticking. Another mistake is not measuring ingredients accurately. Use proper measuring cups for dry and wet ingredients. Lastly, don't rush the cooling process. Letting the cake cool too quickly can make it dense. Be patient for the best results! {{image_4}} You can get creative with frosting. Instead of the simple powdered sugar frosting, try cream cheese frosting for a tangy twist. Combine 8 ounces of softened cream cheese, ½ cup of butter, and 3 cups of powdered sugar. Mix until smooth. This gives a rich flavor that pairs well with pumpkin. For a spiced touch, blend in a teaspoon of cinnamon or nutmeg. You can also use chocolate ganache for a decadent option. Just melt chocolate with cream and let it cool before spreading. To boost the flavor, consider adding a shot of espresso to the batter. This enhances the coffee taste without being too strong. You can also mix in chocolate chips or nuts for added texture. A teaspoon of orange zest brings out the pumpkin flavor nicely. If you like a little heat, add a pinch of cayenne pepper to the batter. This will give a surprising kick that contrasts beautifully with the sweet frosting. If you want a gluten-free version, swap the all-purpose flour for a gluten-free blend. Make sure it has xanthan gum for proper texture. For a dairy-free option, use coconut oil instead of butter and almond milk for the frosting. You can also replace eggs with flaxseed meal mixed with water. One tablespoon of flaxseed meal mixed with three tablespoons of water equals one egg. These swaps help everyone enjoy this cake, no matter their diet! To keep your Pumpkin Spice Latte Cake fresh, store it at room temperature. Use an airtight container or wrap it tightly in plastic wrap. It will stay good for about 3 days. If you want to keep it longer, try refrigerating it. Place it in the fridge for up to a week. Just make sure it is covered well to avoid drying out. For long-term storage, freezing is a great option. First, let the cake cool completely. Wrap each layer in plastic wrap tightly. Then, place the wrapped layers in a freezer-safe bag. You can freeze the cake for up to 3 months. When you’re ready to eat it, let it thaw in the fridge overnight. This keeps the cake moist and tasty. If you want to enjoy your cake warm, reheating is simple. Preheat your oven to 350°F (175°C). Place a slice of cake on a baking sheet. Cover it with foil to keep it from drying out. Heat for about 10-15 minutes. You can also use the microwave. Heat a slice for about 15-20 seconds. Enjoy your delicious cake warm! Yes, you can use fresh pumpkin. Make sure to cook and puree it first. Fresh pumpkin gives a nice texture and flavor. However, it may be a bit wetter than canned. Just drain any extra moisture before using. To boost the coffee flavor, use strong brewed coffee. You can also add a bit of instant coffee granules to the batter. This helps enhance the coffee taste without changing the cake's texture. You can use applesauce or mashed bananas as egg substitutes. For each egg, use 1/4 cup of applesauce or 1/2 a mashed banana. These options keep the cake moist and delicious. The cake can last up to five days at room temperature. If you store it in the fridge, it can last up to a week. For longer storage, freeze it. Wrap it well in plastic wrap. It can keep for up to three months in the freezer. In this post, we covered the key ingredients, step-by-step instructions, and helpful tips. You learned how to make a delicious Pumpkin Spice Latte Cake. We also explored variations to suit your taste and dietary needs while providing storage recommendations. Remember, baking is an art. Keep trying new ideas and be patient. Your cake will turn out great!
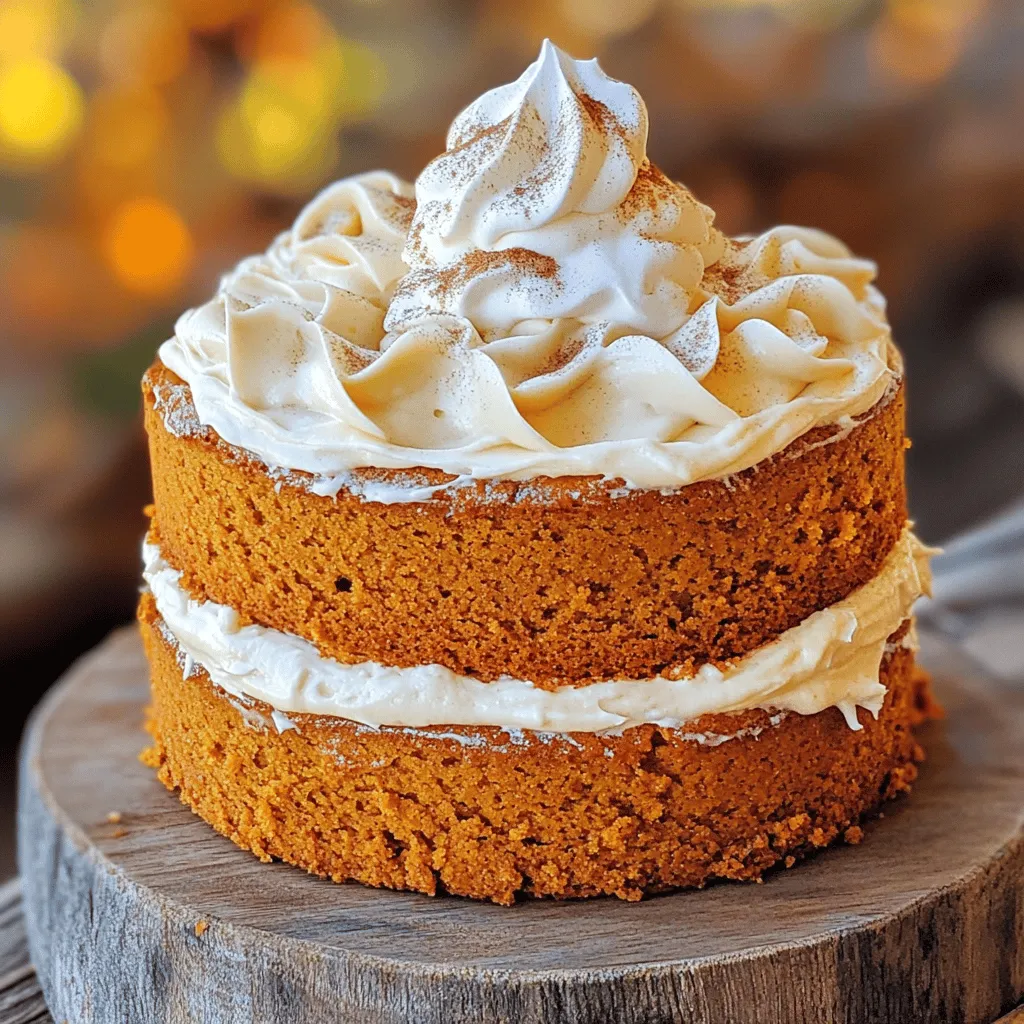
Pumpkin Spice Latte Cake Flavorful Fall Delight
Fall is here, and there’s no better way to celebrate than with a Pumpkin Spice Latte Cake! This cake combines the warmth of spices with
- 1 ½ cups all-purpose flour - 1 teaspoon baking powder - ½ teaspoon baking soda - 1 teaspoon ground cinnamon - ½ teaspoon ground nutmeg - ¼ teaspoon ground ginger - ½ teaspoon salt - ½ cup granulated sugar - ½ cup brown sugar, packed - 1 cup pumpkin puree - 2 large eggs - ½ cup vegetable oil - 1 teaspoon vanilla extract - 4 oz cream cheese, softened - Optional: Chopped walnuts or pecans To make delicious pumpkin cream cheese muffins, gather all these ingredients first. I find that using fresh pumpkin puree gives a nice flavor, but canned works well too. Choose your favorite spices. The blend of cinnamon, nutmeg, and ginger makes the muffins warm and cozy. For the cream cheese, make sure it is soft. Cut it into small cubes so it mixes well. If you like a crunch, add chopped walnuts or pecans on top. This adds a nutty flavor that pairs perfectly with pumpkin. Gathering these ingredients is the first step to creating a tasty treat. Trust me; you will love how these muffins turn out! - Preheat your oven to 350°F (175°C). Prepare your muffin tin by lining it with paper liners or lightly spraying it with non-stick cooking spray. - In a medium bowl, mix 1 ½ cups all-purpose flour, 1 teaspoon baking powder, ½ teaspoon baking soda, 1 teaspoon ground cinnamon, ½ teaspoon ground nutmeg, ¼ teaspoon ground ginger, and ½ teaspoon salt. Whisk this until well blended and set it aside. - In a large bowl, combine ½ cup granulated sugar, ½ cup packed brown sugar, 1 cup pumpkin puree, 2 large eggs, ½ cup vegetable oil, and 1 teaspoon vanilla extract. Whisk until the mixture is smooth and even. - Add the dry ingredients to the wet mixture. Stir gently until just combined. It’s okay if you have a few lumps; avoid overmixing. - Fold in 4 ounces of softened cream cheese, cut into small cubes. Make sure they are evenly distributed for creamy pockets in every muffin. - Divide the batter evenly among the 12 muffin cups. Fill each cup about two-thirds full. If you want, sprinkle chopped walnuts or pecans on top for extra crunch. - Place the muffin tin in the oven and bake for 18-20 minutes. Check for doneness by inserting a toothpick into the center of a muffin. It should come out clean when they are ready. - After baking, let the muffins cool in the pan for about 5 minutes. Then, carefully transfer them to a wire rack to cool completely. - For the best taste, serve warm. You can add a dollop of whipped cream or a swirl of cream cheese frosting on top. A light dusting of cinnamon makes them look and taste even better! - How to prevent overmixing: Mix the wet and dry ingredients gently. Stop as soon as you see no dry flour. A few lumps are okay. Overmixing can make your muffins tough. - Ensuring cream cheese is well-distributed: Cut the cream cheese into small cubes. Gently fold them into the batter. This helps create delicious pockets of cream cheese in every bite. - Serving warm with toppings: Serve your muffins warm. Top them with whipped cream or a bit of cream cheese frosting. A sprinkle of cinnamon makes them even better. - Pairings for beverages: These muffins pair well with coffee, tea, or even hot chocolate. The spices in the muffins match nicely with warm drinks. - Overbaking guidelines: Keep an eye on the muffins while they bake. Check them around 18 minutes. A toothpick should come out clean when they are done. - Ingredients substitutions that affect texture: Avoid swapping the sugar types without testing. Brown sugar adds moisture while granulated sugar adds sweetness. Mixing them helps keep the muffins soft and tasty. {{image_4}} To make these pumpkin cream cheese muffins gluten-free, use a good gluten-free flour blend. Look for blends that include xanthan gum for better texture. You may need to adjust the moisture levels in the batter. Start with an extra tablespoon of oil or pumpkin puree to keep the muffins moist. You can add chocolate chips for a sweet twist. Dark or semi-sweet chocolate works well with pumpkin. Spices like cloves and allspice can also enhance the flavor. For a nutty crunch, fold in chopped walnuts or pecans. Dried fruits like cranberries or raisins add a nice chewiness, too. For Thanksgiving, add a sprinkle of cinnamon sugar on top. This gives a festive look and taste. For Halloween, use orange and black sprinkles as a fun decoration. You could even try adding a dash of orange zest for a bright flavor. These ideas can make your muffins special for any holiday or party! To store your pumpkin cream cheese muffins at room temperature, place them in an airtight container. This keeps them fresh for up to three days. You can also wrap them in plastic wrap for added protection from air. If you live in a humid area, refrigeration can help. Just keep them in the same airtight container. This method can extend their freshness by a few more days. Freezing muffins is easy and effective. First, let them cool completely. Then, wrap each muffin in plastic wrap. For extra protection, place the wrapped muffins in a freezer bag. You can freeze them for up to three months. To thaw, simply leave them at room temperature for a few hours. If you want them warm, you can microwave them for about 20 seconds. Fresh pumpkin muffins last about three days at room temperature. In the fridge, they can stay good for about a week. When they start to dry out, they are losing freshness. Look for signs like mold or a sour smell. If you see either, it's best to discard them. You can make these muffins healthier by swapping some ingredients. Here are a few ideas: - Use whole wheat flour instead of all-purpose flour. - Replace granulated sugar with honey or maple syrup. - Use unsweetened applesauce as a substitute for some oil. - Try low-fat cream cheese to cut fat. These swaps still keep the muffins tasty but lower in sugar and fat. Yes, you can use pumpkin spice! It simplifies things. Use about 2 teaspoons of pumpkin spice for this recipe. Adjust to your taste. This mix contains cinnamon, nutmeg, and ginger, just like the individual spices. There are many fun ways to use leftover pumpkin puree. Here are some ideas: - Add it to smoothies for creaminess and flavor. - Mix it into oatmeal for a warm breakfast. - Use it in soups for a rich taste. - Make pumpkin pancakes or waffles. - Bake pumpkin bread or muffins. Pumpkin puree is versatile and adds nutrition to many dishes! These pumpkin muffins are easy to make and taste great. You need simple ingredients and clear steps. Remember to bake them just right to avoid mistakes. Try fun variations like gluten-free or adding nuts. Store them well to keep fresh. Now you can enjoy tasty muffins any time! Happy baking!
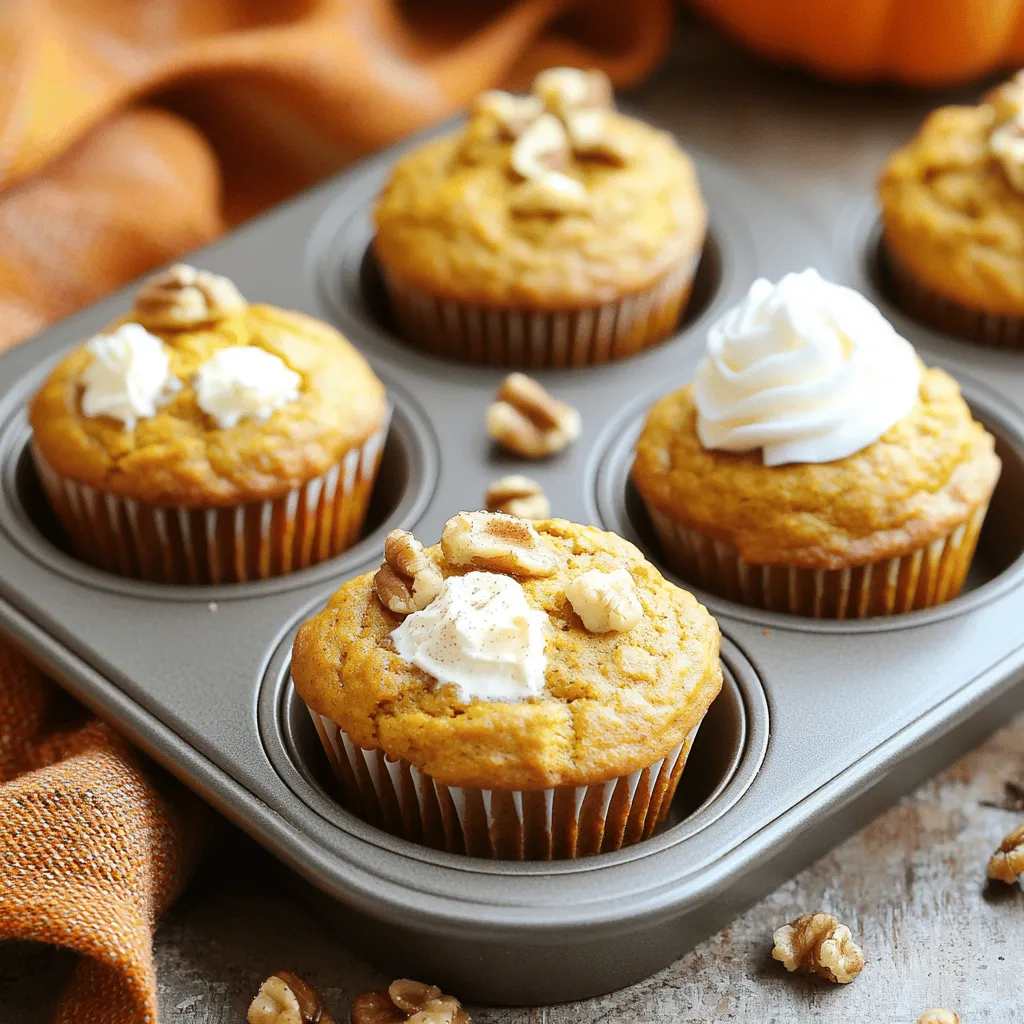
Pumpkin Cream Cheese Muffins Tasty and Simple Recipe
Are you ready to bake the perfect fall treat? My Pumpkin Cream Cheese Muffins are simple, tasty, and sure to impress! With warm spices and
- 1 cup unsalted butter, softened - 1 cup granulated sugar - 1/2 cup packed brown sugar - 2 large eggs - 1 teaspoon pure vanilla extract - 3 cups all-purpose flour - 2 teaspoons cream of tartar - 1 teaspoon baking soda - 1/2 teaspoon fine salt - 1 teaspoon ground cinnamon - 1 cup finely chopped apples (preferably Granny Smith) - 1/2 teaspoon ground nutmeg - 1/4 cup granulated sugar (for rolling) - 1 tablespoon ground cinnamon (for rolling) Gather these ingredients before you start. You will want everything handy. The butter needs to be softened, so plan ahead. I like to chop my apples finely. Granny Smith apples add a nice tartness to balance the sweetness. - Electric mixer - Mixing bowls - Baking sheet - Parchment paper - Cookie scoop or tablespoon - Spatula These tools help make the process smooth. An electric mixer saves time when creaming the butter and sugars. Parchment paper keeps cookies from sticking. A cookie scoop gives you even-sized cookies. - Preheat your oven to 350°F (175°C). Line a baking sheet with parchment paper. - In a large bowl, cream 1 cup of unsalted butter, 1 cup of granulated sugar, and 1/2 cup of brown sugar. Use an electric mixer on medium speed for 2-3 minutes. The mix should be light and fluffy. - Add 2 large eggs, one at a time. Mix well after each egg. Pour in 1 teaspoon of pure vanilla extract and mix until smooth. - In another bowl, whisk together 3 cups of flour, 2 teaspoons of cream of tartar, 1 teaspoon of baking soda, 1/2 teaspoon of fine salt, 1 teaspoon of cinnamon, and 1/2 teaspoon of ground nutmeg. This mix gives the cookies their warm spice flavor. - Gradually add the dry mix to the wet mixture. Mix gently until combined. Be careful not to overmix; this keeps the cookies soft. - Use a spatula to fold in 1 cup of finely chopped apples. I like Granny Smith apples for their tartness. Ensure the apples are evenly distributed. - In a small bowl, combine 1/4 cup of granulated sugar and 1 tablespoon of cinnamon. This will coat the cookies. - Using a cookie scoop or tablespoon, take portions of dough and roll them into balls. Roll each ball in the cinnamon-sugar mix until fully coated. - Place the coated cookie balls on the prepared baking sheet, leaving about 2 inches of space between them. - Bake in the preheated oven for 10-12 minutes. Look for lightly golden edges and set centers. - Let the cookies cool on the baking sheet for about 5 minutes. Then, transfer them to a wire rack to cool completely. To get the right dough, start with soft butter. It helps mix in air. This step makes cookies light. Mix the butter with sugars until fluffy. You want a smooth, creamy texture. When adding apples, chop them small. Use about one medium Granny Smith apple. Gently fold them in the dough. This keeps the apples intact. You want bites of apple, not mush. Know when your cookies are done by looking at the edges. They should be lightly golden. The centers might look soft, but that’s okay. They will firm up as they cool. For a perfect golden edge, watch the time. Bake for 10-12 minutes. Rotate your baking sheet halfway. This ensures even baking. To serve cookies, use a pretty plate. Stack them high for a fun look. Dust some cinnamon-sugar on top for flair. Pair these cookies with ice cream for a treat. Vanilla works well, but feel free to get creative. A scoop of caramel or a drizzle of chocolate also adds joy. {{image_4}} You can change the taste of your Apple Pie Snickerdoodles by adding spices. Try ginger or clove for a warm kick. These spices bring a new twist to the classic flavors. You can also switch up the apples. Different apple types, like Fuji or Honeycrisp, give unique flavors and textures. Each variety adds its own charm to the cookies. If you need gluten-free cookies, use gluten-free flour instead of all-purpose flour. This swap keeps the cookies tasty and chewy. For vegan options, replace butter with coconut oil and use flax eggs instead of regular eggs. These changes let everyone enjoy the cookies, no matter their diet. Want to add more texture? Incorporate nut pieces like walnuts or pecans. They give a nice crunch and extra flavor. For a sweet twist, add a caramel drizzle or filling. It adds richness and makes each bite feel special. These enhancements make your cookies even more delightful and fun to eat. To keep your Apple Pie Snickerdoodles fresh, store them in an airtight container. This will help them stay soft and chewy. You can also add a slice of bread to the container. The bread keeps the cookies moist. If you want to freeze the cookies, follow these steps: - Allow cookies to cool completely. - Place cookies in a single layer on a baking sheet. - Freeze for 1-2 hours until firm. - Transfer cookies to a freezer bag and seal tightly. - Label the bag with the date for easy reference. At room temperature, these cookies last about 5 days. You can enjoy them fresh for several days. Look for signs of spoilage to know if they are still good: - An off smell indicates they may be bad. - A dry texture means they are past their prime. - If you see mold, throw them away immediately. Yes, you can make the dough ahead of time. Just cover it tightly in plastic wrap. Place it in the fridge for up to three days. When you are ready, shape and bake the cookies as usual. This is a great way to save time. Look for a light golden edge on the cookies. The center should look set, not raw. You can also gently press the cookie; it should spring back. If it leaves a fingerprint, bake a bit longer. I recommend using Granny Smith apples. Their tartness balances the sweetness of the cookies. You can also use Honeycrisp or Fuji apples for a sweeter option. Just make sure to chop them finely for even distribution. Yes, you can use pre-made cookie dough. However, adding chopped apples and spices will boost the flavor. Roll the dough in the cinnamon-sugar mixture before baking for that classic snickerdoodle twist. To make these cookies festive, add sprinkles to the cinnamon-sugar mix. You can also serve them on a colorful platter. For added flair, drizzle melted caramel over the top. These touches make the cookies pop for any celebration! You learned how to make Apple Pie Snickerdoodles by gathering ingredients and using the right tools. We walked through each step, ensuring you mix and roll the dough perfectly. With tips for storage and variations, this recipe is flexible and fun. You can play with flavors or adjust for dietary needs. These cookies are delicious, and they store well too. Enjoy baking and sharing these delightful treats with friends and family. Happy baking!
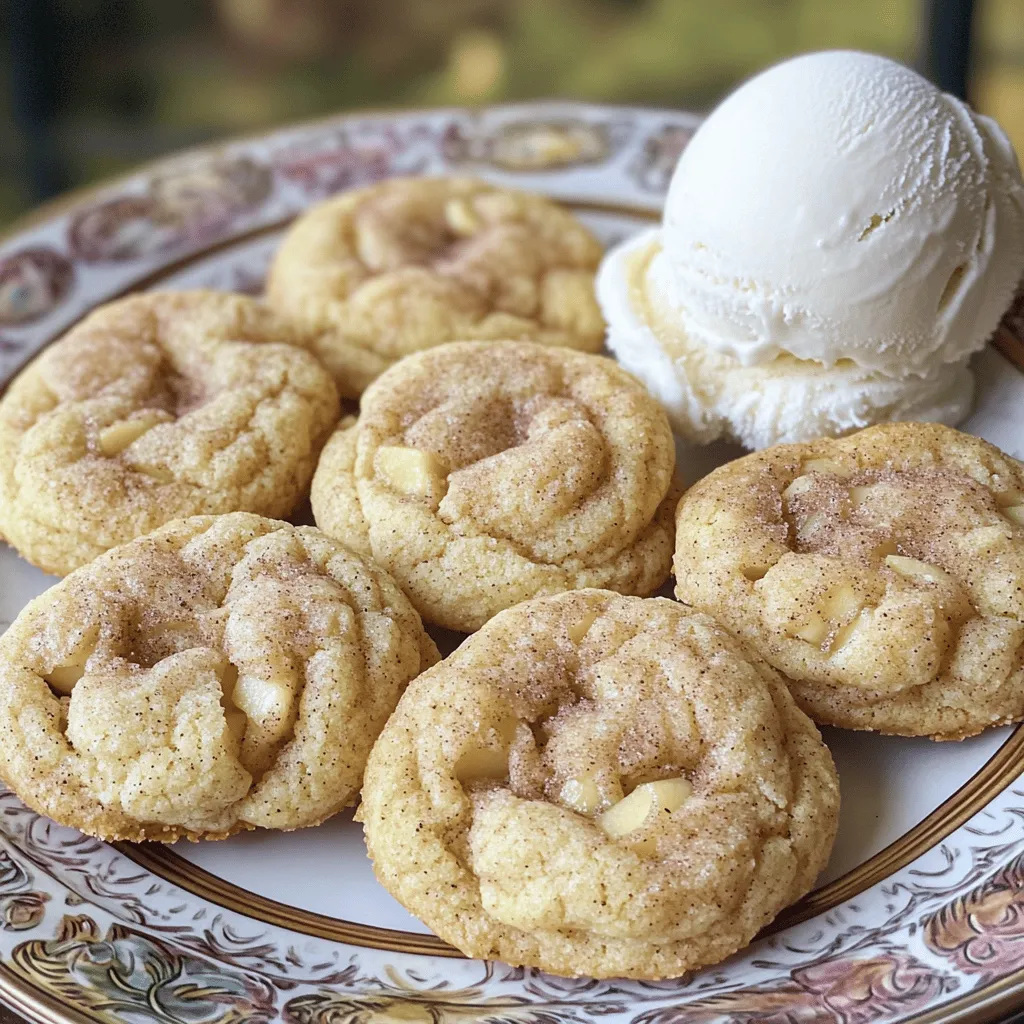
Apple Pie Snickerdoodles Irresistible Cookie Delight
Craving a dessert that combines warm apple pie charm and soft snickerdoodle goodness? Look no further! These Apple Pie Snickerdoodles deliver a comforting mix of