Desserts

To make pumpkin cheesecake cookies, you need a few key items. Here’s the list: - 1 cup all-purpose flour - 1 teaspoon baking soda - 1 teaspoon ground cinnamon - 1/2 teaspoon ground nutmeg - 1/4 teaspoon ground ginger - 1/4 teaspoon salt - 1/2 cup unsalted butter, softened - 1/2 cup granulated sugar - 1/2 cup packed brown sugar - 1 large egg - 1 teaspoon vanilla extract - 1/2 cup pumpkin puree - 1/2 cup cream cheese, softened - 1/4 cup powdered sugar (for the cheesecake filling) - 1/2 teaspoon vanilla extract (for the cheesecake filling) These ingredients come together to create a soft, spiced cookie with a creamy center. The pumpkin adds moisture and flavor, while the spices give a warm taste. You can enhance the cookies with some optional ingredients. If you want a bit of crunch, consider adding: - 1/4 cup chopped walnuts - 1/4 cup chopped pecans These nuts provide a nice contrast to the soft cookie and rich filling. They also add another layer of flavor. If you need alternatives, you have some options. Here are a few suggestions: - For gluten-free cookies, swap all-purpose flour with a gluten-free blend. - Use coconut oil instead of butter for a dairy-free option. - Replace granulated sugar with a sugar substitute like Stevia for lower calories. - If you want a cream cheese alternative, use a vegan cream cheese. These substitutions help make the recipe fit your diet while keeping the cookies delicious. Adjusting ingredients lets everyone enjoy these tasty treats! Start by preheating your oven to 350°F (175°C). Line a baking sheet with parchment paper. This helps the cookies not stick. In a small bowl, mix together the flour, baking soda, ground cinnamon, ground nutmeg, ground ginger, and salt. Whisk these dry ingredients well, then set them aside. In a large bowl, beat the softened butter, granulated sugar, and brown sugar using an electric mixer. Mix on medium speed for about 2-3 minutes. The mixture should turn creamy and smooth. Add the egg and one teaspoon of vanilla extract. Continue mixing for about a minute until everything blends well. Now, gently stir in the pumpkin puree. Use a spatula or wooden spoon to mix until smooth. Next, slowly fold the dry ingredients into the wet mixture. Be careful not to overmix. You want a soft cookie texture. In a separate bowl, combine the softened cream cheese, powdered sugar, and half a teaspoon of vanilla extract. Use a mixer to blend until the mixture is smooth and creamy. This will be your cheesecake filling. Using a tablespoon or cookie scoop, drop spoonfuls of cookie dough onto the lined baking sheet. Space them about 2 inches apart. With your fingertip, make a small indent in the center of each cookie. Now, spoon about half a teaspoon of cream cheese filling into each indent. If you like, sprinkle some chopped walnuts or pecans on top. Place the baking sheet in the oven and bake for 10-12 minutes. The edges should look lightly golden while the centers remain soft. After baking, let the cookies cool on the sheet for 5 minutes. Then, transfer them to a wire rack to cool completely. Enjoy your treats! To bake soft cookies, I follow a few simple steps. First, I use room temperature butter. This helps the butter mix well with sugar for a creamy texture. Next, I avoid overmixing the dough. Mixing just until combined keeps the cookies tender. Also, I remove the cookies when the edges are golden but the centers still look soft. Letting them cool on the pan for a few minutes helps them set without getting hard. To keep cookies fresh, I store them in an airtight container at room temperature. They stay soft for about a week. If you want to enjoy them warm, I reheat them in the microwave for about 10-15 seconds. This brings back that fresh-baked taste. For longer storage, I freeze the cookies. I place them in a freezer-safe bag, and they can last up to three months. For a lovely presentation, I like to arrange the cookies on a decorative platter. A light dusting of powdered sugar adds a nice touch. You can also serve them with a dollop of whipped cream. This makes the treat look fancy and inviting. Adding some fall-themed decorations, like small pumpkins or leaves, will enhance the autumn vibe of your dessert table. {{image_4}} You can boost the flavor of your cookies by adding spices. Try adding cloves for a warm spice kick. A pinch of allspice also adds depth. You could even mix in some citrus zest for a fresh twist. Consider using maple syrup instead of granulated sugar for a unique taste. These small changes will create a new experience with each bite. For a gluten-free version, swap all-purpose flour for a gluten-free blend. Make sure it includes xantham gum for the right texture. To make it vegan, replace the egg with a flax egg. Mix one tablespoon of ground flaxseed with three tablespoons of water. Let it sit for a few minutes to thicken. Use a vegan cream cheese for the filling, too. These swaps keep the treat delicious while catering to different diets. You can change the cookies for special times of the year. For Halloween, use black and orange sprinkles on top. At Thanksgiving, serve them with a dollop of whipped cream. For winter, add peppermint extract to the cream cheese filling. This creates a festive flavor. During spring, use fresh berries on top for a bright touch. Each variation brings new life to these pumpkin cheesecake cookies! To keep your pumpkin cheesecake cookies fresh, store them in an airtight container. This method prevents air from making them dry. Line the container with parchment paper to absorb moisture. You can also separate layers of cookies with paper towels. This extra step keeps them soft and tasty. Freezing is great for saving cookies for later. First, let the cookies cool completely. Then, place them in a single layer on a baking sheet. Freeze them for about 1 hour. Once frozen, transfer the cookies to a freezer bag or container. This method helps avoid sticking. You can keep them in the freezer for up to three months. When stored correctly, pumpkin cheesecake cookies can last about one week at room temperature. If you freeze them, they can stay good for three months. Just remember to let them thaw at room temperature before enjoying. Keeping track of storage time helps you enjoy these treats at their best! Yes, you can make these cookies ahead of time. Prepare the cookie dough and the cream cheese filling and store them separately in the fridge for up to two days. When you are ready, simply scoop the dough, add the filling, and bake. This way, you’ll have fresh cookies with minimal effort. You can tell when the cookies are done by checking the edges. They should be lightly golden and firm. The centers may look soft, but they will firm up as they cool. Bake for 10–12 minutes for the best results. It is not recommended to use pumpkin pie filling. Pumpkin pie filling contains added spices and sugar, which can change the cookie's taste and texture. Stick with pure pumpkin puree for the best flavor and a balanced recipe. You can serve these cookies with whipped cream for extra creaminess. A scoop of vanilla ice cream also pairs well. For a crunchy twist, offer chopped nuts or a drizzle of caramel sauce. Each addition enhances the cookie experience! We covered essential ingredients and helpful tips for making pumpkin cheesecake cookies. I shared steps for preparation, baking, and storage. We explored variations, ensuring you can customize your cookies for any occasion. In summary, these cookies are a fun treat for all. With the right ingredients and care, you can create a delicious dessert. Enjoy experimenting and sharing your tasty results with friends and family. Happy baking!
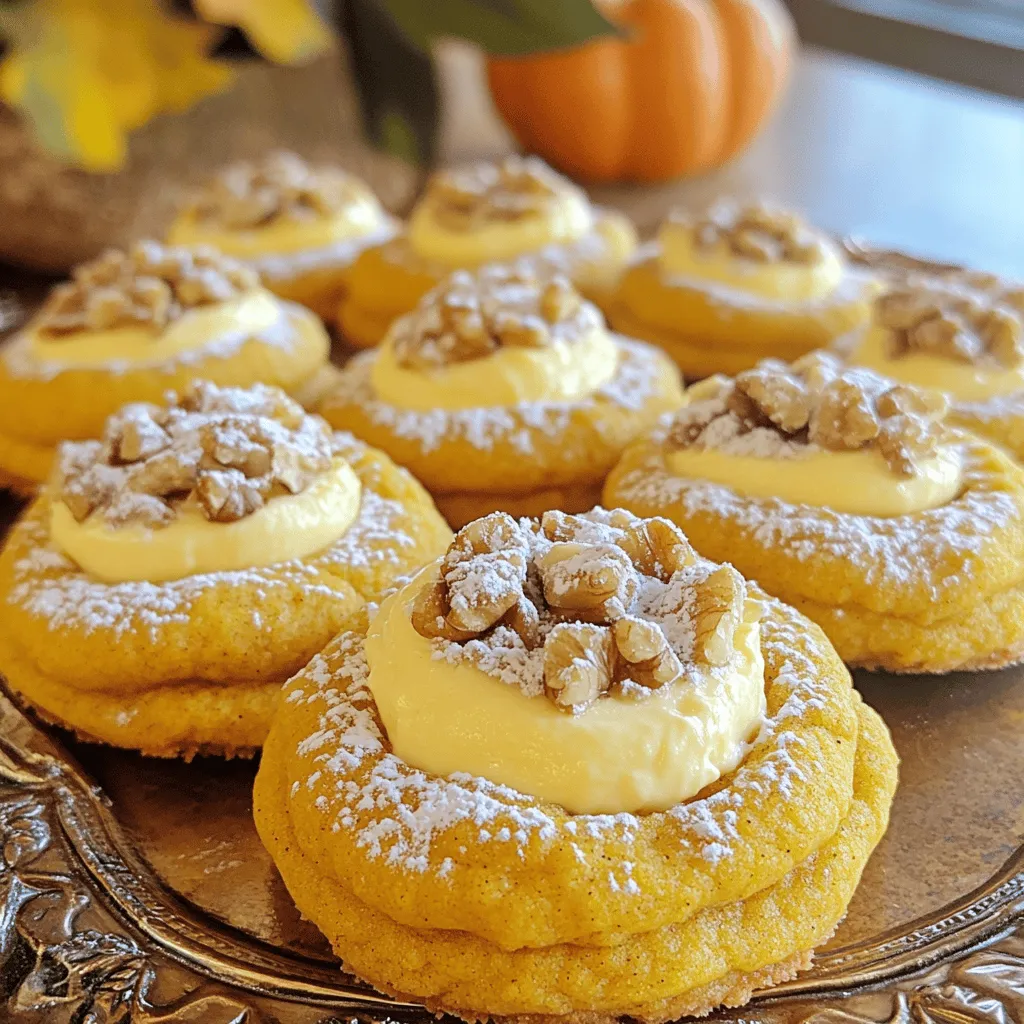
Pumpkin Cheesecake Cookies Irresistible Fall Treat
Get ready for the ultimate fall treat: Pumpkin Cheesecake Cookies! These cookies blend rich pumpkin flavor with creamy cheesecake filling, making them a must-try for
To make vanilla pudding pumpkin bread, you will need: - 1 cup canned pumpkin puree - 1 package (3.4 oz) instant vanilla pudding mix - 2 cups all-purpose flour - 1 teaspoon baking soda - 1 teaspoon baking powder - 1 teaspoon ground cinnamon - 1/2 teaspoon ground nutmeg - 1/2 teaspoon salt - 1/2 cup vegetable oil - 1 cup granulated sugar - 3 large eggs - 1 teaspoon vanilla extract - 1/2 cup chopped walnuts or pecans (optional) You can switch things up with these options: - Use fresh pumpkin instead of canned for a richer taste. - Swap the walnuts or pecans for chocolate chips if you love chocolate. - Try almond or coconut milk instead of vegetable oil for a unique flavor. - Add a pinch of ginger or cloves for extra warmth. When shopping for ingredients, keep these tips in mind: - Choose canned pumpkin with no added sugars or spices for the best flavor. - Check the expiry date on the pudding mix to ensure freshness. - Look for all-purpose flour that is stored in a cool, dry place. - Select eggs that are clean and have no cracks. - If using nuts, buy them whole and chop them yourself for better quality. Selecting fresh ingredients makes your pumpkin bread taste even better! First, set your oven to 350°F (175°C). Grab a 9x5 inch loaf pan and grease it lightly with butter or cooking spray. You can also use parchment paper for easy removal after baking. In a large mixing bowl, add 1 cup of canned pumpkin puree, 1 package of instant vanilla pudding mix, 1/2 cup of vegetable oil, and 1 cup of granulated sugar. Crack in 3 large eggs and add 1 teaspoon of vanilla extract. Use a whisk or an electric mixer to blend these until smooth and creamy. In another bowl, whisk together 2 cups of all-purpose flour, 1 teaspoon of baking soda, 1 teaspoon of baking powder, 1 teaspoon of ground cinnamon, 1/2 teaspoon of ground nutmeg, and 1/2 teaspoon of salt. Make sure they are all mixed well. Gradually add the dry mixture to the wet mixture. Use a spatula or wooden spoon to gently fold them together. Don't overmix, as this can make the bread dense. If you want, fold in 1/2 cup of chopped walnuts or pecans for a nice crunch. Pour the batter into your prepared loaf pan. Use a spatula to smooth the top if needed. This will help the bread bake evenly. Place the loaf pan in your preheated oven. Bake for 55-60 minutes. To check if it's done, insert a toothpick into the center. It should come out clean to show the bread is fully baked. Once baked, take the pan out of the oven and let it cool for about 10 minutes. If you used parchment, carefully lift the bread from the pan. Place it on a wire rack to cool completely. For serving, slice the bread warm or at room temperature. You can dust it with powdered sugar or add a dollop of whipped cream for extra flair. To make it festive, decorate the platter with small pumpkins or colorful leaves. To get the best texture, mix your wet and dry ingredients well. Use a whisk for the wet mix to make it smooth. Fold the dry mix gently into the wet mix. Overmixing can make the bread dense, which you want to avoid. For a lighter bread, let the batter rest for a few minutes before baking. Store leftover bread in an airtight container. This keeps it moist and fresh. You can also wrap it in plastic wrap for extra protection. If you want to keep it longer, freeze the slices. Just ensure they are sealed well to avoid freezer burn. Adding spices makes your bread even better. Use ground cinnamon and nutmeg as in the recipe. You can also try adding a pinch of ginger or allspice for a twist. Don’t be shy to experiment; spices can change the whole flavor profile. Avoid using cold eggs or oil. They should be at room temperature for the best mix. Don’t skip the baking soda and baking powder; they help the bread rise. Lastly, always check the bread with a toothpick. If it comes out clean, you’re good to go! {{image_4}} You can make this bread even sweeter by adding chocolate chips. Use about 1 cup of semi-sweet chocolate chips. Mix them into the batter when you combine the wet and dry ingredients. The rich chocolate pairs well with the warm spices in the pumpkin bread. To make a gluten-free version, swap all-purpose flour with a gluten-free flour blend. Ensure the blend has xanthan gum for better texture. This adjustment keeps the bread moist and delicious, just like the original. To make this recipe vegan, replace the eggs with flaxseed meal. Use 1 tablespoon of flaxseed meal mixed with 2.5 tablespoons of water for each egg. Also, substitute vegetable oil with coconut oil or applesauce. These changes will keep your bread tasty and plant-based. Feel free to get creative! Add 1/2 cup of chopped nuts, like pecans or walnuts, for crunch. You can also mix in dried fruits like raisins or cranberries. These additions will enhance the flavor and texture of your pumpkin bread, making it even more delightful. To store leftover pumpkin bread, let it cool completely. Wrap it tightly in plastic wrap or foil. Place it in an airtight container. This keeps the bread moist and fresh. You can store it at room temperature for up to three days. If you want to keep it longer, refrigeration is an option. However, it may dry out in the fridge. If you have more bread than you can eat, freeze it! Slice the bread before freezing. Wrap each slice in plastic wrap. Then, place the slices in a freezer bag. Make sure to remove as much air as possible. You can freeze the bread for up to three months. When you're ready, just thaw the slices at room temperature. To reheat your pumpkin bread, preheat your oven to 350°F (175°C). Place the bread on a baking sheet. Cover it with foil to prevent over-browning. Heat for about 10-15 minutes. For individual slices, use a microwave. Heat for about 15-20 seconds. This keeps the bread warm and soft for serving. Enjoy your delicious bread fresh again! Yes, you can use fresh pumpkin. Start by roasting the pumpkin. Cut it in half, remove the seeds, and roast it until soft. Then, scoop out the flesh and mash it until smooth. This method gives a fresh taste. Just make sure to measure the same amount as the canned pumpkin. To check if your pumpkin bread is done, use a toothpick. Insert it into the center of the loaf. If it comes out clean, your bread is ready. If it has batter on it, bake for a few more minutes. The edges should look golden brown and firm. Pumpkin bread pairs well with many things. You can serve it with butter or cream cheese for a rich taste. Adding a sprinkle of cinnamon or nutmeg on top can enhance the flavor. For a special touch, serve it with a warm drink like chai tea or apple cider. Pumpkin bread lasts about 3 to 4 days at room temperature. Keep it in an airtight container to keep it fresh. If you want to store it longer, it can last up to 3 months in the freezer. Just wrap it tightly in plastic wrap before freezing. Yes, you can double the recipe easily. Just double all the ingredients. Make sure to use a larger mixing bowl. Also, you may need to bake it longer if you're using a larger loaf pan. Check for doneness with a toothpick as mentioned earlier. To make the perfect pumpkin bread, focus on fresh ingredients, proper mixing, and careful baking. I shared helpful tips for texture, storage, and flavor. You now have options for variations, like gluten-free or vegan. Remember to check the bread for doneness and store it properly. With these skills, your baking will shine. Enjoy sharing your delicious pumpkin bread with friends and family!
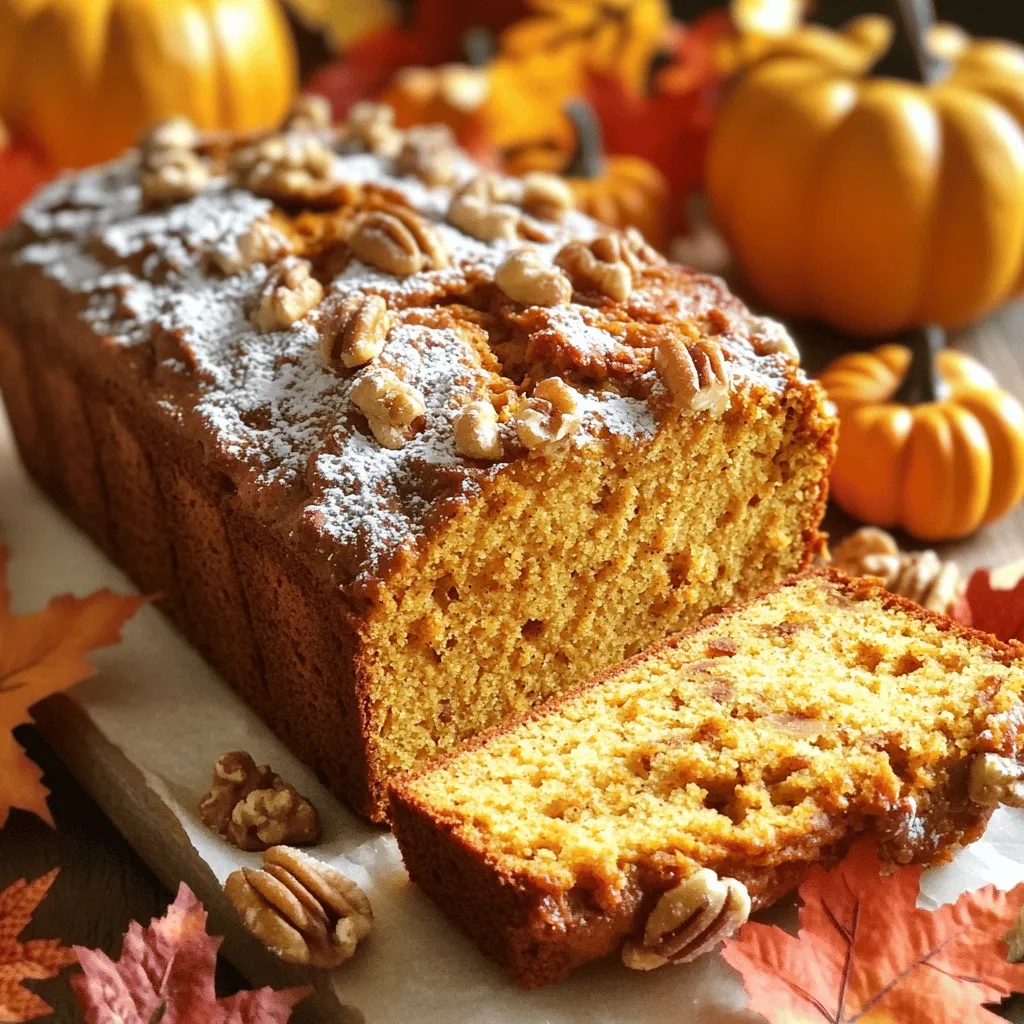
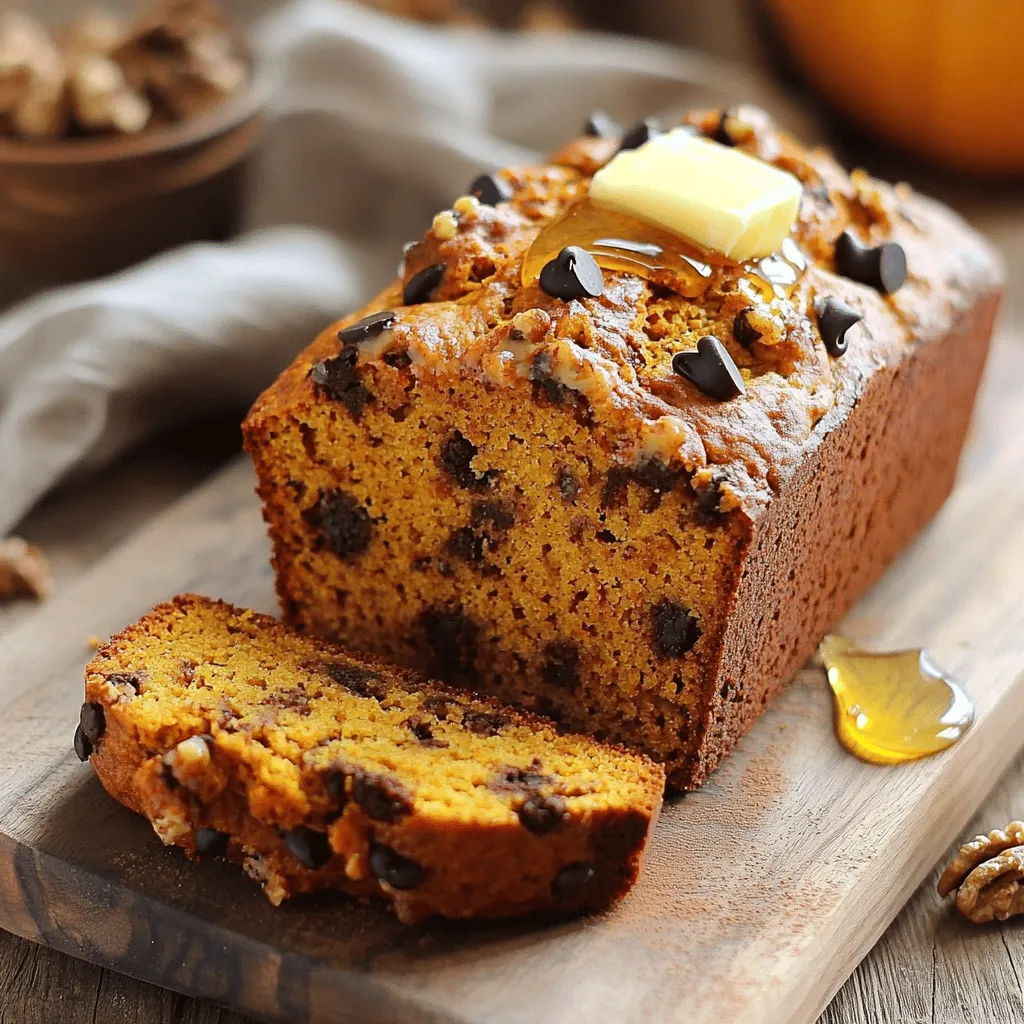
Vanilla Pudding Pumpkin Bread Savory and Simple Recipe
Are you ready to bake something special? This Vanilla Pudding Pumpkin Bread is easy and tasty. With rich flavors and a cozy aroma, it’s perfect
- 1 cup canned pumpkin puree - 1 cup chilled coconut cream (the thick part only) - 1/4 cup pure maple syrup - 1 teaspoon vanilla extract - 1 teaspoon pumpkin pie spice - 1/4 teaspoon sea salt - Crushed graham crackers - Chopped pecans For this Vegan Pumpkin Fluff Dip, you need simple and fresh ingredients. First, grab a can of pumpkin puree. This gives your dip a rich, smooth base. Next, the chilled coconut cream adds a creamy texture. Make sure to use only the thick part for the best fluffiness. You will also need pure maple syrup. It sweetens the dip naturally. The vanilla extract adds a hint of warmth. Pumpkin pie spice brings in those cozy fall flavors. Finally, a touch of sea salt balances all the sweetness. To make it extra special, think about adding some garnishes. Crushed graham crackers add a nice crunch. Chopped pecans also give a lovely nutty flavor. Both options make your dip look great too! Start by grabbing a large mixing bowl. Add 1 cup of canned pumpkin puree. Next, pour in 1/4 cup of pure maple syrup. Then, add 1 teaspoon of vanilla extract, 1 teaspoon of pumpkin pie spice, and 1/4 teaspoon of sea salt. Use a spatula or whisk to mix everything well. Keep mixing until the mixture is smooth and all the ingredients blend nicely. In a separate bowl, scoop out 1 cup of chilled coconut cream, leaving any liquid behind. Using an electric mixer or a whisk, whip the coconut cream for about 2-3 minutes. Aim for a light and fluffy texture. This step is crucial for achieving the dip's fluffiness. Now, gently fold the whipped cream into the pumpkin mixture. Use a spatula to do this. Be careful not to deflate the whipped cream. The air in the cream helps the dip stay light and fluffy. After combining, give the dip a taste. If you want it sweeter, add more maple syrup. Mix gently again to ensure everything is well combined. Pour the fluffy pumpkin dip into a serving bowl. Smooth out the top with a spatula for a nice look. If you want, sprinkle the top with crushed graham crackers or chopped pecans for extra texture. Then, refrigerate the dip for at least 30 minutes. This chilling time helps the flavors meld together beautifully. To keep your dip light and airy, whip the coconut cream slowly. Start by chilling the coconut cream. The thicker part works best. When you scoop it out, avoid the liquid. Use an electric mixer for best results. Whip until it is fluffy, about 2-3 minutes. Fold this whipped cream into the pumpkin mix gently. Use a spatula to combine without deflating it. This step is key for a fluffy dip. You can add more spices to change the flavor. Consider cinnamon or nutmeg for warmth. A pinch of ginger can add a zing. For a sweeter touch, try adding a bit of cocoa powder. Mix and match these spices to find your perfect balance. You can also use flavored extracts, like almond or hazelnut, to switch things up. This dip pairs well with many dippers. Try using fresh apple slices for crunch. Graham crackers offer a sweet touch. Carrot sticks can add a nice contrast. For a fun twist, use pretzels for a salty kick. Garnish with crushed graham crackers or pecans for added texture. These choices will make your dip even more enjoyable. {{image_4}} If you want to switch up the cream, try using other non-dairy creams. You can use cashew cream or almond cream. Both options add a nice flavor. Cashew cream is rich and smooth. Almond cream has a subtle nutty taste. Make sure to whip them well, just like the coconut cream. This keeps your dip light and fluffy. You can also try different sweeteners for your dip. Agave syrup is a great option. It has a mild taste and mixes well. You can also use date syrup for a richer flavor. Both are good choices if you want to avoid maple syrup. If you prefer a low-calorie option, try stevia or erythritol. Just remember to adjust the amount to match the sweetness you like. You can change this dip for different holidays! For Halloween, add some spooky sprinkles or colored whipped cream on top. For Christmas, mix in some crushed peppermint for a festive twist. In the spring, swap pumpkin for sweet potato to create a lighter, springtime version. Each change gives you a fun way to celebrate the seasons with tasty flavors! To store leftovers, place the dip in an airtight container. This keeps it fresh. Make sure the lid is tight to avoid air exposure. You can keep it in the fridge for up to five days. Before serving again, give it a good stir to restore its fluffiness. Yes, you can freeze the dip! Simply scoop it into a freezer-safe container. Leave some space at the top, as it may expand when frozen. Cover it tightly with plastic wrap and a lid. The dip will stay good in the freezer for about three months. When ready to enjoy, thaw it in the fridge overnight and stir again before serving. For the best taste and quality, consume the dip within five days if stored in the fridge. If you freeze it, use it within three months for the best flavor. Always check for any changes in smell or texture before eating. Enjoy your Vegan Pumpkin Fluff Dip while it’s fresh for the best experience! Yes, you can use fresh pumpkin. Fresh pumpkin has a different texture and taste. To use it, first, you need to cook and puree it. Cut the pumpkin, remove seeds, and bake it at 400°F until soft. This usually takes about 45 minutes. After baking, scoop out the flesh and blend it until smooth. Use this in place of canned pumpkin puree in the dip. Just remember, fresh pumpkin might be a bit more watery, so you may need to adjust other ingredients. Yes, this dip is vegan-friendly! The main ingredients are canned pumpkin, coconut cream, maple syrup, and spices. All these ingredients are plant-based, making this dip perfect for anyone on a vegan diet. Be sure to check the labels on your coconut cream and maple syrup to ensure they are indeed vegan. You can serve this dip with many tasty items. Some popular options are: - Apple slices - Graham crackers - Celery sticks - Carrot sticks - Pretzels Each of these adds a nice crunch and pairs well with the creamy dip. You can even use cookies or pita chips for a fun twist! Absolutely! This dip is great for making ahead. You can prepare it a day in advance. Just store it in an airtight container in the fridge. This allows the flavors to blend well. Be sure to give it a quick stir before serving. If you want the best taste, aim to eat it within 3 days. This blog post covered everything you need to know about making a delicious vegan pumpkin fluff dip. We discussed the main ingredients, step-by-step instructions, and some handy tips. You also learned about variations and storage options to keep your dip fresh. Enjoy experimenting with flavors and serving ideas for any occasion. With these guidelines, you’ll create a tasty treat that everyone will love. Dive in and have fun with your pumpkin dip!
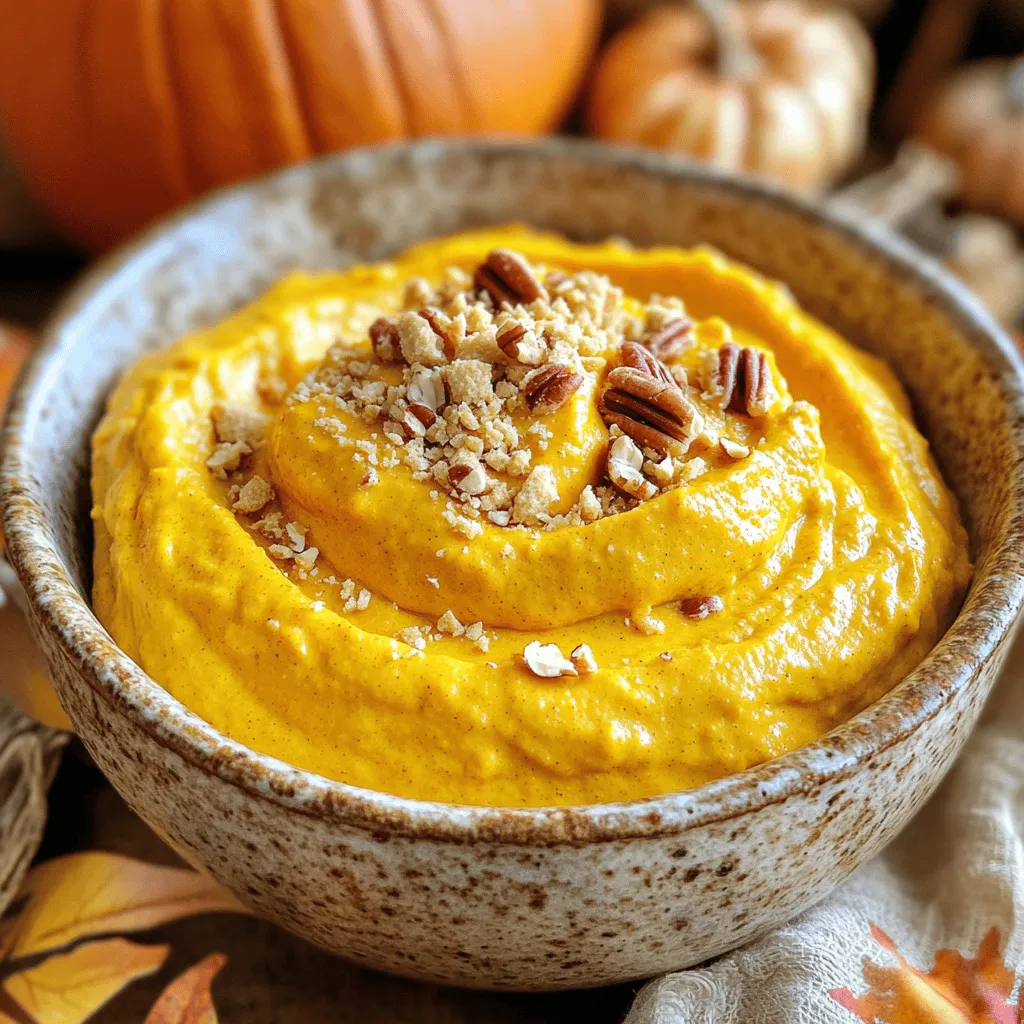
Vegan Pumpkin Fluff Dip Creamy and Delicious Treat
Get ready to indulge in a creamy, dreamy treat: Vegan Pumpkin Fluff Dip! This simple recipe calls for just six tasty ingredients, including smooth pumpkin
- 1 cup canned pumpkin puree - 1 cup all-purpose flour - 1/2 cup unsweetened cocoa powder - 1 cup granulated sugar - 1/2 cup packed brown sugar - 1/2 cup vegetable oil - 2 large eggs, at room temperature - 1 teaspoon vanilla extract - 1 teaspoon baking powder - 1/2 teaspoon baking soda - 1/2 teaspoon salt - 1 teaspoon ground cinnamon - 1/2 teaspoon ground nutmeg - 1/2 cup chocolate chips (optional) These ingredients create a rich, moist, and flavorful cupcake. The pumpkin puree gives a soft texture. The cocoa powder adds a deep chocolate taste. The sugars balance the flavors well. Each egg helps bind everything together, making the cupcakes fluffy. You can make swaps if needed. Use fresh pumpkin puree instead of canned. Applesauce can replace the vegetable oil for a healthier option. If you want a gluten-free treat, try almond or coconut flour. Instead of granulated sugar, use coconut sugar for a different flavor. To boost flavor, consider adding: - 1/2 cup of chocolate chips for extra richness. - A handful of chopped nuts for crunch. - A dash of cayenne pepper for a spicy kick. These add-ins can elevate your cupcakes further, making them even more enjoyable. First, preheat your oven to 350°F (175°C). This step is key to getting the right rise and texture. While the oven heats, line a muffin tin with cupcake liners. Make sure they fit snugly. This helps keep the batter from leaking out. In a large bowl, mix the canned pumpkin puree, granulated sugar, brown sugar, and vegetable oil. Add in the eggs and vanilla extract next. Whisk these ingredients together until they are smooth. This creates a rich base for your cupcakes. In another bowl, sift together the flour, cocoa powder, baking powder, baking soda, salt, cinnamon, and nutmeg. Sifting helps make the mixture light. Gradually add this dry mix into the wet pumpkin mixture. Stir gently with a spatula until just combined. Avoid overmixing to keep your cupcakes light and fluffy. If you want to add chocolate chips, fold them into the batter now. Use a scoop to fill the cupcake liners about two-thirds full. This leaves room for the cupcakes to rise. Place the muffin tin in the oven and bake for 18-20 minutes. Check if they are done by inserting a toothpick into the center. It should come out clean or with a few moist crumbs. After baking, let the cupcakes cool in the tin for about 5 minutes. This helps them set. Then, transfer them to a wire rack to cool completely. Once cool, they are ready for frosting. To get light and fluffy cupcakes, follow these steps: - Use room temperature eggs. Cold eggs can make the batter dense. - Sift dry ingredients. Sifting helps aerate flour and cocoa powder. This gives cupcakes a nice rise. - Mix gently. Combine wet and dry ingredients until just mixed. Overmixing can lead to tough cupcakes. - Don’t skip the chocolate chips. They add moisture and richness. Use semi-sweet or dark for the best flavor. If your cupcakes don’t turn out as expected, here’s what to check: - Cupcakes sink in the middle. This often means they were underbaked. Always test with a toothpick. - Cupcakes are dry. Overbaking is a common cause. Keep an eye on them in the last few minutes. - Cupcakes are too dense. This usually happens from overmixing the batter. Stir just until combined. Once your cupcakes cool, it’s time to make them look great: - Frost with cream cheese frosting. Its tangy flavor pairs well with chocolate and pumpkin. - Sprinkle cocoa powder. A light dusting adds a nice touch. - Add grated chocolate. This gives a rich look and taste. - Use rustic platters. Serving on wooden boards enhances the cozy fall vibe. These tips will help you create the perfect chocolate pumpkin cupcakes, making your fall gatherings delightful. {{image_4}} You can twist this recipe for chocolate pumpkin cupcakes in many fun ways. Here are a few ideas: - Spicy Pumpkin Cupcakes: Add a pinch of cayenne pepper to the batter. It gives a nice kick. - Nutty Chocolate Pumpkin: Mix in chopped walnuts or pecans. They add crunch and flavor. - Chocolate Swirl: After filling the liners, add a spoonful of chocolate batter on top. Swirl it gently with a toothpick for a marbled look. You can easily modify these cupcakes to fit different diets: - Gluten-Free Version: Use a gluten-free flour blend instead of all-purpose flour. This keeps the texture light. - Vegan Option: Replace eggs with flax eggs. Mix 1 tablespoon of flaxseed meal with 2.5 tablespoons of water for each egg. Use a plant-based oil for moisture. Frosting and toppings can really change the taste of your cupcakes. Here are some great ideas: - Cream Cheese Frosting: This classic pairs well with pumpkin and adds a tangy flavor. - Chocolate Ganache: Drizzle this over the cupcakes for extra chocolatey goodness. - Caramel Drizzle: A light caramel sauce adds sweetness and a lovely contrast. - Sprinkles or Nuts: Top with colorful sprinkles or crushed nuts for a fun finish. These variations will keep your chocolate pumpkin cupcakes exciting and delicious! To keep your chocolate pumpkin cupcakes fresh, store them in an airtight container. Use a container that is large enough to avoid squishing the cupcakes. If you have frosting on them, place a piece of parchment paper between layers. This step prevents sticking and preserves the look of your treats. Store the container at room temperature for up to three days. If you want them to last longer, refrigerate them for up to a week. Freezing is a great option if you want to save your cupcakes for later. First, make sure the cupcakes are completely cooled. Wrap each cupcake in plastic wrap tightly. Then, place them in a freezer-safe bag or container. They can stay frozen for up to three months. When you're ready to enjoy them, remove the cupcakes from the freezer. Let them thaw at room temperature for about an hour. This keeps them soft and tasty. Chocolate pumpkin cupcakes can last quite a while when stored properly. At room temperature, they stay fresh for three days. In the fridge, they last about a week. If you want to reheat them, use the microwave. Heat each cupcake for about 10-15 seconds. Check to see if they are warm. Avoid overheating, as this can make them dry. For a cozy fall treat, enjoy them warm with a cup of tea or coffee! Yes, you can use fresh pumpkin. Start by roasting a small pumpkin. Cut it in half, scoop out the seeds, and bake it at 350°F (175°C) for about 45 minutes. Once cool, mash it until smooth. This gives great flavor and freshness to your cupcakes. If you need a substitute for vegetable oil, try using melted coconut oil or applesauce. Both options keep the cupcakes moist and add a unique twist. You can replace the same amount for a good result. To check if your cupcakes are done, insert a toothpick into the center of one cupcake. If it comes out clean or with a few moist crumbs, they are ready. This usually takes about 18-20 minutes of baking time. Cream cheese frosting pairs perfectly with chocolate pumpkin cupcakes. The tangy flavor balances the sweet chocolate and pumpkin. You can also try a simple buttercream or a chocolate ganache for a rich treat. In this post, I covered key ingredients and step-by-step instructions for delicious chocolate pumpkin cupcakes. You learned about common substitutions, tips for perfect texture, and variations, including dietary options. You now have ideas for storage and frosting pairings. Use this knowledge to create tasty treats that impress. Baking is fun and easy, and your cupcakes will surely delight everyone. Enjoy making them!
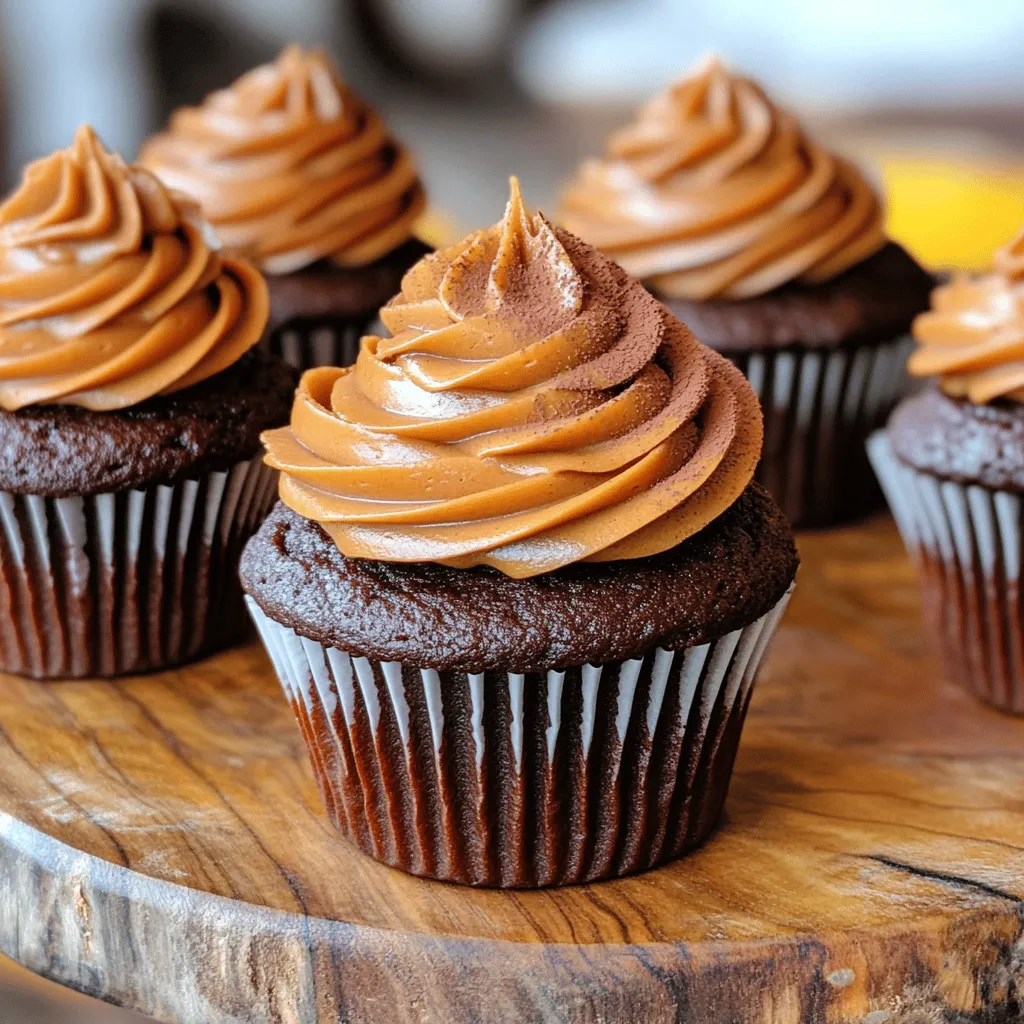
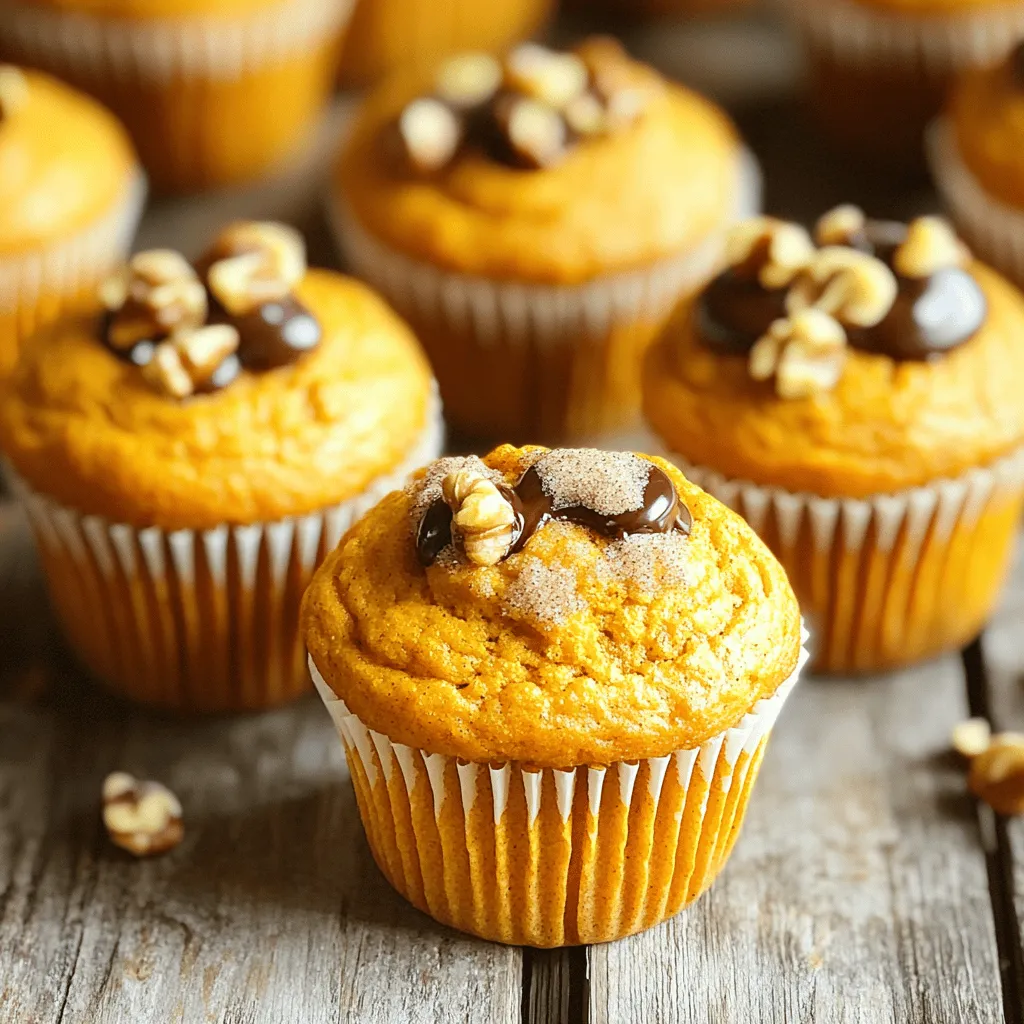
Chocolate Pumpkin Cupcakes Decadent Fall Delight
Fall is here, and it’s time for a sweet treat that combines flavors we love. Chocolate pumpkin cupcakes offer a rich, moist blend of chocolate
To create a delightful pumpkin streusel coffee cake, you will need these key ingredients: - 1 cup canned pumpkin puree - 1 cup granulated sugar - 1/2 cup brown sugar, packed - 1/2 cup vegetable oil - 3 large eggs - 1 teaspoon vanilla extract - 2 cups all-purpose flour - 2 teaspoons baking powder - 1 teaspoon baking soda - 1 teaspoon ground cinnamon - 1/2 teaspoon ground nutmeg - 1/2 teaspoon salt These ingredients form the base of your cake. The pumpkin puree adds moisture and flavor. The sugars give sweetness and help with browning. If you want to boost the taste, consider adding these ingredients: - 1/2 cup chopped walnuts or pecans These nuts add a nice crunch and a rich flavor. You can leave them out if you prefer a smoother texture. The streusel topping is what makes this cake special. Here’s what you need: - 1/2 cup all-purpose flour - 1/3 cup brown sugar, packed - 1/2 teaspoon ground cinnamon - 1/4 cup cold butter, cubed This mixture creates a crumbly topping. It adds a sweet crunch that pairs well with the soft cake. Start by preheating your oven to 350°F (175°C). This step is key for a well-baked cake. Next, grab a 9x13 inch baking pan. Lightly grease it or line it with parchment paper. This will help you remove the cake later. In a large bowl, mix the canned pumpkin puree, granulated sugar, and brown sugar. Pour in the vegetable oil, then add the eggs and vanilla extract. Whisk until smooth. This batter is the heart of your cake, so mix it well. In a different bowl, combine the all-purpose flour, baking powder, baking soda, ground cinnamon, ground nutmeg, and salt. Whisk these dry ingredients together until no lumps remain. This ensures your cake has a consistent flavor and texture. Now, slowly add the dry mix to the pumpkin batter. Stir gently until just combined. It is important not to overmix. If you want a crunch, fold in the chopped walnuts or pecans. This adds an extra layer of flavor. In a small bowl, mix the flour, brown sugar, and ground cinnamon for the streusel. Add the cold, cubed butter. Using your fingers or a pastry cutter, blend until it looks like coarse crumbs. This topping adds a sweet crunch to your cake. Pour the pumpkin batter into your prepared baking pan. Spread it evenly with a spatula. Next, sprinkle the streusel topping generously over the batter. Make sure it covers the entire surface. Place the pan in the oven and bake for 30-35 minutes. Check it with a toothpick. It should come out clean or with a few moist crumbs. After baking, let the cake cool in the pan for about 10 minutes. Then, transfer it to a wire rack. Cooling it fully will improve the texture. For a special touch, dust the cooled cake with powdered sugar. You can also add whipped cream or caramel sauce on each slice. Enjoy your delicious pumpkin streusel coffee cake! To keep your cake moist, always use canned pumpkin puree. It adds great moisture. Use fresh ingredients, too. Fresh eggs and new baking powder help make a soft cake. Don’t overbake it. Check it a few minutes early. A toothpick should come out with a few moist crumbs. Mix your batter gently. After adding the dry mix to the wet mix, stir lightly. Stop mixing as soon as you see no dry flour. Overmixing makes the cake tough. If you add nuts, fold them in at the end. This keeps the batter light and fluffy. Store your coffee cake in an airtight container. This keeps it fresh longer. If you plan to eat it later, refrigerate it. It will stay good for about a week. For longer storage, freeze the cake. Wrap it tightly in plastic wrap. Then, put it in a freezer bag. Thaw it in the fridge for great taste. {{image_4}} You can make your Pumpkin Streusel Coffee Cake healthier. Here are some tips: - Whole Wheat Flour: Substitute half or all of the all-purpose flour with whole wheat flour. This adds fiber and nutrients. - Less Sugar: Reduce the sugar by 1/4 cup. The pumpkin adds natural sweetness. - Applesauce: Replace half the oil with unsweetened applesauce. This keeps it moist while cutting fat. Get creative with flavors in your Pumpkin Streusel Coffee Cake. Here are some ideas: - Spices: Add ginger or allspice for a warm kick. Just a pinch can make a big difference. - Nut Substitutes: Use almonds instead of walnuts or pecans. Chopped hazelnuts also add a nice crunch. - Chocolate Chips: Fold in some chocolate chips for a sweet twist. They melt and create gooey bites throughout the cake. You can adjust this recipe for various diets. Here’s how: - Gluten-Free: Use a gluten-free flour blend instead of all-purpose flour. This works well and keeps the flavor intact. - Vegan Options: Replace eggs with flax eggs. Combine 1 tablespoon of flaxseed meal with 2.5 tablespoons of water for each egg. - Dairy-Free: Use coconut oil instead of butter. It adds a rich flavor and keeps it dairy-free. These variations make the Pumpkin Streusel Coffee Cake fit for everyone. Enjoy experimenting! You can store your Pumpkin Streusel Coffee Cake at room temperature for about three days. Just keep it covered in plastic wrap or in an airtight container. This keeps it moist and fresh. If you live in a warm place, you may want to refrigerate it. In the fridge, it lasts up to a week. Make sure to wrap it well to avoid drying out. For longer storage, you can freeze the cake. First, cool it completely. Then, wrap it tightly in plastic wrap and foil. This helps prevent freezer burn. You can freeze it for up to three months. When you are ready to eat it, let it thaw in the fridge overnight. To reheat your cake, slice it into pieces. Place them on a microwave-safe plate. Heat for about 15 to 30 seconds. Check if it's warm enough. You can also reheat it in the oven. Preheat the oven to 350°F (175°C). Warm it for about 10 minutes. This method keeps the texture nice and soft. Enjoy your delicious coffee cake as if it were fresh! Yes, you can use fresh pumpkin. Start by roasting a small pumpkin. Cut it in half, scoop out the seeds, and roast it at 350°F until soft. Once cool, blend the flesh until smooth. Use this in place of canned pumpkin. Fresh pumpkin can add a deeper flavor, but make sure it’s well pureed. You can check if the cake is done by inserting a toothpick into the center. If it comes out clean or with a few crumbs, the cake is ready. The edges should pull away from the pan slightly, and the top should spring back when touched. This cake pairs well with coffee or tea. You can also serve it with whipped cream, ice cream, or a drizzle of caramel sauce. A sprinkle of nuts on top adds a nice crunch. For an extra touch, dust the cake with powdered sugar before serving. Once baked, the cake can stay fresh for about three days at room temperature. If you store it in the fridge, it can last up to a week. Always keep it covered to prevent it from drying out. Yes, you can make this cake ahead of time. Bake it a day or two before you plan to serve it. Let it cool, then store it in an airtight container. You can also freeze it for longer storage. Just make sure to wrap it tightly in plastic wrap before freezing. This blog post covered everything you need for Pumpkin Streusel Coffee Cake. We discussed key ingredients, from pumpkin to streusel. I shared step-by-step instructions, so you can bake this cake with ease. Tips and tricks help ensure a moist texture, while variations let you get creative. Finally, I provided storage info for keeping it fresh. Now you can confidently bake and enjoy this delicious treat anytime. Happy baking!
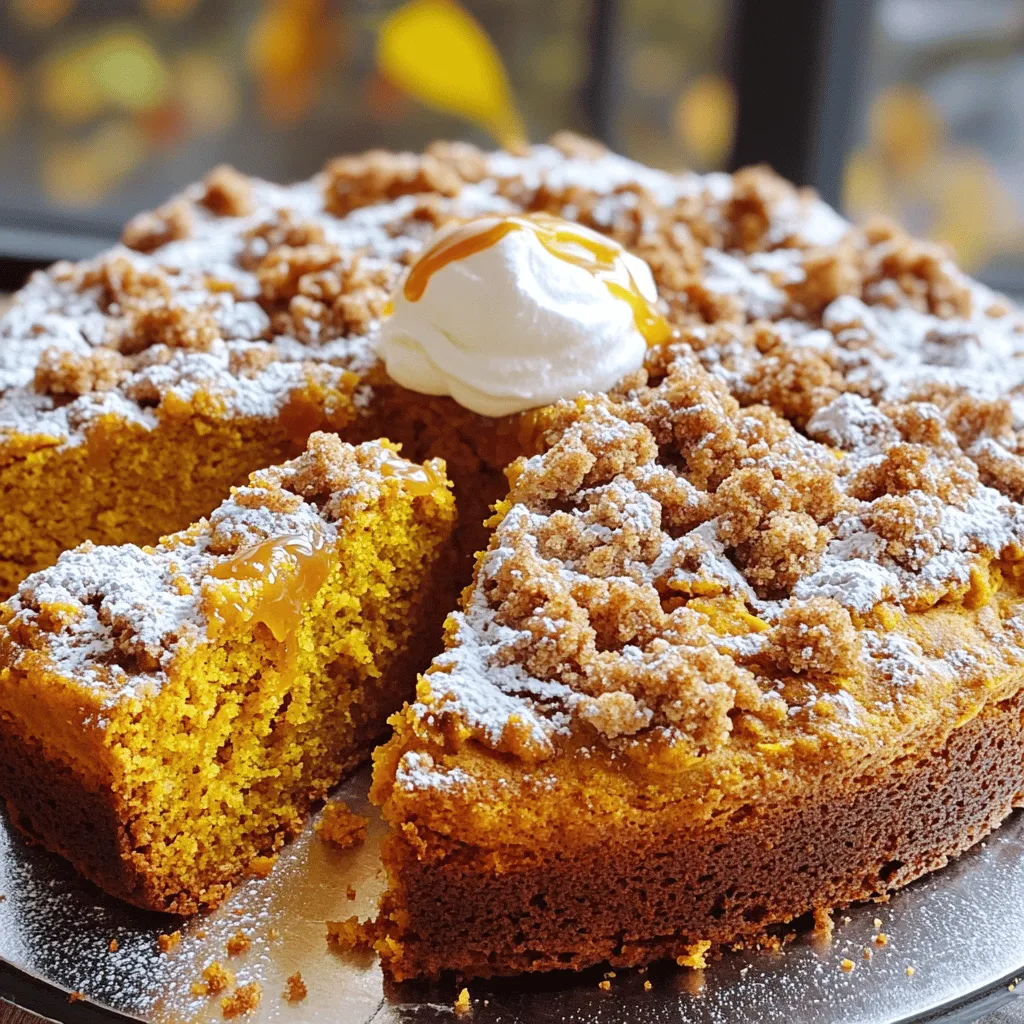
Pumpkin Streusel Coffee Cake Irresistible and Savory
Are you ready to bake something truly special? Pumpkin Streusel Coffee Cake is a delightful treat that blends warm spices and cozy flavors. It’s perfect
- 1 ¾ cups all-purpose flour - 1 teaspoon baking powder - ½ teaspoon baking soda - 1 teaspoon ground cinnamon - ½ teaspoon ground nutmeg - ½ teaspoon ground ginger - ½ teaspoon salt - 1 cup canned pumpkin puree - ½ cup vegetable oil - 1 cup granulated sugar - ½ cup brown sugar, packed - 3 large eggs - 1 teaspoon vanilla extract - ½ cup all-purpose flour - ⅓ cup brown sugar, packed - ½ teaspoon ground cinnamon - ¼ cup cold salted butter, cubed - ¾ cup chopped walnuts or pecans (optional) Gathering the right ingredients is key to making this delicious bread. Start with the dry ingredients. You will need all-purpose flour, baking powder, baking soda, and spices like cinnamon, nutmeg, and ginger. Don’t forget the salt; it boosts all the flavors. For the wet ingredients, canned pumpkin puree is a must. It adds moisture and flavor. You also need vegetable oil, granulated sugar, and brown sugar. Eggs will help bind everything, and vanilla extract adds a nice touch. Next, let’s talk about the streusel topping. You will need all-purpose flour, packed brown sugar, and ground cinnamon. The cold salted butter gives it a crumbly texture. If you like nuts, add chopped walnuts or pecans for crunch. With all these ingredients ready, you are set for a cozy baking experience! - Preheating the Oven: Start by preheating your oven to 350°F (175°C). This step is key for even baking. - Preparing the Loaf Pan: Lightly grease a 9x5-inch loaf pan with cooking spray or butter. This helps the bread release easily later. - Whisking Together Dry Ingredients: In a medium bowl, whisk together 1 ¾ cups all-purpose flour, 1 teaspoon baking powder, ½ teaspoon baking soda, 1 teaspoon ground cinnamon, ½ teaspoon ground nutmeg, ½ teaspoon ground ginger, and ½ teaspoon salt. Make sure all ingredients are well combined. - Blending Wet Ingredients Until Smooth: In a large bowl, mix 1 cup canned pumpkin puree, ½ cup vegetable oil, 1 cup granulated sugar, ½ cup packed brown sugar, 3 large eggs, and 1 teaspoon vanilla extract. Whisk until the mixture is smooth and uniform. - Gradual Incorporation of Dry into Wet: Gradually add the dry mixture to the wet mixture. Stir gently until just combined. Avoid overmixing, as this can change the bread's texture. - Folding in Optional Nuts: If you want to add extra flavor and crunch, fold in ¾ cup chopped walnuts or pecans at this stage. - Preparing the Streusel Mixture: In a small bowl, mix ½ cup all-purpose flour, ⅓ cup packed brown sugar, and ½ teaspoon ground cinnamon. Add ¼ cup cold salted butter, cubed. Use a fork or pastry cutter to mix until it looks like coarse crumbs. - Sprinkling Over Batter: Evenly sprinkle the streusel topping over the pumpkin batter in the loaf pan. Make sure to cover the surface well for a tasty finish. - Baking Time and Toothpick Test: Place the loaf pan in the preheated oven and bake for 50-60 minutes. Use a toothpick to check if it’s done. If it comes out clean or with a few moist crumbs, it’s ready. - Cooling Instructions: Once baked, let the pumpkin bread cool in the pan for about 10 minutes. After that, transfer it to a wire rack to cool completely before slicing. Avoid Overmixing To get a soft and moist bread, mix gently. Stir the wet and dry ingredients until they just blend. If you mix too much, the bread can turn out tough. Temperature of Ingredients Using room temperature eggs and oil helps the batter mix evenly. Cold ingredients can make it hard for the batter to blend well. Spice Adjustments Feel free to tweak the spices! If you love cinnamon, add a little more. Want a bit of heat? Add a pinch of ground cloves. This makes your bread even more delicious. Adding Chocolate Chips or Raisins For a sweet twist, fold in chocolate chips or raisins. They add great flavor and texture. You can use semi-sweet or dark chocolate based on your taste. Slicing and Garnishing Ideas Slice the bread carefully. Place it on a rustic wooden board for a nice look. Sprinkle some cinnamon and extra nuts on top for charm. Serving Suggestions Serve slices warm with cream cheese or butter. A small dish of honey can also be a sweet touch. This makes your pumpkin bread a delightful treat! {{image_4}} Gluten-Free Options If you need a gluten-free version, use a gluten-free flour blend. Make sure it contains xanthan gum, as this helps bind the ingredients. This swap keeps the bread moist and tasty. Vegan Substitutions For a vegan twist, replace the eggs with flax eggs. Mix one tablespoon of flaxseed meal with three tablespoons of water. Let it sit for five minutes to thicken. You can also swap vegetable oil with coconut oil or applesauce for extra flavor. Different Nut Choices While walnuts and pecans are great, try using almonds or hazelnuts instead. These nuts add a unique crunch and flavor. Chop them finely to blend them well in the batter. Incorporating Dried Fruits Dried fruits like cranberries or raisins can add sweetness and texture. Stir in about half a cup before pouring the batter into the pan. This addition brightens up each bite and makes it even more delightful. Cream Cheese Frosting A thin layer of cream cheese frosting can elevate your pumpkin bread. Mix cream cheese, powdered sugar, and a splash of vanilla extract. Spread it on top once the bread cools for a creamy finish. Additional Spices or Extracts You can customize the flavor with spices like allspice or cardamom. A teaspoon of maple extract adds a sweet touch. Experiment with these flavors for a personal touch. To keep your streusel pumpkin bread fresh, follow these steps: - Cool Completely: Let the bread cool on a wire rack first. - Wrap It Up: Use plastic wrap or foil to cover the bread tightly. - Store in a Cool Place: Keep it in a cool, dry area for up to 3 days. - Use an Airtight Container: For better freshness, place it in an airtight container. This method helps keep the bread moist and tasty. If you want to save your pumpkin bread for later, freezing works well. Here’s how to do it: - Cool Completely: Just like before, let the bread cool down first. - Slice It Up: Cut the bread into slices for easy thawing. - Wrap Each Slice: Use plastic wrap to wrap each piece tightly. - Use a Freezer Bag: Place the wrapped slices in a freezer bag. - Label and Date: Write the date on the bag to remember how long it’s been. Frozen pumpkin bread can last for about 3 months. Reheating your streusel pumpkin bread can bring back its warm, cozy flavor. Here’s how to do it right: - Use the Oven: Preheat your oven to 350°F (175°C). - Wrap in Foil: Wrap the bread in aluminum foil to keep it moist. - Heat for 10-15 Minutes: Place it in the oven until warmed through. - Microwave Option: If you’re in a hurry, microwave a slice for 15-20 seconds. These methods help keep the bread soft and delicious. To check if your bread is done, use a toothpick. Insert it into the center of the loaf. If it comes out clean or with a few moist crumbs, the bread is ready. This method is simple and effective. Baking times may vary, so keep an eye on it. Remember, overbaking will dry out your bread. Yes, you can make it ahead of time. Bake the bread and let it cool completely. Once cooled, wrap it tightly in plastic wrap or foil. Store it at room temperature for up to three days. For longer storage, place it in the fridge for up to a week. You can also freeze it for up to three months. Just remember to slice it before freezing for easy access. Absolutely! Fresh pumpkin works great in this recipe. Start with a small pumpkin and cut it in half. Remove the seeds and pulp, then roast it at 350°F (175°C) for about 45 minutes. Once soft, scoop out the flesh and puree it until smooth. Use this puree in place of the canned pumpkin. Fresh pumpkin may add a bit more flavor and texture. Streusel Pumpkin Bread pairs well with many things. Try serving it with cream cheese or butter for a rich taste. A hot cup of coffee or tea goes perfectly too. You can even add a sprinkle of cinnamon or some nuts on top for extra flair. For a fun twist, serve it with yogurt or a scoop of ice cream. The options are endless! This blog covered everything you need to know about making delicious streusel pumpkin bread. We explored each ingredient, from dry and wet components to the scrumptious streusel topping. You learned step-by-step instructions for mixing and baking, plus tips to enhance flavor and perfect texture. Variations for dietary needs and storage advice complete the guide. Now, you can confidently bake and enjoy this treat any time. Mix, bake, and savor every bite of your pumpkin bread!
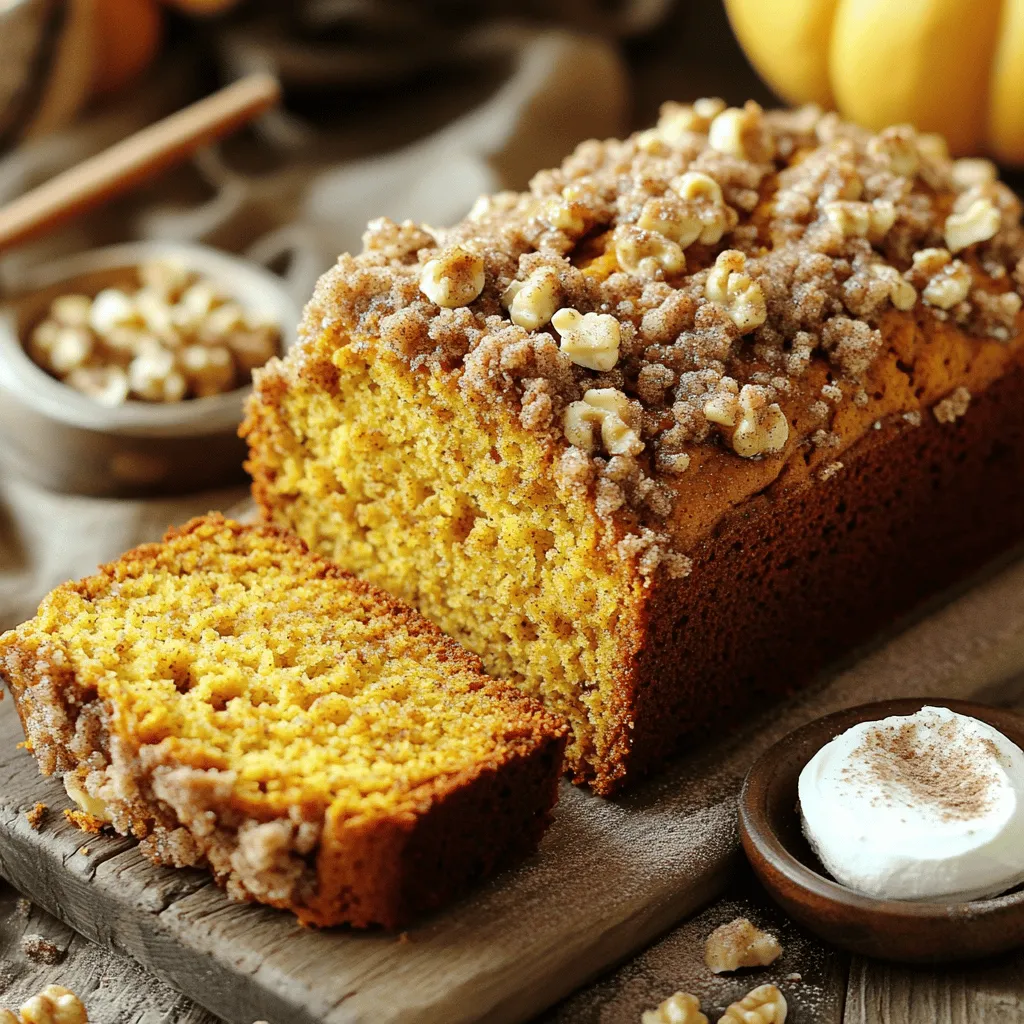
Streusel Pumpkin Bread Delightful and Easy Recipe
Fall is here, and it’s time for something special: Streusel Pumpkin Bread! This easy recipe combines warm spices and sweet pumpkin, topped with a crunchy
The main ingredients in this healthy pumpkin bread are simple and nutritious: - 1 cup pumpkin puree - 2 large eggs - Natural sweeteners: honey or pure maple syrup - Coconut oil for moisture Pumpkin puree gives this bread its rich flavor and bright color. You can use fresh pumpkin or canned puree. Both work well! The eggs help bind the bread and add protein. Honey or maple syrup provide sweetness without refined sugar. Coconut oil keeps the bread moist and adds a nice texture. Choosing the right flour can boost the bread's nutrition. Here are two great options: - Whole wheat flour benefits: Whole wheat flour adds fiber and nutrients. It helps keep you full longer. - Almond flour for added nutrition: Almond flour is lower in carbs. It also adds healthy fats and protein. Mixing whole wheat flour with almond flour gives a great balance of taste and nutrition. Spices enhance the flavor and aroma of your pumpkin bread. Here are some key spices: - Importance of cinnamon, nutmeg, and ginger: These spices add warmth and depth. They make the bread smell wonderful while it bakes. - Reducing added sugars with spices: Using spices means you can use less sweetener. The flavors from the spices help satisfy your sweet tooth. Adding these spices makes your pumpkin bread not just tasty, but also comforting! First, preheat your oven to 350°F (175°C). This step is key for even baking. Next, prepare your loaf pan. You can grease it lightly with coconut oil or line it with parchment paper. This makes it easier to remove the bread after baking. In a large bowl, combine 1 cup of pumpkin puree, 2 large eggs, and 1/3 cup of honey or maple syrup. Add 1/4 cup of melted coconut oil and 1 teaspoon of vanilla extract. Whisk these ingredients until smooth. This mixing is important. It helps blend the flavors and create a nice texture. In a separate bowl, sift together 1 cup of whole wheat flour, 1/2 cup of almond flour, 1 teaspoon of baking soda, and 1 teaspoon of baking powder. Add 1 teaspoon of ground cinnamon, 1/2 teaspoon of nutmeg, 1/4 teaspoon of ginger, and 1/4 teaspoon of sea salt. Sifting removes lumps and helps mix the dry ingredients well. Gradually add this mix to the wet ingredients, stirring gently until just combined. It’s okay to have a few lumps. Overmixing can make the bread tough. Pour the batter into the prepared loaf pan. Use a spatula to spread and smooth the top. Bake in the preheated oven for 50-60 minutes. Check for doneness by inserting a toothpick into the center. If it comes out clean, your bread is ready. If the top browns too quickly, cover it loosely with foil. After baking, let the bread cool in the pan for about 10 minutes. Then, remove it from the pan and transfer it to a wire rack to cool completely. To keep your pumpkin bread moist, avoid overmixing the batter. Overmixing can lead to a tough texture. You want to mix just until the dry and wet ingredients blend together. A few lumps are okay. Coconut oil is key in this recipe. It adds moisture and richness. As it melts, it helps create a soft crumb. Using melted coconut oil also keeps your bread from drying out. For the perfect texture, mix gently. Use a spatula to fold in the dry ingredients. This helps keep the air in the batter. A light touch is best. Combining different flours gives a nice texture. Whole wheat flour adds fiber. Almond flour brings a nutty taste and moisture. Together, they create a lovely crumb. You can boost flavor and nutrition by adding optional ingredients. Nuts like walnuts or pecans add crunch and healthy fats. Chocolate chips or raisins bring sweetness. Feel free to mix and match! Spices make a big difference too. Cinnamon, nutmeg, and ginger add warmth and depth. They help reduce added sugars. Using spices makes your pumpkin bread even more delicious. {{image_4}} If you want a nut-free pumpkin bread, you can simply leave out the nuts. Instead, you can use seeds like sunflower or pumpkin seeds for crunch. These seeds add great texture and are perfect for those with nut allergies. They also bring healthy fats and protein to your bread. If you want to cut back on sugar, consider using applesauce or mashed bananas. These fruits can sweeten the bread naturally while keeping it moist. You can also use stevia or monk fruit sweetener if you prefer low-calorie options. Just remember to adjust the amount to taste, as these sweeteners can be much sweeter than honey or maple syrup. To make your pumpkin bread even more special, think about adding spices. A pinch of allspice or a dash of cloves can give your bread a warm, cozy flavor. You can also mix in dried fruits like cranberries or raisins for a sweet surprise. For a fun twist, add some dark chocolate chips or even coconut flakes. These mix-ins can elevate your bread from good to great! To keep your healthy pumpkin bread fresh, store it in a cool, dry place. If you plan to eat it within a few days, room temperature storage works well. Just place it in an airtight container or wrap it in plastic wrap. This will help keep moisture in and prevent it from drying out. If you want to save some for later, refrigeration is great but can change the texture. It might become a bit dense. If you do chill it, wrap it tightly to keep it fresh. To freeze pumpkin bread, first let it cool completely. Then, slice the bread into pieces for easy thawing. Wrap each slice tightly in plastic wrap. You can also use aluminum foil for extra protection. Place the wrapped slices in a freezer bag. Be sure to remove as much air as possible before sealing it. To thaw, take out a slice and let it sit at room temperature for about 30 minutes. If you want, you can warm it up in the toaster or microwave. Enjoy it with a pat of butter or a drizzle of honey for a tasty treat! Yes, you can use fresh pumpkin. Fresh pumpkin puree gives a richer taste. It also has more nutrients than canned. To make fresh puree, roast a pumpkin. Cut it in half, remove seeds, and bake it until soft. Then, scoop out the flesh and blend it until smooth. This process enhances the flavor in your pumpkin bread. To make this pumpkin bread gluten-free, swap the whole wheat flour. Use almond flour or a gluten-free blend instead. Almond flour adds a nice flavor and keeps it moist. A mix of gluten-free flours can also work well. Just ensure they are finely ground for the best texture. If your bread is dense, try a few tricks. First, check your flour measurement. Too much flour can make it heavy. Next, be gentle when mixing. Overmixing can lead to a tough texture. Lastly, consider adding an extra egg. This can help lighten the bread and improve its rise. In this article, we explored how to make healthy pumpkin bread using simple ingredients like pumpkin puree, eggs, and natural sweeteners. We discussed the best flour options and essential spices that enhance flavor. You learned step-by-step instructions, helpful tips to achieve the right texture, and variations for dietary needs. Remember to store your bread properly to keep it fresh. Creating this tasty treat is easy and rewarding. Enjoy experimenting with flavors and make it your own!
Healthy Pumpkin Bread Simple and Delicious Recipe
Are you craving a warm, comforting slice of pumpkin bread without the guilt? You’re in the right place! This healthy pumpkin bread recipe combines simple
- 1 ½ cups all-purpose flour - 1 teaspoon baking powder - ½ teaspoon baking soda - ½ teaspoon salt - ½ cup unsalted butter, melted - 1 cup packed light brown sugar - ½ cup granulated sugar - 2 large eggs - 1 teaspoon pure vanilla extract - 1 ½ cups fresh diced apples (preferably Granny Smith for tartness) - ½ cup caramel sauce (store-bought or homemade) - ½ teaspoon ground cinnamon (optional, but recommended for warmth) - Chopped pecans or walnuts for topping (optional) I love using fresh apples in this recipe. Granny Smith apples offer a bright tart flavor. They balance perfectly with the sweetness of the sugars and caramel. You can use any apples you like, but Granny Smith is my go-to choice. The flour, baking powder, baking soda, and salt form the base of the blondies. The butter adds richness, while the sugars make them sweet and chewy. Eggs and vanilla bind everything together, adding flavor and texture. Caramel sauce adds a sweet layer, enhancing the apple flavor. Ground cinnamon warms the dish and makes it feel cozy. If you like crunch, sprinkle chopped pecans or walnuts on top. They pair well with the soft blondies and add texture. Gather these ingredients, and you will create a delightful dessert that is simple yet impressive! Start by preheating your oven to 350°F (175°C). This temperature helps the blondies bake evenly. Next, grab a 9x9 inch baking pan. Grease it well with butter or line it with parchment paper. This step makes it easy to remove the blondies later. In a medium mixing bowl, add 1 ½ cups of all-purpose flour, 1 teaspoon of baking powder, ½ teaspoon of baking soda, ½ teaspoon of salt, and ½ teaspoon of ground cinnamon if you like. Whisk these dry ingredients together until they blend well. Set this mixture aside for later. Take a large mixing bowl and pour in ½ cup of melted unsalted butter. Add 1 cup of packed light brown sugar and ½ cup of granulated sugar. Stir these together until they look creamy and smooth. Make sure there are no lumps. Crack 2 large eggs into the bowl, one at a time. Mix well after each egg to keep it smooth. Then, add 1 teaspoon of pure vanilla extract and stir until everything mixes well. Now, take the bowl with dry ingredients. Gradually add it to the wet mixture. Stir gently until just combined. Be careful not to overmix; a few lumps in the batter are okay. This keeps the blondies soft. Take 1 ½ cups of fresh diced apples and fold them into the batter. You can use Granny Smith apples for a nice tartness. Next, add ½ cup of caramel sauce, folding it in evenly. This adds a sweet touch to your blondies. Pour the batter into the prepared baking pan. Use a spatula to smooth the top. Drizzle the remaining caramel sauce over the batter. If you want, sprinkle some chopped pecans or walnuts on top for extra crunch. Place the pan in the preheated oven. Bake for 25–30 minutes. To check if they are done, insert a toothpick into the center. If it comes out clean or with a few moist crumbs, your blondies are ready! Let the blondies cool in the pan for about 15 minutes. After that, transfer them to a wire rack to cool completely. Once cooled, cut them into squares. For a delightful treat, serve them warm with a scoop of vanilla ice cream on top. Drizzle with extra caramel sauce for a sweet finish. Enjoy! To get a gooey texture, you need to watch your mixing. Mix the wet and dry ingredients just until they combine. A few lumps are fine! Overmixing can make your blondies tough. You want them soft and chewy. Blondies taste great with ice cream or whipped cream. A scoop of vanilla ice cream on top makes them even better! Drizzle with extra caramel sauce for a sweet finish. For a nice look, serve them warm on a plate. Add chopped nuts on top for extra crunch. To keep blondies fresh, store them in an airtight container. You can leave them at room temperature for a few days. For longer storage, put them in the fridge. Just make sure they are cooled first. If you want to freeze them, wrap each piece in plastic wrap. Enjoy them later for a quick treat! {{image_4}} You can make your apple blondies more exciting by adding spices. Try some nutmeg or cardamom for a warm twist. These spices will bring out the sweetness of the apples. You can also switch up the apples you use. Granny Smith apples give a nice tartness. However, sweeter apples like Fuji or Honeycrisp can add a different flavor profile. Get creative with your toppings! You can add chocolate chips for a sweet surprise. Coconut flakes can add a chewy texture. If you like nuts, try mixing pecans with walnuts for crunch. Each topping adds a unique flavor, making your blondies even more special. Want to make these blondies gluten-free? No problem! You can use almond flour or oat flour instead of all-purpose flour. These options will keep the texture nice and fluffy. Just ensure you adjust the amount of flour to get the right consistency. To store your apple blondies, let them cool completely. You can keep them at room temperature for up to three days. Just place them in an airtight container. If you prefer, store them in the refrigerator. This will keep them fresh for about a week. Just make sure they are covered to avoid drying out. If you want to enjoy these blondies later, freezing is a great option. First, cut them into squares and wrap each piece in plastic wrap. Then, place them in a freezer-safe bag or container. This will keep them fresh for up to three months. When you're ready to eat them, take out the blondies and let them thaw in the fridge overnight. You can also warm them in the microwave for a few seconds. This way, you’ll have a cozy treat ready whenever you want! To check if your apple blondies are done, use a toothpick. Stick it in the center of the blondies. If it comes out clean or with a few moist crumbs, they are ready to take out. If the toothpick is covered in batter, bake them a bit longer. This test is quick and easy. It helps ensure you get the right texture. Yes, you can use different types of apples. Granny Smith apples are great for a tart flavor. Honeycrisp apples add sweetness and crunch. Fuji apples are also sweet and juicy. Each type of apple will change the taste a bit. Feel free to mix apples for a unique flavor blend. If you want to switch up the flavor, try different toppings. You can use chocolate sauce or a rich butterscotch sauce. A fruit compote can also add a nice twist. You can even leave it out and add extra spices for flavor. These options will give your blondies a fun new taste. Apple blondies last about 3 to 4 days at room temperature. Keep them in an airtight container to keep them fresh. If you store them in the fridge, they can last up to a week. For longer storage, freeze them. They can last up to three months in the freezer. Just thaw them overnight before enjoying! This guide takes you through making delicious apple blondies step by step. You learned about essential ingredients, from flour and butter to fresh apples. We covered each mixing stage and baking tips for a perfect texture. Remember, don’t overmix the batter to keep them gooey. You can add your favorite flavors or nuts for a twist. Finally, store leftovers properly to enjoy them later. Happy baking! Enjoy these treats with friends or on your own.
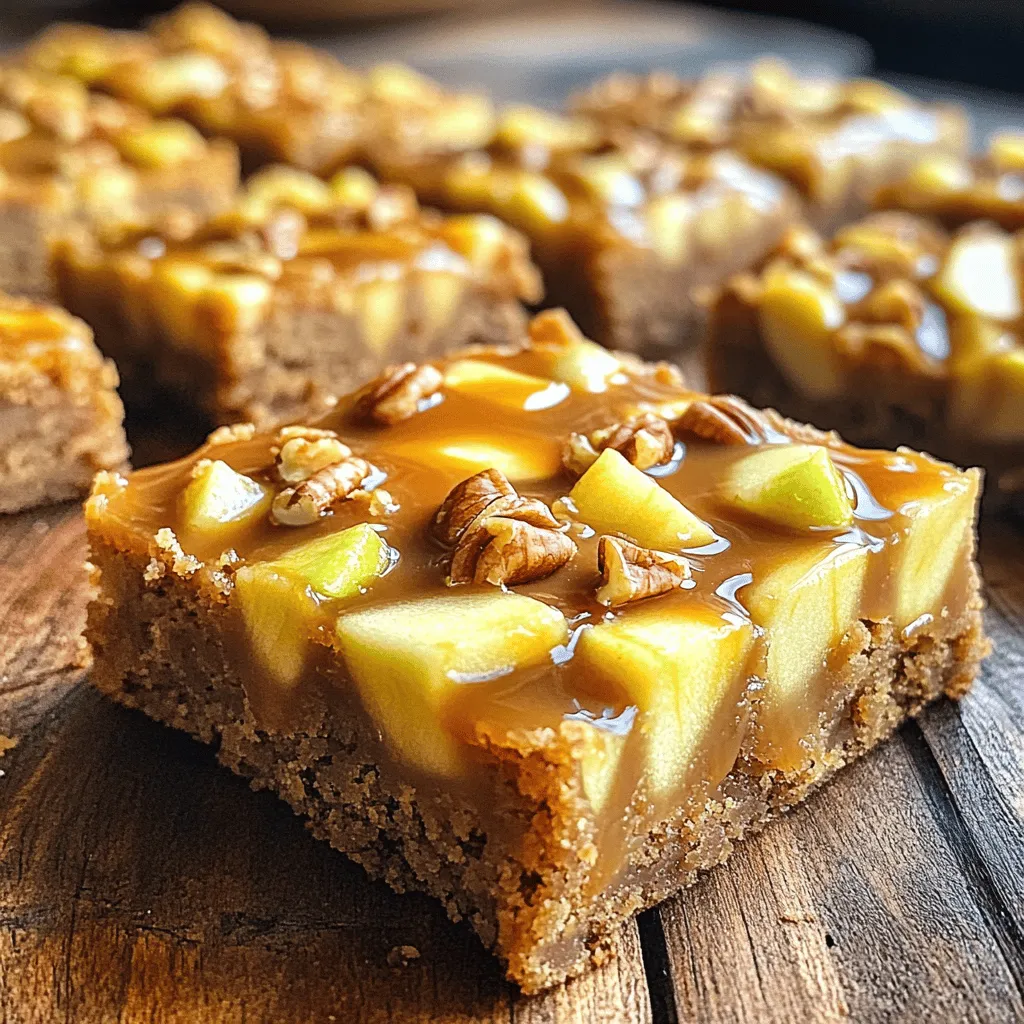
Apple Blondies Delightful and Simple Dessert Recipe
Craving a simple dessert that’s bursting with flavor? Look no further than these delightful Apple Blondies! This easy recipe combines fresh apples, caramel, and just
The right ingredients make these muffins shine. Let’s break them down into dry, wet, and cream cheese swirl ingredients. - 1 ½ cups all-purpose flour - ½ cup granulated sugar - ½ cup packed brown sugar - 1 teaspoon baking soda - 1 teaspoon baking powder - ½ teaspoon salt - 1 teaspoon ground cinnamon - ½ teaspoon ground nutmeg - ½ teaspoon ground ginger These dry ingredients form the base of your muffins. The flour gives structure, while sugars add sweetness. Baking soda and baking powder are your leavening agents, helping the muffins rise. Cinnamon, nutmeg, and ginger add warmth and spice, making your kitchen smell amazing. - 1 cup canned pumpkin puree - 2 large eggs, at room temperature - ½ cup vegetable oil - 1 teaspoon vanilla extract Pumpkin puree is the star of the show, giving moisture and flavor. The eggs help bind everything together. Vegetable oil keeps the muffins soft, and vanilla adds a lovely aroma. - 8 oz cream cheese, softened to room temperature - ¼ cup powdered sugar - 1 teaspoon vanilla extract This swirl adds richness and creaminess. Mixing in powdered sugar sweetens the cream cheese, making it a delightful contrast to the spiced muffin batter. The vanilla enhances the overall flavor, creating a perfect harmony. These ingredients blend to create a cozy treat you’ll want to share. - Preheat the oven to 350°F (175°C). This step is key for even baking. - Line your muffin tin with paper liners. This helps with easy removal and cleanup. - In a large mixing bowl, combine 1 ½ cups all-purpose flour, ½ cup granulated sugar, ½ cup brown sugar, 1 teaspoon baking soda, 1 teaspoon baking powder, ½ teaspoon salt, 1 teaspoon cinnamon, ½ teaspoon nutmeg, and ½ teaspoon ginger. - Whisk these dry ingredients thoroughly. This ensures that your spices and leavening agents mix well. - In a separate bowl, blend 1 cup pumpkin puree, 2 large eggs, ½ cup vegetable oil, and 1 teaspoon vanilla extract. Mix until smooth. - Pour the wet mixture into the dry ingredients. Mix gently with a spatula or wooden spoon. - Avoid overmixing! A few lumps are okay, as this keeps your muffins light. - In another bowl, beat 8 oz softened cream cheese with ¼ cup powdered sugar and 1 teaspoon vanilla extract. Mix until it's smooth and creamy. - Spoon about 2 tablespoons of muffin batter into each lined muffin cup. - Add 1 tablespoon of cream cheese mixture on top, then finish with another tablespoon of muffin batter. - Use a toothpick to gently swirl the cream cheese into the muffin batter. This creates a nice marbled look. - Bake the muffins for 18-20 minutes. - Check for doneness by inserting a toothpick into the center. It should come out clean or with a few moist crumbs. - Let the muffins cool in the pan for about 5 minutes. Then, transfer them to a wire rack to cool completely. This helps set their texture nicely. Using room temperature ingredients is key. It helps the batter mix well. Cold eggs and cream cheese can cause lumps. Let these sit out for about 30 minutes before you start. Avoid overmixing your batter. When you mix too much, muffins can turn dense. Stir just until the dry and wet ingredients combine. A few lumps are okay; they will bake out. You can add spices for an extra flavor boost. Try a pinch of cloves or allspice. You could also mix in chopped nuts or chocolate chips for a fun twist. For toppings, consider a light glaze. A simple mix of powdered sugar and milk works well. You can also sprinkle some cinnamon sugar on top before baking. Once cooled, dust the muffins lightly with powdered sugar. This adds a nice touch and looks great. Serve them on a pretty platter. Pair these muffins with hot coffee or tea for a cozy treat. You could even add a side of cream cheese frosting for extra yum! {{image_4}} You can make these muffins even better for you. Try using whole wheat flour instead of all-purpose flour. Whole wheat flour adds fiber and nutrients. It gives the muffins a hearty taste. For sweeteners, consider using honey or maple syrup. These natural sweeteners give a unique flavor. They also can be less processed than regular sugar. Want to change things up? Add chocolate chips or nuts to the batter. Chocolate chips bring a sweet surprise. Nuts add crunch and a nutty flavor. You can also switch your spices. Use pumpkin spice for a classic taste. Or try other spices like cloves for a new twist. Incorporating seasonal fruits makes the muffins special. Add cranberries for a tart burst. Apples add sweetness and a nice texture. You can adjust these muffins for holidays too. For Halloween, add spooky sprinkles. For Thanksgiving, use nutmeg and cinnamon for more fall flavors. To keep your muffins fresh, store them in an airtight container. This helps to prevent them from drying out. You can use a plastic container or a resealable bag. If they sit out, eat them within two days. For longer storage, consider freezing. Freezing muffins is simple. First, let them cool completely. Then, wrap each muffin tightly in plastic wrap and place them in a freezer bag. This keeps them fresh for up to three months. When you want to enjoy them, just take one out and let it thaw at room temperature or microwave it for a few seconds. To reheat muffins, use your oven or microwave. For the oven, set it to 350°F (175°C) and place the muffin inside for about 5-10 minutes. This helps keep the texture soft. If using a microwave, heat each muffin for 10-15 seconds. Be careful not to overheat, as this can dry them out. Yes, you can use fresh pumpkin. Just cook and puree the pumpkin first. Make sure it’s smooth, like canned puree. This will give your muffins a fresh taste. If you need a substitute, try Greek yogurt or ricotta cheese. Both will add creaminess. You can also use vegan cream cheese for a dairy-free option. These muffins stay fresh for about three days at room temperature. Store them in an airtight container. You can also keep them in the fridge for up to a week. Yes, you can make these muffins gluten-free. Use a gluten-free flour blend. Ensure it has a good binding agent, like xanthan gum, to keep the muffins fluffy. For dairy-free muffins, use a plant-based cream cheese. Substitute regular milk with almond milk or oat milk. These swaps will keep the muffins moist and tasty. To check if the muffins are done, insert a toothpick in the center. It should come out clean or have a few moist crumbs. If it’s wet, bake for another minute or two. These pumpkin muffins are a tasty treat, packed with flavor and comfort. You learned about the ingredients, how to mix them, and bake them to perfection. I shared tips for texture and flavor, plus fun variations to try. Don’t forget to store or freeze your muffins properly to keep them fresh. Enjoy making these muffins for yourself or to share with others! Happy baking!
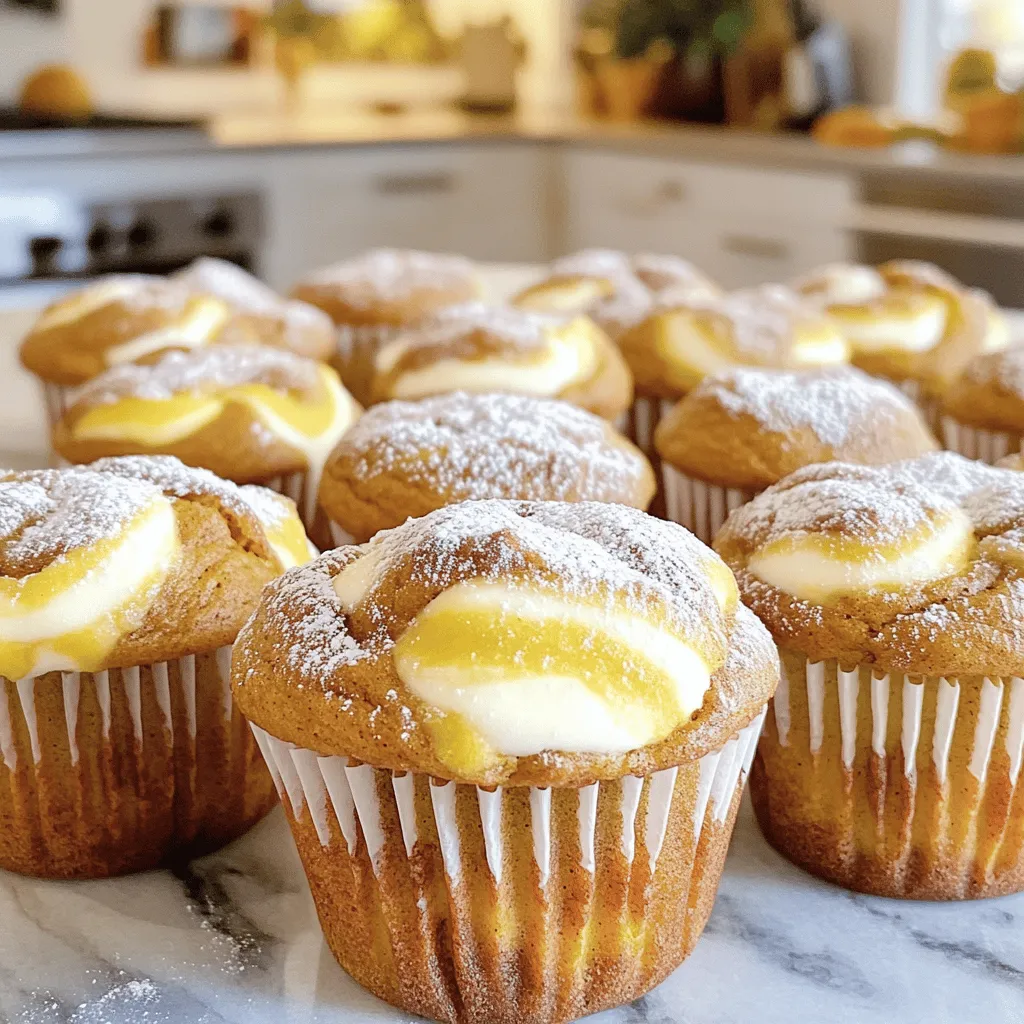
Pumpkin Cream Cheese Swirl Muffins Deliciously Easy
If you love the taste of fall, you’ll adore these Pumpkin Cream Cheese Swirl Muffins! They are warm, soft, and packed with pumpkin spice flavor.
Here is a list of the main ingredients you will need to make perfect pumpkin muffins: - 1 cup canned pumpkin puree - 1/2 cup neutral vegetable oil (like canola or sunflower) - 1/2 cup packed brown sugar - 1/2 cup granulated sugar - 2 large eggs, at room temperature - 1 1/2 cups all-purpose flour - 1 teaspoon baking soda - 1/2 teaspoon baking powder - 1 teaspoon ground cinnamon - 1/2 teaspoon ground nutmeg - 1/4 teaspoon ground ginger - 1/4 teaspoon salt - 1/2 cup chopped walnuts or pecans (optional) - 1/2 cup mini chocolate chips (optional) Canned pumpkin puree gives the muffins a smooth texture. It also adds moisture and flavor. Vegetable oil helps keep them soft. Mixing brown and granulated sugar gives a nice sweetness. Using room temperature eggs helps the muffins rise well. All-purpose flour acts as the base of the batter. Baking soda and baking powder are key for leavening. Ground spices like cinnamon, nutmeg, and ginger bring warmth and richness. Salt balances the sweetness and enhances flavors. If you want extra crunch or sweetness, add walnuts, pecans, or chocolate chips. These optional ingredients make your muffins even more delightful. - Preheat oven to 350°F (175°C). - Prepare muffin tin with liners or cooking spray. In a large bowl, combine the pumpkin puree, vegetable oil, brown sugar, granulated sugar, and eggs. Whisk until smooth and creamy. This gives your muffins a rich flavor and a moist texture. In another bowl, sift together the all-purpose flour, baking soda, baking powder, ground cinnamon, ground nutmeg, ground ginger, and salt. Sifting helps mix the dry ingredients evenly. This ensures each bite bursts with flavor. Gently fold the dry ingredients into the wet mix. Use a spatula and stir just until combined. It's okay to have small lumps. Overmixing can lead to tough muffins, and we want them light and fluffy. If you like, incorporate chopped walnuts, pecans, or mini chocolate chips into the batter. These add texture and flavor. Make sure they are evenly mixed in for a delightful surprise in every bite. Divide the batter evenly among the muffin cups. Fill each cup about three-quarters full. This gives your muffins room to rise. Bake in the preheated oven for 18-20 minutes. To test for doneness, insert a toothpick into the center of a muffin. If it comes out clean, they are ready. Once baked, let the muffins cool in the tin for about 5 minutes. Then, transfer them to a wire rack to cool completely. Enjoy the warm, cozy flavors of fall! To get soft and fluffy muffins, avoid overmixing the batter. When you mix too much, it makes the muffins tough. Stir just until the dry ingredients blend with the wet ones. Remember, some lumps are okay! Using room temperature eggs is also key. Eggs that are warm mix better and help the muffins rise well. You can make your pumpkin muffins even tastier by adjusting the spices. Try adding more cinnamon or nutmeg if you love those flavors. A splash of vanilla extract can also boost the taste. This small change can make a big difference in flavor. For a lovely finish, sprinkle a mix of cinnamon and sugar on top before baking. This will give your muffins a sweet crust. You can also serve them warm with cream cheese frosting or a little butter. This makes each bite feel extra special! {{image_4}} To make gluten-free pumpkin muffins, simply swap all-purpose flour with a gluten-free flour blend. Many brands offer blends that work well in baking. Look for one that includes xanthan gum for better texture. This change keeps your muffins soft and moist. You won’t lose any of the great taste! For vegan pumpkin muffins, replace eggs with flaxseed meal or applesauce. To use flaxseed meal, mix one tablespoon with three tablespoons of water. Let it sit for a few minutes until it thickens. Applesauce is another great choice. Use 1/4 cup per egg. Both options will keep your muffins light and fluffy without eggs. Want to jazz up your muffins? Add cranberries or orange zest for a fruity lift. Dried cranberries give a sweet and tart flavor that pairs well with pumpkin. Just fold in half a cup into the batter. Adding the zest of one orange brings brightness and freshness. These small changes make your muffins even more special! To keep your pumpkin muffins fresh, store them in an airtight container. This helps prevent them from drying out. If you have leftover muffins, place them in the container at room temperature. They stay good for about three days. For longer storage, move them to the fridge. They can last about a week in there. Just be sure to wrap them well to avoid moisture. Freezing muffins is a great way to save them for later. To freeze, let the muffins cool completely. Then, wrap each one in plastic wrap. After that, place the wrapped muffins in a freezer bag. Remove as much air as you can before sealing. Your muffins can stay frozen for up to three months. When you're ready to eat them, just take out how many you want. To reheat your muffins, you can use the oven or microwave. For the oven, preheat it to 350°F (175°C). Place the muffins on a baking sheet and heat for about 5 to 10 minutes. This restores their warm, fresh taste. If you use a microwave, heat one muffin at a time for about 15 to 20 seconds. Make sure to check that it’s warm throughout. Enjoy your muffins like they are fresh out of the oven! Pumpkin muffins are great for a few days. At room temperature, they last about 2-3 days. Keep them in an airtight container to stay fresh. If you store them in the fridge, they can last up to a week. Just remember, they may dry out a bit in the fridge. Yes, you can use fresh pumpkin. Start by cooking the pumpkin until tender. Then, mash it to make a smooth puree. This gives you the same great flavor as canned. Just make sure to measure it correctly. You need 1 cup of fresh puree for the recipe. It may take a bit of time, but the taste is worth it! Dense muffins can be a bummer. This often happens if you overmix the batter. Mixing too much adds too much air and makes them heavy. Another reason could be using too much flour. Always measure your flour correctly. Lastly, check your baking soda and powder. If they are old, they may not work well. You now have a simple way to make delicious pumpkin muffins. We covered all the ingredients, methods, and tips for success. You learned how to mix wet and dry ingredients and bake them perfectly. Remember to experiment with flavors and toppings. Whether you choose gluten-free or vegan options, the possibilities are endless. Store your muffins well for lasting freshness. With these steps, anyone can make tasty muffins easily. Enjoy sharing your tasty treats with friends and family!
Perfect Pumpkin Muffins Irresistible Fall Treat
Are you ready to bake the perfect pumpkin muffins this fall? These tasty treats are packed with warm spices and a rich pumpkin flavor that