Breakfast

- 6 slices of your choice of bread (white or whole grain) - 3 large eggs - 1/4 cup milk (or your preferred non-dairy alternative) - 1 teaspoon vanilla extract - 1 teaspoon ground cinnamon (plus additional for coating) To create these roll-ups, you need the right bread. White bread is soft and absorbs flavors well. Whole grain offers a nutty taste and adds some texture. Both options work great. Eggs and milk form the base of the custard. They help bind everything together and add richness. You can use non-dairy milk if you prefer. The vanilla extract adds a warm, sweet note. Ground cinnamon makes the roll-ups taste like a cozy treat. - Nutella or cream cheese - Fresh berries (e.g., strawberries, blueberries, or raspberries) Feel free to get creative with the fillings. Nutella brings a sweet, chocolatey twist. Cream cheese offers a rich and creamy contrast. You can also skip the filling if you want a simpler version. Fresh berries make a lovely side, adding color and freshness. They are perfect for balancing the sweetness of the roll-ups. - 1/2 cup granulated sugar - Additional ground cinnamon for enhanced flavor The cinnamon sugar coating is a crucial step. It adds a crunchy, sweet finish to your roll-ups. The sugar gives a delightful texture, while the extra cinnamon enhances the flavor. Mix them together in a bowl. Roll the warm roll-ups in this mixture right after cooking. This will make them extra special. For the full recipe, check the detailed instructions. To start, you need to flatten the bread slices. Use a rolling pin to gently press down on each slice. This step makes the bread easier to roll. If you want, you can trim the crusts. This gives you smooth edges for your roll-ups. Next, spread your filling on the bread. You can use Nutella or cream cheese for extra flavor. Spread it evenly on one side. Starting from one end, roll the bread tightly. Make sure it’s snug, but don't squeeze too hard. Now, let’s make the egg mixture. In a shallow bowl, whisk together the eggs, milk, vanilla extract, and ground cinnamon. Mix until smooth. This mixture will coat your roll-ups and give them a custard-like texture. In a large skillet, melt butter over medium heat. The butter should sizzle but not burn. Add 2-3 roll-ups to the skillet. Cook them for 2-3 minutes on each side until they turn golden brown. Remove them and repeat with the rest, adding more butter as needed. While the roll-ups are still warm, roll them in a cinnamon sugar mix. This adds a sweet crunch! Serve your roll-ups right away. You can add fresh berries like strawberries or blueberries on the side for a burst of color and flavor. For more detailed instructions, check the Full Recipe. To get the best French toast roll-ups, you need the right skillet heat. I find medium heat works well. It gives a nice golden color without burning. If your skillet is too hot, the outside cooks fast while the inside stays soggy. Always check if the butter is sizzling but not browning. This means it's ready for the roll-ups. Cook the roll-ups in small batches. I usually do two to three at a time. This helps keep the heat steady and prevents overcrowding. If they touch each other, they may not cook evenly. If you're looking for dairy-free options, almond or oat milk works great in this recipe. You can also use gluten-free bread if needed. Many types of bread will work, like brioche or sourdough. Each will bring its own flavor to the roll-ups. For fillings, think outside the box. Peanut butter, jam, or even fruit slices add a fun twist. You can also try flavored cream cheese for a different taste. Make your roll-ups look as good as they taste! Place them neatly on a plate, stacking them or arranging them in a fan shape. This adds a nice touch. Garnish with fresh berries or a sprinkle of powdered sugar for color. A drizzle of maple syrup on top makes it even more special. These simple ideas make your dish pop and invite everyone to dig in. For the full recipe, check out the details above! {{image_4}} You can make Cinnamon Sugar French Toast Roll-Ups even more fun! Try adding chocolate chips inside. Just sprinkle some on top of the spread before rolling. This makes each bite a sweet surprise. You can also use fresh fruit. Strawberries, blueberries, or bananas add a tasty twist. Slice the fruit thin and lay it on the spread for a fruity flavor burst. Want to change things up? You can create savory roll-ups too. Adding cheese makes them rich and creamy. Try using sharp cheddar or mozzarella. Ham also works well for a salty touch. For a unique flavor, mix in herbs. A little fresh basil or chives can really enhance the taste. You can save time by preparing ahead. Make the roll-ups and store them in the fridge until you are ready to cook. They keep well for a day. Freezing is also an option. Wrap the roll-ups in plastic wrap and place them in a freezer bag. This way, you can enjoy quick breakfasts later. Just thaw them overnight before cooking. For busy mornings, this is a huge help! To keep your roll-ups fresh in the fridge, place them in an airtight container. This helps prevent them from drying out. You can store them for up to three days. When you want to enjoy them, use a microwave to reheat. Heat for about 20-30 seconds. This warms them up without making them soggy. If you prefer a crisp texture, use a skillet instead. Heat a small amount of butter in the skillet and warm the roll-ups for a minute on each side. For long-term storage, you can freeze the leftovers. Place the cooled roll-ups in a single layer on a baking sheet. Freeze for about an hour until they are firm. Then, transfer them to a freezer bag, removing as much air as possible. You can keep them in the freezer for up to one month. When you're ready to eat, take out the roll-ups and let them thaw in the fridge overnight. To reheat, warm them in the oven at 350°F for about 10-15 minutes. This method keeps them nice and crisp. Enjoy your tasty roll-ups later! Yes, you can prepare these roll-ups in advance. Start by making the filling and rolling them up. Place them in the fridge for up to one day. When ready, dip them in the egg mixture and cook. This keeps the flavors fresh and saves time. If you need an egg substitute, try using flaxseed meal or chia seeds. Mix one tablespoon of flaxseed or chia seeds with three tablespoons of water. Let it sit for five minutes until it thickens. This gives a similar binding effect for your roll-ups. To stop sticking, use a non-stick skillet or add enough butter. Heat the skillet over medium-low heat. Make sure the butter melts and sizzles before adding the roll-ups. This helps create a barrier that stops them from sticking. Yes, baking is a great option! Preheat your oven to 375°F (190°C). Place the roll-ups on a baking sheet lined with parchment paper. Bake for 15-20 minutes, turning halfway through. This gives you a crispy outside without frying. Cinnamon Sugar French Toast Roll-Ups are a fun treat made from simple ingredients. We talked about the main items, like bread, eggs, and milk. You learned how to make, cook, and coat these roll-ups to perfection. Don’t forget the tasty fillings and the sweet cinnamon sugar coating! You can customize your roll-ups, too, with sweet or savory flavors. With a few tips on storage and prep, these roll-ups can be a quick breakfast idea. Enjoy making your own version and share it with family and friends. Happy cooking!
Cinnamon Sugar French Toast Roll-Ups Simple Delight
Welcome to a sweet delight that will transform your breakfast! Cinnamon Sugar French Toast Roll-Ups are a fun and tasty twist on a classic favorite.
- 4 cinnamon rolls (store-bought or homemade) - 2 large eggs - 1/2 cup whole milk - 1 tablespoon pure vanilla extract - 1 teaspoon ground cinnamon - 2 tablespoons unsalted butter - 1/4 cup powdered sugar (for dusting) - Maple syrup (for drizzling) - Fresh berries (optional, for garnish) To make the best Cinnamon Roll French Toast Bites, you need quality ingredients. The cinnamon rolls are the star here. You can choose store-bought for ease or make your own for a personal touch. The eggs and milk form a rich custard, while the vanilla and cinnamon add warmth and depth. You can easily swap ingredients to fit your needs. If you prefer homemade cinnamon rolls, go for it! If gluten is a concern, many brands offer gluten-free options. For the milk, almond milk or oat milk work well if you're looking for dairy-free choices. When sweetening, think about using honey or agave syrup instead of powdered sugar. These options can give you a tasty twist while still keeping it sweet. Exploring these options can make this dish work for anyone. Just remember, the core flavors should stay strong, so choose wisely for your swaps! To start, you need cinnamon rolls. You can use store-bought rolls or make your own. If you buy them, just follow the package instructions to bake. After baking, let them cool for a few minutes. This cooling step helps you cut the rolls into small pieces easily. If you make them at home, let them cool completely before cutting. This prevents mess and keeps your bites intact. Next, let's make the egg mixture. In a large bowl, whisk together two eggs, half a cup of whole milk, one tablespoon of pure vanilla extract, and one teaspoon of ground cinnamon. Mix until smooth and creamy. This creates a custard-like base. A smooth mixture is key to getting great flavor in every bite. Now, it’s time to coat the cinnamon roll pieces. Take your cooled pieces and dip each one into the egg mixture. Make sure to coat each piece evenly. Don’t soak them too long, or they will get too soggy. You want a nice layer without making them mushy. This ensures they fry up perfectly later. For cooking, heat a large skillet over medium heat. Add two tablespoons of unsalted butter and let it melt. You want the butter to bubble gently. This helps achieve a golden brown color on the bites. Place the coated cinnamon roll pieces in a single layer in the skillet. Don’t overcrowd the pan. Fry for about three to four minutes on each side. Look for a rich golden brown color and a crispy texture. Once cooked, remove the bites from the skillet and place them on a serving plate. While they are still warm, dust them with powdered sugar for a sweet finish. You can also drizzle them with maple syrup for added flavor. If you like, add a handful of fresh berries on top for a pop of color. These little touches make your dish look and taste even better. For the complete recipe, check out the [Full Recipe]. - Avoiding soggy bites: Dip each cinnamon roll piece lightly in the egg mixture. Make sure to coat it well but do not soak it. This keeps the bites from getting too wet. - Ensuring even cooking on both sides: Heat your skillet over medium heat. This way, the bites cook evenly. Flip them gently after about 3 to 4 minutes. Look for a golden brown color on each side. - Creative plating ideas: Use a large plate. Stack the cinnamon roll bites in a fun way. You can place some on their sides for a nice look. - Garnishing techniques for added appeal: Dust with powdered sugar right before serving. Add a few fresh berries on the side for color. A drizzle of maple syrup adds a sweet touch too. - Additional spices to consider: Try adding a pinch of nutmeg or cardamom to your egg mixture. These spices can give your bites a warm flavor. - Serving suggestions: Pair your bites with fresh fruit or yogurt. A cup of coffee or a glass of milk works great too. These drinks balance the sweetness of the bites. For the full recipe, check the [Full Recipe]. {{image_4}} You can make your cinnamon roll French toast bites even better with some fun flavors. Try adding chocolate chips or chopped nuts to the egg mixture. This adds crunch and sweetness. For seasonal flair, think about using pumpkin spice in the fall or apple cinnamon during cooler months. These flavors bring warmth and joy to your bites. If you follow a vegan diet, you can still enjoy these bites. Use egg substitutes like flaxseed meal or silken tofu, and choose plant-based milk like almond or oat milk. For those needing gluten-free options, look for gluten-free cinnamon rolls. Many brands offer tasty alternatives that work well in this recipe. Cinnamon roll French toast bites shine as both breakfast and dessert. Serve them warm in the morning or as a sweet treat later in the day. To enhance the dish, add a dollop of yogurt or a swirl of whipped cream on top. These additions elevate the bites, making them even more enjoyable. For a touch of sweetness, drizzle with maple syrup and enjoy! After enjoying your Cinnamon Roll French Toast Bites, store any leftovers in the fridge. Use an airtight container to keep them fresh. This helps prevent them from drying out. Make sure they cool down before sealing them in the container. They will stay good for about three days. To reheat the bites, use a skillet for the best results. Heat your skillet to medium heat, then add the bites. Heat them for about 2-3 minutes on each side. This keeps them crispy on the outside. You can also use an oven. Preheat it to 350°F and bake for 5-7 minutes. You can freeze the prepared bites if you have extras. Place them in a single layer on a baking sheet. Freeze them for about an hour until solid. Then, transfer them to a freezer-safe bag. They can last up to two months in the freezer. For thawing, leave them in the fridge overnight. Reheat as mentioned above for the best texture. Start with fresh cinnamon rolls. Bake them, then let them cool. Cut each roll into bite-sized pieces. In a bowl, mix eggs, milk, vanilla, and cinnamon. Dip each piece into this egg mixture. Heat butter in a skillet over medium heat. Fry the bites until golden brown. This gives them a nice crust. Dust with powdered sugar before serving. Drizzle with maple syrup for extra sweetness. Yes, you can prepare the bites ahead of time. Bake the cinnamon rolls and cut them into pieces. Make the egg mixture and dip the pieces. Store them in the fridge for a day. When ready, heat the skillet and cook. This tip saves time on busy mornings. Yes, these bites can freeze well. After cooking, let them cool completely. Place them in a single layer on a baking sheet. Freeze until solid, then transfer to a bag. They can last up to three months. To reheat, bake at 350°F for about 10 minutes. This keeps them warm and tasty. These bites pair well with fresh berries. Add strawberries or blueberries for flavor. You can also serve them with yogurt. A side of bacon adds a savory touch. For drinks, try coffee or a sweet chai tea. These choices make your meal more enjoyable. Cinnamon roll French toast bites are simple to make and delicious. We covered key ingredients, easy steps, and variations. You can swap ingredients to fit your needs. Remember cooking tips for the best texture and appearance. Enjoying these bites for breakfast or dessert adds fun to any meal. With tasty sauces and garnishes, your dish will impress. Try it with your favorite beverages as well. Now, you’re ready to create a delightful treat that everyone will love!
Cinnamon Roll French Toast Bites Delightful and Easy Treat
Are you ready for a cozy breakfast or snack that’s quick and easy? Cinnamon Roll French Toast Bites are the perfect twist on two beloved
To make these tasty roll-ups, you need a few key ingredients: - 8 slices of your favorite bread (white, whole grain, or brioche) - 4 cooked sausages (Italian or breakfast varieties, crumbled) - 4 large eggs - 1/2 cup milk (or a non-dairy alternative) - 1 teaspoon pure vanilla extract - 1 teaspoon ground cinnamon - 1/4 cup granulated sugar (optional, adjust according to your sweetness preference) - Butter or non-stick cooking spray for frying - Maple syrup or honey for drizzling - Powdered sugar for a finishing touch (optional) I recommend using quality ingredients for the best taste. For extra flavor, you can add a pinch of nutmeg to the egg mixture. A dash of salt can also enhance the overall taste. The type of bread you choose matters. Here are some tasty options: - White Bread: Soft and easy to roll. - Whole Grain Bread: Adds texture and a nutty flavor. - Brioche: Rich and buttery, perfect for a special treat. Brioche gives a sweet taste that pairs well with sausage. Whole grain adds a hearty touch. Choose what you love most! To make your roll-ups even better, consider these toppings: - Fresh fruit like strawberries or blueberries. - Flavored syrups such as chocolate or berry. For a side dish, crispy bacon or scrambled eggs works well. You can also serve these roll-ups with a fruit salad for a refreshing touch. Enjoy the fun of mixing and matching flavors! To start, you need to flatten the bread. Use a rolling pin to press each slice until it is about 1/4 inch thick. This makes it much easier to roll. When flattening, be gentle. You want to avoid tearing the bread. Flat bread holds the filling better and makes a nice roll-up. Next, it's time to add the sausage. Take a spoonful of crumbled sausage and place it in a line along one edge of the flattened bread. Roll the bread tightly around the sausage. Start from the edge where the sausage is. Use your fingers to hold the filling in place as you roll. If you need help, stick a toothpick in the ends to keep them closed. Now, let’s cook the roll-ups. Preheat a large skillet over medium heat. Add a little butter or spray the pan with cooking spray. Place the roll-ups seam side down in the skillet. Cook them for about 3-5 minutes. Watch for that golden-brown color. Turn the roll-ups to brown all sides evenly. This gives you that perfect crust. Once you master these steps, you will have a delicious treat! For more details, check the Full Recipe. When making Sausage French Toast Roll-Ups, watch out for a few common mistakes: - Not flattening the bread enough: If the bread isn't thin, it won't roll well. - Overfilling the roll-ups: Too much filling can make them hard to close. - Skipping the egg soak: This step adds flavor and keeps the roll-ups moist. If your roll-ups don’t hold together, try these fixes: - Use toothpicks: Secure the ends to keep them from unrolling. - Ensure the egg coating is complete: This helps the bread stick better. - Adjust cooking heat: If the heat is too high, the roll-ups might cook unevenly. To make your roll-ups even tastier, consider these flavor adjustments: - Add herbs: Fresh or dried herbs like thyme or parsley can enhance the flavor. - Mix in spices: A pinch of nutmeg or a dash of cayenne can add depth. - Incorporate cheese: Try adding shredded cheese inside for a creamy texture. - Add veggies: Finely chopped peppers or spinach can add color and nutrition. You can cook your roll-ups in different ways: - Frying: This method gives a crispy, golden crust. Use medium heat for best results. - Baking: Place roll-ups in a greased dish at 350°F for about 20 minutes. - Air-frying: Preheat your air fryer to 375°F and cook for 10-12 minutes. Frying gives a great texture, but baking or air-frying can be healthier options. Each method brings a unique flavor and texture to your roll-ups. {{image_4}} You can make sausage French toast roll-ups without meat. Try using mushrooms instead. They add a nice texture and flavor. Use crumbled vegan sausage for a meat-like taste. Here are some good options: - 8 slices of your favorite bread - 4 cooked vegan sausages, crumbled - 4 large eggs (or a flax egg for vegan) - 1/2 cup almond milk or other non-dairy milk - 1 teaspoon pure vanilla extract - 1 teaspoon ground cinnamon - 1/4 cup granulated sugar (optional) This way, you enjoy the same yummy flavors. You can also add fresh herbs like parsley or basil to boost the taste. Add fruit or sweet toppings to make your roll-ups even better. You can use fruits like strawberries, bananas, or blueberries. Drizzle honey or maple syrup for extra sweetness. Here’s how to modify the recipe: - Use sweet bread like challah or cinnamon swirl bread. - Fill with cream cheese and fruit for a sweet twist. - Top with whipped cream or powdered sugar for a special treat. These changes turn savory roll-ups into sweet delights. They’re perfect for breakfast or dessert. You can change your roll-ups based on the season or special events. For example, around holidays, add pumpkin spice to the egg mixture. Try using candy canes or peppermint for a festive touch. Here are some ideas: - Use fresh herbs and seasonal vegetables in spring. - For fall, add apple slices or caramel sauce. - Create a fun theme for brunch parties with colorful toppings. These creative twists make your roll-ups fit any occasion. Enjoy making them special! To keep your sausage French toast roll-ups fresh, store them in an airtight container. Refrigerate them within two hours of cooking. They will stay good for up to three days. If you want to freeze them, make sure they're fully cooled first. Wrap each roll-up in plastic wrap and place them in a freezer bag. This helps prevent freezer burn. When you want to reheat, use a skillet over low heat. This keeps the outside crispy while warming the inside. You can also use the microwave, but this may make them a bit soggy. If stored properly, the roll-ups can last three days in the fridge. Watch for signs of spoilage, like an off smell or unusual texture. If they look dry or discolored, it's best to toss them. Always trust your nose and eyes! To freeze roll-ups, prepare them as normal and let them cool completely. Wrap each one tightly in plastic wrap. Then, put them in a freezer-friendly bag. When you want to eat them, take them out of the freezer and let them thaw in the fridge overnight. For cooking from frozen, you can place them directly in a skillet. Cook on medium heat for about 10-12 minutes, turning occasionally. This will give you crispy, delicious roll-ups without losing any taste. For the full recipe, check the details above. For this recipe, I recommend using Italian or breakfast sausage. Both add great flavor. Italian sausage gives a nice spice kick, while breakfast sausage offers a mild taste. You can also use turkey or chicken sausage for a lighter option. Make sure the sausage is fully cooked and crumbled before adding it to the roll-ups. This way, you get a tasty filling with every bite. Yes, you can prepare these roll-ups in advance. You can roll them up and store them in the fridge for up to 24 hours. Just cover them tightly with plastic wrap or foil. When you're ready to cook, dip them in the egg mixture and fry them as usual. This saves time on busy mornings. You can also freeze the un-cooked roll-ups for later. Just thaw them overnight in the fridge before cooking. To make these roll-ups gluten-free, use gluten-free bread. Many stores sell good options now. You can also make your own gluten-free bread if you like. Just ensure the bread is thick enough to hold the filling. For flavor, you can add herbs or spices to the egg mixture. This will keep the taste rich. If you want a crispy texture, fry them until golden brown, just like the regular version. Sausage French Toast Roll-Ups are a fun and tasty dish to make. You can customize them with various ingredients and flavors. We covered essential ingredients, bread types, and delicious toppings to elevate the dish. I shared tips to avoid common mistakes, cooking methods, and a variety of ways to enjoy the roll-ups. Whether you want them vegetarian or sweet, the options are endless. Remember to store any leftovers properly to enjoy them later. With this guide, you can create amazing roll-ups that will impress everyone!
Sausage French Toast Roll-Ups Perfectly Delicious Treat
Sausage French Toast Roll-Ups are a fun and tasty twist on breakfast! Imagine crispy, flavorful sausage wrapped in sweet French toast. This treat is perfect
- 1 cup all-purpose flour - 2 tablespoons granulated sugar - 1 teaspoon baking powder - ½ teaspoon baking soda - ¼ teaspoon sea salt - 1 ripe banana, mashed until smooth - 1 cup buttermilk (or milk with lemon juice) - 1 large egg, at room temperature - 2 tablespoons unsalted butter, melted (plus additional for greasing the skillet) - ½ teaspoon pure vanilla extract - Optional toppings: sliced fresh bananas, pure maple syrup, fluffy whipped cream, and chopped nuts Gather the ingredients before you start. This makes cooking smooth and fun. The flour gives the pancakes structure. Sugar adds sweetness, while baking powder and baking soda help them rise. Sea salt brings out all the flavors. Use a ripe banana for a natural sweetness. If you don’t have buttermilk, mix regular milk with lemon juice. This gives you the same tangy taste. The egg binds everything together. Melted butter adds richness. Lastly, vanilla extract gives a warm, sweet aroma. Optional toppings like sliced bananas or maple syrup make your pancakes even better. You can get creative with nuts or whipped cream too. These ingredients work together to create a light, fluffy pancake that everyone will love. {{ingredient_image_2}} First, grab a large mixing bowl. In this bowl, mix the following dry ingredients: - 1 cup all-purpose flour - 2 tablespoons granulated sugar - 1 teaspoon baking powder - ½ teaspoon baking soda - ¼ teaspoon sea salt Whisk these ingredients well. You want them to blend evenly. This step is key for fluffy pancakes. Next, take a separate bowl for the wet ingredients. Combine these items: - 1 ripe banana, mashed until smooth - 1 cup buttermilk (or regular milk with 1 tablespoon lemon juice) - 1 large egg, at room temperature - 2 tablespoons unsalted butter, melted - ½ teaspoon pure vanilla extract Whisk until the mixture is smooth and creamy. This step adds great flavor and moisture. Now it’s time to mix the wet and dry ingredients. Gently pour the wet mixture into the dry bowl. Use a spatula or wooden spoon to stir. Mix just until combined. It’s okay if the batter is a bit lumpy. Overmixing can make the pancakes tough. Preheat your non-stick skillet or griddle over medium heat. Once it’s hot, lightly coat it with melted butter. For each pancake, pour about ¼ cup of batter onto the skillet. You can spread it gently to form a round shape. Cook for 2-3 minutes. Watch for bubbles on the surface. The edges should look set. Carefully flip the pancake using a spatula. Cook for another 1-2 minutes until golden brown. Once done, place cooked pancakes on a warm plate. Keep them warm while you cook the rest. To make your pancakes fluffy, avoid overmixing the batter. When you mix too much, you activate the gluten in the flour. This can make your pancakes tough instead of light. It’s okay if the batter is a bit lumpy. Just stir until you see no dry flour. Using room temperature ingredients also helps. When your egg and buttermilk are at room temperature, they blend better. This creates a smooth batter and helps your pancakes rise nicely. Adjusting the heat is key for perfect cooking. Start with medium heat. If the pancakes brown too fast, lower the heat. You want a nice golden color, not burnt. To keep pancakes warm, place them on a plate and cover with a clean kitchen towel. You can also put them in a low-temperature oven. This way, they stay warm while you cook the rest. Enjoy them fresh and fluffy! Pro Tips Use Overripe Bananas: The riper the bananas, the sweeter and more flavorful your pancakes will be. Look for bananas with brown spots for the best results. Don't Overmix the Batter: To achieve fluffy pancakes, mix the batter just until combined. It's okay if there are a few lumps; overmixing can lead to dense pancakes. Keep the Skillet at the Right Temperature: If the skillet is too hot, pancakes will burn on the outside while remaining raw on the inside. Medium heat is ideal for even cooking. Experiment with Flavors: Add a pinch of cinnamon or nutmeg to the batter for extra flavor. You can also mix in chocolate chips or blueberries for a delicious twist. {{image_4}} You can make fluffy banana pancakes even better! Here are two tasty ways: - Adding chocolate chips: Mix in ½ cup of chocolate chips to the batter. This creates sweet bursts of flavor in your pancakes. - Using different fruits: Try berries or diced apples instead of bananas. Each fruit adds a unique taste and a fun twist. Want to change the recipe for dietary needs? Here are some easy swaps: - Gluten-free alternatives: Use a gluten-free flour blend instead of all-purpose flour. This makes the pancakes safe for those with gluten issues. - Vegan substitutions: Replace the egg with ¼ cup of applesauce. Use almond milk or oat milk in place of buttermilk. These swaps keep the pancakes delicious and vegan-friendly. Feel free to experiment! These variations can help you create a new favorite. Enjoy your cooking journey! To keep your leftover pancakes fresh, place them in a single layer. Use a plate or a baking sheet for this step. Cover them with plastic wrap or foil. You can also use an airtight container if you have one. Store them in the fridge. They will stay good for up to three days. When you're ready to eat, just reheat them. Freezing pancakes is easy and a great way to save time. First, let your pancakes cool completely. Next, stack them with parchment paper between each one. This helps to keep them from sticking together. Place the stack in a freezer bag. Remove as much air as you can before sealing. You can freeze them for up to two months. To reheat, take out the pancakes and let them thaw in the fridge overnight. You can also pop them in the microwave for about 30 seconds. Alternatively, heat them in a skillet on low heat for a few minutes. Enjoy your fluffy banana pancakes any time! To make your pancakes extra fluffy, focus on these tips: - Use fresh baking powder and baking soda. These help the pancakes rise. - Mix the dry ingredients well before adding wet ones. This ensures even leavening. - Do not overmix the batter. Some lumps are okay. Overmixing makes the pancakes dense. - Let the batter rest for a few minutes before cooking. This allows bubbles to form. Yes, you can use regular milk. To mimic buttermilk, add 1 tablespoon of lemon juice to 1 cup of milk. Let it sit for five minutes. This creates acidity, which helps the pancakes rise and adds flavor. Pancakes can last 3 to 4 days in the fridge. Store them in an airtight container. Make sure they are completely cool before sealing. For safety, check for any signs of spoilage before eating. This blog post covered making easy banana pancakes. We looked at all the ingredients and steps. Mixing wet and dry ingredients carefully helps keep your pancakes fluffy. You can try fun flavors or make dietary swaps. I shared tips on cooking and storing your pancakes. Remember, cooking is about fun and creativity. Enjoy making these delicious pancakes your way!
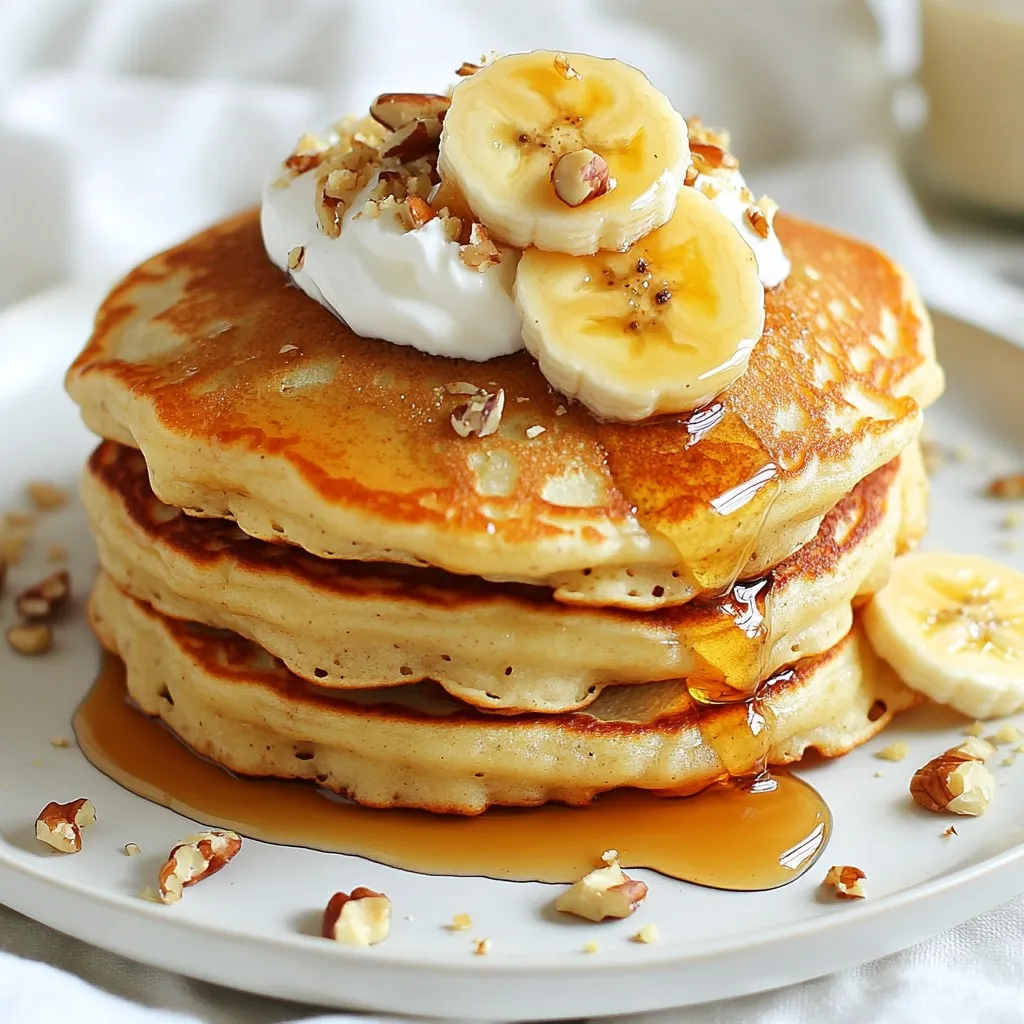
Fluffy Banana Pancakes Delightfully Simple Recipe
Are you ready to treat yourself to the fluffiest banana pancakes ever? This delightfully simple recipe turns ripe bananas into golden, airy pancakes that everyone