Breakfast

- Frozen or Fresh Pumpkin - Types of Bread Suitable for the Recipe - Recommended Toppings and Add-ins Using pumpkin in this recipe gives it a warm, cozy feel. You can use either frozen or fresh pumpkin. Fresh pumpkin needs some prep, so frozen is a quick option. Just thaw it before use. For bread, I suggest brioche or challah. These breads soak up the pumpkin mixture well. They make each bite soft and sweet. You can also try sourdough or whole wheat for a twist. For toppings, maple syrup is a must. It adds a sweet touch. You can also dust with powdered sugar for a nice look. Nuts like pecans or walnuts add crunch. Add them if you like! This simple list of ingredients makes your Pumpkin French Toast Bake easy to prepare. For the full recipe, check the details above. Enjoy cooking! - Preheating the Oven Start by preheating your oven to 350°F (175°C). This step is key for even cooking. - Mixing the Custard Mixture In a large mixing bowl, mix 1 cup canned pumpkin puree, 4 large eggs, 1 cup milk, and 1/2 cup packed brown sugar. Add 1 teaspoon vanilla extract, 1 teaspoon ground cinnamon, 1/2 teaspoon ground nutmeg, 1/4 teaspoon ground ginger, and a pinch of salt. Whisk until smooth. - Preparing the Baking Dish Grease a 9x13-inch baking dish with cooking spray or softened butter. This helps prevent sticking. - Folding in the Bread Carefully fold in the cubed brioche or challah bread. Ensure each piece is fully coated in the pumpkin mixture. If you like, add 1/2 cup of finely chopped pecans or walnuts. - How to Let the Mixture Soak Let the mixture sit for about 15 minutes at room temperature. This allows the bread to soak up the custard, making it moist and tasty. - Spreading in the Dish Pour the soaked bread and pumpkin mixture into the prepared baking dish. Spread it out evenly for even baking. - Covering with Foil Cover the baking dish tightly with aluminum foil to keep moisture in while it cooks. - Baking Time and Temperature Place the baking dish in the preheated oven. Bake for 30 minutes covered, then remove the foil. Continue baking for an additional 15 to 20 minutes. - Signs of Doneness Check for doneness by seeing if the top is golden brown and the center feels set. Let it cool for 5-10 minutes before serving. Enjoy your delicious Pumpkin French Toast Bake! For the full recipe, follow the link provided. Common Mistakes to Avoid Avoid over-soaking your bread. If you let it sit too long, it may become mushy. Instead, soak it just enough to absorb the custard. Ensure your oven is preheated. This helps the bake cook evenly. Also, don't skip the foil cover. It keeps the moisture in during the first part of baking. Best Practices for Even Cooking Cut your bread into uniform cubes. This ensures that all pieces cook at the same rate. Spread the mixture evenly in the baking dish. This helps every bite be just as tasty. Check for doneness by gently pressing the center. It should feel set, not wobbly. How to Enhance Flavor Profiles For a richer taste, add more spices. A bit of cloves or allspice can give a warm kick. Consider using flavored milk, like almond or oat. It can add a unique twist. Toasting the nuts before adding can also boost their flavor. Don’t forget to taste the mixture before baking. Adjust the sweetness to your liking. Pairing with Breakfast Sides Serve your French toast bake with crispy bacon or sausage for a savory touch. Fresh fruit, like berries or sliced bananas, adds a refreshing balance. You could also serve it with yogurt for creaminess. Recommended Condiments Maple syrup is a must for drizzling. You can also use honey or agave for a different sweetness. Add whipped cream for a fun, decadent topping. A light dusting of powdered sugar looks beautiful and adds sweetness. Ideal Beverages for Serving Pair your bake with fresh coffee for a classic breakfast feel. A warm chai tea can complement the spices well. For something different, try a spiced apple cider. It enhances the cozy fall vibe of the dish. For the complete preparation, check out the Full Recipe. {{image_4}} Substituting different breads can change the taste and texture of your dish. I love using brioche or challah because they are soft and sweet. You can also try sourdough or whole wheat bread for a heartier option. Each type will give a unique twist to your pumpkin French toast bake. Adding different spices or extracts can enhance the flavor. You can mix in cardamom, allspice, or even pumpkin pie spice for a kick. A splash of almond or maple extract can add an extra layer of taste that pairs well with pumpkin. For nut-free or dairy-free options, simply switch ingredients. Use almond milk or oat milk instead of regular milk. You can skip the nuts or use seeds like sunflower seeds for crunch. Ideas for holiday twists are fun to explore. You can add cranberries or dried fruit for a festive touch. During Thanksgiving, consider topping your bake with whipped cream or a sprinkle of nutmeg for that seasonal flair. Adapting for other seasons is easy too. In spring, try adding fresh berries or lemon zest for brightness. In summer, peaches or cherries can create a delightful change. Creative additions can also make your dish special. Try drizzling some chocolate sauce on top for a rich dessert. You can even layer in chocolate chips or caramel sauce for a sweet surprise. Explore these variations to make your pumpkin French toast bake uniquely yours. For the complete recipe, check out the [Full Recipe]. Refrigeration Guidelines After you enjoy your Pumpkin French Toast Bake, let it cool. Place it in an airtight container. Store it in the fridge for up to three days. If you want to keep it longer, freezing is a great option. Freezing Instructions To freeze, cut the bake into squares. Wrap each piece in plastic wrap. Then place them in a freezer-safe bag or container. You can freeze it for up to three months. Just remember to label the bag with the date. Best Methods for Reheating You can reheat the French toast bake in a few ways. The oven is the best option. Preheat the oven to 350°F (175°C). Place the pieces on a baking sheet. Cover them with foil to keep them moist. Heat for about 15 to 20 minutes. You can also use a microwave. Just warm each piece for 30 seconds at a time until heated through. Serving Suggestions After Reheating After reheating, serve it warm. Drizzle with maple syrup for added sweetness. A dusting of powdered sugar makes it even better. You might also want to add fresh fruit or nuts. These toppings add flavor and texture. Enjoy your delicious treat! Can I use fresh pumpkin instead of canned? Yes, you can use fresh pumpkin. Just cook and puree it well. Fresh pumpkin has a bright taste but needs more prep work. How to make this recipe vegetarian? This recipe is already vegetarian. Just skip adding any meat toppings. You can add more nuts or fruits for extra flavor. What is the best bread for a French toast bake? Brioche or challah works best. These breads soak up the custard well. They also give a soft and sweet flavor. How long can I store leftovers? You can store leftovers in the fridge for up to four days. Just cover them tightly with plastic wrap or foil. Can I make this dish ahead of time? Yes! You can prepare it the night before. Just keep it in the fridge. Bake it in the morning for a warm breakfast. For the full recipe, check the section above. Pumpkin French Toast Bake is simple and fun to make. We covered ingredients, preparation steps, and baking tips. You learned about perfecting the dish, variations, and storage methods. Each section offers ways to make it your own. I hope you feel ready to enjoy this warm, tasty treat with friends and family. Get creative and have fun in the kitchen. This dish brings comfort and joy, perfect for any gathering. Your delicious pumpkin bake awaits!
Pumpkin French Toast Bake Simple and Tasty Recipe
Are you ready to elevate your breakfast game with a delightful twist? Pumpkin French Toast Bake combines the cozy flavors of fall with the comfort
- 1 cup all-purpose flour - 1 cup whole wheat flour - 1 teaspoon baking powder - 1 teaspoon baking soda - 1 teaspoon ground cinnamon - 1/2 teaspoon ground nutmeg - 1/2 teaspoon ground ginger - 1/2 teaspoon salt For the dry ingredients, I use a mix of all-purpose and whole wheat flour. This adds flavor and fiber. Baking powder and baking soda help the muffins rise. Cinnamon, nutmeg, and ginger give that warm, cozy taste we love in fall. Salt enhances all the flavors. - 1 cup pumpkin puree - 1/2 cup packed brown sugar - 1/4 cup granulated sugar - 1/3 cup vegetable oil - 2 large eggs - 1 teaspoon vanilla extract - 1 medium apple, peeled and diced - 1/2 cup chopped walnuts (optional) For the wet ingredients, I always choose pumpkin puree for its rich, smooth texture. Brown sugar adds a nice depth of flavor. Granulated sugar keeps the muffins sweet. Vegetable oil keeps them moist. Eggs help bind everything together. A splash of vanilla gives a lovely aroma. Diced apples add sweetness and crunch. Walnuts are optional but add great texture. - 1/2 cup rolled oats - 1/3 cup packed brown sugar - 1/4 cup all-purpose flour - 1/4 teaspoon ground cinnamon - 2 tablespoons cold butter, cut into small cubes For the streusel, rolled oats give a hearty crunch. Brown sugar adds sweetness and depth. A bit of all-purpose flour helps bind the topping. Cinnamon ties in the warm flavors. Cold butter creates those lovely, crumbly bits we all enjoy on top of the muffins. For the full recipe, check out the details above! Start by preheating your oven to 350°F (175°C). This step ensures even baking. Line a standard muffin tin with paper liners. This helps with easy serving and cleanup. In a large mixing bowl, whisk together the following dry ingredients: - 1 cup all-purpose flour - 1 cup whole wheat flour - 1 teaspoon baking powder - 1 teaspoon baking soda - 1 teaspoon ground cinnamon - 1/2 teaspoon ground nutmeg - 1/2 teaspoon ground ginger - 1/2 teaspoon salt Make sure these ingredients mix well. This step helps to evenly distribute the leavening agents and spices. In another bowl, whisk together these wet ingredients until smooth: - 1 cup pumpkin puree - 1/2 cup packed brown sugar - 1/4 cup granulated sugar - 1/3 cup vegetable oil - 2 large eggs - 1 teaspoon vanilla extract Mixing them well ensures a uniform texture. Carefully pour the wet mixture into the bowl of dry ingredients. Use a spatula to gently fold the two together. Do this until just combined. Overmixing can make the muffins tough. Gently fold in the diced apple and, if you like, the chopped walnuts. This adds nice texture and flavor. In a small bowl, combine: - 1/2 cup rolled oats - 1/3 cup packed brown sugar - 1/4 cup all-purpose flour - 1/4 teaspoon ground cinnamon Use a fork or pastry cutter to mix in 2 tablespoons of cold butter. You want it to form coarse crumbs. This will be your delightful streusel topping. Carefully divide the muffin batter among the prepared muffin cups. Fill each about 2/3 full. This allows the muffins to rise nicely. Generously sprinkle the streusel on top of each muffin. Place the muffin tin in the preheated oven. Bake for 20 to 25 minutes. The muffins are done when a toothpick comes out clean or with a few moist crumbs. After baking, let them cool in the pan for about 5 minutes. Then, transfer them to a wire rack to cool completely. Enjoy these delicious muffins warm! For the full recipe, check [Full Recipe]. To get the best muffins, follow these simple tips: - Use fresh ingredients: Check the dates on your baking powder and baking soda. Freshness matters. - Don’t overmix: Mix just until combined. This keeps your muffins soft. - Fill cups properly: Only fill the muffin cups two-thirds full. This allows room to rise. - Rotate the pan: Halfway through baking, give your muffin tin a turn. This helps them bake evenly. You can swap ingredients based on what you have: - Flours: You can use all-purpose flour only. Whole wheat gives more fiber but is not a must. - Sugars: Use coconut sugar or maple syrup instead of brown sugar for a different taste. - Oils: You can replace vegetable oil with melted coconut oil. It adds a nice flavor. - Apples: If you can't find Honeycrisp or Granny Smith, any firm apple works fine. A great muffin texture is key: - Room temperature eggs: Use eggs that are not cold. This helps the batter mix better. - Moisture balance: Ensure you use enough pumpkin puree. It keeps muffins moist. - Don’t skip the streusel: The topping adds crunch and flavor. It makes each bite special. For the full recipe, check the [Full Recipe] section above. {{image_4}} I love to change my muffins with the seasons. For fall, I use pumpkin spice. This adds a warm flavor that makes the muffins cozy. You can also switch to apple cinnamon for spring. Just add more cinnamon and some extra apples for a fresh taste. These flavors really make the muffins special. If you need gluten-free muffins, you can swap the flour. Use a gluten-free flour blend instead. This works well in the recipe. For nut-free options, skip the walnuts or use seeds like pumpkin seeds. These changes keep the muffins safe for everyone to enjoy. Want to add more fun? Try mixing in chocolate chips. They melt and create a sweet surprise in each bite. Dried fruits like cranberries or raisins also work great. They add chewiness and extra flavor. Feel free to get creative with your mix-ins! For the full recipe, check the section above. To keep your apple pumpkin streusel muffins fresh, store them in an airtight container. This prevents air from making them dry. You can keep them at room temperature for about three days. If you want them to last longer, try refrigerating them. Just make sure to wrap them tightly to avoid extra moisture. Freezing muffins is an easy way to save some for later. Allow the muffins to cool completely first. Then, wrap each muffin in plastic wrap. Place the wrapped muffins into a freezer bag or container. They can last in the freezer for up to three months. When you're ready to enjoy one, just pull it out and let it thaw at room temperature. Reheating your muffins brings back their warm, fresh taste. If you want to heat them in the oven, preheat it to 350°F (175°C). Place the muffins on a baking sheet and heat for about 10 minutes. You can also microwave them for 15 to 30 seconds. Just be careful not to overheat, or they may become tough. Enjoy your muffins warm and soft, just like when they were fresh! Apple pumpkin streusel muffins are tasty treats that blend pumpkin puree and fresh apples. They have a soft texture and a crunchy topping made of oats and sugar. These muffins are perfect for fall, but you can enjoy them all year. They are easy to make and great for breakfast or snacks. Yes, you can make these muffins ahead of time. They store well in an airtight container for up to three days. You can also freeze them for up to three months. To enjoy, just thaw and warm them in the oven. This way, you can have fresh muffins any time. To check if the muffins are done, insert a toothpick in the center. If it comes out clean or with a few moist crumbs, they are ready. The tops should also be golden brown. If they look wet or doughy, give them a few more minutes in the oven. Yes, you can use fresh pumpkin instead of canned pumpkin puree. Just cook the pumpkin until soft, then blend it until smooth. You need about one cup of fresh pumpkin for this recipe. This gives a fresh taste to your muffins. For the best results, make sure it is well pureed. For the complete recipe, check out the [Full Recipe]. We explored how to make delicious Apple Pumpkin Streusel Muffins with simple steps. First, we looked at the dry and wet ingredients, plus the streusel topping. Then, you learned how to mix everything and bake to perfection. I also shared tips for texture, variations, and storing your muffins. These muffins are easy to adapt and great for any occasion. Enjoy baking and sharing these treats with others! You will impress everyone with your skills in the kitchen. Happy baking!
Apple Pumpkin Streusel Muffins Easy and Delicious Recipe
Get ready to enjoy the perfect fall treat with my easy and delicious Apple Pumpkin Streusel Muffins. These muffins combine warm spices, sweet apples, and
- 1 cup all-purpose flour - 1 tablespoon baking powder - 1/2 teaspoon baking soda - 1 teaspoon ground cinnamon - 1/2 teaspoon ground nutmeg - 1/4 teaspoon ground ginger - 1/4 teaspoon salt - 1 cup pumpkin puree (canned or fresh) - 1 cup milk (or your favorite dairy-free alternative) - 2 large eggs - 2 tablespoons pure maple syrup - 2 tablespoons unsalted butter, melted (or coconut oil for a dairy-free option) - Optional: Chopped pecans or walnuts for topping When I make Gilmore Girls pumpkin pancakes, I love to gather all my ingredients first. It helps keep me organized and makes cooking more fun. Start with 1 cup of all-purpose flour. This forms the base of our pancakes. Next, add 1 tablespoon of baking powder and 1/2 teaspoon of baking soda. These ingredients make the pancakes rise and become fluffy. Now, for the spices! I use 1 teaspoon of ground cinnamon, 1/2 teaspoon of ground nutmeg, and 1/4 teaspoon of ground ginger. These spices give the pancakes their warm flavor, perfect for fall. Don’t forget 1/4 teaspoon of salt to balance the sweetness. Next, we need the star of the show: 1 cup of pumpkin puree. You can use canned pumpkin or make your own from fresh pumpkins. Then, pour in 1 cup of milk. If you prefer dairy-free, any milk alternative works great. Crack in 2 large eggs for moisture and richness. Add 2 tablespoons of pure maple syrup for sweetness, and 2 tablespoons of melted unsalted butter. If you want a dairy-free option, use coconut oil instead. Finally, I love topping my pancakes with chopped pecans or walnuts. They add a nice crunch and extra flavor. Now you have all the right ingredients to make these scrumptious pancakes! If you want the full recipe, you can check it out. First, grab a large mixing bowl. Whisk together the all-purpose flour, baking powder, baking soda, ground cinnamon, ground nutmeg, ground ginger, and salt. This step is key for fluffy pancakes. Mixing these dry ingredients well ensures an even distribution of the leavening agents and spices. You want every bite to be packed with flavor! Next, in a separate bowl, blend the pumpkin puree, milk, eggs, pure maple syrup, and melted butter. Blend until the mixture is smooth and creamy. A creamy texture is important here. It helps to create a rich flavor and keeps the pancakes moist. Now, gently pour the wet mixture into the dry ingredients. Use a spatula to stir until just combined. Avoid overmixing! It’s okay if the batter has small lumps. This will help make your pancakes fluffy and light. Let’s get cooking! Preheat a non-stick skillet or griddle over medium heat. Lightly grease the surface with a bit of butter or oil. For each pancake, pour about 1/4 cup of batter onto the hot skillet. Cook for about 2-3 minutes. Look for small bubbles forming on top and edges that start to look set. Carefully flip each pancake and cook for another 2-3 minutes until golden brown. If they brown too quickly, lower the heat. This helps cook them evenly. Once done, remove them from the skillet and keep warm while you cook the rest. Now you're ready to enjoy these delicious pumpkin pancakes! For the full recipe, check out the detailed instructions. To make fluffy pancakes, avoid overmixing the batter. When you mix the wet and dry ingredients, stir gently. It is okay if there are small lumps. Overmixing can lead to tough pancakes. Let the batter rest for about five to ten minutes. This helps the flour absorb the liquid. Resting also allows the baking powder to activate, which makes your pancakes rise nicely. While maple syrup is a classic topping, try adding fresh fruit like bananas or berries. Whipped cream can also add a nice touch. For a crunch, sprinkle some chopped nuts on top. Pecans or walnuts work great with pumpkin pancakes. If you want to mix things up, add chocolate chips or nuts directly into the batter. Just fold them in gently. This adds bursts of flavor in each bite. To know when to flip your pancakes, look for small bubbles on the surface. When the edges start to look set, it’s time to flip. Make sure your heat is just right. If it’s too hot, the pancakes will brown too fast. If it’s too low, they won’t cook properly. Aim for medium heat to ensure even cooking. Adjust as needed based on your stove. For the full recipe, check out the details above. {{image_4}} To make these pancakes dairy-free, you can easily swap out a few ingredients. Instead of regular milk, use almond milk, oat milk, or soy milk. These alternatives work well and keep the pancakes tasty. For the butter, replace it with coconut oil or a dairy-free margarine. Both options add richness without the dairy. You can spice up your pumpkin pancakes by adding other flavors. Try mixing in a bit of allspice or cardamom for a warm touch. Chopped apples or raisins can add a nice texture. If you're inspired by Gilmore Girls, think about using chocolate chips or a hint of bourbon. These little twists will make your pancakes stand out. These pancakes shine when paired with other breakfast items. Serve them with crispy bacon or sausage for a hearty meal. Fresh fruit like sliced bananas or berries adds a bright flavor. For toppings, try drizzling honey or flavored syrups, like caramel or maple. You can also sprinkle some nuts on top for a crunch. To keep your leftover pancakes fresh, start by letting them cool down. Place them in a single layer on a plate or tray. For short-term storage, wrap them in plastic wrap or foil. You can also use an airtight container. If you want to store them longer, freeze them. Use parchment paper between layers to prevent sticking. This way, you can enjoy them later without losing their shape. There are several methods to reheat your pancakes. The microwave is quick. Place a pancake on a microwave-safe plate. Heat it for about 20 to 30 seconds. This is great for one or two pancakes. For a larger batch, use the oven. Preheat it to 350°F (175°C). Place pancakes on a baking sheet and cover them with foil. Heat for 10 minutes. To keep pancakes fluffy, avoid high heat. If using a skillet, warm it on low. Add a little butter or oil, then place the pancakes in the pan. Flip them after a minute to warm both sides. Enjoy your Gilmore Girls pumpkin pancakes just as fresh as the first time! Yes, you can! Use gluten-free flour blends. Look for blends that include xanthan gum. This helps the pancakes hold together and stay fluffy. You can also try almond flour or oat flour. They add a nice flavor, too. Just adjust the liquid, as these flours may absorb more. Start with a little extra milk to get the right batter consistency. To make these pancakes healthier, reduce sugar by using less maple syrup. You can also substitute some of the butter with applesauce. This keeps them moist without all the fat. Use whole wheat flour for extra fiber. You can even add mashed bananas for natural sweetness and nutrition. This makes the pancakes taste great and keeps them filling. You can use leftover pumpkin puree in many ways! Add it to smoothies for a creamy texture. Mix it into oatmeal for a warm breakfast. You can also make pumpkin muffins or bread. Another idea is to stir it into soups for added flavor. Don't forget to check out the Full Recipe for inspiration on using pumpkin in other tasty dishes. You learned how to make delicious pumpkin pancakes. We covered the ingredients, step-by-step instructions, and tips for the fluffiest results. I shared variations for dietary needs and ways to store leftovers. These pancakes are perfect for breakfast or a cozy brunch. Enjoy experimenting with flavors and toppings. With practice and creativity, your pancakes will shine at the table. Happy cooking!
Gilmore Girls Pumpkin Pancakes Scrumptious Fall Treat
Fall is the perfect time to whip up a batch of Gilmore Girls Pumpkin Pancakes. These delicious, pumpkin-infused treats will remind you of cozy mornings
- 2 medium zucchinis, finely grated - 1 cup whole wheat flour - 1 cup almond flour - 1/2 cup brown sugar or coconut sugar - 1/2 cup pure maple syrup - 1/4 cup unsweetened applesauce - 1/4 cup vegetable oil or melted coconut oil - 1 teaspoon baking soda - 1 teaspoon baking powder - 1 teaspoon ground cinnamon - 1/2 teaspoon ground nutmeg - 1/4 teaspoon sea salt - 1/2 cup chopped walnuts or pecans - 1/2 cup dairy-free dark chocolate chips or raisins When making vegan zucchini muffins, each ingredient plays a key role. The zucchinis add moisture and a subtle flavor. Whole wheat flour gives the muffins a hearty texture. Almond flour adds richness and a nutty taste. Sweeteners like brown sugar and pure maple syrup enhance the muffins' natural sweetness. Unsweetened applesauce replaces eggs, keeping the muffins moist. The oil adds fat, which helps with tenderness and flavor. In the dry ingredients, baking soda and baking powder create rise. Spices like cinnamon and nutmeg give warmth and depth. Sea salt balances the sweetness and enhances the flavors. Optional ingredients like walnuts add crunch, while dark chocolate chips or raisins contribute sweetness. You can mix and match these for your perfect muffin experience. For the full recipe, check the details above. Enjoy baking these wholesome delights! - Preheat oven to 350°F (175°C) - Line muffin tin with paper liners or grease First, you need to preheat your oven. Set it to 350°F (175°C). This step helps the muffins bake evenly. While the oven heats, prepare your muffin tin. Use paper liners or grease each cup to stop sticking. This makes for easy cleanup later. - Combine grated zucchini and dry ingredients in a bowl - Whisk until well mixed Next, grab a large bowl. Add the grated zucchini, which should be squeezed to remove excess water. Then, add whole wheat flour, almond flour, brown sugar (or coconut sugar), baking soda, baking powder, cinnamon, nutmeg, and sea salt. Whisk these dry ingredients until they blend well. This step ensures even flavor in every bite. - In a separate bowl, combine wet ingredients and whisk until smooth In another bowl, mix the wet ingredients. Combine pure maple syrup, applesauce, and vegetable oil (or melted coconut oil). Whisk them together until smooth. This mixture adds moisture and sweetness to your muffins. - Combine wet and dry ingredients without over-mixing - Fold in optional ingredients Now, pour the wet mixture into the bowl with the dry ingredients. Use a spatula to mix them gently. Do not over-mix, as this can make the muffins tough. If you want, fold in nuts or chocolate chips at this stage. This will add extra flavor and texture to your muffins. - Fill muffin cups and bake for 20-25 minutes - Check doneness with a toothpick Carefully fill each muffin cup about two-thirds full. This gives the muffins room to rise. Place the muffin tin in the preheated oven. Bake for 20 to 25 minutes. To check if they're done, insert a toothpick into the center of a muffin. If it comes out clean, they are ready. - Allow cooling in the muffin tin for 5 minutes - Transfer to a wire rack to cool completely Once baked, let the muffins cool in the tin for about five minutes. After that, move them to a wire rack to cool completely. This helps maintain their texture and prevents sogginess. Enjoy the delicious aroma as they cool! To make the best vegan zucchini muffins, you need to keep a few things in mind. First, ensure your zucchinis are well-drained. Squeeze out excess moisture before adding them to the batter. This helps your muffins bake evenly and prevents them from becoming soggy. Second, avoid over-mixing your batter. Mix just until all the ingredients are combined. This keeps your muffins light and fluffy, which is what we want. When it comes to serving, always present your muffins warm. This enhances their flavor and makes them inviting. You can also add optional toppings. A light dusting of powdered sugar can make them look fancy. If you prefer something richer, try drizzling almond butter on top. It adds taste and a touch of elegance. Don't be afraid to get creative with flavors! You can experiment with spices like ginger for a warm kick. Adding citrus zest, like lemon or orange, brightens up the muffins and adds a fresh twist. These little changes can take your muffins from good to great. For the full recipe, check the details above. {{image_4}} You can easily make these muffins gluten-free. Just swap the whole wheat flour and almond flour with gluten-free flour blends. Look for blends that mimic all-purpose flour. This keeps the texture light and fluffy. Want to change things up? You can add spices like pumpkin spice or cocoa powder. Both will bring a new flavor dimension to your muffins. Also, think about incorporating fruits. Blueberries or cranberries add sweetness and a nice pop of color. If you need a nut-free option, no problem! Simply leave out the nuts. Instead, use seeds like sunflower or pumpkin seeds. They will add crunch and nutrition without any nuts. For the full recipe, check the details above and try these fun variations! Store your vegan zucchini muffins in an airtight container at room temperature. They will stay fresh for up to 1 week. This makes them great for breakfast or snacks on the go. If you want to keep them longer, you can freeze the muffins. Wrap each muffin in plastic wrap and place them in a freezer bag. They will last for up to 3 months. When you’re ready to enjoy one, simply thaw it before serving. To refresh your muffins, reheat them in the oven at 350°F for about 5-10 minutes. This method helps restore their moisture and texture. You can also use a microwave for quick heating. Just be careful not to overheat, as this can make them dry. Enjoy your muffins warm for the best taste! Yes, but it may alter the muffin's flavor and texture. Whole wheat flour adds a nutty taste and makes the muffins more filling. Regular flour can make them lighter but less hearty. Use ripe bananas or a sugar substitute. Ripe bananas add natural sweetness and moisture. You can also try using dates or stevia for a sugar-free option. Yogurt or mashed avocado can be used as alternatives. Yogurt gives a creamy texture, while avocado adds healthy fats. Both keep the muffins moist. Yes, adjust the baking time to around 12-15 minutes. Mini muffins are great for snacks or kids. Just watch them closely as they bake. Use a spatula and mix gently to avoid overworking the batter. This keeps the muffins fluffy. Over-mixing can make them tough, so mix just until combined. For more details, check the Full Recipe. In this post, we covered how to make delicious zucchini muffins. We explored key ingredients and the step-by-step process for baking. Plus, we shared tips to elevate your muffins and made suggestions for tasty variations. Remember, soft, fluffy muffins come from not over-mixing. Whether you stick with the classic recipe or try a twist, enjoy every bite. Your baking adventure awaits!
Vegan Zucchini Muffins Wholesome and Simple Recipe
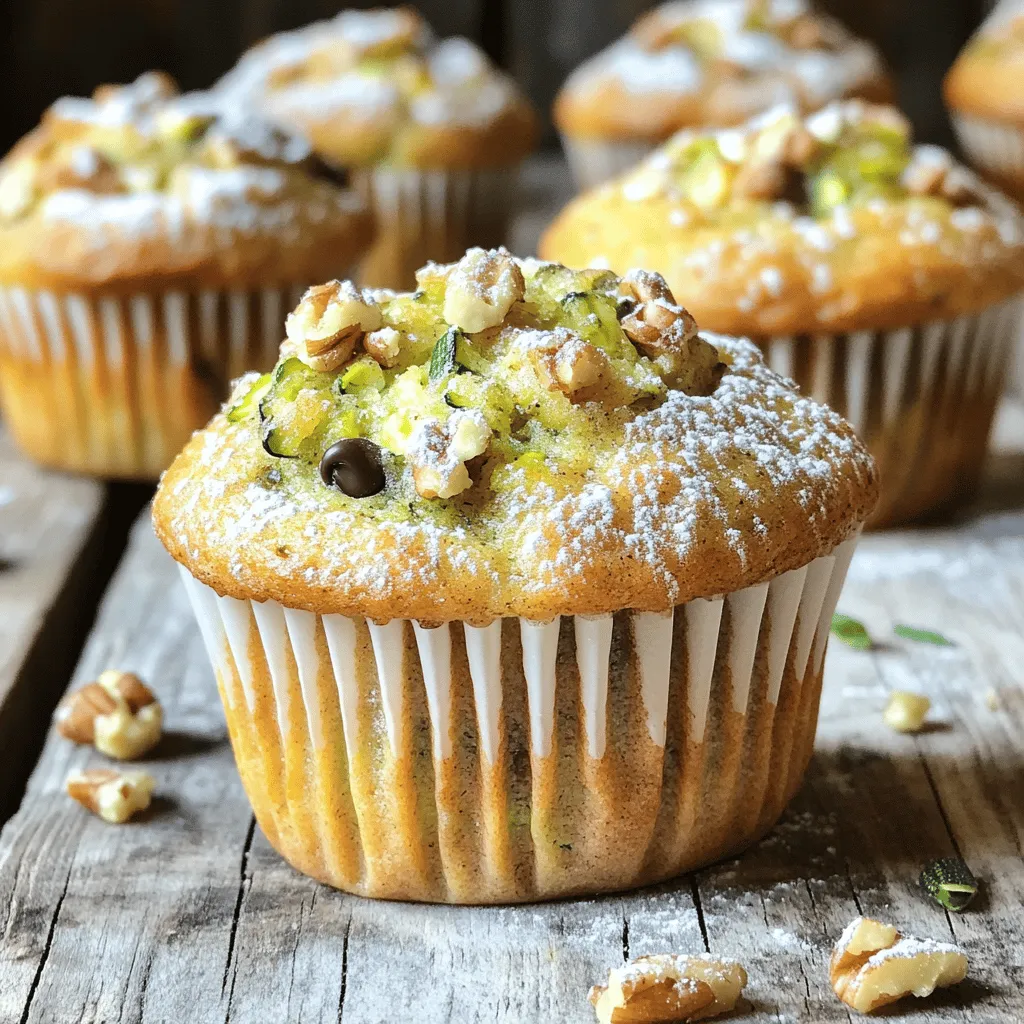
Are you craving a delicious, wholesome snack? These Vegan Zucchini Muffins are your answer! Packed with simple ingredients like zucchini, whole wheat flour, and maple
To make these tasty muffins, you will need: - 1 cup ripe bananas, mashed (about 2-3 medium bananas) - 1 cup freshly grated zucchini (make sure to squeeze out extra moisture) - 1/2 cup Greek yogurt (you can use applesauce for a vegan option) - 1/3 cup honey or pure maple syrup - 1/4 cup vegetable oil (or melted coconut oil for more flavor) - 2 large eggs (or flax eggs for a vegan option) - 1 teaspoon vanilla extract - 1 1/2 cups whole wheat flour (or a gluten-free flour blend) - 1 teaspoon baking powder - 1/2 teaspoon baking soda - 1/2 teaspoon ground cinnamon - 1/4 teaspoon sea salt You can switch some ingredients to fit your needs. For example: - Use almond milk instead of Greek yogurt for a lighter muffin. - Swap honey for agave syrup if you prefer. - Try vegetable puree instead of oil to cut fat. - Use flax eggs to make the recipe vegan. These swaps let you enjoy the muffins in different ways while keeping them healthy. Want to make your muffins even better? Here are some fun add-ins: - 1/2 cup chopped walnuts or pecans - 1/2 cup semi-sweet or dark chocolate chips - A pinch of nutmeg or cardamom for a spice kick These additions can add crunch or sweetness to your muffins. You can mix and match based on what you like! For the full recipe, check out the earlier sections. Start by gathering all your ingredients. You need ripe bananas, zucchini, yogurt, honey, oil, eggs, and vanilla. Don't forget your dry ingredients: whole wheat flour, baking powder, baking soda, cinnamon, and salt. Grate your zucchini first and squeeze out any extra moisture. This step helps keep your muffins from getting soggy. Mash the bananas in a bowl until smooth. In a large bowl, mix the mashed bananas, grated zucchini, yogurt, honey, oil, eggs, and vanilla. Use a whisk to blend everything until smooth. In another bowl, combine the flour, baking powder, baking soda, cinnamon, and salt. Whisk these dry ingredients until they are well mixed. Gradually add the dry mix to the wet mixture. Use a spatula to fold them together gently. It's okay if some lumps remain. Don't overmix; this keeps your muffins light and fluffy. Now, preheat your oven to 350°F (175°C). Prepare your muffin tin with paper liners or grease it well. Spoon the muffin batter into each cup, filling them about two-thirds full. This gives the muffins room to rise while they bake. Bake for 18-20 minutes. Check them by inserting a toothpick into the center. If it comes out clean, they are done! Let the muffins cool in the tin for about five minutes. Then, move them to a wire rack to cool completely. For the full recipe, refer to the earlier section. Enjoy your tasty treats! To keep your muffins moist, use ripe bananas. They add natural sweetness and moisture. Grate your zucchini finely and squeeze out excess water. This step helps prevent soggy muffins. Mixing in Greek yogurt adds creaminess and keeps the texture light. Remember, do not overmix the batter. This keeps your muffins fluffy and soft. Accurate measurements ensure a great bake. Use dry measuring cups for flour and a liquid cup for yogurt or oil. When measuring flour, spoon it into the cup, then level it off with a knife. Avoid packing the flour down, as it can lead to dense muffins. For honey or syrup, use a liquid measuring cup and coat it with oil for easy pouring. One common mistake is not preheating the oven. This can affect how your muffins rise. Another is filling the muffin cups too full. Aim for two-thirds full to allow space for rising. Lastly, check for doneness using a toothpick. If it comes out clean, your muffins are ready. Avoid opening the oven door too often, as this lets heat escape. {{image_4}} You can easily make gluten-free banana zucchini muffins. Just swap the whole wheat flour with a gluten-free flour blend. This keeps the muffins light and fluffy. Make sure the blend you use has xanthan gum. This helps bind the ingredients. You will not miss the gluten at all! Want to make these muffins vegan? It’s simple! Replace the eggs with flax eggs. To do this, mix 1 tablespoon of ground flaxseed with 2.5 tablespoons of water. Let it sit for a few minutes until it thickens. You can also use applesauce instead of Greek yogurt. This swap keeps them moist and tasty! Adding nuts, spices, or fruits can change the flavor of your muffins. Try adding 1/2 cup of chopped walnuts or pecans for crunch. You can also stir in some chocolate chips for a sweet touch. Want a warm spice flavor? Add a teaspoon of nutmeg or more cinnamon. You could even fold in dried fruits like raisins or cranberries. Each twist gives you a new treat to enjoy! To keep your banana zucchini muffins fresh, store them in an airtight container. Place the container at room temperature for up to three days. If you want them to last longer, refrigerate them. Cold storage helps keep moisture in check. Make sure to let them cool completely before sealing to avoid sogginess. Freezing banana zucchini muffins is easy and a great way to save them. First, let the muffins cool fully. Wrap each muffin in plastic wrap or aluminum foil. Then, place them in a freezer-safe bag or container. Label the bag with the date. You can freeze them for up to three months. When you want to enjoy one, just take it out and let it thaw. When you’re ready to eat your muffins, reheating brings back their fresh taste. You can microwave a muffin for about 15-20 seconds. If you prefer, use an oven. Preheat to 350°F (175°C) and heat for about 5-10 minutes. This method keeps the muffin warm and soft. Enjoy them warm for the best flavor! Banana Zucchini Muffins stay fresh for about 3 days at room temperature. Store them in an airtight container to keep them moist. If you want them to last longer, you can put them in the fridge for up to a week. For the best taste, eat them within a few days. Yes, you can use frozen bananas or zucchini! Just make sure to thaw them first. Squeeze out any extra water from the zucchini before mixing. This helps keep your muffins from getting too soggy. Frozen fruit works well and can save time. Serve these muffins warm for the best flavor. You can sprinkle powdered sugar on top for a sweet touch. Another option is to add a spoonful of Greek yogurt for creaminess. They are perfect for breakfast or a tasty snack any time. Enjoy your muffins fresh from the oven or at room temperature! You learned about making delicious banana zucchini muffins. We covered key ingredients, easy steps, and helpful tips. You can try different variations, too. Remember to store your muffins right for the best taste. Whether you choose gluten-free, vegan, or add-ins, each option offers unique flavors. Enjoy baking and sharing these tasty treats!
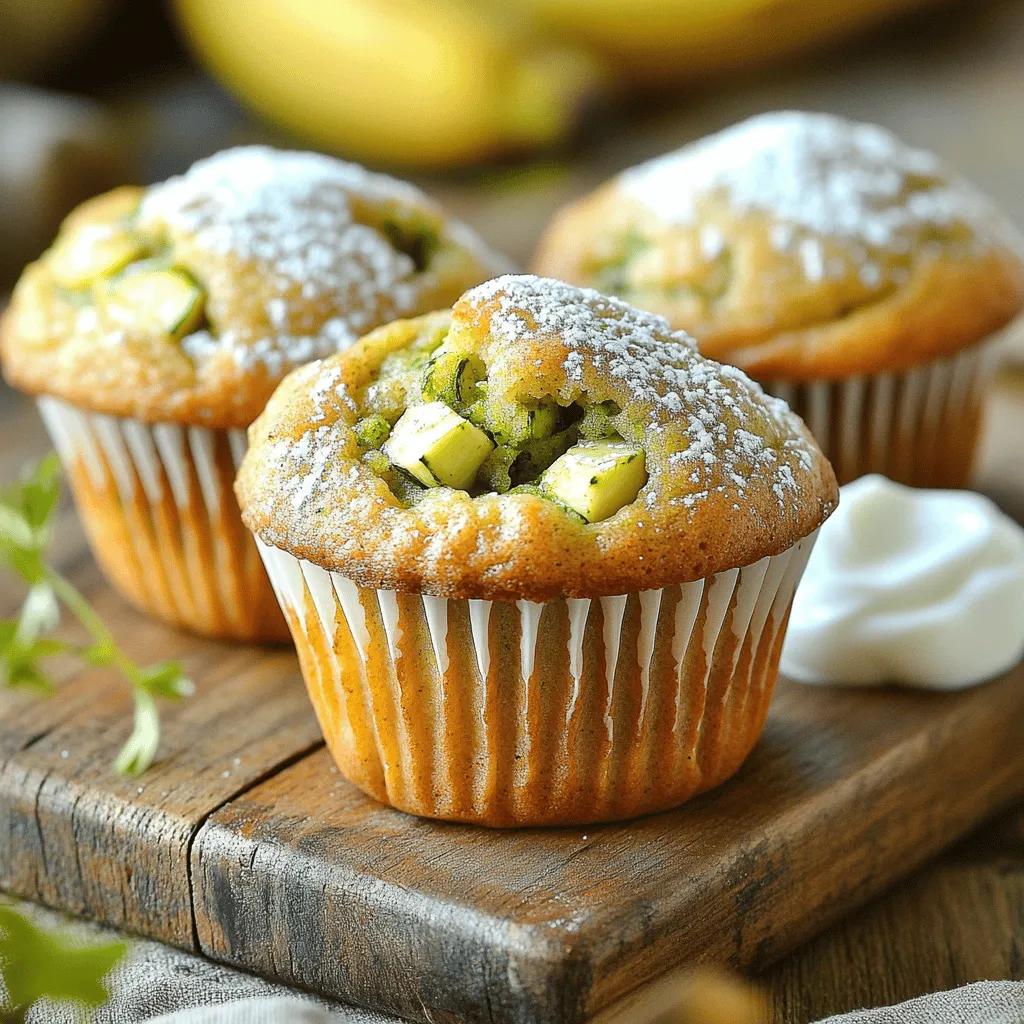
Tasty Banana Zucchini Muffins Easy and Healthy Recipe
Are you looking for a healthy snack that bursts with flavor? Look no further! My Tasty Banana Zucchini Muffins are easy to make and delicious.
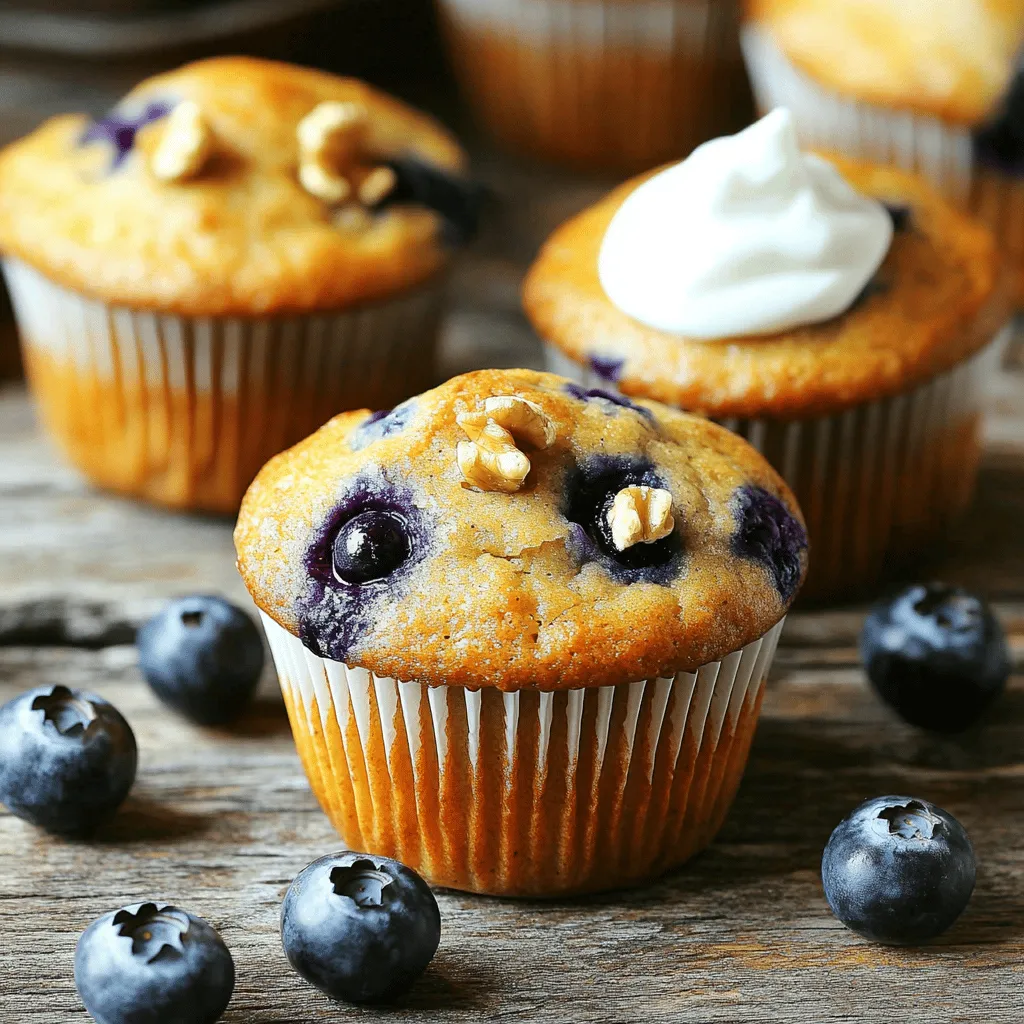
To make fluffy blueberry zucchini muffins, you will need the following ingredients: - 1 medium zucchini, grated - 1 cup fresh blueberries (or frozen, if preferred) - 1 ½ cups all-purpose flour - ½ cup granulated sugar - ½ cup packed brown sugar - 1 teaspoon baking powder - ½ teaspoon baking soda - ½ teaspoon salt - ½ teaspoon ground cinnamon - 2 large eggs - ½ cup vegetable oil - 1 teaspoon vanilla extract - ½ cup Greek yogurt Measuring your ingredients correctly makes a big difference. Use dry measuring cups for flour and sugars. For liquids, use a clear liquid measuring cup. When measuring flour, spoon it into the cup and level it off with a knife. This prevents too much flour in your mix. For brown sugar, pack it tightly into the cup. This ensures you get the right amount. Accurate measurements keep your muffins fluffy and tasty. These muffins are not only delicious but also nutritious. Each muffin has about: - Calories: 180 - Protein: 4g - Fat: 7g - Carbohydrates: 28g - Fiber: 1g - Sugars: 10g Zucchini adds moisture and fiber without many calories. Blueberries provide antioxidants. Greek yogurt adds protein and creaminess. This makes your treat a bit healthier! You can enjoy these muffins guilt-free. For the full recipe, check out the instructions above. Start by getting your kitchen ready. Preheat your oven to 350°F (175°C). This helps the muffins bake evenly. Grab a muffin tin and line it with paper liners or grease it well. This will stop the muffins from sticking. In a big bowl, mix the wet ingredients. Add the grated zucchini, granulated sugar, brown sugar, eggs, vegetable oil, vanilla extract, and Greek yogurt. Use a whisk or a wooden spoon to blend everything together. Aim for a smooth mix. This creates a moist base for your muffins. Now, let's prepare the dry ingredients. In another bowl, whisk together the all-purpose flour, baking powder, baking soda, salt, and ground cinnamon. Make sure everything is well mixed. Breaking up any lumps helps your muffins rise better. Next, combine the wet and dry mixes. Gradually add the dry mix to the wet mix. Stir gently with a spatula or wooden spoon. Stop mixing when the dry ingredients are just combined; a few lumps are okay. Now fold in the blueberries carefully. Spoon the batter into the muffin cups, filling them about three-quarters full. Bake in your preheated oven for 18-22 minutes. Check with a toothpick; if it comes out clean, your muffins are ready. Let them cool in the tin for about 5 minutes. Then, move them to a wire rack to cool completely. For the full recipe, refer to the detailed instructions above. To keep your muffins fluffy, avoid overmixing. When you add dry ingredients to wet ones, mix just until combined. A few lumps are okay! Also, make sure your baking powder and baking soda are fresh. Old leavening agents can lead to dense muffins. Lastly, don't skip the Greek yogurt; it adds moisture and lightness. One common mistake is not measuring ingredients accurately. Use a kitchen scale or measuring cups. Too much flour makes muffins heavy. Another mistake is opening the oven door while baking. This can cause muffins to sink. Finally, be careful with baking time. Check them a few minutes before the timer goes off. Spices can elevate your muffins. Ground cinnamon is a great start. It pairs well with blueberries and zucchini. You can also try adding nutmeg or a pinch of ginger for warmth. If you like a bit of zest, add lemon or orange zest. These flavors brighten each bite! For the full recipe, refer to the earlier section. {{image_4}} You can easily change some ingredients in this recipe. If you want to use whole wheat flour, go ahead. It adds more fiber and a nice flavor. You can also swap granulated sugar for coconut sugar. This makes the muffins a bit healthier. If you don’t have Greek yogurt, regular yogurt works as well. Adding flavors makes these muffins even better. Try mixing in chopped walnuts or pecans for a crunchy bite. You can also add zest from a lemon or orange for a fresh twist. This bright flavor pairs well with blueberries. If you like spices, a bit of nutmeg can add warmth. To make vegan muffins, replace eggs with flax eggs. Mix one tablespoon of ground flaxseed with three tablespoons of water. Let it sit for a few minutes until it thickens. For gluten-free muffins, use a gluten-free all-purpose flour blend. Just ensure it has xanthan gum for the right texture. These simple swaps keep the muffins delicious for everyone. For the complete recipe, check out the [Full Recipe]. To keep your muffins fresh, store them in an airtight container. This will help maintain their moisture. Place a paper towel at the bottom of the container to absorb excess moisture. You can also add another paper towel on top before sealing. This method keeps muffins soft and fluffy for about three days at room temperature. Freezing is a great way to save leftover muffins. First, let the muffins cool completely. Then, wrap each muffin in plastic wrap or foil. Next, place the wrapped muffins in a freezer-safe bag or container. Label the bag with the date. They can last in the freezer for up to three months. When you want one, just take it out and let it thaw at room temperature. To enjoy warm muffins again, reheat them in the oven. Preheat your oven to 350°F (175°C). Place the muffins on a baking sheet and cover them loosely with foil. Heat for about 10 minutes. You can also use a microwave. Just warm one muffin for 15-20 seconds. This will keep them soft and tasty, just like when they were fresh. For the full recipe, be sure to check the detailed instructions! Yes, you can use frozen zucchini. Just make sure to thaw and drain it first. Frozen zucchini may have more water than fresh. This can make your muffins too wet. After draining, squeeze out any extra moisture. This keeps the muffins nice and fluffy. Check your muffins after 18 minutes. Insert a toothpick into the center of a muffin. If it comes out clean or with a few crumbs, they are done. If the toothpick has wet batter, bake for a few more minutes. Keep an eye on them to avoid overbaking. These muffins pair well with many things. You can serve them with butter or cream cheese. A drizzle of honey adds a sweet touch. For a fun twist, serve with yogurt and fresh fruit. You can also enjoy them with a cup of tea or coffee. In this post, we covered how to make tasty blueberry zucchini muffins. We discussed ingredients, measuring tips, and nutritional info. You learned how to prep your kitchen and mix the batter perfectly. I shared tips to keep your muffins fluffy and avoid common mistakes. We explored fun variations and gave storage info, including freezing and reheating. Making these muffins can be easy and fun. Enjoy your baking and share your creations!
Fluffy Blueberry Zucchini Muffins Simple and Tasty Treat
Are you ready to bake something simple yet delicious? Fluffy Blueberry Zucchini Muffins are your answer! Packed with flavor and nutrients, these muffins are perfect
To make the best protein-packed blueberry muffins, gather these simple ingredients: - 1 cup whole wheat flour - 1 cup rolled oats - 2 tablespoons chia seeds - 1 teaspoon baking powder - 1/2 teaspoon baking soda - 1/2 teaspoon salt - 1/2 teaspoon ground cinnamon - 1/2 cup Greek yogurt - 1/2 cup almond milk (or any milk of your choice) - 1/3 cup honey (or maple syrup) - 1 large egg - 1 teaspoon vanilla extract - 1 cup fresh blueberries (can substitute with frozen) - Optional: 1/2 cup chopped nuts (walnuts or pecans) for extra crunch Each ingredient plays a key role. Whole wheat flour and rolled oats give the muffins a hearty base. Chia seeds add protein and fiber. Baking powder and baking soda help the muffins rise. Ground cinnamon adds warmth and flavor. Greek yogurt and almond milk keep them moist. Honey or maple syrup sweeten them naturally. Using fresh or frozen blueberries gives bursts of flavor. If you like crunch, add chopped nuts. This mix of ingredients ensures a delicious and healthy treat. You can find the full recipe and detailed instructions to create this delightful breakfast option. - Preheat Oven and Prepare Muffin Tin Start by setting your oven to 375°F (190°C). This helps the muffins rise nicely. Grab a muffin tin and line it with paper liners or grease it lightly with cooking spray. This keeps the muffins from sticking. - Mixing Dry Ingredients Together In a large bowl, combine 1 cup of whole wheat flour, 1 cup of rolled oats, 2 tablespoons of chia seeds, 1 teaspoon of baking powder, 1/2 teaspoon of baking soda, 1/2 teaspoon of salt, and 1/2 teaspoon of ground cinnamon. Stir well to mix everything. This step is key for even flavor. - Combining Wet Ingredients In a different bowl, whisk together 1/2 cup of Greek yogurt, 1/2 cup of almond milk, 1/3 cup of honey (or maple syrup), 1 large egg, and 1 teaspoon of vanilla extract. Keep whisking until the mixture is smooth and well blended. This adds moisture and flavor. - Folding the Mixtures Pour the wet mixture into the bowl with the dry ingredients. Using a spatula, gently fold them together. Be careful not to overmix; you want it just combined. Overmixing can make the muffins tough. - Adding Blueberries and Nuts Gently fold in 1 cup of fresh blueberries and, if you like, 1/2 cup of chopped nuts. Spread them evenly in the batter without breaking the blueberries. This gives every bite a burst of flavor. - Portioning the Batter Use a spoon or an ice cream scoop to fill each muffin cup about two-thirds full. This allows space for the muffins to rise. Make sure they are fairly even to bake nicely. - Baking Time and Checking for Doneness Place the muffin tin in the oven and bake for 18-22 minutes. To check if they are done, insert a toothpick into the center of a muffin. If it comes out clean, your muffins are ready. - Cooling Tips Once baked, let the muffins cool in the tin for about 5 minutes. This helps them firm up a bit. After that, transfer them to a wire rack to cool completely. This keeps the texture light and fluffy. - Presentation Suggestions Serve the muffins warm. A dollop of Greek yogurt on the side looks great. For a nice touch, sprinkle some fresh blueberries on top of the yogurt. This makes your breakfast treat even more inviting. Enjoy your protein-packed blueberry muffins! For detailed instructions, refer to the Full Recipe. Substituting Ingredients You can boost protein in your muffins by swapping some ingredients. Use half whole wheat flour and half almond flour. Almond flour has more protein. Adding seeds like pumpkin or sunflower seeds can help too. Adding Protein Powders or Greek Yogurt Try adding protein powder to the batter. Just one scoop can make a big difference. If you want a creamier texture, use more Greek yogurt. It adds protein and keeps muffins moist. Avoiding Overmixing Mixing too much can make muffins tough. When you combine wet and dry ingredients, stir gently. Stop as soon as you see no dry flour. This keeps the muffins soft and fluffy. Ensuring Even Baking To bake evenly, place the muffin tin in the center of the oven. If you bake in the wrong spot, the muffins may burn or stay raw. Rotate the muffin tin halfway through baking for even heat. Proper Storage Methods After muffins cool, store them in an airtight container. This keeps them fresh for up to five days. For longer storage, freeze them. Wrap each muffin in plastic wrap before placing them in a freezer bag. Reheating Recommendations To enjoy muffins warm, microwave them for about 15 seconds. This makes them soft again. You can also place them in a toaster oven for a crispy outside. {{image_4}} You can easily change the flavor of your protein-packed blueberry muffins. Adding different fruits or mix-ins gives you many tasty options. Try diced apples, raspberries, or even chocolate chips. Each fruit brings its own unique taste. Using spices can also create unique flavor profiles. Cinnamon is a classic choice, but you can also try nutmeg or ginger for a warm twist. A pinch of cardamom adds a nice touch, too. These small changes can make your muffins exciting every time you bake. If you want to make vegan or gluten-free muffins, it’s simple. For vegan muffins, swap the egg for a flax egg or applesauce. Use plant-based yogurt and almond milk to keep it dairy-free. For gluten-free muffins, replace whole wheat flour with a gluten-free blend. Just make sure the blend includes xanthan gum for the right texture. Adjusting sweetness levels is easy, too. You can use less honey or maple syrup if you prefer a less sweet muffin. You can even use mashed bananas for natural sweetness. You can make your muffins in different sizes, too. Mini muffins are great for snacks or kids, while jumbo muffins are perfect for a hearty breakfast. Adjust baking time based on size. Mini muffins usually take about 10-15 minutes, while jumbo muffins may need 25-30 minutes. With these variations, you can create a muffin that fits your taste and needs. Don't forget to check out the Full Recipe for all the details! - Protein: Each muffin packs about 5 grams of protein. This comes mainly from Greek yogurt and chia seeds. - Carbohydrates: You get around 23 grams of carbs per muffin. Most carbs come from whole wheat flour and oats. - Fats: Each muffin has about 3 grams of healthy fats, mainly from chia seeds and optional nuts. - Calories per Muffin: One muffin contains about 150 calories. This makes them a great snack or breakfast option. - Benefits of Ingredients Used: Whole wheat flour adds fiber, which helps digestion. Chia seeds are rich in omega-3 fatty acids, which are good for your heart. Greek yogurt adds protein and probiotics for gut health. Blueberries are full of antioxidants, which help fight free radicals in the body. - Why Protein-Packed is Beneficial: Protein helps build muscle and keeps you full longer. When you eat protein in the morning, it helps you stay energized throughout the day. - Balancing Muffins with Other Foods: Pair these muffins with a side of fruit or a handful of nuts. This gives you more fiber and healthy fats. - Incorporating into a Healthy Diet: Enjoy these muffins as part of a balanced breakfast. Add a glass of almond milk or a smoothie for a nutrient boost. These muffins fit well into a healthy lifestyle, offering both taste and nutrition. For the full recipe, click here. Can I use frozen blueberries? Yes, you can use frozen blueberries. They work well in this recipe. Just fold them in gently to avoid breaking them. How do I know when the muffins are done? Check for doneness by inserting a toothpick into the center. If it comes out clean, they are ready. Can I substitute almond milk with other types of milk? Yes, you can use any milk you like. Regular milk or oat milk works great too. Are these muffins suitable for meal prep? Absolutely! These muffins store well in the fridge for several days. They make a great grab-and-go breakfast. How can I make them lower in sugar? You can reduce the honey or maple syrup. Using mashed bananas can add sweetness without added sugar. What’s the best way to enjoy protein-packed muffins? Serve them warm with a bit of Greek yogurt. You can also add fresh fruit for extra flavor. What can I do if my muffins are too dry? If your muffins turn out dry, you may have overbaked them. Bake just until golden brown. How do I achieve a dome shape on my muffins? Fill muffin cups to about two-thirds full. This allows room for them to rise beautifully. Can I make this batter ahead of time? Yes, you can prepare the batter and store it in the fridge for up to 24 hours. Just stir gently before baking. In this article, we explored how to make healthy blueberry muffins from scratch. We covered key ingredients, step-by-step instructions, and helpful tips. You learned about variations for different diets and flavors, plus nutritional benefits. These muffins are quick to make and satisfying to eat. Keep experimenting to find your perfect muffin. Enjoy the fun of baking and delight in nutritious snacks. Your journey to great blueberry muffins starts now!
Protein-Packed Blueberry Muffins Simple Breakfast Treat
Looking for a quick breakfast that fuels your day? These Protein-Packed Blueberry Muffins are a delicious solution. Made with wholesome ingredients like whole wheat flour,
To make a delicious crustless zucchini quiche, you'll need: - 2 medium zucchinis, grated - 1 cup shredded mozzarella cheese - 1/2 cup grated parmesan cheese - 4 large eggs - 1/2 cup milk (or your choice of plant-based milk) - 1 small onion, finely chopped - 2 cloves garlic, minced - 1 teaspoon dried oregano - Salt and pepper to taste - 2 tablespoons olive oil - Fresh parsley, chopped (for garnish) Each ingredient plays a vital role. The zucchinis add moisture and texture. The cheeses give it a rich flavor. Eggs bind everything together for a solid quiche. You can add a few optional ingredients to elevate your quiche: - 1/2 cup cooked bacon or ham, diced - 1/2 cup bell peppers, chopped - 1/2 cup chopped spinach or kale - Fresh herbs like basil or thyme These extras add depth and a pop of color. Feel free to mix and match based on what you have on hand. If you need to make adjustments, here are some easy swaps: - For a gluten-free option, this recipe is naturally gluten-free. Just ensure all ingredients are certified gluten-free. - Swap dairy milk with almond, oat, or soy milk for a dairy-free version. - Use nutritional yeast instead of cheese for a vegan alternative. These substitutions keep the essence of your quiche while catering to different diets. You can enjoy a tasty meal that fits your needs. For the complete recipe, check the Full Recipe. First, preheat your oven to 350°F (175°C). This helps cook the quiche evenly. While the oven warms up, take a 9-inch pie dish or quiche dish. Grease it with cooking spray or a little olive oil. This step stops the quiche from sticking. Next, grab a large skillet. Add two tablespoons of olive oil and heat it over medium heat. Chop one small onion finely and mince two cloves of garlic. Add them to the skillet. Sauté for about 3-4 minutes. You want the onion to turn soft and clear. Now, take your two medium zucchinis and grate them. Stir the zucchini into the skillet. Cook for another 5-7 minutes. The zucchini should soften and lose some moisture. Once done, remove the skillet from the heat. Let it cool for a few minutes. While the zucchini cools, grab a large mixing bowl. Crack four large eggs into the bowl. Add 1/2 cup of milk. Whisk them together until blended well. Next, fold in 1 cup of shredded mozzarella and 1/2 cup of grated parmesan. Add one teaspoon of dried oregano, salt, and pepper to taste. This mix will add a lot of flavor. Now it's time to combine everything. Take the cooled zucchini mix and gently fold it into the egg mixture. Make sure everything is well mixed. Pour this combined mix into the greased pie dish. Smooth the top with a spatula for even cooking. Place the dish in the preheated oven. Bake for 30-35 minutes. The quiche is done when it is set and lightly golden on top. Check with a toothpick in the center; it should come out clean. Once baked, let the quiche cool for a few minutes before slicing. This will help you cut neat pieces. Serve warm with fresh parsley on top for a nice touch. Enjoy your delicious crustless zucchini quiche! For the full recipe, check out the detailed instructions. To keep your crustless zucchini quiche from being soggy, follow these steps: - Grate and Drain Zucchini: Grate the zucchini and place it in a clean kitchen towel. Squeeze out as much liquid as you can. This step helps reduce moisture. - Cook Zucchini First: Sauté the grated zucchini in olive oil before adding it to the egg mix. This will help evaporate extra moisture. - Use Less Milk: If you want a firmer quiche, reduce the amount of milk in your recipe. Start with 1/3 cup instead of 1/2 cup. Leftover quiche can taste just as good when reheated. Here’s how: - Oven Reheat: Preheat your oven to 350°F (175°C). Place the slices on a baking sheet and cover them with foil. This keeps them from drying out. Heat for about 15-20 minutes. - Microwave Option: If you’re in a hurry, use the microwave. Heat each slice for 30-60 seconds. Check to avoid overheating, which can make it rubbery. Serving this quiche is fun and easy. Here are some ideas: - Garnish with Fresh Herbs: Add chopped parsley or chives on top for a fresh touch. - Pair with Salad: Serve with a light salad of mixed greens for a balanced meal. - Add a Side: Consider crusty bread or a fruit salad to round out your meal. - Brunch Idea: Slice it into wedges for a lovely brunch presentation. For the complete instructions and ingredients, check out the Full Recipe. {{image_4}} You can easily boost your crustless zucchini quiche with protein. Adding bacon or ham gives it a hearty touch. Simply cook the meat until crispy. Chop it into small pieces and mix it with the zucchini before adding the egg mixture. If you want a lighter option, try adding diced chicken or turkey. This simple swap adds flavor and makes your quiche more filling. Feel free to get creative with vegetables! Bell peppers add color and crunch. Spinach brings a nice, mild flavor. You can mix these veggies into the sautéed zucchini. Just chop them finely and add them to the pan. Remember to sauté them briefly to soften. This not only enhances taste but also boosts nutrition. Other great options include mushrooms, kale, or even sweet corn. Herbs and spices can make your quiche sing! Adding fresh herbs like basil or thyme can brighten the dish. You can also use dried herbs like rosemary or dill, adding them to the egg mixture for depth. For a kick, try adding red pepper flakes or smoked paprika. These small changes can transform your quiche into something new and exciting. Experiment with flavors to find your favorite blend. Feel free to explore these options and find what you love best! For the full recipe, check out the details above. To store leftover crustless zucchini quiche, let it cool first. Wrap slices tightly in plastic wrap or foil. You can also place the slices in an airtight container. Store it in the fridge for up to three days. This keeps the quiche fresh and tasty. If you want to keep the quiche longer, freezing is a great option. Cut the quiche into slices. Wrap each slice in plastic wrap. Then, place the wrapped slices in a freezer-safe bag. Label the bag with the date. You can freeze it for up to three months. When you’re ready to eat, just thaw it in the fridge overnight. Reheating is easy. To keep the quiche moist, use the oven. Preheat the oven to 350°F (175°C). Place the slice on a baking sheet. Heat for about 10-15 minutes, or until warm. You can also use a microwave if you're short on time. Place a slice on a microwave-safe plate. Heat for 1-2 minutes, checking often to avoid overcooking. Enjoy your quiche with a fresh side salad or some fruit for a delightful meal! For the full recipe, check the earlier sections. Yes, you can! This recipe is very flexible. You can use bell peppers, spinach, or mushrooms. Just chop them finely and cook them the same way as zucchini. This adds more flavor and color to your dish. The quiche will last about 3 to 4 days in the fridge. Make sure to store it in an airtight container. This keeps it fresh and tasty for later meals. Absolutely! You can prepare the quiche a day before. Just bake it, let it cool, and store it in the fridge. When you're ready to eat, reheat it in the oven for a warm meal. Serve it warm, straight from the oven. You can sprinkle fresh parsley on top for a nice touch. Pair it with a side salad for a complete meal. For brunch, slice it into wedges for easy serving. Check out the Full Recipe for more tips! In this post, we covered how to make a delicious crustless zucchini quiche. You learned about key ingredients, step-by-step instructions, and tips to avoid moisture. We also explored storage options and answered common questions. This recipe is easy to customize with substitutions, proteins, and veggies. Keep it fresh and flavorful. Enjoy your cooking adventure with this tasty dish!
Crustless Zucchini Quiche Easy and Tasty Recipe
Looking for a simple yet delicious recipe? Crustless Zucchini Quiche is your answer! It’s easy to make and full of flavor. This dish is perfect
- 1 medium zucchini, finely grated - 1 cup fresh blueberries (or thawed frozen blueberries) - 1 cup whole wheat flour - 1/2 cup rolled oats - 1/4 cup honey or maple syrup - 1/4 cup unsweetened applesauce - 2 large eggs - 1 teaspoon pure vanilla extract - 1 teaspoon baking powder - 1/2 teaspoon baking soda - 1/2 teaspoon ground cinnamon - 1/4 teaspoon sea salt - 1/2 cup chopped walnuts or pecans (optional) These ingredients come together to create a tasty and healthy treat. Each one plays a key role in the flavor and texture of the muffins. Zucchini adds moisture without a strong taste. It helps keep the muffins soft and fluffy. Blueberries bring a burst of sweetness and a touch of tartness. Whole wheat flour adds fiber, making these muffins more filling. Honey or maple syrup acts as a natural sweetener. Unsweetened applesauce helps reduce added sugar while keeping them moist. Eggs bind the ingredients, giving structure to the muffins. Baking powder and baking soda are essential for rise. Ground cinnamon adds warmth and depth, while sea salt enhances all flavors. Chopped walnuts or pecans provide a delightful crunch, but they are optional. When you mix these ingredients, you create a healthy snack perfect for any time of day. Check out the Full Recipe to get started on making these delicious blueberry zucchini muffins! - Preheat the oven to 350°F (175°C). - Prepare a muffin tin with paper liners or grease it lightly. - In a large bowl, mix the finely grated zucchini, honey or maple syrup, applesauce, eggs, and vanilla extract. Stir well until all wet ingredients blend. - In another bowl, whisk together whole wheat flour, rolled oats, baking powder, baking soda, cinnamon, and sea salt. - Gradually add the dry ingredients to the wet mixture. Stir gently until just combined. Avoid over-mixing to keep muffins light and fluffy. - Fold in the blueberries and chopped nuts, if desired. Make sure they spread evenly without mashing the berries. - Spoon the batter into muffin cups, filling each about 3/4 full. - Bake in the preheated oven for 18-20 minutes. Check with a toothpick; it should come out clean. - Cool the muffins in the pan for 5 minutes, then transfer to a wire rack to cool completely. For the complete guide, check the Full Recipe. To make light muffins, avoid over-mixing the batter. When you combine the wet and dry ingredients, mix just until combined. This keeps your muffins from getting dense and tough. To check if your muffins are done, use a toothpick. Insert it into the center of a muffin. If it comes out clean, your muffins are ready. If there is wet batter, bake them a few more minutes. For a beautiful presentation, serve your muffins with a dollop of Greek yogurt. Add a few fresh blueberries on top for color and flavor. This makes a tasty snack or breakfast option. To keep your muffins fresh, store them in an airtight container. They can last for about three days at room temperature. If you want to keep them longer, freeze them. Just wrap each muffin in plastic wrap and place them in a freezer bag. They will stay fresh for up to three months. For the Full Recipe, follow the instructions carefully to enjoy every bite of these healthy blueberry zucchini muffins! {{image_4}} You can easily change some ingredients in this recipe. Using almond flour or gluten-free flour makes the muffins gluten-free. This swap keeps the muffins tasty and light. If you need a different sweetener, try agave syrup or coconut sugar. Both options work well in this recipe. They add sweetness without being too heavy. To change the flavor, add spices like nutmeg or cardamom. A pinch of these spices boosts the muffins' taste. You can also mix in other fruits. For example, raspberries or bananas work great. These fruits add new flavors and textures. Don’t hesitate to get creative with your muffin mix! For the full recipe, check the complete guide above. To keep your Healthy Blueberry Zucchini Muffins fresh, follow these steps: - Room Temperature: Place muffins in an airtight container. They last up to three days. - Refrigeration: For longer freshness, store muffins in the fridge. They can stay good for up to a week. - Freezing: Muffins freeze well. Wrap each muffin in plastic wrap and place them in a freezer bag. They can last up to three months. Freezing is great for meal prep. You can enjoy these tasty muffins whenever you want. Reheating muffins helps restore their soft texture. Here are the best methods: - Microwave: Place a muffin on a plate and heat for about 10-15 seconds. Check if it's warm enough. - Oven: Preheat your oven to 350°F (175°C). Wrap the muffins in foil and heat for 10-15 minutes. This method keeps them moist. Both methods work well, but the oven gives a better texture. Enjoy your muffins warm for the best taste! These muffins last about 5 days at room temperature. Store them in an airtight container. For longer freshness, keep them in the fridge. You can also freeze them for up to three months. Just remember to wrap each muffin well. Yes, you can use frozen blueberries. Just thaw and drain them before adding. This helps prevent extra moisture in the batter. They may not hold their shape as well, but they still taste great! For a vegan version, use flax eggs. To make one flax egg, mix 1 tablespoon of ground flaxseed with 2.5 tablespoons of water. Let it sit for about 5 minutes until it thickens. You can also use unsweetened applesauce or mashed bananas. To make the muffins less sweet, reduce the honey or maple syrup. Try using just 2 tablespoons instead of 1/4 cup. You can also use a touch of stevia or erythritol for sweetness without the sugar. To make these muffins gluten-free, substitute whole wheat flour with a gluten-free flour blend. Make sure the blend has binding agents like xanthan gum. This ensures your muffins stay fluffy and delicious. Healthy blueberry zucchini muffins are easy to make and taste great. They take only 15 minutes to prep and 20 minutes to bake. Here’s how to make them. - 1 medium zucchini, finely grated - 1 cup fresh blueberries (or thawed frozen blueberries) - 1 cup whole wheat flour - 1/2 cup rolled oats - 1/4 cup honey or maple syrup - 1/4 cup unsweetened applesauce - 2 large eggs - 1 teaspoon pure vanilla extract - 1 teaspoon baking powder - 1/2 teaspoon baking soda - 1/2 teaspoon ground cinnamon - 1/4 teaspoon sea salt - 1/2 cup chopped walnuts or pecans (optional) 1. Preheat the Oven: Start by preheating your oven to 350°F (175°C). Grease a muffin tin or use paper liners. 2. Mix Wet Ingredients: In a big bowl, mix the grated zucchini, honey or maple syrup, applesauce, eggs, and vanilla extract. Stir this well. 3. Combine Dry Ingredients: In another bowl, whisk together whole wheat flour, rolled oats, baking powder, baking soda, ground cinnamon, and sea salt. 4. Combine Mixtures: Gradually add the dry mix to the wet mix. Stir gently until just combined. Avoid over-mixing, so muffins stay fluffy. 5. Fold in Extras: Gently fold in blueberries and optional nuts. Be careful not to squash the blueberries. 6. Fill Muffin Cups: Spoon the batter into the muffin cups, filling each about 3/4 full. 7. Bake: Bake in the preheated oven for 18-20 minutes. Use a toothpick to check if they’re done. 8. Cool: After baking, cool muffins in the pan for 5 minutes. Then move them to a wire rack to cool completely. These muffins are not just tasty; they also pack in nutrients from zucchini and blueberries, making them a smart snack choice. You can find the full recipe above to explore your baking adventure! These Healthy Blueberry Zucchini Muffins are easy to make and delicious. You learned about essential ingredients like zucchini and blueberries, which add nutrition. I shared simple steps to mix and bake without overdoing it. Baking tips helped you achieve light, fluffy muffins every time. You now know various ingredient swaps and storage methods to keep them fresh. Enjoy making these muffins as a healthy snack. They offer great taste and nutrition!
Healthy Blueberry Zucchini Muffins Easy and Tasty Snack
Looking for a healthy snack that’s also easy to make? Try these Healthy Blueberry Zucchini Muffins! With just a few simple ingredients, you can whip
- 6 large eggs - 1 cup fresh spinach, finely chopped - 1/2 cup bell peppers (red and yellow), diced - 1/2 cup zucchini, grated - 1/2 cup cherry tomatoes, halved - 1/4 cup red onion, finely chopped - 1/4 cup feta cheese, crumbled (optional) - 1 tablespoon extra virgin olive oil - Salt and freshly ground black pepper, to taste - Fresh basil leaves for garnish (optional) You can swap some veggies for different ones. Try mushrooms or asparagus for variety. If you want a dairy-free option, use a nut-based cheese. Always choose fresh produce for the best flavor. Look for bright colors and firm textures when you shop. This will make your frittata taste amazing. For a fun twist, add herbs like parsley or dill. They can change the flavor a lot. Don’t hesitate to get creative with what you have. Cooking should be fun and personal. For the full recipe, check out the Rainbow Veggie Frittata 🥚. - Preheat your oven to 375°F (190°C). This helps with even baking. - In a large skillet, prepare your vegetable mix. - Heat olive oil in the skillet over medium heat. - Add diced bell peppers and red onion. Sauté for 3-4 minutes. - Next, stir in grated zucchini and chopped spinach. Cook for 2-3 minutes. - Once the spinach wilts, add halved cherry tomatoes. Cook for 1 more minute. - While veggies cook, crack 6 large eggs into a bowl. Whisk them with salt and black pepper. - Pour the egg mixture over the sautéed vegetables in the skillet. - Gently mix to combine all the ingredients. - If using feta cheese, sprinkle it on top. - Carefully place the skillet in your preheated oven. Bake for 20-25 minutes. - Check that the eggs are set and the top is slightly golden. - Remove from the oven and let it cool for a minute before slicing. This method makes a delicious and healthy vegetable frittata. For the full recipe, check above. - How to tell when the frittata is done You can tell the frittata is done when the edges pull away from the skillet. The center should feel firm and not jiggly. A toothpick inserted in the middle should come out clean. - Avoiding sogginess in the frittata To avoid sogginess, ensure your veggies are not overcooked. Drain any excess water from veggies like zucchini before adding them. This keeps your frittata light and fluffy. - Best accompaniments for the frittata Serve your frittata with a fresh salad or some whole-grain bread. A light vinaigrette adds a nice touch. You can also pair it with avocado slices for creaminess. - Ideal side dishes for a complete meal Roasted potatoes or a simple fruit salad can make your meal complete. They add texture and flavor that complement the frittata well. - Creative ways to serve frittata Slice the frittata into wedges and serve on a colorful platter. You can stack the slices or arrange them in a circle for a fun look. - Garnishing tips for visual appeal Use fresh herbs like basil or parsley to garnish. A sprinkle of extra cherry tomatoes or a drizzle of olive oil can make the dish pop visually. {{image_4}} You can make your frittata more filling by adding protein. You have many choices, like meats or plant-based options. Here are a few ideas: - Cooked bacon or ham: These add a nice salty flavor. - Cooked chicken: Shredded chicken works well and brings lean protein. - Tofu: Crumbled tofu is great for a plant-based option. - Beans: Black beans or chickpeas can add protein and fiber. Customize your frittata by mixing in your favorite protein. Just be sure to cook any meats before adding them to the egg mix. This way, everything cooks evenly. Frittatas are fun because you can use many veggies. Seasonal vegetables are a great choice to keep it fresh. Here are some tasty swaps: - Asparagus: Adds a nice crunch and earthy flavor. - Mushrooms: They give a rich, umami taste. - Broccoli: This adds color and nutrients. - Sweet potatoes: For a sweet twist, you can use roasted sweet potatoes. Mix and match different vegetables for unique flavors. Think about what is in season or what you love. You can create a new favorite frittata each time! Cheese can change the whole taste of your frittata. You can pick from many types to suit your taste. Here are some options: - Cheddar: A classic choice that melts beautifully. - Goat cheese: This adds creaminess and tang. - Parmesan: A sprinkle of parmesan gives a nice salty kick. - Mozzarella: For a stretchy, gooey texture, mozzarella is perfect. Using different cheeses can change your frittata's flavor profile. Try different combinations to find what you like best. You can even mix cheeses for a richer taste! To keep your leftover frittata fresh, store it in an airtight container. Let it cool first to avoid steam buildup. Place it in the fridge within two hours of cooking. This helps maintain taste and texture. When ready to eat, you can reheat it in the oven or microwave. Yes, you can freeze frittata! Slice it into pieces before freezing. Wrap each slice tightly in plastic wrap. Then, place the wrapped slices in a freezer bag. This method prevents freezer burn. To reheat, thaw overnight in the fridge. For the best texture, heat it in the oven at 350°F (175°C) for about 15-20 minutes. You can keep leftovers in the fridge for 3-4 days. After that, it's best to toss them. Signs that the frittata has gone bad include an off smell or visible mold. Always trust your senses; if it looks or smells odd, it's safer to throw it out. A frittata is an Italian dish made with eggs and various fillings. It is like an open-faced omelet. Frittatas often include vegetables, cheese, and meats. The dish is cooked on the stove and then baked. This method creates a fluffy texture and a golden top. Frittatas date back to the 19th century in Italy. They are a great way to use leftover ingredients and are very versatile. Yes, you can make a frittata ahead of time. Cook it and let it cool completely. Slice it into portions and store it in the fridge. Use an airtight container for best results. When you are ready to eat, reheat slices in the microwave or oven. This method keeps the frittata tasty and fresh. It’s perfect for busy mornings or meal prep. Frittatas and omelets are both egg dishes, but they differ in style. An omelet is folded and often cooked quickly. Frittatas are cooked slowly and not folded. They have more fillings and are thicker. Quiches are another egg dish but have a crust. Frittatas and quiches are baked, while omelets are cooked on the stove. All three are delicious but have unique textures and tastes. Yes, adding herbs enhances the frittata's flavor. Fresh herbs like basil, parsley, and chives work well. They add brightness and aroma to the dish. Dried herbs like oregano or thyme can also be used. Add them when you mix the eggs or sauté the vegetables. Experiment with different herbs to find your favorite flavor combinations. For the complete instructions and ingredients, check out the Full Recipe for the Rainbow Veggie Frittata 🥚. This blog post explored how to make a delicious Rainbow Veggie Frittata. We covered key ingredients, cooking steps, and tips for perfect results. I shared substitutions for various diets and ideas for serving and presentation. Remember, this dish is versatile; you can swap veggies and proteins for your taste. Whether for breakfast or brunch, you can enjoy it all week. Try this frittata and get creative in the kitchen!
Healthy Vegetable Frittata Simple and Tasty Recipe
Looking for a simple and tasty way to enjoy your veggies? This Healthy Vegetable Frittata is your answer! Packed with fresh ingredients like spinach, bell