Breakfast

- 1 cup all-purpose flour - 1 teaspoon baking powder - 1/2 teaspoon baking soda - 1/4 teaspoon salt - 1 teaspoon pumpkin pie spice - 1 cup pumpkin puree (canned or fresh) - 1/2 cup cream cheese, softened to room temperature - 1/4 cup granulated sugar - 1 large egg - 1 teaspoon vanilla extract - 3/4 cup buttermilk (or substitute with regular milk mixed with 1 tablespoon vinegar) - 2 tablespoons maple syrup (plus extra for serving) - Butter or oil for cooking - Optional toppings (whipped cream, chopped nuts) When I make pumpkin cream cheese pancakes, I start with the dry ingredients. First, I mix the flour, baking powder, baking soda, salt, and pumpkin pie spice in a bowl. This blend gives the pancakes their nice rise and flavor. Next, I focus on the wet ingredients. I beat the softened cream cheese until it's smooth. Then, I add pumpkin puree, sugar, egg, vanilla, and maple syrup, mixing until creamy. This step adds richness and sweetness. For the cooking essentials, I use butter or oil in my pan. It helps the pancakes cook evenly and adds flavor. I also prepare optional toppings like whipped cream or chopped nuts, which make the pancakes even more delicious. With these ingredients ready, you're set for a cozy breakfast treat! Start by mixing the dry ingredients. In a medium bowl, add: - 1 cup all-purpose flour - 1 teaspoon baking powder - 1/2 teaspoon baking soda - 1/4 teaspoon salt - 1 teaspoon pumpkin pie spice Use a whisk to blend these ingredients well. This step is key to even flavor. Once mixed, set the bowl aside. You will come back to this later. Next, create the pumpkin mixture. In a larger bowl, beat the cream cheese. Use an electric mixer or a whisk. Make it smooth and creamy. Then, add: - 1 cup pumpkin puree - 1/4 cup granulated sugar - 1 large egg - 1 teaspoon vanilla extract - 2 tablespoons maple syrup Mix until well combined and smooth. The pumpkin and cream cheese make this mixture rich and tasty. Now, it’s time to combine everything. Gradually add the dry mixture to the pumpkin mixture. Alternate this with: - 3/4 cup buttermilk Stir gently. Do not overmix. The batter should be thick and slightly lumpy. Preheat a non-stick skillet over medium heat. Lightly grease it with butter or oil. For each pancake, pour about 1/4 cup of batter onto the skillet. Cook for 2-3 minutes. Look for bubbles on the surface and set edges. Flip the pancakes carefully. Cook for another 1-2 minutes until golden brown. Repeat with the rest of the batter. Add more butter or oil to the skillet as needed. Enjoy the aroma as they cook! To get fluffy pancakes, avoid overmixing the batter. Mix just until combined. If you mix too much, pancakes turn tough and dense. Use room temperature ingredients for the best results. When cream cheese, pumpkin, and eggs are warm, they blend better. This helps create a smooth batter that gives light pancakes. Aim for a skillet temperature of medium heat. If it’s too hot, pancakes may burn outside while staying raw inside. To test, sprinkle a few drops of water on the skillet. If they dance and evaporate, it’s ready. Prevent pancakes from sticking by using enough butter or oil. Coat the skillet lightly before each pancake. This keeps your pancakes intact and helps them cook evenly. Serve your pancakes stacked high on a plate. Drizzle them with maple syrup for a sweet touch. For added delight, top with whipped cream. Be creative with garnishes. Add chopped pecans or walnuts for crunch. A sprinkle of pumpkin pie spice on top makes a festive finish. {{image_4}} You can make your pancakes healthier with just a few changes. - Whole wheat flour option: Swap white flour for whole wheat flour. This boosts fiber and gives a nutty taste. - Sugar substitutes: Use honey or maple syrup instead of granulated sugar. This adds sweetness without refined sugar. Want to make your pancakes even tastier? Try these ideas. - Adding chocolate chips: Toss in some chocolate chips for a sweet surprise. They melt and create pockets of joy. - Incorporating nuts or fruit: Add chopped nuts like walnuts or pecans for crunch. You can also mix in blueberries or sliced bananas for extra flavor. Make your pancakes fit any holiday or season. - Christmas-spice variation: Add cinnamon and nutmeg for a warm holiday flavor. This makes your pancakes feel festive. - Pumpkin spice latte inspiration: Mix in a touch of coffee or espresso powder. This gives your pancakes a cozy coffee twist. To keep your pumpkin cream cheese pancakes fresh, store them in the fridge. Place the pancakes in an airtight container or wrap them in plastic wrap. This method helps maintain their soft texture. The pancakes will last about three to four days in the fridge. If you want to keep them longer, consider freezing. Reheating pancakes is easy and quick. The best method is to use a skillet. Heat the skillet over low to medium heat. Add a tiny bit of butter or oil to prevent sticking. Place the pancakes on the skillet and warm them for about one to two minutes per side. You can also use a microwave, but they might not stay as fluffy. If you freeze them, let them thaw in the fridge overnight before reheating. If you want to make more pancakes, simply scale the recipe. For example, doubling the ingredients will give you about sixteen pancakes. Store extra pancakes in the fridge or freezer like mentioned above. When you make larger batches, ensure you have enough space in your containers to avoid squishing them. Yes, you can use regular milk. Just mix one tablespoon of vinegar with three-quarters of a cup of milk. Let it sit for five minutes. This creates a similar acid that helps the pancakes rise. The texture will still be fluffy and soft, just like with buttermilk. To make pumpkin puree, start with a small pumpkin. Cut it in half and scoop out the seeds. Place the halves cut side down on a baking sheet. Roast them at 350°F for about 45 minutes. Once cool, scoop out the flesh and blend it until smooth. You can use this fresh puree in your pancakes. Toppings can add fun flavors and textures. Here are some great options: - Whipped cream - Maple syrup - Chopped pecans or walnuts - A sprinkle of extra pumpkin pie spice - Chocolate chips for sweetness Feel free to mix and match these toppings to make your pancakes even more delicious! This blog covered how to make delicious pumpkin cream cheese pancakes. We talked about all the ingredients, both dry and wet, needed for this recipe. You learned step-by-step instructions on mixing and cooking. I shared tips for perfect texture and creative serving ideas. Plus, we explored variations and storage info to help you enjoy your pancakes longer. In the end, making this dish is fun and rewarding. Try new toppings or variations to keep it exciting. Enjoy your cooking adventures!
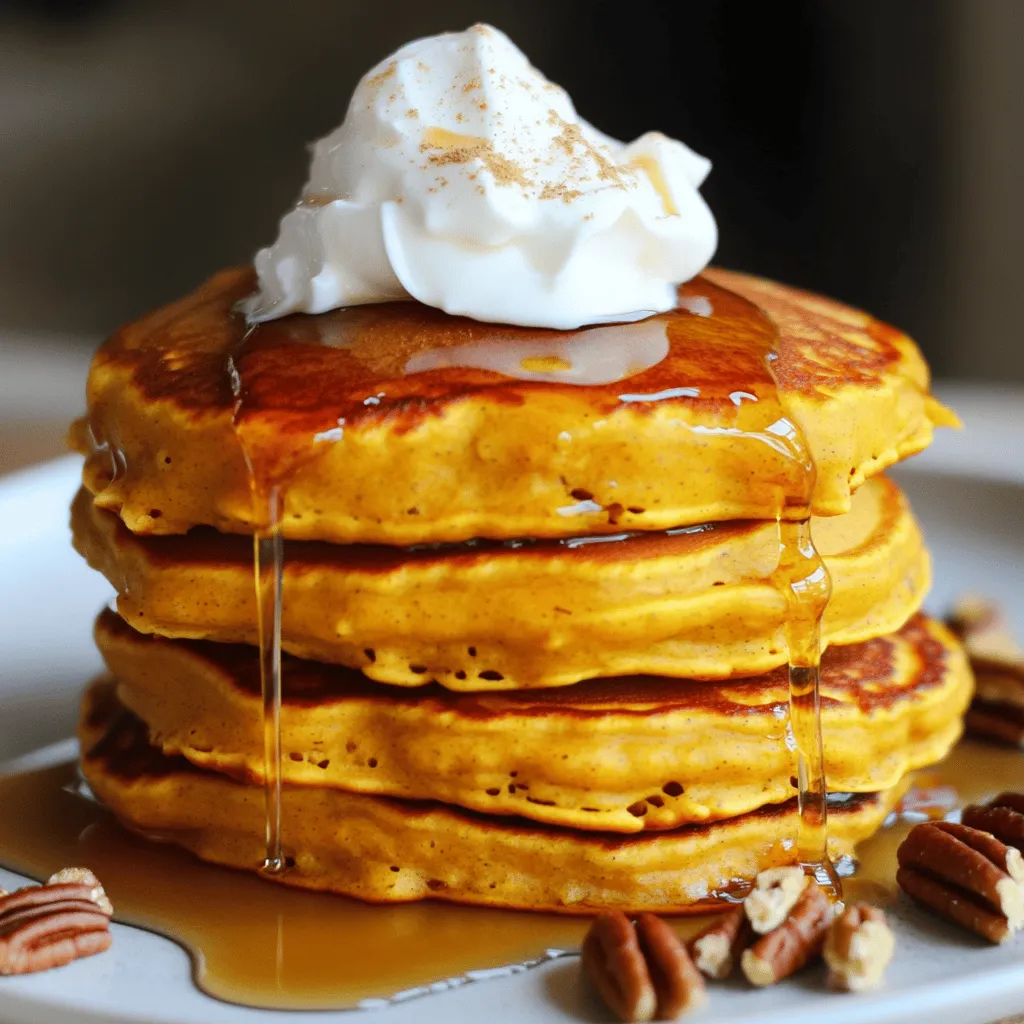
Pumpkin Cream Cheese Pancakes Savory and Comforting Treat
Get ready to treat yourself to a cozy breakfast delight with my Pumpkin Cream Cheese Pancakes! These pancakes blend warm pumpkin spice with creamy richness,
- 1 cup canned pumpkin puree - 1/2 cup Greek yogurt - 2 large eggs - 1/4 cup honey or maple syrup - 1/2 cup almond flour - 1/2 cup rolled oats - 1 scoop vanilla protein powder - 1 teaspoon baking powder - 1 teaspoon baking soda - 1 teaspoon ground cinnamon - 1/2 teaspoon ground nutmeg - 1/4 teaspoon salt - 1/4 cup chopped nuts (such as walnuts or pecans) - 1/4 cup dark chocolate chips The main ingredients make these muffins moist and tasty. Canned pumpkin puree gives them a rich flavor. Greek yogurt adds creaminess while packing in protein. Eggs help bind everything together, making the muffins rise. Honey or maple syrup sweetens the mix naturally. The dry ingredients are just as important. Almond flour keeps them gluten-free and gives a nice texture. Rolled oats add fiber and help fill you up. Protein powder boosts the nutrition, making these muffins a great snack. Baking powder and baking soda help them rise perfectly. The spices, like cinnamon and nutmeg, bring warm, cozy flavors. A touch of salt balances all the sweetness. You can add fun extras too! Chopped nuts add crunch and flavor. Dark chocolate chips make them extra indulgent. You can mix and match these ingredients to make the muffins your own. Enjoy them as a healthy snack or a quick breakfast! - Preheat oven to 350°F (175°C). - Prepare muffin tin with liners or cooking spray. - Combine pumpkin puree, Greek yogurt, and eggs. - Blend until smooth and creamy. - Mix almond flour, rolled oats, protein powder, and spices. - Ensure no lumps remain. - Gradually add dry mixture to wet mixture. - Be cautious not to overmix. - Fill muffin cups two-thirds full. - Add optional nuts or chocolate chips. - Bake muffins for 18-20 minutes. - Cool in tin for 5 minutes, then transfer to a wire rack. Creating these pumpkin protein muffins is simple. Each step builds on the last, resulting in a tasty snack. You’ll enjoy the mix of flavors and textures. The warm spices pair well with the pumpkin. Plus, they are healthy and satisfying. Enjoy them as breakfast or a snack! To make your pumpkin protein muffins fluffy, avoid overmixing. When you mix the wet and dry ingredients, stir just until combined. Overmixing can make them dense. Use fresh ingredients, too. Fresh pumpkin puree and yogurt can enhance flavor and texture. You can adjust the sweetness to your liking. If you prefer less sweet muffins, modify the amount of honey or maple syrup. You can also explore sugar alternatives like agave or stevia. These options can help you keep it low-sugar while still tasting great. For storing leftovers, let muffins cool completely first. Place them in an airtight container to keep them fresh. You can refrigerate them for up to a week. To reheat, pop them in the microwave for about 15-20 seconds. This will keep them soft and warm. {{image_4}} You can easily make these muffins fit your diet. For gluten-free options, swap almond flour with coconut flour or a gluten-free blend. This keeps the muffins soft and tasty. If you want to make them vegan, replace the eggs with flax eggs. Mix one tablespoon of ground flaxseed with three tablespoons of water. Let it sit until it thickens. You can also use non-dairy yogurt instead of Greek yogurt. This lets everyone enjoy these delicious muffins. Want to spice things up? Add different spices like ginger or cloves. These flavors give the muffins a warm twist. You can also mix in fruits like cranberries or blueberries. They add sweetness and a pop of color. Both options keep your muffins exciting and delicious. If you love crunch, add seeds like chia or sunflower seeds. They add a fun texture and healthy fats. You can also swap nuts for different textures. Try using pecans instead of walnuts, or leave them out altogether. These small changes make a big difference in every bite. Pumpkin protein muffins last about one week in the fridge. Store them in an airtight container to keep them fresh. I like using glass containers. They help maintain moisture and prevent spills. To freeze the muffins, let them cool completely. Then, wrap each muffin in plastic wrap. Place them in a freezer bag, and remove as much air as possible. This keeps them fresh. Thaw muffins overnight in the fridge. To reheat, warm them in the microwave for about 15 to 30 seconds. At room temperature, these muffins stay fresh for about three days. Look for signs like a dry texture or mold to know if they are no longer good. If they smell off or taste stale, it’s best to toss them. Pumpkin protein muffins can last about 3 to 5 days at room temperature. Store them in an airtight container. If you want them to last longer, keep them in the fridge for up to a week. Freezing is also an option. They can stay good for about three months in the freezer. Make sure to wrap them tightly to avoid freezer burn. Yes, you can use several alternatives for Greek yogurt. Here are some options: - Regular yogurt (plain) - Cottage cheese, blended until smooth - Silken tofu for a dairy-free option - Unsweetened applesauce for a lower-fat choice Choose based on your taste and dietary needs. Each substitute will give a slightly different flavor and texture. To boost protein in your muffins, consider these tips: - Add more protein powder; just a half scoop can make a difference. - Mix in seeds, like chia or hemp seeds. - Include nut butter; almond or peanut butter works well. - Use nuts as a topping or mix them into the batter. These additions help improve the protein value while enhancing flavor. Absolutely! Pumpkin protein muffins are great for meal prep. You can make a batch on the weekend and enjoy them all week. Here’s how to do it: - Bake muffins and let them cool completely. - Store them in an airtight container in the fridge. - You can also freeze some for later enjoyment. Just thaw them overnight in the fridge when you’re ready to eat. These muffins pair well with many delicious options: - Spread almond butter or peanut butter for extra flavor. - Serve with a side of fresh fruit like apples or bananas. - Enjoy with a cup of yogurt or a smoothie. - Drizzle with honey or maple syrup for added sweetness. These ideas can enhance your snack or breakfast experience. These pumpkin protein muffins combine healthy ingredients and easy steps. You learned about the main components, like pumpkin puree, Greek yogurt, and almond flour. I shared tips to ensure your muffins come out fluffy and delicious. With all the options for flavors and dietary needs, you can customize these muffins to fit your taste. Enjoy baking and experimenting with this recipe! Happy muffin-making!
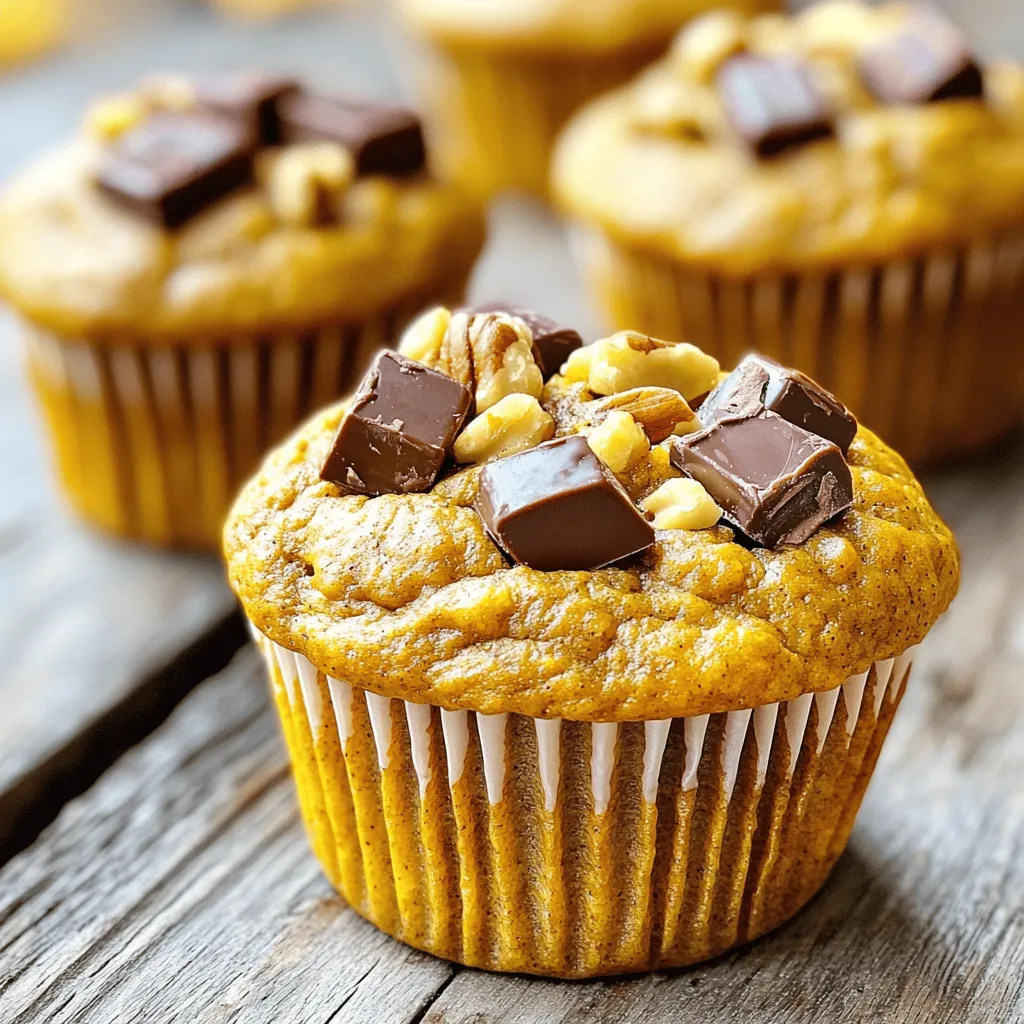
Pumpkin Protein Muffins Healthy and Delicious Snack
If you’re looking for a healthy snack that’s also delicious, you’ve found it! These Pumpkin Protein Muffins are packed with flavor and nutrients. I’ll walk
To make these tasty muffins, you need some key ingredients: - 1 cup canned pumpkin puree - 1/2 cup vegetable oil - 1 cup packed brown sugar - 1/2 cup granulated sugar - 2 large eggs, at room temperature - 1 teaspoon pure vanilla extract - 1 1/2 cups all-purpose flour - 1 teaspoon baking soda - 1 teaspoon baking powder - 1 teaspoon ground cinnamon - 1/2 teaspoon ground nutmeg - 1/4 teaspoon ground ginger - 1/2 teaspoon salt - 1 cup semi-sweet chocolate chips These ingredients create a moist muffin with a rich pumpkin flavor and sweet chocolate bursts. You can customize your muffins with fun add-ins. Here are some ideas: - 1/2 cup chopped walnuts - 1/4 cup dried cranberries - A sprinkle of powdered sugar for serving These options add texture and a little twist to your muffins. Want to make changes? Here are some smart swaps you can try: - Use applesauce instead of oil for a healthier muffin. - Swap out brown sugar for coconut sugar for a lighter flavor. - Use gluten-free flour if you need a gluten-free option. These substitutions still keep the muffins tasty while meeting your needs. Start by preheating your oven to 350°F (175°C). This step is key. While the oven warms up, prepare a muffin tin. Line it with paper liners or spray it lightly with cooking spray. This keeps the muffins from sticking. In a large bowl, mix the canned pumpkin puree, vegetable oil, brown sugar, and granulated sugar. Whisk these ingredients together until smooth. The mixture should feel creamy and rich. Next, add the eggs, one at a time. Mix well after each egg to make sure they blend in. Stir in the vanilla extract for a nice flavor boost. In a separate bowl, combine the all-purpose flour, baking soda, baking powder, ground cinnamon, ground nutmeg, ground ginger, and salt. Whisk these dry ingredients together. This ensures the leavening agents and spices are mixed evenly. Now, gently add the dry ingredients to the wet mix. Stir carefully until just combined. Do not overmix. A few lumps in the batter are completely fine. This helps keep the muffins light and fluffy. Next, fold in the chocolate chips and walnuts if you’re using them. Make sure they spread evenly throughout the batter. This will add great flavor and texture to your muffins. Use a scoop or spoon to fill each muffin cup about two-thirds full. This allows room for the muffins to rise while baking. Place the muffin tin in the oven and bake for 18-20 minutes. To check for doneness, insert a toothpick into a muffin. If it comes out clean, they’re ready. Once baked, take the muffins out of the oven. Let them cool in the tin for about 5 minutes. Then, transfer them to a wire rack. This helps them cool completely and keeps them moist. Enjoy your muffins warm or at room temperature! To make your muffins moist, use canned pumpkin puree. It adds both flavor and moisture. Do not overmix the batter; mix just until combined. This keeps the muffins light and fluffy. Baking them at 350°F is key for even cooking. Bake for 18-20 minutes, and check with a toothpick. If it comes out clean, your muffins are done. One common mistake is measuring flour incorrectly. Use the spoon-and-level method for accuracy. Another mistake is overmixing; it leads to dense muffins. Make sure to preheat your oven before baking. If you skip this step, your muffins may not rise well. Lastly, avoid opening the oven door too often. This can drop the temperature and affect baking. Always line your muffin tin or grease it well. This helps with easy removal. Use room temperature eggs for better mixing. They blend into the batter more smoothly. Fold in chocolate chips gently to avoid breaking them. For extra flavor, try adding chopped walnuts. They give a nice crunch and taste. Serve your muffins warm for the best experience. {{image_4}} You can easily make vegan pumpkin chocolate chip muffins. Simply swap the eggs for flaxseed meal. Use 1 tablespoon of flaxseed meal mixed with 2.5 tablespoons of water for each egg. Let it sit for about five minutes until it thickens. Instead of vegetable oil, use coconut oil or applesauce for moisture. Choose dairy-free chocolate chips to keep it vegan. These muffins taste just as good and are a great option for everyone. If you need gluten-free muffins, replace all-purpose flour with a gluten-free blend. Many store-bought blends work well. Check to ensure they contain xanthan gum for better texture. You can also use almond or oat flour, which adds nice flavor. Just remember, gluten-free flours can absorb more moisture. You may need to add a bit more pumpkin puree or oil to keep them moist. To boost the flavor, add spices or extracts. Try a teaspoon of pumpkin pie spice for more warmth. You can also mix in chopped pecans or hazelnuts for a crunchy twist. For a more indulgent treat, use dark chocolate chips instead of semi-sweet. A pinch of sea salt on top before baking can enhance the sweetness. Get creative and make these muffins your own! To keep your pumpkin chocolate chip muffins fresh, store them in an airtight container. This will keep them moist and tasty. You can place a piece of bread in the container to help absorb moisture. Muffins stay good at room temperature for about three days. If you want them to last longer, consider refrigerating them. They can stay fresh for up to a week in the fridge. Freezing muffins is a great way to enjoy them later. To freeze, let the muffins cool completely first. Then, wrap each muffin in plastic wrap. After that, place them in a freezer-safe bag or container. This keeps them fresh for up to three months. When you’re ready to eat one, just take it out and let it thaw at room temperature. Reheating your muffins can bring back their fresh-baked taste. You can do this in the oven or microwave. For the oven, preheat it to 350°F (175°C). Place the muffins on a baking sheet and heat for about 10 minutes. For the microwave, heat each muffin for about 10-15 seconds. This will make them warm and soft again. Enjoy them fresh, and feel free to pair them with your favorite drink! Yes, you can use fresh pumpkin. Just cook and puree it first. Fresh pumpkin adds a lovely flavor and texture. To prepare it, cut the pumpkin, remove the seeds, and roast it until soft. Then, blend it into a smooth puree. Make sure to measure out one cup for the recipe. Check the muffins after 18 minutes. Insert a toothpick into the center of a muffin. If it comes out clean, the muffins are done. If the toothpick has batter on it, bake for a few more minutes. Keep checking until they are fully baked. The tops should be golden brown and spring back when touched. These muffins pair well with many things. Here are a few ideas: - A warm cup of coffee or tea - Cream cheese spread for added richness - A light drizzle of honey or maple syrup - Fresh fruit, like apples or pears - Yogurt for a healthy boost In this post, we explored how to make perfect pumpkin chocolate chip muffins. We covered essential ingredients, steps for preparation, and helpful tips for success. Remember to choose fresh ingredients for the best taste. Always check for doneness by inserting a toothpick. You can enjoy these muffins in various ways, and they freeze well for future treats. With the right techniques, you can bake muffins everyone will love. Happy baking!
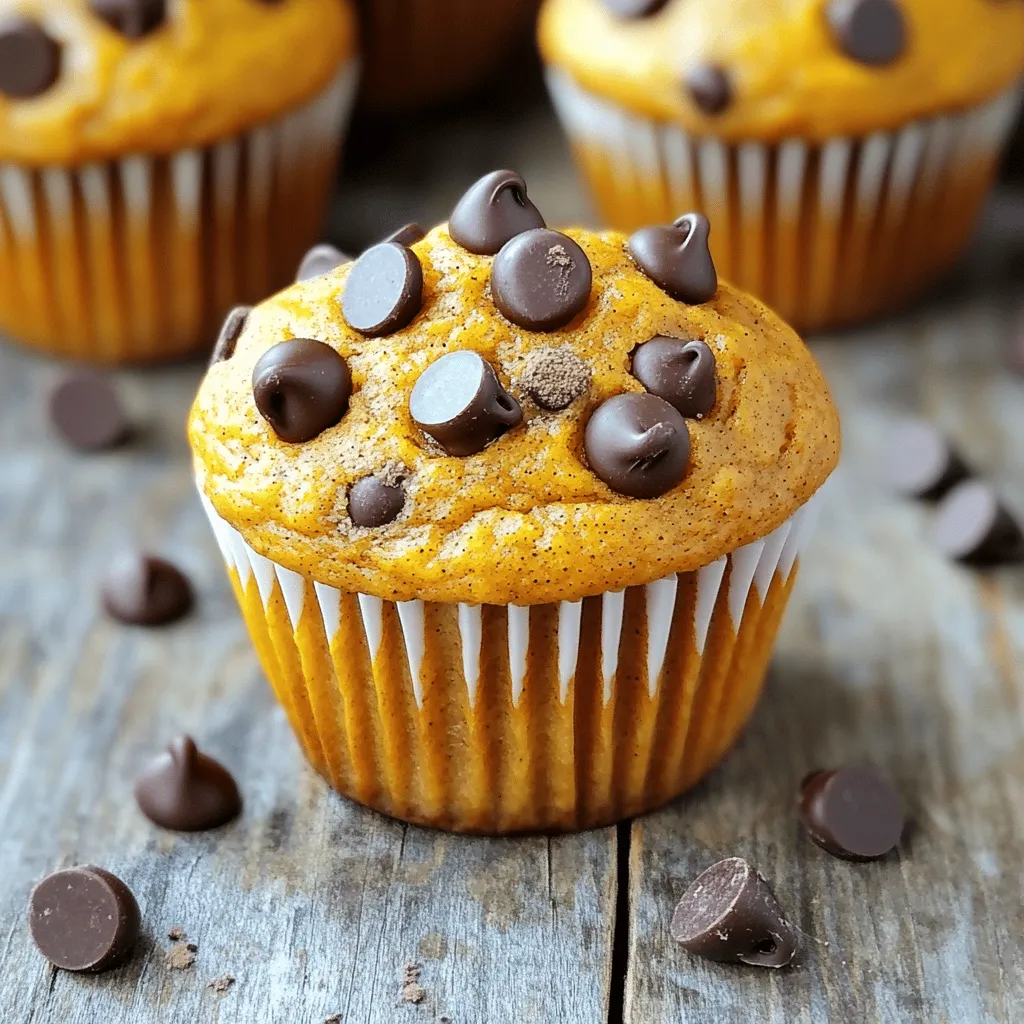
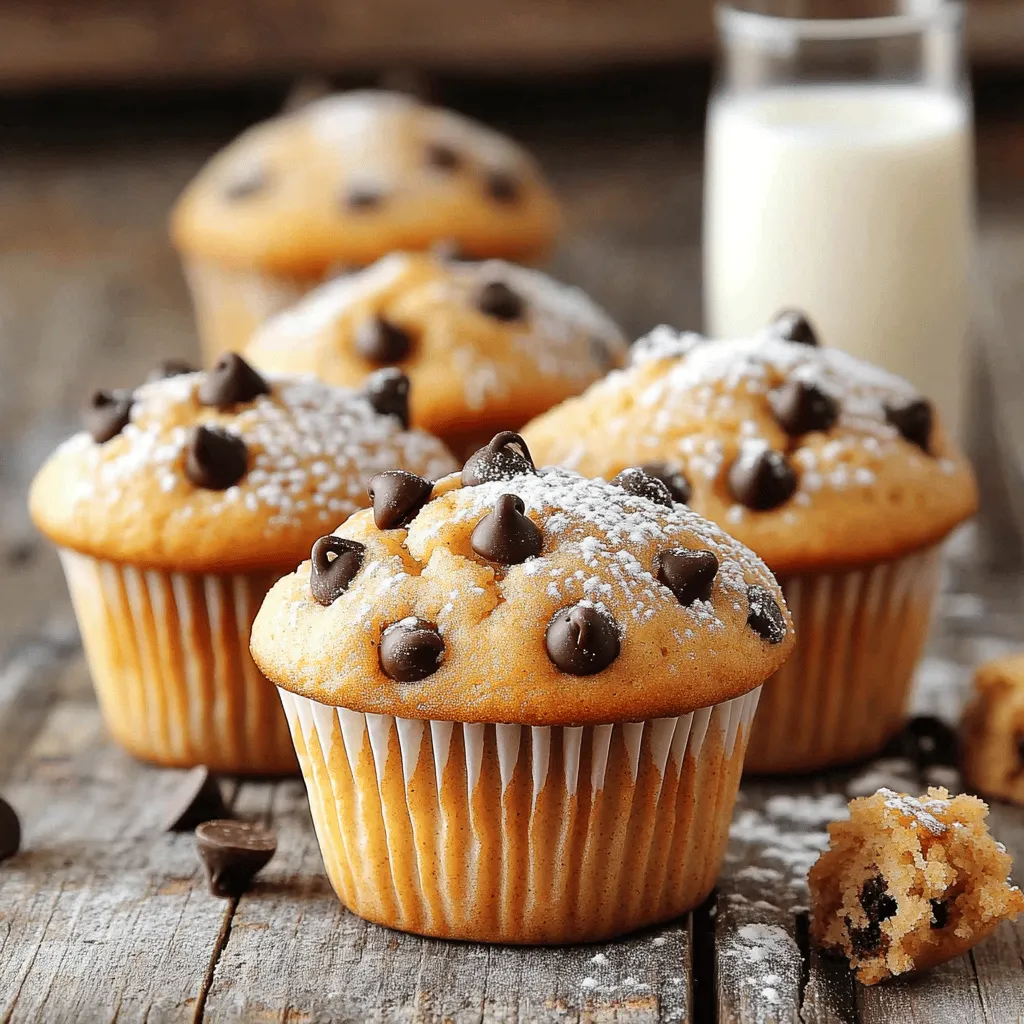
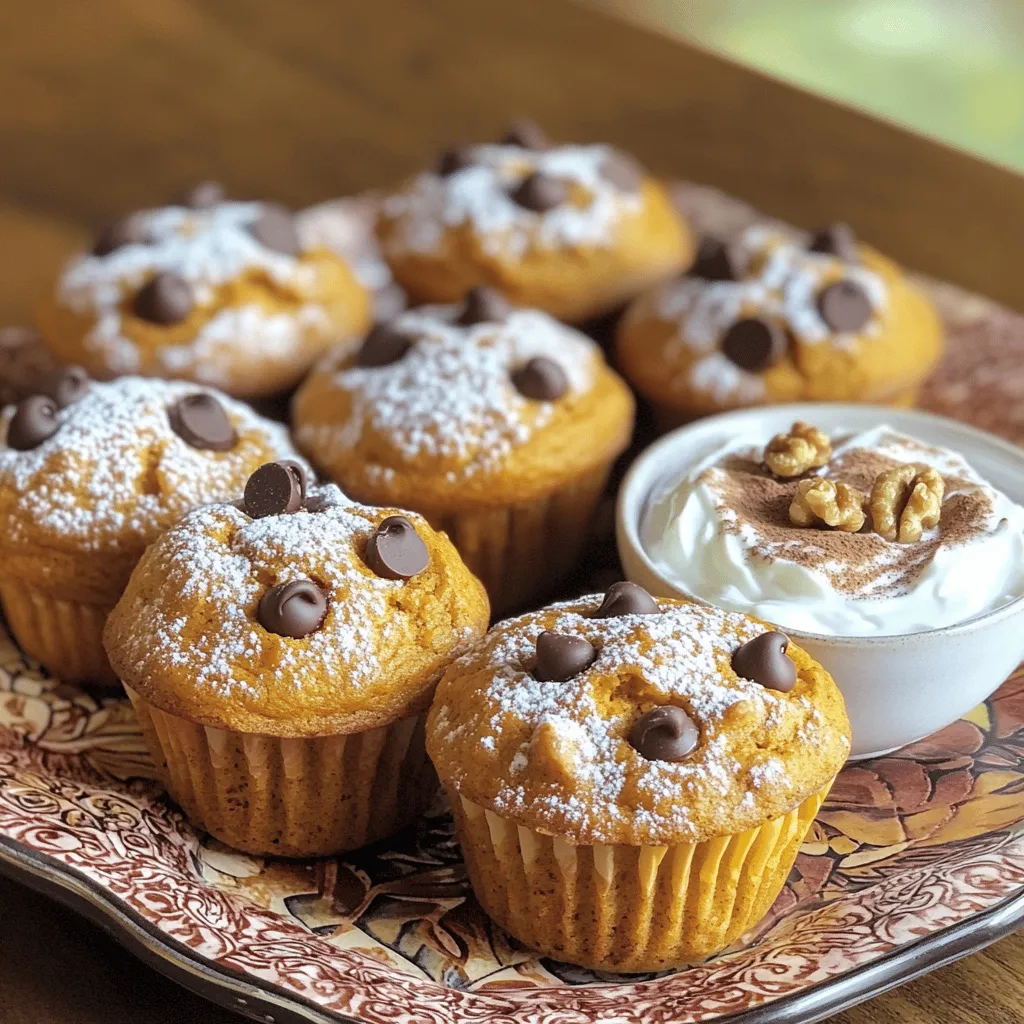
Pumpkin Chocolate Chip Muffins Healthy and Tasty Snack
Craving a delicious treat? Look no further than these Pumpkin Chocolate Chip Muffins! They’re a perfect blend of sweet and healthy, making them the ideal
To make healthy muffins, you need these main ingredients: - 2 ripe bananas, thoroughly mashed - 1 cup rolled oats - 1/2 cup plain Greek yogurt - 1/4 cup honey or maple syrup - 1/2 cup almond flour - 1/4 cup chopped walnuts or pecans - 1 teaspoon baking powder - 1/2 teaspoon baking soda - 1 teaspoon vanilla extract - 1/2 teaspoon ground cinnamon - A pinch of salt These simple ingredients form the base of your muffins. The bananas add natural sweetness and moisture. The oats provide fiber, which helps with digestion. Yogurt makes them fluffy, while almond flour adds healthy fats. - Bananas: High in potassium and vitamin C. They help with heart health and energy. - Rolled oats: Great for heart health and filled with fiber. They keep you full longer. - Greek yogurt: Packed with protein and probiotics, good for your gut health. - Honey or maple syrup: Natural sweeteners that provide quick energy. - Almond flour: Gluten-free and rich in healthy fats, it supports brain health. - Walnuts or pecans: Full of omega-3 fatty acids, they are good for your brain. These key ingredients work together to give you a tasty treat that is also good for you. You can add these optional ingredients to boost flavor: - 1/4 cup dark chocolate chips - Dried fruits like raisins or cranberries - Fresh berries like blueberries or raspberries Adding chocolate chips gives a sweet touch. Dried fruits add chewiness, and berries bring fresh taste. Feel free to mix and match to find your favorite combination! First, set your oven to 350°F (175°C). This is the perfect heat for baking muffins. While the oven heats, grab your muffin tin. You can line it with paper liners or lightly grease each cup. This helps the muffins come out easily after baking. Next, take a large bowl. Add the two mashed bananas to it. Stir in 1/2 cup of plain Greek yogurt, 1/4 cup of honey or maple syrup, and 1 teaspoon of vanilla extract. Mix these well until they blend nicely. This mixture is creamy and sweet, making your muffins tasty. In another bowl, whisk together the dry ingredients. Use 1 cup of rolled oats, 1/2 cup of almond flour, 1 teaspoon of baking powder, 1/2 teaspoon of baking soda, 1 teaspoon of ground cinnamon, and a pinch of salt. Mixing these dry items well ensures even flavor in your muffins. Now, it’s time to mix the wet and dry ingredients. Gradually add the dry mix to the wet mix. Stir gently until the batter is just moistened. Avoid overmixing, as this can make muffins tough. You want a soft, slightly lumpy batter. Lastly, fold in 1/4 cup of chopped walnuts or pecans. If you want a sweet treat, add 1/4 cup of dark chocolate chips. Then, scoop the batter into the muffin tin, filling each cup about 3/4 full. Bake for 18-20 minutes. They are ready when a toothpick comes out clean. Let them cool in the pan for 5 minutes, then move to a wire rack. This cooling step keeps them fluffy and tasty! To get a great muffin texture, mix gently. Overmixing makes muffins dense. Combine wet and dry ingredients just until moistened. This keeps them light and fluffy. Use ripe bananas. They add natural sweetness and moisture. If you want a soft muffin, do not fill the cups too high. Leave some space for rising. If you need gluten-free muffins, swap almond flour for gluten-free flour blends. Oats are often gluten-free, but check the label. For a vegan option, replace Greek yogurt with almond or coconut yogurt. Use maple syrup instead of honey. These swaps keep the muffins tasty while meeting dietary needs. Mix-ins can really boost flavor. Try adding blueberries or chopped apples for a fruity twist. Dark chocolate chips add sweetness and richness. You can also add spices like nutmeg or ginger for warmth. If you enjoy nuts, use pecans or almonds for crunch. Experiment with what you love! {{image_4}} You can add fruit to your muffins for extra flavor. Blueberries work great. Simply fold in one cup of fresh or frozen blueberries into the batter. Apples are also a fun choice. Dice one medium apple and mix it in. Both options add natural sweetness and moisture. They make your muffins even tastier! If you need nut-free options, you can skip the nuts altogether. Instead, use sunflower seeds or pumpkin seeds. These give a nice crunch without nuts. You can also try shredded coconut for added texture. This makes the muffins safe for those with nut allergies. Everyone can enjoy them! For a healthier sweetener, use mashed dates or applesauce. These provide sweetness without refined sugar. You can also try agave syrup or coconut sugar. They offer a more natural flavor. Adjust the amount based on your taste. This way, you can make your muffins just right for you! To keep your nutty banana oat muffins fresh, store them in an airtight container. This helps to lock in moisture and flavor. Place them at room temperature if you plan to eat them within three days. For longer storage, keep the muffins in the fridge. If you want to enjoy them later, freezing is a great option. Freezing muffins is easy. First, let them cool completely. Then, wrap each muffin in plastic wrap. After that, place them in a freezer bag. Make sure to remove as much air as possible before sealing. Muffins can be frozen for up to three months. When you're ready to eat one, simply take it out and let it thaw at room temperature. To reheat your muffins, you can use the microwave or oven. For the microwave, place a muffin on a plate and heat for about 15-20 seconds. If you prefer the oven, preheat it to 350°F (175°C). Then, wrap the muffin in foil and heat for about 10 minutes. This way, your muffins will taste fresh and warm! Yes, you can use frozen bananas. Just thaw them first. They will mash easily. Frozen bananas add natural sweetness and moisture. This keeps your muffins soft and tasty. To make sugar-free muffins, replace honey or maple syrup with a sugar-free sweetener. You can use stevia or erythritol. These options keep the muffins sweet without added sugar. You can add your favorite nuts or seeds for crunch. Try adding berries for a fruity twist. Mix in spices like nutmeg for extra flavor. You can also use different types of flour for variety. These muffins stay fresh for about 3-5 days at room temperature. Store them in an airtight container to keep them moist. You can also freeze them for longer storage. Just thaw when you are ready to eat! This post covered how to make healthy muffins from scratch. We looked at key ingredients and their benefits. I shared step-by-step instructions, plus tips for perfect texture and dietary needs. You learned tasty variations and how to store muffins properly. Enjoy baking your muffins with all these ideas. Mix and match flavors, and have fun. Your kitchen will be filled with delightful smells and happy munching!
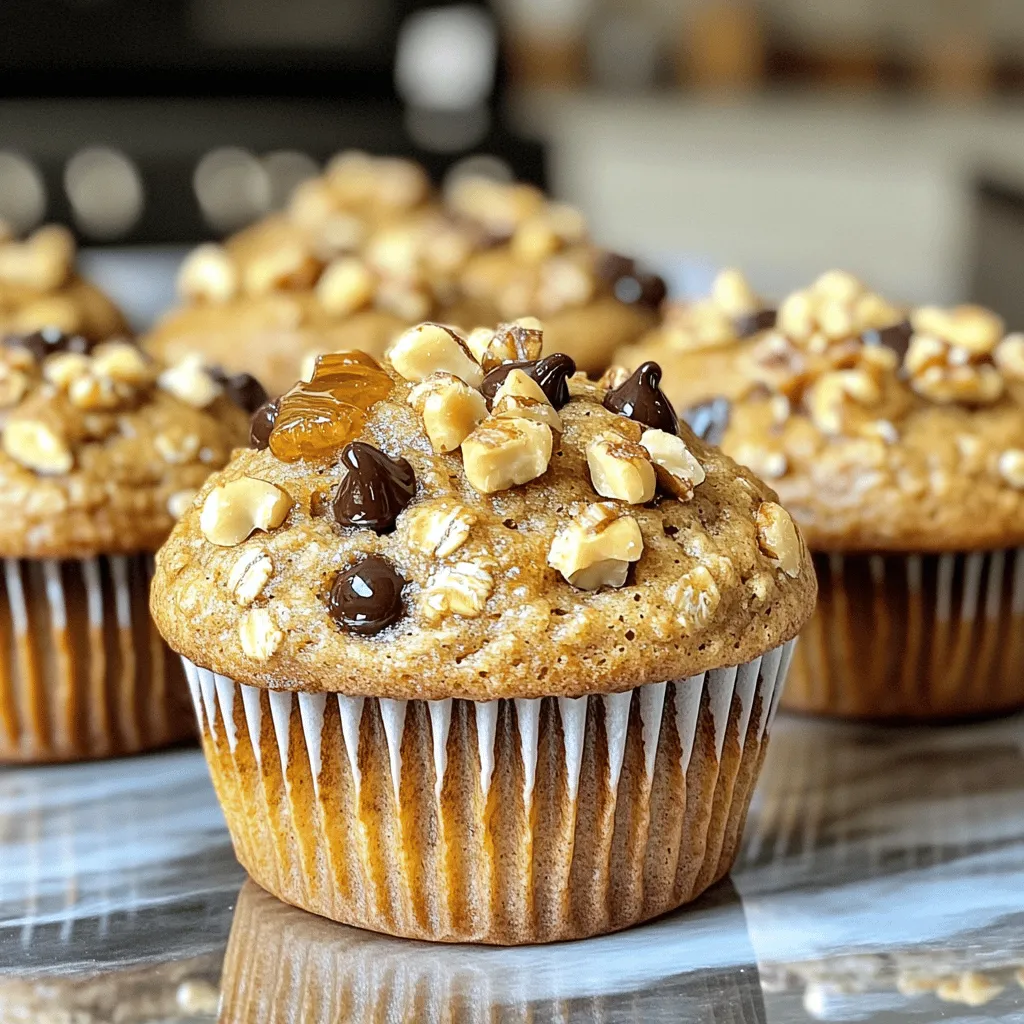
Ingredient Healthy Muffins Simple and Tasty Recipe
Are you ready to bake some delicious and healthy muffins? This simple and tasty recipe uses fresh ingredients that boost nutrition while satisfying your cravings.
To make delicious Peanut Butter Protein Muffins, gather these key ingredients: - 1 cup creamy natural peanut butter - 1 ripe banana, thoroughly mashed - 2 large eggs, at room temperature - 1/3 cup honey or pure maple syrup - 1/2 cup oat flour (or finely blended rolled oats) - 1/2 cup protein powder (either vanilla-flavored or unflavored) - 1 teaspoon baking powder - 1/2 teaspoon baking soda - 1/4 teaspoon fine sea salt - 1/2 cup dark chocolate chips (optional but recommended) These ingredients come together to create moist, protein-packed muffins. The peanut butter adds richness, while the banana provides natural sweetness. Eggs help bind everything, and honey or maple syrup adds flavor. Oat flour or rolled oats gives a nice texture. Protein powder boosts the nutritional value, making these muffins a great snack or breakfast option. The baking powder and soda ensure they rise nicely. Lastly, dark chocolate chips add a delightful touch of indulgence. Enjoy baking! 1. Preheat the oven and prepare the muffin tin Start by preheating your oven to 350°F (175°C). While the oven heats up, grab your muffin tin. You can use paper liners or lightly grease each cup with a bit of cooking spray or oil. 2. Combine wet ingredients in a mixing bowl In a medium bowl, mix the creamy peanut butter, ripe banana, and large eggs. Use a whisk or fork to blend them. Make sure the mixture is smooth and all ingredients are combined well. 3. Incorporate sweetener into the mixture Pour in the honey or pure maple syrup. Stir continuously until the sweetener blends into the peanut butter mix. This step adds sweetness and moisture to your muffins. 1. Creating the dry ingredient mixture In a separate bowl, mix the dry ingredients. Combine oat flour, protein powder, baking powder, baking soda, and fine sea salt. Use a whisk to break up any lumps and ensure everything is blended evenly. 2. Ensuring even distribution of components Make sure all dry ingredients are well mixed. This helps every muffin bake evenly and taste great. 1. Combine wet and dry ingredients Gradually add your dry mixture to the wet ingredients. Stir gently until everything is just combined. Avoid over-mixing to keep your muffins light and fluffy. 2. Fill muffin tins and bake Scoop the batter into your prepared muffin tin. Fill each cup about two-thirds full to allow for rising. Bake the muffins in your preheated oven for 15 to 20 minutes. They are ready when a toothpick comes out clean or with a few crumbs. 3. Cooling the muffins after baking Once baked, let the muffins cool in the tin for about 5 minutes. Then transfer them to a wire rack to cool completely. This helps them firm up and makes them easier to handle. To make perfect muffins, avoid common mistakes. Here are some tips to help you. - Don’t over-mix the batter. This can make your muffins tough. Mix until just combined. - Use room temperature eggs. They blend better, helping your muffins rise well. - Check your leavening agents. Ensure your baking powder and baking soda are fresh for the best rise. - Measure flour correctly. Too much flour can lead to dry muffins. Spoon it into your measuring cup and level it off. To keep your muffins moist and fluffy: - Add a ripe banana. It adds moisture and natural sweetness to your muffins. - Don’t skip the oil or fat. The peanut butter provides moisture. Using creamy peanut butter helps too. - Cool muffins in the tin first. This keeps them soft and prevents them from drying out. Presentation matters. Here are some fun ideas for serving your muffins: - Serve warm for a delightful treat. The aroma will fill your kitchen. - Dust the tops lightly with powdered sugar for a sweet touch. - Spread a thin layer of peanut butter on top for extra flavor. For pairing, consider these options: - A glass of cold almond milk complements the nutty flavor well. - Serve with fresh fruit for a balanced snack. - Pair with yogurt for a protein-packed breakfast. These ideas can make your Peanut Butter Protein Muffins a hit! {{image_4}} You can switch up the flavor of these muffins easily. Try using almond or cashew butter instead of peanut butter. This change adds a new taste while keeping the protein boost. You can also mix in some dried fruits like cranberries or raisins for a sweet twist. If you want some spice, add a dash of cinnamon or nutmeg to the batter. These little tweaks can make your muffins unique and tasty. If you need a gluten-free option, you can use certified gluten-free oat flour. This keeps the muffins light while making them safe for those with gluten issues. For a vegan version, replace the eggs with flaxseed meal. Mix one tablespoon of flaxseed with three tablespoons of water. Let it sit for a few minutes until it thickens. This will help bind the muffins just like eggs do. With these simple changes, everyone can enjoy these delicious muffins! To keep your Peanut Butter Protein Muffins fresh, store them properly. First, let the muffins cool completely after baking. This helps prevent moisture buildup, which can make them soggy. Place the muffins in an airtight container. You can use a glass or plastic container with a tight lid. This keeps them fresh for up to five days at room temperature. If you want to keep them longer, consider the fridge. Just make sure to wrap them in plastic wrap first. This will help them stay moist. Freezing muffins is a great way to save some for later. To freeze them, first let the muffins cool completely. Then, wrap each muffin tightly in plastic wrap. After wrapping, place them in a freezer bag or container. Make sure to remove as much air as possible to avoid freezer burn. You can freeze them for up to three months. When you are ready to enjoy a muffin, take it out of the freezer. Leave it on the counter for about 30 minutes to thaw. If you're in a hurry, you can microwave it. Heat it for about 15 to 20 seconds. For a warm treat, pop it in the oven at 350°F for a few minutes. Enjoy your tasty and healthy muffin any time! How can I make these muffins lower in sugar? To reduce sugar, use less honey or maple syrup. You can also add unsweetened applesauce. This keeps the muffins moist while cutting back on sweetness. Can I substitute peanut butter with another nut butter? Yes, you can use almond butter or cashew butter. Each nut butter will give a different flavor. Just make sure it is creamy for the best results. What is the best way to know when muffins are done baking? Stick a toothpick into the center of a muffin. If it comes out clean or with a few crumbs, they are done. If it has wet batter, bake a little longer. What are the protein content and calories per muffin? Each muffin has about 10 grams of protein and around 200 calories. The protein comes from the peanut butter and protein powder. Are these muffins suitable for meal prep? Yes, these muffins are great for meal prep. They store well in the fridge or freezer. You can grab them for a quick snack or breakfast. These muffins are easy to make and delicious. We covered the key ingredients, step-by-step baking, and helpful tips to ensure success. You can try fun variations, store them well, and even adapt for different diets. Keep your kitchen stocked with oats, bananas, and peanut butter for a quick treat. Remember, baking is all about experimenting, so have fun with it! Enjoy your healthy muffins, and don’t forget to share them with friends and family. Happy baking!
Peanut Butter Protein Muffins Tasty and Healthy Treat
If you’re looking for a tasty snack that fuels your day, look no further! These Peanut Butter Protein Muffins are a perfect blend of flavor
- 1 cup canned pumpkin puree - 1 cup Greek yogurt - 2 large eggs - 1/2 cup honey or maple syrup - 1/4 cup coconut oil, melted - 1 1/2 cups almond flour - 1/2 cup oat flour - 1/2 cup vanilla protein powder - 1 teaspoon baking soda - 1 teaspoon baking powder - 1 teaspoon ground cinnamon - 1/2 teaspoon ground nutmeg - 1/4 teaspoon salt - 1/2 cup chopped walnuts or pecans (optional) - 1/4 cup dark chocolate chips (optional) These muffins are not just tasty; they pack a punch in nutrition. Each muffin contains a good amount of protein, thanks to the Greek yogurt and protein powder. The pumpkin puree adds fiber, which helps with digestion. Here are some key highlights: - High protein content from Greek yogurt and protein powder. - Rich in fiber from pumpkin and oat flour. - Healthy fats from coconut oil and nuts. - Antioxidants from dark chocolate and spices. You can easily swap some ingredients to fit your taste or diet: - Sweeteners: Use agave syrup or stevia instead of honey or maple syrup for a lower-calorie option. - Flours: If you want gluten-free, replace almond flour with a gluten-free flour blend. - Nuts: Omit walnuts or pecans if you have a nut allergy or use seeds instead. - Protein Powder: Use any flavor of protein powder or skip it for a lighter muffin. First, preheat your oven to 350°F (175°C). This step is key for even baking. Next, prepare your muffin tin by lining it with paper liners or greasing it. This prevents the muffins from sticking later. In a large bowl, mix together the canned pumpkin puree, Greek yogurt, eggs, honey (or maple syrup), and melted coconut oil. Use a whisk to blend until you have a smooth and creamy mixture. In another bowl, whisk the almond flour, oat flour, vanilla protein powder, baking soda, baking powder, cinnamon, nutmeg, and salt. Make sure all dry ingredients blend well. Now, slowly fold the dry mix into the wet mix. Do this gently to avoid over-mixing, which can make the muffins tough. If you want to add some crunch, fold in the chopped walnuts or pecans and dark chocolate chips at this stage. Using a spoon or a scoop, fill each muffin cup about three-quarters full with batter. This allows the muffins to rise nicely. Place the muffin tin in your preheated oven and bake for 20-25 minutes. To check if they are done, insert a toothpick into the center of a muffin. If it comes out clean, your muffins are ready! Let them cool in the tin for about 5 minutes, then move them to a wire rack to cool completely. This step helps keep them fluffy. To get the best muffin texture, start by mixing wet and dry ingredients separately. Mix the wet ingredients until creamy. This helps combine the flavors well. When you add the dry mix, fold gently. Avoid over-mixing the batter. This keeps the muffins light and fluffy. If you want a little crunch, add chopped nuts. Walnuts or pecans work great. They give a nice texture and taste. You can also add dark chocolate chips for sweetness. Just remember to fold them in gently, too! Store your muffins in an airtight container. This keeps them fresh and moist. You can keep them at room temperature for 2 to 3 days. If you want to save some for later, freeze them! Wrap each muffin in plastic wrap, then place them in a freezer bag. They stay good for up to 3 months. When you're ready to eat one, just thaw it at room temperature or warm it in the microwave for a few seconds. Serve these muffins warm for the best taste. You can dust them with powdered sugar for a sweet touch. A sprinkle of cinnamon also adds flavor. For a creamy boost, top them with Greek yogurt. This makes a delicious snack or breakfast. Pair them with a cup of coffee or tea for a perfect treat! {{image_4}} You can enhance your muffins with various spices and extracts. Here are some ideas: - Vanilla extract: A splash adds warmth and depth. - Ginger: Fresh or ground ginger gives a nice kick. - Cloves: A pinch adds a holiday vibe. - Cardamom: This spice brings a unique flavor twist. Feel free to mix and match these spices to find your favorite blend. Each addition transforms the taste and makes the muffins special. If you want to change up the protein, you have options: - Pea protein powder: Great for plant-based diets. - Hemp protein: Offers a nutty flavor and extra nutrition. - Soy protein: A solid choice if you want a complete protein source. These alternatives maintain the muffin's texture while boosting protein content. Choose based on your dietary needs and taste preferences. You can easily make these muffins vegan or gluten-free. Here’s how: - Vegan: Replace eggs with flax eggs. Mix 1 tablespoon of flaxseed meal with 2.5 tablespoons of water. Let it sit until it thickens. - Gluten-free: Use a gluten-free flour blend in place of almond and oat flour. These swaps make the muffins accessible to more people and still keep them delicious. Enjoy experimenting with these variations! High-protein pumpkin muffins are a tasty treat packed with nutrients. Each muffin has about: - Calories: 180 - Protein: 8g - Carbohydrates: 22g - Fat: 7g - Fiber: 3g This balance makes them great for breakfast or a snack. The protein comes mainly from Greek yogurt and protein powder. - Pumpkin puree is rich in vitamins A and C. It supports good vision and boosts your immune system. - Greek yogurt adds protein and probiotics. This helps your gut health and keeps you feeling full. - Almond flour is a great source of healthy fats and vitamin E. It promotes heart health. - Oat flour offers fiber, which aids digestion and helps control blood sugar levels. - Honey or maple syrup provide natural sweetness while offering antioxidants. These ingredients work together to make your muffins not just tasty, but good for you too! For the best experience, enjoy one muffin at a time. This portion gives you enough protein and energy without overdoing it. If you want a more filling snack, pair it with a small serving of Greek yogurt or a piece of fruit. You can lower the calories in these muffins by making a few simple swaps. First, use a sugar substitute instead of honey or maple syrup. Options like stevia or erythritol work well. Second, reduce the amount of coconut oil by half, or use unsweetened applesauce instead. This will keep moisture without adding too many calories. Lastly, try using only one egg and adding more Greek yogurt to maintain texture. Yes, you can freeze these muffins. To do this, let them cool completely. Then, wrap each muffin in plastic wrap or foil. Place the wrapped muffins in a freezer-safe bag or container. They can last up to three months in the freezer. When you are ready to eat, simply thaw them in the fridge or heat them in the microwave. Store leftover muffins at room temperature for up to three days. Keep them in an airtight container to maintain freshness. If you want them to last longer, refrigerate them for up to a week. Just remember that refrigeration can change the texture, making them a bit denser. If you prefer them warm, pop them in the microwave for a few seconds before serving. This blog post covered everything you need to know about making high-protein pumpkin muffins. We discussed the key ingredients, their nutritional benefits, and even how to substitute them. You learned the step-by-step process for preparing and baking, plus tips for perfect texture and storage. Explore variations with flavors and protein sources to suit your taste. With this knowledge, you can make delicious, healthy muffins your way. Enjoy the process and get creative in your kitchen!
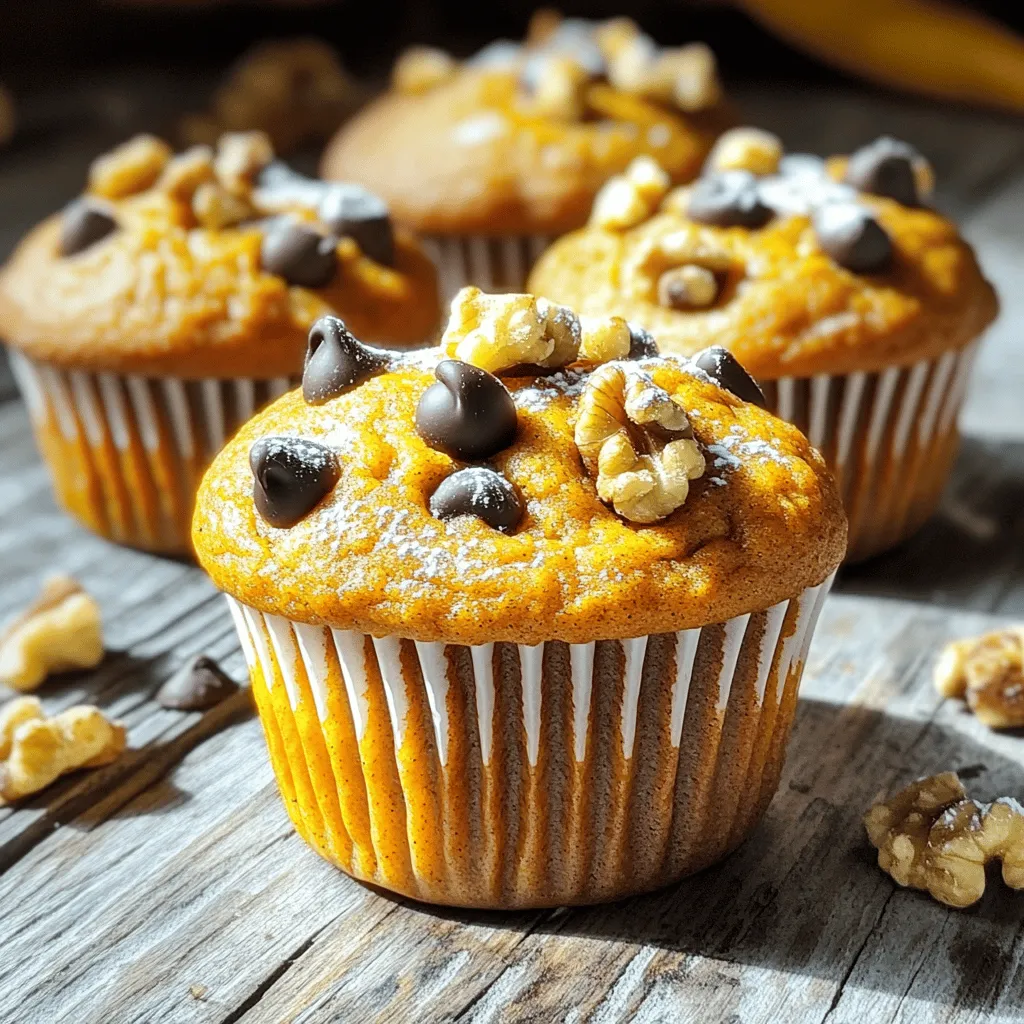
High-Protein Pumpkin Muffins Flavorful and Nutritious
Are you ready to boost your snack game? These High-Protein Pumpkin Muffins are the perfect blend of flavor and nutrition. Packed with protein and made
To make a cozy pumpkin spice latte, you need a few key ingredients. They include: - 1 cup milk (your choice: dairy or non-dairy) - 1/2 cup strong brewed coffee or 1 shot of espresso - 2 tablespoons pumpkin puree - 1 tablespoon granulated sugar (feel free to adjust according to your sweetness preference) - 1/2 teaspoon pumpkin pie spice (plus additional for garnish) - 1/2 teaspoon vanilla extract - Whipped cream (for a luxurious topping) - Caramel sauce (optional, for a delightful drizzle) These ingredients create a rich and creamy drink that warms up any chilly day. You can choose any milk for your latte. Whole milk gives a rich taste. Skim milk is lighter but still creamy. If you want a non-dairy option, almond or oat milk works well. Both add a unique flavor. Coconut milk gives a sweet touch. Experiment with different types to find your favorite. Want to make your latte even better? You can try adding some fun flavors. A sprinkle of cinnamon or nutmeg can boost the spice. You might also add a splash of chocolate syrup for a mocha twist. If you love sweetness, a dash of maple syrup is a delightful choice. Each extra touch can make your latte special and unique. To make the spiced milk, start with a small saucepan. Pour in 1 cup of milk. You can use dairy or a non-dairy option like almond or oat milk. Add 2 tablespoons of pumpkin puree, which gives the latte its rich flavor. Next, include 1 tablespoon of granulated sugar. You can adjust this amount if you want more or less sweetness. Then, mix in 1/2 teaspoon of pumpkin pie spice. This spice blend adds warmth to your drink. Finally, add 1/2 teaspoon of vanilla extract for extra flavor. Set the saucepan over medium heat. Use a whisk to mix everything well. Keep whisking for about 5 minutes. Make sure not to let it boil; you want it warm and creamy. Once heated, take it off the stove. While your spiced milk cools a little, it's time to brew your coffee or espresso. If you prefer coffee, use 1/2 cup of strong brewed coffee. For espresso lovers, a single shot will do. Brew your choice and pour it into a cozy mug. The warm cup will hold all the delightful flavors of your latte. Now it's time to put it all together. Carefully pour the warm spiced milk mixture over the brewed coffee. If you want to save some foam for later, use a spoon to hold it back. This step ensures you get a nice blend of flavors. Next, top your latte with a generous dollop of whipped cream. This adds a luxurious touch to your drink. For an extra sweet kick, drizzle caramel sauce over the whipped cream. To finish, sprinkle a little pumpkin pie spice on top. This step not only adds flavor but also makes your drink look beautiful. Enjoy your pumpkin spice latte right away. Savor the warmth and flavors of this cozy treat! To get rich, creamy milk froth, heat your milk slowly. Use a whisk and stir often. This keeps the milk from burning. You want it warm, not boiling. For an extra frothy top, you can use a milk frother. It makes the drink feel special. Try different amounts of sugar to find your perfect taste. You can start with one tablespoon. If you like it sweeter, add more. Remember, the pumpkin puree adds some natural sweetness too. Taste as you go, and don’t rush. You can spice up your latte with more than just pumpkin pie spice. Add a pinch of nutmeg or cinnamon for a warm kick. Try a touch of ginger for a zesty twist. These small changes can make your drink unique. Experiment with what you enjoy most! {{image_4}} To make an iced pumpkin spice latte, you start with chilled coffee. Brew your coffee or espresso and let it cool. In a separate bowl, mix the milk, pumpkin puree, sugar, and pumpkin pie spice. Blend these ingredients well until smooth. Pour the mixture over ice, then add your cooled coffee. Stir gently and top with whipped cream and a sprinkle of pumpkin pie spice. This drink is refreshing on warm days. For a vegan version, swap your milk for any non-dairy option. Almond, soy, or oat milk works great. Follow the same steps as the original recipe. Combine your chosen milk with pumpkin puree, sugar, and pumpkin pie spice in a pot. Heat gently, whisking well. Once warm, add vanilla extract. Brew your coffee, then pour the spiced milk over it. Finish with whipped coconut cream for a rich topping. You can change the flavor of your latte by using different syrups. Try maple syrup for a sweet twist, or hazelnut syrup for a nutty taste. Use the same amount as the sugar in the original recipe. Mix it into the spiced milk while heating. For a chocolatey kick, add chocolate syrup. Top with whipped cream and your syrup choice drizzled on top. Each variation gives you a new way to enjoy this cozy drink. If you have leftover pumpkin puree, store it in an airtight container. Place it in the fridge. It will last for about a week. You can also freeze it for later use. Pour it into ice cube trays or small bags. This way, you can thaw just what you need. To reheat your pumpkin spice latte, pour it into a small pot. Heat it on low, stirring gently. Avoid boiling to keep the creamy texture. If you like, you can use the microwave. Heat it in short intervals, stirring in between. Keep your ingredients fresh by checking dates before use. Store milk in the coldest part of your fridge. Use fresh pumpkin puree for the best flavor. Avoid letting leftovers sit out too long. Always seal containers tightly to prevent spoilage. You can use strong brewed coffee instead of espresso. Just brew 1/2 cup of strong coffee. This will give you great flavor. Pour the hot coffee into your mug first. Then add the spiced milk mixture on top. It will still taste rich and warm. If you don’t have pumpkin puree, you can use sweet potato puree. You might also try butternut squash puree. These options give a similar taste and texture. You can even use applesauce for a fruity twist. Just remember to adjust the spices if needed. Yes, you can! Try adding a splash of maple syrup for extra sweetness. You can also use almond extract instead of vanilla for a nutty touch. Some people enjoy a hint of chocolate syrup. Be creative and find what you love best! This blog post covered how to make a Pumpkin Spice Latte. We looked at key ingredients and options for dairy and non-dairy types. I shared steps to prepare the milk mixture, brew coffee, and assemble your drink. You learned tips for frothing milk and adjusting sweetness. Variations like iced and vegan lattes offer fun twists. Lastly, I provided storage tips to keep your latte fresh. Enjoy your homemade pumpkin spice latte adventure!
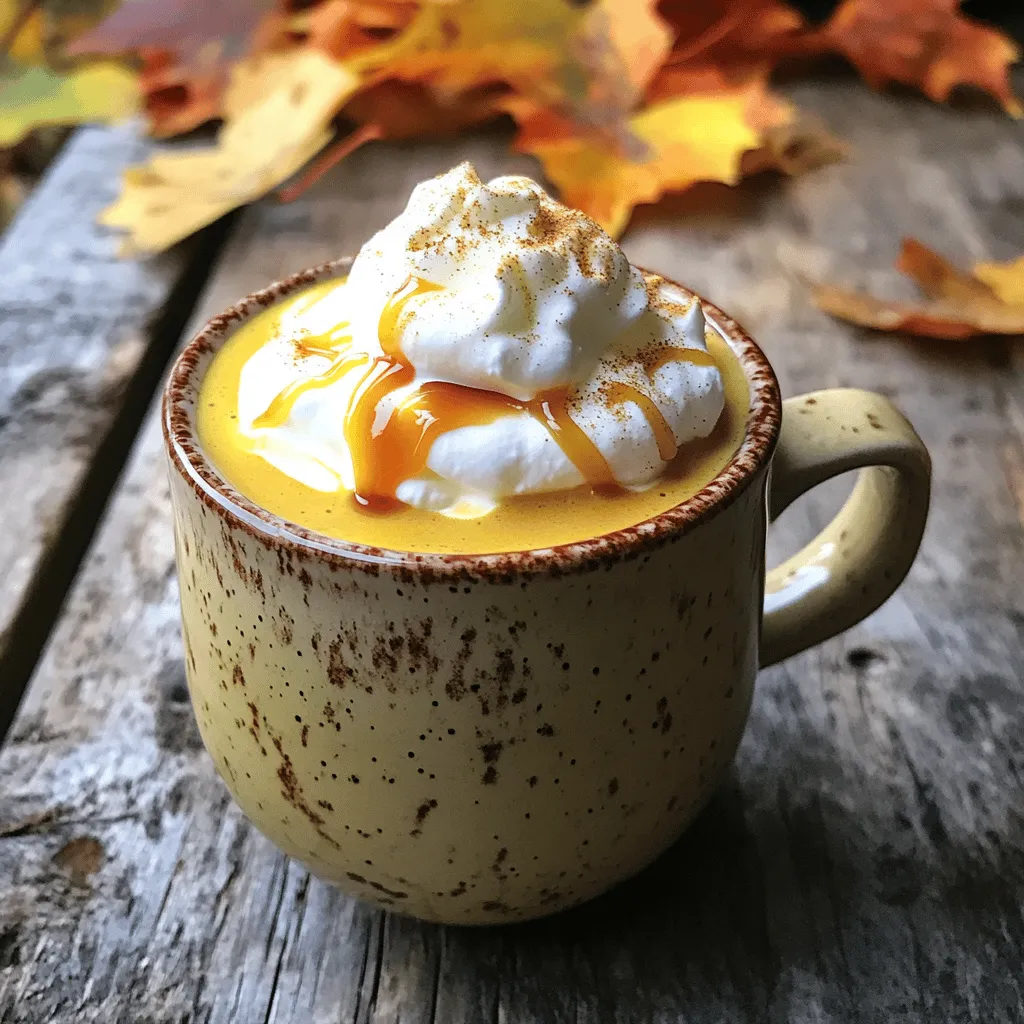
Cafe-Style Pumpkin Spice Latte Creamy and Flavorful
Craving a warm, cozy drink? You’ll love this Cafe-Style Pumpkin Spice Latte. I’ll show you how to make it creamy and flavorful, just like your
To create the perfect Cold Witch's Brew Iced Coffee, gather these simple ingredients: - 2 cups brewed coffee, cooled - 1 cup almond milk (or any milk of choice) - 2 tablespoons maple syrup (adjust to taste) - 1 teaspoon vanilla extract - 1/2 teaspoon ground cinnamon - 1/4 teaspoon nutmeg - Ice cubes - Whipped cream (optional, for topping) - Chocolate shavings or cocoa powder (optional, for garnish) Choosing great coffee matters. I suggest using fresh, high-quality beans. Look for whole beans if you can. These keep flavor better than pre-ground coffee. When you grind your beans, aim for a medium grind for the best taste. A good coffee maker is key. I enjoy using a French press or drip coffee maker. They make a rich, bold brew. If you want dairy-free options, almond milk is fantastic. It has a light flavor that works well. You can also use oat milk or soy milk. Both have great creaminess. If you prefer sweetness, try coconut milk. It adds a nice twist. Adjust any milk choice to fit your taste. Enjoy experimenting! To start, brew 2 cups of your favorite coffee. You can use a drip coffee maker, French press, or any method you like. Let the coffee cool to room temperature. If you want to speed this up, place it in the fridge for 20-30 minutes. This cooling step is important. Hot coffee will melt ice and make your drink watery. In a large bowl or pitcher, mix the cooled coffee with 1 cup of almond milk. You can use any milk you prefer. Next, add 2 tablespoons of maple syrup. Adjust this based on how sweet you want it. Then, pour in 1 teaspoon of vanilla extract, 1/2 teaspoon of ground cinnamon, and 1/4 teaspoon of nutmeg. Whisk everything together until the maple syrup dissolves completely. This step brings all the flavors together. Take two tall glasses and fill them with ice cubes. Aim to fill the glasses about three-quarters full. This keeps your coffee cold and refreshing. Slowly pour the witch's brew mixture over the ice in each glass. For a fun treat, you can add whipped cream on top. Finish with chocolate shavings or a dusting of cocoa powder for that extra touch of magic. Enjoy your delicious Cold Witch’s Brew Iced Coffee right away! To make Cold Witch's Brew Iced Coffee, start with good coffee. Use your favorite method to brew two cups. I love using a French press for its rich flavor. After brewing, let the coffee cool. You can speed up cooling by putting it in the fridge for 20-30 minutes. This step is key. If the coffee is warm, it will melt the ice too quickly. Sweetness is personal. The recipe calls for two tablespoons of maple syrup. You can adjust this based on your taste. If you like it sweeter, add more syrup. If you prefer less sweetness, use one tablespoon. Taste as you mix to find your perfect balance. Remember, you can always add more, but you can't take it out! Serve your Cold Witch's Brew in tall glasses filled with ice. This makes it look extra inviting. For a spooky touch, add whipped cream on top. Dust with cocoa powder or sprinkle chocolate shavings for magic. You can even add a plastic spider or a witch's hat stirrer. These little details make your drink fun and festive. Enjoy your brew while sharing it with friends for a perfect spooky treat! {{image_4}} You can make your Cold Witch's Brew iced coffee unique. Add flavors like caramel or hazelnut. A teaspoon of cocoa powder gives a rich chocolate twist. Want a fruity note? Try adding a splash of vanilla or almond extract. You can even mix in a bit of pumpkin spice for a fall delight. Just remember to keep your base strong. This way, the flavors shine through. Your Cold Witch's Brew can fit any event. Hosting brunch? Serve it in fancy glasses with whipped cream. Want a spooky theme for Halloween? Use black straws and add spooky garnishes. For summer parties, freeze coffee ice cubes. This keeps your drink cold without diluting it. You can also serve it in mason jars for a rustic feel. The drink adapts, just like you! You can switch up the milk in this recipe. Almond milk is great, but consider oat milk for a creamier taste. Coconut milk adds a tropical flair, which is fun for summer. If you like soy milk, it blends well too. For a nut-free option, use rice milk. Remember, each milk changes the flavor slightly, so choose what you enjoy most. To store leftover Cold Witch's Brew iced coffee, follow these steps. First, let the coffee cool completely. This helps keep the flavor fresh. Next, pour the coffee into an airtight container. Glass jars work well. Seal the container tightly to keep air out. Store it in the fridge for the best taste. Avoid using plastic, as it can change the flavor. You can keep your brewed coffee for up to three days in the fridge. After three days, the taste may fade. If the coffee smells off or looks strange, it’s best to toss it. Always trust your senses. Keeping it in an airtight container helps it last longer. You can heat leftover coffee if you want a warm drink. Simply pour it into a pot and warm it on the stove over low heat. Stir it gently to avoid burning. If you prefer iced coffee, use the leftover brew to create new drinks. Try blending it with ice and milk for a quick smoothie. You can also add it to your favorite desserts, like coffee-flavored ice cream or brownies. Get creative! Cold Witch's Brew Iced Coffee is a fun drink that combines rich coffee with creamy milk. It has a hint of sweet maple syrup, vanilla, and spices like cinnamon and nutmeg. This drink is perfect for hot days when you want a cool treat. The mix of flavors makes it special, and the whipped cream adds a fun touch. You can enjoy it at any time, but it feels extra magical. Yes, you can easily make this recipe vegan. Just swap regular milk for almond milk or any other plant-based milk you like. Almond milk works well, but oat milk or soy milk are also great choices. Just make sure your maple syrup is pure, as most brands are vegan. This way, you can enjoy your Cold Witch's Brew without any dairy! To keep your iced coffee from getting watery, use cold coffee and lots of ice. Make sure to cool your brewed coffee before mixing it. You can also make coffee ice cubes. Just pour leftover coffee into an ice tray and freeze it. When you use these coffee ice cubes, your drink stays strong and tasty. This way, you can enjoy every sip without dilution! This blog post covered how to make Cold Witch's Brew Iced Coffee. We explored choosing quality coffee and offered dairy-free alternatives to fit your needs. I provided step-by-step instructions to brew and mix your drink for a perfect result. We also shared tips for customizing flavors and creative serving ideas. Remember, proper storage helps keep leftover coffee fresh. Use this guide to enjoy this spooky treat any time. Get creative and have fun with your coffee!
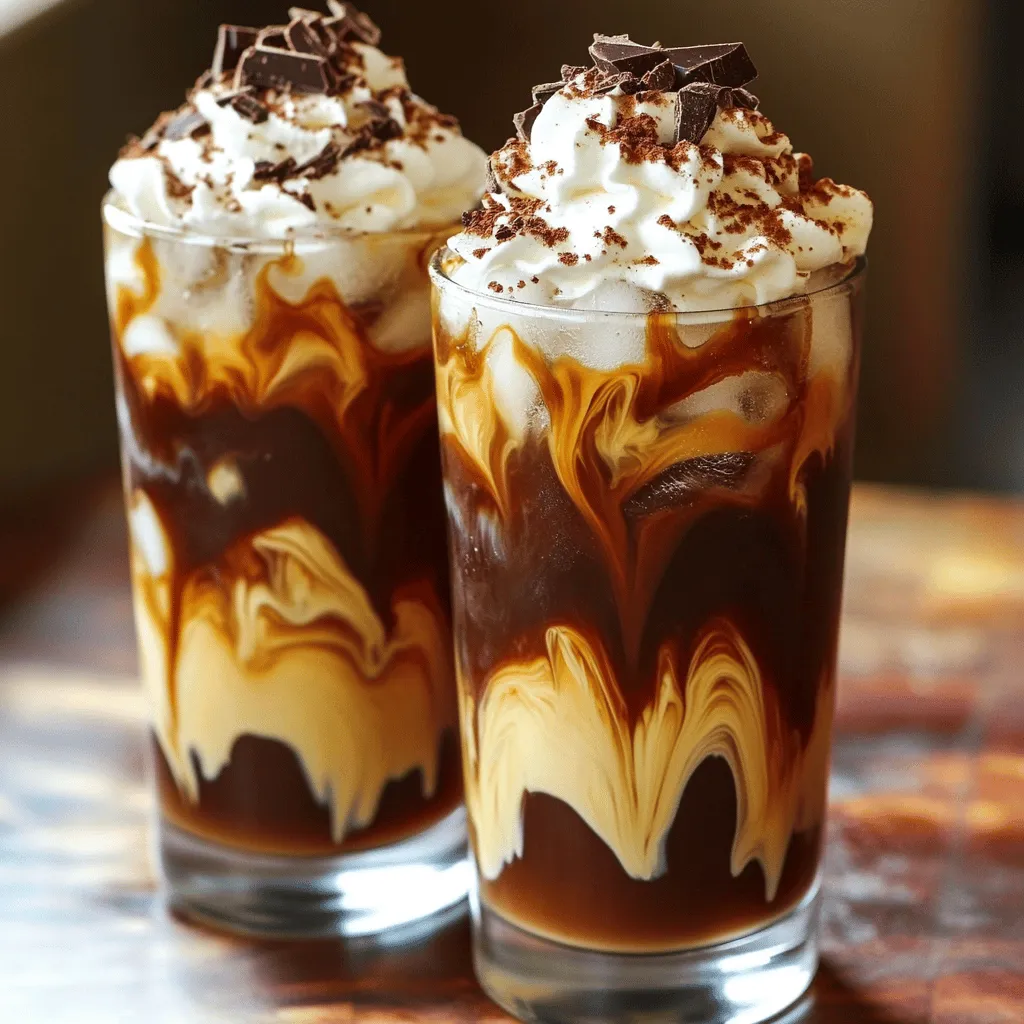
Cold Witch’s Brew Iced Coffee Chilling Recipe Delight
Are you ready to brew magic in your kitchen? This Cold Witch’s Brew Iced Coffee recipe is a chilling delight that will enchant your taste
- 2 cups all-purpose flour - 1 teaspoon baking powder - 1 teaspoon baking soda - 1 teaspoon ground cinnamon - 1/2 teaspoon salt To start, gather your dry ingredients. This mix gives the loaf its structure. Flour is the base. Baking powder and baking soda help it rise. Ground cinnamon adds that warm spice flavor, while salt enhances taste. - 1/2 cup unsalted butter, softened - 3/4 cup packed brown sugar - 1/4 cup granulated sugar - 2 large eggs - 1 teaspoon vanilla extract - 1/2 cup buttermilk (or milk with vinegar) Next, we need the wet ingredients. Softened butter provides richness. Brown sugar and granulated sugar give sweetness and moisture. Adding eggs binds everything together. Vanilla extract adds a lovely aroma. Buttermilk, or a simple substitute, keeps the loaf tender. - 2 cups peeled and diced apples - 1/4 cup chopped walnuts (optional) - 1 tablespoon sugar and 1 teaspoon ground cinnamon for topping For the best flavor, include diced apples. They add natural sweetness and moisture. You can add walnuts for crunch, but that’s up to you! Lastly, sprinkle the sugar and cinnamon topping for a sweet crust. 1. Preheating the oven: Start by preheating your oven to 350°F (175°C). It is important to have your oven ready. This helps the loaf bake evenly. 2. Preparing the loaf pan: Grease a 9x5-inch loaf pan with butter or non-stick spray. You can also use parchment paper for easy removal later. 1. Combining dry ingredients: In a medium bowl, mix the all-purpose flour, baking powder, baking soda, ground cinnamon, and salt. Whisk them together until well blended. Then, set this bowl aside. 2. Creaming butter and sugars: In a large bowl, cream the softened unsalted butter with the brown and granulated sugars. Use an electric mixer at medium speed for about 2-3 minutes. You want this mixture to be light and fluffy. 1. Incorporating eggs and vanilla: Add the eggs one at a time to the butter-sugar mix, mixing well after each. Next, stir in the vanilla extract. This adds great flavor. 2. Merging wet and dry ingredients: Gradually mix in the dry ingredients with the creamed butter and sugar. Alternate with the buttermilk. Start and end with the dry mix. Mix until just combined to keep your loaf tender. 3. Adding apples and walnuts: Carefully fold in the diced apples and walnuts, if you choose to use them. Ensure they are evenly spread through the batter without overmixing. 1. Transferring batter to pan: Pour the batter into your prepared loaf pan. Spread it evenly across the top. 2. Topping with sugar and cinnamon: In a small bowl, mix the tablespoon of sugar with the teaspoon of ground cinnamon. Sprinkle this mixture over the top of the batter for a sweet crust. 3. Baking time and toothpick test: Place the loaf pan in your preheated oven. Bake for 50-60 minutes. To check if it’s done, insert a toothpick into the center. If it comes out clean, your loaf is ready. 1. Cooling in the pan: Once baked, let the loaf cool in the pan for about 10 minutes. This helps it set up nicely. 2. Presentation tips: After cooling, turn the loaf out onto a wire rack. For a great look, serve warm slices on a rustic board. You can sprinkle powdered sugar on top and add a few apple slices for decoration. A side of butter or cream cheese pairs well with this loaf. To make the best apple cinnamon loaf, avoid overmixing the batter. Overmixing can lead to a tough loaf. Mix just until the wet and dry ingredients combine. Ensure even apple distribution for great flavor in every bite. After folding in the diced apples, gently stir until they are evenly spread. This way, every slice has apples. You can add optional spices for extra flavor. Try nutmeg or ginger for a warm twist. Just a pinch can make a big difference. For natural sweeteners, consider using maple syrup or honey. These options add sweetness and a unique taste. Adjust the amount to fit your preference. Different ovens can bake unevenly. If your oven runs hot, check the loaf a bit early. Use an oven thermometer to see if it’s accurate. At high altitudes, your loaf may need some tweaks. You might need less baking powder or a bit more liquid. Test small changes to find what works best for your area. {{image_4}} You can use many fruits in this loaf. Try bananas, pears, or peaches. Each fruit adds a unique taste and texture. Apples are classic, but don’t be afraid to experiment. Dried fruits are also a great option. They add sweetness and chewiness. Use raisins, cranberries, or apricots. Just remember to chop them small if they are large. If you need a gluten-free option, swap the flour for a gluten-free blend. Many blends work well in baking. For a vegan loaf, use plant-based butter and flax eggs instead of regular eggs. Mix 1 tablespoon of flaxseed meal with 2.5 tablespoons of water for each egg. This makes a good egg substitute that binds the loaf. To change the loaf's texture, consider adding oats or seeds. Oats add heartiness, while seeds like chia or sunflower give a nice crunch. You can also swap walnuts for other nuts such as pecans or almonds. This adds different flavors and textures to your breakfast loaf. To keep your Apple Cinnamon Breakfast Loaf fresh at room temperature, wrap it tightly in plastic wrap. Place it in an airtight container to prevent it from drying out. A cake dome also works well. This way, you can enjoy it over a few days without losing flavor. If you want to save the loaf for later, freezing is a great option. Wrap the loaf in plastic wrap and then in aluminum foil. This helps keep out air and moisture. You can freeze it for up to three months. When you’re ready to eat, let it thaw in the fridge overnight or at room temperature for a few hours. To check for spoilage, look for mold or an off smell. If the loaf feels dry or hard, it may be past its prime. To maintain moisture, store it in a cool, dark place. Adding a slice of bread in the container can help keep it soft. Enjoy your tasty treat even days later! You can use regular milk mixed with vinegar. Just add 1/2 tablespoon of vinegar to 1/2 cup of milk. Let it sit for five minutes. This will make a good substitute for buttermilk. You can also use plain yogurt or sour cream. Just mix them with a little water to thin them out. Both options work great in this recipe. Yes, you can make this loaf ahead of time. Bake it and let it cool completely. Wrap the loaf in plastic wrap or foil. Store it at room temperature for up to three days. You can also freeze it for longer storage. Just slice it first. This way, you can grab a slice whenever you want a tasty breakfast! To check if the loaf is done, insert a toothpick into the center. If it comes out clean or with just a few crumbs, the loaf is ready. If it has wet batter on it, bake for a few more minutes. Keep an eye on it, so it doesn't overbake. A well-baked loaf will have a nice golden color on top, too! This blog post covered how to make a delicious breakfast loaf. We talked about ingredients, step-by-step instructions, tips for the perfect loaf, and variations. I shared storage advice and answered common questions too. Now, you’re ready to bake your own tasty loaf. Try different flavors and make it yours. Enjoy the warmth of fresh bread and the smiles it brings! Happy baking!
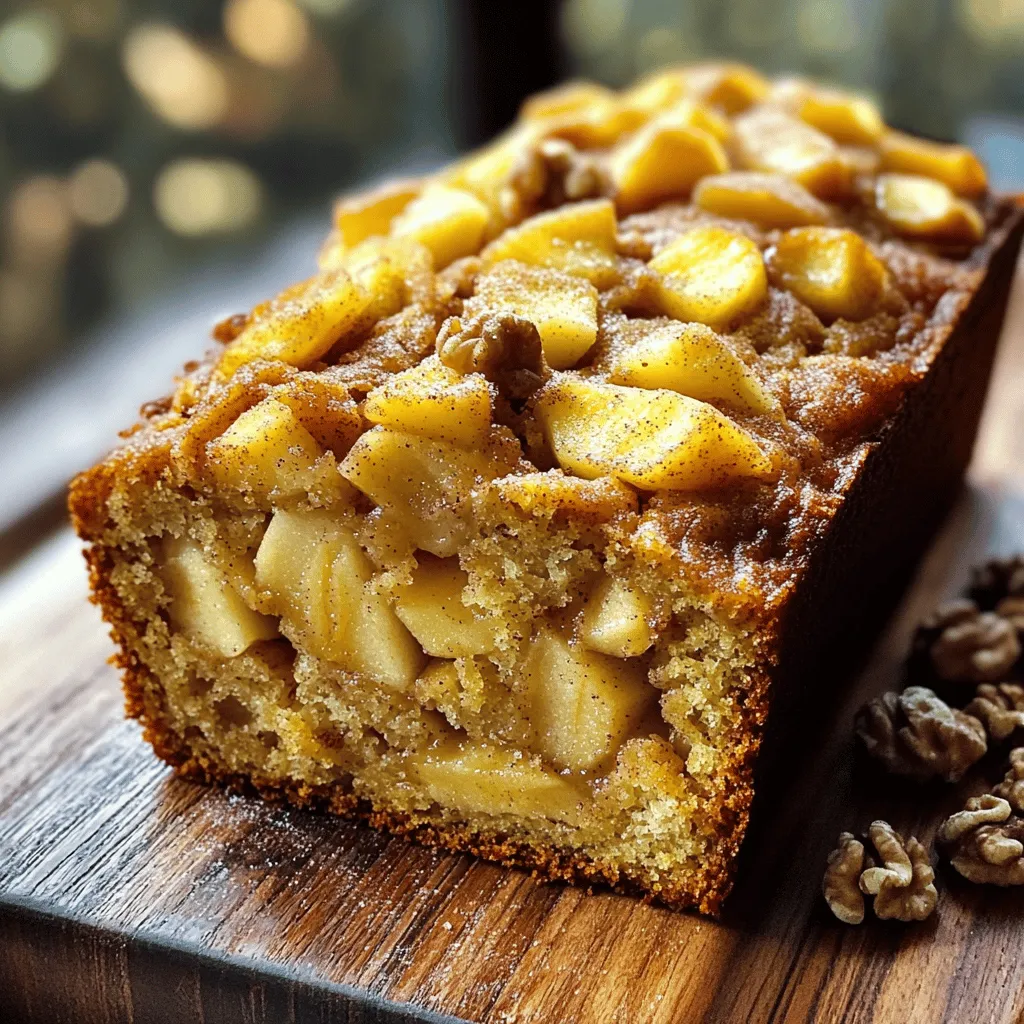
Apple Cinnamon Breakfast Loaf Delightful Morning Treat
Start your mornings right with my Apple Cinnamon Breakfast Loaf—a warm, sweet delight! This recipe blends cozy spices and juicy apples for a treat that’s
To make High-Protein Greek Yogurt Pumpkin Muffins, you need the following: - 1 cup canned pumpkin puree - 1 cup non-fat Greek yogurt - 2 large eggs - 1/2 cup honey or maple syrup - 1/4 cup unsweetened applesauce - 1 1/2 cups whole wheat flour - 1 teaspoon baking soda - 1 teaspoon baking powder - 1 tablespoon pumpkin pie spice - 1/2 teaspoon salt - 1/2 cup chopped walnuts or pecans (optional) - 1/4 cup chocolate chips (optional) You can swap some ingredients for a different taste or diet: - Use almond butter instead of applesauce for a nutty flavor. - Instead of whole wheat flour, try oat flour for a gluten-free option. - For a vegan muffin, replace eggs with flax eggs (1 tablespoon flaxseed meal + 2.5 tablespoons water per egg). - Maple syrup can replace honey for a vegan sweetener. These muffins are not just tasty; they also pack a nutritional punch. Each muffin has roughly: - Calories: 150 - Protein: 6 grams - Carbohydrates: 24 grams - Fat: 5 grams - Fiber: 3 grams Using Greek yogurt boosts the protein content. Plus, pumpkin adds vitamins like A and C. Start by preheating your oven to 350°F (175°C). This helps the muffins bake evenly. Next, prepare your muffin tin. You can line it with paper liners or spray it with non-stick spray. Both options work well for easy muffin release. In a large bowl, combine the following ingredients: - 1 cup canned pumpkin puree - 1 cup non-fat Greek yogurt - 2 large eggs - 1/2 cup honey or maple syrup - 1/4 cup unsweetened applesauce Whisk these ingredients together until the mixture is smooth. Make sure there are no lumps. This step is key for a nice, fluffy muffin. In another bowl, sift together: - 1 1/2 cups whole wheat flour - 1 teaspoon baking soda - 1 teaspoon baking powder - 1 tablespoon pumpkin pie spice - 1/2 teaspoon salt Sifting helps mix the dry ingredients well and adds air. This makes your muffins light and fluffy. If you want to add a twist, now is the time! Gently fold in: - 1/2 cup chopped walnuts or pecans (optional) - 1/4 cup chocolate chips (optional) These add-ins give your muffins a nice crunch and a bit of sweetness. Spoon the batter into the prepared muffin tin. Fill each cup about three-quarters full. This gives them room to rise. Bake in the preheated oven for 18 to 22 minutes. To check if they are done, use a toothpick. If it comes out clean or with a few crumbs, they are ready. After baking, let the muffins cool in the tin for about 5 minutes. Then, transfer them to a wire rack. This keeps them fluffy and prevents sogginess. Store any leftovers in an airtight container. Enjoy your delicious muffins! To create the best muffins, follow these simple tips: - Measure ingredients carefully. Use a kitchen scale if possible. - Don’t overmix. Stir just until the wet and dry ingredients blend. - Fill the muffin cups correctly. Fill them three-quarters full for good rise. - Use fresh ingredients. Check your baking powder and spices for freshness. - Bake in batches. If your oven has uneven heat, bake in smaller batches. Many make common mistakes when baking muffins. Here are a few to avoid: - Overmixing the batter. This leads to tough muffins. Mix gently and stop when combined. - Skipping the cooling step. Muffins need time to set. Let them cool before eating. - Not checking for doneness. Use a toothpick to check if they are baked through. - Ignoring ingredient temperatures. Use room-temperature eggs and yogurt for better mixing. - Using too much flour. Scoop flour lightly into the measuring cup to avoid adding too much. Serve your muffins for breakfast or a snack. Here are some fun ideas: - Pair with Greek yogurt. A dollop on the side adds creaminess. - Add a sprinkle of cinnamon. Dust a little cinnamon on top for extra flavor. - Serve warm. Warm muffins taste best and bring out the flavors. - Try a drizzle of honey. A honey drizzle adds sweetness and moisture. - Pair with coffee or tea. They make a perfect morning or afternoon treat! {{image_4}} You can make these muffins gluten-free. Use a gluten-free flour blend instead of whole wheat flour. Look for a mix that has xanthan gum in it. This will help the muffins rise and hold together well. To make these muffins vegan, swap the eggs for flaxseed meal. Use one tablespoon of flaxseed mixed with three tablespoons of water for each egg. Let it sit for a few minutes until it thickens. Replace Greek yogurt with a dairy-free yogurt. Maple syrup can be used for sweetening. You can change the flavor of these muffins in fun ways. Try adding different spices, like cardamom or allspice, to give them a unique taste. You can also mix in dried fruits, like cranberries or raisins. Nuts like almonds or pecans can add crunch. If you want a sweeter touch, fold in chocolate chips or butterscotch chips for a rich flavor. To keep your high-protein Greek yogurt pumpkin muffins fresh, store them in an airtight container. A simple zip-top bag works well too. Make sure to let them cool completely before sealing. This keeps moisture at bay and helps them stay fluffy. If you plan to eat them within a few days, keep them at room temperature. If you need them to last longer, consider freezing. To freeze your muffins, first, let them cool down. Then, wrap each muffin in plastic wrap. After that, place the wrapped muffins in a freezer-safe bag. This extra layer prevents freezer burn. They can stay in the freezer for up to three months. When you want a muffin, just take one out and let it thaw at room temperature. Reheating your muffins is easy and quick. For the best result, preheat your oven to 350°F (175°C). Place the muffins on a baking sheet and warm them for about 5 to 10 minutes. This helps restore their softness. You can also microwave them for about 15-20 seconds. Just be careful not to overheat, or they may become dry. Enjoy your muffins warm for a delightful treat! Yes, you can use different flours. Almond flour and oat flour are great options. Keep in mind, each flour changes the texture. For example, almond flour can make muffins softer. Oat flour can add a nice chew. If you use gluten-free flour, check the package for measurements. To sweeten the muffins, add more honey or maple syrup. You can also mix in chocolate chips for extra sweetness. If you want a natural sweetener, try mashed bananas or dates. They can boost flavor and moisture too. Greek yogurt adds protein and moisture. It gives the muffins a nice texture. It also helps keep them fresh longer. Greek yogurt contains probiotics, which are good for digestion. Plus, it cuts down on added fat, making this recipe healthier. These muffins last about 3 to 5 days at room temperature. Store them in an airtight container. If you want them to last longer, freeze them. They can keep for up to 3 months in the freezer. Just thaw them before enjoying! We covered all you need for making great muffins, from ingredients to storage tips. You learned about ingredient swaps, step-by-step prep, and tricks for perfect muffins. Don’t forget, you can customize flavors and find healthy ways to store them. Enjoy experimenting with options, and share your tasty results! Happy baking!
High-Protein Greek Yogurt Pumpkin Muffins Recipe
Welcome to your new favorite fall treat: High-Protein Greek Yogurt Pumpkin Muffins! These muffins are not just delicious; they pack in nutrition too. Made with