Appetizers
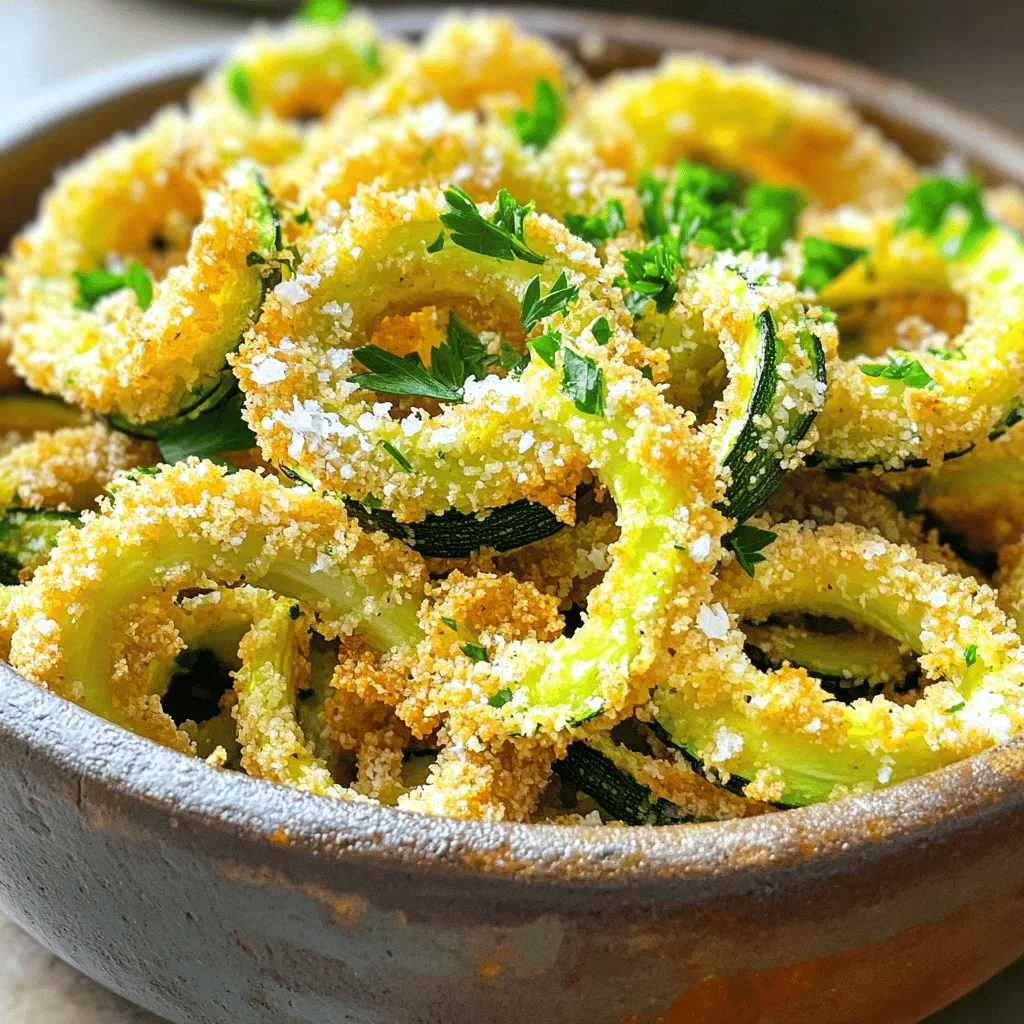
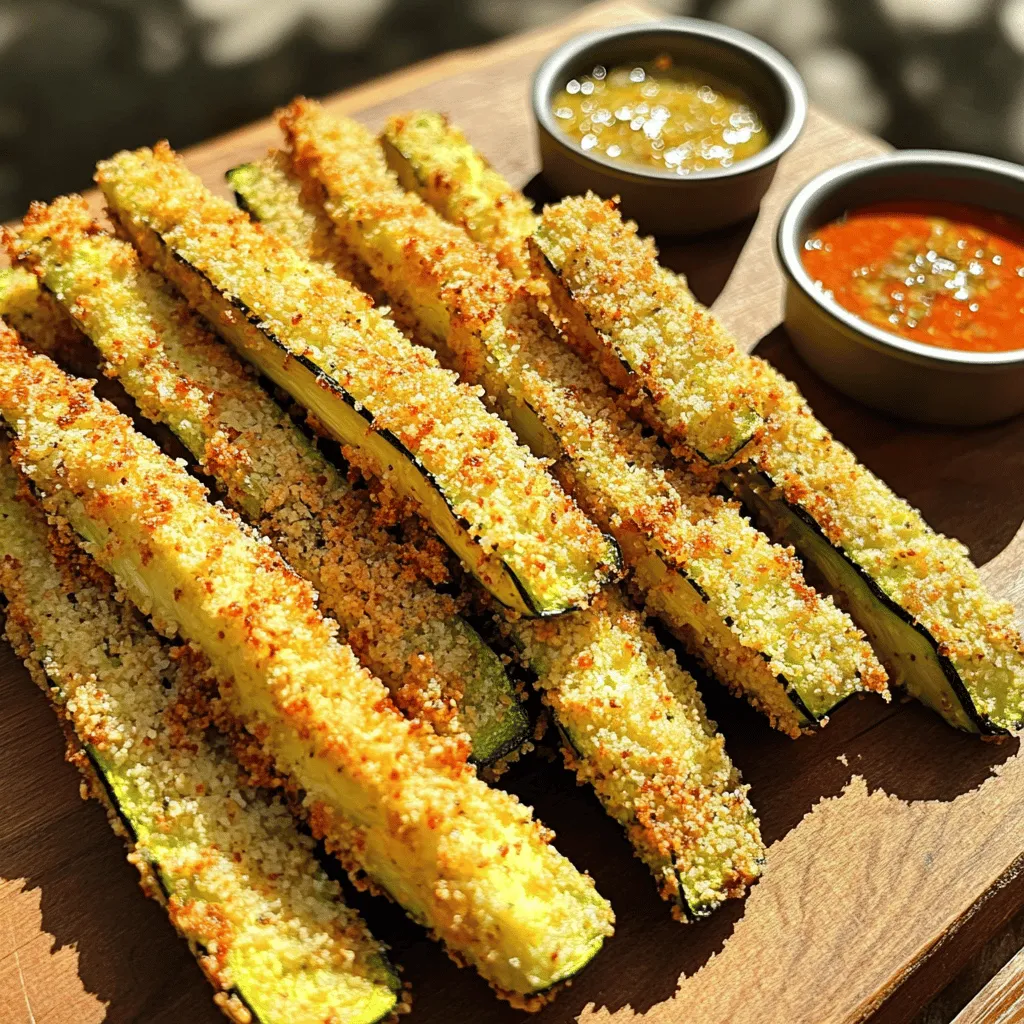
. To get that perfect crispiness, you must start with the right oven temperature. Preheat your oven to 425°F (220°C). This high heat helps the zucchini cook quickly and brown nicely. While you roast, avoid overcrowding on the baking sheet. If the zucchini slices are too close, they will steam instead of roast. Spread them out in a single layer for the best results. Fresh herbs bring out the best flavors in your dish. I love adding basil or thyme to my roasted zucchini. You can also try optional spices like smoked paprika or cumin for a unique twist. These add depth and make the dish pop with flavor. To get an even cheese coverage, sprinkle the grated Parmesan cheese evenly over the zucchini. Make sure each slice has a nice layer of cheese. Keep an eye on the roasting time. You want the cheese to turn golden brown and crispy, which usually takes about 15-20 minutes. If it needs a bit more time, check every few minutes to avoid burning. {{image_4}} You can change the cheese in this recipe. Try using mozzarella or feta for a different taste. These cheeses melt well and add a unique flavor. You can also mix cheeses for more depth. Adding diced vegetables is a fun twist. Bell peppers, cherry tomatoes, or onions work great. These veggies cook well and add color. Just make sure they are cut small enough to roast evenly. Incorporating lemon zest brightens the dish. Just a little zest adds a fresh, zingy flavor. You can also squeeze a bit of lemon juice over the zucchini after roasting for added brightness. Trying different herbs and spices can change the whole taste. Consider using thyme, basil, or rosemary. Each herb brings its own unique character. Experiment to find your favorite combination! Pairing your roasted zucchini with side dishes is easy. Try serving it with rice, quinoa, or a fresh salad. These sides complement the flavors well and add nice contrast. You can also pair roasted zucchini with proteins. Grilled chicken, fish, or steak work beautifully. The creamy cheese and tender zucchini balance nicely with heartier meats. To check out the full recipe, click here: [Full Recipe]. To keep your Oven Roasted Parmesan Zucchini fresh, refrigerate it right away. Place leftovers in an airtight container. This helps to lock in moisture and flavor. Use a container that fits well, so the zucchini does not get squished. You can store it for up to three days in the fridge. When reheating, you want to keep the zucchini crispy. The best way is to use an oven. Preheat your oven to 350°F (175°C). Spread the zucchini on a baking sheet in a single layer. Heat for about 10 minutes. Check if it’s warm and crispy. You can also use a skillet, cooking on medium heat for 5-7 minutes. If you want to freeze your zucchini, start by letting it cool completely. Arrange the slices on a baking sheet in a single layer. Freeze them for about 2 hours. Once frozen, transfer the zucchini to a freezer bag. Squeeze out as much air as you can. It will last up to three months in the freezer. To thaw, place the zucchini in the fridge overnight. For reheating, use the oven method above for the best results. Enjoy your tasty side dish whenever you want! For the full recipe, check out the complete steps in the article. To make Oven Roasted Parmesan Zucchini, follow these steps: 1. Preheat your oven to 425°F (220°C). 2. Line a baking sheet with parchment paper. 3. Slice 4 medium zucchinis into ½ inch rounds. 4. In a bowl, mix the zucchini with 2 tablespoons of olive oil. 5. Add 1 teaspoon of garlic powder, 1 teaspoon of dried oregano, salt, and pepper. 6. Toss the zucchini to coat evenly. 7. Arrange the zucchini on the baking sheet in a single layer. 8. Sprinkle ½ cup of grated Parmesan cheese over the zucchini. 9. Roast for 15-20 minutes until tender and golden brown. 10. Garnish with 2 tablespoons of chopped fresh parsley before serving. This method gives the zucchini a crispy texture and rich cheese flavor. For the full recipe, check the details provided above. Yes, you can use yellow squash instead of zucchini. Both squash types have a similar taste and texture. - Zucchini is slightly firmer and has a mild flavor. - Yellow squash is a bit softer and has a sweeter taste. Both work well when roasted. You can mix them for a colorful dish. Oven Roasted Parmesan Zucchini pairs great with many dishes. Here are some tasty ideas: - Grilled chicken or fish for a healthy protein. - Quinoa or rice for a hearty grain side. - A fresh garden salad for added crunch and nutrition. - Pasta dishes to balance the flavors and textures. These sides will enhance your meal and complement the zucchini dish beautifully. Oven roasted Parmesan zucchini is simple and delicious. We covered key ingredients, easy steps, and great tips to make this dish perfect. Remember to use fresh herbs for extra flavor. You can mix in different cheeses or veggies for a twist. Store leftovers well and reheat for a quick snack. This recipe makes a tasty side or a light meal. Enjoy every crunchy bite of your flavorful creation!](https://roastedflavors.com/wp-content/uploads/2025/07/4100f6c5-3c77-44df-9867-b910280b0692.webp)
Oven Roasted Parmesan Zucchini Flavorful Side Dish
Are you ready to elevate your side dish game? Oven Roasted Parmesan Zucchini is an easy, tasty option that will impress everyone at your table.
Air Fryer Curly Zucchini Fries Crispy and Delicious Snack
Looking for a tasty snack that’s easy to make? Air fryer curly zucchini fries are just what you need! With a crispy outer layer and

Fried Squash Recipe Crispy and Flavorful Delight
Are you ready to enjoy a crispy and flavorful treat? This Fried Squash Recipe delivers a delicious crunch and a burst of savory flavor in
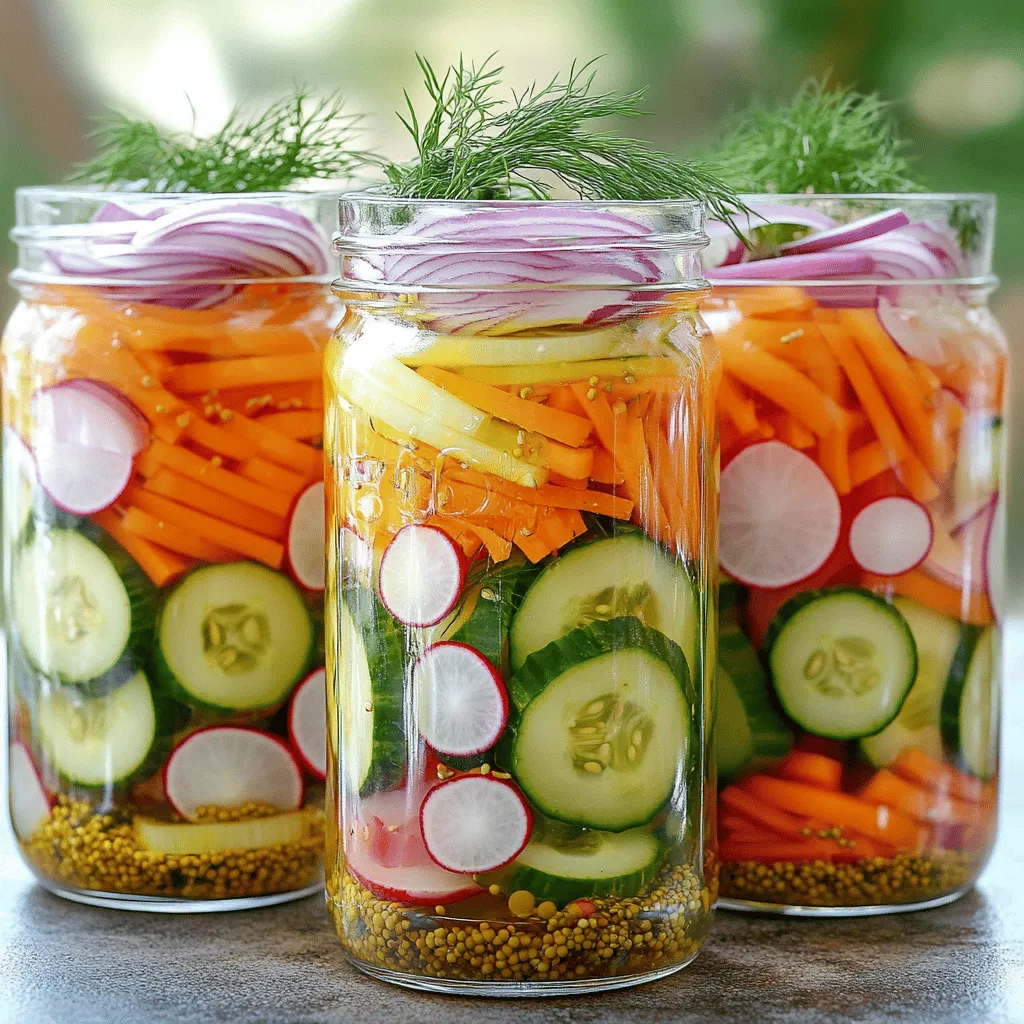
Pickled Vegetables for a Healthy Snack Delight
Are you looking for a tasty and healthy snack option? Pickled vegetables are the perfect choice! They are crunchy, tangy, and packed with nutrients. In
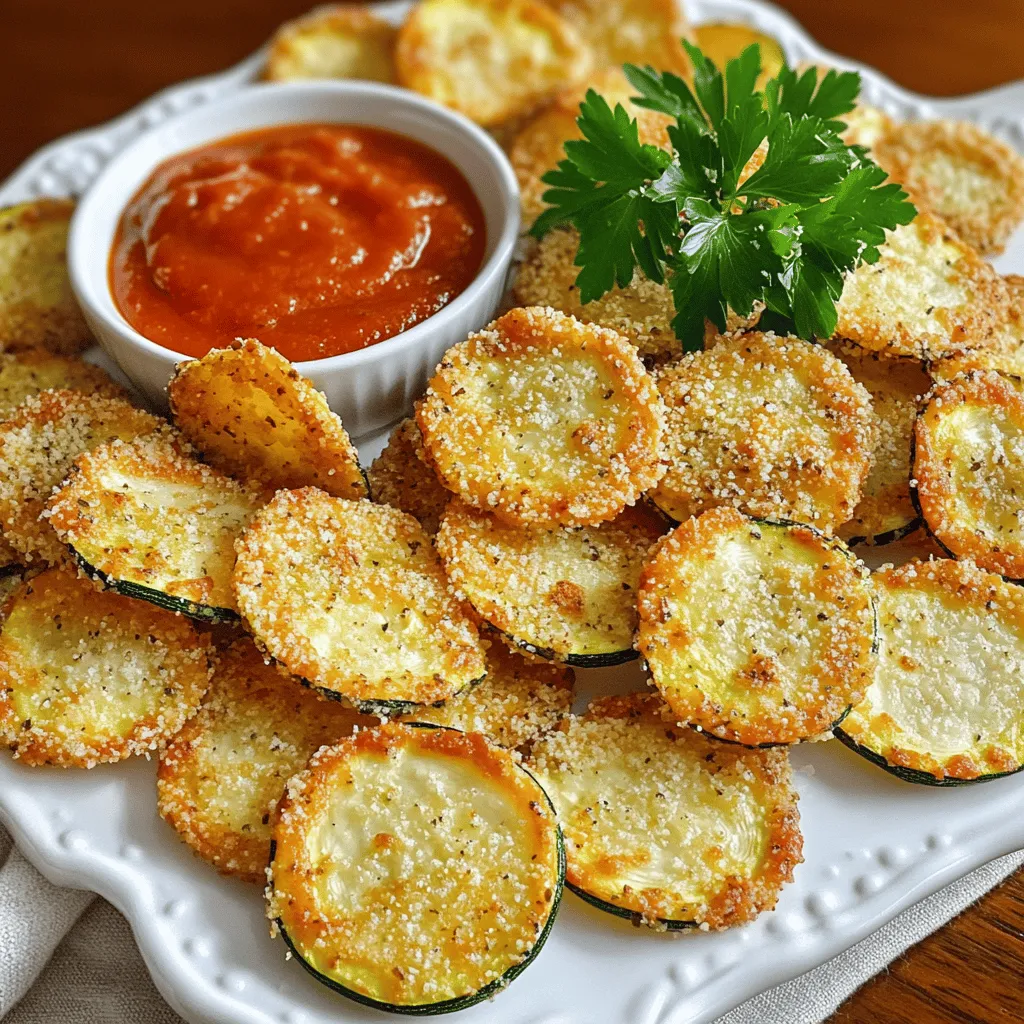
Parmesan Zucchini Chips Crispy and Flavorful Snack
Looking for a tasty and healthy snack? You’ve got to try Parmesan Zucchini Chips! These chips are crispy, flavorful, and easy to make. Plus, they

Copycat Pizza Hut Cheese Sticks Simple and Delicious
Craving those cheesy, golden sticks from Pizza Hut? You’re in the right place! My Copycat Pizza Hut Cheese Sticks recipe is simple and delicious, perfect
![Here’s what you need for cheesy garlic zucchini steaks: - 2 large zucchinis - 1 cup shredded mozzarella cheese - 1/2 cup grated Parmesan cheese - 2 tablespoons olive oil - 4 cloves garlic, minced - 1 teaspoon dried oregano - 1 teaspoon garlic powder - Salt and black pepper to taste - Fresh parsley, chopped (for garnish) Fresh ingredients make a big difference in flavor. Zucchinis are tender and mild. Their light taste lets the garlic and cheese shine. Look for firm zucchinis with smooth skin. Choose ones that feel heavy for their size. Fresh garlic adds a strong, rich flavor. It also makes the dish aromatic. Fresh parsley brings a pop of color and taste, too. You might already have these items in your pantry. Olive oil adds richness and helps the spices stick. Dried oregano enhances the dish with a hint of earthiness. Garlic powder gives a robust taste that complements fresh garlic. Salt and black pepper balance out the flavors. These simple items help create a delicious meal. Remember, you can find the full recipe above to guide you through each step! Start by preheating your oven to 400°F (200°C). This ensures a hot and even bake. Next, grab your two large zucchinis. Wash them well under cool water to remove any dirt. Then, slice each zucchini lengthwise into thick steaks. Aim for about 1/2-inch thick pieces. This thickness helps the zucchini cook evenly. Place the sliced zucchini on a cutting board. Set them aside while you make the garlic oil mixture. In a small mixing bowl, combine 2 tablespoons of olive oil with 4 cloves of minced garlic. Add 1 teaspoon each of dried oregano and garlic powder. Season this mixture with salt and black pepper to taste. Stir well to blend all the flavors. This garlic oil will coat your zucchini steaks, adding rich flavor. Make sure to mix it well, so every bite is tasty. Now, it’s time to bake! Line a baking sheet with parchment paper. This will keep the zucchini from sticking. Arrange the zucchini steaks in a single layer on the sheet. Use a brush or spoon to apply the garlic oil mixture generously on both sides of each steak. Bake the zucchini for about 15 minutes. You want them to soften and become tender. After the first bake, take the zucchini out of the oven. Sprinkle 1 cup of shredded mozzarella and 1/2 cup of grated Parmesan cheese evenly over each steak. Return the baking sheet to the oven. Bake for another 10-12 minutes. Watch for the cheese to melt and bubble. The final dish should have a golden, cheesy crust. Once done, remove the zucchini from the oven. Let them cool slightly before garnishing with chopped parsley. This adds a fresh touch to your delicious meal. For the full recipe, check the previous section. To get the best flavor, use fresh garlic. Fresh garlic brings a strong taste that dried garlic cannot match. For a richer flavor, mix in herbs like thyme or basil. You can also add a pinch of red pepper flakes for heat. When cutting zucchini, make sure the slices are thick, about 1/2 inch. This helps them hold their shape while baking. For added texture, let the zucchini sit with salt for 15 minutes before cooking. This draws out moisture and enhances the flavor. Cheesy garlic zucchini steaks work great as a side dish or a main meal. Serve them with grilled chicken or fish for a healthy dinner. They also pair well with a light salad or a grain bowl. You can make a fun meal by serving them in a taco format. Just add some avocado and pico de gallo for a fresh twist. If you want a vegetarian option, serve them with quinoa or rice. To impress your guests, focus on how you plate the dish. Use a colorful platter to make the zucchini steaks pop. Drizzle some extra olive oil on top for shine. Garnish with fresh parsley for a burst of color. You can also sprinkle some extra cheese on top just before serving for a gourmet touch. If you want to add freshness, include lemon wedges on the side. This adds a nice touch and lets people brighten up their meal. For the complete recipe, check out the [Full Recipe]. {{image_4}} You can switch up the cheese for more flavor. Try using cheddar cheese for a sharp taste. Gouda adds a smoky flavor that pairs well with zucchini. If you love blue cheese, crumble some on top for a bold kick. For a lighter option, consider using low-fat cheese. This keeps the dish healthy while still being cheesy. Feel free to mix in other veggies. Bell peppers, mushrooms, or cherry tomatoes add color and taste. You can roast these alongside the zucchini for extra flavor. If you want protein, add cooked chicken or shrimp. Simply place them on top of the zucchini steaks before baking. This makes for a heartier meal. This recipe is naturally gluten-free. You don’t need to change anything for it to stay gluten-free. If you serve it with bread, use gluten-free options. You can also pair it with a salad or rice. These sides keep the meal light and tasty. Enjoying this dish gluten-free is easy and delicious! For the full recipe, check the earlier sections. After cooking your cheesy garlic zucchini steaks, let them cool. Place them in an airtight container. They can stay fresh in the fridge for up to three days. Always label your container with the date. This helps you keep track of how long they’ve been stored. You can freeze leftover zucchini steaks for later use. First, cool them completely. Wrap each steak in plastic wrap, then place them in a freezer bag. They can last up to three months in the freezer. When you’re ready to eat them, thaw in the fridge overnight. To reheat your zucchini steaks, preheat the oven to 350°F (175°C). Place the steaks on a baking sheet lined with parchment paper. Heat for about 10 to 15 minutes until warm. You can also reheat them in the microwave for about 1 to 2 minutes. Just be careful not to overcook, or they may become mushy. Enjoy your delicious meal again! For the complete recipe, check out the [Full Recipe]. You will know the zucchini is done when it softens and turns slightly golden. A fork should easily pierce the flesh. Bake it for about 15 minutes at 400°F (200°C) to get it tender. After adding cheese, bake for another 10 to 12 minutes until the cheese is melty and bubbly. Absolutely! You can try eggplant, bell peppers, or even mushrooms. Just cut them into similar thickness to ensure even cooking. Each vegetable will bring its own unique flavor and texture, making it a fun experiment in the kitchen. These zucchini steaks go well with many sides. Here are some ideas: - A fresh green salad with a light vinaigrette - Roasted potatoes seasoned with herbs - Quinoa or rice pilaf for added texture - Grilled chicken or fish for protein Feel free to mix and match to create a balanced meal. You can find the full recipe for cheesy garlic zucchini steaks above. This article shared how to make cheesy garlic zucchini steaks. We looked at fresh ingredients, pantry items, and step-by-step instructions. You learned about perfecting flavors and serving ideas. I also covered variations and storage tips to keep your dish fresh. Try these tips to enjoy this dish at its best. Cooking can be fun and easy. Remember, you can always change it up to fit your taste! Enjoy every bite.](https://roastedflavors.com/wp-content/uploads/2025/07/f035817c-262f-4f2a-9b27-39933b664b05.webp)
Cheesy Garlic Zucchini Steaks Flavorful and Easy Meal
Are you ready to elevate your veggie game? Cheesy Garlic Zucchini Steaks are a simple, tasty dish that brings flavor to your table. Packed with
![Zucchini Röllchen is a simple dish that needs fresh and tasty ingredients. Each ingredient works together to create a delightful flavor. You will need zucchini, cheeses, sun-dried tomatoes, and herbs. These add creaminess, color, and taste to the rolls. Here’s what you will need: - 2 medium zucchinis - 1 cup ricotta cheese - 1/2 cup grated Parmesan cheese - 1/2 cup sun-dried tomatoes, finely chopped - 1/4 cup fresh basil, finely chopped - 1 clove garlic, minced - Salt and black pepper to taste - 1 tablespoon olive oil - 1/2 cup marinara sauce (for serving) - 1/4 teaspoon crushed red pepper flakes (optional for a spicy kick) Choose fresh zucchinis for the best flavor and texture. Look for firm zucchinis with vibrant skin. For cheese, fresh ricotta gives a creamy texture. Parmesan adds a nice bite, but you can use any hard cheese. If you need a dairy-free option, try cashew cheese or tofu. Fresh herbs make a big difference, but dried herbs can work in a pinch. Always taste your filling and adjust seasoning as needed. Start by slicing the zucchinis. Cut them lengthwise into thin strips, about 1/8 inch thick. A mandoline slicer works best for this. If you don’t have one, a sharp knife will do. You should get 8 to 10 strips from each zucchini, depending on their size. Next, sprinkle the strips lightly with salt. Let them sit for about 15 minutes. This step helps draw out extra moisture. After 15 minutes, use a paper towel to pat the strips dry. This removes the water that the salt pulled out. In a mixing bowl, combine the filling ingredients. Add 1 cup of ricotta cheese, 1/2 cup of grated Parmesan cheese, 1/2 cup of finely chopped sun-dried tomatoes, and 1/4 cup of finely chopped fresh basil. Add 1 minced garlic clove and a pinch of salt and black pepper. Mix everything until smooth and creamy. This filling is where the flavor starts, so make sure it’s well blended. Preheat your oven to 375°F (190°C). To assemble, take one zucchini strip and add about a tablespoon of the cheese mixture on one end. Roll it tightly around the filling to form a röllchen. Repeat this with the rest of the strips and filling. For baking, spread a thin layer of marinara sauce at the bottom of a baking dish. Place the filled rolls seam-side down in the dish. Drizzle a little olive oil on top. If you like it spicy, add a sprinkle of crushed red pepper flakes. Cover the dish with aluminum foil and bake for 20 minutes. Then, remove the foil and bake for another 10 minutes until they are heated through and golden on top. Let them cool for a few minutes before serving. For the full recipe, refer to the earlier section. Enjoy your Zucchini Röllchen! To keep your Zucchini Röllchen from turning soggy, you need to draw out moisture. After slicing the zucchinis, sprinkle them lightly with salt. Let them sit for about 15 minutes. The salt helps pull out extra water. Afterward, use a paper towel to pat them dry. This simple step makes a big difference in texture. Flavor is key in any dish. For Zucchini Röllchen, mix fresh herbs with your cheese filling. I love adding chopped basil and sun-dried tomatoes. They give a burst of flavor and freshness. You can also sprinkle a bit of crushed red pepper flakes for heat. This extra touch can make your dish pop with taste. Presentation matters! For a beautiful serving, place the Zucchini Röllchen on a plate with marinara sauce. Drizzle the sauce on the bottom first. Then, arrange the rolls seam-side down. Finish by garnishing with fresh basil and grated Parmesan. This not only looks appealing but also adds more flavor. Enjoy serving this dish warm for the best experience! {{image_4}} You can change the filling for Zucchini Röllchen easily. Try using goat cheese or feta for a tangy twist. You can also add cooked spinach or mushrooms for a savory touch. If you enjoy a bit of heat, mix in some jalapeños or chili flakes. This gives you a unique flavor each time. To make this dish vegan or dairy-free, swap the cheese with a nut-based cream. Cashew cream works great here. You can also use nutritional yeast to give a cheesy flavor. Add some chopped olives or artichokes for a tasty kick. This way, everyone can enjoy Zucchini Röllchen. Zucchini Röllchen taste best when served warm. Place them on a bed of marinara sauce. You can sprinkle fresh herbs like basil or parsley for color. A light salad pairs nicely as a side. It balances the meal beautifully. For a fun twist, serve them with crusty bread to soak up the sauce. You can find the Full Recipe for Zucchini Röllchen to explore all these ideas! After making Zucchini Röllchen, let them cool down. Place any leftover rolls in an airtight container. They will stay fresh for about 3 to 4 days in the fridge. If you want to enjoy them later, make sure to wrap them well. This helps keep their flavor and texture. To freeze Zucchini Röllchen, first cool them completely. Then, place them in a single layer on a baking sheet. Freeze for about 1 hour. Once firm, transfer the rolls to a freezer-safe bag. They can last up to 3 months in the freezer. Remember to label the bag with the date. This way, you’ll know when to use them. To reheat Zucchini Röllchen, preheat your oven to 350°F (175°C). Place the rolls in a baking dish and cover them with foil. Heat for about 15 to 20 minutes, or until warm. You can also use a microwave. Place the rolls on a plate and cover with a damp paper towel. Heat for 1 to 2 minutes. This keeps them moist and tasty. Enjoy your Zucchini Röllchen from the [Full Recipe] any time! To stop zucchini from getting soggy, you need to draw out moisture. First, slice the zucchini into thin strips. Then, sprinkle salt on the strips. Let them sit for about 15 minutes. This process helps to pull out extra water. After that, use a paper towel to pat them dry. This simple step makes a big difference in texture. Yes, you can prepare Zucchini Röllchen ahead of time. You can make the filling and assemble the rolls a day in advance. Just cover them and store them in the fridge. When you’re ready, bake them straight from the fridge. This way, you save time and still enjoy a fresh dish. Zucchini Röllchen pair well with many sides. You can serve them with a fresh salad. A simple green salad with vinaigrette works great. You can also add some crusty bread for a nice crunch. If you want a heartier meal, serve them with pasta or rice. Don't forget to drizzle extra marinara sauce on top for flavor. For the full recipe, check the complete guide above! In this guide, you learned about the key ingredients for Zucchini Röllchen and how to prepare them. We covered step-by-step instructions, helpful tips, and tasty variations. Remember to choose quality ingredients and try different fillings for fun. Store leftovers properly to enjoy later. You can prepare these ahead of time and impress your guests with a beautiful dish. With practice, you will master this recipe and delight everyone at your table. Now, it’s time to get cooking and enjoy your delicious Zucchini Röllchen!](https://roastedflavors.com/wp-content/uploads/2025/07/3d6e8984-f147-46be-b75a-cea91c792a21.webp)
Zucchini Röllchen Tasty and Simple Meal Idea
Looking for a quick and tasty meal idea? Let me introduce you to Zucchini Röllchen! These little rolls pack a punch with fresh flavors and
Air Fryer Zucchini Fries Crispy and Flavorful Snack
If you’re looking for a tasty snack that’s both crispy and healthy, you’ll love Air Fryer Zucchini Fries. These golden fries are easy to make

Grilled Zucchini with Parmesan Savory and Simple Side
Are you ready to spice up your side dish game with grilled zucchini? This simple and savory recipe features tender strips of zucchini coated in