Appetizers

Sheet Pan Green Chile Chicken Taquitos Flavor Boost
Are you ready to spice up your weeknight dinners? My Sheet Pan Green Chile Chicken Taquitos are packed with flavor and easy to make! Using

Baked Elote Dip Flavorful and Creamy Delight
Are you ready to impress your friends with a delicious Baked Elote Dip? This creamy delight combines sweet corn, rich cheeses, and zesty spices for
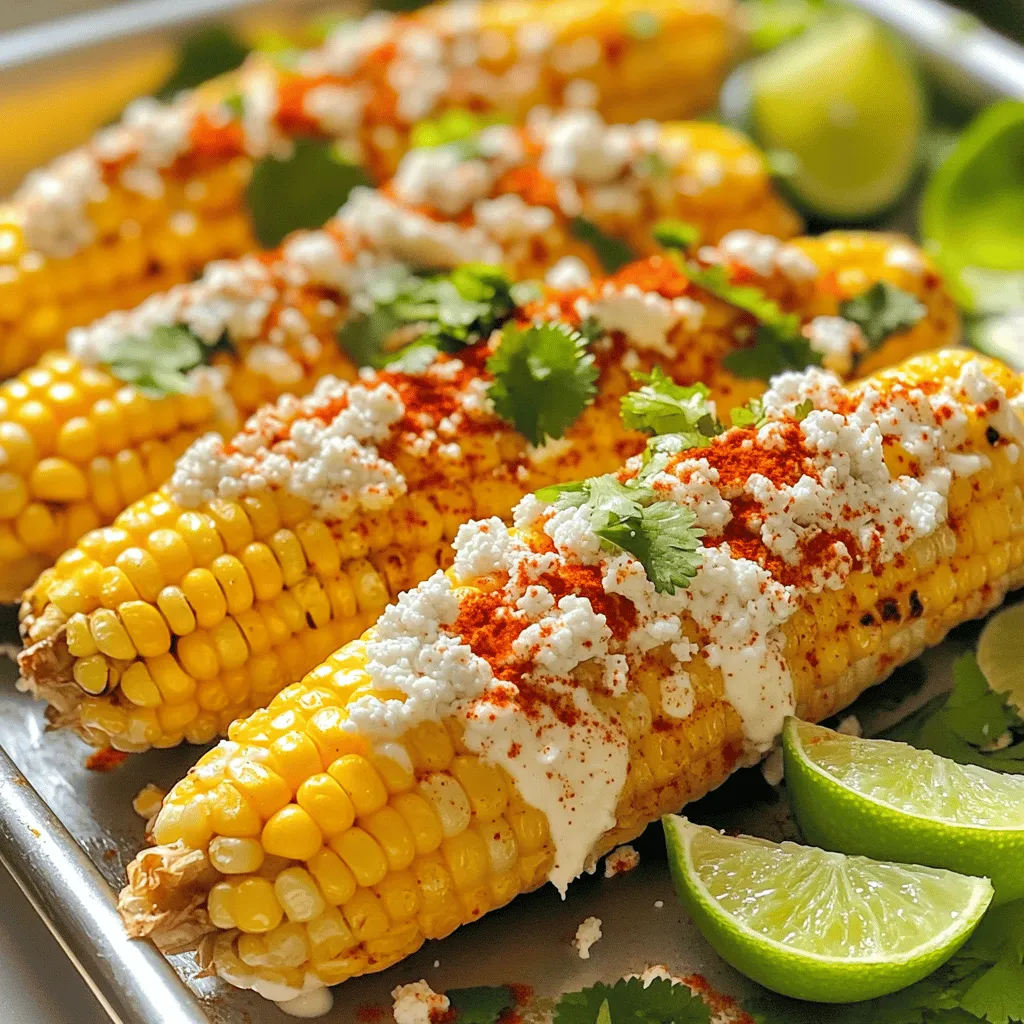
Easy Mexican Street Corn Flavorful and Simple Recipe
Are you ready to taste the vibrant flavors of Easy Mexican Street Corn? This simple recipe will transport you straight to the bustling streets of
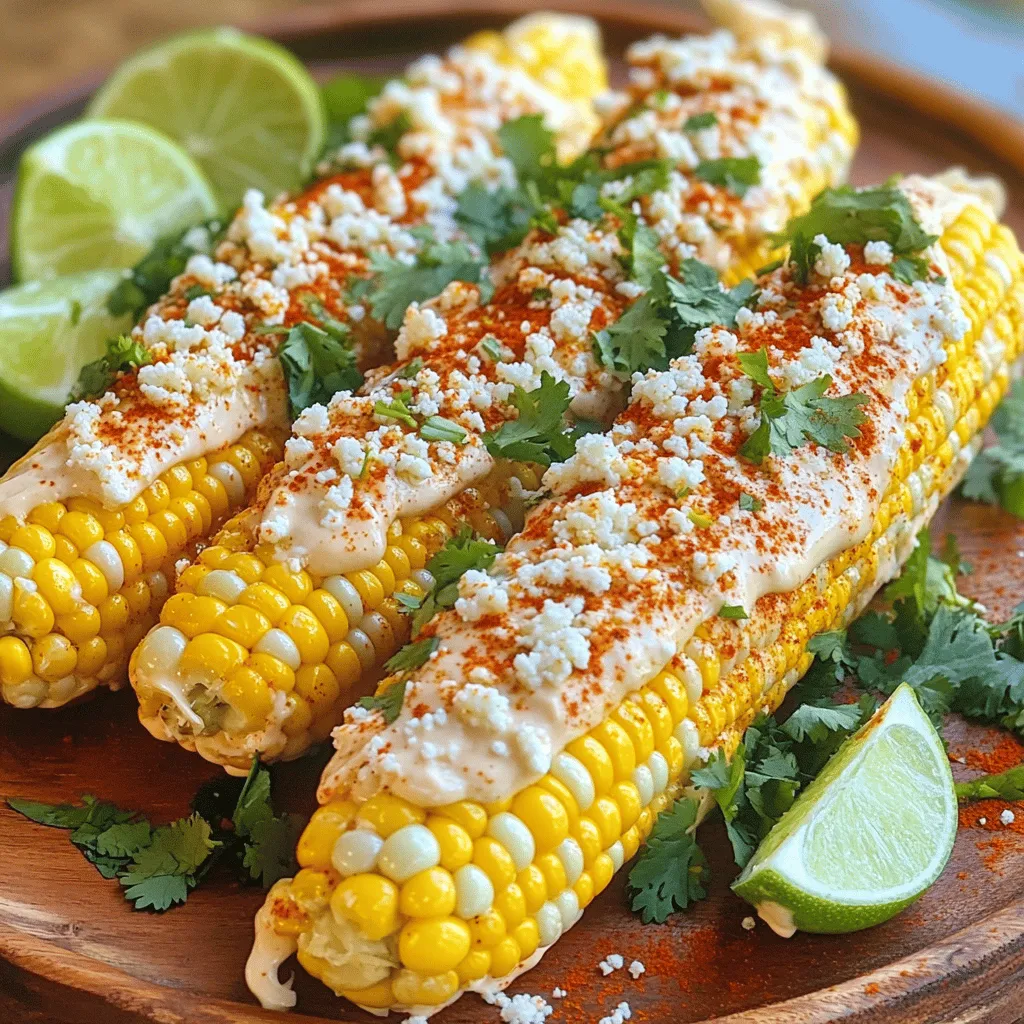
Mexican Street Corn on the Cob Joyful Flavor Delight
Are you ready to savor the vibrant flavors of Mexican Street Corn on the Cob? This delicious snack bursts with joy and spice, making it
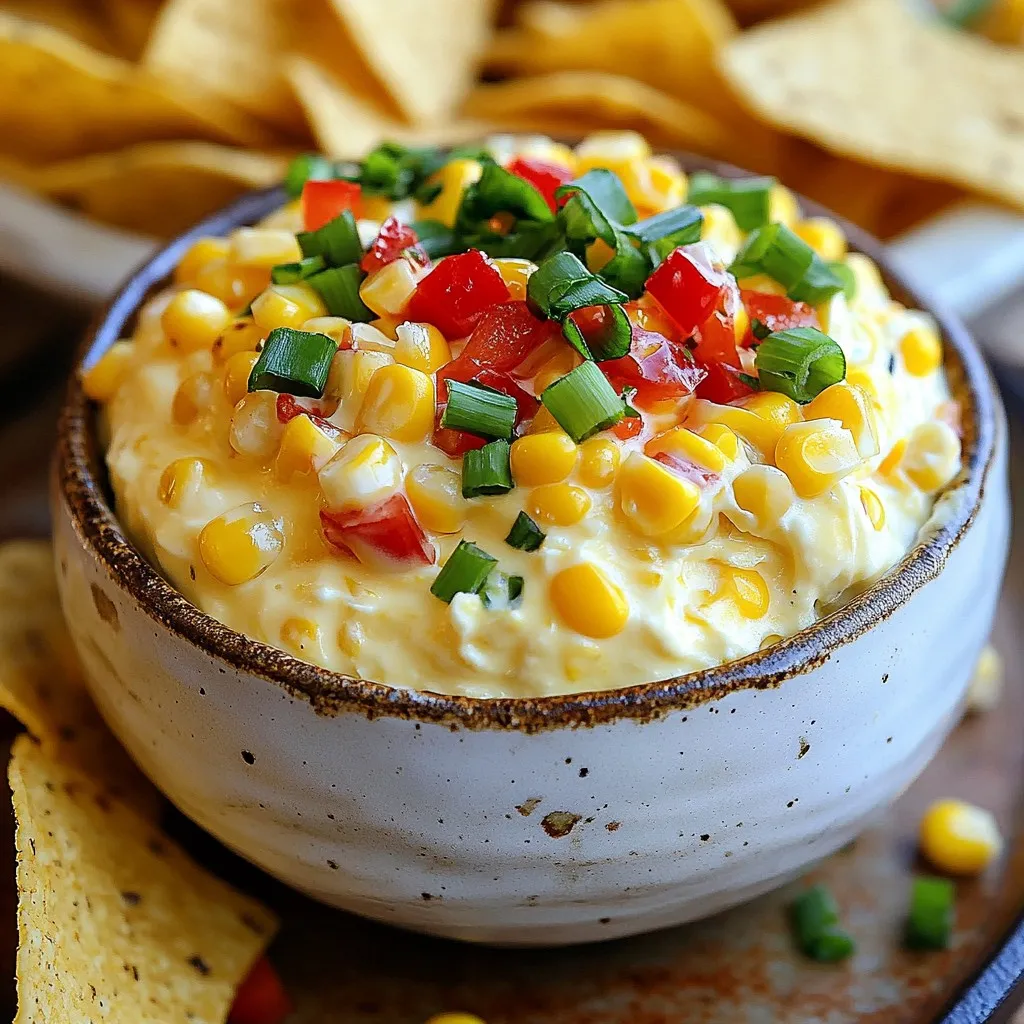
Creamy Corn Dip Irresistible Crowd-Pleaser Recipe
Looking for a dip that will wow your guests? This Creamy Corn Dip is an easy crowd-pleaser that combines sweet corn, creamy cheese, and bold

Muffin Tin Pizza Bombs Fun and Tasty Snack Idea
Looking for a fun and tasty snack? Muffin Tin Pizza Bombs are your answer! These bite-sized pizza pockets combine your favorite toppings into pockets of
![- Ripe Tomatoes - Large Onion - Garlic Cloves - Jalapeño Peppers - Fresh Cilantro - Fresh Lime Juice - Salt - Extra Virgin Olive Oil How to Choose Ripe Tomatoes Pick tomatoes that feel heavy for their size. Look for rich color and a slight give when you press them. The smell should be sweet and fragrant. This means they're ready to shine in your salsa. Selecting the Right Onion Choose a large onion with a firm feel and smooth skin. Avoid those with soft spots or blemishes. A good onion adds sweetness to your salsa and balances the heat from the jalapeños. Freshness in Herbs and Spices Look for bright green cilantro leaves with no wilting. Fresh herbs boost flavor in your salsa. When you smell them, they should have a strong and fresh scent. For salt, use a fine sea salt to help it blend well. Using fresh ingredients makes a big difference. They bring amazing flavor to your fire roasted salsa. Check out the Full Recipe for a complete list and instructions! - Preheat your grill to medium-high heat, or warm a cast iron skillet on the stove. - Arrange the halved tomatoes, quartered onion, unpeeled garlic cloves, and halved jalapeños on your grill or skillet. - Roast the veggies for about 10 to 12 minutes. Turn them often to get even charring. You want the skins to blister and the garlic to soften. - Watch for the tomatoes to get nice dark spots and the garlic to turn tender. - Once the veggies cool for 5 minutes, peel the garlic. Add all roasted vegetables to a blender. - Toss in chopped cilantro, fresh lime juice, and a pinch of salt. Blend until you reach your desired salsa texture. - Taste your salsa. Adjust flavors by adding more salt or lime juice if needed. - Drizzle a tablespoon of olive oil over the salsa to boost the flavor before serving. For the full recipe, check the Fire Roasted Salsa section. Roasting your ingredients brings out a deep, rich taste. When you fire-roast tomatoes, onions, and peppers, the heat caramelizes their natural sugars. This adds a sweet and smoky flavor to your salsa. Roasting also softens the vegetables, making them easier to blend. For the best results, I suggest using a grill or a cast iron skillet. A grill gives that nice char and smoky edge. If using a skillet, make sure it’s well-seasoned. Heat it to medium-high before adding your veggies. Fire roasted salsa pairs well with many dishes. You can serve it with tortilla chips for a classic snack. It also goes great on tacos, grilled meats, or even scrambled eggs. The fresh lime juice adds a zesty kick that brightens any meal. For presentation, use a rustic bowl. Add a sprinkle of chopped cilantro on top. This adds color and freshness. You might also drizzle a bit of olive oil for a polished look. If you have leftover salsa, store it in an airtight container. It will stay fresh in the fridge for about a week. For longer storage, you can freeze it. Just make sure to leave some space in the container, as the salsa will expand when frozen. You can also use leftover salsa in other recipes. Mix it into scrambled eggs for a tasty breakfast. Stir it into soups or stews for added flavor. You can even use it as a topping for grilled chicken or fish. Enjoy exploring all the ways to use your fire roasted salsa! {{image_4}} You can easily change the heat of your fire roasted salsa. If you want it milder, use less jalapeño. You can also remove the seeds to lower the spice. For a spicier salsa, add more jalapeños or even a pinch of cayenne pepper. You can taste as you go to find the right heat for you. You can swap out some ingredients if needed. For example, you can use red bell peppers instead of jalapeños for a sweet flavor. You could also try using green onions instead of a regular onion. Fresh herbs like parsley or basil can replace cilantro. Want to get creative? You can mix in other ingredients. Chopped mango adds sweetness. Black beans give you protein and texture. For a smoky flavor, try adding roasted corn. Each choice adds a unique twist to your salsa. Fire roasted salsa is great in many dishes. You can use it as a topping for tacos or burritos. It also works well as a fresh dip with chips. You can even stir it into scrambled eggs for breakfast. Add fire roasted salsa to grilled meats for extra flavor. It’s perfect on chicken, fish, or steak. You can also make a delicious salsa salad by mixing the salsa with diced cucumber and avocado. The options are endless! For the full recipe, check out the full recipe. You can find pre-made fire roasted salsa at many stores. Look for brands like Frontera, Pace, or Trader Joe’s. These brands make tasty salsa with fire-roasted flavors. You can buy them online as well. Check sites like Amazon, Walmart, or Target. They often have good prices and fast shipping. If you want to make salsa at home, you need the right tools. A good blender or food processor makes blending easy. I recommend brands like Ninja or Vitamix for great results. For roasting, use a sturdy grill or a cast iron skillet. A cast iron skillet heats evenly and works well on the stove. You will also need basic utensils like a knife, cutting board, and a spoon for mixing. With the right tools, making fire roasted salsa becomes simple and fun. You can check the [Full Recipe] for details on how to make it! What is Fire Roasted Salsa? Fire roasted salsa is a fresh dip made from roasted tomatoes, onions, garlic, and jalapeños. The roasting gives it a smoky flavor that adds depth. You can mix in cilantro, lime juice, and salt for a bright finish. This salsa is great for chips or as a topping for tacos. How Long Does Fire Roasted Salsa Last? Fire roasted salsa can last up to five days in the fridge. Make sure to store it in an airtight container. If you notice any off smell or changes in color, it’s best to toss it. Can I Freeze Fire Roasted Salsa? Yes, you can freeze fire roasted salsa! It keeps well for about three months. Use freezer-safe containers and leave some space for expansion. Thaw it in the fridge overnight before using. Can I roast the ingredients in the oven? Absolutely! You can roast the ingredients in your oven. Set it to 400°F (200°C). Spread the veggies on a baking sheet and roast until they’re charred. This method gives a similar flavor to grilling. What if I don’t have a grill or skillet? If you lack a grill or skillet, use your oven or even a broiler. Place the veggies on a tray and broil them for a few minutes. Just keep an eye on them to avoid burning. Is Fire Roasted Salsa Healthy? Yes, fire roasted salsa is healthy! It’s low in calories and packed with vitamins. The fresh ingredients offer a lot of nutrients without added sugars or fats. What Are the Health Benefits of Fire Roasted Ingredients? Fire roasting enhances the flavors and nutrients in veggies. Roasted tomatoes have more lycopene, which is good for your heart. Garlic adds immune-boosting properties. Jalapeños can help with metabolism. Enjoying this salsa gives you tasty health benefits! This post explored the key ingredients and steps to make fire-roasted salsa. We discussed selecting fresh tomatoes, onions, and herbs to ensure the best flavors. Roasting techniques elevate the taste, and blending brings everything together. You can adjust spice levels or substitute ingredients for custom options. Serve it fresh alongside your favorite dishes. Remember, storing salsa correctly can enhance its shelf life. Try different variations to keep it exciting. Enjoy making your salsa, and don’t be afraid to experiment!](https://roastedflavors.com/wp-content/uploads/2025/08/111c10c8-cd17-4cbb-a163-fb5425230489.webp)
Fire Roasted Salsa Flavorful and Simple Recipe Guide
Fire roasted salsa brings bold flavor and vibrant freshness to your table. In this simple recipe guide, I will help you create a salsa that
![- 4 large ripe tomatoes, halved - 1 small red onion, quartered - 2 cloves garlic, unpeeled - 1 jalapeño pepper, halved and deseeded (adjust based on heat preference) - 2 tablespoons extra virgin olive oil - 1/2 teaspoon ground cumin - 1/2 teaspoon smoked paprika - Salt and freshly ground black pepper, to taste - Juice of 1 lime - 1/4 cup fresh cilantro, finely chopped Using fresh ingredients makes a big difference. Ripe tomatoes bring sweetness and depth. A small red onion adds a nice bite without overpowering the dish. Garlic, when roasted, becomes sweet and creamy. The jalapeño gives a heat kick, but you can adjust it to your liking. Extra virgin olive oil ensures the veggies roast nicely. Ground cumin and smoked paprika add warmth and flavor. Salt and pepper are essential for balancing all the tastes. Fresh lime juice brightens everything up, while cilantro adds a fresh touch. For those looking to enhance flavors, consider adding: - A splash of vinegar for tanginess - A pinch of sugar to balance acidity - Diced bell pepper for extra crunch Spice measurements are important for the best results. Stick to the suggested amounts, but feel free to adjust based on your taste. This recipe is all about making it your own while keeping the essence of roasted tomato salsa. You can find the Full Recipe for detailed cooking steps. 1. Start by preheating your oven to 400°F (200°C). This heat is perfect for roasting. 2. Next, get a large baking sheet. Place the halved tomatoes cut-side up. Add the quartered red onion, unpeeled garlic cloves, and halved jalapeño. 3. Drizzle the vegetables with olive oil. Make sure they are well covered. Sprinkle ground cumin, smoked paprika, salt, and black pepper on top. This adds great flavor to each bite. 1. Roast the vegetables in your preheated oven for 20 to 25 minutes. Keep an eye on them. 2. The tomatoes should blister, the onion should soften, and the garlic should become tender and caramelized. This shows they are ready. 1. After roasting, take the baking sheet out of the oven. Let the vegetables cool for a few minutes. This makes them safer to handle. 2. Squeeze the garlic out of its skin into a blender. Add the roasted tomatoes, onion, and jalapeño as well. 3. Blend everything together until you reach your desired consistency. You can make it smooth or slightly chunky. 4. Finally, mix in fresh lime juice and chopped cilantro. Taste your salsa and adjust the seasoning if needed. 5. For the best flavor, let the salsa sit for 15 to 30 minutes. This allows the flavors to blend perfectly. 6. For the full recipe, check the details provided earlier. To make your roasted tomato salsa stand out, try adding spices. A pinch of oregano or chili powder can boost the flavor. You can also swap smoked paprika for regular paprika for a different taste. If you want more heat, leave some seeds in the jalapeño. For less heat, use a milder pepper like a poblano. Roasted tomato salsa is super versatile. Serve it with crispy tortilla chips for a classic snack. You can also use it as a fresh topping for grilled chicken or fish. Try it on tacos or even as a sauce for pasta. Pair it with guacamole for a fun dip platter. It adds a zesty punch to any dish! For the best roasting results, use ripe tomatoes. They’ll caramelize beautifully for a rich flavor. Make sure to spread the veggies out on the baking sheet. This helps them roast evenly. After making your salsa, store it in an airtight container. Keep it in the fridge for up to a week. For longer storage, freeze it in small portions. This way, you can enjoy it later. {{image_4}} You can easily change up your roasted tomato salsa. Adding fruits brings a fun twist. Try using mango or peach for a sweet flavor. These fruits enhance the salsa's taste and add color. You can also mix in beans for more texture. Black beans or white beans work well. They add protein and fiber, making the salsa heartier. You can prepare salsa in different ways. Grilling your veggies gives a smoky flavor. Just like roasting, grilling takes about the same time. If you prefer a fresher taste, you can make raw salsa. Raw salsa uses fresh tomatoes, onions, and peppers. It has a bright and zesty flavor. Cooked salsa, on the other hand, has a deeper taste due to roasting or grilling. Each method gives you a unique salsa experience. After making your roasted tomato salsa, store it properly to keep it fresh. - Refrigerating your roasted tomato salsa: Place your salsa in an airtight container. It can stay in the fridge for up to a week. Always use a clean spoon when scooping out salsa. This keeps germs away. - Freezing options for long-term storage: If you want to keep it longer, freeze your salsa. Use a freezer-safe container or a zip-top bag. Leave some space for the salsa to expand. It can last for about three months in the freezer. You may wonder how long roasted tomato salsa lasts. - How long does roasted tomato salsa last?: In the fridge, expect it to last about 5 to 7 days. In the freezer, it stays good for up to 3 months. - Signs of spoilage to watch out for: Check for changes in smell or color. If it smells sour or has a strange look, it’s time to toss it. Always trust your senses when it comes to food safety. Can I use canned tomatoes instead of fresh? Yes, you can use canned tomatoes. Choose high-quality canned tomatoes for the best flavor. However, fresh tomatoes give a better taste. How can I adjust the recipe for a larger batch? Simply double or triple the ingredient amounts. Keep the roasting time similar but check for doneness. Is it safe to eat salsa made with roasted garlic? Yes, roasted garlic is safe to eat. It becomes sweet and soft when cooked. What recipes can I use this salsa with? This salsa pairs well with tacos, grilled meats, and tortilla chips. You can also use it in salads or on sandwiches. How to keep salsa from getting watery? To avoid watery salsa, use firm tomatoes. You can also drain excess liquid before blending. Can I make roasted tomato salsa in advance? Yes, you can make salsa ahead of time. Store it in the fridge for up to three days. For the best flavor, let it sit for a while before serving. For the full recipe, check out the [Full Recipe]. We explored the key ingredients for roasted tomato salsa, including fresh and optional options. I shared step-by-step roasting and blending instructions to help you achieve the best flavor. Plus, I offered tips for enhancing taste, serving ideas, and storage techniques. Remember, you can customize your salsa with fruits or beans. Now, you have all you need to create delicious roasted tomato salsa. Enjoy experimenting in the kitchen!](https://roastedflavors.com/wp-content/uploads/2025/08/268c0c3d-cbb9-48bf-a522-08cf835d08b1.webp)
Roasted Tomato Salsa Recipe Flavorful and Fresh Taste
If you want to brighten up your meals, you need my roasted tomato salsa recipe. This salsa bursts with fresh flavors from simple, wholesome ingredients.
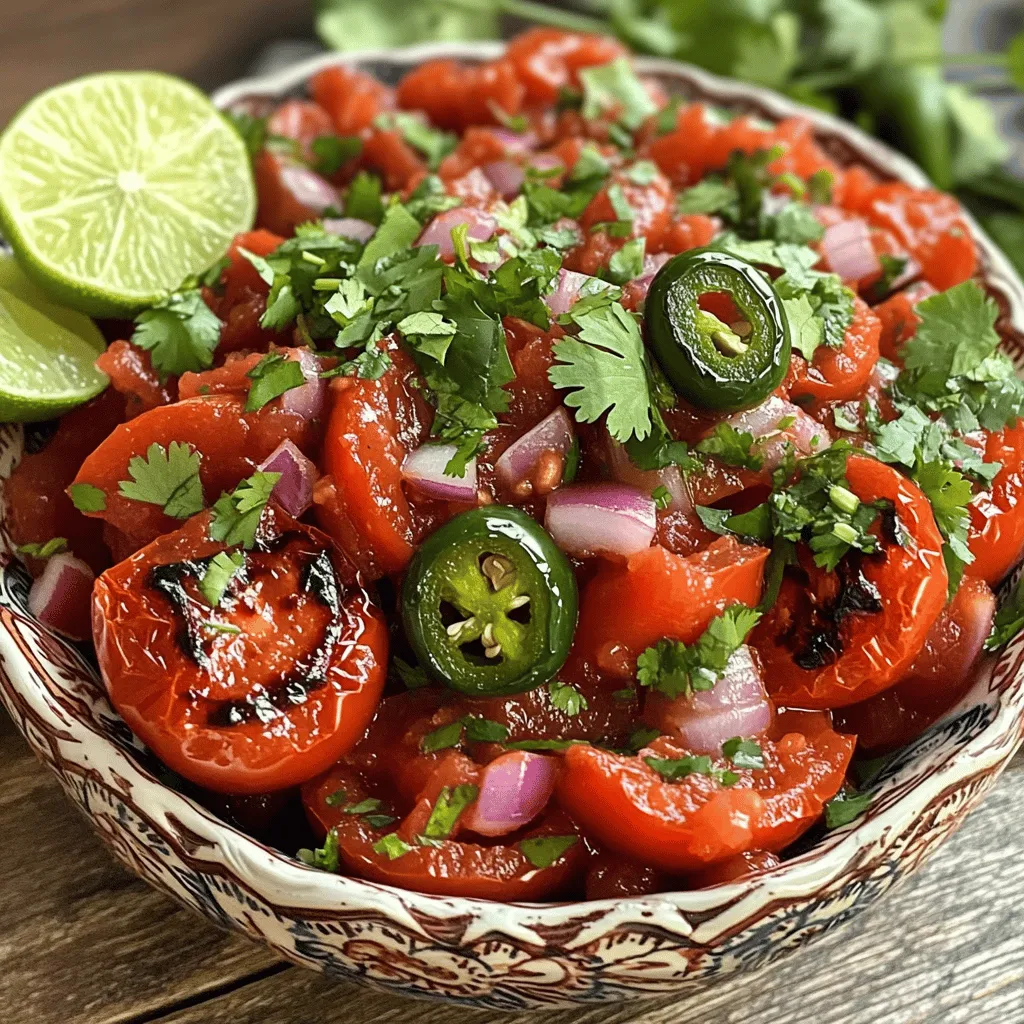
Simple Salsa Roja Recipe Flavorful and Easy to Make
Are you ready to spice up your meals with a burst of flavor? This Simple Salsa Roja Recipe is not only easy to make, but
![- 4 whole wheat tortillas - 8 ounces sliced turkey breast - 1 cup mixed greens (a refreshing blend of spinach, arugula, and other greens) - 1 cup bell peppers, sliced (choose a combination of vibrant red, yellow, or orange) - 1/2 cup cucumber, thinly sliced for crunch - 1/2 cup shredded carrots for sweetness - 1/4 cup creamy hummus - 1 tablespoon tangy Dijon mustard - A sprinkle of crumbled feta cheese or slices of creamy avocado for added richness These ingredients come together to create a fun lunch that kids will love. The whole wheat tortillas offer fiber, while the turkey adds protein. Mixed greens bring vitamins, and colorful veggies keep things exciting. You can customize each wrap to suit your child's taste. For extra flavor, adding hummus and mustard makes each bite pop. Kids enjoy the crunchy cucumbers and sweet carrots. You can even sneak in some feta or avocado for a creamy touch. Mix and match ingredients based on what you have or what your kids prefer. This flexibility helps keep lunchtime exciting. Check out the Full Recipe for easy step-by-step instructions. First, clean and organize your cooking area. A tidy space helps you focus. Lay each tortilla flat on the surface. This makes assembly easy and fun. Spread hummus on each tortilla. Use about one tablespoon for even coverage. Next, layer the sliced turkey breast on top of the hummus. This adds a tasty protein boost. Now, grab a handful of mixed greens. Place them on the turkey. Follow with sliced bell peppers, cucumber rounds, and shredded carrots. Each bite should be colorful and crunchy. Drizzle some Dijon mustard over the veggies. This gives a nice tangy flavor. Sprinkle salt and pepper to taste. For an extra treat, add crumbled feta cheese or avocado slices. These make the wraps even richer. Now, it’s time to roll. Starting from one end, carefully roll each tortilla tightly. If needed, use toothpicks to hold them together. Slice each wrap in half for easy handling. Pack them in lunch containers. To make it a complete meal, add crunchy baby carrots or fresh apple slices. This makes the lunch not just tasty, but also balanced. Enjoy the fun of making these wraps! To make lunch prep a breeze, batch preparation works wonders. You can make several wraps at once. This saves time on busy mornings. I recommend using pre-sliced vegetables. They add crunch and color without extra work. Grab a bag of mixed bell peppers or pre-shredded carrots. These small steps really cut down on prep time. Flavor is key to a tasty wrap. Try adding spices like smoked paprika or garlic powder. A drizzle of ranch dressing or a touch of sriracha can jazz things up too. Pairing sides with your wraps is also important. Crunchy baby carrots or apple slices make great companions. They add balance and more flavors to the meal. Choosing the right lunch container is crucial. I like using containers with separate sections. This keeps wraps fresh and prevents sogginess. You can also wrap each one in parchment paper. This way, they stay tight and easy to grab. Remember to pack an ice pack if it's warm out. Keeping wraps cool helps them taste great at lunchtime. {{image_4}} You can easily swap turkey for plant-based protein. Try using black beans or chickpeas. They add great flavor and protein. Another option is to use hummus as the main protein source. Hummus is smooth and creamy. It pairs well with veggies. Spread a thick layer of hummus on your tortilla. This makes your wrap tasty and filling. Want a low-carb option? Use lettuce wraps instead of tortillas. Leafy greens like romaine or butter lettuce work great. They add crunch and keep things light. You can also use other low-carb ingredients. Try adding avocado slices or cheese. These ingredients boost flavor without extra carbs. Get creative by adding fruits like apples or pears. Thinly slice them for a sweet crunch. This contrast makes your wrap exciting. You can also try different sauces and spreads. Use ranch dressing, salsa, or spicy mayo. Each option changes the wrap’s taste. Don't be afraid to experiment with flavors! For a full recipe of this delicious wrap, check out the [Full Recipe]. To keep your wraps fresh, store them in the fridge right away. Wrap them tightly in plastic wrap or foil. This helps keep air out. Use containers with tight lids that fit your wraps snugly. This way, they won't get soggy. You can also add a paper towel inside the container. The towel absorbs extra moisture and keeps the wraps crisp. Wraps stay fresh in the fridge for about 3 days. After that, they may lose their taste or texture. Check for signs of spoilage. If you see any discoloration or a strange smell, it's best to toss them. A good wrap should still smell fresh and look appetizing. You can freeze your wraps for longer storage. First, wrap each one tightly in plastic wrap. Then, place them in a freezer bag. Make sure to squeeze out all the air before sealing. To enjoy them later, take a wrap out and thaw it in the fridge overnight. For quick thawing, you can use the microwave. Just unwrap it and heat it for 30 seconds. This will keep the taste and texture intact. Enjoy your tasty Turkey & Veggie Wrap Delight even after school! Yes, you can make these wraps ahead of time! Meal prep makes busy mornings easier. Wraps stay fresh in the fridge for up to two days. To prep, follow these steps: - Assemble the wraps: Prepare the wraps as directed in the Full Recipe. - Wrap tightly: Use plastic wrap or foil to cover them well. - Store in the fridge: Keep them in an airtight container to avoid moisture. Absolutely! You can easily adjust the recipe for different needs. Here are some ideas: - Nut-free: Skip any nut-based dips or toppings. - Dairy-free: Replace feta cheese with extra hummus or avocado. - Gluten-free: Use gluten-free tortillas for the wraps. These options allow everyone to enjoy the deliciousness of the turkey and veggie wraps. Keeping wraps fresh is key to a great lunch. Here are some tips for moisture control: - Use dry ingredients: Pat vegetables dry before adding them to the wrap. - Spread wisely: Apply hummus sparingly to avoid excess moisture. - Pack smart: Use a compartmentalized lunchbox. Keep wet and dry items separate until mealtime. These simple steps will help maintain that crunchy, tasty texture in your wraps! The Tasty Turkey & Veggie Wrap Delight is simple and fun to make. You learned about key ingredients, from tortillas to fresh veggies. I showed you easy steps to prepare and pack them. You also discovered tips for flavor and ways to customize your wraps. Finally, storing leftovers is a breeze with our methods. Experiment with variations and enjoy every bite! Your lunch can be healthy and delightful. Try it out and share your tasty creations!](https://roastedflavors.com/wp-content/uploads/2025/07/9a68786c-baf5-46d0-a820-b9198c125364.webp)
Back-to-School Lunch Ideas That Delight Kids
Back-to-school season is here, and it’s time to make lunchtime exciting again! If you want to delight your kids with tasty, healthy lunches, I’ve got