Appetizers

To make Teriyaki Chicken Lettuce Cups, you need fresh and simple ingredients. Here’s what you will need: - 1 lb boneless, skinless chicken thighs, diced into bite-sized pieces - 1/2 cup low-sodium soy sauce - 1/4 cup honey, preferably raw for a richer flavor - 2 tablespoons rice vinegar - 1 tablespoon toasted sesame oil for added depth - 1 teaspoon fresh ginger, finely minced - 2 garlic cloves, minced for aromatic flavor - 1/2 cup diced bell peppers (mix red and yellow for a colorful look) - 1/4 cup green onions, finely chopped - 1 tablespoon sesame seeds, toasted if desired - 1 head of butter or iceberg lettuce, separated into individual leaves - Freshly cracked salt and pepper to taste These ingredients bring a great balance of sweet, salty, and savory flavors. You can make your dish even better with a few extras. Here are some optional garnishes and toppings to consider: - Additional sesame seeds for crunch - More finely chopped green onions for freshness - Lime wedges for a zesty kick - Sliced cucumbers for a refreshing bite - Chopped cilantro for an herby touch These options let you customize each cup, making them even more delicious. If you have dietary needs, you can still enjoy this dish. Here are some easy swaps: - Chicken thighs: Use chicken breasts for a leaner option. - Soy sauce: Try tamari for gluten-free soy sauce. - Honey: Maple syrup or agave syrup work well if you avoid honey. - Sesame oil: Substitute with olive oil or avocado oil if needed. - Lettuce: Use collard greens or rice paper for wraps instead of lettuce. These substitutions keep the dish tasty while meeting your needs. {{ingredient_image_2}} Start by mixing your marinade. In a medium bowl, combine the low-sodium soy sauce, honey, rice vinegar, sesame oil, fresh ginger, and minced garlic. Whisk it well until blended. This mix adds great flavor to the chicken. Now, add the diced chicken thighs into the bowl. Ensure each piece is coated in the marinade. Cover the bowl with plastic wrap. Place it in the fridge for at least 30 minutes. This step helps the flavors soak in. Heat a non-stick skillet over medium-high heat. Once hot, add the marinated chicken to the skillet with a splash of the reserved marinade. Sauté the chicken for about 5-7 minutes. Stir occasionally to brown it evenly. You want it to be cooked through and golden. Next, add the reserved marinade to the skillet. Bring it to a gentle simmer. Cook for another 2-3 minutes. This helps the sauce thicken nicely. Now, toss in the diced bell peppers. Cook for another minute. You want them vibrant and slightly soft but still crisp. Remove the skillet from heat. Sprinkle the chicken mixture with chopped green onions and sesame seeds. Mix gently to combine everything. Grab a fresh lettuce leaf. Spoon a generous amount of the teriyaki chicken mixture into the center. Fold the leaf over to create a wrap. Serve immediately for the best taste. Enjoy this fun and healthy dish! I love using a non-stick skillet for chicken thighs. It prevents sticking and makes cleanup easy. You can also grill the chicken for a smoky flavor. Just make sure to marinate the chicken first. This helps keep the meat juicy and adds great taste. To check if your chicken is done, cut a piece in half. The inside should be white, not pink. You can also use a meat thermometer. The safe internal temperature is 165°F. Let the chicken rest for a few minutes before serving. This keeps it tender and flavorful. Feel free to get creative with the recipe. Adding crushed red pepper gives a nice kick. You can also mix in pineapple for a sweet twist. Fresh herbs like cilantro or basil add brightness. Remember to sprinkle sesame seeds on top for crunch and extra flavor. Enjoy making it your own! Pro Tips Marinate Longer for Flavor: For the best flavor, consider marinating the chicken for at least 1-2 hours, or even overnight, to allow the marinade to deeply penetrate the meat. Use Fresh Ingredients: Fresh ginger and garlic enhance the dish's flavor significantly, so avoid using pre-minced varieties if possible. Adjust Sweetness: If you prefer a less sweet dish, reduce the amount of honey or substitute with a sugar-free alternative to suit your taste. Experiment with Vegetables: Feel free to add other vegetables like shredded carrots or snap peas for added texture and nutrition in your lettuce wraps. {{image_4}} If you want a vegetarian version of teriyaki lettuce cups, try using tofu or tempeh. Both are great protein options. Press the tofu to remove excess water, then cube it. Marinate the tofu just like the chicken. Cook it in the skillet until it's golden brown. Tempeh can also be diced and cooked similarly. It has a nutty flavor that pairs well with teriyaki sauce. You can mix things up by using different sauces. Try using hoisin sauce for a sweeter touch. You might also enjoy a spicy sriracha sauce for some heat. If you want a tangy flavor, consider a sweet and sour sauce. Each option can bring a unique twist to your lettuce cups while keeping them delicious. Feel free to add more veggies for crunch and color. Shredded carrots or sliced cucumbers work well. You could also try diced avocado for creaminess. For some extra flavor, top with chopped cilantro or mint. These toppings not only taste great, but they also make your dish look vibrant and fresh. To store your leftover teriyaki chicken, let it cool first. Place it in an airtight container. Make sure to keep it in the fridge. It should stay fresh for up to three days. If you want to keep it longer, consider freezing it. When reheating, use a microwave or a skillet. If using a microwave, heat it in short bursts. Check the chicken often to avoid overheating. If using a skillet, warm it over low heat. Add a splash of water or reserved marinade to keep it moist. To freeze, use a freezer-safe bag or container. Remove as much air as possible to prevent freezer burn. Label the bag with the date and contents. The teriyaki chicken can last up to three months in the freezer. When ready to eat, thaw it overnight in the fridge before reheating. Yes, you can use chicken breasts. They will work fine. Chicken breasts are leaner. They might dry out faster. To avoid this, cook them for a shorter time. Check the chicken's inside temperature. It should reach 165°F. This ensures they are safe to eat. To make Teriyaki Chicken Lettuce Cups gluten-free, swap soy sauce. Use gluten-free soy sauce or tamari. Honey is naturally gluten-free, so keep it. Ensure all other ingredients are gluten-free too. This way, you can enjoy the dish without worry. Several side dishes go well with these lettuce cups. Here are some ideas: - Steamed jasmine rice for a classic touch. - A light cucumber salad for crunch. - Edamame for protein and fiber. - Miso soup for warmth and flavor. - Grilled veggies for a colorful plate. These sides complement the teriyaki sauce well. They add variety and balance to your meal. Teriyaki Chicken Lettuce Cups offer a simple, tasty dish. We covered the main ingredients, how to marinate and cook chicken, and tips for perfect flavor. You can switch ingredients for dietary needs and explore fun variations, like adding extra veggies. Store leftovers well so you can enjoy them later. Remember to reheat properly for the best taste. With these steps and tips, you can create a meal that is both healthy and satisfying. Try it out and enjoy every bite!
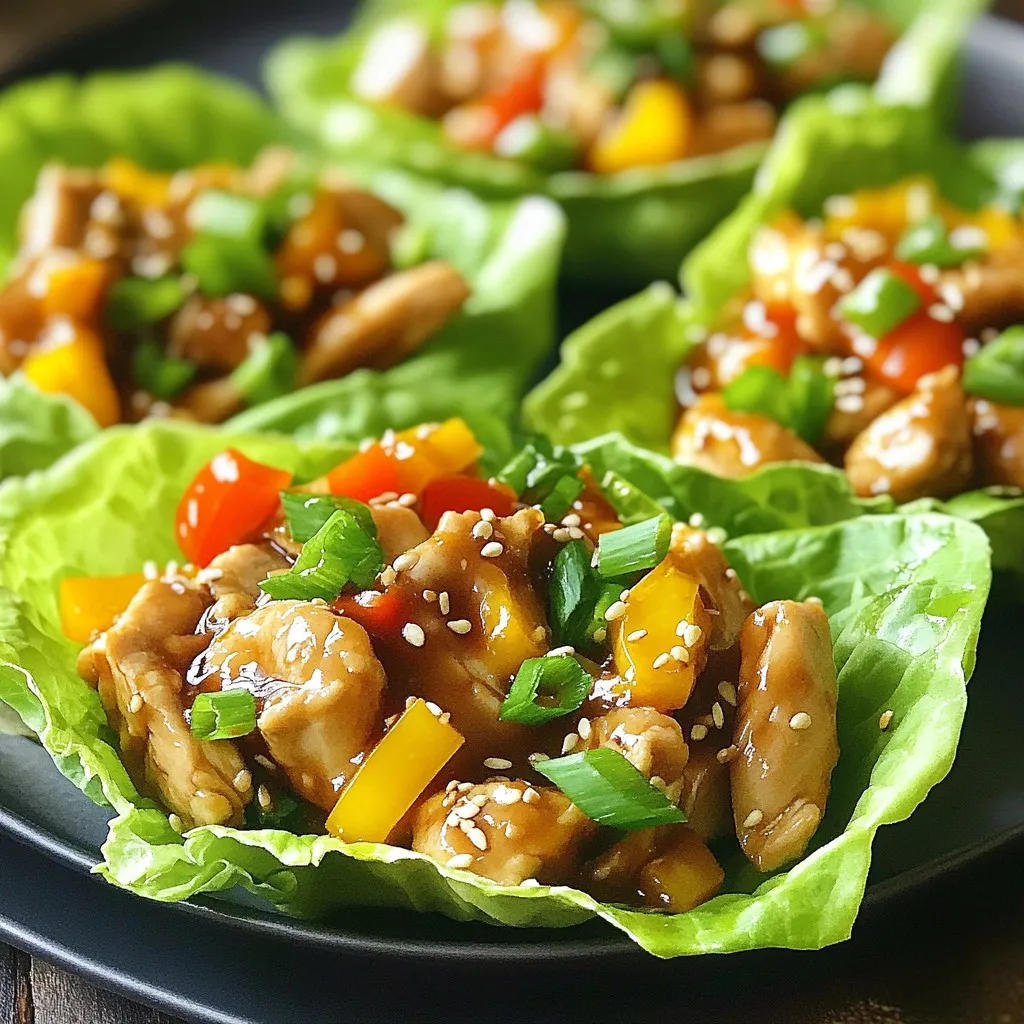
Teriyaki Chicken Lettuce Cups Flavorful and Easy Dish
Looking for a quick and tasty meal? Teriyaki Chicken Lettuce Cups are your answer! This dish combines savory chicken, fresh lettuce, and a hint of
- 1 lb ground chicken - 1 tablespoon vegetable oil - 1 medium bell pepper, diced - 1 cup shredded carrots - 1/4 cup unsalted peanut butter - 2 tablespoons soy sauce - 1 tablespoon fresh lime juice - 1 tablespoon honey - 1 teaspoon sriracha (optional) - Fresh cilantro leaves - Chopped peanuts - Lettuce variety (butter or iceberg) When you gather these ingredients, you'll see how simple this recipe can be. The ground chicken is rich in flavor and cooks quickly. You can use any color of bell pepper for a vibrant look. Shredded carrots add both sweetness and crunch. The sauce is what makes this dish truly special. Peanut butter gives a creamy texture. Soy sauce adds saltiness. Lime juice brings a fresh zing. Honey balances the flavors with a hint of sweetness, while sriracha can give it a spicy kick if you like heat. For a beautiful finish, you’ll want fresh cilantro leaves and chopped peanuts. They add great flavor and texture. Use butter or iceberg lettuce for the wraps. Each leaf will cradle the chicken mixture perfectly, making each bite delicious. {{ingredient_image_2}} First, heat 1 tablespoon of vegetable oil in a large skillet over medium heat. Once the oil is hot, add 2 cloves of minced garlic and 1 tablespoon of freshly grated ginger. Sauté them for about 30 seconds until they smell great. Be careful not to let them brown. Next, add 1 pound of ground chicken. Use a wooden spoon to break the chicken apart. Cook it for 5 to 7 minutes. Stir occasionally until the chicken is browned and fully cooked. Now, it’s time to add some color and crunch. Incorporate 1 diced bell pepper and 1 cup of shredded carrots into the skillet. Stir everything together and cook for another 3 to 4 minutes. You want the veggies to be tender but still crisp. While the chicken and veggies cook, let’s make the sauce. In a small bowl, mix 1/4 cup of unsalted peanut butter, 2 tablespoons of soy sauce, 1 tablespoon of fresh lime juice, 1 tablespoon of honey, and 1 teaspoon of sriracha (if you like it spicy). Whisk until smooth and creamy. Pour this sauce over the chicken and vegetable mixture. Stir well to coat everything evenly. Cook for another 2 minutes to heat the sauce through. This adds a rich flavor that brings the dish to life. Now you're ready to serve your delicious Thai Peanut Chicken Lettuce Wraps! To ensure your chicken is fully cooked, use a meat thermometer. The internal temperature should reach 165°F. This step keeps your meal safe and tasty. Also, cook the chicken until it turns a nice golden brown. This adds flavor and shows it’s done. For bell peppers, I like using red, yellow, or orange. They are sweeter than green ones. This sweetness pairs well with the savory chicken and peanut sauce. Diced bell peppers also add a lovely color to the dish. For the best presentation, serve your lettuce wraps on a large platter. Lay out the lettuce leaves and fill them with the chicken mix. Place lime wedges around the platter. The lime adds a fresh touch and extra flavor. Pair these wraps with a light side salad or steamed rice. Both options complement the meal and add more nutrients. You can also add a fruit salad for a sweet contrast. To adjust the spice level, use sriracha to taste. Start with a small amount, then add more if you like it hotter. This method helps you control the heat without overpowering the dish. If you need a nut-free option, use sunbutter or tahini instead of peanut butter. Both alternatives provide a similar texture. They also add a unique flavor that works well in this dish. Pro Tips Use Fresh Ingredients: Fresh vegetables and herbs enhance the flavor and texture of your wraps, making them more vibrant and delicious. Adjust the Spice Level: Customize the heat by varying the amount of sriracha or adding fresh chili slices for those who enjoy a bit more kick. Make Ahead: Prepare the chicken filling in advance and store it in the refrigerator. Assemble the wraps just before serving for maximum freshness. Experiment with Toppings: Feel free to add other toppings such as shredded cabbage, bean sprouts, or avocado for extra flavor and texture in each wrap. {{image_4}} You can switch the ground chicken for turkey, tofu, or plant-based meat. Turkey offers a lean option that still packs a punch. Tofu is great for a vegetarian diet and absorbs flavors well. For plant-based eaters, many brands now offer tasty meat substitutes. These alternatives keep the wraps flavorful and fun. Feel free to add veggies like water chestnuts or zucchini for a crunch. These additions bring new textures to your meal. You can also switch up herbs and garnishes. Fresh basil or mint can give your wraps a unique twist. The best part? You can mix and match to satisfy your taste buds. If peanut sauce isn’t your thing, try teriyaki or hoisin sauce. These sauces add a sweet and savory flavor. You can even turn this dish into a salad instead of wraps. Just toss the chicken mixture with greens and your favorite dressing. This way, you can still enjoy the same great taste in a different form. To store leftover chicken mixture, let it cool first. Once cool, place it in an airtight container. This keeps the chicken fresh and safe to eat. A glass or plastic container works well for this. Make sure to use a lid that seals tightly to keep out air. When reheating, use a skillet over medium heat. This helps keep the chicken moist. Stir occasionally to prevent sticking. If you have a lot, you can heat it in the microwave. Just cover it with a damp paper towel for even heating. Yes, you can freeze leftovers! Just make sure to use a freezer-safe container. In the fridge, the chicken mixture lasts about 3 to 4 days. After that, it may spoil. Look for changes in smell or color. If it smells sour or looks off, it's best to throw it away. Always trust your senses when it comes to food safety. If you don’t have peanut butter, don’t worry! You have options. Here are some nut butter substitutions: - Almond butter - Cashew butter - Sunflower seed butter (nut-free) - Tahini (sesame seed paste) Each of these can add creaminess and flavor. Almond and cashew butters will give a hint of sweetness. Sunflower seed butter works well for nut allergies. Tahini offers a unique, earthy taste. Yes, you can prepare these wraps ahead of time. Here are some tips for meal prep and storage: - Cook the chicken mixture: You can cook and store it in the fridge for up to three days. - Store separately: Keep the chicken mixture and lettuce leaves separate. This keeps the lettuce crisp. - Reheat before serving: Warm the chicken mixture before assembling. This way, you can enjoy a quick meal without much fuss! If you want to spice up your wraps, try these ideas: - Add more sriracha to the peanut sauce. - Mix in chopped fresh chilies. - Use a spicier hot sauce instead of sriracha. You can start with a small amount of spice and adjust to your taste. Enjoy the heat! This recipe highlights how to make tasty chicken lettuce wraps. We covered key ingredients like chicken, veggies, and a rich peanut sauce. I shared tips for cooking, serving, and storing your wraps. You can customize it with different proteins and flavors. Now, you can enjoy easy, fun meals, perfect for any occasion. Remember, you have control over the spice and ingredients. Enjoy your culinary adventure!
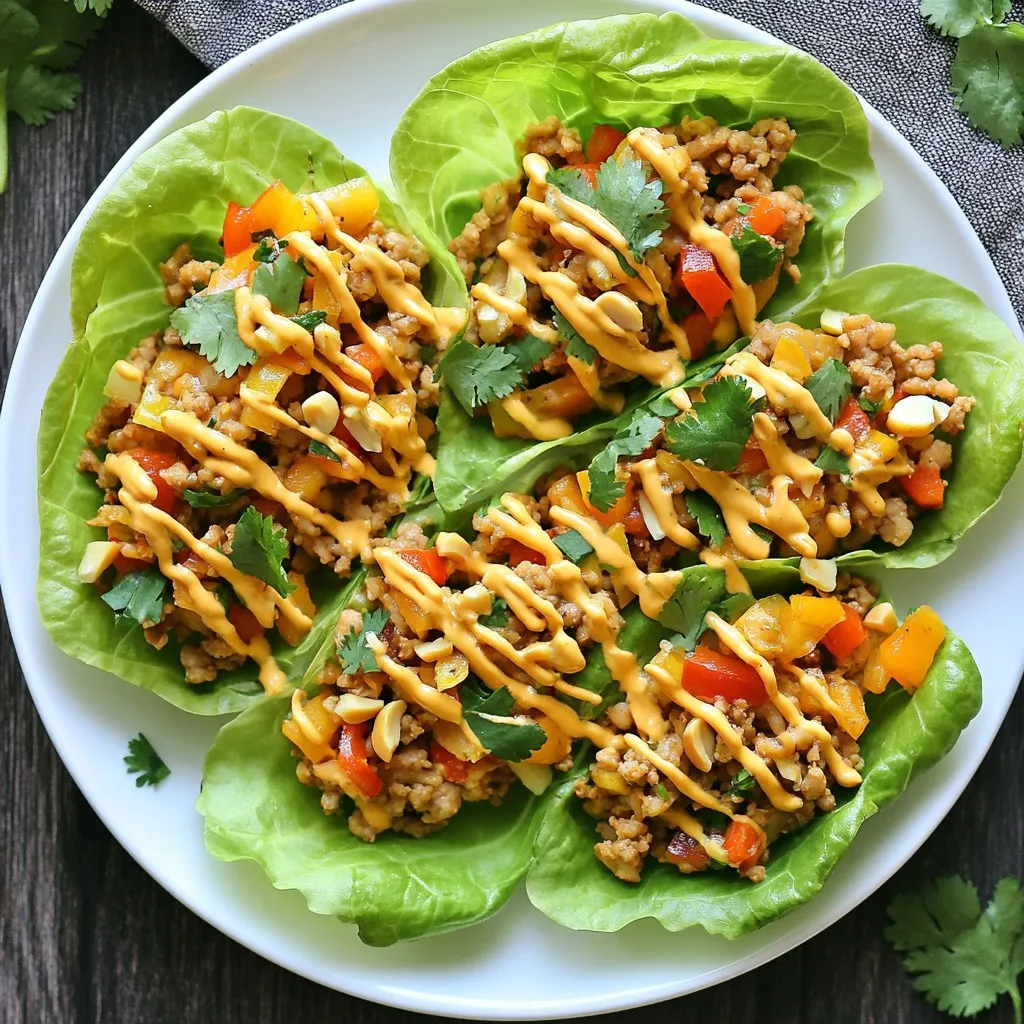
Thai Peanut Chicken Lettuce Wraps Flavorful Easy Meal
Looking for a quick, tasty meal? Thai Peanut Chicken Lettuce Wraps are here to save your dinner! This dish packs flavor with just a few
- 2 large chicken breasts, grilled and sliced - 1 ripe avocado, sliced - 1 cup mixed greens (spinach, arugula, and romaine) - 1 small cucumber, thinly sliced - 1/2 red bell pepper, julienned - 1/4 cup red onion, thinly sliced - 2 tablespoons Greek yogurt - 1 tablespoon lime juice - 1 tablespoon olive oil - Salt and pepper, to taste Chicken avocado wraps are simple yet packed with flavor. Start with grilled chicken breasts. These should be juicy and sliced thin. Slice a ripe avocado next. This adds creaminess and healthy fats. For greens, use a mix of spinach, arugula, and romaine. They provide a fresh crunch. Add a small cucumber, thinly sliced. This adds a nice crisp texture. A half red bell pepper, julienned, gives a sweet hint. Finally, thinly slice a quarter cup of red onion for a bit of bite. Now, for the creamy dressing, mix Greek yogurt, lime juice, and olive oil. Season with salt and pepper. This dressing ties all the flavors together. It’s tangy and creamy, making each bite delightful. With these fresh ingredients, you’ll create a light meal that nourishes and delights. They’re perfect for lunch or a picnic. {{ingredient_image_2}} In a mixing bowl, I whisk together the Greek yogurt, lime juice, olive oil, salt, and pepper. This simple step creates a creamy dressing that adds great flavor. Make sure to blend it well for a smooth finish. The lime juice gives it a nice zing. I always taste it to adjust the salt and pepper. Next, I place a whole wheat tortilla flat on my clean counter. I use a spoon to spread a generous dollop of the creamy dressing right in the center. Then, I layer on mixed greens, followed by the grilled chicken slices. I add the ripe avocado slices, cucumber, red bell pepper, and red onion on top. Sometimes, I drizzle a little more dressing for extra flavor. Each layer adds color and crunch. Now it's time to wrap! I fold the sides of the tortilla inward over the fillings. This keeps everything inside. Then, I roll from the bottom up tightly. This step is key to a good wrap. I repeat this with the rest of the tortillas and fillings. Once done, I slice each wrap in half diagonally. This makes them easier to hold and looks great on a plate. Choosing the right tortilla makes a big difference. I recommend using whole wheat tortillas. They add a nice flavor and hold up well. Look for tortillas that are soft and pliable. This helps with wrapping without tearing. For cutting your ingredients, even slices are key. Use a sharp knife for clean cuts. Aim for thin slices of avocado, cucumber, and bell pepper. This way, every bite has the right balance of flavors. You can boost the taste of your wraps with extra seasonings. Try adding garlic powder or smoked paprika to the creamy dressing. This gives it a unique kick. You may also sprinkle some chili flakes for heat. Garnishes can elevate your wraps too. Fresh cilantro or parsley adds color and freshness. A squeeze of lime over the top enhances the flavor and looks great. Present your wraps in a fun way. Arrange them on a colorful platter. You can cut them in half for easy eating. Add a side of salsa or guacamole for dipping. Pair your Chicken Avocado Wraps with fresh fruit or a light salad. A crisp side dish balances the meal and adds freshness. Enjoy your delicious wraps! Pro Tips Use Fresh Ingredients: Always opt for fresh veggies and ripe avocados to enhance the flavor and texture of your wraps. Grill Chicken Perfectly: Marinate the chicken in lime juice and spices before grilling for added flavor and tenderness. Adjust Creaminess: If you prefer a creamier dressing, simply add more Greek yogurt or a splash of sour cream. Wrap Like a Pro: Ensure you tightly roll the wrap to prevent the fillings from spilling out, making it easier to eat. {{image_4}} You can mix things up by choosing other proteins. Turkey is a great choice. It has a nice flavor and cooks quickly. Tofu is another option. It’s perfect for a plant-based meal. Just make sure to press it to remove extra moisture. If you want a quick fix, try using shredded rotisserie chicken. It’s already cooked and ready to go, saving you time. If you need a gluten-free option, look for gluten-free tortillas. Many brands offer tasty alternatives. You can also make your wrap vegan. For the creamy dressing, swap Greek yogurt for a plant-based yogurt. This way, you can enjoy the same great taste while sticking to your diet. To make your wraps exciting, try adding different veggies or herbs. Slices of radish or fresh cilantro can brighten up the flavor. For a spicy kick, add jalapeños or a few drops of hot sauce. These small changes can create a whole new experience for your taste buds. To keep your Chicken Avocado Wraps fresh, wrap each one tightly in plastic wrap or foil. This keeps them from drying out. Place the wrapped wraps in an airtight container. This will also help maintain their flavor and texture. If you have any extra dressing, store it in a small jar to keep it fresh. You can store your wraps in the refrigerator for up to three days. This ensures they stay tasty and safe to eat. Always check for any signs of spoilage before enjoying them. If they have a strange smell or look off, it's best to toss them. You can freeze assembled wraps, but keep in mind that the texture may change. To freeze properly, wrap each one tightly in plastic wrap, then place them in a freezer bag. They can last up to three months in the freezer. For best taste, thaw wraps in the fridge overnight. You can also heat them in the microwave for about 30 seconds to warm through. Enjoy your delicious wraps any time! Yes, you can make Chicken Avocado Wraps ahead of time. This is great for meal prep. To do this, follow these tips: - Prepare the wraps: Assemble the wraps without adding the dressing. This keeps them fresh. - Wrap tightly: Use plastic wrap or foil to keep them sealed. This prevents drying out. - Store in the fridge: Place the wrapped wraps in an airtight container. They will last up to 2 days. - Add dressing later: When ready to eat, drizzle the dressing on top. This keeps the wrap crisp. Yes, you can use other types of greens. Mixed greens are great, but there are many options. Here are some recommended alternatives: - Kale: Offers a hearty texture and bold flavor. - Spinach: Soft and mild, great for layering. - Romaine: Crunchy and refreshing, adds a nice bite. - Swiss chard: Colorful and nutritious, a tasty choice. Feel free to mix and match according to your taste! Pairing side dishes can enhance your Chicken Avocado Wraps. Here are some good options: - Chips: Serve with tortilla chips for crunch. - Fruit salad: A fresh mix of berries and melons adds sweetness. - Veggie sticks: Carrots and celery with hummus are healthy and fun. - Dips: Try guacamole or salsa for extra flavor. These sides make your meal more filling and enjoyable! You learned how to make tasty chicken avocado wraps. We covered the main ingredients, like grilled chicken and ripe avocado. You saw how to prepare the creamy dressing and assemble your wraps. We also shared tips for perfecting your wraps and offered tasty variations. Finally, we discussed how to store them properly. Now, you can make delicious wraps anytime. Get creative with flavors and enjoy making them for meals and snacks!
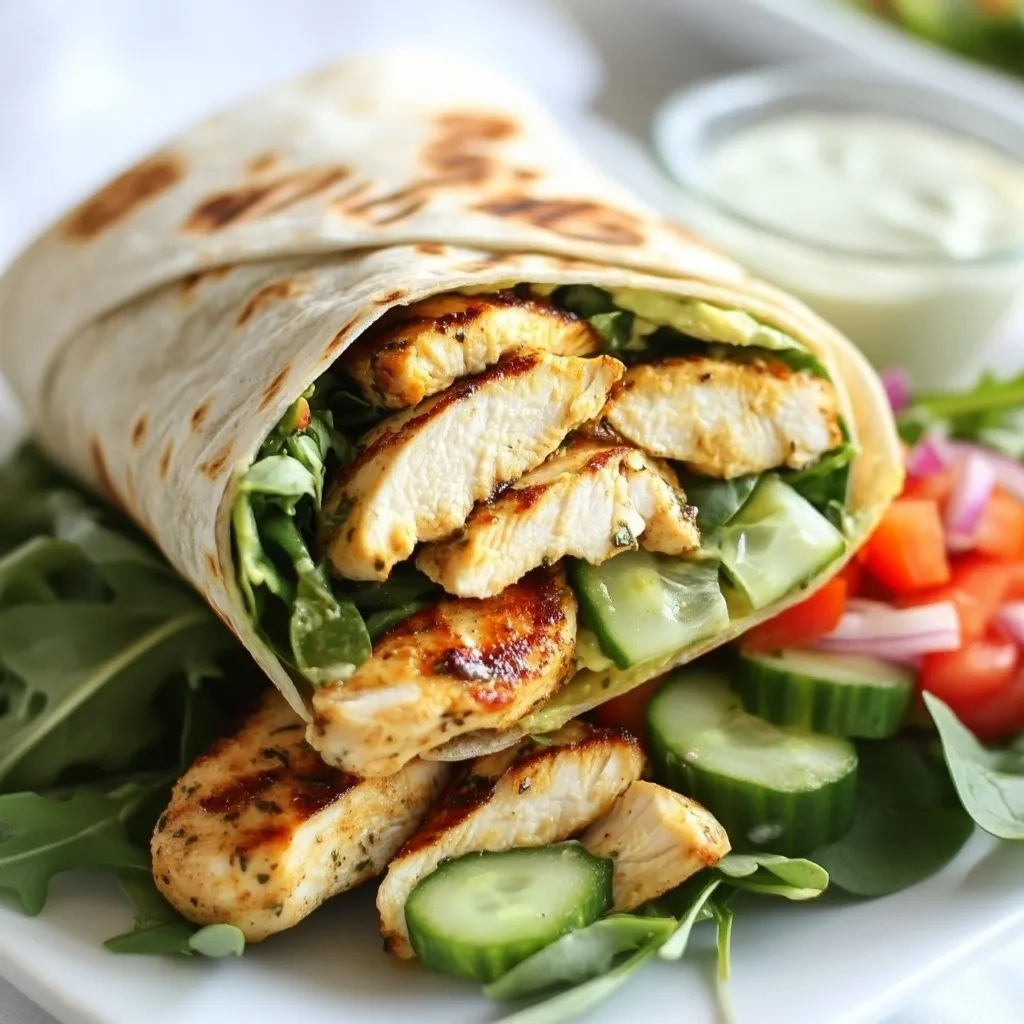
Chicken Avocado Wraps That Delight and Nourish
Craving a healthy yet delicious meal? Dive into my easy Chicken Avocado Wraps that delight and nourish! These wraps are loaded with grilled chicken, ripe
- Tortilla Chips - Cheeses (Cheddar & Monterey Jack) - Black Beans & Their Prep - Jalapeños (fresh or pickled) - Avocado, Sour Cream, Cilantro, Red Onion, Lime - Seasoning (Salt & Black Pepper) For my Air Fryer Loaded Nachos, I choose a bag of crispy tortilla chips as the base. They should be sturdy enough to hold all the toppings. Next, I use two types of cheese for a rich flavor: sharp cheddar and Monterey Jack. I shred them fresh to get great melting results. I always include black beans in my nachos. I rinse and drain a can thoroughly to remove excess sodium. This adds protein and a nice texture. For a kick, I add jalapeños. You can use fresh ones for crunch or pickled for some tang. To finish, I love to top my nachos with diced avocado, creamy sour cream, fresh cilantro, and diced red onion. These add freshness and balance the flavors. I also serve lime wedges on the side for a zesty squeeze. Lastly, I season with salt and black pepper to taste, making sure every bite is packed with flavor. {{ingredient_image_2}} To start, set your air fryer to 350°F (175°C). Let it heat for about 5 minutes. Preheating helps the nachos cook evenly. This step makes the cheese melt perfectly. In a large bowl, add tortilla chips, black beans, diced red onion, and jalapeños. Mix them gently. This ensures each chip gets a taste of the flavors. Tossing is key. You want every bite to be loaded with goodness. First, take half of the chip mix. Spread it out in the air fryer basket. Make a solid base layer. Next, sprinkle half of the sharp cheddar and Monterey Jack cheeses on top. Let the cheese melt into the chips for a gooey texture. After that, add the rest of the chip mixture. Top it with the remaining cheese. This creates a cheesy crown over your nachos. Cook the nachos for 5-7 minutes. Keep an eye on them while they cook. You want the cheese to bubble without burning. This careful monitoring ensures you get that perfect melted cheese. After cooking, use tongs to remove the nachos carefully. They will be hot! Top them with diced avocado, a drizzle of sour cream, and fresh cilantro. This not only adds taste but also makes them look great. Serve with lime wedges on the side. A squeeze of lime gives a bright kick to every bite. Avoiding Soggy Chips To keep your chips crisp, avoid adding too many toppings. Layer your ingredients wisely. Use a mix of beans and cheese, but don’t drown the chips. Air fry them right after layering. This helps keep the chips crunchy. Cheese Melting Tips For the best cheese melt, use a mix of sharp cheddar and Monterey Jack. These cheeses melt well and create a rich flavor. Layer cheese between chips and on top. This way, every bite has gooey goodness. Suggested Seasoning Variations Add a pinch of chili powder or cumin for a kick. You can use smoked paprika for a deeper taste. Mix in some garlic powder for an extra layer of flavor. Just sprinkle these spices on your nachos before air frying. Additional Toppings Top your nachos with olives for a briny bite. Fresh salsa adds zest and freshness. You can even add pickled jalapeños for tang. Diced tomatoes or green onions also brighten up the dish. Each topping can change the flavor, so mix and match! Pro Tips Choose the Right Tortilla Chips: Opt for thick, sturdy chips that can hold up to the toppings without getting soggy. Combine Cheeses for Flavor: Mixing different types of cheese not only enhances the flavor but also improves the melting quality. Keep an Eye on Cooking Time: Air fryers can vary in power; monitor your nachos closely to avoid burning. Customize Your Toppings: Feel free to add other toppings like diced tomatoes, olives, or cooked ground meat for extra flavor and texture. {{image_4}} - Gluten-Free Alternatives: If you need a gluten-free option, choose corn tortilla chips. They taste great and keep the crunch. Many brands offer gluten-free chips, so check the labels to be sure. - Dairy-Free Cheese Options: For those who avoid dairy, use plant-based cheese. Look for brands that melt well. Dairy-free sour cream can also add creaminess to your nachos without the dairy. - Different Bean Choices: Black beans are classic, but you can switch it up! Try pinto beans or refried beans. Each type offers a different taste and texture, making your nachos unique. - Spicy vs. Mild Jalapeños: Choose your jalapeños based on your heat level. Fresh jalapeños add a crisp bite, while pickled ones bring a tangy flavor. You can even mix them for a fun twist! To keep your nachos fresh, store them in an airtight container. This helps keep moisture out. It’s best to refrigerate them within two hours of cooking. Leftover nachos stay good for about 2-3 days in the fridge. For the best results, reheat nachos in the air fryer. Set it to 350°F and cook for 3-5 minutes. This helps restore the crunch. You can also use a microwave, but it may make the chips soft. If you prefer the oven, heat it to 350°F and bake for about 5-7 minutes. Both methods work, but the air fryer is best for crispness. To add spice, use fresh jalapeños. You can also try spicy cheese or hot sauce. If you want more heat, add chili powder. Mix it into the beans or sprinkle it over the top. This adds a nice kick without changing the dish too much. Yes! You can use any cheese you like. Pepper Jack adds spice. Gouda gives a rich flavor. Just remember, the cheese should melt well. Mixing different cheeses creates a fun new taste. Use sturdy tortilla chips. Look for thick ones that won’t break easily. They should hold up under all those toppings. Corn chips also work well. Avoid thin chips; they get soggy fast. Prep time is about 10 minutes. Cooking takes 5 to 7 minutes. You can have delicious nachos ready in 15 minutes! It's quick and easy, perfect for a snack or party. Absolutely! You can add any toppings you like. Try olives, diced tomatoes, or cooked meat. You can even go vegan with beans and avocado. Customize to make it your way! Air fryer loaded nachos are a fun and tasty dish. You learned about the key ingredients, like tortilla chips, cheeses, and toppings. I shared step-by-step instructions for preheating your air fryer, mixing, and layering. We covered cooking times and garnishing tips. I also detailed storage methods and answered common questions. With these tips, you can create the perfect nachos every time. Enjoy experimenting with flavors and toppings. Don't be afraid to make each batch your own. Happy cooking!
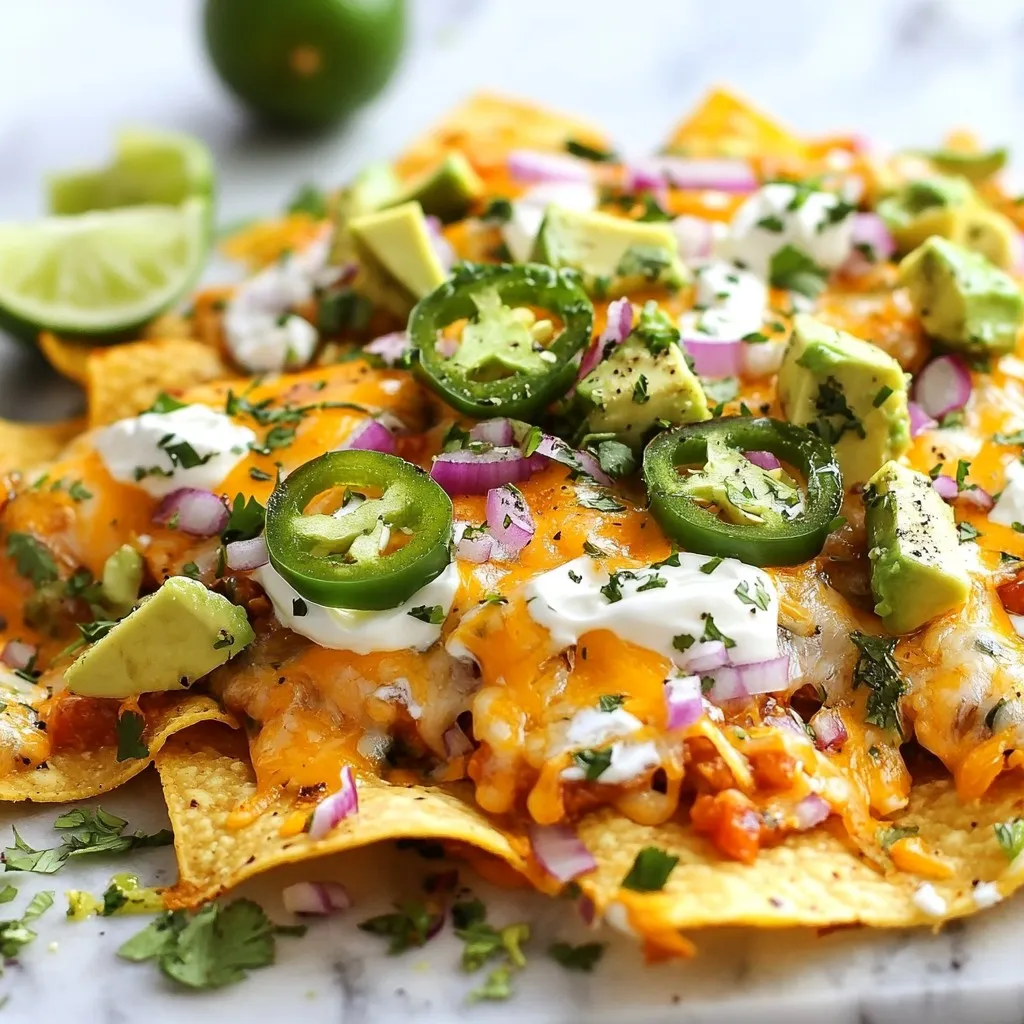
Air Fryer Loaded Nachos Crunchy and Flavorful Treat
Craving a snack that’s both crunchy and packed with flavor? Look no further than Air Fryer Loaded Nachos! This dish brings together gooey cheese, crispy