Appetizers
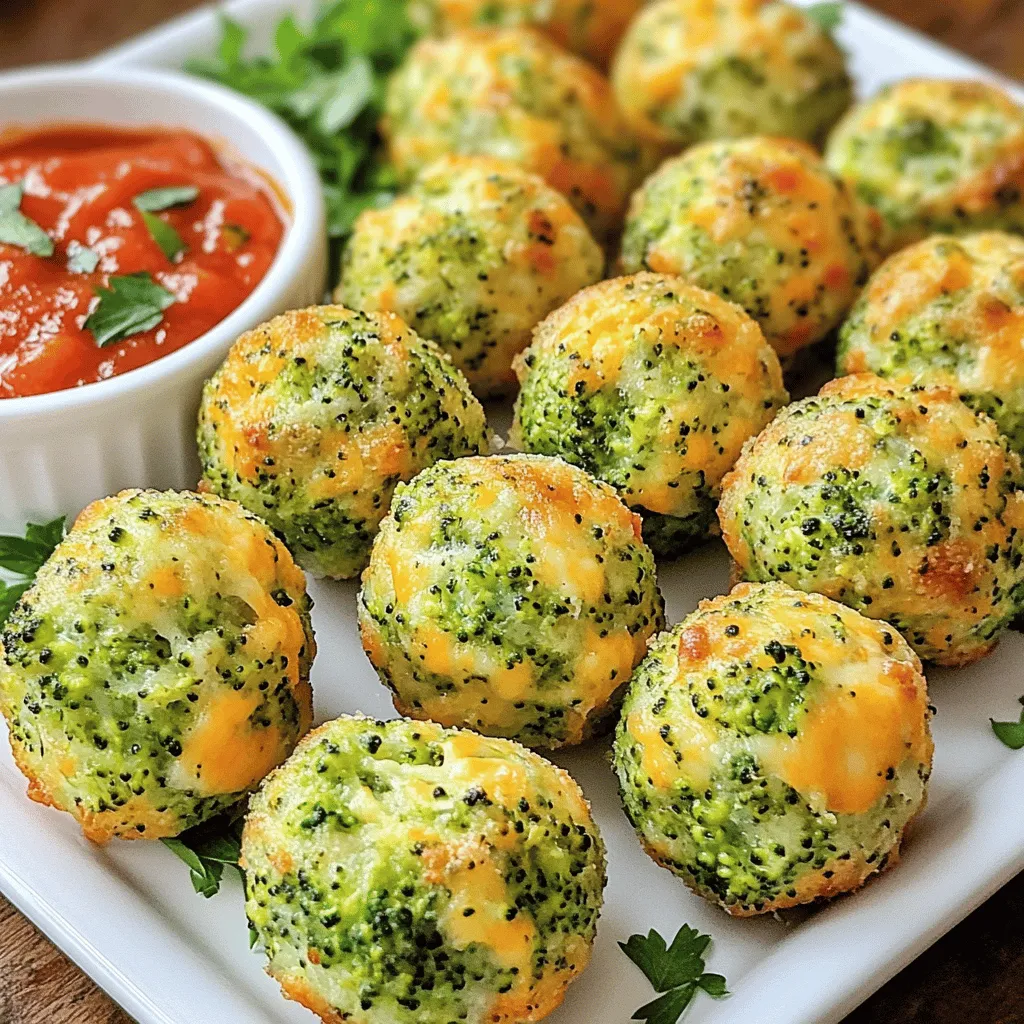
Baked Broccoli Cheese Balls Delicious Flavor Packed Treat
Looking for a fun and tasty treat? You’ve come to the right place! Baked Broccoli Cheese Balls are not just delicious; they’re packed with flavor

Stuffed Potato Cakes Crunchy and Flavorful Delight
Are you ready for a crunchy and flavorful delight? Stuffed potato cakes are an excellent way to turn simple ingredients into a satisfying meal. In
![To make chicken wonton tacos, you need fresh and tasty ingredients. Here’s what you will need: - 1 pound ground chicken - 1 tablespoon soy sauce - 1 tablespoon sesame oil - 1 teaspoon fresh ginger, grated - 2 cloves garlic, minced - 1 cup green cabbage, finely shredded - 1/2 cup carrots, finely shredded - 1/4 cup green onions, thinly sliced - 1 tablespoon fresh cilantro, chopped - 24 wonton wrappers - Cooking oil, for frying - Lime wedges, for serving - Sriracha or your preferred hot sauce, for serving These ingredients mix well to create a delicious taco filling. You can add a twist to your tacos with optional ingredients. Here are some ideas: - Bell peppers for extra crunch - Avocado for creaminess - Jalapeños for heat - Ground turkey or beef as a substitute for chicken Feel free to swap any ingredient based on what you have at home. Choosing the right oil is key for frying. I recommend using vegetable oil or canola oil. These oils have a high smoke point, making them perfect for frying. Avoid using olive oil, as it burns too quickly. Make sure to heat the oil until it shimmers. This helps the tacos fry evenly and become crispy. To start, heat one tablespoon of sesame oil in a large skillet over medium heat. Once it’s hot, add one pound of ground chicken. Cook this for about 5 to 7 minutes. Use a spatula to break the chicken into smaller pieces. You want it brown and fully cooked. Next, stir in one tablespoon of soy sauce, one teaspoon of grated ginger, and two minced garlic cloves. Cook for another 2 minutes. This step adds flavor and makes your kitchen smell amazing. Once done, take it off the heat and let it cool a bit. In a large bowl, mix the cooled chicken with one cup of finely shredded green cabbage, half a cup of finely shredded carrots, a quarter cup of thinly sliced green onions, and one tablespoon of chopped cilantro. Toss everything well. This blend gives your filling great texture and freshness. Now it’s time to fill the wonton wrappers. Take one wrapper and place about one tablespoon of the chicken filling in the center. Lightly moisten the edges with water. This helps the taco seal tightly. Fold the wrapper diagonally to create a triangle shape. Press the edges firmly to seal. Make sure there are no gaps. Repeat this process until all your wrappers are filled. You’ll love how these look! For frying, heat cooking oil in a deep skillet. You want about 1/4 inch of oil, heated over medium-high heat. To check if it’s ready, drop a small piece of a wonton wrapper in. If it sizzles, you’re good to go! Carefully add the filled wontons in batches. Fry them for 2 to 3 minutes on each side. You want them to be golden brown and crisp. Once they’re done, transfer them to a plate lined with paper towels. This absorbs any extra oil. Serve your crispy wonton tacos warm. Don’t forget lime wedges for squeezing on top, and some Sriracha or your favorite hot sauce for that extra kick. These tacos are a real treat! For the full recipe, check out the detailed instructions above. To make great wonton tacos, start with quality wrappers. Fresh wonton wrappers work best. If they feel dry, moisten them lightly. This helps the edges seal better. When filling, don’t overstuff. About one tablespoon of filling is perfect. Too much filling can cause the wrapper to break. Crispiness is key for tasty tacos. Heat your oil to the right temperature. Use a small piece of wrapper to test. If it sizzles, the oil is ready. Fry them in small batches. This keeps the oil hot and helps them cook evenly. Once golden, drain them on paper towels. This step removes excess oil and keeps them crispy. For extra flavor, consider adding spices. A pinch of chili powder adds warmth. Experiment with herbs like parsley or basil. You can also mix in lime juice for a zesty kick. Serve with sauces like Sriracha or mango salsa for variety. These additions make each bite more exciting. For the full recipe, check out the [Full Recipe]. {{image_4}} You can easily make these tacos vegetarian or vegan. For a vegetarian option, substitute ground chicken with a mix of mushrooms and tofu. Chop the mushrooms finely and sauté them with soy sauce, garlic, and ginger. For a vegan option, use plant-based chicken or lentils instead. Both options provide great flavor while keeping the texture satisfying. Feel free to get creative with fillings. Try using shrimp, pork, or even beef. You could also mix in some black beans or corn for added texture. For a spicy kick, add jalapeños or bell peppers to the mix. If you want a fresh twist, consider adding diced mango or pineapple. Each filling creates a different taste experience. Serve your wonton tacos with refreshing sides. A simple slaw made from cabbage and carrots pairs well. You might also want to include guacamole or a zesty salsa. Lime wedges add a burst of flavor when squeezed over the tacos. For heat, offer Sriracha or a chili sauce on the side. Check out the Full Recipe for more serving ideas! To keep your chicken wonton tacos fresh, store them in an airtight container. Place a paper towel inside to absorb moisture. This helps maintain crispiness. Keep them in the fridge for up to three days. Make sure to let them cool completely before sealing. Never stack the tacos to avoid sogginess. To reheat your tacos, use an oven or air fryer. Preheat your oven to 350°F (175°C). Place the tacos on a baking sheet. Heat for about 10-15 minutes. This method keeps them crispy and delicious. Avoid using a microwave, as it makes the tacos soft and chewy. For air fryers, set them to 350°F and heat for 5-7 minutes. You can freeze un-fried wonton tacos for later use. Place them in a single layer on a baking sheet and freeze until firm. Then, transfer them to a freezer bag. Make sure to remove as much air as possible. When ready to cook, fry them straight from the freezer. Do not thaw, as this can make them soggy. Fried tacos do not freeze well, so enjoy them fresh! For the full recipe, check out the instructions above. The best way to make wonton tacos is to focus on fresh ingredients. Start with ground chicken. Cook it with soy sauce, garlic, and ginger. This mix gives a rich flavor. Then, add veggies like cabbage and carrots. These add crunch and color. When assembling the tacos, use wonton wrappers. They should be filled with about one tablespoon of the chicken mix. Seal the edges tightly to keep the filling inside. Fry them until golden brown. This step makes them crispy and delicious. Yes, you can bake wonton tacos! Baking is a great way to save on fat. Preheat your oven to 375°F (190°C). Place the filled wonton wrappers on a baking sheet. Brush them lightly with oil. Bake for about 15 minutes, turning halfway. This method results in a lighter taco. However, they may not be as crispy as fried ones. You can customize the filling in many tasty ways! Try using different meats, like pork or shrimp. You can also swap in tofu for a vegetarian option. Add your favorite spices for a flavor boost. Don’t forget about the veggies! Bell peppers, mushrooms, or even zucchini work well. Fresh herbs like basil or mint can add a unique twist. Mix and match until you find your perfect combination. For the full recipe, check out the detailed instructions included above. You learned about making chicken wonton tacos from start to finish. We covered key ingredients, cooking steps, and tips for great flavor. Keep these ideas in mind when you cook, and feel free to try new fillings. Remember to store leftovers properly, so you can enjoy them later. With practice, your wonton tacos will impress everyone. Get creative and make this dish your own. Happy cooking!](https://roastedflavors.com/wp-content/uploads/2025/05/31d723fd-5e79-4aff-b39b-bce3397d334a.webp)
Chicken Wonton Tacos Crispy and Flavorful Delight
Are you ready to enjoy a tasty twist on taco night? Chicken Wonton Tacos bring crunchy wrappers and juicy chicken together for a treat you
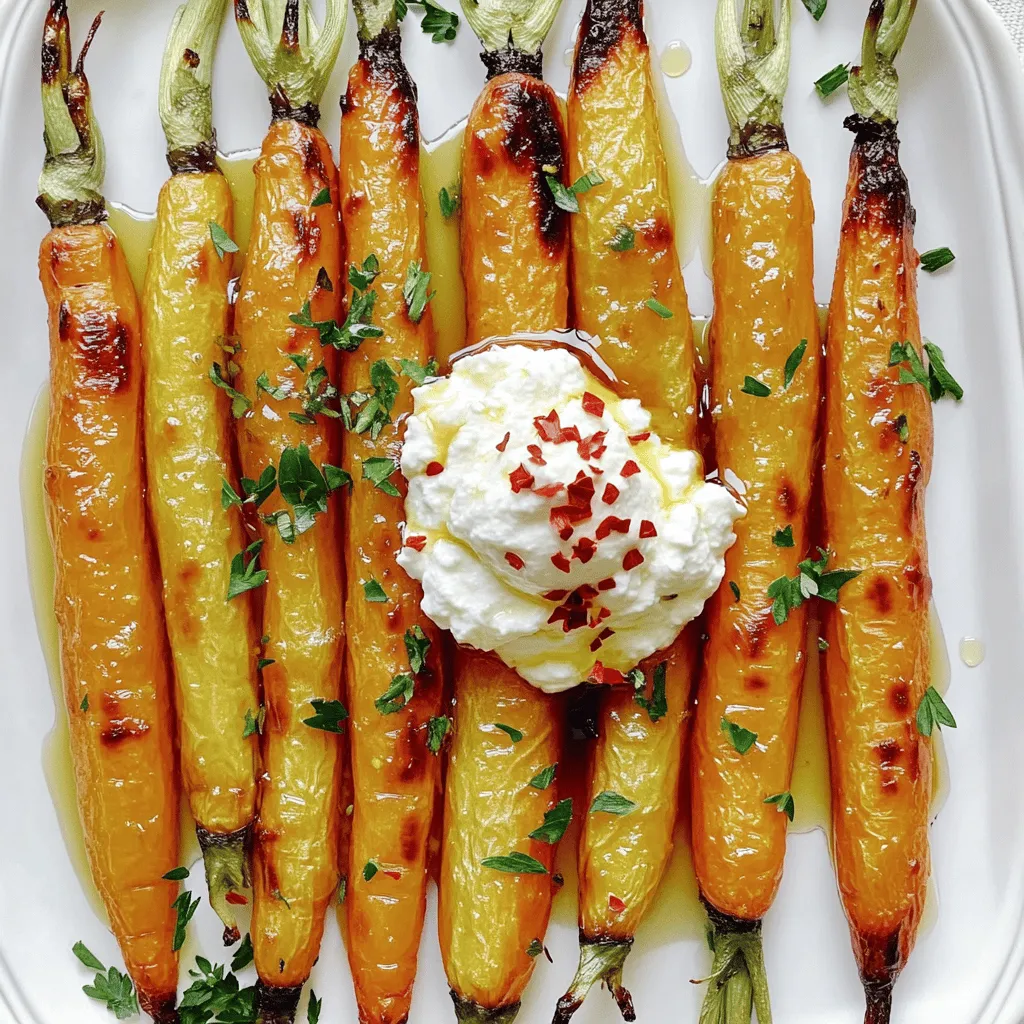
Roasted Carrots with Whipped Ricotta and Hot Honey Delight
Savor the sweet crunch of Roasted Carrots with Whipped Ricotta and Hot Honey! This dish combines smooth, creamy ricotta with the natural sweetness of carrots,

Spinach and Artichoke Stuffed Bread Delight Recipe
Are you ready to take your appetizer game to the next level? This Spinach and Artichoke Stuffed Bread Delight Recipe combines creamy spinach and artichokes
![- 1 lb fresh salmon fillet - 1/4 cup honey - 3 tablespoons soy sauce - 3 cloves garlic - 1 tablespoon fresh ginger - 1 tablespoon sesame oil - 2 green onions for garnish - 1 tablespoon sesame seeds - Salt and freshly cracked pepper Marinating the salmon is key for great flavor. The honey adds sweetness, while the soy sauce gives it a savory touch. Garlic and ginger bring warmth and depth. Salt and pepper enhance all these flavors. You should let the salmon sit in the marinade. This makes the dish taste even better. Aim for at least 20 to 30 minutes in the fridge. To start, mix honey, soy sauce, garlic, ginger, and sesame oil. Each ingredient plays a key role in the flavor. Honey adds sweetness, while soy sauce brings saltiness. Garlic and ginger give a warm kick. Sesame oil adds a nutty taste, tying all the flavors together. This marinade creates a perfect balance for the salmon. Next, take your salmon cubes and coat them well with the marinade. Make sure every piece is covered. This helps the salmon absorb the flavors. Cover the bowl with plastic wrap and place it in the fridge. Let it marinate for 20-30 minutes. This time allows the flavors to blend into the fish. You can cook the salmon in two ways: baking or pan-frying. If you bake, set your oven to 400°F (200°C). Line a baking sheet with parchment paper for easy cleanup. Arrange the salmon in a single layer. Bake for 12-15 minutes. If you prefer pan-frying, heat a non-stick skillet over medium-high heat. Cook the salmon for 8-10 minutes. Flip the pieces halfway through for even cooking. Both methods will give you tasty, caramelized bites. To make sure your salmon cooks evenly, flip each piece halfway through the cooking time. This simple step helps prevent overcooking on one side. For those caramelized edges, avoid crowding the pan or baking sheet. Leave space between each salmon bite to allow heat to circulate well. For a stunning presentation, serve the salmon on a colorful plate. You can also add toothpicks for easy eating at parties. A bed of mixed greens adds a nice touch of color. Pair these bites with a fresh salad or steamed veggies. A light white wine or iced tea complements the flavors well. If you find your salmon is still undercooked, return it to the heat for a few more minutes. Keep an eye on it so you don’t overcook. If you want to adjust the marinade taste, add more honey for sweetness or soy sauce for saltiness. This flexibility lets you create a dish that fits your taste. For the complete recipe, check the section above. {{image_4}} You can easily change the flavor of your honey garlic salmon bites. Want some heat? Add red pepper flakes to the marinade. Just a pinch gives a nice kick. You can also swap honey for maple syrup. This adds a rich, deep sweetness that works well with salmon. If you want to switch proteins, chicken or tofu are great choices. For chicken, use boneless breast and cut it into bite-sized pieces. You can use the same marinade. Just ensure you cook it until it reaches 165°F. For tofu, use firm or extra-firm tofu. Cut it into cubes and press out excess water. Cook it the same way as the salmon, adjusting the time to get a nice crisp. Using seasonal garnishes can elevate your dish. In spring, try fresh herbs like dill or chives. In fall, add roasted pumpkin seeds for crunch. You can also mix in seasonal veggies. Try adding bell peppers or asparagus to the baking sheet. They cook well with the salmon and soak up the marinade flavor. For the full recipe, check out the detailed steps above. To keep your honey garlic salmon bites fresh, place them in an airtight container. Make sure the container is sealed tightly to avoid any odors from the fridge. These salmon bites will last up to three days in the fridge. If you want to enjoy them later, freezing is a great option. To freeze salmon bites, let them cool completely first. Lay them in a single layer on a baking sheet and freeze until solid. Once frozen, transfer them to a freezer-safe bag or container. Remove as much air as possible to prevent freezer burn. Properly stored, they can last up to three months. When you're ready to eat, move them to the fridge to thaw overnight for best results. When reheating, aim to keep the flavor and texture intact. The best method is to use an oven set at 350°F (175°C). Place the salmon bites on a baking sheet and heat for about 10 minutes. You can also reheat them in a skillet over medium heat, flipping gently to avoid overcooking. Be mindful not to cook them too long, as this can dry them out. Enjoy the deliciousness with each bite! For the full recipe, check out the [Full Recipe]. You should marinate the salmon for 20 to 30 minutes. This time is just right for the flavors to soak in. If you marinate too long, the fish can become mushy. I like to cover the bowl with plastic wrap and place it in the fridge. This keeps the salmon fresh and helps the marinade stick. Yes, you can use frozen salmon! Just make sure to defrost it first. The best way is to place it in the fridge overnight. If you're in a hurry, you can submerge it in cold water for about an hour. Be sure to pat it dry before marinating. This helps the marinade stick better and gives you a nice, tasty bite. You can serve honey garlic salmon bites with many delicious sides. Here are some ideas: - Steamed broccoli or asparagus - Rice or quinoa for a filling option - A fresh salad with mixed greens - Sliced cucumbers or carrots for crunch These sides balance the sweet and savory flavors of the salmon. Enjoy your meal! For a complete recipe, check the Full Recipe section. This blog covered how to make delicious honey garlic salmon bites. We discussed key ingredients, like fresh salmon, honey, and garlic. You learned about marinating, cooking options, and tips for perfect results. I shared variations using different proteins and spices to keep things exciting. Finally, we covered storage tips to make sure leftovers stay tasty. Creating this dish can be fun and rewarding. Enjoy making your own honey garlic salmon bites!](https://roastedflavors.com/wp-content/uploads/2025/05/c7e2ba61-f3d2-4b66-bf13-180e8b2b41a8.webp)
Mouthwatering Honey Garlic Salmon Bites Delightful Dish
Are you ready to impress your taste buds? These Honey Garlic Salmon Bites are a must-try! With just a few simple ingredients, like fresh salmon,
![- Salmon fillet preparation: Use 1 lb of fresh salmon fillet. Remove the skin and cut it into bite-sized cubes. This ensures even cooking and a great texture. - Coating elements: You will need three main items for the coating: - 1 cup panko breadcrumbs - 1/2 cup all-purpose flour - 2 large eggs, beaten Each of these elements plays a key role. The flour helps the egg stick, while the panko gives a nice, crispy finish. - Mayonnaise and Sweet Chili Sauce: Blend together 1/2 cup of mayonnaise and 2 tablespoons of sweet chili sauce. This mix creates a creamy and slightly sweet base. - Adjusting spice levels: Add 1 tablespoon of Sriracha and 1 tablespoon of lime juice to tailor the heat. If you like it spicier, add more Sriracha. Taste your sauce and adjust the salt as needed. By combining these ingredients, you get a rich, zesty sauce that complements the salmon perfectly. For the full recipe, check it out [here]. To start, you need to dry the salmon cubes. This step is key for a crispy bite. Moisture makes the coating soggy. Use paper towels to remove any water. Once dry, season the salmon with salt and black pepper. This simple seasoning enhances the fish's natural flavors. Next, set up your breading station. You will need three shallow bowls. In the first bowl, mix all-purpose flour, garlic powder, smoked paprika, salt, and black pepper. In the second bowl, beat the eggs. The third bowl holds the panko breadcrumbs. To bread the salmon, take a cube and dip it in the flour mix. Make sure to coat it well, then shake off excess flour. Next, dip it in the beaten eggs. Let any extra egg drip off. Finally, roll the salmon in the panko breadcrumbs. Press lightly to help the coating stick. Now it’s time to fry! In a skillet, add enough oil to be about 1/2 inch deep. Heat the oil over medium-high heat. To check if the oil is ready, drop in a small piece of bread. If it sizzles right away, it’s hot enough. Carefully add the breaded salmon bites in small batches. If you crowd the pan, the oil cools down. Fry for 3-4 minutes on each side until golden brown. Use a slotted spoon to remove the bites and place them on a paper towel-lined plate. This helps drain any extra oil. To get that perfect crunch, oil temperature matters. Heat the oil to medium-high before frying. If it's too cold, the salmon bites will become soggy. Fry in small batches. This keeps the oil hot and allows even cooking. You want each piece to fry beautifully without steaming. Using a slotted spoon helps drain excess oil. Once the salmon is golden brown, lift it out with this spoon. Place the bites on a paper towel-lined plate. This step is key to keeping them crispy and not greasy. Garnishing can elevate your dish. Use lime wedges to add a fresh pop of color. Finely chopped herbs like cilantro or green onions also look great. They make the dish inviting and add flavor. For serving, arrange the crispy salmon bites on a vibrant platter. Drizzle the Bang Bang sauce over them or serve it in a small bowl on the side. This makes it easy for guests to dip. A well-presented dish is sure to impress everyone at your table. {{image_4}} You can change the flavor with different sauces. Try honey mustard or a garlic aioli. Both add a tasty twist. If you like spice, add more Sriracha to your Bang Bang sauce. You can also mix in lime zest for extra zing. To customize the sauce, start with the basic recipe. Then, taste it as you go. Adjust the spice level to match your taste. This way, you can create a sauce that fits your mood. If salmon isn't your favorite, you can use chicken or tofu. Both will work well in this recipe. For chicken, use bite-sized pieces of boneless breast or thighs. For tofu, use firm tofu cut into cubes. When using chicken, cook it longer. Fry chicken for about 5-7 minutes until it’s golden and cooked through. Tofu needs less time, about 3-4 minutes, until it’s crispy. Each protein adds its unique flavor and texture. For the full recipe, check the cooking times and adjust as needed! To keep your crispy salmon bites fresh, store them in an airtight container. This method helps preserve their flavor and texture. Place a paper towel inside the container to absorb moisture. Try to eat the leftovers within three days for the best taste. When it's time to reheat, the oven is your best friend. Preheat it to 350°F (175°C) and place the salmon bites on a baking sheet. Bake them for about 10 minutes. This method keeps the bites crispy. If you only have a microwave, use it with caution. Microwave them for 30 seconds, then check. Repeat as needed, but this may make them less crispy. Enjoy your leftover crispy Bang Bang salmon bites just as much as when they were fresh! Yes, you can prepare the salmon bites ahead. To do this, follow these steps: - Prepare the Salmon: Cut and season the salmon as needed. - Breading: Complete the breading process but do not fry them yet. - Storage: Place the breaded bites in a single layer on a baking sheet. Cover with plastic wrap and refrigerate. This way, they stay fresh and crispy. When ready to cook, simply heat your oil and fry them until golden. For crispy salmon bites, fresh salmon fillet is ideal. Here are some great options: - Sockeye Salmon: Rich flavor and firm texture. - Coho Salmon: Mild taste, great for frying. - King Salmon: Buttery and high in fat, very delicious. These types ensure your bites are tasty and juicy. To kick up the heat in your Bang Bang sauce, try these tips: - Add More Sriracha: Start with a teaspoon more, then taste. - Include Red Pepper Flakes: Mix in a pinch for extra spice. - Use Hot Chili Sauce: Substitute sweet chili sauce with a spicier version. These changes can help you find the perfect level of heat. Many places serve dishes like Crispy Bang Bang Salmon Bites. Here are some suggestions: - Asian Fusion Restaurants: They often have creative seafood dishes. - Seafood Restaurants: Look for specialty salmon bites on the menu. - Tapas Bars: They may have small plates similar to these bites. Exploring these venues can lead to delicious finds. Yes, baking is a healthier option. Here’s how you can do it: - Preheat your oven to 400°F (200°C). - Prepare a baking sheet: Line it with parchment paper. - Place Salmon Bites: Arrange the breaded bites in a single layer. - Bake for 12-15 minutes, flipping halfway: This helps them crisp up. Baking will give you a lighter version while still being tasty. For the complete recipe, check out the [Full Recipe]. In this blog post, we explored how to make Crispy Bang Bang Salmon Bites, from ingredients to cooking tips. You learned about key ingredients, including salmon, coating elements, and the tasty Bang Bang sauce. We covered the frying techniques for perfect crispiness and shared storage information for leftovers. Using these steps, you can impress your friends with a delicious dish. Remember, you can experiment with sauces and proteins. Enjoy the process and make it your own!](https://roastedflavors.com/wp-content/uploads/2025/05/d55be09e-83cc-420d-9f97-31988b055214.webp)
Crispy Bang Bang Salmon Bites Flavorful Delight Within
Are you ready to elevate your snack game with Crispy Bang Bang Salmon Bites? These bites are a delightful mix of crunchy coating and savory

Bang Bang Chicken Simple and Tasty Recipe Guide
Are you ready to try a dish that bursts with flavor? Bang Bang Chicken is easy to make and oh-so-tasty! In this guide, I’ll walk
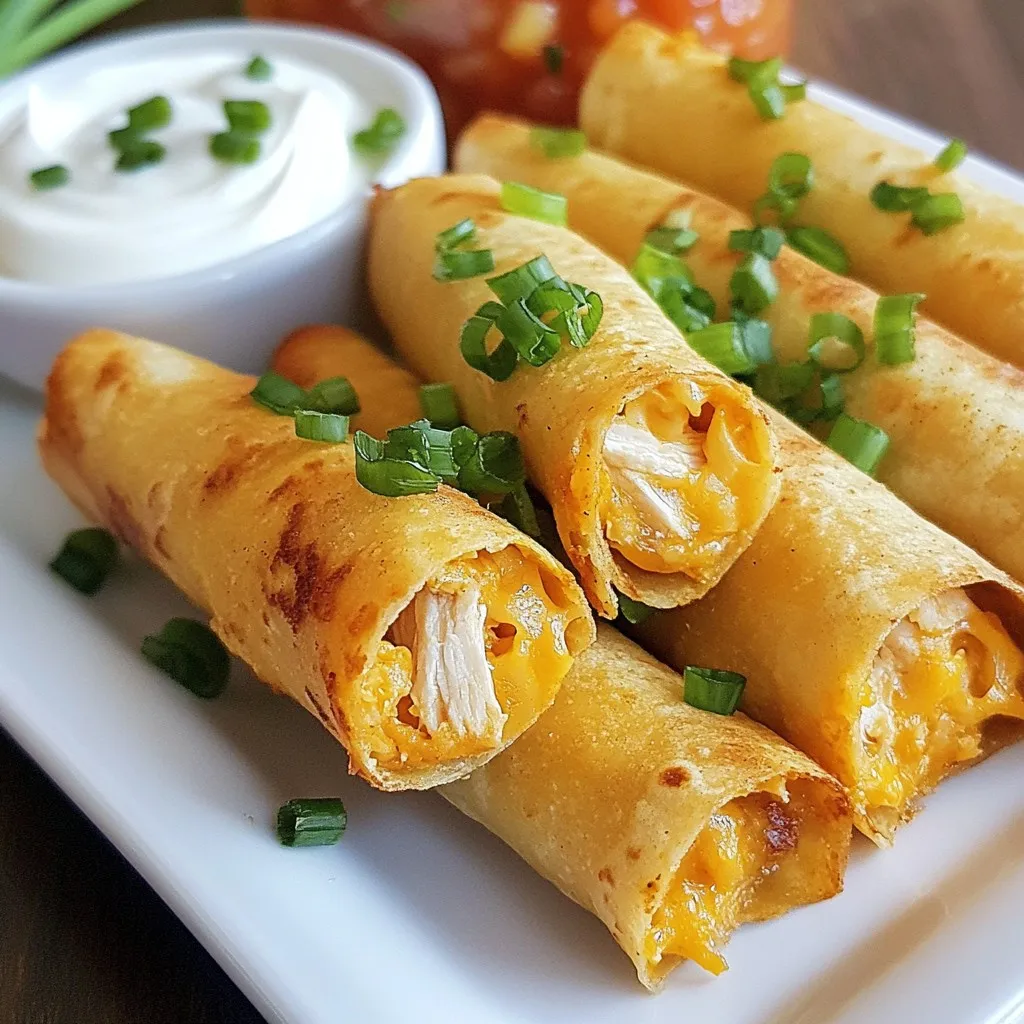
Baked Cream Cheese Chicken Taquitos Savory Delight
Are you ready to take your snack game to the next level? Baked Cream Cheese Chicken Taquitos are here to impress! These savory bites combine

Mashed Potato Cheese Puffs Quick and Tasty Snack
Craving a snack that’s both quick and tasty? You’ll love these Mashed Potato Cheese Puffs! They are simple to make and pack a cheesy punch.