Appetizers
![To make these tasty bites, gather the following items: - 1 lb skinless, boneless salmon fillet - 1 cup panko breadcrumbs - 1/2 cup all-purpose flour - 2 large eggs - 1 teaspoon garlic powder - 1 teaspoon paprika - 1/2 teaspoon salt - 1/2 teaspoon freshly ground black pepper - Vegetable oil for frying - 1/3 cup mayonnaise - 2 tablespoons sweet chili sauce - 1 tablespoon sriracha (adjust for heat) - 1 green onion, thinly sliced (for garnish) These ingredients come together to create a dish that is both simple and delicious. The salmon provides rich flavor, while the panko gives it a satisfying crunch. You can add personal touches to your Bang Bang Salmon Bites. Consider these optional items: - Fresh herbs like cilantro or parsley for garnish - Lime juice for a zesty finish - Sesame seeds to sprinkle on top Feel free to mix in your favorite flavors to make this dish truly your own. To prepare these salmon bites, you will need some basic kitchen tools: - A sharp knife for cutting salmon - Three bowls for dredging - A large non-stick skillet for frying - Paper towels for draining excess oil - Whisk for mixing the sauce Having the right tools will make this cooking process smoother and more enjoyable. Enjoy making your Easy Bang Bang Salmon Bites! For the full recipe, check out the detailed instructions. To start, cut the salmon fillet into bite-sized cubes. Each piece should be about 1 inch. This size helps them cook evenly. Next, use paper towels to pat the salmon cubes dry. Removing moisture is key for a crispy result. Now, set up your dredging station. You need three bowls. In the first bowl, mix flour and garlic powder. In the second bowl, combine panko breadcrumbs with paprika. In the third bowl, beat the eggs, adding salt and pepper. This setup makes coating easy. For frying, heat about 1/4 inch of vegetable oil in a large non-stick skillet over medium heat. Wait until the oil shimmers. Add the salmon bites in batches. Do not overcrowd the pan. Fry for 3-4 minutes on each side. They should turn golden brown and crispy. To make the Bang Bang sauce, whisk together mayonnaise, sweet chili sauce, and sriracha in a small bowl. Keep the sauce smooth. You can adjust the sriracha to your taste. Add more for spice or less for mild. This sauce pairs perfectly with the salmon bites. For the full recipe, check the [Full Recipe]. To make crispy salmon bites, start with fresh salmon. Cut the salmon into 1-inch cubes. Pat them dry with paper towels. This step helps remove moisture, which leads to crispiness. Use panko breadcrumbs for the best crunch. They give a light, airy texture. When frying, heat the oil until it shimmers. This ensures a golden brown finish. Avoid overcrowding the pan. Cook in batches to keep the temperature steady. The Bang Bang sauce is a star, but feel free to mix it up. You can also try ranch or tartar sauce. A squeeze of lemon adds a bright touch. For a spicy kick, serve with extra sriracha. If you like sweetness, honey mustard works well too. Get creative with your dips to match your taste. One common mistake is skipping the drying step. Moisture leads to soggy bites. Another error is not heating the oil enough. If the oil is cold, the salmon absorbs it, making it greasy. Be careful when flipping the salmon. Use a spatula to gently turn them without breaking. Lastly, avoid cooking too many at once. This can lower the oil temp and ruin the crispness. For a full recipe, check the details above. {{image_4}} You can swap salmon for other proteins. Chicken bites work great. Cut boneless chicken into cubes. Follow the same steps as with salmon. Shrimp is another tasty choice. Use large shrimp and adjust cooking time. Cook them until they turn pink and firm. Tofu is a wonderful plant-based option. Press and cube firm tofu. Marinate it to add flavor, then coat and fry. For a vegetarian twist, try using eggplant. Cut it into bite-sized pieces. Bread and fry it just like salmon. Cauliflower florets also make great bites. Coat them in the same mixture and fry until golden. If you want a vegan version, use chickpea flour instead of eggs. It will help the coating stick while keeping it plant-based. You can easily modify flavors to suit your taste. For a zesty kick, add lime juice to the sauce. If you prefer a sweeter taste, increase the sweet chili sauce. For a smoky flavor, try adding smoked paprika. You can also mix in fresh herbs like cilantro or basil. This gives a fresh burst of flavor. Adjust the spice level in the sauce to your liking by adding more or less sriracha. Explore the full recipe for more delicious details! To keep your Bang Bang salmon bites fresh, store them in an airtight container. Let them cool to room temperature before sealing. Refrigerate the leftovers right away. They stay good for up to three days. For best taste, try to eat them within the first two days. When reheating, I recommend using an oven or an air fryer. Preheat your oven to 375°F (190°C). Arrange the salmon bites in a single layer on a baking sheet. Heat for about 10-12 minutes, or until they crisp back up. If using an air fryer, set it to 350°F (175°C) and cook for about 5-7 minutes. This helps keep them crunchy. If you want to freeze your salmon bites, place them in a single layer on a baking sheet. Freeze them for about an hour, then transfer to a freezer-safe bag. They can last up to three months in the freezer. When ready to eat, thaw them in the fridge overnight, then reheat as mentioned above. This method helps maintain their taste and texture. For the full recipe, check out the section above. Bang Bang sauce is a creamy, spicy dip. It usually includes mayonnaise, sweet chili sauce, and sriracha. This mix creates a nice balance of flavor and heat. You can adjust the sauce to fit your taste. If you like it hotter, add more sriracha. If you prefer it milder, use less. This sauce pairs perfectly with the salmon bites and enhances their flavor. Yes, you can bake the salmon bites! Baking is a healthier option. To do this, preheat your oven to 400°F (200°C). Place the coated salmon bites on a baking sheet lined with parchment paper. Bake them for about 12-15 minutes. Flip them halfway for even cooking. They may not be as crispy, but they will still be delicious. To adjust the spice level, focus on the sriracha. Add more sriracha for heat or reduce it for a milder sauce. You might also try adding a pinch of cayenne pepper. Taste as you go, ensuring you get the perfect heat for your palate. This flexibility makes Bang Bang sauce a hit with everyone. Yes, you can use frozen salmon! Just remember to thaw it first. Place the frozen salmon in the fridge overnight or run it under cold water. Once thawed, pat it dry before cutting. Using frozen salmon might change the texture slightly, but it will still taste great. This article detailed how to make easy Bang Bang salmon bites. You learned about key ingredients, cooking tips, and variations. Remember to pick the right protein and customize the sauce for your taste. Storing leftovers properly ensures they stay fresh. With these steps, you can create a tasty dish that suits all diets. Enjoy the fun of cooking and share these bites with friends. Your next meal can be a hit!](https://roastedflavors.com/wp-content/uploads/2025/05/9f91fa49-c2b0-4b08-a300-589ce3452a7a.webp)
Easy Bang Bang Salmon Bites Simple and Tasty Dish
If you’re craving a quick and tasty meal, try my Easy Bang Bang Salmon Bites! This dish packs a punch with flavor and is simple
![- 1 cup unsalted butter, softened - 1/2 cup shelled pistachios, finely chopped - 2 tablespoons honey (preferably raw) - 1 teaspoon pure vanilla extract - 1/4 teaspoon flaky sea salt - Zest of 1 lemon (optional) - Additional herbs or spices - Variations for different flavor profiles - Serving accompaniments Pistachio compound butter is a fun and tasty treat. The main ingredients are simple and easy to find. You will need one cup of unsalted butter. Make sure it is soft, so it mixes well. Next, grab half a cup of shelled pistachios. Chop them finely for the best texture. Honey adds a sweet touch. Use two tablespoons, and raw honey is the best choice. It gives a richer flavor. You will also need one teaspoon of pure vanilla extract. This adds a lovely aroma and taste. A quarter teaspoon of flaky sea salt balances the sweetness perfectly. If you want a bright flavor, add the zest of one lemon. This is optional, but it makes the butter fresh and lively. For optional ingredients, feel free to explore! You can add herbs like thyme or spices like cinnamon for a unique twist. Think about what you enjoy. When serving, consider warm bread, grilled meats, or veggies. This butter melts beautifully and adds a rich taste. Enjoy experimenting with flavors and pairings! For the complete recipe, check out the [Full Recipe]. 1. Start with your butter. Place 1 cup of softened unsalted butter in a medium bowl. 2. Use a fork or spatula to cream the butter. Beat it until it is light and fluffy, about 2-3 minutes. 3. Next, add 1/2 cup of finely chopped pistachios to the bowl. Mix well until the nuts are evenly distributed. 4. Now, drizzle in 2 tablespoons of honey, 1 teaspoon of pure vanilla extract, and 1/4 teaspoon of flaky sea salt. Stir until all flavors blend nicely. 5. If you like, fold in the zest of 1 lemon for a fresh twist. This adds a bright flavor to your butter. 6. Grab a sheet of parchment paper. Spoon the mixture onto it, shaping it into a log. 7. Roll up the parchment around the butter. Twist the ends to seal it tightly, just like wrapping candy. 1. Chill the wrapped log in the fridge for at least 2 hours. This helps it firm up. 2. Want to store it longer? You can freeze the log for future use. 3. After chilling, unwrap the log and slice it into rounds. 4. Serve these slices on warm bread or with grilled meats. You can also add them to cooked veggies for a tasty finish. To keep your pistachio compound butter fresh, store it correctly. - In the refrigerator, wrap the butter in parchment paper or plastic wrap. It lasts up to two weeks. - For the freezer, wrap it tightly in plastic wrap, then place it in a freezer bag. It can last for three months. To maintain freshness, always use a clean knife to scoop out the butter. This way, you avoid adding moisture or bacteria to the mix. Pistachio compound butter is versatile and tasty. Here are some fun ideas to enjoy it: - Spread it on warm, crusty bread for a delightful snack. - Use it to enhance grilled meats like chicken or steak, adding flavor and moisture. - Toss it with steamed vegetables for a rich finish. You can also get creative! Try melting it over popcorn for a gourmet twist or use it in baking to add a nutty flavor to cookies and cakes. {{image_4}} You can change the flavor of your pistachio compound butter easily. Try using different nuts like almonds or walnuts. Each nut will bring its own taste and texture. For a sweeter touch, use maple syrup instead of honey. This change adds a new depth to the flavor. Spices can also enhance your butter. Adding a pinch of cinnamon gives a warm, cozy feel. Fresh herbs like rosemary or thyme can add a savory twist. Mix them in with the pistachios. Just remember to start with a little, then taste and adjust. If you want a vegan option, swap the butter for a plant-based butter. Look for one made from coconut oil or cashew. It will mimic the creamy texture well. For sweeteners, use agave syrup instead of honey to keep it vegan. For gluten-free needs, this recipe works perfectly as is. All the ingredients are gluten-free. So, feel free to enjoy it with gluten-free bread or on veggies. You can savor delicious flavors without worry. Explore these variations to make pistachio compound butter your own. A little change can create a whole new taste adventure! For the complete recipe, check out the Full Recipe section. Pistachio compound butter lasts about one week in the refrigerator. Store it in an airtight container. If you freeze it, it can last up to six months. Just make sure to wrap it well to avoid freezer burn. You can use salted butter, but it changes the taste. The butter will be saltier, which may overpower the other flavors. If you like a strong flavor, go for it. Otherwise, stick to unsalted butter for balance. You can use pistachio compound butter in many tasty ways. Spread it on warm bread, grilled meats, or steamed veggies. It also works well on pancakes or waffles. You can even mix it into pasta for a unique flavor twist. The options are endless! For the full recipe, check out the details above. To make pistachio compound butter, start by softening unsalted butter. Cream it until fluffy. Next, mix in finely chopped pistachios. Add honey, vanilla, and flaky sea salt. If you like, fold in lemon zest for a fresh taste. Shape the mixture into a log using parchment paper. Chill for at least 2 hours. Slice the chilled butter into rounds and serve. This butter is perfect on bread or with meats. This compound butter has about 100 calories per tablespoon. It provides healthy fats from pistachios. Each serving offers protein, vitamin E, and magnesium. Enjoy it in moderation to balance your diet. Each recipe makes roughly 1 cup of butter. You can pair it with warm crusty bread or grilled veggies for added flavor. Pistachio compound butter offers richness and flavor in every bite. We covered the main and optional ingredients, preparation steps, and serving tips. You learned ways to store your butter and how to adapt it for diets. Now, get creative with your flavors! Enjoy using this compound butter on bread, meats, or vegetables. It enhances any dish you make. Get ready to impress your guests with this easy, tasty addition!](https://roastedflavors.com/wp-content/uploads/2025/05/5d24647f-22a9-4cf0-93fb-d961c4072972.webp)
How to Make Pistachio Compound Butter Delightfully
Are you ready to elevate your spreads? Making pistachio compound butter is simple and delightful. With just a few ingredients, you can transform ordinary butter
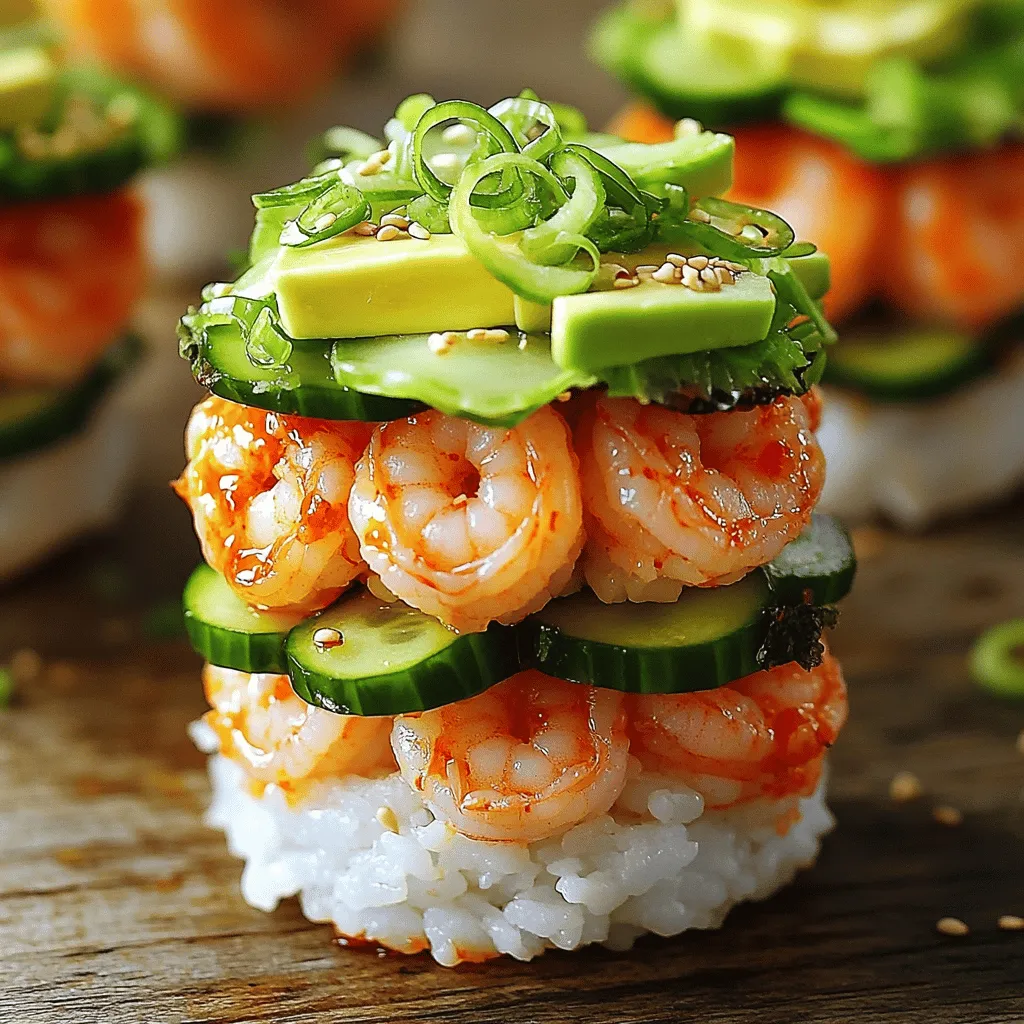
Spicy Shrimp Sushi Stacks Flavorful and Easy Recipe
Looking to impress your friends with a fun, fresh dish? Dive into my Spicy Shrimp Sushi Stacks! This easy recipe combines juicy shrimp with tasty

Air Fryer Quesadillas Crispy and Simple Recipe
Are you ready to enjoy a delicious, crispy snack? Air fryer quesadillas are simple to make and packed with flavor. With just a few ingredients
. To enjoy a milder bite, remove the seeds from the jalapeños. The seeds hold most of the heat. If you want a different pepper, try using banana or Anaheim peppers. They have less heat and can still pack a flavorful punch. You can change up the taste by using different cheeses. Cream cheese is great, but try pepper jack for a kick or mozzarella for a milder flavor. Adding fresh herbs like cilantro or parsley can also lift the dish. A squeeze of lemon juice adds brightness and balance. When serving, place the stuffed jalapeños on a colorful platter. This makes the dish pop. You can garnish with extra chopped green onions or a sprinkle of paprika for color. Drizzle some hot sauce on top for extra flair and flavor. {{image_4}} If you want a meat-free dish, swap shrimp with mushrooms or tofu. Mushrooms add a nice, earthy flavor. Tofu absorbs all the spices well. This option is perfect for plant lovers. Just sauté the mushrooms or tofu until golden before mixing. Mix things up by using pepper jack or blue cheese. Pepper jack brings a spicy kick to the dish. Blue cheese adds a rich and bold flavor. You can use one or a mix of both. Cheese lovers will enjoy the depth of flavor in each bite. For a fun twist, add corn or black beans to the filling. Both ingredients boost flavor and texture. They also add some color, making your dish pop. Corn brings sweetness, while black beans give you protein. This twist keeps the dish exciting and fresh. For the full recipe, check out the detailed instructions above. To store leftovers, place the stuffed jalapeños in an airtight container. Keep them in the fridge for up to three days. When you want to enjoy them again, simply reheat in a 350°F (175°C) oven. This method helps maintain their crispy texture. Heat for about 10-15 minutes or until warm throughout. You can freeze stuffed jalapeños for longer storage. After baking, let them cool completely. Arrange them on a baking sheet and freeze until solid. Then, transfer them to a freezer bag. This way, they won't stick together. They can last up to three months in the freezer. To thaw, move them to the fridge overnight. You can also cook them straight from frozen. If cooking from frozen, add an extra 10-15 minutes to your baking time. This method ensures they heat through without drying out. For the full recipe, check the earlier section. To reduce the heat, remove the seeds and membranes from the jalapeños. This step makes a big difference. You can also choose milder peppers, like Anaheim or poblano, for a gentler bite. Another option is to mix in more cream cheese to balance the spice. Adding a bit of sugar can help cut through the heat, too. Yes, you can! To make them ahead, prepare the stuffed jalapeños and place them in the fridge. Cover them tightly with plastic wrap. You can store them like this for up to 24 hours. When ready, bake them straight from the fridge. Just add a few minutes to the baking time to ensure they heat through properly. These stuffed jalapeños pair well with many sides. Try serving them with a fresh salad, like a simple green or a spicy coleslaw. Rice dishes, such as Cajun rice or cilantro lime rice, also complement the flavors nicely. For a fun twist, serve with tortilla chips and salsa for a complete feast. Check the Full Recipe for more ideas! You now have all the tools to make Cajun shrimp stuffed jalapeños. We covered ingredients, preparation, and baking steps. You also learned how to customize the heat and flavor. Remember to experiment with variations like vegetarian options or different cheeses. For storage, save leftovers in the fridge or freeze them for later. Enjoy your creation as a savory snack or fun party dish! You can impress your friends and family with this delicious recipe. Happy cooking!](https://roastedflavors.com/wp-content/uploads/2025/05/a720fe4c-9b73-4163-bffa-cbe3c3cd17ce.webp)
Fiery Cajun Shrimp Stuffed Jalapeños Recipe Delight
If you crave bold flavors and a kick of spice, you’ll love my Fiery Cajun Shrimp Stuffed Jalapeños! This tasty recipe combines the heat of

Pull-Apart Meatball Sliders with Garlic Parmesan Butter
Craving a tasty treat that’s easy to make and fun to eat? Look no further! These Pull-Apart Meatball Sliders with Garlic Parmesan Butter are a

Crispy Zucchini Fritters Simple and Tasty Recipe
Looking for a tasty treat that’s easy to make? These crispy zucchini fritters are the answer! With just a few simple ingredients, you can whip
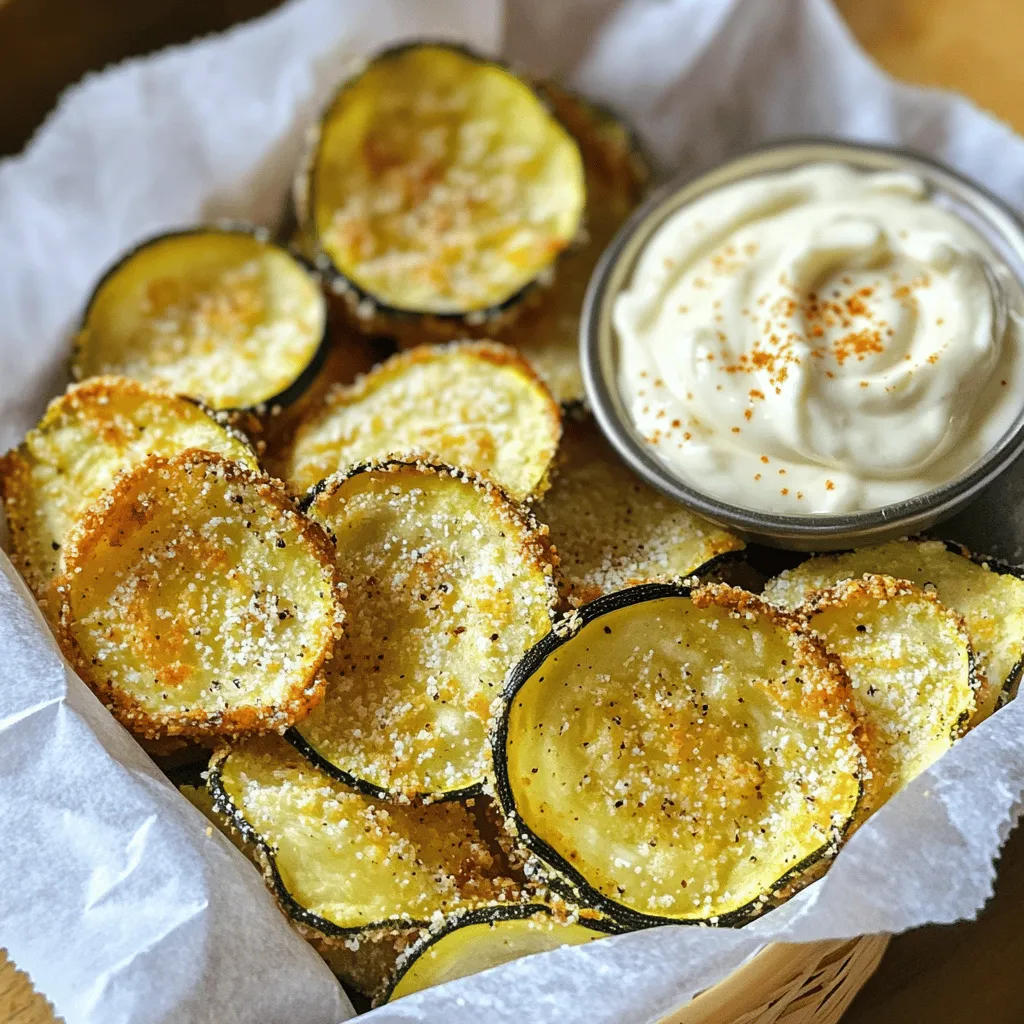
Crunchy Zucchini Chips Flavorful and Healthy Snack
Craving a snack that’s both tasty and healthy? Look no further! My crunchy zucchini chips are perfect for you. They provide the satisfying crunch you
![To make Air Fryer Crispy Onions, you'll need a few simple ingredients. Here’s the list: - 2 large onions, thinly sliced - 1 cup buttermilk or dairy-free alternative - 1 cup all-purpose flour - 1 teaspoon garlic powder - 1 teaspoon smoked paprika - ½ teaspoon cayenne pepper (optional) - Salt and freshly cracked black pepper - Cooking spray (preferably olive oil or avocado oil) These ingredients work together to create a tasty and crunchy snack. The buttermilk helps to tenderize the onions and adds flavor. The flour coating gives them that satisfying crunch. Garlic powder and smoked paprika bring out a nice depth of flavor, while the cayenne pepper adds a little heat. Don’t forget the salt and pepper; they help to enhance all the flavors. When you gather these ingredients, you will be ready to create the perfect crispy snack. Trust me, once you try them, you’ll want to make this recipe over and over again. For the full recipe, check out the details in the next sections. - Immerse onion rings in buttermilk. - Soak for at least 30 minutes. Start by slicing your onions into thin rings. Place these rings in a large bowl and pour in the buttermilk. The soaking process is crucial. It tenderizes the onions and adds flavor. Aim for a soak time of at least 30 minutes. If you have time, longer is even better! - Combine flour, garlic powder, smoked paprika, and pepper. - Whisk to mix evenly. While the onions soak, prepare the coating. In a separate bowl, mix the all-purpose flour, garlic powder, smoked paprika, and pepper. Whisk the dry ingredients well. This will give your crispy onions a tasty kick and an even coating. - Drain and toss onion rings in the flour mixture. - Shake off excess flour. After the soak, drain the onion rings from the buttermilk. Toss the rings in the flour mixture until they are fully coated. Make sure to shake off any extra flour. Too much flour can lead to clumping and uneven cooking. - Set temperature to 375°F (190°C). - Preheat for 5 minutes. Now, it's time to preheat your air fryer. Set the temperature to 375°F (190°C) and let it preheat for 5 minutes. This step helps ensure that your onions cook evenly and get that perfect crunch. - Spread rings in a single layer in the air fryer. - Air fry for 10-12 minutes, shaking halfway. Once the air fryer is hot, spread the onion rings in a single layer in the basket. Avoid overcrowding to allow air circulation. Cook the onions for 10 to 12 minutes. Remember to shake the basket halfway through. This helps them crisp up evenly. - Remove and cool on paper towels. When the onions turn golden brown and crispy, carefully remove them from the air fryer. Place them on a plate lined with paper towels. This will soak up any extra oil, keeping them crunchy. Enjoy your crispy onions as a snack or topping on your favorite dishes! For the full recipe, check out [Full Recipe]. To get those perfect crispy onions, avoid overcrowding your air fryer. When you pack too many onions in, they steam instead of crisp. This makes them soggy. Cook in batches if needed. The thickness of your onion rings matters. Thicker rings may need extra time to cook. Start with 10 minutes and check for doneness. Adjust the time based on how thick your slices are. Adding spices can take your crispy onions to the next level. Try adding a pinch of smoked paprika or a dash of garlic powder. You can also blend in some onion powder for extra flavor. To balance the flavors, season with salt and pepper. This simple step brings out the taste of the onions. Taste as you go, and adjust to your liking for the best results. Crispy onions make a great topping for many dishes. Sprinkle them on salads for a crunchy bite. They also work well on burgers, adding texture and flavor. For presentation, place them in a small bowl next to your dish. Serve with ranch dressing or spicy mayo for dipping. This gives a fun touch and makes your meal more exciting. For the full recipe, check out the detailed instructions above! {{image_4}} You can add a twist to your crispy onions with different seasonings. Here are some ideas: - Italian Style: Mix in dried oregano, basil, and a bit of grated Parmesan. - Spicy Kick: Use chili powder, cayenne, and a pinch of cumin for heat. - Herb Blend: Combine garlic powder, onion powder, and a touch of thyme. These blends can elevate your crispy onions, making them unique and flavorful. Experiment and find your favorite mix! If you need a gluten-free version, replace all-purpose flour with gluten-free flour. Here are some easy swaps: - Almond Flour: This adds a nutty flavor and great texture. - Rice Flour: This keeps the onions light and crispy. - Chickpea Flour: This adds protein and a distinct taste. These alternatives work well in the recipe, so you can enjoy crispy onions without worries. For a sweet twist, try adding caramelized sugars or balsamic glaze to your crispy onions. Here’s how: - Caramelized Sugar: Toss the onions with a bit of brown sugar before air frying. - Balsamic Glaze: Drizzle some glaze over the cooked onions for a tangy sweetness. These options give your crispy onions a fun flavor change, making them a delightful snack or topping. To keep your crispy onions crunchy, follow these tips: - Cool Completely: Let the onions cool down before storing. - Use Airtight Containers: Store in a glass or plastic container with a tight lid. - Avoid Moisture: Place a paper towel inside to absorb moisture. This helps maintain their crispiness. I recommend using small containers. This way, you can grab just what you need. Storing them in the fridge can keep them fresh for about three days. To reheat your crispy onions and keep them crunchy, use one of these methods: - Oven Method: Preheat your oven to 350°F (175°C). Spread the onions on a baking sheet in a single layer. Heat for about 5-10 minutes. Keep an eye on them to avoid burning. - Microwave Method: This method is quick but may not keep them crispy. Place the onions on a microwave-safe plate. Heat in short bursts of 15-20 seconds until warm. I prefer the oven method for the best crunch. Enjoy them as a snack or use them in your favorite dishes! Yes, you can use different onions. Yellow onions are the most common choice. They have a strong flavor and turn sweet when cooked. Red onions offer a milder taste and add color. Sweet onions, like Vidalia, bring a sugary flavor, making them great for a sweeter snack. All types can work well, but the taste and crunch might vary. To add heat, sprinkle cayenne pepper into your flour mix. You can adjust the amount based on your taste. For more spice, you could also try adding hot sauce to the buttermilk. Another option is to use spicy seasoning blends or mix in black pepper. Experiment to find your perfect heat level. Yes, you can freeze crispy onions! To do this, let them cool completely. Then, spread them in a single layer on a baking sheet. Freeze them for about an hour, then transfer to a freezer bag. This method keeps them from clumping together. Use frozen crispy onions on salads, burgers, or soups. They add a great crunch and flavor! For best results, reheat them in an air fryer or oven to restore crispiness. This blog post covered how to make crispy onions in an air fryer. We discussed the key ingredients, like onions and buttermilk, and detailed the steps for soaking and coating. Tips for achieving the perfect crispiness and flavor were shared, along with variations and storage methods. These crispy onions can enhance many dishes. With a bit of practice, you’ll master this recipe in no time. Now go make some delicious crispy onions!](https://roastedflavors.com/wp-content/uploads/2025/05/70f19e66-5c18-4280-8f2e-94b06846fc79.webp)
Air Fryer Crispy Onions Flavorful and Crunchy Snack
If you crave a crunchy snack that packs a punch, Air Fryer Crispy Onions are your answer! This simple recipe transforms humble onions into a
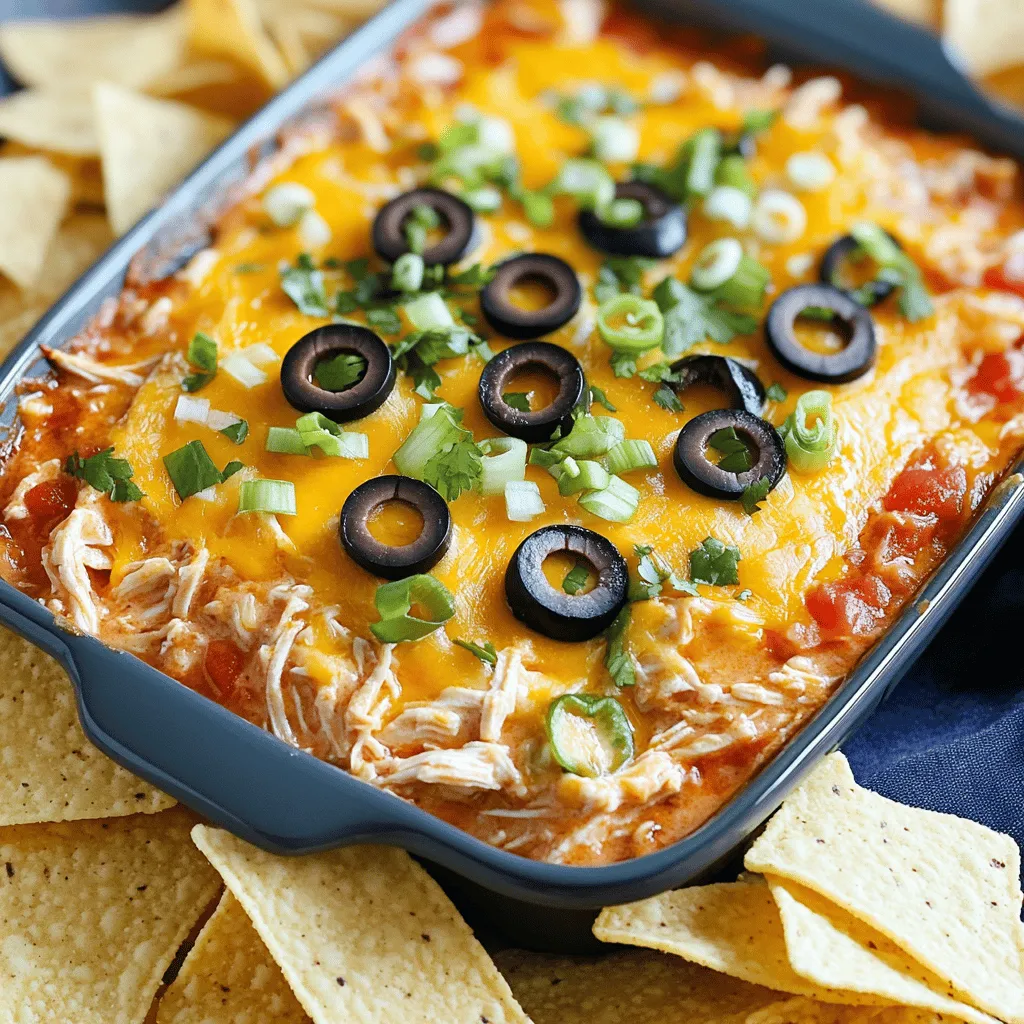
How to Make Chicken Taco Dip Flavorful and Simple
Are you ready to impress your friends at the next gathering? Making Chicken Taco Dip is easy and rewarding. With just a few simple ingredients,