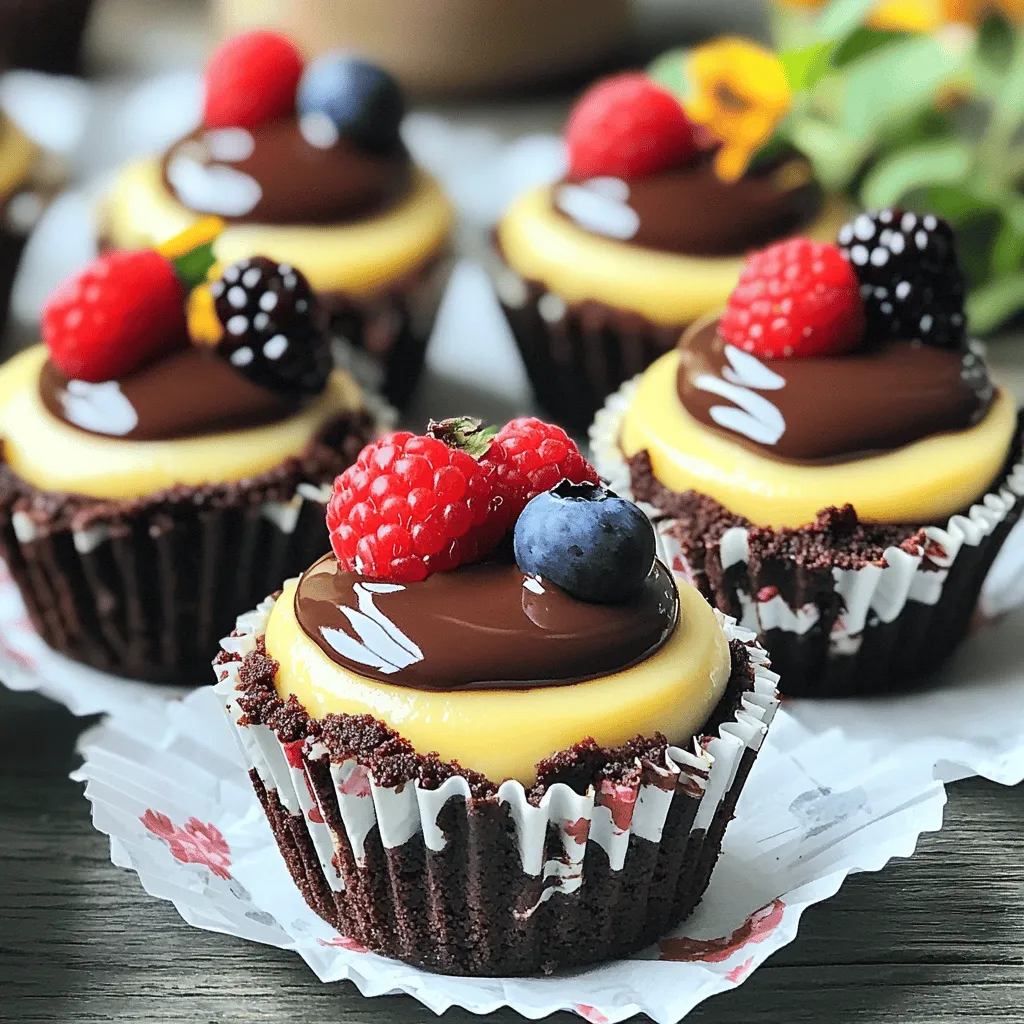
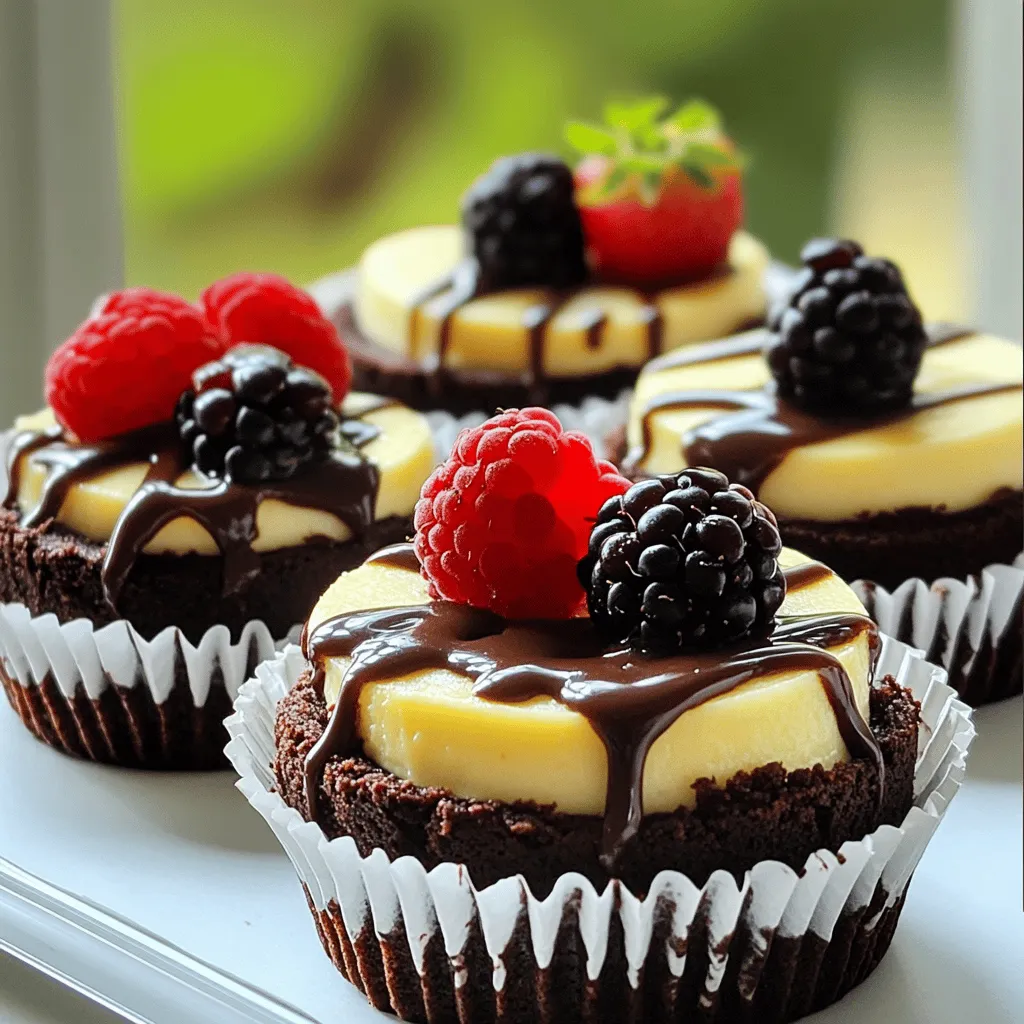
Indulge your sweet tooth with these Brownie Bottom Mini Cheesecakes! They combine rich chocolate brownies with creamy cheesecake for a perfect treat. Whether you want to impress friends or enjoy a simple dessert, this recipe is a winner. You’ll learn how to make them step-by-step, plus tips for presenting and storing your creations. Get ready to dive into a delicious adventure that you can share with loved ones!
Ingredients
Brownie Base Ingredients
– 1 cup brownie mix
– 1/4 cup unsalted butter, melted
– 1 large egg
Cheesecake Filling Ingredients
– 8 oz cream cheese, softened to room temperature
– 1/2 cup granulated sugar
– 1 teaspoon pure vanilla extract
– 1 large egg
– 1 tablespoon all-purpose flour
– 1/4 cup sour cream
Optional Toppings
– Chocolate sauce
– Fresh berries
– Whipped cream
For my Brownie Bottom Mini Cheesecakes, I love using simple ingredients. The brownie base is rich and fudgy. You only need three ingredients: brownie mix, melted butter, and one egg. This mix makes it easy to whip up the brownies quickly.
The cheesecake filling is where the magic happens. Start with softened cream cheese for a smooth texture. Mix in sugar, vanilla, another egg, flour, and sour cream. Each ingredient adds to the creaminess and flavor.
Finally, think about toppings. You can drizzle chocolate sauce for richness. Fresh berries add a nice tartness. Or, top with whipped cream for a light finish. Each topping brings its own fun twist!
This recipe is straightforward and lets you create delicious treats. For the full recipe, check out the details above!
Step-by-Step Instructions
Preparing the Brownie Base
1. Preheat your oven to 350°F (175°C). Prepare a muffin tin by lining it with paper liners. This keeps the mini cheesecakes from sticking.
2. In a mixing bowl, combine 1 cup of brownie mix, 1/4 cup of melted butter, and 1 large egg. Stir until the mixture is fully blended. It should be thick and smooth.
3. Use a spoon or small ice cream scoop to distribute about 1 tablespoon of the brownie batter into each muffin liner. Smooth the tops with a spatula to make them even.
4. Place the muffin tin in the oven and bake the brownie bases for 10 minutes. They should be slightly firm. After baking, remove the tin and let the brownie bases cool for a few minutes.
Making the Cheesecake Filling
1. In a large mixing bowl, beat 8 oz of softened cream cheese with an electric mixer. Mix until it is smooth and creamy.
2. Gradually add 1/2 cup of granulated sugar while mixing. This helps to sweeten the filling evenly.
3. Next, add 1 teaspoon of pure vanilla extract, 1 large egg, 1 tablespoon of all-purpose flour, and 1/4 cup of sour cream. Beat until everything is creamy and free of lumps.
Baking the Mini Cheesecakes
1. Carefully pour the cheesecake filling over the brownie base in each muffin liner. Fill each one about three-quarters full.
2. Return the muffin tin to the oven. Bake for an additional 15-18 minutes. The centers should be set but still have a slight jiggle.
3. When baking is done, turn off the oven and crack the door open. Let the cheesecakes cool inside for about 30 minutes. This step helps to prevent cracks.
4. Once cooled, transfer the mini cheesecakes to the fridge for at least 2 hours. This allows them to fully set and taste even better.
For the full recipe, check out the detailed instructions above. Enjoy these delicious treats!
Tips & Tricks
Preventing Cracks in Cheesecakes
To keep your mini cheesecakes smooth, use a gradual cooling process. After baking, turn off the oven and crack the door. Let them sit in the oven for about 30 minutes. This helps them cool slowly and reduces the chance of cracks.
Achieving the Perfect Texture
Proper mixing of ingredients is key. Beat the cream cheese until it is creamy and lump-free. Then add the sugar and mix well. For baking time, keep an eye on the cheesecakes. They should jiggle slightly in the center when done. This will ensure a creamy texture.
Presentation Suggestions
For a fun touch, think about creative toppings. Drizzle chocolate sauce on top for extra sweetness. You can also add fresh berries for a pop of color. A dollop of whipped cream makes it look fancy. Serve them in muffin liners for easy handling. These simple ideas make your mini cheesecakes even more delightful!
Variations
Flavor Adjustments
You can easily change the flavor of these mini cheesecakes.
– Add chocolate chips to the brownie base: This gives an extra burst of rich chocolate. Just mix in a half cup of chocolate chips into the brownie batter before you bake it.
– Use flavored cream cheese: Try using strawberry or chocolate cream cheese for a fun twist. It adds a unique taste that makes each bite exciting.
Dietary Modifications
You can also make these treats fit different diets.
– Gluten-free brownie mix: Swap the standard brownie mix for a gluten-free option. This keeps the deliciousness while catering to those with gluten sensitivities.
– Vegan cheesecake options: Use vegan cream cheese and plant-based butter. With these swaps, you can enjoy a dairy-free version.
Presentation Variations
How you present these mini cheesecakes can bring joy to any gathering.
– Use different toppings for seasonal themes: Top them with crushed candy canes for winter or fresh peaches in summer. This adds a festive touch!
– Create a layered dessert in jars: Layer the brownie and cheesecake in small jars. This makes for a lovely dessert and is easy to serve.
These variations allow you to customize your Brownie Bottom Mini Cheesecakes to suit any taste or occasion. For the full recipe, check out the detailed steps above!
Storage Info
Refrigeration
You should store the mini cheesecakes in the fridge for up to five days. Keep them in an airtight container to maintain taste and texture. This helps them stay fresh and prevents them from picking up other flavors from your fridge. If you use toppings like whipped cream or berries, add them right before serving. This keeps them from getting soggy.
Freezing
To freeze your mini cheesecakes, wrap each one tightly in plastic wrap. Then place them in a freezer-safe bag or container. They can last for up to three months in the freezer. When you’re ready to enjoy them, remove them from the freezer and let them thaw in the fridge overnight. It’s best to avoid thawing them at room temperature, as this can cause them to lose their creamy texture.
Serving After Storage
For the best experience, serve your chilled mini cheesecakes straight from the fridge. They taste amazing cold and will have a nice firmness. If you thawed them, let them rest for about 10 minutes at room temperature. This helps bring out their flavors. You can add toppings like chocolate sauce or fresh fruit just before serving for a pop of color and taste. For the full recipe, check out the earlier sections.
FAQs
Can I use homemade brownie mix for the base?
Yes, you can use homemade brownie mix. Homemade mixes add a rich flavor. They often use fresh ingredients, which can improve the taste. Plus, you can control the sweetness and texture. Store-bought mixes are quick and easy, but they may not match the taste of homemade. Try both to see which you like best!
How do I know when the cheesecakes are done baking?
You’ll know the cheesecakes are done when the edges are set. The centers should still jiggle a bit when you gently shake the pan. If they look too wobbly, give them a few more minutes. Don’t overbake, or they might crack. Trust your eyes and the jiggle!
Can I make these mini cheesecakes ahead of time?
Yes, you can make these mini cheesecakes ahead of time. They taste great after a day in the fridge. Just bake them, cool, and chill. Store them in an airtight container. You can make them up to three days in advance. This makes them perfect for parties or gatherings!
What can I substitute for cream cheese?
You can use a few alternatives for cream cheese. Greek yogurt is a popular choice. It gives a similar texture and adds protein. Silken tofu blended until smooth is another option for a dairy-free choice. Lastly, you could try mascarpone cheese for a richer taste. Each will change the flavor, so pick what suits your taste best!
These mini cheesecakes are simple and fun to make. We covered the ingredients, from the brownie base to the cheesecake filling. You learned how to bake them perfectly and prevent cracks. Plus, I shared tips for creative toppings and variations.
Feel free to experiment with flavors and presentations. Enjoy sharing these tasty treats with friends and family! Remember, baking mini cheesecakes opens a world of dessert possibilities.
Brownie Bottom Mini Cheesecakes
Delicious mini cheesecakes with a brownie base, perfect for any occasion.
Ingredients
Instructions
- 1
Begin by preheating your oven to 350°F (175°C). Prepare a muffin tin by lining each cup with paper liners to prevent sticking.
- 2
In a mixing bowl, combine the brownie mix with the melted butter and 1 egg. Stir together until the mixture is fully blended and thick.
- 3
Using a spoon or small ice cream scoop, distribute approximately 1 tablespoon of the brownie batter into each muffin liner. Use a spatula to gently smooth the tops for an even layer.
- 4
Place the muffin tin in the preheated oven and bake the brownie bases for 10 minutes. Once baked, remove the tin from the oven and allow the brownie bases to cool slightly.
- 5
In a separate large mixing bowl, beat the softened cream cheese with an electric mixer until it becomes smooth and creamy. Gradually incorporate the granulated sugar, mixing continuously.
- 6
Add the vanilla extract, 1 egg, all-purpose flour, and sour cream to the bowl with the cream cheese. Beat the mixture until it is creamy and free of lumps, ensuring all ingredients are well combined.
- 7
Carefully pour the cheesecake filling over the baked brownie bases, filling each liner about three-quarters full to allow room for rising.
- 8
Return the muffin tin to the oven and bake for an additional 15-18 minutes. The cheesecake centers should be set but may still have a slight jiggle when you gently shake the pan.
- 9
After baking, turn off the oven and crack the oven door open slightly. Let the cheesecakes cool in the oven for about 30 minutes. This gradual cooling helps to prevent any cracks from forming.
- 10
Once they have cooled to room temperature, transfer the mini cheesecakes to the refrigerator for at least 2 hours. This allows them to set completely and enhances their flavor.
Chef's Notes
For a delightful touch, top each mini cheesecake with a rich drizzle of chocolate sauce, a handful of fresh berries, or a dollop of fluffy whipped cream just before serving.


Recipe Creator
Remy
I’m Chef Remy, your recipe companion, here to bring warmth, bold taste, and simplicity to your kitchen.
View My Recipes