Healthy Strawberry Oatmeal Bars Flavorful and Nutritious

Are you ready to make a snack that’s both healthy and tasty? These Healthy Strawberry Oatmeal Bars are packed with flavors and nutrients you’ll love. With simple ingredients like oats, …

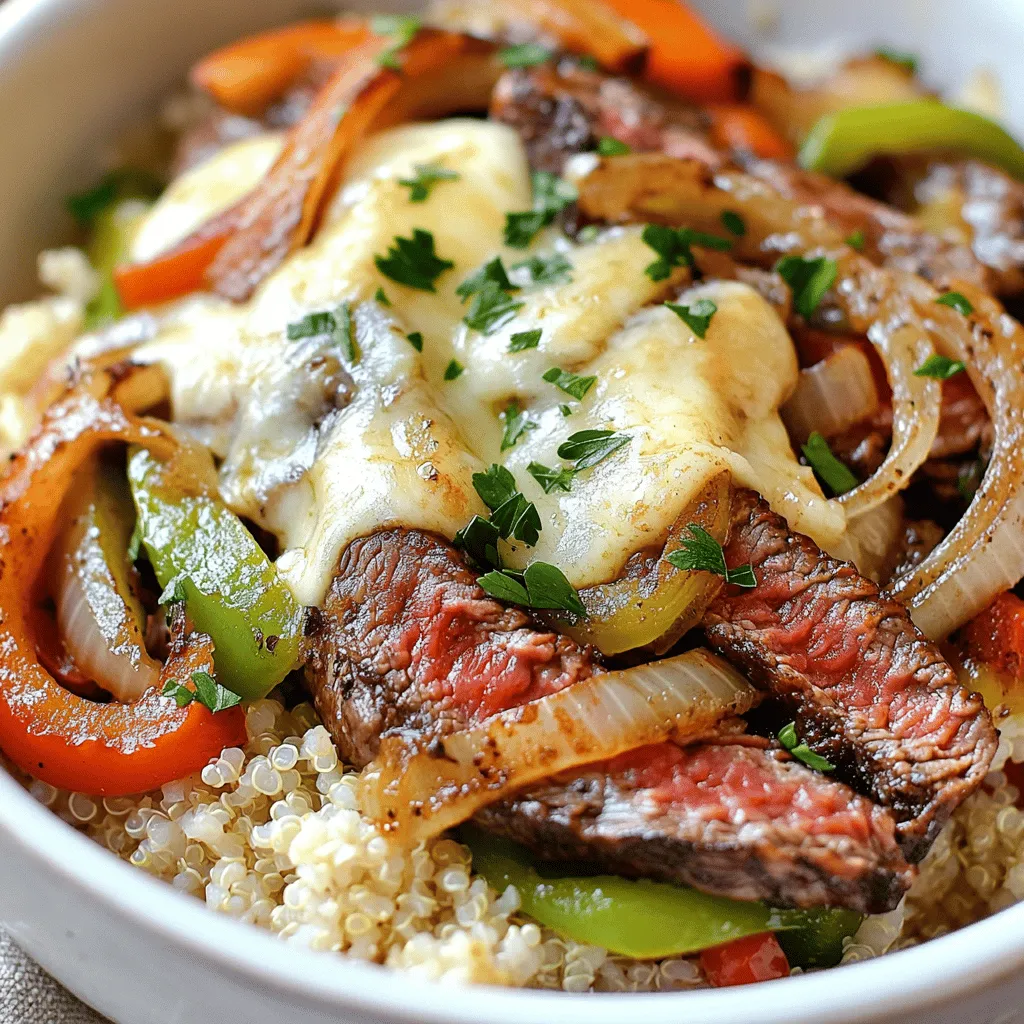
![- 4 boneless, skinless chicken thighs - 1 cup long-grain rice (preferably basmati) - 2 cups chicken broth (low-sodium recommended) - 1 large lemon (for both zest and juice) - 3 tablespoons extra-virgin olive oil - 4 cloves garlic, finely minced - Herbs: 1 teaspoon dried oregano, 1 teaspoon dried thyme - Salt and freshly cracked pepper to taste - Fresh parsley, finely chopped (for garnishing) - 1/2 cup Kalamata olives, pitted and sliced - 1/2 cup crumbled feta cheese When I think about the ingredients for Greek chicken and lemon rice, I get excited! Each element adds a unique touch. The chicken thighs are juicy and tender, perfect for soaking up flavors. Basmati rice gives the dish a nice fluffy texture. The chicken broth keeps everything moist and tasty. I love using low-sodium broth to control salt. The lemon brings brightness and zest, making the dish pop. To enhance the flavors, I use extra-virgin olive oil. It not only adds richness but also helps to infuse the garlic and herbs. Minced garlic gives a strong aroma and taste. Dried oregano and thyme add earthy notes that remind me of sunny Greece. For those who want to add more, I suggest toppings like fresh parsley for color and a hint of freshness. Kalamata olives bring a salty bite, while crumbled feta cheese adds creaminess. All these ingredients together create a lovely harmony on your plate. Check out the Full Recipe for detailed steps and tips to make this dish shine! - Combine marinade ingredients in a bowl: In a medium bowl, mix olive oil, minced garlic, lemon juice, lemon zest, oregano, thyme, salt, and pepper. This mix will give your chicken a zesty flavor. - Coat chicken thighs and let marinate: Add the chicken thighs to the bowl, ensuring they are covered well. Let them sit for at least 30 minutes at room temperature. For deeper flavor, refrigerate for up to 2 hours. - Sear marinated chicken in skillet: Heat a large skillet over medium heat. Remove the chicken from the marinade, letting any extra drip off. Place the thighs in the hot skillet. - Ensure chicken reaches internal temperature of 165°F (75°C): Sear the chicken for about 5-7 minutes on each side. Look for a golden-brown color. Use a meat thermometer to check that the chicken is safe to eat. - Toast rice in skillet before adding broth: In the same skillet, add the long-grain rice. Stir it for about 1 minute. This step adds flavor and enhances the rice's texture. - Simmer until liquid is absorbed and rice is tender: Carefully pour in the chicken broth. Bring it to a boil. Reduce the heat to low, cover the skillet, and let it simmer for about 15 minutes. The rice should absorb all the liquid and become tender. - Nestle cooked chicken into the rice: Once the rice is ready, place the seared chicken thighs back into the skillet. Pour any leftover marinade over them for extra taste. - Add optional olives and feta, and let rest: If you choose, sprinkle in the sliced Kalamata olives and crumbled feta cheese. Gently mix everything. Cover and let it rest off the heat for an additional 5 minutes. This helps the flavors blend beautifully. For the full recipe, check out [Full Recipe]. Marinade your chicken for at least 30 minutes. This time helps the flavors soak in. If you want a deeper taste, let it sit for two hours in the fridge. Avoid marinating too long; it can change the chicken's texture. Over-marinating can make it mushy, which is not what we want. Rinsing rice is key before cooking. This step removes excess starch and prevents stickiness. To rinse, place the rice in a fine-mesh strainer and run cool water over it. Stir the rice gently with your fingers. For fluffy rice, avoid stirring it too much while cooking. Once cooked, let the rice rest covered for a few minutes to finish the process. For a family-style meal, use a large platter. Arrange the chicken and rice nicely. Sprinkle fresh parsley on top for color. Add lemon wedges for a bright touch. For individual servings, plate the rice first, then add a chicken thigh on top. Include olives and feta on the side for extra flavor. This makes each plate look gourmet and inviting. Check out the Full Recipe for more details! {{image_4}} You can easily change this dish's taste. Swap chicken thighs for chicken breasts if you prefer. Chicken breasts cook quickly and stay juicy. They work well with the marinade's flavors. If you want a vegetarian option, use chickpeas or tofu. Both ingredients soak up the lemon and herb flavors. They make a satisfying meal too. Consider using quinoa or couscous instead of rice. Quinoa adds protein and a nutty taste. It cooks in about 15 minutes. Couscous cooks quickly too, making it a convenient choice. You can also adjust your cooking methods for grains. Cook the quinoa in broth for more flavor. For couscous, simply add hot water and let it sit. Incorporate seasonal vegetables or herbs for extra freshness. Try adding spinach or zucchini during the summer. They cook quickly and blend well with the dish. Adjusting flavors can fit different tastes. Add more lemon for a zesty kick or use herbs like dill for a twist. These small changes create a unique dish each time. For the complete recipe, check out the Full Recipe section. To keep your Greek Chicken and Lemon Rice fresh, store it in the refrigerator. Use airtight containers for best results. This will help keep the flavors intact. Make sure to cool the dish before sealing it. If you leave it out too long, bacteria can grow. You can freeze Greek Chicken and Lemon Rice for later meals. First, let it cool completely. Then, pack it into freezer-safe containers or bags. Remove as much air as possible. This keeps the rice and chicken flavorful. When ready to eat, thaw it in the fridge overnight. When reheating, use the microwave or stovetop. For the microwave, heat in short bursts, stirring in between. This helps maintain texture. On the stovetop, add a splash of chicken broth to keep it moist. Serve with a sprinkle of fresh parsley or extra lemon for a bright touch. Greek Chicken and Lemon Rice has roots in Mediterranean cooking. Greek cuisine often features fresh ingredients, herbs, and olive oil. This dish showcases the classic combo of lemon and chicken, a staple in many Greek meals. The use of rice as a side is common in Greece. It provides a filling base to absorb the flavors of the chicken. This dish reflects the Greek love for simple, yet vibrant flavors. Yes, you can prepare Greek Chicken and Lemon Rice ahead of time. Marinate the chicken a day before. This deepens the flavors and saves time. Cook the dish, then cool it. Store it in airtight containers in the fridge. You can reheat it easily before serving. The rice may soften slightly, but it will still taste great. For sides, consider a Greek salad. Its fresh veggies balance the rich chicken. You could also serve grilled vegetables or roasted potatoes. A light tzatziki sauce pairs well too. For drinks, try a crisp white wine or sparkling water with lemon. These options complement the flavors beautifully. To lower calories, use skinless chicken breasts instead of thighs. You can also reduce the olive oil in the marinade. Swap regular rice for cauliflower rice for a low-carb option. Use low-fat feta cheese or skip it altogether. These swaps keep the dish tasty while reducing calories. In this blog, we explored the key ingredients for Greek Chicken and Lemon Rice. You learned how to marinate, cook the chicken, and prepare the rice. We also discussed tips for perfect texture and variations to suit your taste. Remember, cooking is about experimenting and having fun. Use this recipe as a way to connect with flavors and enjoy a delicious meal. Follow these steps, and you'll create a dish that impresses everyone at your table.](https://roastedflavors.com/wp-content/uploads/2025/06/1c9f82d4-7e2a-43f0-918e-e3c7a5b9088d.webp)
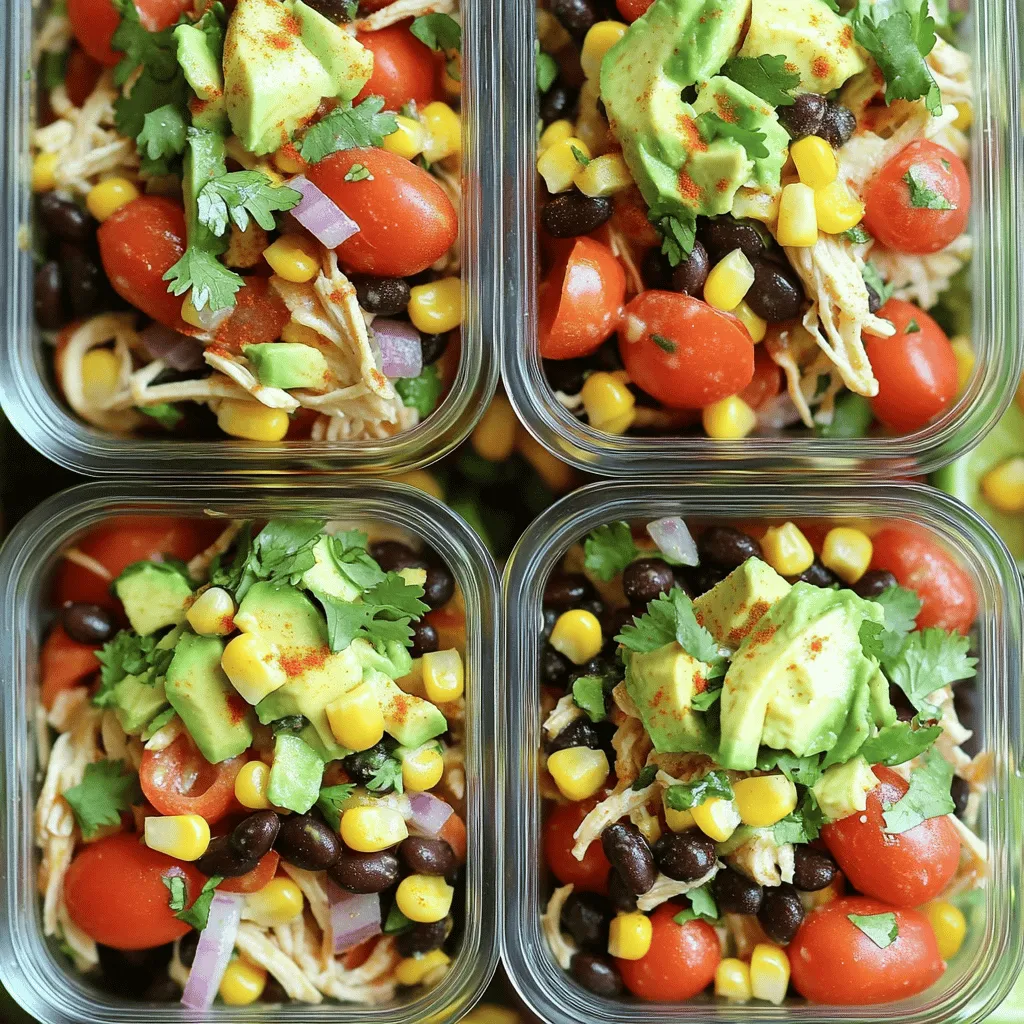
. {{image_4}} To keep your salad low in carbs, focus on fresh veggies. You can swap out high-carb ingredients. For example, use zucchini noodles instead of pasta. Cauliflower rice can also add bulk without the carbs. This keeps your meal light and healthy. You can change the protein to suit your taste. Try diced chicken or shrimp for a twist. If you like fish, tuna can add a nice flavor. Each protein brings its own taste and texture. This makes the salad more fun to eat. If you're vegetarian or vegan, it's easy to adapt. Omit the turkey and cheese for a lighter dish. Instead, add chickpeas or lentils for protein. You can also include avocado for creaminess. This keeps the salad filling and delicious without meat or dairy. For the full recipe, check out the Low Carb Italian Grinder Salad. To keep your Low Carb Italian Grinder Salad fresh, store it in airtight containers. Glass containers work best, but you can also use plastic ones. Make sure to separate the dressing if you have leftover salad. This way, the veggies stay crisp and fresh. When stored correctly, your salad can last up to three days in the fridge. After this time, the veggies may lose their crunch. If you notice any wilting or off smells, it’s best to toss it out. Always trust your senses! This salad is best enjoyed cold. There’s no need to reheat it. If you do want a warm dish, consider using the cooked turkey breast in a different recipe. The salad’s flavors shine best when served chilled, so enjoy it fresh! The carb count for a Low Carb Italian Grinder Salad is about 8 grams per serving. This count can vary based on the ingredients you choose. Most of the carbs come from the veggies, like tomatoes and cucumbers. Using low carb dressing can help keep the count low. You can enjoy this salad without feeling guilty about your carb intake. Yes, you can make this salad ahead of time. However, I suggest you keep the dressing separate until you're ready to eat. This keeps the salad crisp and fresh. Prepare the veggies and turkey a day in advance. Just store them in an airtight container in the fridge. When you're ready to serve, add the dressing and toss. This way, every bite stays tasty and crunchy. There are many low carb dressing options you can use. Some great choices include olive oil and vinegar, ranch, or Caesar dressing. You can also make your own dressing. Mix olive oil, vinegar, herbs, and spices to create your perfect blend. Just be sure to check the labels on store-bought dressings. Some may have hidden sugars that can add carbs. Enjoy experimenting with flavors to find what you love! For the full recipe, check out the Low Carb Italian Grinder Salad. This blog post explored the key ingredients and their nutritional benefits. You learned how to prepare and combine your salad easily. We discussed tips for customizing and keeping your salad fresh. Variations allow you to enjoy low-carb and protein-packed options. Finally, we covered storage methods for leftovers and answered common questions. Eating healthy does not have to be hard. With these steps, you can enjoy tasty meals every time.](https://roastedflavors.com/wp-content/uploads/2025/06/2c1081e2-1350-4a44-a119-17356a28fd30.webp)
. When you pick tuna, look for high-quality options. Canned tuna should have a good color. Choose light tuna for a milder taste. If you want something richer, go for chunk white tuna. Always check the label for sustainability. Brands that use responsible fishing practices are the best choice. Your tuna melt will taste better and help the planet too. Grilling your wraps right makes all the difference. Use a non-stick skillet or grill pan. Heat it over medium heat and add olive oil. Make sure the oil is hot before adding the wraps. This helps them get golden brown and crispy. Grill each side for about 3-4 minutes. Keep an eye on them, so they don’t burn. You want that cheesy goodness to melt and ooze out! Prep your tuna mixture ahead of time for quick meals. You can store it in the fridge for up to two days. Just keep it in an airtight container. When you’re ready to eat, grab your tortillas and spinach. Assemble your wraps in minutes. This saves you time on busy days. You’ll have a tasty meal ready to go without the fuss. For the full recipe, refer back to the initial section. {{image_4}} You can make a tasty vegetarian version. Substitute the tuna with mashed chickpeas. Mash them well and mix with mayonnaise and mustard. Add in red onion, celery, and cheese. You can also add diced bell peppers for a crunchy twist. This keeps the same great wrap feel while being meat-free. If you like heat, try this spicy twist. Add chopped jalapeños or a splash of hot sauce to the tuna mix. You can even stir in some sriracha for extra kick. Consider using pepper jack cheese. This adds a creamy, spicy flavor that will excite your taste buds. For a gluten-free option, swap flour tortillas for gluten-free wraps. Many good brands offer tasty choices. Always check the label for hidden gluten. You can also use lettuce leaves for a low-carb wrap option. This keeps your meal light and fresh while packing in the flavor. To keep your tuna melt wraps fresh, store them in the fridge. Place any leftovers in an airtight container. This helps to keep the flavors intact. The wraps will stay good for about three days. If you notice any off smells or changes in texture, it's best to toss them. Always check your food before eating. If you want to save some wraps for later, you can freeze them. Wrap each tuna melt in plastic wrap, then put them in a freezer bag. This prevents freezer burn and keeps them tasty. They will last in the freezer for about a month. When ready, thaw them in the fridge overnight before reheating. Reheating tuna melts can be easy. You can use a skillet or an oven. If using a skillet, heat it on medium. Place the wrap in the pan for about 3-4 minutes per side. This helps keep the outside crispy. If you prefer the oven, preheat it to 350°F (175°C). Bake the wraps for about 10-15 minutes, until warm. Enjoy your tasty tuna melt again! For the full recipe, refer to the earlier sections. You can use Greek yogurt instead of mayonnaise. It gives a creamy texture and adds protein. Another good option is avocado. It adds rich flavor and healthy fats. You can also try hummus for a unique twist. This makes your tuna melt wrap light and fresh. Yes, you can add many vegetables. Chopped bell peppers add crunch and sweetness. Grated carrots can give more color and flavor. You can also use cucumber for a crisp bite. Just make sure to chop them small so they mix well with the tuna. To make it healthier, use whole grain tortillas. They have more fiber and nutrients. You can also cut down on cheese or use a low-fat version. Adding more veggies boosts the nutrients too. Lastly, consider using less oil when grilling. This helps keep your meal light and nutritious. For the full recipe, check out the Tuscan Tuna Melt Wrap. This article covered all you need to make tasty tuna wraps. We talked about essential and optional ingredients, and I gave you clear steps for mixing, assembling, and grilling. I also shared tips on choosing quality tuna and ensuring a great grill. Plus, I offered variations for vegetarian diets or spicy lovers. Don’t forget to store them right for freshness. With these tips, you can prepare quick and healthy meals that everyone will love. Enjoy your cooking journey and have fun with your tuna wraps!](https://roastedflavors.com/wp-content/uploads/2025/06/2627e316-a657-44af-acf6-60afb34afb21.webp)
. To store leftovers, place the salmon bites in airtight containers. This keeps them fresh and tasty. The recommended shelf life of cooked salmon bites is about 3 days in the fridge. Make sure to let them cool before sealing. If you want to freeze the salmon bites, do it in a single layer on a baking sheet first. This helps keep them from sticking together. After they freeze, transfer them to a freezer-safe bag. They can last about 2 months in the freezer. To reheat, bake them in the oven at 350°F for 10-15 minutes. This helps keep them crispy. You can refresh leftovers in fun ways! Try adding them to salads for a protein boost. You can also use them in tacos with fresh veggies. This makes for a tasty meal. Another idea is to toss them in pasta or rice dishes for added flavor. Enjoy getting creative with your leftovers! For the full recipe, check it out above. Making crispy honey garlic salmon bites is quick and easy. The prep time is just 15 minutes. Cooking takes about 10 minutes, giving you a total time of 25 minutes. This makes it perfect for busy days when you want a tasty meal fast. Yes, you can prepare this dish ahead of time. You can coat the salmon bites and store them in the fridge. Just keep them in an airtight container. They stay fresh for about a day. When you are ready to eat, cook them as directed. This makes meal prep easy and saves time. These salmon bites pair well with many sides. You can serve them with steamed rice or a fresh salad. For drinks, a light white wine or sparkling water works great. You can also try pairing them with a tangy dipping sauce for extra flavor. Absolutely! The salmon bites are great for meal prep. You can make a big batch and store them in the fridge. They stay tasty for up to three days. Reheat them in the skillet for a crispy texture. This makes it easy to enjoy a delicious meal all week. For the full recipe, check the earlier sections. This blog post walked you through making crispy honey garlic salmon bites. You learned about the key ingredients, cooking methods, and tips for perfect texture. Remember to experiment with flavors and proteins or try pairing suggestions for a complete meal. Don’t be afraid to get creative with garnishes for extra appeal. This dish is simple and delicious. You can easily impress friends or family with these bites! Enjoy your cooking journey and make it a fun experience.](https://roastedflavors.com/wp-content/uploads/2025/06/52e2bdb1-678c-41f5-bfc9-f1c7f7ae3c3e.webp)
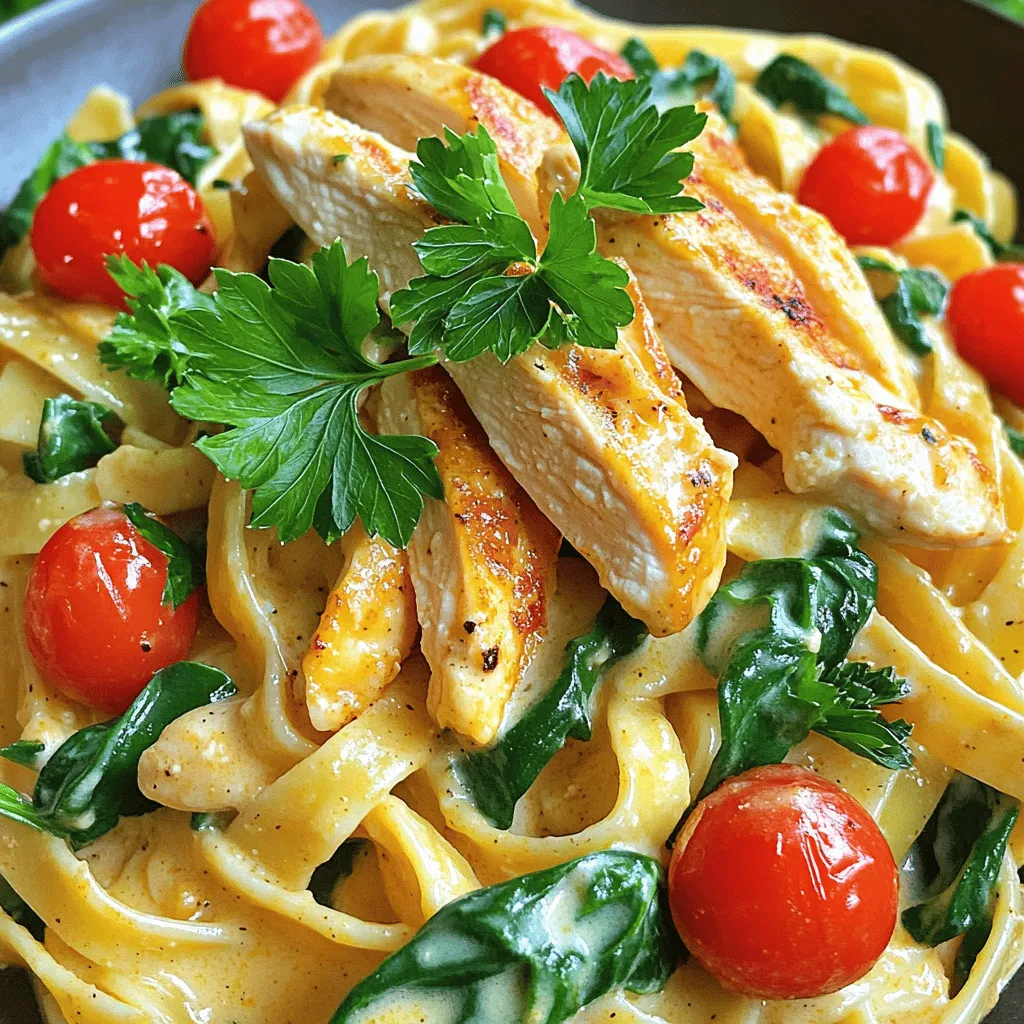
![To make Creamy Basil Tomato Pasta, you need a few simple ingredients. Each one plays a key role in creating rich flavors. Here’s the list: - 12 oz pasta (fettuccine or penne recommended) - 1 tablespoon extra virgin olive oil - 3 cloves garlic, finely minced - 1 can (14 oz) crushed tomatoes (preferably San Marzano) - 1 cup cold heavy cream - 1/2 cup freshly grated Parmesan cheese - 1/2 cup fresh basil leaves, roughly chopped - Sea salt and black pepper to taste - Pinch of red pepper flakes (optional) Each ingredient brings something special to the dish. The pasta is your base. I recommend fettuccine or penne. They hold the sauce well, making each bite creamy and rich. The extra virgin olive oil adds depth. Garlic gives a lovely aroma and flavor that fills your kitchen. Crushed tomatoes are essential. I highly suggest San Marzano for their sweet taste. The cold heavy cream creates that luxurious texture. Parmesan cheese adds a salty kick. Fresh basil brightens the dish and gives it a fresh taste. Don’t forget the sea salt and black pepper. These enhance the flavors. A pinch of red pepper flakes can add warmth if you like a little heat. This simple list of ingredients will bring you joy in every bite! For the complete cooking process, check the Full Recipe. First, grab a large pot and fill it with water. Add a generous amount of salt. This step is key. It enhances the flavor of the pasta while it cooks. Bring the water to a rolling boil. Once it’s boiling, add 12 ounces of your chosen pasta. Cook the pasta according to the package instructions until it’s al dente. This means it should be firm but not hard. Before draining, remember to reserve half a cup of that pasta water. This starchy water is a secret weapon for your sauce. It helps to adjust the sauce's thickness later. In a spacious skillet, heat one tablespoon of extra virgin olive oil over medium heat. Once it’s warm, add three finely minced cloves of garlic. Sauté the garlic for about one minute. Watch it closely so it doesn’t burn. Burnt garlic can ruin the dish with a bitter taste. Next, pour in one can of crushed tomatoes. I recommend using San Marzano for a richer flavor. Stir the mixture briefly, then let it simmer gently for five minutes. This helps the sauce thicken and develop great flavors. Now it's time to make the sauce creamy. Reduce the heat to low and add one cup of cold heavy cream. Stir continuously until the cream blends smoothly with the tomato sauce. Next, gradually add half a cup of freshly grated Parmesan cheese. Keep stirring until the cheese melts completely. Fold in half a cup of roughly chopped fresh basil. Season your sauce with sea salt and freshly cracked black pepper to taste. If you like a bit of heat, you can add a pinch of red pepper flakes here. Finally, gently toss the cooked pasta into the skillet with the sauce. Ensure every strand is coated nicely. If the sauce is too thick, add a splash of the reserved pasta water until it reaches your desired consistency. Serve the pasta immediately. Garnish with extra basil leaves and a sprinkle of Parmesan cheese. This adds a beautiful touch to your dish. For the full recipe, you can refer to the earlier section. Enjoy every delicious bite! How to prevent garlic from burning? To keep garlic from burning, cook it on medium heat. Stir it often and watch it closely. If garlic turns brown, it can taste bitter. A light golden color is best. Achieving the perfect consistency in the sauce? For a creamy sauce, add cold heavy cream slowly. Mix it well with tomatoes. If the sauce is too thick, use the reserved pasta water. Just a little can help thin it out. Presentation tips for an elegant dish? Serve your pasta in shallow bowls for a fancy look. Drizzle a bit of extra olive oil on top. Add a few whole basil leaves for color and flair. Recommended pairings (e.g., wine or bread)? Pair your creamy basil tomato pasta with garlic bread. A crisp white wine, like Pinot Grigio, complements the dish well. Both enhance the flavors and make your meal special. Adding fresh herbs or spices for more depth? Fresh herbs can boost flavor. Try adding parsley or oregano along with the basil. A pinch of red pepper flakes gives a nice kick too. Alternatives to Parmesan cheese? If you need a cheese swap, try nutritional yeast for a vegan option. Crumbled feta or goat cheese can also add a different but tasty twist. {{image_4}} You can easily change the pasta type to fit your needs. For gluten-free options, use rice or quinoa pasta. These choices work well and taste great. You can also swap the cream for healthier alternatives. Try using cashew cream or coconut milk. These swaps still give you a creamy texture but with fewer calories. If you want to add more taste, consider including extra vegetables. Spinach adds a nice color and nutrition. Sun-dried tomatoes bring a sweet, tangy twist to the dish. Both options make the meal richer and more filling. You can also add proteins like grilled chicken or shrimp. These additions make your pasta a complete meal. They pair perfectly with the creamy sauce. To make the dish vegan or dairy-free, simply use plant-based cream and nutritional yeast instead of Parmesan. This keeps the creamy flavor while making it suitable for everyone. You can also adjust spice levels. If you prefer a mild dish, skip the red pepper flakes. For a kick, add more to suit your taste. Experimenting with these adjustments can lead to a perfect meal just for you. To store leftover creamy basil tomato pasta, let it cool first. Place it in an airtight container. Keep it in the fridge. It will stay fresh for about 3 to 5 days. When you want to eat it, just reheat gently. You can freeze creamy basil tomato pasta too. To do this, let it cool completely. Transfer it to a freezer-safe container or bag. It will last about 2 to 3 months in the freezer. When you are ready to enjoy it, thaw it in the fridge overnight. Reheat on the stove over low heat. Add a splash of cream or pasta water to help it come back to life. To avoid texture changes, don’t freeze it with extra sauce. Instead, keep some sauce separate if possible. When reheating, stir well to ensure even warmth. This way, your pasta stays creamy and delicious! You can make this dish ahead of time. Cook the pasta and sauce separately. Mix them together when you're ready to serve. Store the sauce in an airtight container in the fridge. It stays fresh for about three days. When reheating, add a splash of reserved pasta water for creaminess. Heat gently on low heat until warm. This pasta pairs well with garlic bread or a fresh green salad. A Caesar salad adds crunch and flavor. For drinks, try a light white wine or sparkling water. These options balance the rich pasta nicely. You can also serve it with a side of roasted veggies. Yes, you can use dried herbs. Fresh herbs have a bright flavor. Dried herbs are more concentrated. Use one teaspoon of dried basil for every tablespoon of fresh. Add dried herbs earlier in the cooking to help release their flavors. To make this recipe allergy-friendly, use gluten-free pasta. For dairy-free, swap heavy cream with coconut cream or cashew cream. If you have nut allergies, skip the nuts and stick to safe ingredients. Always check labels for hidden allergens. Fettuccine and penne are great choices. Fettuccine holds the sauce well with its flat shape. Penne has ridges that catch the sauce, making every bite flavorful. You can also use spaghetti for a classic feel. Choose any pasta you love! For the complete instructions, check out the [Full Recipe]. This blog offered a simple guide to making creamy basil tomato pasta. You learned about key ingredients, cooking steps, and creative variations. I shared tips to enhance both flavor and presentation. You can now confidently explore swaps for dietary needs and storage tips for leftovers. Cooking can be fun and easy. Enjoy experimenting with this recipe to make it your own!](https://roastedflavors.com/wp-content/uploads/2025/06/ba1fda5b-dd41-4d82-9b91-863d7a920518.webp)